X

Sign up to receive exclusive recipes, tips, updates and other goodies from Aliya!

  • Home
  • Blog
    • All
    • Recipes
    • Spices + Ingredients
    • Lifestyle, etc.
    • Travel
  • The Cookbook
  • The App
  • Media
    • All Media
    • Video
  • About
  • Passions
Aliya LeeKong
  • Home
  • Blog
    • All
    • Recipes
    • Spices + Ingredients
    • Lifestyle, etc.
    • Travel
  • The Cookbook
  • The App
  • Media
    • All Media
    • Video
  • About
  • Passions

Cherry-Pinot Paletas

View fullsize cherry-pic1-500x333.jpg
View fullsize cherry-pic2-500x333.jpg
View fullsize cherry-pic3-500x333.jpg

Cherry-Pinot Paletas

When cherry season rolls around each year, I get oddly giddy.  Maybe it’s a remnant of childhood – the feeling that these little fruits are the nectar of the gods (and thus you only get one of them on top of a sundae), that they are a privilege to eat (I remember fighting for the last one…), or that they were hands-down the best hard candy (Blow-pop, Ring Pop, Lifesaver, Jolly Rancher) flavor out there.  Whatever the case, as an adult, I definitely go a bit dessert crazy around this time of year, working cherries in wherever I can, and here is one with a decidedly un-childlike spin….

The weather here in New York City has been absurdly hot, so naturally my thoughts turn to ways to cool off.  Paletas are basically Latin American popsicles, and THE way to do it.  They are usually made with fresh fruit juice, sometimes with bits of fruit, or can be milk-based.  I thought cherries would be the perfect ingredient until I became overwhelmed by the thought of having to pit and stem them…And then it struck me, why do I have to?!?

The adult spin here is that I use a bit of red wine.  I had a popsicle phase last summer where I was freezing everything from fresh juices to my St. Lucian rum punch (which didn’t freeze by the way because of the alcohol!), and I love serving these as dessert at a summer bbq.  It’s a light treat after serious grubbing and happens to keep the party going… These pops not only have cherries and red wine, a heavenly combo, but also a host of spices – black peppercorns, cloves, cinnamon and vanilla bean – that create gorgeous flavor.  You may end up just wanting to reduce the liquid to a syrup and pour it all over ice cream!  Enjoy!

Ingredients

Yields 3¾ cups juice or 10-12 popsicles

2 lbs fresh, sweet cherries, washed*

2 cups water

¾ cup sugar

½ cup red wine (Pinot Noir or whatever red wine you like)**

3 black peppercorns

2-3 whole cloves

1 cinnamon stick

1 vanilla bean, split and scraped

Procedure

The best part about this recipe is that you just throw in the whole cherries here, stems, seeds and all.  The whole bits get strained out at the end.

In a medium-sized pot, bring all ingredients up to a boil.  Lower to a simmer  and simmer half-covered for 10 minutes.  Let cool to room temperature.

Using a potato masher, mash up the mixture until the cherries are completely broken down.  Strain liquid through a mesh sieve extracting as much of the juice as possible.  I like to use the back of the spoon to push on the pulp.

Pour into popsicle molds and let freeze until solid (about 7 to 8 hours).

*I used bing cherries here but feel free to use whatever is in season nearest you.  Pitted, frozen cherries would also work wonderfully here – without the pits or stems, you could blend up the whole mixture to get bits of the cherry in there and change up the texture.  Just remember you’ll likely have more than 10 to 12 popsicles at the end!

**Of course, if you are making these for the little ones, you can replace the red wine here with some juice or water.


tags: recipes for summer, popsicles, paletas, cherries
categories: desserts, recipes, snacks, all
Monday 06.25.12
Posted by Aliya LeeKong
 

North African-Spiced Chicken Thighs with Oranges, Marcona Almonds, & Summer Vegetables

View fullsize chicken-pic1-500x333.jpg
View fullsize chicken-pic2-500x333.jpg
View fullsize chicken-pic3-500x166.jpg

North African-Spiced Chicken Thighs with Oranges, Marcona Almonds, & Summer Vegetables

Crispy, chicken thighs, as of late, are fast becoming one of my favorite weeknight meals.  I cycle through trends in cooking like a lot of people and I just can’t resist how easy and fulfilling these are.  I’ve tried countless different spice blends and ways of cooking them (my friends and husband are partial to my Cajun ones…) but I love the flavor in these North African-inspired ones.

The technique I use here is a go to – crisp the thighs, cook the vegetables in the flavored chicken fat, layer the chicken back on top, throw it all in the oven and prep a salad, make the table or do whatever else you need to do!  The result is beautifully, tender chicken with really flavorful vegetables.  I love this method.

The North African blend here is called ras el hanout.  I’ll write more about this later this week but think of it like a Moroccan curry.  The roasted cumin powder – white cumin seeds I toast up in a pan before grinding to a powder – creates a lovely, smoky undertone.  The cinnamon adds a bit of sweetness, the black pepper rounds it out, and I love the gentle aroma of the saffron here.  When these spices mingle with the julienned zucchini and squash, the natural sweetness in the vegetables really come through, highlighted by the orange slices and zest.  The almonds plump and add a nutty bite.  When the season warms a bit I like to throw in some gorgeous grape or cherry tomatoes as well….Enjoy!

Ingredients

Serves 4 to 6

4 or 5 zucchini or summer squash, julienned

1½ – 1¾ tsp salt

2 lbs chicken thighs, skin-on with bone (4 to 6 thights)

2 tsp paprika

2 tsp ground cumin, toasted*

½ tsp cinnamon

¼ tsp turmeric

½ tsp ground ginger

2 tsp ground black pepper

¼ tsp cayenne pepper

pinch saffron

1 tsp unsalted butter

2 tsps vegetable oil

1 onion, julienned or finely chopped

2 cloves garlic, minced

¼ cup raw, unsalted marcona almonds, toasted

small bunch of thyme

5 or 6 thin slices of orange (~1/4 of an orange)

1 tsp orange zest

Salt to taste

Procedure

Preheat the oven to 400° F and place the rack on the top shelf.

For the zucchini, I like to use my mandoline fitted with the julienne attachment.   You can also use a food processor or quite simply a knife to do this.  In a large bowl, mix together the julienned zucchini / squash with ½ to ¾ teaspoon of salt and place in a colander over a bowl or in the sink.  You want to remove as much water as possible, so let sit for 15 minutes and then wring out the vegetables using a kitchen towel, paper towels and your hands.

Let the chicken thighs come up to room temperature.  Mix together the paprika, cumin, cinnamon, turmeric, ground ginger, black pepper, cayenne, saffron and 1 teaspoon of the salt.  Season chicken thighs on both sides with the spice blend – I personally add a bit more salt than this but I want to leave it up to you how salty you want these.  Heat a large pan over medium-high heat.  Add butter and oil and place thighs skin-side down in the pan.  Let cook for 3 to 4 minutes until the skin turns crisp.  Be careful not to let the heat creep up too high or the spices will burn.  Flip thighs and let cook another 2 minutes.  Remove to a plate and set aside.

Reduce heat to medium and pour off excess fat.  Add onions and garlic with a bit more salt to draw out the moisture and cook for a minute.  Switch off heat and add julienned zucchini, almonds and thyme and toss together.  Layer slices of orange around the outside of the pan and place the thighs on top of the bed of vegetables.  Sprinkle with orange zest and place on the top rack of the oven and cook for 20 to 25 minutes (until the juices run clear out of the chicken.

Serve chicken thighs hot with a side of the vegetables.

Note: The thighs should stay crisp but this depends on how much moisture is coming off the vegetables.  If not, I have in the past popped them back in a clean sauté pan with a bit of oil for a minute over medium-high heat to crisp them back up.

*For this blend, I like to take whole cumin seeds and toast them in a pan over a low flame until they deepen in color and are fragrant.  I then grind this to a powder.

tags: chicken thighs, marcona almonds, summer vegetables
categories: all, recipes, main dishes
Monday 06.18.12
Posted by Aliya LeeKong
 

A Forgotten Food, Seera

View fullsize Seera-pic1-500x333.jpg
View fullsize seera-pic2-500x333.jpg
View fullsize seera-pic3-500x333.jpg

A Forgotten Food, Seera

Last week, one of the chefs over at Junoon shocked me into taste memory.  He cooked up a batch of seera (also called sheera or seero), which is a sweet, crumbly, buttery, cake-like dessert usually made with semolina or cream of wheat.  My mom used to make it for me growing up, and I hadn’t thought about it in years!  One bite…it’s amazing how the smell and taste of something can just transport you back.  That night, I went right home and made my own, comforting batch that I thought I’d share with you.

Seera belongs to a dessert family called halvas – these are desserts served throughout South, Central and West Asia, parts of Europe, the Middle East and North Africa.  Oftentimes, they are flour-based as you see here, but they can also be made from dense nut pastes and be more of a confection.

I had a full-on debate with my mom about the pros and cons of using semolina vs. cream of wheat, when’s the right time to add the cardamom, what the resulting color should be, and how no one should feel guilty if they want to eat this for breakfast (it’s cream of wheat after all!).  She even whipped out my grandmother’s old recipe written out in mugs!  I love that….Well, this is what I came up with.  And the reality is farina or cream of wheat will result in a slightly softer, more crumbly halva and the semolina, depending on the grind, will be a bit more dense and cake-like with a brighter yellow color.  Buttery, with the aromatics of saffron and cardamom, pure comfort, and whips up in less than 10 minutes…enjoy!

Ingredients

Serves 4 to 6

1 cup milk

½ tsp vanilla extract

pinch saffron

pinch salt

¾ cup palm sugar*

1 stick + 2 tbsps unsalted butter

2 cardamom pods, cracked

1 cup farina, cream of wheat or semolina flour

Optional garnishes:**

Pistachios, toasted

Sliced almonds, toasted

Sultanas

A few dashes of rosewater

Procedure

In a small, nonstick saucepan, bring milk up to a boil.  Lower to a simmer and add vanilla extract, saffron, salt and palm sugar, whisking to dissolve.  Keep over a low flame.

In another nonstick saucepan over medium heat, add butter and cardamom pods.  When the butter has melted and the foam subsides, add the farina and toast in the butter until golden brown, about 3 to 4 minutes.  Lower the flame, add the sweetened milk mixture and stir until texture dries a bit, another 2 to 3 minutes or so.

Serve warm or room temperature.

*You can substitute white or brown sugars here, but I would adjust down the amount as palm sugar is a bit less sweet than those two (so closer to ½ cup).

**For the optional garnishes, you can add as much as you like right on top.  For the sultanas, I like to throw them in with the simmering milk, so they plump up a bit.

tags: seera, halva, cardamom, almonds
categories: all, desserts, recipes, breads & cakes, breakfast
Monday 06.11.12
Posted by Aliya LeeKong
 

Awaze Skirt Steak

View fullsize steak-pic11-500x333.jpg
View fullsize steak-pic2-500x333.jpg
View fullsize steak-pic3-500x166.jpg

Awaze Skirt Steak

Awaze.  Pronounced Ah-wah-zay.  Awaze is an Ethiopian chili paste, a staple in the cuisine, made with one of their more famous spice blends, berbere. It’s a sauce, it’s a condiment, it’s a marinade.  And that last function is exactly how I used it here, to infuse flavor into some gorgeous, marbled skirt steaks in time for a bit of Sunday (almost) summer grilling.

And awaze IS full-flavored in all its multi-function glory.  First, the base of it, the spice blendberbere, is made from aromatics like red onion, chilies and garlic, spices like fenugreek, cardamom and ajwain, and even an herb called sacred basil. For awaze, berbere is traditionally mixed with Ethiopian honey wine (called tej) to form a paste or diluted a bit for more of a sauce consistency.

I only have one bottle of tej left and am saving it for a rainy day, so I approximated with some red wine and honey for the marinade.  I also threw in a bit of lime juice for acidity, fresh garlic for flavor, and a pinch of cayenne for heat.  The steaks took on the flavors beautifully and grilled up to perfection.  It doesn’t take long for the marinade to kick in, so even if you only have a few hours to marinate, it’s worth the trouble (trouble being mixing a few items together in a bowl and pouring it over the steaks!).  Rich, an intoxicating mix of spices, a touch of heat and sweetness from the honey…Enjoy!

Ingredients

Serves 4

6 tbsps berbere

generous pinch of salt

pinch of cayenne

juice of 1 lime

4 cloves garlic, minced

3 ½ tsps honey

1 ½ to 2 cups dry red wine

2 lbs skirt steak, trimmed cut into 4 pieces

kosher salt and freshly ground pepper

Procedure*

In a mixing bowl, whisk together the berbere, salt, cayenne, lime juice, garlic, honey and red wine.  Place steaks in a ziploc bag and pour marinade over steaks.  Remove as much air from the bag as possible before sealing. Refrigerate for a minimum of 2 hours and up to 24.

Remove steaks from bag, pat dry with paper towels, and let them come up to room temperature.   Season both sides of each steak generously with salt and freshly ground pepper.

Heat a grill or grill pan over medium-high heat.  Grill steaks 1 to 2 minutes per side for medium-rare and longer if you prefer them well done.   Rest for about 7 to 10 minutes tented with foil before serving.

*To serve with the steak, I like to cook red onions down in olive oil and use some of the remaining awaze marinade to season them.

tags: Awaze, skirt steak, grilled
categories: all, recipes, main dishes-1
Monday 06.04.12
Posted by Aliya LeeKong
 

Happy Memorial Day + Strawberry-Chia Aqua Fresca

View fullsize aqua-pic1-500x333.jpg
View fullsize aqua-pic2-500x333.jpg

Happy Memorial Day + Strawberry-Chia Aqua Fresca

First off, Happy Memorial Day to everyone!  It’s the unofficial start of summer, and I am hanging out with friends and enjoying it – I hope you are too.  I wanted to start off the summer with something very simple, something you could even make today if you wanted.  It’s refreshing and is all about easy summer cooking and entertaining. – an aqua fresca.

I love when something in another language makes it sound so much more interesting or complex!  The reality is aqua fresca, or “fresh waters”, are traditional Latin American beverages that blend seasonal fruits and sometimes even grains or seeds with water and a touch of sugar or natural sweetener.  The succulent strawberries that have been staring at me in the market seemed a natural base for a refreshing drink, and I decided to include another popular aqua fresca ingredient: chia.

If you didn’t read my diatribe last week on chia seeds, you should if you are interested in all of the amazing health benefits of this superfood.  If not, they add a nice gelatinous texture to the drink and at the very least increase hydration on a hot day.  Enjoy!

Ingredients

Yields approximately 4 cups / Serves 4 to 6

1 lb fresh strawberries, washed and hulled

1-2 tbsps honey

2 cups cold water

Juice of 1 lime

4-6 tsps chia seeds

Procedure

In a blender, puree the strawberries with honey, water and lime juice.  Pass through a strainer.  Chill further if desired or pour into glasses.

I like to add the chia seeds, 1 teaspoon per serving, directly to the glasses and let sit in the aqua fresca for about 10 minutes to bloom.  The chia seeds will absorb some of the liquid and become gelatinous.   Serve with or without ice.

tags: chia, recipes for summer, aqua fresca, strawberries, drinks
categories: drinks & cocktails, recipes, all -1
Monday 05.28.12
Posted by Aliya LeeKong
 

Roasted Garlic, Cheese & Herb Baked Rice

View fullsize rice-pic1-500x333.jpg
View fullsize rice-pic2-500x333.jpg
View fullsize rice-pic3-500x166.jpg

Roasted Garlic, Cheese & Herb Baked Rice

This is not your every day, throw-in-the-oven-rather-than-on-the-stovetop rice.  My inspiration for this dish is Tah Chin, a Persian rice pilaf that layers saffron rice with chicken and bakes it to perfection.  The rice is bound with yoghurt and egg yolks and during its slow-baking process forms this beautiful crust where it hits the baking dish, not wholly unlike soccarat (which is the crusty layer found at the bottom or paella).  Suffice it to say, I veered a bit off of tradition with this version….

Many of the items are similar to the original – the long grain rice (though trying this with Valencia or Bomba rice sounds pretty alluring), saffron, yoghurt and egg yolks.  But that is where it ends!  I leave out the chicken and created this to be an easy (and slightly more elegant…) substitute for mac n’ cheese, a lovely casserole side.  Thus, I included some butter and crème fraiche for richness and tang, some cheeses for good measure, roasted garlic and herbs for depth of flavor.

It was truly an experiment, and I love the result…First of all, it’s beautiful! I plan to just leave the cutting board and knife out for people to help themselves at my next dinner party.   I warn you, however, to do this as close to serving time as possible.  It was all I could do to snap a few pics before my husband hacked off a third of it and ran off!  The smell of it drove him mad…the roasted garlic and cheese, creaminess and that crusty layer of rice – amazing.  Enjoy!

Ingredient

Yields (1) 9”x13” baking dish

3 cups long grain rice

3 tbsps kosher salt

½ stick unsalted butter

½ cup yoghurt

½ cup crème fraiche

pinch saffron

4 egg yolks

1 cup grated mozzarella cheese

¾ cup grated grana padano or parmigiano reggiano cheese

12-13 roasted garlic cloves

¾ cup chopped herbs

freshly ground black pepper

Procedure

Preheat oven to 350° F.

Rinse the rice in changes of hot water until the water runs clear.  In a medium pot, bring 6 cups of water up to a boil.  Add 1 ½ tablespoons of the salt and the washed rice.  Let cook 6 to 8 minutes (rice should start to soften but still be raw at the center), drain and rinse lightly.  Transfer to a large bowl.

In a small saucepan, melt butter with yoghurt and crème fraiche over medium heat.  When it starts to bubble, shut off the heat and add the saffron.  Let it bloom for 5 minutes.  Place the egg yolks in a medium bowl.  Add spoonfuls of the saffron mixture to the egg yolks stirring constantly – you want to bring the egg yolks up to temperature slowly.

To the drained rice, now add the saffron-egg yolk mixture, the cheeses, roasted garlic cloves, chopped herbs, the other 1 ½ tablespoons of salt and freshly ground black pepper to taste.  Combine thoroughly.

Grease a 9” x 13” baking pan and line the bottom with parchment paper.  Transfer the rice mixture to the baking pan, cover with foil and bake for 1 hour and 35 minutes.  Let cool slightly and then loosen the side of the rice from the dish.  Turn out onto a cutting board and serve hot in slices or squares as you choose.

tags: baked rice, saffron, vegetarian sides, roasted garlic, cheese
categories: all -1, side dishes, recipes, vegetarian-1
Monday 05.21.12
Posted by Aliya LeeKong
 

South African Milk Tart with Fruits

View fullsize tart-pic1-500x361.jpg
View fullsize tart-pic4-500x333.jpg
View fullsize tart-pic3-500x222 (1).jpg

South African Milk Tart with Fruits

I tried a really delicious milk tart a few years back when I was visiting Capetown and was hooked!  This is one of those ubiquitous desserts in South Africa that’s served throughout the country, on all sorts of occasions and every cook has his or her own secrets.  Melktart (meaning, literally, milk tart…) is a tradition that came from the Dutch settlers in the country, a custard-based tart scented with cinnamon delivered in a flaky pastry crust.

I am one of those people that have fruit tart cravings.  I will take a gorgeous tart with a pastry cream filling and topped with fruit over a straight fruit pie any day.  For some reason, I feel like the creaminess balances out the acidity in the fruit and with a flaky crust creates a perfect dessert. For me, the idea of putting fruit on top of a milk tart seemed perfectly natural (though it’s not usually done there).

Also, I semi-cheated and used puff pastry for the crust – how I could go on about the benefits of puff pastry!!  I’ve made it before from scratch, and it’s definitely a process.   Puff pastry tastes good, and those guys who’ve created the frozen versions have mastered it – why mess with perfection here?  This crust comes together easily, and it’s a few less steps you have to take to make an equally delicious tart.

So, now about milk tart itself.  The filling is basically a custard with hints of cinnamon, almond, and (my addition) vanilla.  The cornstarch helps to thicken the custard and make sure it’s not too eggy – you don’t want a crème brulée tart here!  The beaten egg whites lighten the batter and add an airy quality to the finished product.  The result is a beautiful, creamy, vanilla-specked filling with that caramelized top in a gorgeous flaky crust – the fruit just adds another lovely layer of flavor.  This is perfect for a dinner party (impressive too!) or even a ladies lunch.  Enjoy!

Ingredients

Yields 1 9-inch fluted tart / Serves 6 to 8

Crust:

½ package frozen puff pastry (1 sheet), defrosted

1 egg beaten with a bit of heavy cream for egg wash

Wax paper and dry beans to weight down

Filling:

1 ½ cups whole milk

½ tsp salt

1 stick cinnamon

1 vanilla bean, split and scraped

½ tsp almond essence

½ cup heavy cream

¼ cup cornstarch

1 ½ tbsps unsalted butter

2 eggs, separated

½ cup + 2 tbsps confectioner’s sugar

½ tsp cinnamon ground

Topping:

Sliced or whole fruit of choice: strawberries, blueberries, raspberries, kumquats, cape gooseberries, etc.

Procedure

For the crust:

Preheat the oven to 350° F convection / 375° F convention.

Let’s start by rolling out and blind-baking the crust.  On a floured surface, roll the sheet of puff pastry out just enough so it will cover the inside of the tart pan and have some overlap.   Place it carefully in the 9-inch, fluted tart shell and press it into the corners and sides.  Trim the excess.  Place a piece of wax paper across the top of the tart so it covers the sides.  Add dried beans to weight down the crust and refrigerate for 15 minutes while you start on the filling.

Place in the oven and bake for 20 minutes.  Take the crust out of the oven, remove the weights, and brush with the egg wash.  Put back in the oven for another 5 minutes until golden.  Set aside until ready to fill and leave the oven on.

For the filling:

In a small saucepan, bring the milk, salt, cinnamon stick, vanilla bean, and almond essence up to boil.  Lower immediately to a simmer.  In a small bowl, whisk together the heavy cream with the cornstarch making sure there aren’t any lumps.  Add this to the milk mixture along with the butter and stir until the mixture thickens.  Remove from the heat.

Make sure the egg yolks are in a larger-sized bowl because you’ll be adding the milk mixture to them.  You want to start by adding a little bit of the milk mixture and stirring or whisking to incorporate.   Continue to do this a little at a time until the milk mixture is completely incorporated – we do this to avoid cooking the yolks and having bits of it in the tart.  Let this mixture cool to closer to body temperature before moving on to the next step.

In another bowl, beat the egg whites with the ½ cup of confectioner’s sugar until soft peaks form – should be light and fluffy.  Add a spoonful or two of the milk custard to the egg whites and incorporate.  Carefully, fold the egg whites into the milk custard to lighten it up.  Be careful not to overmix or you will deflate it significantly.

Add this filling to the tart shell.  Mix together the last 2 tablespoons of confectioner’s sugar with cinnamon and sprinkle on top of the tart.  This will develop into a nice brown crust on top.

Bake for 10 minutes, and then lower the temperature 25 degrees and bake another 15 minutes.  Don’t be surprised if it puffs up during cooking – it will reduce down as it cools.  Cool on a rack and top with fruits of your choice.

This tart can be served warm or cold, but since I added the fruits I thought I’d keep it on the cooler side myself.

tags: milk tart, desserts, fruit, special occasion, south african
categories: desserts, recipes, all -1
Monday 05.14.12
Posted by Aliya LeeKong
 

My Homemade Nutella

View fullsize nutella-pic3-500x333.jpg
View fullsize nutella-pic2-500x333.jpg
View fullsize nutella-pic1-500x330.jpg

My Homemade Nutella

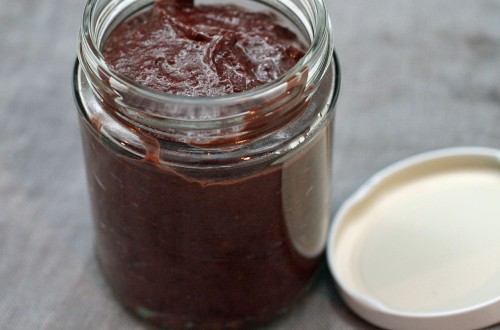
So, admittedly, I’ve been on a bit of a healthy kick lately – toting around awful looking bottles of green juice, trying to eat more raw foods and roughage, and avoiding alcohol (gasp!). A bit of a spring cleanse, if you will.  It’s been about two weeks (14 days, 11 hours and 33 minutes but who’s counting?), and I’m feeling pretty good.  For some reason, over the last few days, my sweet tooth has gone a bit haywire, so I decided to make something I crave pretty often…nutella!

Now, nutella is one of those items with which I avoid eye contact in the grocery store.  God forbid I bring a jar of it home, and it sits there longingly, just asking for me to take a spoon to it each time I go into the kitchen.  I grew up eating it on special breakfast occasions, a lusciously chocolate-y and nutty filling for crèpes, a tradition I’ve carried on to adulthood.  It’s popular for breakfast in Europe, where it’s touted as healthy!  Can you actually believe it??

On closer inspection, it really isn’t that bad for you!  Nuts, skim milk, a bit of cocoa powder – I thought a homemade version could only be better.  I used a slightly healthier oil, hazelnut oil, in lieu of the palm oil used in the original version.  I also used a local honey instead of sugar.  I did add some real dark chocolate to mine, but I rationalized that 3.5 ounces spread out over a whole jar can’t be that bad for you, and isn’t dark chocolate an antioxidant anyway? This nutella is creamy, rich, and delicious and tastes just like the ingredients it’s made from (so use good ones!).  Enjoy!

Ingredients

¾ cup chopped hazelnuts, toasted*

¼ cup raw almonds, toasted*

2 tbsps hazelnut oil

1-3 tbsps local honey**

½ tsp vanilla extract

1 tbsp unsweetened cocoa powder

½ tsp kosher salt

½ cup skim milk

3.5 ounces semisweet or dark chocolate, chopped

Procedure

To the bowl of a food processor, add the toasted hazelnuts and almonds and process until a fine crumb.  Add the oil, honey, vanilla extract, cocoa powder and salt and process until a paste.

In a small saucepan, heat the milk and chocolate together until the chocolate is completely melted.  Add to the food processor and process until the nutella’s texture is smooth and creamy.  Cool and refrigerate.  This can be stored in the refrigerator for about a week.

*I chopped up the hazelnuts here to increase their surface area, so they toast up quicker.  You can easily toast the chopped hazelnuts and almonds together in a 350° F oven for 5 to 10 minutes.

**The variation in the amount of honey really depends on 2 things: (1) what type of chocolate you are using and (2) your personal preference for how sweet you want this.  I used a 70% dark chocolate and about 2 tablespoons, but if you are using a semisweet or even a milk chocolate, you may need less.  This is something that you can add at the end to taste if you like.

tags: dessert, healthy, raw, breakfast, nutella, almonds, chocolate, hazelnut
categories: breakfast, desserts, recipes, snacks, all -1
Monday 05.07.12
Posted by Aliya LeeKong
 

Rhubarb, Cucumber & Mint Salsa

View fullsize salsa-pic1-500x333.jpg
View fullsize rhubarb-pic2-500x333 (1).jpg
View fullsize salsa-pic3-500x333.jpg

Rhubarb, Cucumber & Mint Salsa

Increasingly, I’m realizing that every culture has its form of “salsa.”  When I was down in St. Lucia a few weeks back, I found out they have their version called souscaille.  In South Asian cuisines, it’s called kachumber, and in African cuisines, kachumbari.  At all points, it’s a fresh salad, often with onions or shallots, with acidity in the form of the juice or segments of citrus or vinegar.  I wanted to inject a little seasonality into my salsa this week, and spring’s tart rhubarb was the perfect add.

Rhubarb, contrary to popular belief, is a vegetable, and it has a crisp, fresh texture that’s somewhere between jicama and celery with a sourness that’s reminiscent of green apples.  I’ve played with it before in a dessert, a granita, but here I wanted to see what it could do from a savoury point of view.

The cucumber and rhubarb meld together beautifully.  You have the cooling, soothing, watery cucumber contrasted with the tart bite of the rhubarb.  The shallots add mellow onion flavor and the fresh mint a bright finish.  It would be perfect on fish or shrimp tacos or a simply grilled chicken breast.  Enjoy!

Ingredients

Yields approximately 2 ½ cups

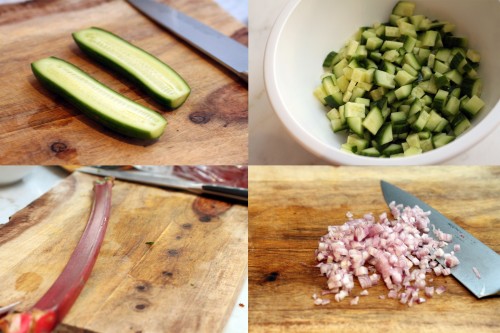
2 mini seedless cucumbers, cut into a small dice

1 stalk rhubarb, cut into small dice

1 shallot, finely chopped

juice of half a lime

½ tsp kosher salt

pinch cayenne pepper

pinch white sugar

small handful fresh mint, finely chopped

Procedure

In a small bowl, toss together the cucumbers, rhubarb and shallot.  Add the lime juice, salt, cayenne, sugar and mint mix thoroughly.

tags: rhubarb, salsa, recipes for spring
categories: all -1, condiments, recipes, side dishes, salads, soups & salads, vegetarian-1
Monday 04.30.12
Posted by Aliya LeeKong
 

Kerala Shrimp Curry

View fullsize kerala-pic1-500x333.jpg
View fullsize kerala-2-500x333.jpg

Kerala Shrimp Curry

Most of the time, what I make for you guys is a very personal interpretation of a dish.  I think of it like my little fantasy, how I’d like to eat a dish regardless of its origin or culture and using ingredients I can get to.  I think everyone that loves to cook does this on some level – cooks things the way they like it.  But, there are times when I do crave the original!  That’s when I research (eating and reading) and try to recreate it from scratch, adjusting the spice level and seasoning where necessary but keeping to the unadulterated tradition as much as possible, which is the case with this Kerala-style shrimp curry.

This is actually a traditional curry I created for Junoon.  I did a ton of research and found out that in the south of India, in Kerala, they use this (very hard to come by) ingredient called kodampuli, which is also called Malabar or smoked tamarind.  And smoky is right – it’s used as a souring agent and has a tart, smoky, complex quality that I love!  That said, if you can’t find it, kokum or regular tamarind also works really well here to create that tart flavor.

People usually think curries are heavy, and they certainly can be.  I know I have to be in a mood to eat them. But not so with this one – despite the coconut milk, this curry feels a lot lighter.  The flavors are bright and fresh and not overly spiced.  There’s heat from the chilies, depth from the curry leaves, and that brightness from the cilantro.  I like to sear the shrimp and develop a nice brown on them before putting them into the curry.  Some simply fried shallots create a beautiful crunch on top and spooning this over some warm, basmati rice is pure heaven.  Enjoy!

Ingredients
Serves 4

4 pieces kodampuli*

3/4 cup boiling water

1 yellow onion, peeled and roughly chopped

2 shallots, peeled and roughly chopped

1 2.5-inch generous knob of ginger, peeled roughly chopped

8 cloves garlic, peeled

1 Thai green chili, stemmed

5-7 tablespoons coconut oil

2 teaspoons brown mustard seed

1 tsp white cumin seeds

pinch of fennel seeds

10 curry leaves

2-3 dried red chilies

¼ tsp Indian hot chili powder

½ tsp paprika

1 tsp turmeric

1 tsp ground coriander

1 tsp ground cumin

½ tsp garam masala

1 ½ cans coconut milk

1 ½ tsps palm sugar

squeeze of lemon juice

1 ½ lbs shrimp, cleaned and shelled

kosher salt and freshly ground pepper

small handful of cilantro, chopped

fried shallots (optional, as garnish)

grilled lime (optional, as garnish)

Procedure

In a metal or heat safe bowl, pour boiling water over the kodampuli.  After 10 minutes, remove one piece from the water.  Blend remaining in a blender and strain.  Set aside strained liquid and one piece.

To the bowl of a food processor, add the onion, shallot, ginger, garlic, and green chili.  Process to a smooth paste.

Heat 3 to 4 tablespoons of coconut oil in a medium pot over medium-high heat. When hot, add mustard seeds, cumin seeds, fennel seeds, curry leaves, and dried red chilies. Move around in the pot – it will sputter and pop so be careful!  Cook for about 30 seconds and then add the onion paste along with all of the dry spices.  Cook until the paste dries up and the onions turn golden brown, stirring to make sure it isn’t sticking too much or burning.

Add the single kodampuli, the strained liquid, the coconut milk, and the palm sugar.  Lower heat and simmer for 8 to 10 minutes until the sauce thickens. Squeeze in a bit of lemon juice, and adjust the seasoning here adding salt and freshly ground pepper as necessary.

Dry shrimp and season with salt and freshly ground pepper.  Heat a skillet over medium-high heat.  Add 2 to 3 tablespoons of coconut oil and sauté shrimp, working in batches if necessary.  Cook for 2 to 3 minutes, drain of excess oil and then transfer to the pot with the curry.

Add the cilantro to the curry right before serving and remember to remove the hot, dried red chilies so no one eats them!  Serve hot, preferably with basmati rice or naan, garnished with fried shallots and a grilled lime.

*Kodampuli is not the easiest to find, so you can substitute kokum or a piece of a tamarind block in its place.  You want a relatively tart liquid to flavor the curry.

tags: shrimp, curry, Junoon, Kerala
categories: all -1, main dishes, recipes
Monday 04.23.12
Posted by Aliya LeeKong
 

My Easter Stuffing

View fullsize stuffing-pic1-500x333.jpg
View fullsize stuffing-pic2-500x333.jpg

My Easter Stuffing

I always love cooking for holidays and get-togethers, and yesterday was no exception.  Usually, I decide the dishes way in advance and have a 3-day prep list in order to make my life easier and, quite frankly, less stressful for the event.  This Easter Sunday, not so much.  I bolted awake Saturday in a panic and interrogated my husband to figure out what to make.  His response was classic and came as no surprise in their usual casserole form: “shepherd’s pie and stuffing and I really don’t care what else you make.”

We ended up having a bunch of friends (whose family is not in the NYC area) over for the Sunday meal.  I’m used to stuffing for Thanksgiving when there’s actually a bird or something to be stuffed.  That said, who doesn’t love stuffing?  The weather is still cold, so I threw together some hearty ingredients that complemented the brined pork chops I served.

The foundation of the stuffing (besides the whole bread thing) is the bacon.  It adds that first layer of salty, smoky crunch, and I use its fat to cook the other vegetables.  The shiitakes add in that meaty, umami flavor and roasted leeks a signature, onion-like one.  For heat, I threw in a very generous pinch of Aleppo chili flakes, which are tangy, a bit sweet, with that kick.  I loved the results. If you want a vegetarian version, you can obviously omit the bacon and use vegetable stock in lieu of chicken stock; I’d use butter though for richness and maybe throw in some smoked paprika.  Crusty, moist, flavorful and pure comfort…enjoy!

Ingredients

Serves 6 to 8 / Yields (1) 2-quart baking dish

1 loaf challah bread, crusts removed, cut into cubes*

1 leek, white and light green parts only, thickly sliced

olive oil

kosher salt to taste

2 pieces of bacon, cut into a small dice

12-14 shiitake mushrooms, cleaned and stemmed, thinly sliced

1 shallot, finely chopped

3-4 garlic cloves, minced

very large pinch Aleppo chili flakes

¼ cup white wine

½ cup chicken stock

2 eggs, beaten

¼ cup heavy cream

1 ½ tsps chopped fresh thyme

small handful cilantro, finely chopped

freshly ground black pepper to taste

Procedure

Preheat oven to 400° F.

Transfer challah cubes to a large bowl and add the other ingredients as they are ready.

Toss leek with a bit of olive oil and salt and lay out on a baking sheet.  Roast in the oven for 15 to 20 minutes until starting to brown as you are prepping the rest of the ingredients.  Transfer to the bowl with the challah bread.

Heat a medium skillet over medium heat.  Add the bacon and cook stirring until the fat has rendered and the bacon has crisped up.  Using a slotted spoon, transfer the bacon to the challah bread reserving the fat in the pan.

Turn the heat up to high and when hot, add the shiitake mushrooms to the pan with the bacon fat.  Let them just sit there for a minute or two before stirring – you want to develop a nice brown on them.  Stir and add in the shallot, garlic, Aleppo and some salt to draw out the moisture.  Cook until the shallot is translucent.  Add the white wine and reduce until it’s almost all gone.  Add the chicken stock and let simmer for 1 minute.  Transfer the vegetables and liquid to the bowl with the challah bread.

Add the eggs, heavy cream and herbs to the bread as well and toss the whole mixture together.  You can add a bit more chicken stock if you find it isn’t moist enough.

Transfer stuffing to a greased baking dish and cover with foil.  Bake covered for 30 minutes.  Remove foil and bake uncovered for another 10 to 15 until crisp.

* I usually use brioche or challah for this and buy the bread the day before.  If the bread still has a lot of moisture, transfer the cubed pieces to a baking sheet and throw it in a 350° F oven for 5 to 10 minutes to crisp up.  You want them to be dry before adding the rest of the ingredients.

tags: Easter recipes, stuffing, shiitake mushrooms
categories: all -1, recipes, side dishes
Monday 04.09.12
Posted by Aliya LeeKong
 

Sweet Avocado-Chocolate Tart (No Bake!)

View fullsize avocado-pic1-500x333(1).jpg
View fullsize avocado-pic2-500x333.jpg
View fullsize avocado-pic3-500x166.jpg

Sweet Avocado-Chocolate Tart (No Bake!)

Avocados as dessert?  Yes, yes, and yes.  I am still reminiscing about my trip to Brazil, and there, avocados (which are fruits, mind you…) are often eaten as a dessert – sometimes sprinkled with lime juice and sugar and other times blended with cream or condensed milk to produce a thick pudding, amongst other ways.  In the U.S., we have gone so far as to add them to milk shakes or protein shakes, why not take it a step further and embrace this creamy fruit as dessert-worthy…

I picked up this beautiful, long, rectangular tart mold recently and had been itching to use it.  That said, if I’m being completely honest, I have to have the baking bug to go that extra mile and bake a tart from scratch.  This is a no-bake tart!  You merely have to press buttered, cookie crumbs into the mold and freeze for a few minutes to set.  It doesn’t get easier.

Add to that the filling is a breeze – a few ingredients thrown into a food processor to do the work – and this may be the easiest tart you’ve ever made.  It sets up in a few hours so could easily be thrown together before a dinner party.  Avocado season has begun and will run through the summer, and this is the perfect icebox treat to keep around for summer entertaining.  The avocado pairs with chocolate beautifully – sweet, creamy with the bitter, chocolaty crunch from the crust…Enjoy!

Ingredients

Yields 1 13 ¾” x 4 1/2 “ x 1” tart

Crust:

1 ½ sticks unsalted butter

2 ¼ cups chocolate cookie crumbs (from Oreos without the center filling or other chocolate wafer cookies

1 tsp kosher salt

Filling:

4 oz mascarpone cheese

½ can sweetened condensed milk

½ tsp vanilla extract

Squeeze of lime juice

2 ripe avocados, pitted

Garnish (optional):

fresh whipped cream

shaved bittersweet chocolate

Procedure

Melt butter in a medium saucepan.  Add cookie crumbs and a ½ teaspoon of the salt and mix with a fork until fully incorporated.  Press evenly into the tart pan going up the sides as well.  Place in the freezer for 10 minutes.

To the bowl of a food processor, add the mascarpone, sweetened condensed milk, vanilla extract, the other ½ teaspoon of kosher salt, squeeze of lime juice and spoon in the avocado flesh.  Process until thick, creamy and uniform consistency.

Spoon avocado mixture into the tart shell and smooth with a spatula.  Refrigerate for a minimum of two hours, though this can definitely be made a day or two ahead.  When unmolding, let the tart sit at room temperature for 20 to 30 minutes first, so that it loosens easily.

Serve slightly chilled with a dollop of whipped cream and some shavings of chocolate.

tags: desserts, avocado desserts, no bake desserts
categories: desserts, recipes, all -1
Monday 04.02.12
Posted by Aliya LeeKong
 

The Tea I Grew Up Drinking

View fullsize tea-pic1-500x333.jpg
View fullsize tea-pic2-500x333.jpg
View fullsize tea-pic3-500x166.jpg
View fullsize tea-pic4-500x166.jpg

The Tea I Grew Up Drinking

This past weekend I headed back home to Florida to visit my parents.  I love how easily you can just slide into old habits (well, food-related anyway!) – warm apple cake with vanilla ice cream upon arrival, fresh crèpes for breakfast, and other assorted dishes from food requests I made of my mom weeks ago in advance of the trip.  One thing that requires no request when I head down is a tea that was a staple in my household growing up – creamy, spiced, a touch sweet, and pure comfort.

You have no idea how hard it was to document this (seemingly simple) recipe!  The mere idea that I was going to record measurements and photograph spun the kitchen (my mom and myself included) completely out of order!  What normally happens by instinct, adding the tea leaves, sugar or milk for example (yes, all of the ingredients in the recipe…), became a tall task, and it somehow took us multiple takes to get this right.

Just look at what happened when we turned our back to confer on how much of the spices we added.  Milk explosion and a mess!

In any case, most people these days know about masala chai or just chai, which is the Hindi/Urdu word for “tea”.  The stuff in the supermarkets and the original masala chai have a ton of spices – clove, cinnamon, and even black pepper included – as well as a strong, distinctive taste.  This is notthat.  This is a black tea that’s brewed, lightly spiced with green cardamom and a touch of saffron, and simmered with milk until it’s thickened.  The result is creamy satisfaction and slightly decadent – the actual taste of the tea shines through (not just spices).  And for me?  It’s an easy way to remind myself of home.  Enjoy!

Ingredients

Serves 4

3 cups water

3 tbsps loose black tea (Assam, English Breakfast or whichever you like)

4 green cardamom pods, cracked

pinch saffron

4 tsps sugar (or to your taste level)

¾ cup whole milk

¾ cup evaporated milk

Procedure

In a kettle or small saucepan, bring water up to a boil.  Add black tea, cardamom, saffron and sugar and boil for 1 minute.  You may have to adjust the amount of black tea depending on the strength of what you are using.  I used an Assam tea here.  Also, you can do sugar to taste if you prefer.

Add both milks and bring up to a simmer.  Simmer uncovered for 20 to 25 minutes until the tea has thickened a bit.  Be careful not to let it boil over!

Strain and serve immediately.

tags: tea
categories: drinks & cocktails, recipes, all -1
Monday 03.26.12
Posted by Aliya LeeKong
 

Scallops with Spiced–Brown Butter Cassava Purée

View fullsize scallop-pic1-500x333.jpg
View fullsize scallop-pic2-500x333.jpg

Scallops with Spiced–Brown Butter Cassava Purée

So in a few weeks I’m headed down to St. Lucia to do a little cooking.  Last time I was down there, it was a bit of a blur because I was perfecting this rum punch recipe.  This time, I’m all business!  Usually, I travel to learn about the food and cooking of a place, but I’m actually going to partnerwith a local restaurant to do some exciting things with their menu.  The fact that it’s at one of the most beautiful resorts in the world (in my opinion!) makes me pretty much one of the luckiest ladies out there, and the fact that the menu is based on South Asian / Indian and West Indian influences couldn’t suit my background and passions more.  Here is a sneak peak at one of the dishes I’m developing for them.

Scallops, brown butter and spices work together really well, particularly with a nice root purée.  The island has incredible local seafood as well as produce – cassava is a local vegetable that’s starchy and takes on flavor beautifully.  I cook it here much like I would heavenly, creamy mashed potatoes and infuse it with signature South Asian spices like cumin and coriander.  I may change my mind and mix it with a bit of potato or use dasheen (taro root) instead, but I really did like the way this one came out so I wanted to share.

I am in absolute love with my ricer for making purées of root vegetables, and it really helps create that creamy, silky texture.  The spices make the cassava pop, and the nutty brown butter pairs with sweet scallops in such a lovely way.  I love to get a nice crust on the scallops, and secretly I cooked them in the same pan in which I made the brown butter for some extra flavor.  This is an easy weeknight meal but is certainly entertainment worthy.  You can absolutely substitute potatoes or even cauliflower here (adjusting cooking times of course) if cassava isn’t readily available.  Enjoy!

Ingredients

Serves 4

1 quart chicken stock

3 cups water

2 cassavas, approx. 1 ¾ lbs peeled, chopped cassava

½ tsp kosher salt

1 stick + 2 tbsps unsalted butter

¾ tsp turmeric

1 ½ tsps cumin

1 ½ tsps coriander

¾ tsp white pepper

large pinch cinnamon

large pinch cayenne

2 cups heavy cream

16 large, dry sea scallops, muscle removed

vegetable oil

kosher salt & freshly ground pepper

Procedure

In a stockpot, bring stock, water, cassava and salt up to a boil and lower to a simmer.  Simmer for 20 to 25 minutes until cassava is tender and breaks very easily with a fork.  Drain, pass through a ricer (or use a potato masher) and put back into a large saucepan.  Place saucepan on low heat, stirring for 2 to 3 minutes to dry out the cassava thoroughly.

In a small skillet, melt 1 stick of butter over medium-high heat.  Add spices and continue cooking butter until it browns and becomes fragrant in a hazelnut kind of way.

Whisk browned, spiced butter and heavy cream into cassava and heat through.  At this point you can serve like this or push it through a mesh sieve to get an even finer texture.  To keep warm, hold purée in a double boiler (i.e. in a bowl over simmering water).

For the scallops, you want to develop a nice, deep color on them.  Thoroughly dry the scallops before cooking and season generously with salt and freshly ground pepper.  If they are wet, they won’t caramelize and will sort of steam in the pan.  Also, if you crowd the pan, they will also steam, so work in batches if necessary.

Heat a skillet over medium-high heat and add vegetable oil to just coat the bottom of the pan.  When it’s just about to smoke, add the scallops, dragging a little so that the side gets coated in olive oil.  Cook for about two minutes and add a tablespoon or so of the butter.  Let cook for another minute or so and then flip.  They should have a nice brown crust on them.  At this point, I turn the heat down just a tad.  Let them cook on this side for another three minutes or so until they are cooked to your desired level.  I like mine so that the middle third looks a bit translucent and the top and bottom thirds are opaque, but remember different-sized scallops will take differing cooking times.

Serve scallops immediately with a side of the cassava purée and some chopped herbs if you desire.

tags: scallops, seafood recipes, cassava
categories: all -1, recipes, main dishes-1
Monday 03.12.12
Posted by Aliya LeeKong
 

Baked Trini Wontons

View fullsize wonton-pic1-500x333.jpg
View fullsize wonton-pic4-500x333.jpg

Baked Trini Wontons

I’m just going to say it to get it out of the way.  Frying just tastes better.  It does.  There is no other way to get that perfect, even texture, signature crunch, and lovely fried flavor…BUT if you can pretend like fried wontons never existed or not do some sort of unfair comparison of a fried wonton vs. a baked one, these are absolutely delicious (and, of course, a little better for you and your waistline).

I first came across the fried and soup version of these because of my husband and his wonton cravings. The Chinese influence on Trinidad is evident here as it combines traditional Asian flavors with pops of West Indian influence – particularly the scotch bonnet or habanero.  What I love about this recipe is that it is ridiculously versatile – you can, of course, deep-fry these (as I do for company), keep them frozen and pop them in the oven for a weeknight appetizer for the family, throw a few of them into a brothy vegetable soup to cook with and add a bit of flavor, or even just use the stuffing mixture with some breadcrumbs for a nice, spicy pork meatball.  AND, if you want to use ground chicken, beef or shrimp instead of pork, the recipe still works great.

I got a bit crazy while making these and tested out the wontons at 25 degree intervals in the oven, on both convention and convection settings, to figure out which creates the best texture (crazy, I know, but effective!).  Deep-frying, because of the circulation of hot oil, cooks evenly and quickly, so I ended up going with a relatively high temperature (425° F) and using the convection setting (for circulating air) to yummy, crispy results.  These don’t take too long to cook, and what this does is prevent the wonton dough from getting too chewy, which seemed to happen at the lower temperatures.  Again, these do freeze up really easily, but make sure to bring to room temp before baking (if you’re frying, straight from the freezer is fine).  Easy weeknight app, little hors d’oeuvres for entertaining…this wonton is spicy, flavorful, crunchy and satisfying – Enjoy!

Ingredients

Yields 24 to 30 wontons

2 tbsps vegetable oil

1 large shallot, finely chopped

½ habanero pepper, seeded and minced

1 ½” piece of ginger, minced (~½ tsp)

1 scallion, minced

2-3 garlic cloves, minced

½ lb ground pork, room temperature

zest of 1 lime

¾ tsp soy sauce

½ tsp Worcestershire sauce

2 tbsps chopped fresh cilantro

salt and freshly ground black pepper

24-30 wonton skins

Olive oil or cooking spray

Procedure

Preheat the oven to 425° F on the convection setting for optimal texture.  If you don’t have an oven that has convection capabilities, preheat the regular oven to 450° F.

Heat a small pan over medium heat.  Add the vegetable oil and then add the shallot, pepper, ginger and scallion.  Add a little salt to draw out the moisture and sauté for 3 to 4 minutes until the shallot is translucent.  Add the minced garlic and sauté for another minute until the garlic is fragrant.  Remove from the heat and let cool.

Using a large bowl, mix together the pork with the cooled shallot mixture, lime zest, soy sauce, Worcestershire, cilantro and season with salt and freshly ground pepper (remember the soy and Worcestershire are salty so you might not need much).  You can always quickly sauté a tiny patty to check seasoning.

Set up a little work station for yourself with a cutting board, a small bowl with water, a towel to wipe your hands, the wonton skins, and the pork mixture.  I like to make these 3 to 5 at a time.

Lay out the wonton skins on your cutting board, and then spoon even amounts of the pork mixture in the center of each.  You don’t want to overstuff so test out the first one to see what the right amount of the pork mixture is.

Dip your fingertips in the water bowl, and then wipe across the four edges of the wonton skin with it so they’re wet.  Fold one corner over to the other and press down the corner and sides to form a triangle.  Don’t be afraid – press hard!  Or else your stuffing will ooze out.  Bring the other two edges up to meet, using more water if necessary, and press together. Place on a parchment-lined baking sheet that has been greased with either olive oil or spray.

Repeat until all of the wontons have been formed.  Spray each wonton or brush with olive oil and place in the oven.  Bake for 8 to 10 minutes until deep, golden brown.  Serve warm with your dipping sauce of choice.

*If you’ve frozen or refrigerated these, make sure they come up to room temperature before baking.

tags: wontons, baked snacks, pork
categories: all -1, appetizers, man-friendly, recipes, side dishes
Monday 03.05.12
Posted by Aliya LeeKong
 

Mujaddara with Bulgur & Yoghurt

View fullsize mujadarra-pic1-500x333.jpg
View fullsize muj-pic2-500x333.jpg
View fullsize muj-pic3-500x333.jpg

Mujaddara with Bulgur & Yoghurt

Let me just say…thank goodness for the rainbow microgreens I had stashed in my fridge from earlier this week.  Without which, this dish would not look quite so attractive!  Looks aside, this has to be one of my favorite sides – shockingly delicious (don’t let the bulgur and lentils fool you), exquisitely simple to make, and, yes, healthy on top of it all.

Mujaddara is a Middle Eastern dish that traditionally pairs lentils with rice and caramelized onions.  Certain versions, like this one, exchange the rice for bulgur wheat, which adds a sweet nuttiness and beautiful texture to the dish.  But the real star here are the caramelized onions that are cooked a bit further than you might be used to, to the point where the edges get really dark and take on a bittersweet quality.  These onions take this dish to the next level and give it that addictive quality, the kind that makes you keep going back to the fridge to nibble quick, little, cold spoonfuls of it (or is that just me?).

The dish could not be simpler – caramelize onions, cook lentils, add bulgur, mix everything together.  I do a few extra things, of course, to boost the flavor a bit: namely, use chicken stock to cook the lentils and bulgur, add a few extra spices and aromatics while cooking them, and top the whole thing off with toasted pine nuts.  But this recipe can easily be modified for vegetarians and even vegans if butter is omitted and/or vegetable stock is used.  A bowl of nice, cool yoghurt pairs beautifully with the dish, and I love a few pinches of pimentón de la Vera on top for some smoky heat.  The texture is tender and fluffy with rich bites of the caramelized onions and a hint of spice…and wait ‘til you taste it the second day, even better.  Enjoy!

Ingredients

Serves 4 to 6

2 tbsps unsalted butter

1 tbsp vegetable oil

2 yellow onions, thinly sliced

4 cups chicken stock

1 bay leaf

1 small bunch fresh thyme

¾ tsp ground coriander

½ tsp ground cumin

generous pinch chili flakes (I used Aleppo but any will do)

tiny pinch cinnamon

1 ¼ cups lentilles du Puy (French green lentils but brown ones work too)

¾ cup bulgur wheat

¼ cup pine nuts, toasted

salt and freshly ground black pepper to taste

extra virgin olive oil

Yoghurt:

yoghurt

pimentón de la Vera

Procedure

Heat a medium-sized skillet over medium heat.  Add butter and oil, and when the foam subsides, add the sliced onions and a few pinches of salt to draw out the moisture.  Reduce the heat to low and cook for 30 to 45 minutes until the onions deeply caramelize and brown.  They should go even darker than traditional caramelized onions, just before they start to turn bitter.  Remove with a slotted spoon and set aside.

While the onions are cooking, bring the chicken stock up to a boil with the bay leaf, thyme, coriander, cumin, chili flakes and cinnamon.  I like to tie the thyme bunch with a bit of kitchen twine, so I can easily toss it at the end.  Add the lentils, reduce the heat to a simmer and simmer covered for 15 to 20 minutes until the lentils are almost tender but have a slight bite.

Add the bulgur, season with salt and freshly ground pepper, and stir to combine thoroughly.  Cover and simmer for another 15 minutes.  Turn off the heat and let sit for another 10 minutes for the bulgur to finish cooking and to turn fluffy and tender.

Remove the bay leaf and thyme, and add the caramelized onions to the lentils and bulgur, mixing thoroughly, and adjust seasoning if necessary.

Serve warm topped with toasted pine nuts and a drizzle of extra virgin olive oil with a side of yoghurt sprinkled with pimentón de la Vera.

tags: Mujadarra, Bulgur, middle eastern recipes, lentils
categories: all -1, recipes, side dishes, vegetarian
Monday 02.27.12
Posted by Aliya LeeKong
 

Quick Use-Your-Veggies Quinoa Soup

View fullsize soup-pic1-500x333.jpg
View fullsize soup-pic2-500x166.jpg
View fullsize soup-pic3-500x166.jpg

Quick Use-Your-Veggies Quinoa Soup

I know what you’re thinking.  This chick went to Peru and came back plumb-quinoa-crazy since she just posted a quinoa recipe 2 weeks ago.  I feel you guys deserve an explanation, so I’m going to level with you.  I was actually working on an exciting recipe for some black sesame Arabic donuts with date molasses (sounds pretty delicious, no?), but I had a yeast malfunction issue. TWICE.  And after 2 trips to the store in the cold and a bit of heartache (I’m not a yeast novice.  I blame the yeast!), I decided to warm myself up with this soup and share it with you guys.  Donuts tbd…

I did, in fact, learn a version of quinoa soup in the Sacred Valley in Peru.  And I’ve made this soup a few times.  What I LOVE about it is that it gives you a chance to use up all of the random vegetables you might have sitting in your fridge.  I like to save onion scraps, carrot halves, any little bits of a vegetable – and all of that works well in the soup.  Not overcooking the veggies also adds a beautiful, textural crunch.

The soup I had in Peru was super rich, cooked with evaporated milk, egg, and luscious cubes of cheese.  I omit the egg, leave the cheese optional here and opt for a bit of heavy cream to thicken instead, but I have to admit the cheese is an amaaaazing part of the soup.  It’s so warm and comforting and really pops with flavor (while you get your protein punch from the quinoa).  If you keep cooked quinoa in your fridge like I do, this takes no time to make – 15 minutes (half an hour if you have to make the quinoa).  Either way, this is a perfect winter weeknight meal – enjoy!

Ingredients

Serves 4 to 6

2-3 tbsps olive oil

1 red onion, finely chopped

1 jalapeno, finely chopped

2 scallions, thinly sliced

1 ½ cups finely chopped mixed vegetables (carrot, celery, zucchini, etc.)

4 to 6 garlic cloves, minced

4 cups cooked quinoa*

2 quarts vegetable or chicken stock

1 cup cubed Monterey jack cheese (optional)

½ cup heavy cream

Handful of fresh cilantro, roughly chopped

salt and freshly ground black pepper

Procedure

Heat a medium-sized pot over medium heat.  Add olive oil and throw in the red onion and jalapeno as well as a bit of salt to draw out the moisture.  Cook for a few minutes until the red onions start to turn translucent.  Add in the scallions and mixed vegetables.  You want to cook for another few minutes but you want the vegetables to retain some crunch (so don’t overcook).

Add the garlic and sauté another 30 seconds and then throw in the quinoa and stock.  Bring the mixture up to a boil and then lower to a simmer.  Add in the cheese, if using, and the heavy cream and simmer for another 2 minutes so the flavors come together.  Add the cilantro and season to taste.

*As a rule of thumb, I assume quinoa triples in size.  So I made 1 1/3 cups of quinoa (in 2 2/3 cups water) for this recipe.

tags: soups for winter, quinoa, vegetarian meals, leftover veggies, quick soups, easy soups, weeknight meals
categories: main dishes, recipes, soups & salads, all -1, vegetarian-1
Monday 02.06.12
Posted by Aliya LeeKong
 

Espresso-Chocolate Brigadeiros

View fullsize brig-pic1-500x333.jpg
View fullsize brig-pic2-500x333.jpg
View fullsize brig-pic3-500x166.jpg

Espresso-Chocolate Brigadeiros

I love when I discover a food or dish that is completely a blank slate – a truly adaptable item that you can tailor to your own taste preferences with a few key ingredients.  Brigadeiros, another one of my Brazilian discoveries, are precisely that, a docinho or sweet that is enjoyed all over the country.  These are effectively little balls of luscious, milk fudge that are ridiculously easy to make and that can be layered with any flavor combo you like.

Now, when I say easy, even that might be an overstatement.  It can be as simple as 3 ingredients – sweetened condensed milk, unsalted butter, and whatever you are flavoring are garnishing these little guys with.  I found my favorite sweet shop in Rio and kept sneaking a new flavor (or two, who are we kidding) back to my hotel room each day, but my heart really settled on chocolate, which is one of the most popular versions.

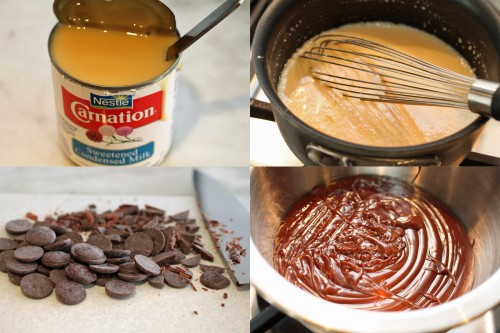
So, I will admit, I made the recipe more complicated than the original BUT only in number of ingredients.  And, of course, I think using real chocolate in lieu of just cocoa (the tradition) gives it a much richer taste.  It’s seldom I go all in on just chocolate in a dessert, so the espresso powder, I think, brings out what’s best about the semisweet chocolate.  I would say that the addition of heavy cream,  vanilla, salt and corn syrup make this somewhere between a truffle and a brigadeiro – but the result is simply heavenly: rich, thick fudgy bites with that signature mocha flavor.  Next time, I plan to use Mexican chocolate, one of my favorite ingredients out there, and see what happens.  Enjoy!

Ingredient

Makes approximately 2 dozen brigadeiros

3 tbsps unsalted butter

1 (14 oz) can sweetened condensed milk

¼ tsp kosher salt

3 tbsps heavy cream

1 tsp light corn syrup

½ tsp vanilla extract

1 ¼ tsp instant espresso powder

1 tsp unsweetened cocoa powder

3.5 oz semisweet or bittersweet chocolate, chopped (approx ¾ cup)

Garnish: cocoa powder, chocolate sprinkles or vermicelli, and/or chocolate-covered espresso bean

Procedure

In a small, preferably nonstick, pot, melt the butter over medium-low heat.  Add the sweetened condensed milk, salt, heavy cream, corn syrup and vanilla extract and whisk to combine.  When the mixture starts to bubble, add the espresso powder, cocoa powder and chopped chocolate and whisk to melt chocolate.  Cook on medium-low for 10-15 minutes whisking constantly.  The mixture should just lightly bubble around the edges so reduce the heat if it’s cooking too quickly.

When it’s ready, you should see that the mixture will pull away from the sides and slide around the bottom.  Transfer to a metal bowl and don’t scrape the bottom of the pot.  Let cool for 30 to 45 minutes at room temperature.  Cover with plastic wrap and transfer to the fridge.

You want to cool the mixture completely before rolling the brigadeiros.  This will take likely between 3 and 4 hours.  I actually took the bowl out after 2 hours and used a small, greased ice cream scoop to scoop out 24 equal mounds of the mixture onto a parchment-lined baking sheet.  Then, I put it back into the fridge to firm up for another 20 minutes.  The increased surface area makes it cool faster.

Make sure your hands are greased and roll the mixture into even-sized balls.  Then, it is up to your imagination how to garnish.  You can simply roll in cocoa powder or sprinkles.  I garnished mine with chocolate vermicelli and a chocolate-covered espresso bean.  I think the little paper baking cups make it look adorable.  These are best enjoyed at room temperature.

These will keep for 2 days at room temperature if you keep them in an airtight container.  In the fridge, they’ll keep for closer to a month.  If refrigerating, bring to room temperature before serving.

tags: brigadeiros, espresso, chocolate, chocolate desserts
categories: all -1, desserts, recipes
Monday 01.30.12
Posted by Aliya LeeKong
 

Quinoa Crusted Shrimp with Chipotle Mayo

View fullsize shrimp-pic11-500x333.jpg
View fullsize shrimp-pic2-500x333.jpg
View fullsize srhimp-pic3-500x333.jpg

Quinoa Crusted Shrimp with Chipotle Mayo

It feels like over the last few years, Americans have gotten really smart about the health benefits and cooking of quinoa (and, in reality, about a lot of the ancient grains / foods that are showing up in supermarkets).  Quinoa, in particular, has gotten a lot of attention because it’s a complete protein source, high in fiber and minerals and is gluten-free.  The “pseudograin” is actually native to the Andes and a big part of the diet out there, so while I was in Peru a few weeks back, I was a bit obsessed with learning traditional quinoa recipes.

I had the opportunity to cook with a few chefs in the Sacred Valley, and they gave me their creative interpretations of the grain – using it in surprisingly delicious, brothy soups, cooking it like a risotto in a dish called “quinotto”, and even sweet, in a dessert that’s not unlike a frozen rice pudding.  I too wanted to put my spin on it, so I thought replacing traditional breading for fried shrimp with quinoa would create a healthier (but still super flavorful) option.

And this recipe is almost gluten-free.  You can easily replace the all-purpose flour in this recipe with rice flour, and you are good to go.  One of the chilies used in Peruvian cooking (the “ajis” as they call it) is aji panca, a dried, smoky chili which I think has a similar flavor profile to the chipotle.  I thought a creamy, homemade mayo spiked with chipotle pepper would be the perfect accompaniment to this shrimp.  The quinoa crust is nutty, crunchy and satisfying and tastes heavenly with a bit of smoky, spicy mayo….Enjoy!

Ingredients

Serves 4 to 6

For the shrimp:

½ cup flour

1 tsp salt

¼ tsp freshly ground black pepper

½ tsp ground cumin

½ tsp paprika

¾ tsp garlic powder

½ tsp onion powder

2 eggs, beaten

1 cup raw quinoa*

1 lb medium shrimp, peeled and deveined

Olive or vegetable oil, for frying

For the chipotle mayo:

Yields ¾ cup

1 egg yolk

1 garlic clove

½ tsp mustard

1 tbsp lemon juice

150 mL olive oil

generous pinch of salt

1 chipotle in adobo sauce

Procedure

Let’s start by quinoa-crusting the shrimp.  Set up 3 bowls and a baking sheet with a rack on top.  In the first bowl, thoroughly mix together the flour with the salt and all of the ground spices.  The second bowl will have the beaten eggs, and the third bowl, the quinoa.  For each shrimp, holding by the tail dip them in the flour mixture, eggs, and then quinoa – shaking off excess at each stage.  Place on the rack on the baking sheet and set in the fridge while heating the oil.

In a heavy-bottomed pot, heat 2 to 3 inches of oil to 375° – 380° F.  The key here is that the oil has to be hot enough or the quinoa won’t cook through.  It should be crisp but not taste raw.  You want to work in batches so the oil temperature doesn’t drop too much – the overall goal is to keep the temperature above 360° F for the duration of cooking.  Fry shrimp for 3 minutes and transfer to another rack on a baking sheet.  Immediately, season with a bit of salt while it’s hot out of the oil.

For the mayo, in a food processor or a blender, blend together the egg yolk with the garlic clove, mustard, and lemon juice.  With the machine on, slowly drizzle in the olive oil until fully incorporated.  Add the chipotle and blend until uniform.

Serve shrimp hot with a side of the chipotle mayo.

*I used a combination of red and white quinoa here (and would have used black as well had I found it).  You can use whatever variety you have on hand.

tags: quinoa, shrimp, chipotle mayo, Peruvian cooking
categories: all -1, appetizers, recipes
Monday 01.23.12
Posted by Aliya LeeKong
 

Arroz Con Pato

View fullsize arroz-pic1-500x333.jpg
View fullsize arroz-pic2-500x333.jpg
View fullsize arroz-pic3-500x166.jpg

Arroz Con Pato

A classic dish in Spanish and Latin culture is Arroz con Pollo or chicken with rice.  It’s a family-style, one-pot dish, chicken cooked with onions, peppers, garlic, tomatoes (sofrito) and rice – some families add achiote, others saffron, cilantro, or culantro…whatever is that family’s tradition.  One of the best dishes I tried in Peru was Arroz con Pato, where succulent duck replaces the chicken in the traditional dish.  It was such a rich and elegant dish that I had to try my hand at it now that I’m back home in NYC.  I’m so happy I did….

Two of the differences between arroz con pollo and arroz con pato (aside from the whole chicken v. duck thing) is that chicha, Peruvian corn beer, is used to cook the rice and duck in arroz con pato.  Also, cilantro is blended with water and added to the braising liquid, so the color of the dish takes on a gorgeous, green hue.  Beer, cilantro, and duck?  A winning combination in my book!

I learned a number of dishes from a fantastic friend in Lima, Naguib Ciurlizza, a colorful and multi-talented gentleman who boasts poetry and painting as skills alongside his vast knowledge of Peruvian cuisine.  He detailed to me how the original dish was made.  I had to make a few twists and turns to accommodate what’s locally available here in the States (aji amarillo can be so difficult to find!) and to accommodate my own taste.  So I use jalapenos in lieu of Peruvian peppers.  I also substitute a good stout beer instead of corn beer and chicken stock instead of water.  Traditionally, a long grain rice is used, but I went with a shorter grain rice that’s more of a paella tradition because I just love the texture.  I also throw in some olives at the end for a salty bite.

I will be blunt – this is not something to be whipped up in 30 minutes.  It’s a long, slow, loving cooking process, but I promise you the results are incredible and rewarding.   Fall-off-the-bone duck meat in a flavorful rice infused with beer and cilantro, studded with peas, bell pepper, and olives.  It’s a meal your family will love you for or that works for a great, casual dinner party (when you want to flex your Peruvian-inspired skills).  I’m a cook, so I shouldn’t say this but…I was literally shocked by how delicious this version of the dish is!  Enjoy!

Ingredients

Serves 4 to 6

Vegetable oil to coat pot

Duck, preferably 2 legs, bone-in with thigh meat and 1 breast, boneless split (approximately 3 lbs)

3 shallots, finely chopped

1 jalapeno, minced

2 tsps ground cumin

5 cloves garlic, minced

¾ cup stout beer

¼ cup Pisco liqueur (optional)

4 cups chicken stock

1 very large handful cilantro (no tough stems but soft stems are fine)

Bay leaf, dried or fresh

2 ½ cups Valencia, bomba or calasparra rice (paella rice)

¾ cup fresh or frozen peas

1 cup bell pepper, small dice (mixed yellow, red and orange)

Black olives (garnish)

Salt and freshly ground black pepper

Procedure

Preheat oven to 350° F.

Start by prepping the duck.  Dry the legs and breast and trim of excess fat.  I like to reserve this fat to melt down and keep for cooking in the future.  Prick the legs all over with a fork (this will help the legs render the fat easier) and season all over with salt and freshly ground pepper.  Score the skin on the breast in a criss-cross pattern (again for fat-rendering purposes) and set aside.

Heat a large pot or dutch oven over medium-low heat.  Add vegetable oil to coat the bottom of the pot and prevent the duck from sticking.  Add the legs skin-side down.  You want the fat to render out and the skin to crisp and brown.  This should take 3 to 4 minutes.  Turn pieces over and cook for another 3 minutes.  Remove legs to a plate and set aside.  Pour off (and keep!) any excess fat, reserving a few tablespoons in the pot for cooking the vegetables.

Add shallots, minced jalapeno and cumin and cook for 3 to 5 minutes until the shallots are softened and translucent.  Add the minced garlic and cook for another minute.  Pour in the beer and pisco, if using, and increase the heat.  Scrape the bottom of the pan with your spoon to dislodge any brown bits and bring up to boil.

While the duck or vegetables are cooking, blend 2 cups of the chicken stock in a blender with a large handful of the cilantro, reserving a small handful to chop for garnish later.  You want to blend on high for several minutes until the cilantro is totally pulverized.

Nestle the duck legs back into the pot, skin-side up.  Add the chicken stock blended with the cilantro and a bay leaf, cover and bring up to a boil.  As soon as it boils, place covered pot into the oven and cook for 1½ hours.

Take pot out of the oven, place on the stovetop and temporarily (and carefully) remove the duck legs.  Add the rice, peas, and chopped peppers and season very well with salt now to avoid stirring once it’s cooked.  Add the remaining 2 cups of chicken stock, stir and nestle the duck thighs back in.  Cover and bring back up to a boil.  Place in the oven for another 30 to 40 minutes until the rice is cooked through.

In the last 10 minutes of cooking, heat a skillet over medium-low heat.  Season scored duck breast all over with salt and freshly ground pepper.  Add a touch of oil to prevent the duck breast from sticking and place breast pieces skin-side down.  You want to render all of the fat out, so as the fat accumulates in the pan, carefully pour it off (and keep!).  Cook for 8 to 10 minutes until the skin has become crisp and there is no layer of fat underneath it.  Turn breast pieces over, increase heat to medium-high and cook for another 2 minutes.  This will yield a medium-rare breast – cook for longer if you like your meat more well done.

Remove the duck breast to a cutting board, cover loosely with foil and let rest for 5 minutes.  Thinly slice the duck breast.

Serve the rice garnished with black olives, some fresh cilantro and sliced duck breast.

tags: duck, Peru, Peruvian cooking
categories: recipes, travel, all-2, main dishes-1
Monday 01.16.12
Posted by Aliya LeeKong
 
Newer / Older