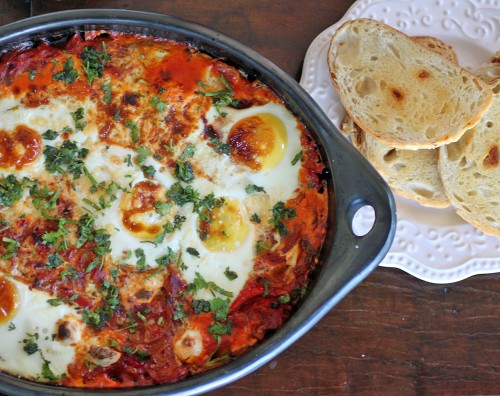
X

Sign up to receive exclusive recipes, tips, updates and other goodies from Aliya!

  • Home
  • Blog
    • All
    • Recipes
    • Spices + Ingredients
    • Lifestyle, etc.
    • Travel
  • The Cookbook
  • The App
  • Media
    • All Media
    • Video
  • About
  • Passions
Aliya LeeKong
  • Home
  • Blog
    • All
    • Recipes
    • Spices + Ingredients
    • Lifestyle, etc.
    • Travel
  • The Cookbook
  • The App
  • Media
    • All Media
    • Video
  • About
  • Passions

Shrimp and Grits

View fullsize grits-pic1-500x318.jpg
View fullsize grits-pic2-500x333.jpg
View fullsize grits-pic3-500x333.jpg

Shrimp and Grits

This weekend, I taught a class with the De Gustibus cooking school over at Junoon.  I had a blast (!) chatting about spices in our spice room and walking the students through a traditional South Indian curry – which they made by themselves to rave reviews!  In any case, one of the students asked me about vadouvan, a mix I wrote about months back and in what dishes I might use it.  It put the bug in my brain, and this French-Indian spice blend became my seasoning du jour for some exotic shrimp and grits I whipped up for Sunday brunch.

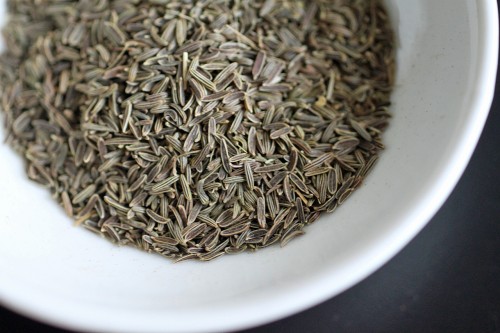
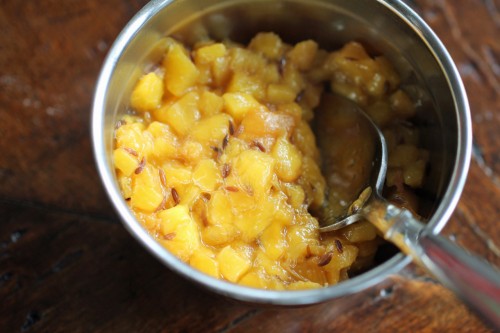
Now, I’m honestly in favor of blending your own curry powder from spices you have on hand, tailoring to your palate.  But vadouvan is a fantastic blend to keep on hand.  It has a softer approach to curry, with ingredients like dried shallots, bay leaves and even fennel seeds blended in.  There is a warm sweetness to it that I think complements shrimp tremendously, and when you use a bit of butter to cook the shrimp, the pan drippings become a beautiful, fragrant golden sauce.

I know bacon or smoked sausage is traditional in shrimp and grits (not that tradition is reigning here anyway…), but the friend I cooked for is not big on pork.  For that reason, I used some grated smoked mozzarella to infuse the creamy grits with that signature smokiness.  Using milk and chicken stock give the grits a silkiness and rich flavor.  The shrimp need little else besides the vadouvan and a bit of salt, but the shallots and minced jalapeno are great here.  Finishing with fresh herbs brings in brightness, and this dish has so much body it could easily be a (super) easy weeknight dinner.  The curry notes, sweet shrimp and creamy smoky grits…heavenly.  Enjoy!

Ingredients

Serves 4

2 cups milk

2 cups chicken stock

salt & freshly ground black pepper

1 cup stone ground grits

5 tbsps unsalted butter

1 ½ cups smoked mozzarella, grated

1 lb shrimp, peeled and deveined

3 ½ tsps vadouvan

1 tbsp olive oil

1 shallot, minced

1 jalapeno, seeded, deveined and minced

Chopped scallions  and parsley / cilantro (for garnish)

Procedure

In a saucepan, bring milk and chicken stock up to a boil.  Lower to a simmer, season with salt and pepper, and whisk in grits.  Cover and cook at a low simmer for 25 to 30 minutes.  Remove from the heat and add in 3 tablespoons of the butter and the smoked mozzarella, whisking to incorporate fully.  Keep covered and warm.

Make sure the shrimp are dry and toss with vadouvan and some salt.  Heat a skillet over medium-high heat.  Add 2 tablespoons of butter and 1 of olive oil.  Add shrimp and cook for a minute or so.   Flip shrimp, lower heat to medium-low and add in the shallots and jalapeno, tossing to combine.  Cook for another 2 minutes.

Serve grits hot and spoon shrimp mixture on top, letting some of the pan juices drip on to the grits.  Garnish with some chopped scallions and parsley or cilantro.

tags: shrimp, grits, vadouvan
categories: recipes, breakfast, all-2, main dishes-1
Monday 10.17.11
Posted by Aliya LeeKong
 

Creole Mustard

View fullsize creole-pic1-500x333.jpg
View fullsize creole-pic2-500x314.jpg

Creole Mustard

You guys may remember a few months back I headed out to New Orleans, ate at some crazy delicious spots, and got to do some cooking to learn how the locals really throw down.  Predictably, I came back with a suitcase full of Louisiana-centric ingredients – maybe 5 different types of hot sauce, boil seasoning (both powdered and liquid), and some mayhaw jelly to name a few of them.  One of my favorite NOLA finds, though, was this secret recipe Creole Mustard.

Now, I say secret recipe because (and I heard this from a man named Don Creole, mind you, down at the French Market. Check him out if you go!) this is top secret stuff, and the companies that make the mustard won’t go much further than to say they use high quality brown mustard seeds (stone ground and more flavorful than the yellow bunch) and a ton of spices.  The bottle also maddeningly says that the ingredients are: “water, vinegar, mustard seed, spice, canola oil, and xanthum gum.”  Which spice I ask?!?  Don also said that this Rex brand is the best of the best, and his accent was so syrupy and convincing that I threw the bottle right on in my basket next to the mayhaw jelly.

Creole mustard takes mustard to a new level.  It’s thick, rich, and spicy without having a ton of heat.  I’ve heard that the seeds are marinated for quite some time in vinegar, and I can detect garlic, cayenne, either nutmeg or allspice, and a touch of horseradish in the bottle I have.  It’s a key ingredient in the famed, Louisiana remoulade sauce, and I’ve been using it in lieu of Dijon mustard since I got back.

Delicious in marinades, transformative on a ham sandwich, and makes a next level vinaigrette, I’m all about Creole mustard from here on out.  You can definitely find it online, but can you believe even Whole Foods carries it…

tags: New Orleans, Creole mustard, Don Creole, French Market
categories: all-2, spices-1
Thursday 10.13.11
Posted by Aliya LeeKong
 

Apple Pie with Star Anise Brown Butter

View fullsize apple-pic-pic4-500x299.jpg
View fullsize apple-pic-pic2-500x333.jpg
View fullsize apple-pic-pic3-500x333.jpg
View fullsize apple-pic-pic11-500x333.jpg

Apple Pie with Star Anise Brown Butter

Fall may just be my favorite time of year.  I grew up in Florida, where seasons blend and highs in the 80’s are not unheard of in mid-December.  Now that I’ve been in NYC for so long, I can’t tell you how much I look forward to that first cool breeze, the leaf change and, of course, something I NEVER did before living up here…apple-picking!  Yes, a beautiful, clear Fall day driving out to a farm, apple-picking, rooting around a pumpkin patch (and, potentially, a hayride to my husband’s dismay) is for me perfection.

Now, the reality is once you get out amongst the orchards, apple-picking turns to sport.  And you can’t help but go a bit loony and bring back a quantity of apples that most normal people couldn’t consume in a year.  I end up making pies, apple butter and chutneys until I can’t look at another apple for a year, and this weekend was no exception.  I went in on some Red Delicious, Idareds, and Mushus, and this pie was the (necessary) result.

In fact, it was really my post from last week where I was dreaming up incorporating star anise into an apple pie that led me to create this recipe.  The star anise infuses the brown butter, and that fragrant nuttiness complements the light, licorice-like flavor of the spice.  In combination with cinnamon, nutmeg, and a rich vanilla bean, the pie has a complexity that still doesn’t take away from the simplicity of the apple pie itself – that traditional apple flavor and buttery, flaky crust.  I love to make the crust from scratch, but feel free to use your own recipe here or go ready-made.  The filling could not be more simple, and this is now my go-to apple pie…Enjoy!

Ingredients

Yields (1) 9-inch pie

Double crust:

2 ½ cups all-purpose flour

1 tsp salt

1 tbsp sugar

2 sticks butter, chilled and cut into cubes

8-9 tbsps ice water

For the pie filling:

6 apples, peeled, cored and sliced 1/8” thick*

a generous squeeze lemon juice

½ cup light brown sugar

1 tsp ground cinnamon

¼ tsp ground nutmeg

½ tsp ground star anise

3 tbsps all-purpose flour

4 tbsps butter

1 vanilla bean, split and scraped

1 star anise

heavy cream for brushing

sugar for sprinkling

Procedure

First, we’re going to make and chill the crust.  To the bowl of a food processor, add the flour, salt, sugar and butter and pulse until mixture resembles a coarse meal.  Turn mixture out into a bowl and add water, a tablespoon at a time, pressing dough using a pastry cutter or a fork until dough starts to come together.  Dough will have both sandier crumbs and more clumped wet pieces.  Divide dough in half and wrap each piece in plastic wrap forming each into flattened discs.  Refrigerate for at least an hour.

Preheat oven to 425° F.

In a large bowl, mix together the sliced apples with lemon juice, brown sugar, cinnamon, nutmeg, star anise, and flour.

In a small sauté pan over medium-low heat, melt butter with vanilla bean, the scraped vanilla seeds, and the star anise.  Swirl pan and watch carefully as the foam subsides and the milk solids take on a golden brown color.  The butter should look like the color of and smell like hazelnuts.  Remove from the heat immediately, take out the vanilla bean and star anise and add to the apple mixture, stirring to incorporate thoroughly.

On a floured surface or between parchment paper, roll out the first disc to a 12” diameter circle and place carefully in the pie dish.  Fill with apple mixture.  Roll out the second disc and cut strips using a knife or pastry cutter to desired width.  Place strips over pie and place remaining strips at a right angle, weaving if desired.  Brush top crust with heavy cream and sprinkle with sugar.

Bake for 15 minutes keeping the pie on the middle rack with a baking sheet on the rack just below it to catch anything that might bubble over.  Reduce heat to 350° F and bake for another 35 to 40 minutes until top is golden brown.

Let cool on a rack for 2 hours before serving.  Serve warm or at room temperature.

*I used a combination of Idareds and Mushus here.


tags: apple pie, star anise, Thanksgiving recipes, recipes for fall
categories: all-2, desserts, recipes
Monday 10.10.11
Posted by Aliya LeeKong
 

Star Anise

View fullsize star-anise-pic1-500x333.jpg
View fullsize star-anise-pic2-500x333.jpg

Star Anise

This might sound completely idiotic, but I’ve recently been hit over the head with the fact that everyday is a totally subjective monster.  What’s everyday to you may be completely foreign to someone else, and so it’s always better to err on the side of giving too much info lest you leave someone out!  Recently, I’ve been doing a lot of events and I always keep a bunch of spices out on the table.  I’ve noticed that, without fail, star anise seems to draw people in who want to know more about its flavor and how to use it in cooking.

Spidery, little star anise is actually the fruit of an evergreen tree that’s been dried.  The spokes of star anise are usually split, revealing a shiny, oblong seed; interestingly enough, the pod has a lot more flavor than the seeds.  And what an incredible flavor!  Although completely unrelated to aniseed, the flavor is similar with really strong, licorice-like notes.  There’s also a woodsy spiciness, not unlike cinnamon or even clove – truly complex and warm and deep.  When you inhale the fragrance of the spice, it smells sweeter and more herbal than it tastes.  The scent is transporting…

Star anise is a secret weapon, that ingredient you can add to everything from desserts to braises that people won’t be able to identify.  I’ve used it in a few sweet dishes on here: a sugar plum sherbet and my Godson’s favorite banana & star anise tapioca pudding (see note below), and I plan to throw it in a mean, super spiced apple pie post apple-picking; it’s ridiculously delicious with vanilla bean, cinnamon and nutmeg .  But it’s a beautiful ingredient on the savoury side as well – key in Indian garam masala and Chinese five spice, this spice takes bbq sauce to a new level and is gorgeous in some wine-braised shortribs.

Although beautiful in its whole state, beware that it is extremely difficult to grind star anise to a complete powder without industrial strength.  I like to keep some whole ones to throw into liquids as the flavor diffuses easily and also keep some powder for dishes where a ground spice is more appropriate.


Note: Star anise should NOT be confused with Japanese star anise. Star anise (which is the Chinese version that is typically sold for cooking purposes) has long been used to treat colic in babies in many different cultures along with fennel and anise.

tags: star anise, spices
categories: all-2, spices-1
Thursday 10.06.11
Posted by Aliya LeeKong
 

Hawaij, a Yemenite Spice Blend

View fullsize hawaij-500x333.jpg

Hawaij, a Yemenite Spice Blend

Lately, I’ve been noticing certain occurrences, coincidences, tapping me on the shoulder, and I’m learning that it’s important to pay attention when these things happen.  They say things come in threes, and that’s how I thought to take notice of this spice mix.  First, I read this poignant article on how loss motivated a return to culture in the case of Chef Michael Solomonov and (a restaurant I’ve been dying to visit) Zahav in Philly.  And hawaij is mentioned.  Second, I was flipping through one of my favorite author’s cookbooks, Claudia Roden and the Book of Jewish food – and, again, this spice blend jumped off the page at me.  And third…it’s Rosh Hashanah – Happy New Year to those that celebrate!

Hawaij is actually a Yemenite Jewish tradition, a ground spice mixture that consists of black pepper, saffron, turmeric and cardamom.  In Aden, a port city of Yemen, the blend is slightly different – it still has black pepper and cardamom but includes cumin and coriander (according to Claudia).  Of course, other sources include clove, cinnamon, and even ginger in the mix – it’s definitely one of those traditions that differ by family history.   The turmeric in the blend obviously draws parallels to curry, but to me, the flavor is floral, peppery, earthy, and astringent from the cardamom.

It’s typically used in soups and stews and to flavor rice, but it also makes a killer spice rub.  I envision some crispy chicken thighs rubbed with hawaij drizzled with a  delicious pan sauce  from the chicken drippings, stock and butter.  That just made me so hungry.  I also love the idea of lively-ing up a basic fall/winter brothy soup with a small teaspoonful of this stuff.  And, you know, why not a tender, fall-off-the-bone osso bucco seasoned with hawaij and served with a fall mushroom risotto?  I’m motivated – so check back for recipes with hawaij soon…

tags: Hawaij, Yemenite spice blend, Yemenite Jewish cooking
categories: all-2, spices-1
Thursday 09.29.11
Posted by Aliya LeeKong
 

Buttermilk Gruyère Biscuits with Ajwain

View fullsize biscuit-pic1-500x333.jpg
View fullsize biscuit-pic2-500x333.jpg
View fullsize biscuit-pic3-500x166.jpg

Buttermilk Gruyère Biscuits with Ajwain

Let’s face it.  Those biscuits in the refrigerated section of the grocery are easy (and tasty!), and we’ve all used them in a pinch to deliver some buttery goodness to the breakfast or dinner table.  BUT.  It’s just not the same as the homemade kind (see: nothing artificial), and this recipe, with or without the fancy cheese and spices, is so easy and quick, you may swear off the metal tube-sort for good…

I have always loved cheddar-thyme biscuits, and those were precisely the inspiration for this spice-flecked version.  I wrote about ajwain some months ago and used it in a gorgeous pissaladière with mushrooms and onions, and what I think is fantastic about this spice is its resemblance to thyme, albeit with a slightly more pungent, menthol quality to it.  It’s used a lot in South Asian cooking and is often added to flatbread or samosa dough.

The base of this recipe is self-rising flour.  I used it because it has a slightly lower protein content than all-purpose, which translates into super tender, flaky biscuits.  White Lily brand is supposedly the go-to flour for Southern biscuits because it has a significantly lower protein content than some of the other national brands out there, but if you can’t find it, any self-rising flour works well here.  You whir the flour with cold butter, pour in some buttermilk and voilá! Biscuit dough in about 2 minutes flat.  I add in some grated gruyere or cheddar, typically, along with a bit of ajwain for that signature flavor.  Enjoy!

Ingredients

Yields 1 dozen biscuits

2 cups self-rising flour

¼ tsp black pepper

½ stick cold, unsalted butter, cut into small cubes + 1 tbsp for brushing

1 cup grated gruyère or cheddar cheese

½ tsp ajwain seeds

¾ cups cold buttermilk

kosher or maldon salt

Procedure

The key to making tender, flaky biscuits is to not over-develop the glutens in the dough.  One way to do this is to keep all of the ingredients cold, and another is to not work the dough too much.

Preheat the oven to 425° F.

In a food processor or stand mixer, sift the flour and the black pepper together.  Add the cold, cubed butter and pulse or mix just until a sandy texture forms, and there are no visible clumps of butter.  Add the cheese and ajwain seeds and pulse to combine.  Pour the buttermilk in all at once and pulse until the dough sticks together.

Turn the dough out onto a floured surface.  Gently knead the dough a few times so that it comes together and form into a flat, 1-inch thick disc.  Use a 2-inch cutter to cut out a dozen biscuits.

Melt 1 tablespoon of butter over low heat in a small saucepan.  Place the biscuits so they are touching on a greased or parchment-lined baking sheet.  Paint the tops of the biscuits with the melted butter and sprinkle with a little salt.

Bake for 15 – 20 minutes until golden brown.  Serve warm…

tags: buttermilk biscuits, buttermilk cheese biscuits, Gruyère, Buttermilk Gruyère Biscuits, Ajwain, homemade biscuits
categories: all-2, breads & cakes, side dishes, recipes, vegetarian-1, breakfast
Monday 09.26.11
Posted by Aliya LeeKong
 

Umeboshi Paste

View fullsize umeboshi-pic1-500x333.jpg
View fullsize umeboshi-pic2-500x333.jpg

Umeboshi Paste

Ok, so I have to admit.  In gathering all of my ingredients for the popcorn with homemade furikake, I went a little bit wild in Sunrise Mart.  Food shopping almost trumps shoe shopping, and I totally glazed over that day throwing item after fascinating item into my basket.  In the end, I walked out with three different kinds of soy sauces, some matcha green tea powder I plan to use in shortbread, and a diluted yuzu seasoning base I already have used to make a killer fish marinade.  I also picked up some of this totally unexpected umeboshi paste…

Umeboshi are Japanese plums that have been pickled with red shiso and salt, and the paste is simply the purée.  The plums are traditionally eaten with rice or inside a rice ball, in sushi, layered between egg slices, with tea or even shochu.  The flavor is distinctive – tart and plum-my, a touch of sweetness, and extremely salty – and if it’s a wet version, the umeboshi “vinegar” (or left over pickling juice) is super strong and acidic, so use in moderation.

I have all sort of thoughts for how to use umeboshi paste!  Yes, in salad dressings and marinades – it’s the perfect acidic balance.  But also mixed in with yoghurt for a crudité dip, with garlic in an aioli, to round out a beautiful cocktail (killer margarita ingredient! No salt rim necessary…), in scrambled eggs, to add a kick to a potato gratin, or to jazz up a simple brothy soup.

You can find umeboshi and umeboshi paste at most Asian grocers, at certain Whole Foods and online retailers.

tags: Umeboshi, Umeboshi paste, Japanese ingredients
categories: all-2, spices-1
Thursday 09.22.11
Posted by Aliya LeeKong
 

Popcorn + Homemade Furikake

View fullsize popcorn-pic11-500x333.jpg
View fullsize popcorn-pic2-500x333.jpg
View fullsize popcorn-pic31-500x165.jpg

Popcorn + Homemade Furikake

Popcorn (with, ahem, a goblet of red wine) is my signature comfort food; it’s what I crave after a hard day or if I’m settling down on the couch for a night of t.v. or to watch a movie.  A number of years back, I went through this Hawaiian Hurricane popcorn faze where I must have consumed this concoction of buttery popcorn with Japanese furikake and rice crackers on a daily basis for weeks on end.  As expected, I made myself sick and had to swear off the stuff, but a recent conversation with a friend (who is a homemade popcorn snob!) made me think revisiting the idea, on a healthier, homemade basis, might not be such a bad idea…

Furikake is a Japanese seasoning that is typically sprinkled on top of cooked rice but is truly an all-purpose condiment.  There are different versions with the core of roasted seaweed, sesame seeds, salt and sugar mixed in with other ingredients like bonito flakes, ground shiso leaf, dried egg, miso, salmon flakes, and powdered soy sauce.  It’s a truly umami experience, and once you try it, you start thinking of other ways to incorporate furikake into your cooking.

And, on top of popcorn, drizzled with butter – it’s perfect!  You get that crunch of the popcorn along with lovely butteriness, saltiness, a touch of sweet, nuttiness from the sesame and rice crackers, a (very pleasant) touch of fishiness from the bonito flakes, and that umami of the seaweed.  Consume this in moderation lest you fall into an addictive phase like I did.  This is an elevated version of popcorn worthy of being served at parties or simply as a special treat for the family.  Enjoy!

Ingredients

Yields approximately 14 cups (one big bowl)

4 tbsps vegetable or blended oil

½ cup popcorn kernels

4 tbsps unsalted butter

½ tsp soy sauce

4 tbsps furikake (see recipe below)

1 ¼ cups Japanese rice crackers (optional)

Procedure

In a medium-sized pot or large saucepan with a cover, add the oil so that it coats the bottom of the pan.  Add the popcorn, cover, and place over medium-high heat.  When the kernels start to pop, shake the pan until the popping slows to a few seconds between each pop.  Shaking the pan will help to prevent the popcorn from burning.

In a small saucepan, melt the butter and add the soy sauce and furikake.  If using, add the rice crackers to the popped popcorn, and pour the butter-soy-furikake mixture all over, tossing to coat.  Tranfer to a large bowl and serve warm.

Homemade Furikake Ingredients

Yields approximately 4 tbsps

3 tbsps roasted shredded seaweed*, torn into smaller pieces

¾ tsp bonito flakes**

1 ½ tsps black and/or white sesame seeds, toasted

1 tsp salt

1 tsp light brown sugar

Procedure

Mix all the ingredients together and store in an airtight container.

*If you can’t find this, you can roast nori or seaweed sheets in a skillet over medium heat until they turn crisp.  They can then easily be torn or crumbled into small pieces.

** Look for the smallest flakes to use here.  Bonito flakes are from a type of tuna that is cooked, smoked and dried.

tags: popcorn, homemade furikake, snacks, comfort food
categories: man-friendly, recipes, snacks, all-2, vegetarian-1
Monday 09.19.11
Posted by Aliya LeeKong
 

Bzar, an Emirati Spice Blend

View fullsize bzar-pic1-500x333.jpg
View fullsize bzar-pic2-500x333.jpg

Bzar, an Emirati Spice Blend

It was kismet!  My good friend, Arwa, over at La Mère Culinaire and I have been emailing back and forth about Emirati food.  She keeps telling me how I have to head out to Dubai to get some serious cooking lessons in the cuisine of the region AND even went so far as to send me this gorgeously fragrant spice blend to entice me further.  A few weekends ago, as I was catching up on all my food mag reading, I came across this article in Saveur that talks about the same blend!   It’s called bzar, is key to making delicious and authentic Emirati cuisine, and I just had to share it with you all.

Now, this super special version that Arwa sent me is actually her grandmother’s secret recipe (love it!) that her aunts gather at her grandmother’s house to make.  She tells me that you can pick up pre-fab versions of the blend in the UAE (and I’ve seen a few versions masquerading around as Arabic Spice Blend here), but apparently her grandma’s is the real deal and so I feel very fortunate to have some. 

The good news is that the individual spices that make up the blend are all readily available.  Cumin seeds, coriander seeds, black peppercorns, fennel seeds, cinnamon, cardamom, nutmeg, ginger, fenugreek seeds and dried red chilies all go into this complex blend, and the cumin, coriander and red chilies are dry roasted in a pan before blending to a powder with the rest of the ingredients.

Bzar is used to spice Emirati stews, which are often called saloona or marag, is an integral ingredient in Emirati foga, meaning “on top of”, which is a rice dish where lamb, chicken or fish is on top of the rice, and makes a great rub for fried fish!  I used it in a lamb stew I made and even tried it with lentils (delicious!).  It’s warm, earthy – perfect in time for the Fall and would make a fantastic rub for any roast.  Bzar-rubbed roast chicken anyone?

tags: Bzar, Emirati spice blend, Emirati food, Arabic Spice Blend
categories: spices-1, all-2
Thursday 09.15.11
Posted by Aliya LeeKong
 

Farm Stand Corn & Mushroom Tortilla Salad

View fullsize corn-tortilla-pic2-500x333.jpg

Farm Stand Corn & Mushroom Tortilla Salad

I walked into a coffee shop the other day, Nina Simone playing in the background, an unidentifiable buzz and warmth in the room and the scent of hot beverages brewing, and it totally transported me; I feel ready for the cooler months ahead to be filled with days of apple picking, Fall dinners with friends in Fort Greene, weekend drives to go leaf peeping, the build to the holidays and rum toddies.  I’m finally facing the fact that it’s the end of summer and am filled with this mixture of wistful nostalgia and excited anticipation of the fall to come. That said, it’s my last hurrah! And I couldn’t help but take one last shot at summer with this beautiful salad inspired by the farm stands I visited out in the South Fork this past week and a Mexican tortilleria in Queens where I spent the day cooking.

In thinking about Mexican food and traditions, I wanted to visit Tortilleria Nixtamal because they make incredible corn tortillas in keeping with true Mexican tradition, a not-so-straightforward process that hinges on corn quality, cal, humidity, and timing (they happen to supply to many of the best of the best Mexican restos in town).  The restaurant also turns out gorgeous authentic food to boot, so I headed out to Queens to learn a few dishes from the Chef there, Santiago, and see just how this tortilla process works.  My time at Nixtamal and this dish is the basis for my next webisode of Exotic Table, so stay tuned!

One dish Chef Santiago taught me was a quesadilla with Oaxaca cheese, corn, and huitlacoche, a fungus that actually grows on the corn and is a Mexican delicacy.  Here, I decided to use that as inspiration for a salad, substituting some farm stand shitakes to add the earthy kick from otherwise hard-to-find huitlacoche and threw in some gorgeous grape tomatoes.  Bright and filled with end of summer flavors, this is a super easy dish to make at home, tortilla bowls included.  Enjoy!

Ingredients

Yields 4 servings

4 corn tortillas (the thinnest you can find)

Butter and olive oil

¾ cup shitake mushrooms, thinly sliced

1 shallot, finely chopped

1 jalapeno, seeded and finely chopped

1 ¼ cups fresh corn kernels (about 2 ears)

6 – 8 grape tomatoes, halved

handful of cilantro, chopped

farmer’s cheese or queso fresco

salt and freshly ground black pepper

Procedure

The first step is to make the tortilla “bowls.”  Rather than deep-frying to achieve pliability and moldability, I like to go a bit healthier and just use a skillet with a touch of butter and/or olive oil to get similar results. While doing this, you’re going to use small bowls that fit inside each other to mold the tortillas.  They will not turn out as crisp (and using thinner tortillas will help), but this method makes me feel better about calling this a salad.

Simply heat a medium-sized skillet over medium-high heat.  When hot, add the tortilla and flip at intervals until it puffs and browns a bit.  You’ll feel the edges start to get crispy.  At this point, add a ½ tablespoon of butter or olive oil and let coat the tortilla.   Place a small bowl upside down on a cookie sheet.  Remove tortilla carefully and place on top of the overturned bowl.  Take another bowl, overturned, and put it on top.  It should mold the tortilla to the shape of the bowl and hold it in place as it cools.   Repeat for remaining tortillas, and let cool while preparing the rest of the ingredients.

Heat the same skillet over medium-high heat, and add another tablespoon of butter with 1 to 2 tablespoons of oil.  When the foam subsides, add the mushrooms and let sit undisturbed in a single layer for about 2 minutes.  You want to develop a nice, golden brown on the mushrooms and bring out the flavor.   Stir the mushrooms and sauté for another minute or two to cook through.  Add salt at the end to taste and, using a slotted spoon, transfer to a bowl.

Add another tablespoon or two of butter or olive oil to the pan.  Add shallots and jalapeno and a bit of salt to draw out the moisture.  When shallots are translucent (about 3 to 4 minutes), add corn kernels and tomatoes and toss to mix thoroughly.  I like to crank the heat up a bit here to develop a more roasted flavor to the corn, but be careful because the corn can start to pop a bit.  Cook for 5 to 7 minutes until corn is cooked through and tomatoes have puckered a bit.

Remove from the heat, toss back in the mushrooms, season with salt and freshly ground pepper to taste and add some chopped cilantro, reserving some of the cilantro for garnish.  Spoon mixture into tortilla bowls and dollop farmer’s cheese or queso fresco to your heart’s content.  Garnish with remaining cilantro and serve warm or room temperature.

tags: corn, mushrooms, recipes for summer, Mexican recipes, Tortilleria Nixtamal
categories: recipes, soups & salads, all-2, vegetarian-1, main dishes-1
Monday 09.12.11
Posted by Aliya LeeKong
 

Heirloom Tomato Shakshuka

View fullsize shakshuka-pic1-500x396.jpg
View fullsize shakshuka-pic2-500x333.jpg
View fullsize shakshuka-pic3-500x333.jpg
View fullsize shakshuka-pic4-500x166.jpg

Heirloom Tomato Shakshuka

Summer’s tomatoes have been a constant source of inspiration – from different salads to bruschetta toppings to side dishes and even simply roasted and sprinkled with sea salt.  The late summer varieties and, particularly, the heirlooms were speaking to me last weekend. I wanted to create a dish that, typically calling for canned whole tomatoes, would benefit from the intense flavor and sweetness these tomatoes offer.  I went with a Maghreb dish called shakshuka.

My inspiration started with a local farm stand’s crazy number of heirloom varieties.  I went with the heirloom plum tomatoes, which are excellent for a sauce like this.

The Maghreb region incorporates the northwest portion of Africa – Tunisia, Morocco, Libya, Algeria and Mauritania.  Shakshuka is a mainstay there – baked eggs over an onion and tomato sauce that’s eaten for breakfast or supper – and even made its way to Israel where it’s an extremely popular dish.  The main ingredients for the dish are tomatoes, onions, garlic and eggs, and it differs from country to country, city to city, family to family.  It can be as simple or extravagant as you like – I tailored this version to my tastes, but feel free to make it your own!

First, please excuse the overcooked eggs in these pictures.  My husband likes everything well done and I didn’t take the dish out early enough for the final picture…ha!  It was still delicious and the cheese melted down and got all brown and bubbly.  The sweet onions, the intensity of those tomatoes, a bit of heat from the chilies and the fragrant spices – cumin, saffron, smoked paprika….it was all a bit heady.  I got a fresh-baked, roasted garlic loaf, sliced that baby up and toasted with a bit of butter.  The combination was heavenly!  I could put that sauce on anything (grilled fish, some nicely seared scallops, that bread alone…) and be incredibly happy.  This is my brunch staple…enjoy!

Ingredients

Serves 4 – 5

¾ tsp whole cumin seeds

2-3 tbsps olive oil

2 yellow onions, thinly sliced

3 – 4 red peppers, mix of hot and sweet*

pinch of saffron

1 tsp smoked paprika

3 cloves garlic, thinly sliced

4 sprigs thyme

2 bay leaves

2 lbs heirloom plum tomatoes, roughly chopped

handful of cilantro, chopped

salt and freshly ground black pepper to taste

1/3 cup fresh cheese (cream cheese, farmer’s cheese or queso fresco all work well)

6 whole eggs

Procedure

I like to cook this in a skillet and then transfer to a clay baking dish to finish in the oven.  You can just as easily make this in a cast-iron pan for double-duty or simply cover and finish this dish on the stove.  If you are finishing in the oven, preheat the broiler.

Heat a large skillet over medium heat.  Add cumin seeds and dry toast until fragrant.  Add olive oil, sliced onions, peppers, saffron, and paprika and cook for 6 to 8 minutes until onions are translucent.  Add garlic, thyme and bay leaf and sauté another minute or two until the garlic is fragrant.  I add in the thyme whole, let the leaves fall off, and pull off the stems later.  If you want to remove the leaves from the stems before adding, feel free.

Now, add in the rough-chopped tomatoes (seeds and all!) and cook for another 12 to 15 minutes until tomatoes have softened, much of the liquid has evaporated, and the dish has taken on a thick, sauce-like consistency.

Remove the thyme stems, if left in, and bay leaves.  Add the chopped cilantro, reserving a few tablespoons for garnish, and adjust seasoning.

If you are transferring to a baking dish, do this now.  Divide the cheese into small bite-sized pieces with your hands, and dot the surface of the sauce with it.  Carefully, crack the eggs over the sauce so that the eggs are distributed evenly across the surface.  Sprinkle the tops of the eggs with a bit of salt.  Either cover dish with a lid or foil and cook for another 6 to 8 minutes or place under the broiler for 3 to 4 minutes until the whites of the eggs have set and the cheese is melted.

Garnish with remaining chopped cilantro and serve hot with thick-cut pieces of toast.

* I used (2) hot red chilies and (2) medium-sized sweet peppers, but feel free to adapt to your own tastes.

tags: recipes for summer, eggs, brunch, heirloom tomato, shakshuka
categories: breakfast, recipes, vegetarian, all-2
Monday 08.29.11
Posted by Aliya LeeKong
 

Black Cumin

View fullsize black-cumin-pic1-500x333.jpg
View fullsize black-cumin-pic2-500x333.jpg

Black Cumin

One of my favorite things about the smoked peach chutney I posted earlier this week is the quick, sharp bite of cumin that hits whenever I bite into one of the seeds.  I left them whole in the chutney precisely for that reason – I love that subtlety.  The chutney inspired me this week to talk about another cumin seed that isn’t featured as prominently in grocery stores as its cousin the traditional cumin seed, called black cumin.

If you google black cumin, a ton of links come up for nigella seeds, which is not correct.  Both cumin and black cumin are from the parsley family, and black cumin is simply a darker-colored version of the traditional sort.  It looks a lot like caraway and has a slightly different, more milder flavor than traditional cumin.  Where cumin has a bit more earthiness and an almost gamey quality, black cumin is sweeter, delicate, with more of the pine-menthol flavors and even a nuttiness.  To me, it doesn’t linger as much on the palate as regular cumin.

Another difference from traditional cumin is in its use – how and where it is added to dishes.  Rather than being ground to a powder form, black cumin is often left whole. It is generally very lightly toasted, which highlights that nutty flavor even more.

Black cumin is featured in a lot of North Indian, Pakistani, Afghani, and Persian dishes, often referred to as kala jeera or shahi jeera. Rice dishes like biryani benefit from a sprinkling of these seeds, and they are often a first ingredient for curries and stews.  I love that they are used in breads and plan to do some black cumin biscuits soon myself.   I pretty much use it whenever I want a milder version of cumin, where I want it to highlight but not overpower.  Let me know if you’ve ever worked with this spice before!

tags: black cumin, spices
categories: all-3, spices-1
Thursday 08.25.11
Posted by Aliya LeeKong
 

Smoked Peach Chutney

View fullsize smoked-peach-pic1-500x333.jpg
View fullsize smoked-peach-pic2-500x166.jpg
View fullsize smoked-peach-pic3-500x333.jpg

Smoked Peach Chutney

Biting through velvet skin into the honeyed-sweet juiciness of a peach is such a summer pleasure.  I’ve been on a quest, from farm stand to farm stand, to find the best of the bunch and have tasted this summer the stuff poets write about.  Of course, a few weekends back, I got a bit carried away at a local stand, and I ended up with more peaches than I knew what to do with.  What better way to use up this peak season fruit than to turn it into a chutney…Interestingly enough, it was a cocktail that inspired the flavor combo for the chutney; the drink had bourbon, crème de peche and cumin.  Genius!  The smokiness of the bourbon played beautifully off of the sweet tanginess of the peach intermingling with the warm earthiness of the cumin.  I wanted to figure out how to capture that in this chutney.

Smoking was the answer, and you can use either a stovetop smoker (my lifesaver in a NYC kitchen…) or the grill.  The smoked peaches by themselves are distinctive but a bit overwhelming until cooked down a bit more with some sugar, honey and the roasted cumin seeds.  The resulting chutney has a gorgeous flavor!  Smoky, sweet, tangy, with the bite of the cumin seed…it’s perfect on pork chops, fish or even with creamy brie on crackers. Enjoy!

Ingredients

Yields approximately 1 quart

6 large, lusciously-ripe peaches, halved with pit removed (skin on)

1 ¼ tbsps cumin seeds

2-3 tbsps water

¼ cup sugar

¼ cup honey

pinch of salt

Procedure

The first step of this chutney is smoking the peaches. I used a stovetop smoker and cherry wood.  Placing the peaches cut side down on the grate, I smoked the peaches for 6 minutes and achieved the perfect level of smokiness.  If you choose to do this on the grill, I would keep the temperature low (200° F to 225° F).  Once the chips start to smoke, place the peaches cut side down on the side with no flame (indirect heat), cover, and smoke for about 10-15 minutes.

Peel the peaches, the skin should slip off relatively easily, and cut into a fine dice.  Set aside.

Heat a medium-sized pot over medium heat.  Add the cumin seeds, and toast, stirring, until fragrant and slightly darker in color.  Reduce the heat slightly, add the diced peaches and remaining ingredients and simmer for 8 to 10 minutes, stirring at intervals, until the peaches are soft.  You want this chutney to have form, so overcooking will turn the peaches to mush.

You can serve this warm, cold, or at room temperature.

tags: recipes for summer, peaches, chutney, condiments
categories: breakfast, recipes, snacks, side dishes, vegetarian, all-3
Monday 08.22.11
Posted by Aliya LeeKong
 

Yuzu-Basil Rickey

View fullsize yuzu-pic1-500x333.jpg
View fullsize yuzu-pic2-500x333.jpg
View fullsize yuzu-pic3-500x333.jpg

Yuzu-Basil Rickey

The art of the summer cocktail…something light, refreshing, icy cool, perfect for a summer bbq or a breezy night out on the porch (or stoop as the case may be), and preferably in a pitcher so friends can help themselves!  I personally love something that has a tart-sweetness to it like a mojito, caipirinha, or a spiked lime rickey, which was the inspiration for this drink.

I’ve talked a bit about yuzu in the past, but, basically, it’s a Japanese citrus that has an interesting flavor mix of lime, grapefruit and mandarin with a musky and slightly salty quality to it.  It’s rarely found fresh here, but a bottle of yuzu juice from the Asian market will last forever (a few dashes go a long way).  I love it in salad dressings, anywhere I might use lemon, and particularly in cocktails like this one.

A lime rickey is pretty simple – usually it’s made from fresh lime juice, carbonated water, and sometimes simple syrup to sweeten.  My take here replaces lime juice with lemon and yuzu juices, includes club soda, and is spiked with vodka.  The very simple syrup gets infused with fresh basil leaves, which complements the yuzu incredibly.  This drink goes down a bit too easy if you know what I mean (what vodka?), but truly it’s my perfect summer drink – flavorful and totally refreshing.  Enjoy!

Ingredients

Serves 8 to 10

1 ¼ cups water

1 ¼ cups sugar

10 to 12 leaves of basil

¾ cup lemon juice

1 ½ tbsp yuzu juice

2 ¾ cups club soda

1 ¼ cup vodka

Procedure

First, make the basil-infused simple syrup.  In a saucepan, heat the water, sugar and basil stirring until water comes up to a boil.  Remove from the heat, cover, and let steep for 15 minutes.  Strain and cool.

In a large pitcher, mix together the remaining ingredients with the cooled simple syrup.  It’s best to let it chill for a few hours for the flavors to come together, but it’s still great right away.

Serve the yuzu-basil rickey over ice.


tags: recipes for summer, cocktails, yuzu, basil, drinks, citrus
categories: drinks & cocktails, recipes, all-3
Monday 08.08.11
Posted by Aliya LeeKong
 

Flaxseeds

View fullsize flax-pic1-500x333.jpg
View fullsize flax-2-500x333.jpg

Flaxseeds

These bear an uncanny resemblance to the Himalayan red rice of a few weeks ago, no?  But red rice these are not.  Although we think of flaxseeds as super healthy (which they are) and great on oatmeal and in granola (also true), flaxseeds have actually been used for centuries in cultural cooking from ancient Rome to the Egyptians.

A few years back, when I was learning about Ethiopian cuisine, I was pleasantly surprised to see flaxseeds toasted and sprinkled on top of salads, ground and mixed with water and honey to make a cool drink (telba), or ground into a paste to have with bread or the famous Ethiopian flatbread, injera.  In Italy, it’s baked into bread, and, in India, flaxseeds are ground with spices to add to dishes or chutneys.

These cultures all recognize the not-so-secret health benefits of the seed and have found smart ways to incorporate it.  High in Omega-3 fatty acids, high fiber, and cholesterol lowering, this is just a great ingredient to add in to cooking.  I’m a huge fan of the morning, breakfast shake, where I always throw in a handful of flaxseeds.   I take a cue from the Ethiopians and toast them like sesame seeds to sprinkle on my salads, and have thoughts about making a gorgeous spread out of it with spices, roasted garlic and cannellini beans.

How do you cook with flaxseeds?

tags: flaxseeds, healthy, ingredients
categories: all-3, spices-1
Thursday 08.04.11
Posted by Aliya LeeKong
 

Porcini Macaroni Pie

View fullsize porcini-pic3-500x333.jpg
View fullsize porcini-pic2-500x139.jpg

Porcini Macaroni Pie

So I’m working on my second episode of Exotic Table, and this one is inspired by a nonna I met at Enoteca Maria, an Italian spot in Staten Island that has grandmas from all over Italy as chefs making specialties from their individual regions.  How inviting is that?  I found the concept so powerful – I had to dig deeper, and a nonna by the name of Rosa Turano showed me her simple and elegant porcini dish. 

Of course, I can never leave well enough alone, so I did a bit of a double twist here drawing from my incredible day in the kitchen with Rosa and one of my favorites, Trinidadian Macaroni Pie.  The result is this beautiful baked mac ‘n cheese threaded with porcinis.  Cheesy, buttery, with a crust and that gorgeous porcini flavor…Enjoy and look out for the Exotic Table episode in a few weeks!

Ingredients

Serves 6 to 8 (yields (1) 3-quart baking dish)

olive oil or butter

1 cup fresh or rehydrated porcini mushrooms, thinly sliced*

1 yellow onion, finely diced

3 garlic cloves, minced

1 stick unsalted butter

½ cup all-purpose flour

1 quart milk

½ tsp white pepper

½ tsp black pepper

2 tsps salt

2 ½ cups grated gruyère

2 eggs

1 lb pasta (I used pappardelle here)

1 tbsp + 1 tsp fresh chives, finely chopped

1 ½ tsps fresh thyme, finely chopped

Procedure

Preheat oven to 350º F.

Heat a medium skillet over medium-high heat.  Add olive oil, and, when hot, add mushrooms.  Leave them alone and let them brown for a minute or two and then throw in a pat of butter to help with the browning.  Stir and add salt – browning the mushrooms will really bring out their earthy flavor and adding salt at the end will prevent moisture from ruining the browning process.  Lower the heat to medium-low and throw in the onions.  Cook for 3 to 5 minutes until the onions are translucent.  Add garlic and cook for 30 seconds or so until fragrant.  Remove from heat and cool in a bowl.

In a large sauté pan or pot over medium heat, melt butter.  Add flour all at once and whisk vigorously to avoid lumps.  Cook for 2 to 3 minutes.  You just want to remove the raw taste.  Add milk and spices and continue to whisk to prevent lumps (remember to get the corners!).  Once the mixture starts to bubble, reduce heat to low and cook for 8 to 10 minutes whisking often.  You want this to simmer gently while it’s thickening.  Remove from heat.

To the onion mixture in the bowl, add 2 cups of the grated cheese as well as the eggs.  Add a ladle full of the béchamel (milk mixture) and stir.  Continue to add ladlefuls until the egg mixture is up to temperature with the béchamel.  Add everything back to the béchamel in the sauté pan and stir to combine thoroughly and make sure cheese is completely melted.

Add pasta to boiling, heavily salted water and cook until it’s a bit underdone.  It depends on what type of pasta you are using.  I used fresh pappardelle, and it cooked in 2 to 3 minutes.  It’s going to continue cooking in the oven, so leave it al dente.  Drain pasta and add to the béchamel/cheese mixture.  Add 1 tablespoon of the chopped chives and 1 teaspoon of the chopped thyme and combine thoroughly.  Pour into a heavily greased, 3-quart baking dish.

In a bowl, combine remaining herbs, ½ cup of cheese, and breadcrumbs.  Sprinkle on top of macaroni and either dot with butter or drizzle with olive oil.  Bake for 35 minutes until top is browned and bubbly.

tags: Porcini Mushroom Pie, Enoteca Maria, vegetarian meals, macaroni pie
categories: all-3, recipes, side dishes, vegetarian-1, main dishes-1
Monday 08.01.11
Posted by Aliya LeeKong
 

Orange Blossom Water

View fullsize orange-blossom-pic1-500x333.jpg

Orange Blossom Water

I was making a fruit salad this week and threw in a few dashes of orange blossom water when (gasp!) I realized I’ve never really highlighted it in depth here.  It’s such a beautiful ingredient, and now is truly my favorite time of year to work with it.  Orange blossom water goes incredibly well with fruits, summer fruits in particular, and gives summer pies or a simple fruit salad a hint of something truly special.

Orange blossom water comes from the blossoms of the Seville orange, a bitter and crazy fragrant orange native to Asia.  The petals of the flower are heated in water and the resulting steam is condensed and separated, now scented with the orange blossom.  The result is a clear liquid that is at once floral with orange citrus notes and a hint of bitterness.

Orange blossom water is found throughout the cooking of the Middle East, North Africa, French and Mediterranean where its delicate fragrance laces some of the most beloved desserts, savory dishes, and, in some instance, even drinking water.  It’s often added to a sugar syrup to drizzle over desserts or fruit, but it tastes beautiful used sparingly in tagines or other stews that have fruits.  I’ve used it a few times here, once as a gorgeous floral balance to melon in a gelato and another time in one of my favorite desserts, Om Ali, a puff pastry-based bread pudding. I definitely plan to experiment more with it in savoury dishes and have designs to add it to fall vegetable mashes like butternut squash or sweet potato.

Having a light hand helps when it comes to this ingredient – it gets overwhelmingly perfume-y in excess and be sure to taste your particular brand before following a recipe.  Your bottle may be stronger or weaker than what’s called for, and it’s better to use your cooking instincts and preferences here.  Orange blossom water is becoming more widely available by the day – in Whole Foods, gourmet stores, Italian specialty shops, and, of course, Middle Eastern grocers.

tags: orange blossom water, ingredients
categories: all-3, spices-1
Thursday 07.28.11
Posted by Aliya LeeKong
 

Cinnamon-Passion Fruit Fool

View fullsize fool-pic1-500x333.jpg
View fullsize fool-pic2-500x333.jpg
View fullsize fool-pic3-500x166.jpg

Cinnamon-Passion Fruit Fool

When the weather is hot and beautiful fresh fruits abound, I always turn to a fruit fool as dessert.  A classic British dessert, a fool is quite simply puréed fruit and a bit of sugar folded in with fluffy whipped cream. They are light, no fuss, and always highlight the flavors of the season.

There are umpteen variations and shortcuts for this dish – from the type of fruit (gooseberries, strawberries, peaches) to using a frozen purée or pre-fab whipped cream.  You really can’t go wrong with this one.  With the fragrant passion fruits in season right now, this latest incarnation of a fool became doubly inspired by a staple Brazilian dessert, mousse de maracujá.  Maracujá is Portuguese for passion fruit, and the Brazilian version uses thick cream, sweetened condensed milk, and sometimes gelatin.

This dessert literally could not be easier.  Passion fruits are basically already puréed, so you simply have to split and remove the pulp; you can, of course, use a frozen purée if you can’t find fresh.  I sweeten the passion fruit pulp with a bit of sugar, add a squeeze of lime juice for brightness and a bit of cinnamon because I think it really brings out the signature flavor of the fruit.  Fold all of that into whipped cream, and that’s it!  It’s shockingly delicious.  My fussy I-only-eat-meat-and-no-dessert husband went to town on a few bowls after initially, begrudgingly taste-testing.  Light, fluffy, tart, sweet – this might be my favorite, easy summer dessert.  Enjoy!

Ingredients

4 passion fruits, seeds and pulp removed to a bowl*

squeeze of lime juice

1 tsp cinnamon

½ cup sugar

2 cups heavy cream, cold

Procedure

In a bowl, mix together thoroughly all except a few tablespoons of the passion fruit seeds and pulp, the squeeze of lime juice, cinnamon and ¼ cup of the sugar.

In another bowl using a stand or hand mixer, beat the heavy cream with the other ¼ cup of sugar until stiff peaks form.  Fold the passion fruit mixture carefully into the sweetened whipped cream.  I like to add a third at a time and not overmix to avoid collapsing the fluffy cream.

Spoon mixture into dessert glasses and top with a few of the reserved passion fruit seeds and a bit of juice / pulp.  I like to refrigerate for a bit before serving, but it can be eaten straight away.

*Slice the top off of a passion fruit, and use a spoon to remove all of the seeds and pulp to be used.  You could also substitute about one cup of thawed, frozen passion fruit purée.


tags: cinnamon, passion fruit, fool, desserts, recipes for summer
categories: recipes, all-3, desserts-1
Monday 07.25.11
Posted by Aliya LeeKong
 

Jardaloo (Hunza Apricots)

View fullsize jardaloo-pic1-500x333.jpg
View fullsize jardaloo-pic2-500x167.jpg

Jardaloo (Hunza Apricots)

So I thought I’d keep my exotic ingredient in theme this week and talk about these beautiful little, dried apricots I picked up the other day.  The saffron fried chicken was definitely a nod to Persian influence, and it so happens that these apricots, or jardaloo, also have their roots in Persian cooking by way of the Parsis of India.  

Jardaloo are also referred to as Hunza apricots, meaning wild apricots from the mountainsides of the Hunza Valley on the borders of Kashmir and Pakistan.  In their ripe state, they are a beige-colored, sweet, small variety that have a bit more acidity than the cultivated fruit and a delicious almond-like pit.  You can even crack the pit of these sundried ones to obtain it – it has a great nutty flavor and the kernel oil is loaded with vitamins.

Parsis are one of the Persian Zoroastrian communities that live in South Asia, migrating from Iran centuries ago to flee persecution, and with them they brought a truly rich culture and cuisine.  Their nonvegetarian cooking retains a lot of the Persian influences introducing certain nuts and fruits, like this, to their stewed meats and curries.  Their vegetarian cuisine is equally rich; I learned of a certain lentil dish called Dhansak when I was in Goa and returned a bit obsessed to learn from scratch this tradition that combines several different lentils with tons of seasonal vegetables and a spice blend, the Dhansak masala, that includes cinnamon, clove, star anise and fenugreek (to name a very few…).

Jardaloo are used in the Parsi signature dish Jardaloo Sali Murgh, where chicken is cooked down with aromatics, spices, and this lovely dried apricot to lend a sweet and sour effect.  It’s gorgeous in slow-cooked dishes like a lamb stew, and the sweet applications would be too numerous (jardaloo clafouti anyone?), though pitting could prove to be too big a pain.  I love to throw it into rice or even biryani for a nice fruity bite, warning all that eat to watch out for the pits!

Middle Eastern grocers or online purveyors are the way to go to find these little gems.

tags: Hunza Apricots, apricots, ingredients, Jardaloo
categories: all-3, spices-1
Thursday 07.21.11
Posted by Aliya LeeKong
 

Saffron Fried Chicken

View fullsize fried-chicken-pic1-500x333.jpg
View fullsize fried-chicken-pic2-500x333.jpg
View fullsize fried-chicken-pic31-500x166.jpg
View fullsize fried-chicken-pic3-500x333.jpg

Saffron Fried Chicken

Is there anything more satisfying than biting into a salty, flavorful, crisp piece of fried chicken?  I know I have a particular weakness for the stuff (umm, it’s my post-workout week splurge) and if I head down to visit my family in Florida, driving by a particular chain that starts with a “P” and has the same name as an old children’s cartoon and NOT hitting the drive-thru is next to impossible. Perfecting fried chicken is not easy, and it’s taken me years, a bit of a fried chicken connoisseur myself, to create a recipe that I’m fully happy with.  Of course, leaving it well alone is not an option, so I created my own twist with saffron.

A friend of mine gave me this beautiful gift of Persian saffron that I am treasuring and using sparingly. Saffron is used in a lot of Middle Eastern and South Asian marinades, oftentimes with yoghurt, and it complements the flavor of chicken amazingly.  Fried chicken was my perfect reason to break into the saffron stash.

So the reality is that there are a few (worthwhile!) steps here.  I marinate the chicken in saffron buttermilk that serves to brine the chicken, make it even juicier, and deeply infuse it with all of the marinade ingredients – a pinch of saffron, garlic, a touch of mustard.  I then double dip the chicken to create a super-crisp crust, and let it air-dry while the meat loses its chill.  Finally, frying at the perfect temperature ensures fried chicken nirvana – crisp, flavorful, aromatic, tender and juicy.  Enjoy!

Ingredients

Yields 3 to 4 servings

1 (3 to 4 lb) broiler / fryer chicken, cut into 8 pieces

Marinade / Brine:

3 cups buttermilk

1 generous pinch saffron

2 eggs

3 cloves garlic

½ tsp dijon mustard

2 tbsps kosher salt

1 tbsp sugar

Crust:

1 cup all purpose flour

½ cup cornstarch

1 tsp kosher salt

1 tsp black pepper

1 ½ tsps garlic powder

1 ½ tsps onion powder

1 tsp paprika

pinch of cayenne pepper

Vegetable shortening or oil for frying

Procedure

In a small saucepan, heat a ½ cup of the buttermilk until it comes up to a simmer.  Add saffron and switch off heat.  Let it sit for 10 minutes.

Pour this mixture along with the remaining buttermilk and the rest of the marinade ingredients into a blender and blend on high until smooth.  Place chicken in a bowl or casserole dish and cover with the marinade.  Refrigerate for a minimum of 6 hours and up to 24.

In a large bowl, paper or plastic bag, combine the crust ingredients thoroughly.  Remove chicken from marinade and place in a colander for a few minutes to drain, reserving the marinade.  Dredge or shake chicken pieces individually in the flour mixture and place on a wire rack fitted over a baking sheet.

Dip chicken once more in the marinade, letting any excess drip off.  Coat again in the flour mixture and place back on the wire rack.  Let chicken sit on the rack for an hour to dry / come up to room temperature.

In a large, heavy-bottomed pot, heat 2 inches of oil to 350º F.  You actually want to fry the chicken at 325º F for the entire time, but the temperature will drop once you add it in.  Place chicken in the hot oil and fry for 13 to 17 minutes making sure the temperature stays at 325º F.  I like to take the wings out at 13 minutes , and fry the rest between 15 and 17 minutes depending on the size of the pieces and the type of meat.  White meat cooks faster than the dark meat, and fatter pieces will cook slower.  If the juices run clear, the chicken is cooked through.

Serve hot! It can be held uncovered in a 250º F  oven to stay warm, but it’s preferable to serve immediately.

tags: fried chicken, saffron, Persian saffron
categories: all-3, main dishes, man-friendly, recipes
Monday 07.18.11
Posted by Aliya LeeKong
 
Newer / Older