Black Sesame Arabic Donuts w/Date Molasses
Last week I told you all about my yeast fiasco and how it wasn’t proofing, but this week I at least got that straight! I tasted these while staying with a good friend in Bahrain – she made them for afternoon tea, and I knew I was going to come home and work on my own version. I’ve just never tasted a donut like this – with cardamom, (black) sesame seeds for nuttiness, and, though I know it looks sticky sweet, not-too-sweet date molasses as the glaze. It’s the perfect little treat.
The original dish is called luqaimat or luqmat, and they are often described as fermented, sweet dumplings; they’re eaten year-round but especially around Ramadan and may be glazed with sugar syrup rather than date molasses. But as with most foods, these balls of fried dough aren’t 100% unique. They are related to loukamades, a Greek version, and are loosely similar to Indian jalebiand even Italian zeppole.
And the reality is that what I had in Bahrain had a hollower, lighter and crisper texture. When I watched this batter being made, it was completely by eye and water (rather than milk) was added to achieve the right batter consistency. I turned these guys into more of a donut (much closer to zeppole) for my own purposes. I love them this way but will continue to experiment and play around with quantities to see what I others end up liking the best.
Regardless, these are hard to resist – crispy and doughy at the same time, perfumed with cardamom and saffron, a touch of sesame for nuttiness and that tangy, addictive date molasses…Enjoy!
Ingredients
Yields approximately 2 dozen donuts
3/4 cup milk
¼ cup sugar
1 packet active dry yeast (2 ¼ tsps)
1 cup flour
½ tsp ground cardamom
½ tsp salt
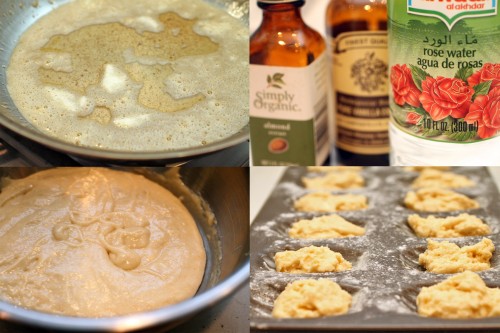
pinch saffron
2 tbsps black sesame seeds, toasted
3 tbsps yoghurt, room temperature
oil for frying
¼ cup date molasses
Procedure
In a small saucepan, heat milk to just warm and remove from the heat. If it gets too hot, it will kill the yeast – you should still be able to dip your finger in it with no problem (110°-115° F). Add the sugar and the yeast and stir to combine. Let sit 10 minutes. It should start to bubble and get foamy (if not, your yeast may no longer be active).
In a bowl, sift together the flour, cardamom and salt. Add the saffron and the black sesame seeds to the flour mixture and whisk to combine. Add the yoghurt to the warm milk/yeast mixture, whisk to combine and then whisk it into the flour mixture. You want to make the batter uniform and lump free. Transfer to a greased bowl – cover and keep in a warm place for 2 hours.
Heat 2 to 3 inches of your preferred frying oil in a large pot to 325° F. Using a small ice cream scoop (or spoon), spoon uniform balls of the batter into the hot oil. Fry for 5 to 7 minutes until the donuts turn a dark golden brown. Continuously move them around and flip them so that they get evenly browned. Transfer to a rack or paper towels to degrease.
Toss the fried donuts with the date molasses while they are still warm and serve as soon as possible.