X

Sign up to receive exclusive recipes, tips, updates and other goodies from Aliya!

  • Home
  • Blog
    • All
    • Recipes
    • Spices + Ingredients
    • Lifestyle, etc.
    • Travel
  • The Cookbook
  • The App
  • Media
    • All Media
    • Video
  • About
  • Passions
Aliya LeeKong
  • Home
  • Blog
    • All
    • Recipes
    • Spices + Ingredients
    • Lifestyle, etc.
    • Travel
  • The Cookbook
  • The App
  • Media
    • All Media
    • Video
  • About
  • Passions

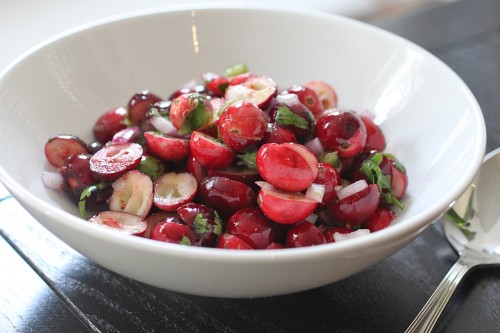
An Easy Thanksgiving Side: Cranberry Salsa

View fullsize cranberry-pic1-500x333.jpg

An Easy Thanksgiving Side: Cranberry Salsa

Thanksgiving is my favorite of favorites, and I’ve already gone on and on about how my sides turn into a total global mash up.  I love the day and although I go a little prep crazy, I do try to sneak in at least a few, no-brainer, quick dishes to make my life (and any voluntary sous-chefs!) a little easier.

This is a fast, Mexican-inspired side using seasonal fresh cranberries – don’t worry you can use frozen if that’s what you got.  I like to mix this up the night before and let all the flavors mingle (and the cranberries break down a bit).  It’s really tasty and adds a bit of heat and piquant flavor to the meal….enjoy!

Ingredients

Serves 6 to 8

3 cups fresh or frozen cranberries, halved

½ red onion, finely chopped

1 jalapeno, seeded and ribbed, finely chopped

2 – 4 tbsps sugar

pinch of salt

½ tsp lime zest

juice of half a lime

small handful of cilantro, finely chopped

Procedure

In a large bowl, mix all ingredients together.  Since different batches of cranberries can be sweeter than others, adjust the amount of sugar to your personal taste.

Refrigerate covered for at least a half hour to let the flavors marry.  Serve chilled.

tags: Thanksgiving ideas, cranberry salsa
categories: recipes, side dishes, all, soups & salads, vegetarian-1
Thursday 11.15.12
Posted by Aliya LeeKong
 

Swiss Chard "Leaves"

View fullsize dolma-pic1-500x333.jpg
View fullsize dolma-pic2-500x166.jpg

Swiss Chard "Leaves"

Grape leaves have to be one of my all-time, favorite Middle Eastern snacks (and something I deemed impossible to make at home for many years).  When I visited Turkey a few years back, I learned a nifty trick for how to make them using a more common green to the West, swiss chard.  This would actually work with a number of different greens, but I do have to say the flavor of swiss chard works great – it’s mild and verdant and lets the flavor of the stuffing pop.

Grape leaves are often stuffed with ground meat and/or rice and flavored with mint and lemon.  They are part of a group of stuffed vegetables made throughout the Middle East, Greece and Turkey called dolmas.

I kept these guys vegetarian – I feel like they are a bit more delicate that way.  A few other things: in lieu of long-grain rice, I used a short-grain one, Egyptian rice, which is one of my favorites!  It’s fluffy, rounder, has a great toothsome texture and absorbs flavor beautifully.  Also, in lieu of steaming them the traditional way – I lay the leaves on top of stacked lemon slices and let the juice from the lemons steam and infuse them with even more flavor.  These are not the most speedy hors d’oeuvres to make, but they are well worth it!  And I guarantee by your 48th folding, you’ll be a lot faster…Enjoy!

Ingredients

24 Swiss chard leaves, washed and stems removed (approximately 3 bunches)

2 tbsps unsalted butter

1 small shallot, finely chopped

1 garlic clove, minced

½ tsp dried mint

¼ tsp ground allspice

¼ tsp ground cinnamon

¼ tsp ground black pepper

pinch chili flakes

pinch ground cloves

¾ cup Egyptian rice

1 cup vegetable stock or water

2 tbsps pine nuts, toasted

1 tbsp lemon juice

½ tsp lemon zest

2 tbsps chives and parley, finely chopped

3 or 4 lemons, cut into ½ inch rounds

olive oil

salt

Procedure

Preheat oven to 350° F.

Bring a large pot of water up to a boil and prepare a large bowl with ice and water.  Add enough salt to make the boiling water taste like the sea.  Place the chard leaves in the boiling water for 60 seconds and then shock them in the ice bath.  Let dry on paper towels.

In a medium saucepan, melt butter over medium heat.  Add shallot and garlic and sauté for 3-4 minutes until shallots are translucent.  Add spices and then the Egyptian rice and toast for about 1 minute.  Add stock or water and bring up to a boil.  Lower to a simmer and cook partially covered for 15 minutes.  Let cool slightly and add pine nuts, lemon juice, lemon zest and herbs.  Season to taste, though note that the rice will not yet be fully cooked.

Cut chard leaves down the middle on either side of the seam.  Place one leaf rib-side up, vertically in front of you.  Add about 2 teaspoons of the rice mixture about an inch up the leaf.  Start by rolling the end closest to you away from you to cover the rice.  Tuck each side of the chard leaf in and roll the entire parcel.  If the leaf is too long, you can cut the other end a bit short.  Repeat until you’ve finished the chard leaves and rice mixture.

Layer lemons in a dutch oven or pot with ¼ cup of water.  Layer the dolmas on top and drizzle them with a little olive oil.  Cover and bake for 30-40 minutes until the rice is fully cooked.

Serve warm or cold.

tags: swiss chard recipes, dolmas, middle eastern recipes
categories: side dishes, appetizers, snacks, vegetarian, all, spices
Monday 07.30.12
Posted by Aliya LeeKong
 

Roasted Garlic, Cheese & Herb Baked Rice

View fullsize rice-pic1-500x333.jpg
View fullsize rice-pic2-500x333.jpg
View fullsize rice-pic3-500x166.jpg

Roasted Garlic, Cheese & Herb Baked Rice

This is not your every day, throw-in-the-oven-rather-than-on-the-stovetop rice.  My inspiration for this dish is Tah Chin, a Persian rice pilaf that layers saffron rice with chicken and bakes it to perfection.  The rice is bound with yoghurt and egg yolks and during its slow-baking process forms this beautiful crust where it hits the baking dish, not wholly unlike soccarat (which is the crusty layer found at the bottom or paella).  Suffice it to say, I veered a bit off of tradition with this version….

Many of the items are similar to the original – the long grain rice (though trying this with Valencia or Bomba rice sounds pretty alluring), saffron, yoghurt and egg yolks.  But that is where it ends!  I leave out the chicken and created this to be an easy (and slightly more elegant…) substitute for mac n’ cheese, a lovely casserole side.  Thus, I included some butter and crème fraiche for richness and tang, some cheeses for good measure, roasted garlic and herbs for depth of flavor.

It was truly an experiment, and I love the result…First of all, it’s beautiful! I plan to just leave the cutting board and knife out for people to help themselves at my next dinner party.   I warn you, however, to do this as close to serving time as possible.  It was all I could do to snap a few pics before my husband hacked off a third of it and ran off!  The smell of it drove him mad…the roasted garlic and cheese, creaminess and that crusty layer of rice – amazing.  Enjoy!

Ingredient

Yields (1) 9”x13” baking dish

3 cups long grain rice

3 tbsps kosher salt

½ stick unsalted butter

½ cup yoghurt

½ cup crème fraiche

pinch saffron

4 egg yolks

1 cup grated mozzarella cheese

¾ cup grated grana padano or parmigiano reggiano cheese

12-13 roasted garlic cloves

¾ cup chopped herbs

freshly ground black pepper

Procedure

Preheat oven to 350° F.

Rinse the rice in changes of hot water until the water runs clear.  In a medium pot, bring 6 cups of water up to a boil.  Add 1 ½ tablespoons of the salt and the washed rice.  Let cook 6 to 8 minutes (rice should start to soften but still be raw at the center), drain and rinse lightly.  Transfer to a large bowl.

In a small saucepan, melt butter with yoghurt and crème fraiche over medium heat.  When it starts to bubble, shut off the heat and add the saffron.  Let it bloom for 5 minutes.  Place the egg yolks in a medium bowl.  Add spoonfuls of the saffron mixture to the egg yolks stirring constantly – you want to bring the egg yolks up to temperature slowly.

To the drained rice, now add the saffron-egg yolk mixture, the cheeses, roasted garlic cloves, chopped herbs, the other 1 ½ tablespoons of salt and freshly ground black pepper to taste.  Combine thoroughly.

Grease a 9” x 13” baking pan and line the bottom with parchment paper.  Transfer the rice mixture to the baking pan, cover with foil and bake for 1 hour and 35 minutes.  Let cool slightly and then loosen the side of the rice from the dish.  Turn out onto a cutting board and serve hot in slices or squares as you choose.

tags: baked rice, saffron, vegetarian sides, roasted garlic, cheese
categories: all -1, side dishes, recipes, vegetarian-1
Monday 05.21.12
Posted by Aliya LeeKong
 

Rhubarb, Cucumber & Mint Salsa

View fullsize salsa-pic1-500x333.jpg
View fullsize rhubarb-pic2-500x333 (1).jpg
View fullsize salsa-pic3-500x333.jpg

Rhubarb, Cucumber & Mint Salsa

Increasingly, I’m realizing that every culture has its form of “salsa.”  When I was down in St. Lucia a few weeks back, I found out they have their version called souscaille.  In South Asian cuisines, it’s called kachumber, and in African cuisines, kachumbari.  At all points, it’s a fresh salad, often with onions or shallots, with acidity in the form of the juice or segments of citrus or vinegar.  I wanted to inject a little seasonality into my salsa this week, and spring’s tart rhubarb was the perfect add.

Rhubarb, contrary to popular belief, is a vegetable, and it has a crisp, fresh texture that’s somewhere between jicama and celery with a sourness that’s reminiscent of green apples.  I’ve played with it before in a dessert, a granita, but here I wanted to see what it could do from a savoury point of view.

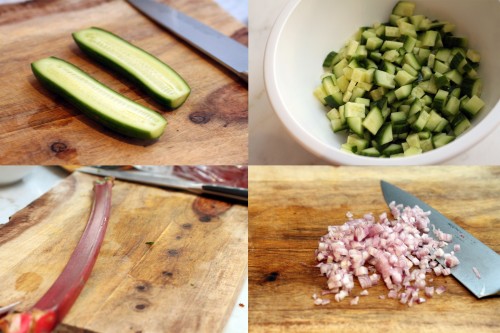
The cucumber and rhubarb meld together beautifully.  You have the cooling, soothing, watery cucumber contrasted with the tart bite of the rhubarb.  The shallots add mellow onion flavor and the fresh mint a bright finish.  It would be perfect on fish or shrimp tacos or a simply grilled chicken breast.  Enjoy!

Ingredients

Yields approximately 2 ½ cups

2 mini seedless cucumbers, cut into a small dice

1 stalk rhubarb, cut into small dice

1 shallot, finely chopped

juice of half a lime

½ tsp kosher salt

pinch cayenne pepper

pinch white sugar

small handful fresh mint, finely chopped

Procedure

In a small bowl, toss together the cucumbers, rhubarb and shallot.  Add the lime juice, salt, cayenne, sugar and mint mix thoroughly.

tags: rhubarb, salsa, recipes for spring
categories: all -1, condiments, recipes, side dishes, salads, soups & salads, vegetarian-1
Monday 04.30.12
Posted by Aliya LeeKong
 

My Easter Stuffing

View fullsize stuffing-pic1-500x333.jpg
View fullsize stuffing-pic2-500x333.jpg

My Easter Stuffing

I always love cooking for holidays and get-togethers, and yesterday was no exception.  Usually, I decide the dishes way in advance and have a 3-day prep list in order to make my life easier and, quite frankly, less stressful for the event.  This Easter Sunday, not so much.  I bolted awake Saturday in a panic and interrogated my husband to figure out what to make.  His response was classic and came as no surprise in their usual casserole form: “shepherd’s pie and stuffing and I really don’t care what else you make.”

We ended up having a bunch of friends (whose family is not in the NYC area) over for the Sunday meal.  I’m used to stuffing for Thanksgiving when there’s actually a bird or something to be stuffed.  That said, who doesn’t love stuffing?  The weather is still cold, so I threw together some hearty ingredients that complemented the brined pork chops I served.

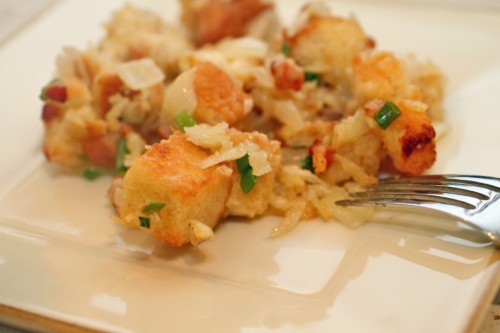
The foundation of the stuffing (besides the whole bread thing) is the bacon.  It adds that first layer of salty, smoky crunch, and I use its fat to cook the other vegetables.  The shiitakes add in that meaty, umami flavor and roasted leeks a signature, onion-like one.  For heat, I threw in a very generous pinch of Aleppo chili flakes, which are tangy, a bit sweet, with that kick.  I loved the results. If you want a vegetarian version, you can obviously omit the bacon and use vegetable stock in lieu of chicken stock; I’d use butter though for richness and maybe throw in some smoked paprika.  Crusty, moist, flavorful and pure comfort…enjoy!

Ingredients

Serves 6 to 8 / Yields (1) 2-quart baking dish

1 loaf challah bread, crusts removed, cut into cubes*

1 leek, white and light green parts only, thickly sliced

olive oil

kosher salt to taste

2 pieces of bacon, cut into a small dice

12-14 shiitake mushrooms, cleaned and stemmed, thinly sliced

1 shallot, finely chopped

3-4 garlic cloves, minced

very large pinch Aleppo chili flakes

¼ cup white wine

½ cup chicken stock

2 eggs, beaten

¼ cup heavy cream

1 ½ tsps chopped fresh thyme

small handful cilantro, finely chopped

freshly ground black pepper to taste

Procedure

Preheat oven to 400° F.

Transfer challah cubes to a large bowl and add the other ingredients as they are ready.

Toss leek with a bit of olive oil and salt and lay out on a baking sheet.  Roast in the oven for 15 to 20 minutes until starting to brown as you are prepping the rest of the ingredients.  Transfer to the bowl with the challah bread.

Heat a medium skillet over medium heat.  Add the bacon and cook stirring until the fat has rendered and the bacon has crisped up.  Using a slotted spoon, transfer the bacon to the challah bread reserving the fat in the pan.

Turn the heat up to high and when hot, add the shiitake mushrooms to the pan with the bacon fat.  Let them just sit there for a minute or two before stirring – you want to develop a nice brown on them.  Stir and add in the shallot, garlic, Aleppo and some salt to draw out the moisture.  Cook until the shallot is translucent.  Add the white wine and reduce until it’s almost all gone.  Add the chicken stock and let simmer for 1 minute.  Transfer the vegetables and liquid to the bowl with the challah bread.

Add the eggs, heavy cream and herbs to the bread as well and toss the whole mixture together.  You can add a bit more chicken stock if you find it isn’t moist enough.

Transfer stuffing to a greased baking dish and cover with foil.  Bake covered for 30 minutes.  Remove foil and bake uncovered for another 10 to 15 until crisp.

* I usually use brioche or challah for this and buy the bread the day before.  If the bread still has a lot of moisture, transfer the cubed pieces to a baking sheet and throw it in a 350° F oven for 5 to 10 minutes to crisp up.  You want them to be dry before adding the rest of the ingredients.

tags: Easter recipes, stuffing, shiitake mushrooms
categories: all -1, recipes, side dishes
Monday 04.09.12
Posted by Aliya LeeKong
 

Parsnip Cakes with Spring Garlic & Chile

View fullsize parsnip-pic1-500x333.jpg
View fullsize parsnip-pic2-500x333.jpg
View fullsize parsnip-pic3-500x222.jpg

Parsnip Cakes with Spring Garlic & Chile

Walking through the Union Square Greenmarket the other day (as the weather shifted from the low 40’s to the low 60’s), it felt to me that the season is being a bit ambivalent, unsure of whether it’s winter or spring.  Piled high were the hearty root vegetables of the winter – rutabagas, salsify and parsnips – next to the burgeoning spring crop with lovely spring garlic and rhubarb making an appearance.  I nabbed some of the spring garlic and for breakfast this Sunday created these little cakes, as an ode to this in-between season.

Parsnip is an incredibly flavorful and versatile vegetable.  The flavor is somewhere between a potato and a carrot, and it’s signature sweetness works beautifully with butter, spices, and heat. Spring garlic, on the other hand, is like a two-for-one sale – garlic and green onion flavor in one!  If you can’t find any, using a bit of garlic with leek or green onion works really well here too.

This recipe couldn’t be simpler or more forgiving – cook the parsnips til tender, add other ingredients, fry until golden.  You could easily use potatoes instead of parsnips here if you have them on hand.  I love these for breakfast with some scrambled eggs and a touch of sriracha to dip.  But these could also be a great dinner side to accompany roast chicken or a nice piece of fish.  A crisp bite with that sweet, creamy parsnip flavor, garlic, onion and the heat from the chilies…Enjoy!

Ingredients

Serves 4 to 6

2 lbs parsnips, peeled and cut into a medium dice

1-2 red and/or green chilies, finely chopped (red jalapeno, jalapeno, Thai)

2 spring garlic shoots, finely chopped (approximately 1/3 cup)

½ cup all-purpose flour

¾ tsp kosher salt

½ tsp sugar

handful of fresh herbs (chives, cilantro, parsley), roughly chopped

unsalted butter for frying

kosher salt to taste

Procedure

Put diced parsnips in a pot and cover with cold water.  Place over medium-high heat, cover and bring to a boil.  Lower to a strong simmer and simmer until fork tender (approximately 10-15 minutes depending on the size of your dice).  Drain in a colander and let air dry for a few minutes.

In a large bowl, mash parsnips with a potato masher or use a ricer to break them up.  Add the chilies, spring garlic, flour, salt, sugar and herbs and mix until a uniform texture (don’t overmix though or they’ll get a tad gummy).

Heat a sauté or cast iron pan over medium heat and add butter.  For the parsnip cakes, I like to use an ice cream scoop so I can be sure I get even amounts.  I love to use my hands here, making a flat patty out of the parsnip mixture and then just sliding them into the pan.  They don’t have to be perfectly shaped.

Fry for 3 to 4 minutes per side just to develop that nice golden crust, and work in batches if necessary to finish off the mixture.  Let drain on a paper towel-lined baking sheet.  Sprinkle with a bit of salt while it’s hot for extra flavor.

Serve immediately.  I like mine with a bit of sriracha on the side to dip.

tags: parsnip, spring garlic, vegetarian sides
categories: all -1, appetizers, breakfast, side dishes, vegetarian-1
Monday 03.19.12
Posted by Aliya LeeKong
 

Baked Trini Wontons

View fullsize wonton-pic1-500x333.jpg
View fullsize wonton-pic4-500x333.jpg

Baked Trini Wontons

I’m just going to say it to get it out of the way.  Frying just tastes better.  It does.  There is no other way to get that perfect, even texture, signature crunch, and lovely fried flavor…BUT if you can pretend like fried wontons never existed or not do some sort of unfair comparison of a fried wonton vs. a baked one, these are absolutely delicious (and, of course, a little better for you and your waistline).

I first came across the fried and soup version of these because of my husband and his wonton cravings. The Chinese influence on Trinidad is evident here as it combines traditional Asian flavors with pops of West Indian influence – particularly the scotch bonnet or habanero.  What I love about this recipe is that it is ridiculously versatile – you can, of course, deep-fry these (as I do for company), keep them frozen and pop them in the oven for a weeknight appetizer for the family, throw a few of them into a brothy vegetable soup to cook with and add a bit of flavor, or even just use the stuffing mixture with some breadcrumbs for a nice, spicy pork meatball.  AND, if you want to use ground chicken, beef or shrimp instead of pork, the recipe still works great.

I got a bit crazy while making these and tested out the wontons at 25 degree intervals in the oven, on both convention and convection settings, to figure out which creates the best texture (crazy, I know, but effective!).  Deep-frying, because of the circulation of hot oil, cooks evenly and quickly, so I ended up going with a relatively high temperature (425° F) and using the convection setting (for circulating air) to yummy, crispy results.  These don’t take too long to cook, and what this does is prevent the wonton dough from getting too chewy, which seemed to happen at the lower temperatures.  Again, these do freeze up really easily, but make sure to bring to room temp before baking (if you’re frying, straight from the freezer is fine).  Easy weeknight app, little hors d’oeuvres for entertaining…this wonton is spicy, flavorful, crunchy and satisfying – Enjoy!

Ingredients

Yields 24 to 30 wontons

2 tbsps vegetable oil

1 large shallot, finely chopped

½ habanero pepper, seeded and minced

1 ½” piece of ginger, minced (~½ tsp)

1 scallion, minced

2-3 garlic cloves, minced

½ lb ground pork, room temperature

zest of 1 lime

¾ tsp soy sauce

½ tsp Worcestershire sauce

2 tbsps chopped fresh cilantro

salt and freshly ground black pepper

24-30 wonton skins

Olive oil or cooking spray

Procedure

Preheat the oven to 425° F on the convection setting for optimal texture.  If you don’t have an oven that has convection capabilities, preheat the regular oven to 450° F.

Heat a small pan over medium heat.  Add the vegetable oil and then add the shallot, pepper, ginger and scallion.  Add a little salt to draw out the moisture and sauté for 3 to 4 minutes until the shallot is translucent.  Add the minced garlic and sauté for another minute until the garlic is fragrant.  Remove from the heat and let cool.

Using a large bowl, mix together the pork with the cooled shallot mixture, lime zest, soy sauce, Worcestershire, cilantro and season with salt and freshly ground pepper (remember the soy and Worcestershire are salty so you might not need much).  You can always quickly sauté a tiny patty to check seasoning.

Set up a little work station for yourself with a cutting board, a small bowl with water, a towel to wipe your hands, the wonton skins, and the pork mixture.  I like to make these 3 to 5 at a time.

Lay out the wonton skins on your cutting board, and then spoon even amounts of the pork mixture in the center of each.  You don’t want to overstuff so test out the first one to see what the right amount of the pork mixture is.

Dip your fingertips in the water bowl, and then wipe across the four edges of the wonton skin with it so they’re wet.  Fold one corner over to the other and press down the corner and sides to form a triangle.  Don’t be afraid – press hard!  Or else your stuffing will ooze out.  Bring the other two edges up to meet, using more water if necessary, and press together. Place on a parchment-lined baking sheet that has been greased with either olive oil or spray.

Repeat until all of the wontons have been formed.  Spray each wonton or brush with olive oil and place in the oven.  Bake for 8 to 10 minutes until deep, golden brown.  Serve warm with your dipping sauce of choice.

*If you’ve frozen or refrigerated these, make sure they come up to room temperature before baking.

tags: wontons, baked snacks, pork
categories: all -1, appetizers, man-friendly, recipes, side dishes
Monday 03.05.12
Posted by Aliya LeeKong
 

Mujaddara with Bulgur & Yoghurt

View fullsize mujadarra-pic1-500x333.jpg
View fullsize muj-pic2-500x333.jpg
View fullsize muj-pic3-500x333.jpg

Mujaddara with Bulgur & Yoghurt

Let me just say…thank goodness for the rainbow microgreens I had stashed in my fridge from earlier this week.  Without which, this dish would not look quite so attractive!  Looks aside, this has to be one of my favorite sides – shockingly delicious (don’t let the bulgur and lentils fool you), exquisitely simple to make, and, yes, healthy on top of it all.

Mujaddara is a Middle Eastern dish that traditionally pairs lentils with rice and caramelized onions.  Certain versions, like this one, exchange the rice for bulgur wheat, which adds a sweet nuttiness and beautiful texture to the dish.  But the real star here are the caramelized onions that are cooked a bit further than you might be used to, to the point where the edges get really dark and take on a bittersweet quality.  These onions take this dish to the next level and give it that addictive quality, the kind that makes you keep going back to the fridge to nibble quick, little, cold spoonfuls of it (or is that just me?).

The dish could not be simpler – caramelize onions, cook lentils, add bulgur, mix everything together.  I do a few extra things, of course, to boost the flavor a bit: namely, use chicken stock to cook the lentils and bulgur, add a few extra spices and aromatics while cooking them, and top the whole thing off with toasted pine nuts.  But this recipe can easily be modified for vegetarians and even vegans if butter is omitted and/or vegetable stock is used.  A bowl of nice, cool yoghurt pairs beautifully with the dish, and I love a few pinches of pimentón de la Vera on top for some smoky heat.  The texture is tender and fluffy with rich bites of the caramelized onions and a hint of spice…and wait ‘til you taste it the second day, even better.  Enjoy!

Ingredients

Serves 4 to 6

2 tbsps unsalted butter

1 tbsp vegetable oil

2 yellow onions, thinly sliced

4 cups chicken stock

1 bay leaf

1 small bunch fresh thyme

¾ tsp ground coriander

½ tsp ground cumin

generous pinch chili flakes (I used Aleppo but any will do)

tiny pinch cinnamon

1 ¼ cups lentilles du Puy (French green lentils but brown ones work too)

¾ cup bulgur wheat

¼ cup pine nuts, toasted

salt and freshly ground black pepper to taste

extra virgin olive oil

Yoghurt:

yoghurt

pimentón de la Vera

Procedure

Heat a medium-sized skillet over medium heat.  Add butter and oil, and when the foam subsides, add the sliced onions and a few pinches of salt to draw out the moisture.  Reduce the heat to low and cook for 30 to 45 minutes until the onions deeply caramelize and brown.  They should go even darker than traditional caramelized onions, just before they start to turn bitter.  Remove with a slotted spoon and set aside.

While the onions are cooking, bring the chicken stock up to a boil with the bay leaf, thyme, coriander, cumin, chili flakes and cinnamon.  I like to tie the thyme bunch with a bit of kitchen twine, so I can easily toss it at the end.  Add the lentils, reduce the heat to a simmer and simmer covered for 15 to 20 minutes until the lentils are almost tender but have a slight bite.

Add the bulgur, season with salt and freshly ground pepper, and stir to combine thoroughly.  Cover and simmer for another 15 minutes.  Turn off the heat and let sit for another 10 minutes for the bulgur to finish cooking and to turn fluffy and tender.

Remove the bay leaf and thyme, and add the caramelized onions to the lentils and bulgur, mixing thoroughly, and adjust seasoning if necessary.

Serve warm topped with toasted pine nuts and a drizzle of extra virgin olive oil with a side of yoghurt sprinkled with pimentón de la Vera.

tags: Mujadarra, Bulgur, middle eastern recipes, lentils
categories: all -1, recipes, side dishes, vegetarian
Monday 02.27.12
Posted by Aliya LeeKong
 

Buttermilk Gruyère Biscuits with Ajwain

View fullsize biscuit-pic1-500x333.jpg
View fullsize biscuit-pic2-500x333.jpg
View fullsize biscuit-pic3-500x166.jpg

Buttermilk Gruyère Biscuits with Ajwain

Let’s face it.  Those biscuits in the refrigerated section of the grocery are easy (and tasty!), and we’ve all used them in a pinch to deliver some buttery goodness to the breakfast or dinner table.  BUT.  It’s just not the same as the homemade kind (see: nothing artificial), and this recipe, with or without the fancy cheese and spices, is so easy and quick, you may swear off the metal tube-sort for good…

I have always loved cheddar-thyme biscuits, and those were precisely the inspiration for this spice-flecked version.  I wrote about ajwain some months ago and used it in a gorgeous pissaladière with mushrooms and onions, and what I think is fantastic about this spice is its resemblance to thyme, albeit with a slightly more pungent, menthol quality to it.  It’s used a lot in South Asian cooking and is often added to flatbread or samosa dough.

The base of this recipe is self-rising flour.  I used it because it has a slightly lower protein content than all-purpose, which translates into super tender, flaky biscuits.  White Lily brand is supposedly the go-to flour for Southern biscuits because it has a significantly lower protein content than some of the other national brands out there, but if you can’t find it, any self-rising flour works well here.  You whir the flour with cold butter, pour in some buttermilk and voilá! Biscuit dough in about 2 minutes flat.  I add in some grated gruyere or cheddar, typically, along with a bit of ajwain for that signature flavor.  Enjoy!

Ingredients

Yields 1 dozen biscuits

2 cups self-rising flour

¼ tsp black pepper

½ stick cold, unsalted butter, cut into small cubes + 1 tbsp for brushing

1 cup grated gruyère or cheddar cheese

½ tsp ajwain seeds

¾ cups cold buttermilk

kosher or maldon salt

Procedure

The key to making tender, flaky biscuits is to not over-develop the glutens in the dough.  One way to do this is to keep all of the ingredients cold, and another is to not work the dough too much.

Preheat the oven to 425° F.

In a food processor or stand mixer, sift the flour and the black pepper together.  Add the cold, cubed butter and pulse or mix just until a sandy texture forms, and there are no visible clumps of butter.  Add the cheese and ajwain seeds and pulse to combine.  Pour the buttermilk in all at once and pulse until the dough sticks together.

Turn the dough out onto a floured surface.  Gently knead the dough a few times so that it comes together and form into a flat, 1-inch thick disc.  Use a 2-inch cutter to cut out a dozen biscuits.

Melt 1 tablespoon of butter over low heat in a small saucepan.  Place the biscuits so they are touching on a greased or parchment-lined baking sheet.  Paint the tops of the biscuits with the melted butter and sprinkle with a little salt.

Bake for 15 – 20 minutes until golden brown.  Serve warm…

tags: buttermilk biscuits, buttermilk cheese biscuits, Gruyère, Buttermilk Gruyère Biscuits, Ajwain, homemade biscuits
categories: all-2, breads & cakes, side dishes, recipes, vegetarian-1, breakfast
Monday 09.26.11
Posted by Aliya LeeKong
 

Smoked Peach Chutney

View fullsize smoked-peach-pic1-500x333.jpg
View fullsize smoked-peach-pic2-500x166.jpg
View fullsize smoked-peach-pic3-500x333.jpg

Smoked Peach Chutney

Biting through velvet skin into the honeyed-sweet juiciness of a peach is such a summer pleasure.  I’ve been on a quest, from farm stand to farm stand, to find the best of the bunch and have tasted this summer the stuff poets write about.  Of course, a few weekends back, I got a bit carried away at a local stand, and I ended up with more peaches than I knew what to do with.  What better way to use up this peak season fruit than to turn it into a chutney…Interestingly enough, it was a cocktail that inspired the flavor combo for the chutney; the drink had bourbon, crème de peche and cumin.  Genius!  The smokiness of the bourbon played beautifully off of the sweet tanginess of the peach intermingling with the warm earthiness of the cumin.  I wanted to figure out how to capture that in this chutney.

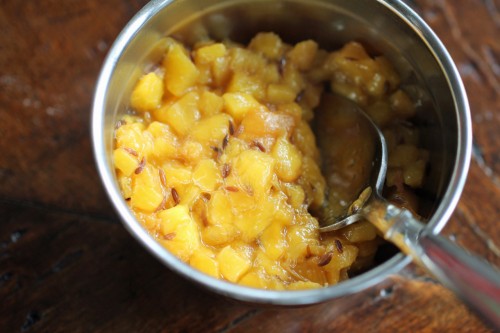
Smoking was the answer, and you can use either a stovetop smoker (my lifesaver in a NYC kitchen…) or the grill.  The smoked peaches by themselves are distinctive but a bit overwhelming until cooked down a bit more with some sugar, honey and the roasted cumin seeds.  The resulting chutney has a gorgeous flavor!  Smoky, sweet, tangy, with the bite of the cumin seed…it’s perfect on pork chops, fish or even with creamy brie on crackers. Enjoy!

Ingredients

Yields approximately 1 quart

6 large, lusciously-ripe peaches, halved with pit removed (skin on)

1 ¼ tbsps cumin seeds

2-3 tbsps water

¼ cup sugar

¼ cup honey

pinch of salt

Procedure

The first step of this chutney is smoking the peaches. I used a stovetop smoker and cherry wood.  Placing the peaches cut side down on the grate, I smoked the peaches for 6 minutes and achieved the perfect level of smokiness.  If you choose to do this on the grill, I would keep the temperature low (200° F to 225° F).  Once the chips start to smoke, place the peaches cut side down on the side with no flame (indirect heat), cover, and smoke for about 10-15 minutes.

Peel the peaches, the skin should slip off relatively easily, and cut into a fine dice.  Set aside.

Heat a medium-sized pot over medium heat.  Add the cumin seeds, and toast, stirring, until fragrant and slightly darker in color.  Reduce the heat slightly, add the diced peaches and remaining ingredients and simmer for 8 to 10 minutes, stirring at intervals, until the peaches are soft.  You want this chutney to have form, so overcooking will turn the peaches to mush.

You can serve this warm, cold, or at room temperature.

tags: recipes for summer, peaches, chutney, condiments
categories: breakfast, recipes, snacks, side dishes, vegetarian, all-3
Monday 08.22.11
Posted by Aliya LeeKong
 

Porcini Macaroni Pie

View fullsize porcini-pic3-500x333.jpg
View fullsize porcini-pic2-500x139.jpg

Porcini Macaroni Pie

So I’m working on my second episode of Exotic Table, and this one is inspired by a nonna I met at Enoteca Maria, an Italian spot in Staten Island that has grandmas from all over Italy as chefs making specialties from their individual regions.  How inviting is that?  I found the concept so powerful – I had to dig deeper, and a nonna by the name of Rosa Turano showed me her simple and elegant porcini dish. 

Of course, I can never leave well enough alone, so I did a bit of a double twist here drawing from my incredible day in the kitchen with Rosa and one of my favorites, Trinidadian Macaroni Pie.  The result is this beautiful baked mac ‘n cheese threaded with porcinis.  Cheesy, buttery, with a crust and that gorgeous porcini flavor…Enjoy and look out for the Exotic Table episode in a few weeks!

Ingredients

Serves 6 to 8 (yields (1) 3-quart baking dish)

olive oil or butter

1 cup fresh or rehydrated porcini mushrooms, thinly sliced*

1 yellow onion, finely diced

3 garlic cloves, minced

1 stick unsalted butter

½ cup all-purpose flour

1 quart milk

½ tsp white pepper

½ tsp black pepper

2 tsps salt

2 ½ cups grated gruyère

2 eggs

1 lb pasta (I used pappardelle here)

1 tbsp + 1 tsp fresh chives, finely chopped

1 ½ tsps fresh thyme, finely chopped

Procedure

Preheat oven to 350º F.

Heat a medium skillet over medium-high heat.  Add olive oil, and, when hot, add mushrooms.  Leave them alone and let them brown for a minute or two and then throw in a pat of butter to help with the browning.  Stir and add salt – browning the mushrooms will really bring out their earthy flavor and adding salt at the end will prevent moisture from ruining the browning process.  Lower the heat to medium-low and throw in the onions.  Cook for 3 to 5 minutes until the onions are translucent.  Add garlic and cook for 30 seconds or so until fragrant.  Remove from heat and cool in a bowl.

In a large sauté pan or pot over medium heat, melt butter.  Add flour all at once and whisk vigorously to avoid lumps.  Cook for 2 to 3 minutes.  You just want to remove the raw taste.  Add milk and spices and continue to whisk to prevent lumps (remember to get the corners!).  Once the mixture starts to bubble, reduce heat to low and cook for 8 to 10 minutes whisking often.  You want this to simmer gently while it’s thickening.  Remove from heat.

To the onion mixture in the bowl, add 2 cups of the grated cheese as well as the eggs.  Add a ladle full of the béchamel (milk mixture) and stir.  Continue to add ladlefuls until the egg mixture is up to temperature with the béchamel.  Add everything back to the béchamel in the sauté pan and stir to combine thoroughly and make sure cheese is completely melted.

Add pasta to boiling, heavily salted water and cook until it’s a bit underdone.  It depends on what type of pasta you are using.  I used fresh pappardelle, and it cooked in 2 to 3 minutes.  It’s going to continue cooking in the oven, so leave it al dente.  Drain pasta and add to the béchamel/cheese mixture.  Add 1 tablespoon of the chopped chives and 1 teaspoon of the chopped thyme and combine thoroughly.  Pour into a heavily greased, 3-quart baking dish.

In a bowl, combine remaining herbs, ½ cup of cheese, and breadcrumbs.  Sprinkle on top of macaroni and either dot with butter or drizzle with olive oil.  Bake for 35 minutes until top is browned and bubbly.

tags: Porcini Mushroom Pie, Enoteca Maria, vegetarian meals, macaroni pie
categories: all-3, recipes, side dishes, vegetarian-1, main dishes-1
Monday 08.01.11
Posted by Aliya LeeKong
 

Pão de Queijo (Brazilian Cheese Bread)

View fullsize pao-pic1-500x333.jpg
View fullsize pao-pic2-500x333.jpg
View fullsize pao-pic3-500x166.jpg
View fullsize pao-pic4-500x167.jpg

Pão de Queijo (Brazilian Cheese Bread)

One of my favorite Brazilian restaurants in the city is Casa.  Tucked away on a quiet block in the West Village, this cozy spot gets it right – spot on flavors, perfect portions, delicious wines, an intimate setting.  The feijoada and moqueca are killer, but I can never make it through a dinner there without ordering their little basket of farm cheese bread, or pão de queijo. These little cheesy, chewy, buttery balls are perfection, so I decided to dig further to satisfy my cheese bread cravings at home.

Brazilian cuisine is completely amazing to me because of the number and span of cultures that have contributed to it – Portuguese, African, Native American, Japanese, Syrian, Lebanese.  Cassava or yucca is a staple ingredient in Brazilian cooking, and the resulting flour is used, in its coarse form, for farofa, and its finely ground form to make these lovely rolls.

We are familiar with one form of cassava or manioc starch, which is tapioca, but Brazilians have a sour fermented version, polvilho azedo, and a sweet one, polvilho doce.  Traditionally, both are used to make this bread, but, on the fly, I only found plain manioc starch and went with it.  If you can find both kinds, I suggest using them in 2/3rd sour / 1/3rd sweet ratio.

The great thing about these is, if you have a stand mixer, they are really easy to make.  Otherwise, it’s a bit of a work out and requires some sweat to knead!  The procedure and form is not unlike those lovely, French gougères, but the result here is a lot more dense and toothsome than that.  They are the perfect dinner roll – buttery and cheesy with a delicately crunchy exterior.  I added a touch of black pepper and nutmeg, not traditional but I think gives it a balanced flavor.  Be forewarned, they are addictive…Enjoy!

Ingredients

Yields 20 golf ball-sized pieces

1 ½ cup manioc or tapioca starch

½ cup all-purpose flour*

2 tsps kosher salt

1 tsp sugar

½ tsp black pepper

pinch of ground nutmeg

1 cup milk

6 tbsps stick butter

3 eggs

1 ½ cups finely grated parmesan

Procedure**

Preheat oven to 350° F.

Fit a stand mixer with a paddle attachment.  In the bowl of the stand mixer, sift together starch, flour, salt, sugar, and spices.  In a small saucepan, heat milk and butter over medium-high heat until mixture comes up to a full boil (make sure it doesn’t boil over!).  Add milk mixture to dry ingredients and mix on low for 2 minutes.

In a small bowl, beat together 1 egg and 1 egg yolk.  With the mixer still running, add eggs to the dough. When eggs are incorporated, add grated parmesan and mix/knead for another 5 minutes, scraping down at intervals.  Refrigerate for a minimum of 1 hour.

Using a small ice cream scoop or your hands, portion out dough into even-sized pieces.  Heavily (and repeatedly) flour hands and roll portioned pieces into balls.  Place on a parchment-lined baking sheet.  In a small bowl, beat the other egg.  Brush dough balls with egg wash and bake for 25 to 30 minutes until browned and the outside is crisp and a bit cracked.  Serve immediately.

*If you want these to be gluten-free, just use manioc starch in lieu of all-purpose flour here.

**A few points on procedure.  The dough can be kneaded traditionally – that is, by hand – if desired.  It just takes a bit of upper body strength.  The resulting dough should be soft and very sticky.  If not baking immediately (or that day), the dough can be frozen when formed into balls and popped in the oven at a later time.  This bread is best served warm and straight from the oven as it turns a bit gummy when cold (though, of course, if can be reheated).

tags: Pão de Queijo, Brazilian cheese bread, Brazilian cuisine, farofa
categories: all-3, breads & cakes, vegetarian, recipes, appetizers, side dishes
Monday 07.11.11
Posted by Aliya LeeKong
 

Crispy Asparagus with Fenugreek Aioli

View fullsize asparagus-pic1-500x333.jpg
View fullsize asparagus-pic2-500x333.jpg
View fullsize asparagus-pic3-500x333.jpg

Crispy Asparagus with Fenugreek Aioli

Asparagus can be polarizing, lovers and haters – I happen to be a lover.  I’m a huge fan of throwing asparagus in an oven with some olive oil, salt and pepper (and maybe a pat or two of butter…) and letting it roast to perfection while I’m making the rest of my meal.  With the abundance of beautiful, thick and luscious asparagus in the greenmarket, I’ve found myself going beyond simple roasting and grilling techniques to figure out ways to single it out and highlight its taste at this time of year.  This recipe is one lovely variation.

I know.  The old adage that frying makes everything taste better is a bit overused, but, in this case, it is so true!  This requires basic breading, but I like to spice up the flour for dredging a bit and use panko to form the crispy crust.  The asparagus are then shallow-fried until they just yield under the bite.

Homemade aioli is the perfect accompaniment.  It’s cheaper and easier to make your own mayo, and this one is scented with a bit of fenugreek powder.  Fenugreek is one of the key spices in curry.  I actually love it on its own, without the rest of the spices that comprise curry.  It definitely has a bitter edge to it though, so a little goes a long way.  Some garlic, a touch of mustard, and you have a deliciously creamy sauce.  The crisp asparagus dipped into the garlicky aioli with hints of curry are the perfect summer side.  Enjoy!

Ingredients

Serves 4 to 6

For the asparagus:

¼ cup all purpose flour

½ tsp salt

1 tsp garlic powder

½ tsp onion powder

black pepper to taste

2 eggs, beaten

1 ¼ cups panko breadcrumbs

1 bunch of asparagus (approximately 1 lb)

oil for frying

For the fenugreek aioli:

2 or 3 garlic cloves

large pinch salt

1 egg yolk, room temperature

2 ½ teaspoons fresh lemon juice

½ tsp Dijon mustard

¼ tsp + a small pinch finely ground fenugreek

½ cup oil*

Procedure

For the asparagus, using three trays or bowls, set up a breading station.  Whisk together the flour, salt, garlic powder, onion powder, and black pepper into one.  Set up another with the beaten eggs, and a third with the panko.  If you like, pulse the panko in the food processor to make it a bit finer before using.

Dredge the asparagus in the flour mixture, tapping off any excess.  Dip into the beaten eggs, and, finally, coat with the panko.  Transfer to a rack over a baking sheet and work in batches to bread all of the asparagus.

Heat ¼” to a ½” of oil in a large skillet to medium heat.  You don’t want the oil to be too hot or the breading will brown (and burn) before the asparagus cooks through.  I like to shallow-fry about 2 to 3 minutes per side on a medium heat to get that golden brown crust and perfectly-cooked asparagus.

Transfer back to the rack over the baking sheet and sprinkle with additional salt if you like.  If you aren’t serving immediately, keep warm in a 200° F oven.

For the aioli, place the garlic and salt in a food processor and pulse until chopped as finely as possible.  Conversely, you can do this by hand and chop the garlic finely and make a paste with the salt.  Add the egg yolk, lemon juice, mustard and fenugreek and pulse or whisk until blended and uniform.  Start the processor or continue whisking and add in the oil in a thin stream until all is completely incorporated.

Serve the asparagus warm with a side of the aioli.

*To save a bit, I like to use a combination of regular olive oil (extra virgin can turn bitter) and canola or other vegetable oil.

tags: asparagus, crispy asparagus, fried vegetables, fenugreek aioli, aioli, recipes for spring
categories: all-3, appetizers, recipes, side dishes, vegetarian-1
Monday 06.13.11
Posted by Aliya LeeKong
 

Mandazi (East African Donuts)

View fullsize mandazi-pic4-500x333.jpg
View fullsize mandazi-pic2-500x333.jpg
View fullsize mandazi-pic3-500x333.jpg
View fullsize mandazi-pic1-500x333.jpg

Mandazi (East African Donuts)

One of my earliest cooking memories was when I asked my aunt to teach me how to make mandazis.  I think I was about 8 or 9 years old, and I was very serious about learning how to do these.  For some reason, we wouldn’t make these delectable little donuts at home.  I got to eat them when I traveled to see my family, and only the old school grandmas and aunties knew the secret.  Of course, East African restaurants were pretty much nonexistent in Florida where I grew up (not that I can find any now that serve these in NYC…I’m just saying).  So I felt I had to carry on the tradition!

Of course, the dish was a bit ambitious for an 8 year old (in one ear…and out the other!), and I was more focused on enjoying the fruits of my aunt’s and my labor than on getting the technique down.  As an adult, however, I decided I wanted to perfect my own using the tad more culinary knowledge I now have.

I should be clear: mandazis are savoury.  They shouldn’t be too sweet or too salty.  One of my most treasured food memories is sitting, facing the Indian Ocean, in Dar-Es-Salaam, Tanzania, using the (hollow) mandazis to scoop up a tender stew of pigeon peas in coconut milk with fresh chilies and cilantro (called barazi).  But, of course, you can eat them however you like; I’m partial now to having them for breakfast.

These are very easy to make.  A little yeast leavens the dough, and I use a combination of all-purpose and rice flour to make them even lighter.  A touch of sweetness, lightly coconut-scented, and that signature cardamom flavor.  Heavenly…Enjoy!

Ingredients

Yields 2 dozen donuts

¼ cup sugar

1 ½ tsp yeast

2/3 cup warm water

½ cup coconut milk

1 ¾ cup all purpose flour

¾ cup rice flour

¾ tsp salt

3 tbsp dried grated coconut (preferably unsweetened, adjust sugar if not)

¾ – 1 ¼ tsps ground cardamom*

oil for frying

salt & powdered sugar

Procedure

This can easily be made in a stand mixer or by hand.

In the bowl of a stand mixer fitted with a dough hook, dissolve sugar and yeast in warm water and let bloom 5-10 minutes.  It should become foamy and frothy.  Turn the mixer on low and add coconut milk.

In a separate bowl, sift flours together and mix in salt, grated coconut and cardamom.  Add contents to liquids in the mixer and knead on low for 5 to 10 minutes.  Conversely, you can also knead by hand – the dough should get pretty smooth (except for the grated coconut) and relatively sticky.

Transfer dough to a greased bowl, cover, and let rise for a minimum of 2 hours.

On a floured work surface, divide dough into 4 even pieces.  Form each piece into a ball and flatten to a disc.  Roll each circle out to about ¼” thick and cut like a pie into six triangular pieces.  Transfer to a parchment lined baking sheet while working on each piece.

In a dutch oven or pot, heat 3 to 4 inches of oil to 360 F.  Working in batches, carefully drop a few triangles into the oil.  Don’t overcrowd or the oil temperature will drop.  As soon as the triangles puff, quickly flip them over.  This will ensure that both sides cook – if they become lopsided, it will be hard to keep them on the less inflated side to brown.  Cook for a few minutes, flipping at intervals until golden brown.  Remove to a paper towel-lined plate or baking sheet and lighltly salt.

Before serving, sprinkle with powdered sugar.

They are best served warm as they can get a touch chewy once they’ve cooled.  If you need to reheat, do so in a very low oven or on a low power in the microwave.

*Traditionally, cardamom is roughly ground and added to the mandazi batter.  This results in biting into delightful pieces of cardamom while eating the donuts.  I add about 1 ¼ teaspoons when I’m using roughly ground cardamom and more like ¾ teaspoon when I use the powdered / ground form.


tags: Mandazi, East African donuts, donuts
categories: all-3, breads & cakes, desserts, recipes, side dishes, breakfast
Monday 05.23.11
Posted by Aliya LeeKong
 

Fava Purée Topped with Sumac Onions

View fullsize fava-pic1-500x333.jpg
View fullsize fava-pic2-500x333.jpg
View fullsize fava-pic3-500x166.jpg

Fava Purée Topped with Sumac Onions

The terms spring and vegetables really go hand-in-hand – earthy artichokes, thick, luscious asparagus, comical fiddleheads and, one of my personal favorites, fava beans.  Yes, they are a bit labor-intensive as they have to be shelled from their pods and then each individual fava has to be peeled…but the taste, the creamy butteriness, makes all of that work worthwhile.

Fava beans, or broad beans as they are sometimes called, are actually very popular in the Middle East, North Africa and Mediterranean regions.  In fact, ful medames, a dish consisted of slow-cooked favas with garlic, lemon and spices, is a typical breakfast dish in Egypt often served with eggs and pita.  Seasonally, fresh favas may be available, but year-round, dried favas are a staple in the Egyptian diet.

Fava purée is a great way to enjoy the seasonally abundant, fresh favas at the greenmarkets.  I like to add similar ingredients to the Egyptian dish – garlic, lemon, spices, but I also add potato to give the purée a bit of body.  For a silky mouthfeel, I gently stir in extra virgin olive oil at the end; blending too vigorously with the rest of the ingredients can make the oil bitter.  To top this puree, I soften sweet onions in a pan with tart spice sumac.  The result is a beautiful side dish or starter that’s creamy, luscious, and bright.  Enjoy!

Ingredients

Yields approximately 1 ½ cups of puree

Fava Puree:

2 cups shelled fresh favas (from about 2 lbs unshelled)

3 tbsp butter (1 tbsp is optional, melted)

1 tbsp olive oil

1 small yellow onion, finely chopped

1 yukon gold potato, peeled and shredded

¾ tsp ground cumin

pinch of chili powder

5 garlic cloves, minced

juice of half a lemon

½ cup chicken or vegetable stock

3 tbsp extra virgin olive oil

salt and black pepper to taste

Sumac Onions:

3 tbsps butter or olive oil

1 medium yellow onion, thinly sliced

1 tbsp ground sumac

Procedure

For the fava purée, bring a medium pot of salted water up to a boil over high heat.  Add favas and cook for 90 seconds to 2 minutes (they should be bright green).  Drain and shock in an ice bath or run under cold water to stop cooking.  Peel outer layer of skin from favas – they should slip out pretty easily.  Discard skins and set peeled favas aside.

Heat 2 tablespoons of butter and olive oil over medium heat.  Add onion, potato, cumin, chili and favas (and a pinch or two of salt) and cook for 4 to 5 minutes until potatoes and favas are softened.  Add garlic and cook for another 30 seconds until fragrant.  Add lemon juice and chicken stock and bring up to a simmer.

Transfer fava mixture to a blender and purée to desired texture.  Add a bit more stock if necessary to achieve a smoother texture.  Remove to a bowl and stir in extra virgin olive oil and 1 tablespoon of melted butter to get a creamy, mouthfeel.  I like to stir in the oil, rather than blend, so that it doesn’t get bitter from overprocessing.  Season with salt and pepper to taste.

For the sumac onions, heat butter or oil over medium heat.  Add onion and sumac and cook until softened.

Serve fava purée warm, topped with sumac onions and a side of pita or toast points.

tags: fava beans, sumac, recipes for spring
categories: all-3, appetizers, side dishes, recipes, vegetarian-1
Monday 05.16.11
Posted by Aliya LeeKong
 

Saffron & Roasted Garlic Spaghetti Squash Gratin

View fullsize squash-pic1-500x333.jpg
View fullsize squash-pic2-500x333.jpg
View fullsize squash-pic3-500x166.jpg
View fullsize squash-pic4-500x333.jpg

Saffron & Roasted Garlic Spaghetti Squash Gratin

Saffron, without a doubt, is an expensive spice to work with.  I’m a bit of a deal hunter when it comes to it and always search around when I’m traveling to see if I can get it on the cheap.  I remember spotting it in the medina in Marrakech for a ridiculously low price and basically carting home a bushel full.  It wasn’t incredibly fragrant (and quite frankly the color was off) but eh, it was saffron!  It’s been sitting in my spice cabinet ever since – the lousiest, tasteless saffron I’ve ever met…and somehow I still won’t part with it.

The saffron for this dish I picked up during my visit to Mercat de la Boqueria a few months back.  I still trekked around to each stall that sold it to make sure I got the cheapest one!  Got it right this time.  This stuff has an incredible perfume and was beautiful in this dish.

When I dug deep into why I thought spaghetti squash and saffron would pair well together, I realized the mental origin of this dish might seem a bit strange.  There’s a South Asian pudding that can be made with either rice or vermicelli called kheer; it’s often scented with saffron.  This, to me, was like a savoury version of it.

The saffron, of course, compliments the flavor of the spaghetti squash, which I boost a bit with a touch of brown sugar.  The sweet, roasted garlic adds a lovely nuttiness and works incredibly well with the freshly grated parm.  I love this dish.  It’s a bit sinful, but healthier as far as gratins go since we’re using squash.  Cheesy, creamy, nutty with the perfume of saffron – Enjoy!

Ingredients

Yields 1 2-quart casserole dish

2 medium-sized spaghetti squash

5 garlic cloves

olive oil

salt and freshly ground pepper

½ stick butter

¼ cup all-purpose flour

2 cups milk

¼ cup crème fraiche

generous pinch of saffron

pinch of cayenne

a few dashes of hot sauce

1 ½ tsps light brown sugar

½ cup freshly grated parmesan

Procedure

Preheat oven to 375° F.

Poke holes with a knife into the spaghetti squash on all sides and place on a foil-lined baking sheet.  Season garlic cloves with a little olive oil, salt and pepper and wrap separately in foil.

Bake the squash for 1 hour turning every 15 to 20 minutes.  Cooking time may vary depending on the size of the squash.  Let it cool.  Split the squash lengthwise (should easily cut) and remove the seeds.  The flesh should be easy to pull out – if not, place it cut side up back on the baking sheet and cook for a bit longer.  I like to use a fork around the edges to pull out the squash flesh.  You want all of it to be separate, like spaghetti.  Reserve in a bowl.

Remove the garlic after another 15 minutes or so.  It should be soft, caramelized, and smell nutty and fragrant.

Reduce oven to 350° F.

In a saucepan over medium-low heat, melt butter.  Add flour and cook 2 to 3 minutes, whisking continuously.  Add milk, crème fraiche, saffron, cayenne, hot sauce and sugar.  At this point, you can purée the roasted garlic and add it.  I actually just added the cloves right in and used my whisk and the heat to break it up.  Continue to whisk and simmer for 5 to 6 minutes.  It should be at a slow bubble.

Combine béchamel mixture with squash and transfer to a greased 2-quart baking dish.  Sprinkle the freshly grated parmesan all over the top, and bake for 45 to 50 minutes until brown and bubbly.

tags: spaghetti squash gratin, squash recipes, spaghetti squash recipes, gratin recipes, saffron
categories: all-5, vegetarian, recipes, side dishes, main dishes-1
Monday 11.22.10
Posted by Aliya LeeKong
 

Bacon, Cheddar & Cassava Stuffing

View fullsize stuffing-pic1-500x333.jpg
View fullsize stuffing-pic2-500x333.jpg
View fullsize stuffing-pic3-500x333.jpg

Bacon, Cheddar & Cassava Stuffing

A lovely food memory of mine growing up was baked cassava with a little lime, salt and chili pepper.  It’s an incredibly versatile vegetable whether deep-fried, ground into flour, puréed or even baked into a sweet dessert – my favorite being West Indian cassava pone, a thick, moist, gelatinous cake with coconut and spices like cinnamon and nutmeg.  Yum!  I craved it just thinking about it – will definitely be making soon…

Cassava, which is also called yucca, is a staple starch in many tropical areas.  It’s found throughout South America and the Caribbean and is also a large part of sub-Saharan African cuisines.  Again, building on the Thanksgiving-preparation concept, I decided to make a stuffing.  I used the cassava here much like I would a potato – for it’s starchy binding effect, gentle flavor and texture.

The flavors that really pop in this dish are the salty, smoky bacon, tangy cheddar and green onion.  It’s like a biscuit-turned-stuffing!   Totally yummy and pairs well with just about anything.    I’m not sure why stuffing has been relegated to holiday status – I would so eat this on any given day as my carb side.  Enjoy!

Ingredients

Yields 1 9” x 13” x 2” baking dish

2 to 3 slices bacon, diced

5 tbsps butter

2 cups diced onions

1 ½ cups grated cassava

3 cloves garlic, minced

1/3 cup sliced green onions, green and light green parts only

1 ¼ cups shredded cheddar cheese

10 cups day-old white or sourdough bread, cut into 3/4 “ cubes*

1 1/4 cup chicken stock

2 eggs, beaten

Procedure

Preheat oven to 350°F.

Heat a medium skillet over medium heat.  Add diced bacon and cook for 5 to 7 minutes until crispy.  Transfer bacon using a slotted spoon to a paper towel-lined plate.  Pour out most of the rendered bacon fat save about 2 teaspoons.

Turn heat down to medium-low and add butter.  Add onions and cook 3 to 5 minutes until translucent.  Add cassava and garlic and cook for another minute.  Transfer to a bowl.

Add green onions, cheese, bread, eggs, and chicken stock to onion mixture and combine thoroughly.  Pour stuffing mixture into a greased baking dish and bake for 30 to 40 minutes until the outside is lightly browned and the stuffing is warmed through.  Serve warm.

*You want the bread to be a little crusty.  If the bread is soft, lay the cubes out on baking sheets, and bake in a 350°F oven until lightly toasted (7 to 10 minutes).

tags: bacon recipes, stuffing recipes, Cassava recipes, bacon-cheddar
categories: all-5, side dishes, recipes
Monday 11.08.10
Posted by Aliya LeeKong
 

Lemon-Fennel Israeli Couscous Risotto

View fullsize risotto4-500x333.jpg
View fullsize risotto-pic2-500x333.jpg
View fullsize risotto-pic3-500x333.jpg

Lemon-Fennel Israeli Couscous Risotto

Risotto is one of my favorite things in the world to make.  It’s one of those dishes that has endless permutations.  It can take on any flavors you desire, can be simplified as a side dish, beefed up for a main, and is always creamy and satisfying.  I can get a bit heavy-handed with my risottos (a jumbo lump crab and smoked mozzarella iteration comes to mind…), so I wanted to create a slightly lighter dish here.

Israeli couscous is a tiny, pearl-shaped pasta that was created during a period in Israel when rice was scarce.  It has a slightly toothsome texture when cooked and a nutty flavor.  Because of its small size, it cooks up a lot quicker than most pastas.  That’s why I decided to use it here – instead of 30 plus minutes of constant stirring, you get a similarly delicious dish in about 15 minutes from start to finish.  You definitely still want to stir to develop the creamy texture, but it requires a lot less maintenance and time than traditional risotto.

When thinking about this dish, my mind immediately went to fennel since it’s in season.  Paired with bright lemon zest and a bit of juice, the result is a much lighter and fresher risotto than I typically make.  I cooked up a simply seared piece of fish, and it worked perfectly with the light and creamy, lemon-y couscous “risotto”.  Enjoy!

Ingredients

4 tbsps unsalted butter

2 small shallots, medium dice (2/3 cup)

½ medium fennel bulb, medium dice (2/3 cup)

3 or 4 garlic cloves, minced

2 cups toasted Israeli Couscous

1/3 cup white wine

3 cups vegetable or chicken stock

juice of half a lemon

1 tbsp lemon zest

finely chopped parsley, chives, and/or cilantro to finish

salt and freshly ground black pepper

Procedure

Heat a nonstick sauté pan over medium heat and bring the stock in a separate saucepan up to a boil.  Add 3 tablespoons of butter, and when foam subsides, add diced shallots and fennel and a pinch of salt to draw out the moisture.  Cook for 5 to 7 minutes stirring often until vegetables have softened.  Add garlic cloves and cook for 30 seconds to a minute until fragrant.

Add couscous and cook for a minute stirring to coat with the fat.  Add white wine and reduce completely.  Reduce heat to medium-low.  Add boiling stock in increments of one cup or so, stirring often.  Repeat until all stock has been incorporated and couscous has cooked for about 10 minutes.

Remove from the heat.  Stir in lemon juice and lemon zest.  Taste couscous and add salt and pepper as needed.  Add remaining tablespoon of butter and chopped herbs.  Serve immediately.

tags: israeli couscous recipes, couscous risotto, lemon risotto, risotto recipes, fennel
categories: recipes, side dishes, vegetarian, all-6
Monday 10.25.10
Posted by Aliya LeeKong
 

Trini-style Macaroni Pie

View fullsize mac-pie-pic1-500x333.jpg
View fullsize mac-pie-pic2-500x333.jpg
View fullsize mac-pie-pic3-500x333.jpg
View fullsize mac-pie-pic4-500x166.jpg

Trini-style Macaroni Pie

Thanksgiving is by far my favorite holiday of the year.  My family always does it big down in Florida, and I love the coming together of friends and family of all ages, the hustle in the kitchen with my mom and me and other intruders…I mean, helpers..., the beautiful cool, fall weather (yes, even in Florida).  Ours is a whole day affair with people stopping by at different points in the meal, card games at the kitchen table later followed by a second session of eating in the evening.

Our table is a complete mash-up!  A humungous turkey filled with my mom’s famous stuffing that my dad carves to perfection, a plethora of South Asian, African and other international dishes to complement, one definite chocolate dessert as well as everything else under the sun.  Thanksgiving isn’t too far away, and I’m inspired by my table to bring dishes to you that you might want to try for your own Thanksgiving.  This gives you ample time to do a trial run and see what you like.

My husband’s family always does the most delicious macaroni pie, a staple dish from Trinidad.  It’s a delectably spicy mac and cheese that is baked and served casserole-style.  It’s great because it can be assembled ahead of time if you are going over to someone else’s house.

Macaroni pie is like a blank slate that you can totally personalize.  Traditionally, this pie uses full-on spaghetti, but I personally prefer penne because it’s easy to eat, and I love when the center fills with the creamy sauce.  I also use a half of a habanero pepper here, but feel free to use as much or as little as your heat tolerance permits – other peppers would work well here too.  I’ve seen macaroni pie made with a bunch of different cheeses; I’m partial to gruyere because it’s nutty and works really well with the spices.  Again, you can use whatever grated cheese is your preference.  The herbs really boost the flavor, and I love the crunchy breadcrumb topping.  This is the perfect side dish, truly.  Creamy, cheesy, crunchy with a bit of a kick.  Enjoy!

Ingredients

Serves 6 to 8 (yields 1 3 quart baking dish)

olive oil or butter

1 yellow onion, finely diced

½ habanero pepper, seeded and ribbed, minced

3 garlic cloves, minced

1 stick unsalted butter

½ cup all-purpose flour

1 quart milk

½ tsp powdered mustard

1 tsp paprika

½ tsp white pepper

½ tsp black pepper

2 tsps salt

2 ½ cups grated gruyère

2 eggs

1 lb pasta (I used penne but anything you like)

1 tbsp + 1 tsp fresh chives, finely chopped

1 ½ tsps fresh thyme, finely chopped

¾ cup breadcrumbs

Procedure

Preheat oven to 350° F.

Heat a medium skillet over medium-low heat.  Add olive oil, and, when hot, add onion and pepper.  You want the onions to be pretty finely diced, so they will spread easily throughout the dish and cook quickly.  Cook for 3 to 5 minutes until the onions are translucent.  Add garlic and cook for 30 seconds or so until fragrant.  Remove from heat and cool in a bowl.

In a sauté pan over medium heat, melt butter.  Add flour all at once and whisk vigorously to avoid lumps.  Cook for 2 to 3 minutes.  You just want to remove the raw taste.  Add milk and spices and continue to whisk to prevent lumps (remember to get the corners!).  Once the mixture starts to bubble, reduce heat to low and cook for 8 to 10 minutes whisking often.  You want this to simmer gently while it’s thickening.  Remove from heat.

To the onion mixture in the bowl, add 2 cups of the grated cheese as well as the eggs.  Add a ladle full of the béchamel (milk mixture) and stir.  Continue to add ladlefuls until the egg mixture is up to temperature with the béchamel.  Add everything back to the béchamel in the sauté pan and stir to combine thoroughly and insure cheese is completely melted.

Add pasta to boiling, heavily salted water and cook until it’s a bit underdone.  It depends on what type of pasta you are using.  I used penne and cooked it for about 9 or 10 minutes.  It’s going to continue cooking in the oven.  Drain pasta and add to the béchamel/cheese mixture.  Add 1 tablespoon of the chopped chives and 1 teaspoon of the chopped thyme and combine thoroughly.  Pour into a heavily greased 3 quart baking dish.

In a bowl, combine remaining herbs, ½ cup of cheese, and breadcrumbs.  Sprinkle on top of macaroni and either dot with butter or drizzle with olive oil.  Bake for 35 minutes until top is browned and bubbly.

tags: macaroni pie, trini-style cooking, comfort food
categories: side dishes, recipes, all-6, vegetarian-1
Wednesday 10.13.10
Posted by Aliya LeeKong
 

Sweet Apple Couscous

View fullsize couscous-pic1-500x333.jpg
View fullsize couscous-pic2-500x333.jpg
View fullsize couscous-pic3-500x333.jpg
View fullsize couscous-pic4-500x333.jpg

Sweet Apple Couscous

I sort of jumped the gun and went apple picking this past weekend.  I couldn’t help myself.  I’m a sucker for fall, the first cool change of temperature and all the apple picking, pumpkin patch wandering, and wine-tasting (I threw that in there…).  It’s a bit early in the season, so where I usually come back with several different varieties I ended up with who-knows-how-many pounds of Honeycrisps.  They are literally overflowing in my kitchen, so I’m pressed to find ways to use them up…Luckily, they are delicious, the perfect balance of sweet and tart, and hold up well to cooking.

Couscous, while a North African staple, has truly become popularized and is found throughout parts of France, Spain, Portugal, Italy, Eastern Europe, and across the Middle East.  Here, in the States, I’ve seen it creep onto dinner tables because of its incredible versatility and high nutritional content compared to rice and pasta.  North African cooking, particularly Moroccan, is full of sweet and savoury dishes – with spices like cardamom or cinnamon bridging the gap.  So couscous as a sweet side dish or a dessert does exist, though I surely haven’t seen any Berber recipes with apples…

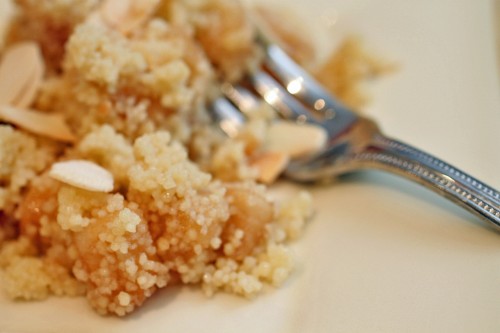
For this dish, I was inspired by (obviously) the mass of apples in my kitchen, the sweet couscous recipes of North Africa involving dried fruits and nuts, and even the rice puddings of American and South Asian cultures (though this has no cream or milk).  This dish is extraordinarily simple, healthy and delicious.  It’s basically cooking a warm, buttery apple pie filling, folding it in to light, fluffy, sweetened couscous, and topping it with nutty, crunchy thin almond slices.  The textures are beautiful and who can resist the combination of apples and cinnamon.  A great fall dish… enjoy!

Ingredients

Serves 4 to 6

2-3 tbsps butter

5 cups apples, peeled, cored, and cut into a small/medium dice

½ cup brown sugar

¾ tsp cinnamon

¼ tsp nutmeg

¼ tsp salt

½ tsp vanilla extract

2 cups couscous*

2 cups water

3 tbsps butter

1/3 cup sugar

½ tsp salt

½ cup sliced almonds, toasted

Procedure

Place a skillet on the stove over medium heat and melt the butter.  When the foam subsides, add the diced apples and stir to coat.  Turn temperature slightly down and cook on medium-low heat for 10 minutes, stirring every few minutes to make sure the apples evenly cook.  Add brown sugar, cinnamon, nutmeg, salt, and vanilla to the apples and stir to coat.  Cook for another 5 minutes.  The apples should be soft but still hold their shape (not complete mush).

In a casserole dish, spread couscous out to an even layer.  Cooking it in this type of dish will increase surface area and keep the resulting texture light and fluffy.  In a saucepan, bring water, butter, sugar and salt to a boil.  Pour over couscous, stir briefly with a fork, cover tightly with plastic wrap, and let sit 5 minutes.  After the 5 minutes, remove the plastic wrap and fluff couscous with a fork – the butter should keep the grains separate and prevent any clumping.

In the same dish or another serving bowl, mix together the couscous with the apple mixture and top with the toasted sliced almonds.  Serve warm.

*I used the typical, plain, non-whole wheat, pre-steamed variety from the grocery store.  Be careful not to use the tri-color type, which has spinach and tomato flavoring, or Israeli couscous, which is larger and requires a longer cooking time.

tags: couscous, sweet couscous, apple couscous, recipes for fall, apple recipes
categories: all-6, desserts-1, side dishes, vegetarian, recipes, breakfast
Wednesday 09.22.10
Posted by Aliya LeeKong
 
Newer / Older