X

Sign up to receive exclusive recipes, tips, updates and other goodies from Aliya!

  • Home
  • Blog
    • All
    • Recipes
    • Spices + Ingredients
    • Lifestyle, etc.
    • Travel
  • The Cookbook
  • The App
  • Media
    • All Media
    • Video
  • About
  • Passions
Aliya LeeKong
  • Home
  • Blog
    • All
    • Recipes
    • Spices + Ingredients
    • Lifestyle, etc.
    • Travel
  • The Cookbook
  • The App
  • Media
    • All Media
    • Video
  • About
  • Passions

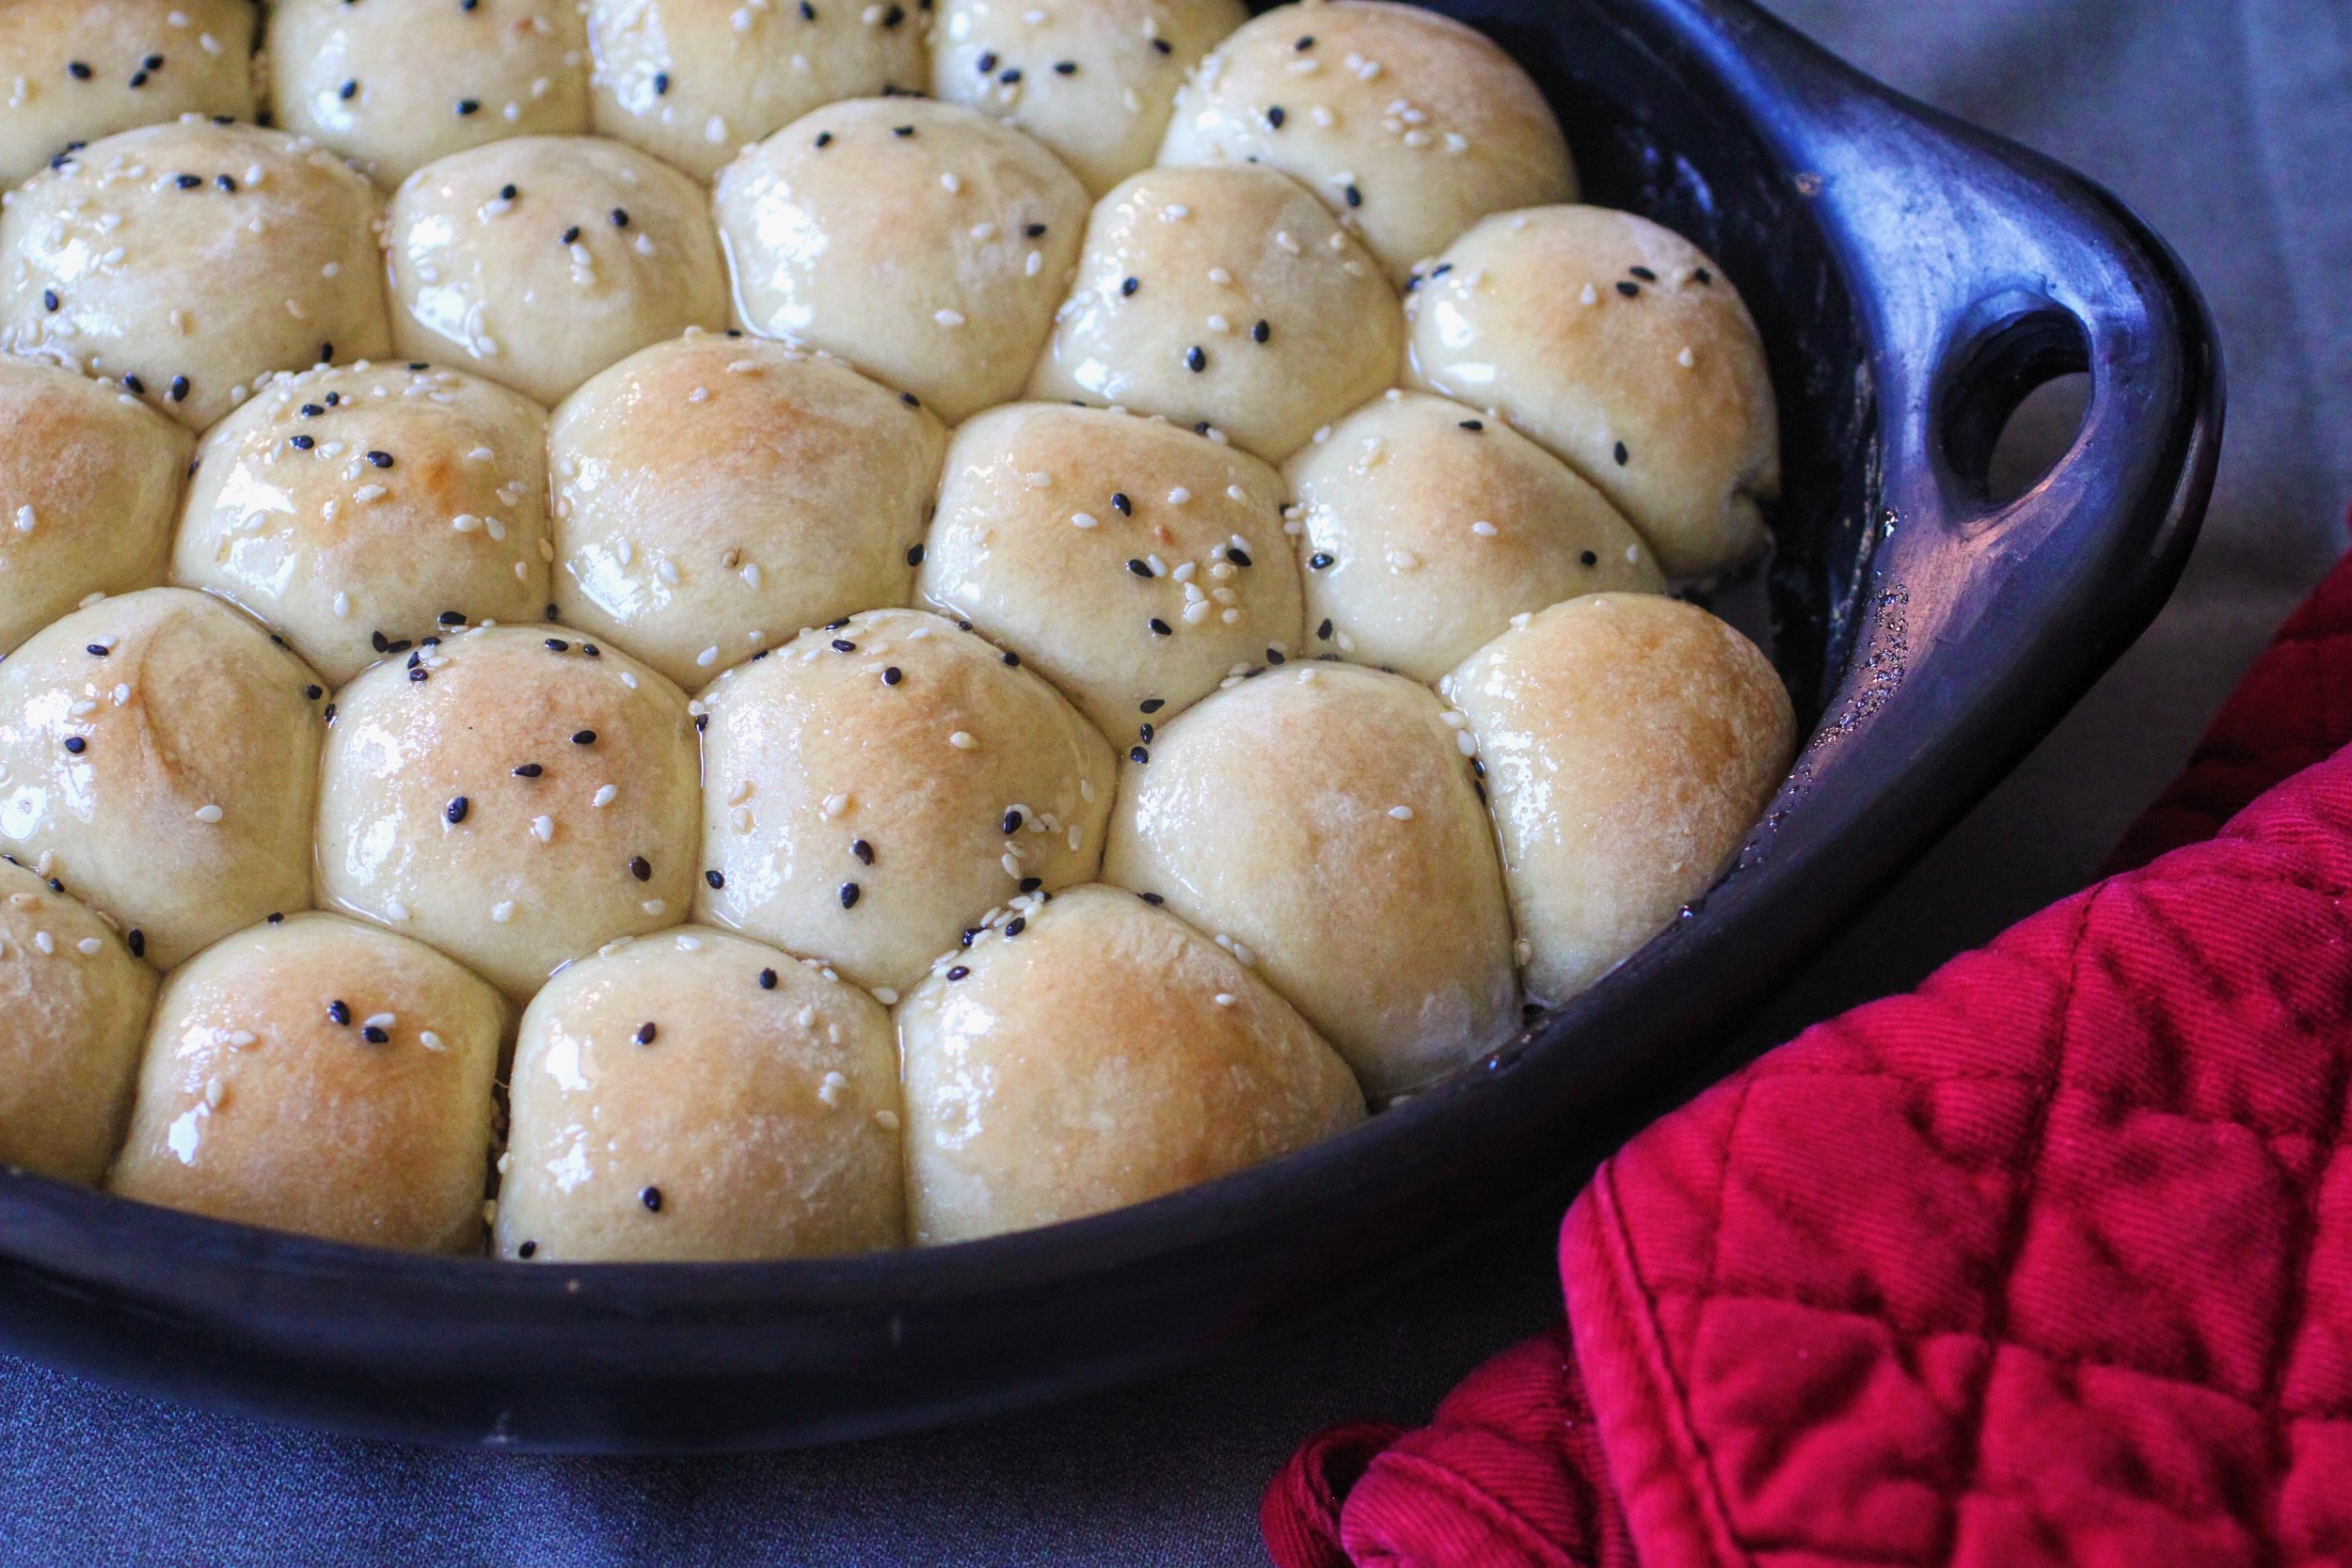
Yemen Honeycomb Bread (Khaliat Nahal)

View fullsize Yemeni honeycomb bread.jpeg
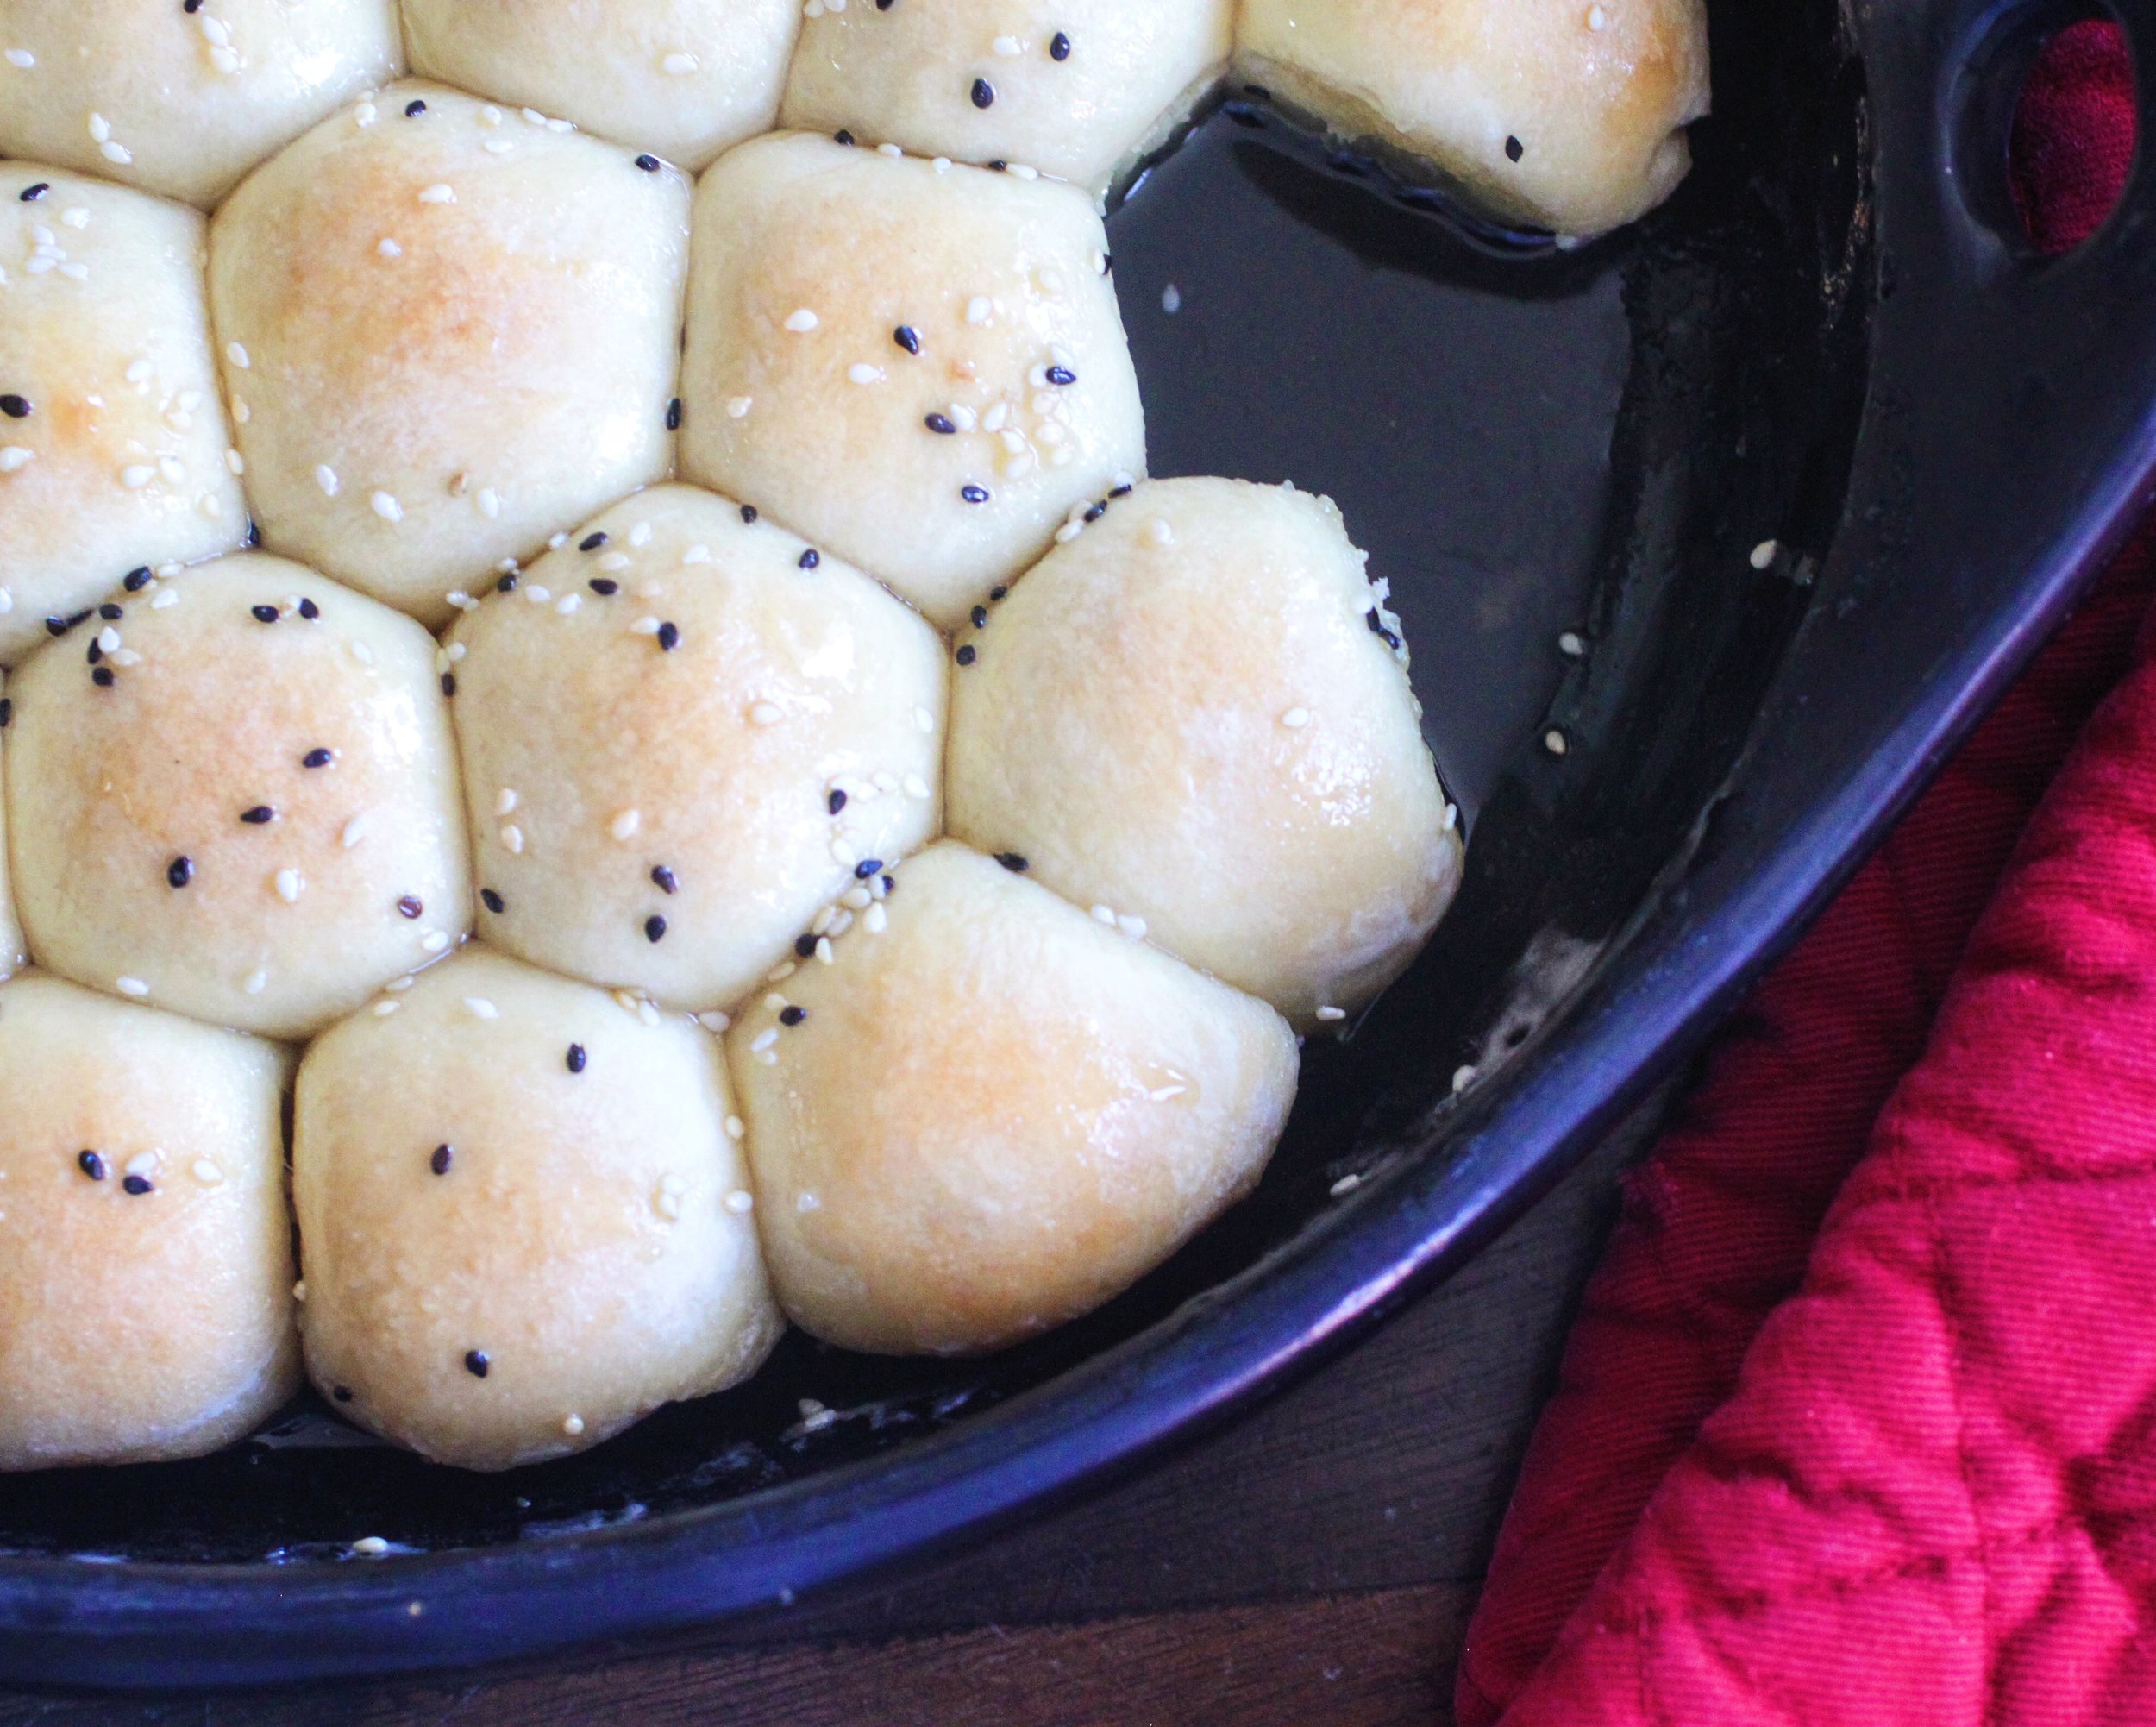
View fullsize File Mar 15, 7 37 15 PM.jpeg

YEMEN HONEYCOMB BREAD (KHALIAT NAHAL)

For the last few months, I've been feeling a bit overwhelmed by the political climate and a tenor of hate that's been seeping into conversations, news, social media, everywhere.  It feels like the floodgates have opened, and bigotry has been given a safe space to be expressed. 

A bit heavy, I know, but I can't deny how I've been feeling.

Though for sure, everyone is welcome at my table (it's my go to hashtag :) and that's plain to see in all of the recipes and stories I have here on my blog, as of late, I’ve been cooking food from the (now) 6 banned Muslim countries.  Some dishes are as familiar as an old friend; others are a tentative handshake with someone new.  From Irani Javaher Polow, a jeweled rice which comingles in my memory with Pakistani rice dishes from my childhood, to Yemeni Khaliat Nahal, honeycomb bread rolls filled with cheese and glazed with a sweet, orange blossom-scented syrup (recipe here!), each dish is a bit of resistance.  I’m doing it in part to raise awareness, but it's truly my way through: my personal means of processing this concerted exclusion. Of my parents.  Of me.  Of my daughter. Of so many others.

Ingredients

Yields 32 rolls

For the bread:

¼ cup lukewarm water

1 (¾) ounce packet yeast (active dry or instant)

¾ cup milk

7 tablespoons butter, softened, divided

¼ cup sugar

2 teaspoons salt

1 egg, beaten

3 ¾ to 4 cups all purpose flour

1 (8 oz) package of cream cheese, cut into 32 squares

1 tablespoon black and white sesame seeds, for garnish

For the glaze:

1/3 cup water

1 cup sugar

1 tablespoon honey

1 tablespoon orange blossom water

For the rolls: I make this recipe in a stand mixer, but you can easily do this by hand.  Start with the lukewarm water in the bowl of the stand mixer and sprinkle the packet of yeast over.  Mix gently to combine and let sit 5 minutes or so while you prepare the other ingredients.

In a medium pot, bring the milk up to a simmer and add 5 tablespoons of the butter, the sugar and salt.  Simmer for a minute, just until the butter melts and remove from the heat.  This should not be scalding, so let it cool for a bit before adding to the mixture.

Add the egg and 3 ¾ cups of flour to the yeast mixture and mix together with a fork.  Slowly pour in the milk mixture, using the fork to make a shaggy dough.  Using the dough hook attachment (or your hands), knead for about 3-4 minutes.  The dough should be soft and a bit tacky but should NOT stick to your hands.  If it's sticky, keep adding flour in tablespoon increments until you have a non-sticky consistency.  When you pull up the dough hook, the dough should slide right off.

Grease a 12 inch pie pan or cast iron skillet.  Divide the dough into 32 even-sized pieces. Flatten each piece and place a cream cheese square in the middle.  Form in to ball and place in the greased pan.  Once all the balls have been rolled,  cover with a kitchen towel and let rise for 1 hour.  Preheat oven to 375˚ F.

After the rise, brush the rolls generously with the remaining 2 tablespoons of melted butter, sprinkle with sesame seeds, and bake for 25 to 30 minutes.

For the glaze: Add the water and sugar to a saucepan and bring to a boil over medium-heat (until the sugar has dissolved).  Remove from the heat and whisk in the honey and orange blossom water.  Let cool while the rolls are baking.

Once the rolls are done, pour the glaze over the rolls while they are hot.  Enjoy!

tags: yemenite recipes, yemen recipes, yemen honeycomb bread, khaliat nahal
categories: appetizers 1, blog, breads & cakes, breakfast-1, desserts, recipes, traditions, all 5
Friday 03.17.17
Posted by Aliya LeeKong
 

The Festival of Lights

THE FESTIVAL OF LIGHTS

This year, Christmas and Hanukkah land on the same day, and this has me thinking about lots of shared traditions and stories....and, of course, dessert!  If you have ever had the pleasure of enjoying a traditional Jewish meal on one of their many holidays, you understand the connection.  There’s nothing more extravagant and plentiful than a homemade Jewish feast and just when you think you can’t eat any more after dinner, the table gets cleared and rows and rows of sweet treats are placed in front of you!  From rugelach (my daughter's fave) to chocolate-covered matzo to coconut macaroons, it’s truly amazing for a dessert lover. 

For Hanukkah, the main dessert is sufganiyot, which is effectively a cultural jelly doughnut!  For the Festival of Lights, sufganiyot symbolizes the burning lamps in the ancient holy temple in Jerusalem.  Below is a fantastic recipe for these treats as well as a few others to round out the holiday table.  Enjoy and a very happy holiday season to you all!


STRAWBERRY SUFGANIYOT

Photo: Bon Appetit


THE BEST RUGELACH!

Photo: The Kitchn


BETTER CHOCOLATE BABKA

Photo: Smitten Kitchen


BLACK SESAME DONUTS WITH DATE MOLASSES


BLACK AND WHITE COOKIES

Photo: Chai & Home


COCONUT MACAROONS

Photo: Food & Wine

tags: hanukkah dessert recipes, babka recipe, rugelach recipe, how to make rugelach, sufganiyot recipe
categories: all 4, blog, breads & cakes, desserts, holiday, traditions
Wednesday 12.21.16
Posted by Aliya LeeKong
 

Rose-Scented Falooda

View fullsize falooda3.jpg
View fullsize falooda2.jpg
View fullsize falooda1.jpg

ROSE-SCENTED FALOODA

This weekend kicked off the start of Eid Al Adha (or Feast of Sacrifice).  For those that are unfamiliar, it's the second of the two Muslim holy holidays and is considered the most holy, the other being Eid Al-Fitr, celebrating the end of Ramadan.

Although this holiday is considered the "Salty Eid" with savoury dishes being the mainstay of the celebration, it made me think about a sweet drink I grew up having at the sweet shops when I travelled.  Falooda is a rose-scented, sweet milk that is flecked with sweet basil seeds (tukmaria), a cornstarch vermicelli and ice cream.  It's such a distinct taste memory, an Indo-Pakistani bubble milk tea of sorts for a reference point, and was always a treat. 

I thought it would be fun to recreate and also do it a bit more naturally (to give to my little one!).  I used a rice vermicelli because falooda sev, the traditional cornstarch noodle, was too hard to find.  In lieu of a pre-fab, pre-sweeted rose syrup, I made my own to control for sweetness, but, by all means, it tastes great using either.  Finally, I used a touch of kewra essence because that flavor is part of my childhood, but it's totally optional (and also not the easiest to find).

Basil seeds, by the way, are very similar to chia seeds.  When you soak them, they swell and become gelatinous.  Like chia, they are considered a superfood, but, theoretically, you could sub in chia if they are too tough to find. 

Serves 4

2 teaspoons basil seeds

1/3 cup white or brown rice vermicelli, broken into 1- to 2-inch pieces

2 cups milk (whole, skim, almond, coconut)

3 tablespoons rose syrup*

1 1/2 tablespoons kewra essence (optional)

4 medium scoops ice cream (vanilla, honey, pistachio, or any flavor you think fits here)

In a small bowl, cover the basil seeds with water and let sit 5 to 10 minutes.  They will swell up, so you may need to add a bit more water.  Strain.

Cook the vermicelli per the package instructions - usually about 3 minutes in boiling (unsalted!) water.  Strain and transfer to an ice bath (water and ice) to cool down immediately and stop cooking.  Strain once cooled.

To the milk, stir in the rose syrup and kewra essence, if using.

Divide the basil seeds and vermicelli between 4 glasses.  Top with the rose milk and finish with a scoop of ice cream.  Serve immediately with a straw and a spoon!


*For the rose syrup, in a medium pot, bring 1 1/2 cups water, 1 cup dried rose petals and 1 cup white sugar (if using a natural brown sugar like palm or coconut, change this to 3/4 cup) up to a boil.  Remove from the heat, cover, and let steep until it cools to room temperature.  Strain, using the back of the spoon to press through as much of the liquid (and flavor) from the rose petals as possible.  Add a few tablespoons of rose water to intensify the flavor if need be - it all depends on the strength of the rose petals you're using.

tags: falooda recipe, natural falooda, kewra, rosewater, rose syrup recipe, how to make rose simple syrup, eid foods
categories: all 4, desserts, drinks & cocktails, holiday, quick & easy, recipes, traditions
Wednesday 09.14.16
Posted by Aliya LeeKong
 

Peak Berry Season at the Market

PEAK BERRY SEASON AT THE MARKET

If you can ignore the sweltering heat, this is the best time of year at the farmers' market.  Why, might you ask?  Because it is the only time that all the berries overlap each other in the season, not to mention all of the heirloom tomatoes, stone fruit and the beginning of chili pepper season.  I went to my local greenmarket over the weekend (it was sooo hot out!) and was surprised to see strawberries still available - that doesn’t happen often!  But, always, there is a short window where blueberries, blackberries, raspberries and cherries come together.  This is the time that I make a mad rush to get a mixed berry jam going and, of course, possibly a new tart recipe.  

It’s also the time that I start to think about preserving, whether it be canning tomato sauce, pickling cherry peppers, freezing the berries, or creating syrups or shrubs to enjoy in a cocktail later!   Below are some recipes I may be bringing back for this limited berry season!  Enjoy!


SUGAR PLUM & CURRANT TORTE


MY BREAKFAST CLAFOUTIS


BLUEBERRY, RAW HONEY & COCONUT FOOL


BLUEBERRY-HIBISCUS SMASH


tags: dessert recipes, berry recipes, strawberry recipes, cherry clafouti
categories: all 4, blog, breads & cakes, breakfast-1, desserts
Wednesday 08.17.16
Posted by Aliya LeeKong
 

Japanese-Inspired 5-Ingredient Cheesecake

View fullsize cheesecake 3.jpg
View fullsize cheesecake2.jpg
View fullsize cheesecake1.jpg

JAPANESE-INSPIRED 5-INGREDIENT CHEESECAKE

The fact that National Cheesecake Day falls in the summertime is a bit odd to me.  That thick, tangy lusciousness somehow belongs during a time when you're not trying to eat light (and kill it in a bathing suit...).  BUT I recently tried a Japanese cheesecake, which is also called a Cotton cheesecake (because of how light and fluffy it is).  Think if an angel food cake and a cheesecake had a baby....Turns out, this crustless, spongy creation is the perfect summer dessert.

I set out to create a simplified version of it because summer desserts should be a bit easy.  I wanted a canvas, a simple cake, to showcase seasonal ingredients as its topping.  This cake is 5 ingredients, and the hardest step is just whipping the egg whites to stiff peaks and folding into the batter.  Other than that, foolproof!  I used yuzu juice as the acid in keeping with the Japanese theme and because it has a touch of salinity, which I looooove, but lemon juice or even key lime juice would be a great substitute.

When I’m indecisive about a topping for my cheesecake, my favorite go to is a whipped sour cream topping.  The tangy tartness of the sour cream with the bite of the creamy, sweet cheesecake is one of the more surprising taste combinations.  Who would have thought sour cream with cheesecake would be a thing!?  And it’s super simple to make.  For a more basic recipe I use sour cream, confectioner’s sugar and vanilla extract.  Just throw it all into the Kitchenaid and whip 'til smooth or whisk in a bowl if you don’t like lugging out your stand mixer. 

There were so many blueberries at my Saturday's farmers' market, so I thought I would test out a blueberry sauce with my cheesecake.  This recipe combines the blueberries with one of my favorite herbs, lemon verbena.  It’s a super simple sauce and starts off like you would a jam.  Instead of letting it boil down til thick, you simply take off the heat and let cool.  I like to steep the lemon verbena in boiling water to really bring out the flavor and then use the water when making the sauce.  In a sauce pan, mix the blueberries, corn starch, and sugar until the blueberries start to release their juices.  Gradually stir in the lemon verbena water and bring to a simmer.  Let cook for 5-10 minutes until desired consistency and some of the berries start to burst.  Turn off heat and let cool to room temperature.

Here's the 5-ingredient cheesecake recipe - enjoy!

Yields (1) 9-inch cake

1 can sweetened condensed milk
8 ounces cream cheese, room temp
6 eggs, room temp and separated
2 ½ tablespoons cornstarch
1 tablespoon yuzu, lemon or key lime juice

Preheat the oven to 350° F.

In a large bowl, whisk together condensed milk and cream cheese.  Fold in yolks, cornstarch and yuzu/lemon juice.

In a separate bowl, whip egg whites to stiff peaks.  Add a little bit of the egg whites to the cream cheese mixture to lighten and then fold in the rest in 3 increments.  Transfer to a greased, parchment-lined 9-inch cake tin or springform pan.  Place in a roasting pan and pour boiling water in the pan to halfway up the cake tin (if using a springform, make sure to wrap in foil all over to keep the water from seeping in.

Bake for 40 minutes.  Then, turn off the oven and leave the cheesecake in the oven for another 15 minutes.  Remove and let cool completely before refrigerating.  Refrigerate at least hours before serving.


tags: cheesecake recipes, japanese cheesecake, easy cheesecake recipe, cotton cheesecake, desserts
categories: all 4, desserts, holiday, quick & easy, recipes, traditions
Wednesday 07.27.16
Posted by Aliya LeeKong
 

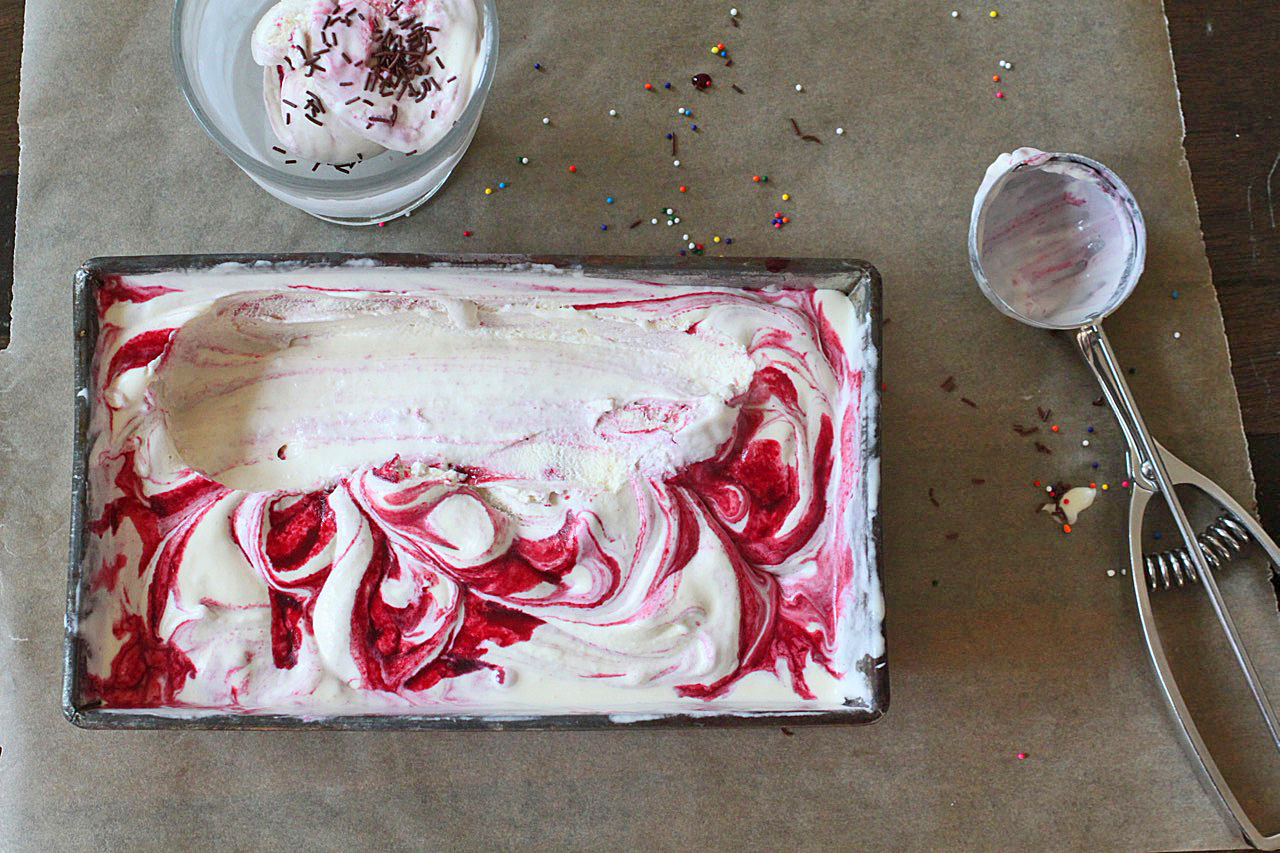
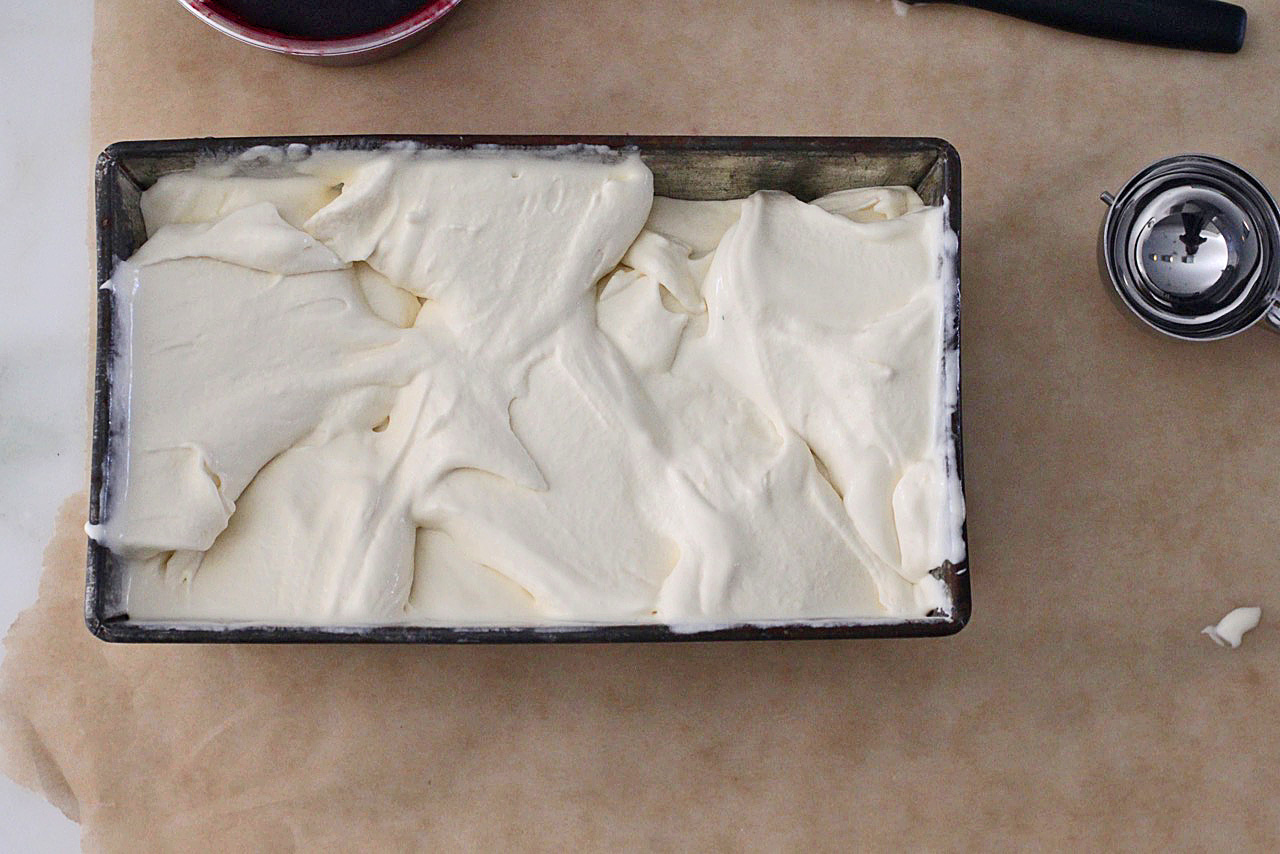
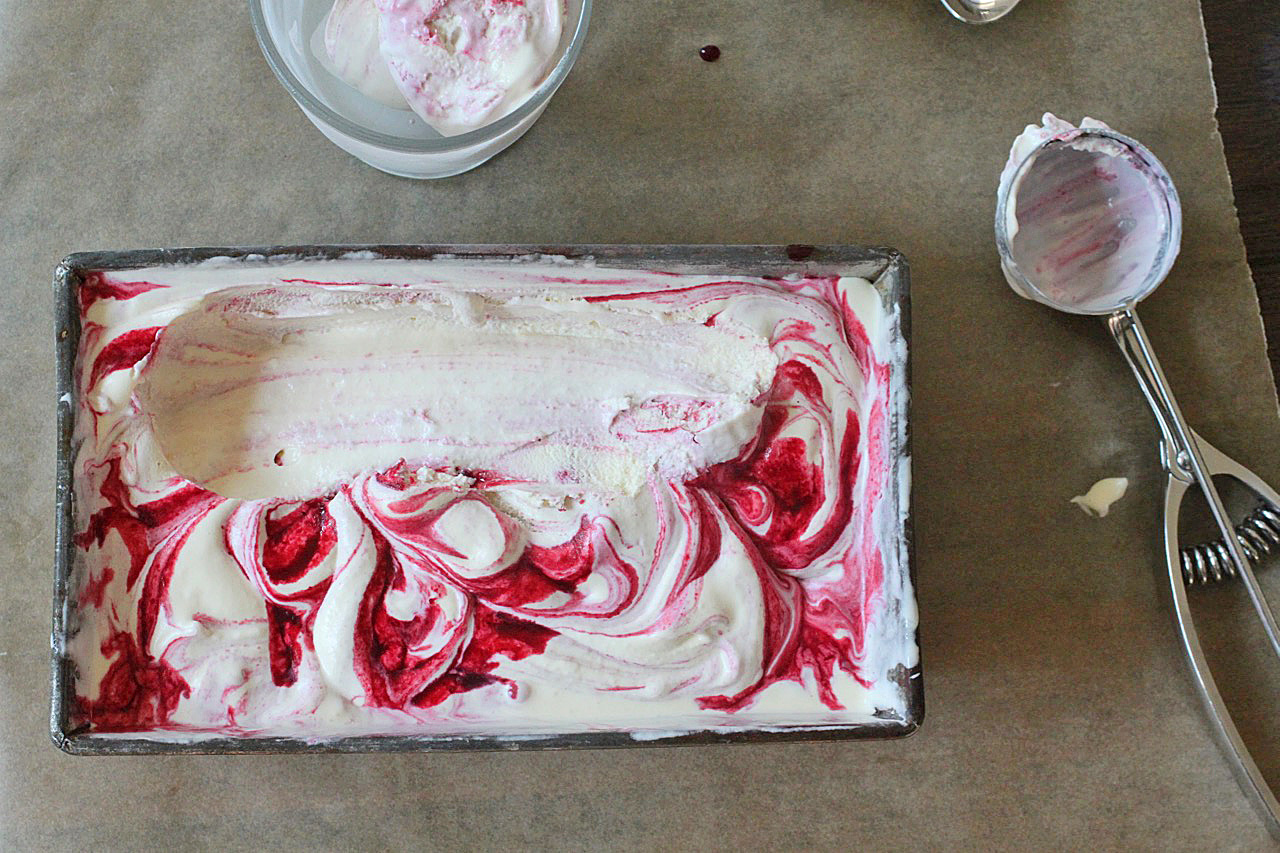
Honey Frozen Custard with Cherry-Currant Swirl

ice cream5.jpg
ice cream1.jpg
ice cream2.jpg
ice cream3.jpg
ice cream4.jpg

HONEY FROZEN CUSTARD WITH CHERRY-CURRANT SWIRL

As far as desserts go, I'd be perfectly content to eat ice cream all summer long (and maybe the occasional fruit tart or two)!  It's a past time for my daughter and I to take the walk over to Fort Grace
 in our neighborhood, grab a cone or two (likely with sprinkles) and leisurely stroll back home. 

But I have to admit, as time has gone on and, you know, being a mother and all, I get more and more focused on sourcing my ingredients and trying to make as many treats from scratch as I can.  With the help of a good ice cream maker or an ice cream attachment to your stand mixer, making your own ice cream is really not that tough AND you can control your ingredients - whether for health reasons or simply to tailor to your own tastes.  Not to mention, it's badass.

This is really a frozen custard, not quite ice cream, which is to say it has more yolks than tradition dictates and is a bit higher on the cream side.  The result: luscious, whipped, soft serve-style ice cream that keeps its fluffiness even after freezing for some time.  I used (raw / local) honey to sweeten here, in lieu of sugar, which adds to that silky texture as well.  You could easily use the base to make so many different flavors - I sometimes add cinnamon and toasted pecans to it for a totally different take.

With a glut of cherries and both red and black currants in my house, this sauce was an easy and rewarding way to use them all up!  I didn't even pit the cherries - just threw them all in a pot, knowing I was going to strain away the solids at the end.  If you have pitted cherries, you could easily just blend this mixture up in a good blender for a bit of texture instead of straining, but, remember, you'll probably have a bit more than the recipe calls for.

I love the combination of red fruits and cream - that creamsicle-like flavor, and this tastes AH-MAZING with a bit of chocolate, whether a sauce, some dark chocolate pieces or sprinkles.   Enjoy!

Ingredients

Yields about 2 pints

Frozen Custard Base:

1 cup milk

2 cups heavy cream

½ cup + 2 tablespoons honey

½ teaspoon vanilla extract

1/8 teaspoon salt

6 large egg yolks

Cherry-Currant Swirl:

1 cup red and/or black currants

1 cup cherries, stems removed (pitted or not, doesn’t matter)

2 tablespoons honey

1 tablespoon sherry vinegar

3 tablespoons water

a pinch of salt

For the ice cream base:  In a medium saucepan, bring milk, heavy cream, honey, vanilla and salt up to a simmer and remove from the heat.  Whisk the egg yolks in a heatproof mixing bowl.  Temper the yolks by adding a little of the milk mixture to them and beating in between until a third of the milk mixture has been added.  Return the milk-yolk mixture to the saucepan and place back over low heat.  Cook, stirring frequently, until the mixture thickens and coats the back of a spoon.  Strain and cool completely in the fridge (4 to 8 hours).

For the cherry-currant swirl:  Heat the currants and cherries with the honey, vinegar, water and salt over medium heat.  Simmer covered for 5 minutes until the fruit breaks down and then simmer uncovered another 4 to 5 minutes until the juice thickens.  Strain through a fine mesh strainer, pressing against the solids until all of the juice is through.  Cool completely (and it will continue to thicken as it cools) in the fridge.

To finish: Pour ice cream base into an ice cream maker or ice cream stand mixer attachment and process according to the manufacturer’s directions.  It usually takes about 25 to 30 minutes.  Transfer half of the ice cream into a container.  Pour half of the currant-cherry mixture on top and use a knife or small offset spatula to form swirls.  Repeat with the other half of the ice cream and sauce on top.

Serve immediately soft serve-style or freeze to firm it up a bit (will still be fluffy and soft) with or without sprinkles!

tags: ice cream recipe, frozen custard recipe, how to make ice cream, honey ice cream, swirl ice cream recipe
categories: all 4, blog, desserts, recipes
Wednesday 07.13.16
Posted by Aliya LeeKong
 

Summer Fruit Tart Addiction

SUMMER FRUIT TART ADDICTION

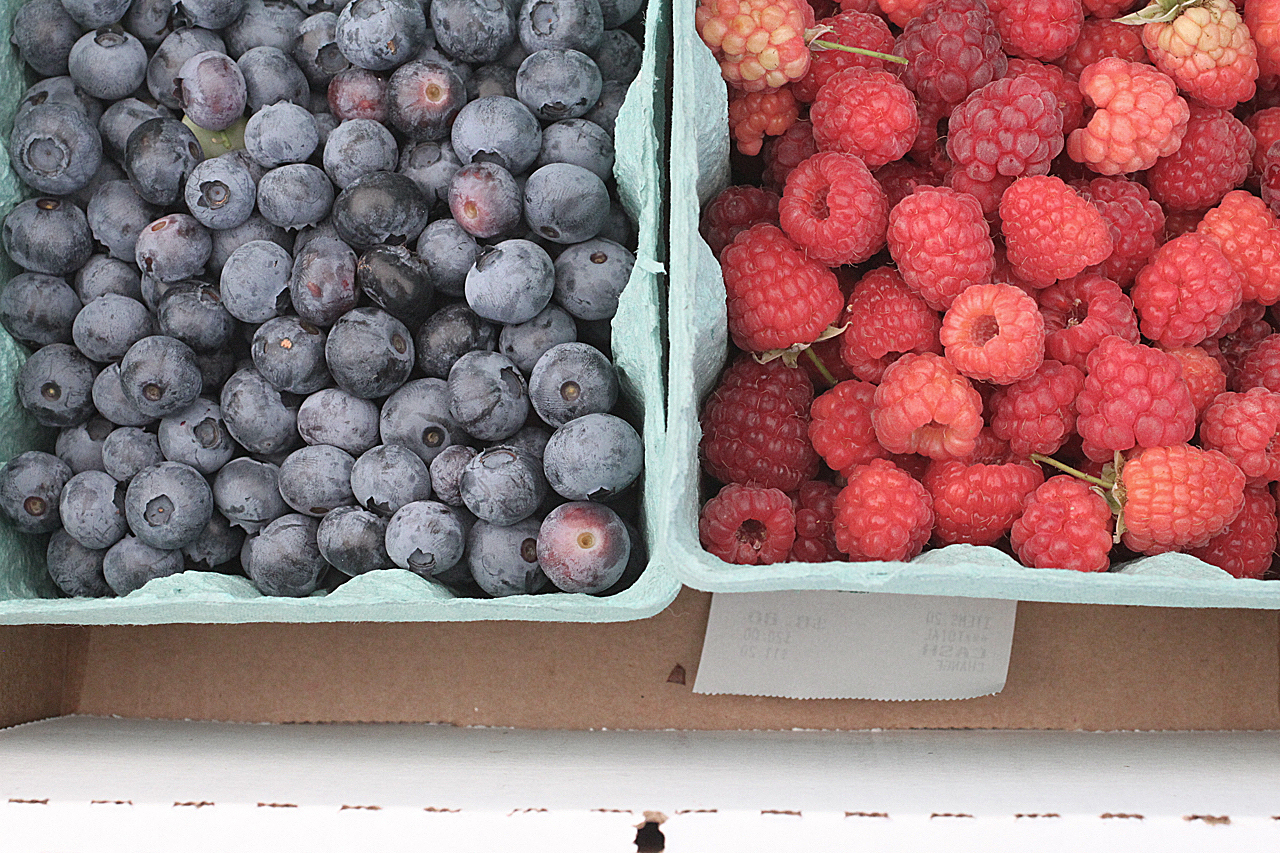
Honestly, summer is my favorite time of year...I love when the weather turns warm and days (and daylight!) so long; attitudes feel more carefree and New York City comes alive.  The farmer's markets are always flush with fruits and vegetables, and, this weekend, it was overflowing with all sorts of berries (raspberries, blueberries, gooseberries, cherries, currants & strawberries). To me, this just signifies the official start of summer, and, if you follow my IG you'll know this to be true, I invariably have some form of a fruit tart on my counter throughout this time.  I wanted to share with you some go-to's - easy options so you can freestyle your own tarts this summer.


CRUSTS

I have 3 go-to crusts that I use depending on my mood, if I plan to bake the filling and who I’m hosting! 

(1) I love a classic, homemade tart dough (recipe: here).  I keep mine a bit low on the sugar, so I can use it for sweet and savoury crusts.  Doubling the recipe is key and allows you to freeze some to have for later.   This is a great dough to use for both a filling you have to cook or one you don't have to cook.

(2) Of course, already-made and frozen puff pastry is another way to go.  Who doesn’t love that flakey, buttery crust? Mixed with a layer of pastry cream and fresh fruit....This is what I use for my South African Milk Tart (pictured below).  I like to do an initial blind-bake and then fill - this weights it down so it doesn't puff too much.

(3) My third is for my gluten-free friends - a super easy, gluten-free pecan crust. 

You take 1 ½ cups raw pecans and pulse in a food processor until chopped.  Throw in 2 tablespoons unsalted, melted butter, 1 tablespoon honey,  ¼ teaspoon salt, ½ teaspoon ground cinnamon, and 1 egg white and pulse until a fine meal.  It will be a bit wet.  Press into a tart shell and bake at 375° F for 15 minutes.  Done.


CUSTARD FILLING

(1) Baked custard - One of my favorite tarts is this South African Milk Tart.  The creaminess of the cooked custard filling with the berries on top……sooo good.  It's not too egg-y and has a hint of cinnamon.  I love that the beaten egg whites also lighten the custard.

(2) Stovetop custard - I also love to make a quick stovetop custard (or pastry cream) instead of the baked custard in the milk tart recipe.  All you need is some sugar, eggs yolks, corn starch, vanilla bean and milk!  Ok, so sometimes I substitute the milk for Champagne or a nice Prosecco….  The process is simple:

In a medium pot, simmer 2 cups milk with a vanilla bean cut in half and seeds scraped out in to milk and remove from the heat. 

Separately, bring a pot of water to boil for your double boiler. In a metal bowl, whisk 4 egg yolks with 1/3 cup sugar until the mixture is a nice pale yellow.  Add ¼ cup cornstarch and whisk away any lumps.  Slowly stir in the warmed milk mixture and fit the bowl over the boiling water (without letting it touch the water) and constantly stir until the consistency starts to thicken. 

Remove from heat and cover the top directly with plastic wrap and let come to room temp before using.  You can also whip some cream and fold into this pastry cream to make it lighter.

(3) No-cook cream filling - A final option is to make a no cook cream filling and keep the tart refrigerated.  This is a bit like a lightened panna cotta.  Bloom 1 teaspoon gelatin in 2 tablespoons cold water.  Whip 1 cup heavy cream to soft peaks with 2 tablespoons regular or coconut sugar (you can make this sweeter if you like. taste and adjust).  Add in 1 teaspoon vanilla and fold in 4 ounces of mascarpone cheese.  Quickly blast the gelatin-water mixture in the microwave for 5 seconds or so until it's melted and fold that into the cream mixture as well.  It sets up very quickly in the fridge - just make sure to use it in a completely cooled tart or it will melt away!


FILL AND ASSEMBLY

Unless you are baking your custard, the tart shells should be blind-baked and cooled before you assemble.

Now, in terms of what goes on top, this is the time for you to experiment and be creative.  Seriously, whatever is the sweetest and in season works, and experiment to see how you like to arrange your fruits.  I looove cape gooseberries, but apricots and strawberries pair so well together.  It will all go!

If you want some extra sheen, microwave a bit of apricot preserves and paint the fruit with it.  You can also just simply sift a bit of powdered sugar too - up to you....

Enjoy!


tags: summer fruits, how to make a fruit tart, summer fruit tart recipe
categories: all 4, blog, desserts, holiday, lifestyle-1, recipes
Wednesday 06.22.16
Posted by Aliya LeeKong
 

3-Ingredient Chocolate Truffles

View fullsize truff4.jpg
View fullsize truff1.jpg
View fullsize truff2.jpg
View fullsize truff3.jpg
View fullsize truff5.jpg

3-INGREDIENT CHOCOLATE TRUFFLES

With Valentine's Day just a few days away, chocolate is on the brain.  Nothing says “I love you” more than a double decker box of chocolates…but making your own chocolate truffles is way simpler than most people think (and who doesn't prefer a handmade gift?). 

This is a super simple, 3-ingredient recipe to get you started to make decadent, silky, chocolate truffles.  Then, if you want, you can tailor to your preferences.  I'm including options for flavorings to add to the base or leave the recipe as is and just coat the truffles in a different ways (think cocoa powder, crushed pistachios, shredded coconut, etc…).  Enjoy!

Yields approximately 2 dozen truffles

12 ounces dark, semisweet or milk chocolate chips, roughly chopped (1 bag)
3/4 cup heavy cream
1/4 tsp salt

Place the chopped chocolate in a large mixing bowl.  In a saucepan, bring the heavy cream and salt to a simmer, just enough to dissolve the salt and watch that it doesn't boil over.  Pour the cream over the chocolate and allow to sit for 5 minutes before stirring.  Stir until the chocolate has melted and the mixture is smooth (this is also the time to add any liquid ingredients for flavor).

Allow to cool at room temperature for an hour.  Using a teaspoon or a small cookie scoop, scoop the truffles onto parchment paper.  Place in the fridge for 10 to 15 minutes to firm up a bit.  Roll in the palm of your hands to get them perfect (but quickly or they will start to melt!).  Roll them in whatever toppings you like and enjoy!

Mix-ins: 1/2 teaspoon vanilla extract, 2 tablespoons liqueur (coffee, rum, Grand Marnier, kirsch), 1 tablespoon orange blossom water, 1 tablespoon espresso, 1 1/2 teaspoons peppermint extract

To Coat: cocoa powder (with or without cinnamon, cardamom, etc), sweetened or unsweetened shredded coconut, crushed nuts (hazelnuts, almonds, pistachios), sprinkles, flake sea salt (just a pinch on top!)


tags: Valentine's Day, Valentine's Day gift, what to give for Valentine's day, chocolate, chocolate recipes, chocolate desserts, chocolate truffles
categories: all 3, blog, desserts, holiday, lifestyle-1, quick & easy, recipes
Friday 02.12.16
Posted by Aliya LeeKong
 

Sugar Plum & Currant Torte

View fullsize plum1.jpg
View fullsize plum2.jpg
View fullsize plum3.jpg
View fullsize plum4.jpg

SUGAR PLUM & CURRANT TORTE

I am forever going on and on about the market at this time of year and how truly beautiful, bright and flavorful all of the fruit is, and this post is no exception!  I found some gorgeous sugar plums and tart currants and set off to bake on a Sunday - nothing too complicated, just a tad decadent, and delicious for days into the week.

What I ended up with is this torte, a true summer dessert (and sometimes breakfast!).  This is perfect for cake novices because the batter is just so easy.  It comes together in less than 10 minutes and is virtually fool-proof.

A few points: I happened to make this gluten-free, but if you only have all purpose flour on hand, go ahead and replace the flours with an equal amount of it; just drop down the baking powder to 1 teaspoon.  Also, I don't use a ton of sugar here, so the key is using super sweet plums to offset the tartness of the currants. Taste before baking!

Enjoy!

Ingredients

Serves 6 to 8

½ cup oat flour

½ cup brown rice flour

¼ cup almond flour

1 ½ teaspoons baking powder

pinch of salt

1 stick unsalted butter, room temperature

¾ cup coconut, palm, unrefined, or plain old white sugar

2 eggs, room temperature

10 sugar plums, halved and pitted

½ cup red currants

raw honey + cinnamon

Procedure

Preheat the oven to 350˚ F.

In a medium bowl, mix together the flours, baking powder and salt.

With a stand or hand mixer, cream the butter with the sugar.  To the sweet butter, add the eggs one at a time until incorporated.  With the mixer on low, add in the flour until just incorporated.

Transfer the batter to a greased 9-inch cake or pie tin.  Layer the plum halves (skin side up) and currants.  Brush the plums with a bit of raw honey and sprinkle cinnamon all over.

Bake for 40 to 45 minutes until a toothpick inserted comes out clean.  Cool completely before unmolding.

tags: plum torte recipe, sugar plums, torte recipe, how to make plum torte, desserts, plum dessert
categories: all 2, breads & cakes, breakfast, desserts
Tuesday 08.11.15
Posted by Aliya LeeKong
 

Berry Picking + Blueberry, Raw Honey & Coconut Fool

BERRY PICKING + BLUEBERRY, RAW HONEY & COCONUT FOOL

This past weekend, I drove out to Ochs Orchard an hour and a half outside NYC to pick some berries and, really, to take my little girl berry picking for the first time.  This is a gorgeous pick-your-own farm that had blueberries, raspberries and cherries that day (call for availability before going always!), and we had an incredible time.  What's super cute about this farm is that they have a donkey and goat that you can pet and feed and also a farm store with serious ice cream (and heavenly raw honey).  It's definitely worth the drive out and made for an exhausting day for my little one!

View fullsize coconut9.jpg
View fullsize coconut4.jpg
View fullsize coconut5.jpg
View fullsize coconut6.jpg
View fullsize coconut8.jpg
View fullsize coconut10.jpg

Coming home with a glut of berries means I've been messing around with recipes and preserving this week.  What I love is that they are so sweet, whatever I've made I use minimal sugar.  I wanted to make a non-dairy frozen dessert, so I decided to go the coconut route.  Did you realize you can whip coconut cream, the semi-solid, thick layer in coconut milk?  I did not!  and so I set off whipping coconut cream, cooking down the blueberries to concentrate the juices and folding them in with a bit of honey.  The result was a delicious blueberry, raw honey and coconut fool (a fool is an English dessert which usually has fruit folded into whipped cream or other custard).

I really loved it in it's chilled, custard-like state; all of the flavors really stood out that way - the creaminess of the coconut, the slightly tart and sweet, syrupy blueberries and the floral, raw honey.  I cooked the blueberries down with a bit of sherry vinegar and honey, and it really brought out all that signature blueberry flavor.  BUT I still wanted to see what happened if I froze it...and so I did.  It made for a delicious semifreddo though the blueberries and low sugar content made it a bit more icy than I prefer.  Verdict on the semifreddo: flavor on point, texture not the best.  So the recipe I'm sharing is for the fool.  Feel free to enjoy it however you want!

View fullsize coconut12.jpg
View fullsize coconut3.jpg
View fullsize coconut 13.jpg
View fullsize coconut11.jpg
View fullsize coconut2.jpg
View fullsize coconut1.jpg

Ingredients

Yields 1 9” x 5”  loaf pan

Blueberry mixture:

2 ¾ cups blueberries

2 tablespoons raw honey, plus more for drizzling

2 tablespoons sherry vinegar

3 tablespoons water

a pinch of salt

Fool base:

4 cans coconut milk, chilled in the fridge overnight

2 tablespoons confectioner’s sugar

1 teaspoon vanilla extract

1 teaspoon cinnamon

Procedure

A few things to do ahead of time:  (1) make sure to chill the coconut milk overnight in the fridge to solidify the coconut cream; and (2) chill the whipping bowl and whisk or whisk attachment in the fridge for a half hour or so before using (will help it whip up).

Heat blueberries with honey and vinegar over medium heat.  Simmer covered for 5 minutes until the blueberries break down and then simmer uncovered another 4 to 5 minutes until the juice thickens.  Cool completely (and it will continue to thicken as it cools).

Open the chilled cans of coconut milk and take out the top, solid layer of coconut cream only, leaving behind the water.  Whip the coconut cream in the chilled bowl with confectioner’s sugar, vanilla and cinnamon for 3 to 4 minutes using either a stand/hand mixer or straight arm strength. 

Layer half of the coconut mixture in the loaf pan.  Drizzle all over with raw honey and half of the blueberry mixture.  Top with the remaining whipped coconut cream and repeat. Take a butter knife and make swirls to incorporate the layers.  Chill for a minimum of 4 hours before serving. 

You can also freeze it if you want to go the semifreddo route!


tags: how to whip coconut milk, coconut whipped cream, coconut desserts, blueberry fool, blueberry desserts, raw honey dessert, coconut fool recipe, berry picking NYC
categories: all 2, desserts, lifestyle, quick & easy, recipes
Thursday 07.16.15
Posted by Aliya LeeKong
 

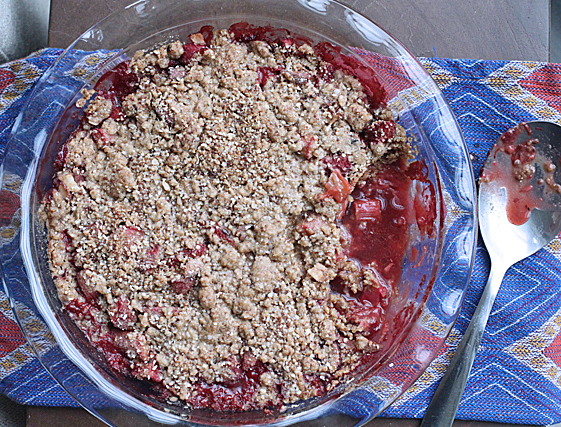
Strawberry Rhubarb Crumble with Ancient Grain Oatmeal + Coconut Sugar

View fullsize straw4.jpg
View fullsize straw1.jpg
View fullsize straw2.jpg
View fullsize straw3.jpg

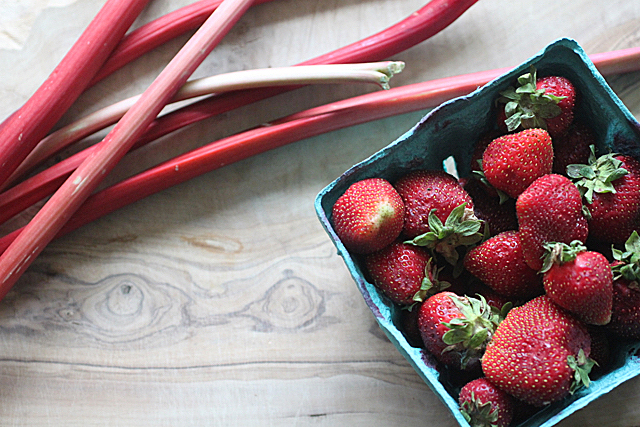
I have been slightly losing my mind over the strawberries that have just gotten to the market, and so I've been playing around with variations on crumbles.  I particularly love this one with rhubarb because strawberry and rhubarb are just so classic together, but, also, using peak season fruit means I can bake with a lot less sugar - the berries taste like candy! 

The filling gets an ingredient that you usually don't see in a crumble: sherry vinegar.  The vinegar really brightens and intensifies that berry flavor in a unique way.  I let the fruit marinate for a bit before topping and throwing into the oven.  And in lieu of an all purpose flour crumble topping, I use a bit of brown rice flour and an ancient grain oatmeal that has gluten-free oats, amaranth, and hemp amongst other ingredients.  When I set out to make this recipe, I actually wanted to create a breakfast crumble I could give my little girl, and this does double duty - for breakfast or a simple dessert.  I also used coconut sugar here - an unrefined sugar with a lot of antioxidants and lower glycemic effect; it's a bit sweeter than white sugar, so I used a lot less than other recipes you'll see out there.

Breakfast or not, this crumble is decadent - sweet ripe fruit with bits of sliced almonds topped with a buttery, crumb topping.  Full-bodied and deeply flavored - breakfast never tasted so good!

Enjoy!

Ingredients

Serves 6 to 8 / Yields (1) 9 1/2-inch pie dish

For the filling:

1 quart strawberries, hulled and halved (about 4 cups chopped)

5-6 stalks rhubarb (about a ½ lb), diced into ½ inch pieces

½ teaspoon vanilla extract

2 teaspoons (good quality) sherry vinegar

2 ½  tablespoons coconut sugar

2 tablespoons cornstarch

1/3 cup sliced almonds

For the crumb topping:

½ cup brown rice flour

½ cup ancient grain oatmeal (rolled oats work great here too)

1 teaspoon baking powder

¼ cup coconut sugar

½ teaspoon cinnamon

¼ tsp salt

7 tablespoons cold unsalted butter, cut into cubes (plus a bit more for greasing)

Procedure

Preheat the oven to 375° F.

In a medium bowl, mix together all of the filling ingredients.  Let marinate 10-15 minutes while preparing the topping.

In a food processor, add the flour, oatmeal, baking powder, sugar, cinnamon and salt.  Pulse until uniformly mixed.  Scatter the cold cubes of butter and pulse until a coarse meal forms.  Don't let it run for too long because the butter will warm up and start to clump.

Grease a 9 ½-inch pie dish with a bit of butter and place on a baking sheet (to catch any juicy overflow).  Add the strawberry-rhubarb mixture.  Top with the crumb topping and bake for 35 minutes until the fruit is bubbling and the crumble topping has browned up.

Serve warm as is for breakfast or with a bit of ice cream or whipped cream for dessert.


tags: gluten free, gluten free baking, crumble recipe, crisp, strawberry rhubarb crumble, strawberry rhubarb crisp, strawberry pie, desserts
categories: all 2, breakfast, desserts
Tuesday 06.02.15
Posted by Aliya LeeKong
 

Butternut Squash & Apple Bread with Maple and Cardamom

View fullsize squash 1.jpg
View fullsize Squash 2.jpg
View fullsize squash 3.jpg
View fullsize squash 4.jpg

Butternut Squash & Apple Bread with Maple and Cardamom

I posted a photo of this on Instagram a few days back, and a number of people came back and asked for this recipe to bake for the holidays.  And here it is!  It’s a bit lighter than other fruit or vegetable breads (think: cake), and relies much more on butternut squash than apple for flavor.  That said, the great thing about this bread is that the squash doesn’t have to be precooked or pureed or anything before being added in.  Grating it up in a processor does all the work you need, and the squash cooks in the baking time.

I made this cake for my daughter, who hated squash (until now…hah!).  And for that reason, I changed out the flour using an “all purpose” mix of oat, brown rice, and almond flours.  Really, it isn’t so much about the gluten, though being gluten free is a benefit for some here.  It’s more about the fact that oats and brown rice and almonds have a lot more nutritional value than AP flour.  Same goes for the maple sugar, a sugar from the maple tree that has a flavor very close to the syrup.   Again, maple sugar has antioxidants and minerals not found in refined sugar.  It has a lower glycemic index, and I always use a lot less of it in recipes.

These are just my choices, but feel free to use all purpose flour here and substitute another sugar if you can’t find maple.  Enjoy!


Ingredients

Yields 1 8½” x 4¼” x 2¾” loaf pan

2 cups raw, peeled, and grated butternut squash

1 cup peeled, cored and grated apple

scant 1 cup maple sugar

1 cup oat flour

½ cup brown rice flour

½ cup almond flour

½ tsp salt

½ tsp cinnamon

½ tsp ground cardamom

½ tsp baking soda

2 tsps baking powder

¼ cup organic, unrefined coconut oil or ½ stick butter, room temperature

1 tsp vanilla extract

2 eggs, room temperature

Procedure

Preheat oven to 375˚ F.

Place grated squash and apple in a bowl along with 3 tablespoons of the maple sugar.   Stir to combine and let stand to macerate for 15 minutes.

In another bowl, sift together flours with salt, spices, baking soda and baking powder.

In a stand mixer, cream together remaining sugar and coconut oil or butter.  With mixer on medium-low, add vanilla and then the eggs one at a time.  Turn mixer down to low, and add in the flour in three increments, stopping to scrape down the sides.  Mix until almost combined.  Fold in the macerated squash and apple with any liquid that’s accumulated and mix until thoroughly combined.

Pour batter into a greased loaf pan, and bake for 45-50 minutes or until a toothpick inserted into the center comes out clean.  Cool before unmolding.

tags: apple cake, holiday baking, holiday cakes, butternut squash recipes, maple sugar, butternut squash bread, squash bread, apple bread recipe, gluten free, gluten free baking
categories: breads & cakes, breakfast, desserts, holiday, recipes, sweet & savoury, all 2
Friday 12.05.14
Posted by Aliya LeeKong
 

Matcha Crème Brûlée

View fullsize green-tea1-500x333.jpg
View fullsize green-tea2-500x354.jpg
View fullsize green-tea3-500x333.jpg

Matcha Crème Brûlée

Crème brûlée is one of those fancy desserts that shockingly don’t take a ton of ingredients or time to make. I’m always playing around with the basic goodness , and this green tea version is a new favorite – light, delicately-scented, and simple.

The key ingredient here is matcha, a finely milled green tea powder that you can pick up at specialty, gourmet, and Japanese grocers. I love this stuff and all you really need is a teaspoon or so to transform a basic dessert or cake into something a bit more special. Beyond using it here, it’s delicious in crèpe batter, shortbread cookies, cheesecake and simple vanilla cupcakes….it’s fantastic to add to baked items because you don’t need to adjust your wet-dry ratios at all.

Enjoy!

Ingredients
Yields 4-5 (5-inch) oval ramekins
2 cups heavy creaam
1 teaspoon matcha green tea powder
1 vanilla bean, split and scraped
¼ tsp salt
5 egg yolks
1/4 cup sugar plus extra, for brulée
2 tablespoons honey

Procedure

Preheat the oven to 325° F.

In a saucepan, heat heavy cream, matcha powder, vanilla bean, and salt.  Bring mixture up to a boil on medium heat.  Remove from heat, cover, and let steep 15 minutes.

In a medium bowl or stand mixer, whisk egg yolks, 1/4 cup sugar, and honey until well blended and light yellow in color.  It should look very creamy at this point.

Strain cream mixture through a fine sieve and add it in small amounts to the yolks, whisking after each addition.  You want to slowly bring up the temperature of the yolks (not scramble).  Transfer custard to a measuring cup or something that pours easily.

Place paper towels in one or  two different baking dishes (depending on size) and set the ramekins inside.  Carefully, pour the custard ¾ of the way up into the ramekins.  Then, add boiling water to the baking dishes so that it comes about halfway up the sides of the ramekins.  I bake these in a water bath, and the paper towels help the ramekins from sliding around and also help reduce the risk of splash as you pour the water into the dishes.

Bake at 325° F for 35 minutes.  It should still jiggle slightly.  Remove from water bath and let cool at room temperature for 10 minutes.  Cover in plastic wrap (don’t let it touch the surface), and chill in the refrigerator for at least 2 hours in order to set the custard.

Coat the top of the custard in each ramekin with a layer of sugar.  Turn over to remove excess.  Carefully, using a torch, brûlée the sugar, working in circles evenly over the ramekins.

Note: if you use larger or deeper ramekins, the cooking time will inevitably be longer.  The key things are the water bath and also that it still jiggles when it comes out.  You want smooth, creamy custard, not overcooked and curd-like.

tags: desserts, creme brulee, easy desserts, matcha, green tea desserts
categories: recipes, desserts, all 2
Monday 03.03.14
Posted by Liz Neilson
 

Announcement & Cookies for Everyone!

View fullsize cookie-1-500x333.jpg

Announcement & Cookies for Everyone!

I have some exciting news and want to share it with you all.  Hopefully, from reading my site over the past few years, you’ve had the opportunity to see that I have an incredible passion for culture, food and cooking.  I love bringing together all of the travels and experiences that make up my life – combining flavors, textures, techniques and ingredients into my own personal style of cooking.  I’ve recently signed on to do my first cookbook!  I’m extremely thrilled (and a bit nervous, honestly…) to bring together and share the flavors of my Exotic Table in a lasting work, and over the next six months I’ll be cooking, writing, and photographing each step of the process.  As you can imagine, my creative resources will be dedicated to the book, but I hope to share with you the experiences, inspirations and trials and tribulations here (p.s. I will from time to time to post interesting recipes you won’t be able to find in the book).

I want to thank you all for your continued support!  None of this would be possible without the feedback and confidence I receive from you guys.  As a token of my appreciation, I want to share with you my most treasured, secret, best cookie recipe ever!  I’m a huge fan of how oatmeal changes the texture of a cookie and the combination of that with some dark chocolate and a touch of cinnamon and salt is heavenly… Enjoy!

Ingredients

Yields approximately 2 dozen cookies (size-dependent)

¾ cup all-purpose flour

½ tsp baking soda

¼ tsp baking powder

½ tsp ground cinnamon

½ tsp salt

1 stick unsalted butter, room temperature*

¼ cup shortening

1/3 cup white sugar

½ cup light brown sugar

1 egg, room temperature

1 tsp vanilla extract

1 ¼ cup dark chocolate chunks or chips

1 cup oats**

Procedure

Preheat oven to 350° F.  Line two baking sheets with parchment paper.

In a bowl, sift together flour, baking soda, baking powder, cinnamon and salt.

In the bowl of a stand mixer or with a hand mixer using a paddle attachment, cream together butter, shortening and both sugars.  Add the egg and vanilla extract.  Add flour mixture and mix until almost completely incorporated.  It should mostly be sticking to the paddle at this point.  Scrape down, add in chips and oats and mix for another 15 to 20 seconds until uniform.

At this point, I like to turn the cookie dough out onto plastic wrap, form into a cylinder, and freeze for about 10 minutes.  This makes it easier to cut into even sized, round cookies.  Conversely, you can just drop rounded spoonfuls a few inches apart onto prepared baking sheets.

Bake for 9 to 11 minutes depending on how chewy or crunchy or what size you made the cookies.  Cool on the baking sheets for 5 minutes and then transfer to wire racks to cool completely.

*If you are feeling extra ambitious, browning the butter (heating the butter over medium heat until the foam subsides, little brown flecks appear in the bottom of the pan and it smells like hazelnuts) is a great step to add depth of flavor.  Just cool down before the creaming step.

**Quick-cooking oats are fine here.

tags: Exotic Table, cookies, chocolate chip cookies
categories: desserts, recipes, all
Monday 07.16.12
Posted by Aliya LeeKong
 

Lemon-Orange Blossom “Pots de Crème”

View fullsize lemon-pic1-500x333.jpg
View fullsize lemon-pic2-500x333.jpg
View fullsize lemon-pic3-500x166.jpg

Lemon-Orange Blossom “Pots de Crème”

As a chef, one of the most thrilling things I experience is when I learn a new little trick or technique that makes a dish that much better (or that much easier!).  I remember when I was in Turkey and witnessed a shortcut that would make baklava a quick and easy affair. And how in Ethiopian cuisine, warming chopped beef and bathing in spiced butter made a steak tartare truly legendary.  It’s those little technique plays that are gratifying and why I’m so happy with this week’s lemon-orange blossom “pots de crème” recipe…

I recently read a recipe where lemon juice set a custard by simply being added to hot cream and then refrigerating.  ?!?!  I’ve used lemon juice in hot milk to break it and form cheese – it causes curdling, so to hear you could just add it like that and create a custard seemed quite frankly magical! 

The good news is…it’s true!  And so, of course, I tested a few recipes and came up with this one, which I think creates the best texture and combines the lovely citrus-y lemon with one of my favorite secret ingredients, orange blossom water.  With traditional pots de crème, you have to make the custard one of the old school-styles (the two ways are, roughly: stirred on the stovetop or baked in the oven), which is to say scald cream and flavors, add egg yolks and bake in a low slow water bath until jiggly perfection like this one…. This is waaay simpler: heat cream with flavors, add lemon juice, refrigerate for a few hours…and that’s it!  Enjoy!

Ingredients

Yields 6 5-inch oval ramekins

2 ½ cups heavy cream

1 vanilla bean

¼ tsp salt

¼ cup sugar

3 tbsps honey

2 ½ tbsps orange blossom water*

1 tbsp lemon zest

7 tbsps lemon juice

Procedure

In a small saucepan, bring heavy cream, vanilla bean, salt, sugar, honey, orange blossom water and lemon zest up to a boil.  Remove from the heat, cover and let steep 20 minutes.  Gently stir in lemon juice and strain cream mixture.  Refrigerate for a minimum of 4 to 5 hours until thickened (these can definitely be made a day or two ahead of time).

Serve well-chilled with fruit, if desired.

*The amount of orange blossom water really depends on the brand you are using.  For mine, I used 2 ½ tablespoons, but taste yours as you add to make sure it doesn’t become too cloying.

tags: pots de creme, citrus, lemon, lemon desserts
categories: desserts, recipes, all
Monday 07.02.12
Posted by Aliya LeeKong
 

Cherry-Pinot Paletas

View fullsize cherry-pic1-500x333.jpg
View fullsize cherry-pic2-500x333.jpg
View fullsize cherry-pic3-500x333.jpg

Cherry-Pinot Paletas

When cherry season rolls around each year, I get oddly giddy.  Maybe it’s a remnant of childhood – the feeling that these little fruits are the nectar of the gods (and thus you only get one of them on top of a sundae), that they are a privilege to eat (I remember fighting for the last one…), or that they were hands-down the best hard candy (Blow-pop, Ring Pop, Lifesaver, Jolly Rancher) flavor out there.  Whatever the case, as an adult, I definitely go a bit dessert crazy around this time of year, working cherries in wherever I can, and here is one with a decidedly un-childlike spin….

The weather here in New York City has been absurdly hot, so naturally my thoughts turn to ways to cool off.  Paletas are basically Latin American popsicles, and THE way to do it.  They are usually made with fresh fruit juice, sometimes with bits of fruit, or can be milk-based.  I thought cherries would be the perfect ingredient until I became overwhelmed by the thought of having to pit and stem them…And then it struck me, why do I have to?!?

The adult spin here is that I use a bit of red wine.  I had a popsicle phase last summer where I was freezing everything from fresh juices to my St. Lucian rum punch (which didn’t freeze by the way because of the alcohol!), and I love serving these as dessert at a summer bbq.  It’s a light treat after serious grubbing and happens to keep the party going… These pops not only have cherries and red wine, a heavenly combo, but also a host of spices – black peppercorns, cloves, cinnamon and vanilla bean – that create gorgeous flavor.  You may end up just wanting to reduce the liquid to a syrup and pour it all over ice cream!  Enjoy!

Ingredients

Yields 3¾ cups juice or 10-12 popsicles

2 lbs fresh, sweet cherries, washed*

2 cups water

¾ cup sugar

½ cup red wine (Pinot Noir or whatever red wine you like)**

3 black peppercorns

2-3 whole cloves

1 cinnamon stick

1 vanilla bean, split and scraped

Procedure

The best part about this recipe is that you just throw in the whole cherries here, stems, seeds and all.  The whole bits get strained out at the end.

In a medium-sized pot, bring all ingredients up to a boil.  Lower to a simmer  and simmer half-covered for 10 minutes.  Let cool to room temperature.

Using a potato masher, mash up the mixture until the cherries are completely broken down.  Strain liquid through a mesh sieve extracting as much of the juice as possible.  I like to use the back of the spoon to push on the pulp.

Pour into popsicle molds and let freeze until solid (about 7 to 8 hours).

*I used bing cherries here but feel free to use whatever is in season nearest you.  Pitted, frozen cherries would also work wonderfully here – without the pits or stems, you could blend up the whole mixture to get bits of the cherry in there and change up the texture.  Just remember you’ll likely have more than 10 to 12 popsicles at the end!

**Of course, if you are making these for the little ones, you can replace the red wine here with some juice or water.


tags: recipes for summer, popsicles, paletas, cherries
categories: desserts, recipes, snacks, all
Monday 06.25.12
Posted by Aliya LeeKong
 

A Forgotten Food, Seera

View fullsize Seera-pic1-500x333.jpg
View fullsize seera-pic2-500x333.jpg
View fullsize seera-pic3-500x333.jpg

A Forgotten Food, Seera

Last week, one of the chefs over at Junoon shocked me into taste memory.  He cooked up a batch of seera (also called sheera or seero), which is a sweet, crumbly, buttery, cake-like dessert usually made with semolina or cream of wheat.  My mom used to make it for me growing up, and I hadn’t thought about it in years!  One bite…it’s amazing how the smell and taste of something can just transport you back.  That night, I went right home and made my own, comforting batch that I thought I’d share with you.

Seera belongs to a dessert family called halvas – these are desserts served throughout South, Central and West Asia, parts of Europe, the Middle East and North Africa.  Oftentimes, they are flour-based as you see here, but they can also be made from dense nut pastes and be more of a confection.

I had a full-on debate with my mom about the pros and cons of using semolina vs. cream of wheat, when’s the right time to add the cardamom, what the resulting color should be, and how no one should feel guilty if they want to eat this for breakfast (it’s cream of wheat after all!).  She even whipped out my grandmother’s old recipe written out in mugs!  I love that….Well, this is what I came up with.  And the reality is farina or cream of wheat will result in a slightly softer, more crumbly halva and the semolina, depending on the grind, will be a bit more dense and cake-like with a brighter yellow color.  Buttery, with the aromatics of saffron and cardamom, pure comfort, and whips up in less than 10 minutes…enjoy!

Ingredients

Serves 4 to 6

1 cup milk

½ tsp vanilla extract

pinch saffron

pinch salt

¾ cup palm sugar*

1 stick + 2 tbsps unsalted butter

2 cardamom pods, cracked

1 cup farina, cream of wheat or semolina flour

Optional garnishes:**

Pistachios, toasted

Sliced almonds, toasted

Sultanas

A few dashes of rosewater

Procedure

In a small, nonstick saucepan, bring milk up to a boil.  Lower to a simmer and add vanilla extract, saffron, salt and palm sugar, whisking to dissolve.  Keep over a low flame.

In another nonstick saucepan over medium heat, add butter and cardamom pods.  When the butter has melted and the foam subsides, add the farina and toast in the butter until golden brown, about 3 to 4 minutes.  Lower the flame, add the sweetened milk mixture and stir until texture dries a bit, another 2 to 3 minutes or so.

Serve warm or room temperature.

*You can substitute white or brown sugars here, but I would adjust down the amount as palm sugar is a bit less sweet than those two (so closer to ½ cup).

**For the optional garnishes, you can add as much as you like right on top.  For the sultanas, I like to throw them in with the simmering milk, so they plump up a bit.

tags: seera, halva, cardamom, almonds
categories: all, desserts, recipes, breads & cakes, breakfast
Monday 06.11.12
Posted by Aliya LeeKong
 

South African Milk Tart with Fruits

View fullsize tart-pic1-500x361.jpg
View fullsize tart-pic4-500x333.jpg
View fullsize tart-pic3-500x222 (1).jpg

South African Milk Tart with Fruits

I tried a really delicious milk tart a few years back when I was visiting Capetown and was hooked!  This is one of those ubiquitous desserts in South Africa that’s served throughout the country, on all sorts of occasions and every cook has his or her own secrets.  Melktart (meaning, literally, milk tart…) is a tradition that came from the Dutch settlers in the country, a custard-based tart scented with cinnamon delivered in a flaky pastry crust.

I am one of those people that have fruit tart cravings.  I will take a gorgeous tart with a pastry cream filling and topped with fruit over a straight fruit pie any day.  For some reason, I feel like the creaminess balances out the acidity in the fruit and with a flaky crust creates a perfect dessert. For me, the idea of putting fruit on top of a milk tart seemed perfectly natural (though it’s not usually done there).

Also, I semi-cheated and used puff pastry for the crust – how I could go on about the benefits of puff pastry!!  I’ve made it before from scratch, and it’s definitely a process.   Puff pastry tastes good, and those guys who’ve created the frozen versions have mastered it – why mess with perfection here?  This crust comes together easily, and it’s a few less steps you have to take to make an equally delicious tart.

So, now about milk tart itself.  The filling is basically a custard with hints of cinnamon, almond, and (my addition) vanilla.  The cornstarch helps to thicken the custard and make sure it’s not too eggy – you don’t want a crème brulée tart here!  The beaten egg whites lighten the batter and add an airy quality to the finished product.  The result is a beautiful, creamy, vanilla-specked filling with that caramelized top in a gorgeous flaky crust – the fruit just adds another lovely layer of flavor.  This is perfect for a dinner party (impressive too!) or even a ladies lunch.  Enjoy!

Ingredients

Yields 1 9-inch fluted tart / Serves 6 to 8

Crust:

½ package frozen puff pastry (1 sheet), defrosted

1 egg beaten with a bit of heavy cream for egg wash

Wax paper and dry beans to weight down

Filling:

1 ½ cups whole milk

½ tsp salt

1 stick cinnamon

1 vanilla bean, split and scraped

½ tsp almond essence

½ cup heavy cream

¼ cup cornstarch

1 ½ tbsps unsalted butter

2 eggs, separated

½ cup + 2 tbsps confectioner’s sugar

½ tsp cinnamon ground

Topping:

Sliced or whole fruit of choice: strawberries, blueberries, raspberries, kumquats, cape gooseberries, etc.

Procedure

For the crust:

Preheat the oven to 350° F convection / 375° F convention.

Let’s start by rolling out and blind-baking the crust.  On a floured surface, roll the sheet of puff pastry out just enough so it will cover the inside of the tart pan and have some overlap.   Place it carefully in the 9-inch, fluted tart shell and press it into the corners and sides.  Trim the excess.  Place a piece of wax paper across the top of the tart so it covers the sides.  Add dried beans to weight down the crust and refrigerate for 15 minutes while you start on the filling.

Place in the oven and bake for 20 minutes.  Take the crust out of the oven, remove the weights, and brush with the egg wash.  Put back in the oven for another 5 minutes until golden.  Set aside until ready to fill and leave the oven on.

For the filling:

In a small saucepan, bring the milk, salt, cinnamon stick, vanilla bean, and almond essence up to boil.  Lower immediately to a simmer.  In a small bowl, whisk together the heavy cream with the cornstarch making sure there aren’t any lumps.  Add this to the milk mixture along with the butter and stir until the mixture thickens.  Remove from the heat.

Make sure the egg yolks are in a larger-sized bowl because you’ll be adding the milk mixture to them.  You want to start by adding a little bit of the milk mixture and stirring or whisking to incorporate.   Continue to do this a little at a time until the milk mixture is completely incorporated – we do this to avoid cooking the yolks and having bits of it in the tart.  Let this mixture cool to closer to body temperature before moving on to the next step.

In another bowl, beat the egg whites with the ½ cup of confectioner’s sugar until soft peaks form – should be light and fluffy.  Add a spoonful or two of the milk custard to the egg whites and incorporate.  Carefully, fold the egg whites into the milk custard to lighten it up.  Be careful not to overmix or you will deflate it significantly.

Add this filling to the tart shell.  Mix together the last 2 tablespoons of confectioner’s sugar with cinnamon and sprinkle on top of the tart.  This will develop into a nice brown crust on top.

Bake for 10 minutes, and then lower the temperature 25 degrees and bake another 15 minutes.  Don’t be surprised if it puffs up during cooking – it will reduce down as it cools.  Cool on a rack and top with fruits of your choice.

This tart can be served warm or cold, but since I added the fruits I thought I’d keep it on the cooler side myself.

tags: milk tart, desserts, fruit, special occasion, south african
categories: desserts, recipes, all -1
Monday 05.14.12
Posted by Aliya LeeKong
 

My Homemade Nutella

View fullsize nutella-pic3-500x333.jpg
View fullsize nutella-pic2-500x333.jpg
View fullsize nutella-pic1-500x330.jpg

My Homemade Nutella

So, admittedly, I’ve been on a bit of a healthy kick lately – toting around awful looking bottles of green juice, trying to eat more raw foods and roughage, and avoiding alcohol (gasp!). A bit of a spring cleanse, if you will.  It’s been about two weeks (14 days, 11 hours and 33 minutes but who’s counting?), and I’m feeling pretty good.  For some reason, over the last few days, my sweet tooth has gone a bit haywire, so I decided to make something I crave pretty often…nutella!

Now, nutella is one of those items with which I avoid eye contact in the grocery store.  God forbid I bring a jar of it home, and it sits there longingly, just asking for me to take a spoon to it each time I go into the kitchen.  I grew up eating it on special breakfast occasions, a lusciously chocolate-y and nutty filling for crèpes, a tradition I’ve carried on to adulthood.  It’s popular for breakfast in Europe, where it’s touted as healthy!  Can you actually believe it??

On closer inspection, it really isn’t that bad for you!  Nuts, skim milk, a bit of cocoa powder – I thought a homemade version could only be better.  I used a slightly healthier oil, hazelnut oil, in lieu of the palm oil used in the original version.  I also used a local honey instead of sugar.  I did add some real dark chocolate to mine, but I rationalized that 3.5 ounces spread out over a whole jar can’t be that bad for you, and isn’t dark chocolate an antioxidant anyway? This nutella is creamy, rich, and delicious and tastes just like the ingredients it’s made from (so use good ones!).  Enjoy!

Ingredients

¾ cup chopped hazelnuts, toasted*

¼ cup raw almonds, toasted*

2 tbsps hazelnut oil

1-3 tbsps local honey**

½ tsp vanilla extract

1 tbsp unsweetened cocoa powder

½ tsp kosher salt

½ cup skim milk

3.5 ounces semisweet or dark chocolate, chopped

Procedure

To the bowl of a food processor, add the toasted hazelnuts and almonds and process until a fine crumb.  Add the oil, honey, vanilla extract, cocoa powder and salt and process until a paste.

In a small saucepan, heat the milk and chocolate together until the chocolate is completely melted.  Add to the food processor and process until the nutella’s texture is smooth and creamy.  Cool and refrigerate.  This can be stored in the refrigerator for about a week.

*I chopped up the hazelnuts here to increase their surface area, so they toast up quicker.  You can easily toast the chopped hazelnuts and almonds together in a 350° F oven for 5 to 10 minutes.

**The variation in the amount of honey really depends on 2 things: (1) what type of chocolate you are using and (2) your personal preference for how sweet you want this.  I used a 70% dark chocolate and about 2 tablespoons, but if you are using a semisweet or even a milk chocolate, you may need less.  This is something that you can add at the end to taste if you like.

tags: dessert, healthy, raw, breakfast, nutella, almonds, chocolate, hazelnut
categories: breakfast, desserts, recipes, snacks, all -1
Monday 05.07.12
Posted by Aliya LeeKong
 

Sweet Avocado-Chocolate Tart (No Bake!)

View fullsize avocado-pic1-500x333(1).jpg
View fullsize avocado-pic2-500x333.jpg
View fullsize avocado-pic3-500x166.jpg

Sweet Avocado-Chocolate Tart (No Bake!)

Avocados as dessert?  Yes, yes, and yes.  I am still reminiscing about my trip to Brazil, and there, avocados (which are fruits, mind you…) are often eaten as a dessert – sometimes sprinkled with lime juice and sugar and other times blended with cream or condensed milk to produce a thick pudding, amongst other ways.  In the U.S., we have gone so far as to add them to milk shakes or protein shakes, why not take it a step further and embrace this creamy fruit as dessert-worthy…

I picked up this beautiful, long, rectangular tart mold recently and had been itching to use it.  That said, if I’m being completely honest, I have to have the baking bug to go that extra mile and bake a tart from scratch.  This is a no-bake tart!  You merely have to press buttered, cookie crumbs into the mold and freeze for a few minutes to set.  It doesn’t get easier.

Add to that the filling is a breeze – a few ingredients thrown into a food processor to do the work – and this may be the easiest tart you’ve ever made.  It sets up in a few hours so could easily be thrown together before a dinner party.  Avocado season has begun and will run through the summer, and this is the perfect icebox treat to keep around for summer entertaining.  The avocado pairs with chocolate beautifully – sweet, creamy with the bitter, chocolaty crunch from the crust…Enjoy!

Ingredients

Yields 1 13 ¾” x 4 1/2 “ x 1” tart

Crust:

1 ½ sticks unsalted butter

2 ¼ cups chocolate cookie crumbs (from Oreos without the center filling or other chocolate wafer cookies

1 tsp kosher salt

Filling:

4 oz mascarpone cheese

½ can sweetened condensed milk

½ tsp vanilla extract

Squeeze of lime juice

2 ripe avocados, pitted

Garnish (optional):

fresh whipped cream

shaved bittersweet chocolate

Procedure

Melt butter in a medium saucepan.  Add cookie crumbs and a ½ teaspoon of the salt and mix with a fork until fully incorporated.  Press evenly into the tart pan going up the sides as well.  Place in the freezer for 10 minutes.

To the bowl of a food processor, add the mascarpone, sweetened condensed milk, vanilla extract, the other ½ teaspoon of kosher salt, squeeze of lime juice and spoon in the avocado flesh.  Process until thick, creamy and uniform consistency.

Spoon avocado mixture into the tart shell and smooth with a spatula.  Refrigerate for a minimum of two hours, though this can definitely be made a day or two ahead.  When unmolding, let the tart sit at room temperature for 20 to 30 minutes first, so that it loosens easily.

Serve slightly chilled with a dollop of whipped cream and some shavings of chocolate.

tags: desserts, avocado desserts, no bake desserts
categories: desserts, recipes, all -1
Monday 04.02.12
Posted by Aliya LeeKong
 
Newer / Older