X

Sign up to receive exclusive recipes, tips, updates and other goodies from Aliya!

  • Home
  • Blog
    • All
    • Recipes
    • Spices + Ingredients
    • Lifestyle, etc.
    • Travel
  • The Cookbook
  • The App
  • Media
    • All Media
    • Video
  • About
  • Passions
Aliya LeeKong
  • Home
  • Blog
    • All
    • Recipes
    • Spices + Ingredients
    • Lifestyle, etc.
    • Travel
  • The Cookbook
  • The App
  • Media
    • All Media
    • Video
  • About
  • Passions

Squash Toast with Chipotle Honey + Pepitas

View fullsize squashtoast2.jpg
View fullsize squashtoast4.jpg
View fullsize squashtoast3.jpg
View fullsize squashtoast1.jpg

SQUASH TOAST WITH CHIPOTLE HONEY + PEPITAS

Okay, so I looove avocado.  BUT (and I know this might offend some of you), I'm not the biggest avocado toast fan.  I know!  In the beginning, it was pretty cute, but now, it's become a phenomenon and a food trend (with an $8+ price tag to boot at most of my local Brooklyn spots)!  Beyond that, it's Fall - the season has changed and so a time has come to explore some alternatives for your morning breakfast, snack or however you might traditionally eat toast.

Squash is everywhere, so why not mash up some buttery, sweet squash and slather it on toast?  Let's go a step further.  Why not spice up the squash with some minced shallots and jalapeño, top with some chipotle-infused honey, throw in some cream cheese and roasted pepitas....I think you get my point here.  Toast can be so much more!

That's what this squash toast is all about.  Hitting highs and lows of flavor and texture.  You've got crunchy, creamy, sweet, savory, spicy (I could go on)....Enjoy!

Ingredients

Serves 4 to 6

For the chipotle honey:

½ cup honey

1-2 dried chipotle chilies (adjust to your heat tolerance)

For the squash toast:

Canola or olive oil

1 medium-sized butternut squash or kabocha (2 to 3 lb) squash, halved and seeded

salt and freshly ground pepper to taste

1 small shallot, minced

1 jalapeno, seeded, ribbed and minced

small handful of cilantro, finely chopped

juice of half a lime

8 to 10 slices white/wheat country bread, lightly toasted

1/2 to 2/3rd cup cream cheese or mascarpone

1/3rd cup pepitas, roasted

Procedure

For the chipotle honey:

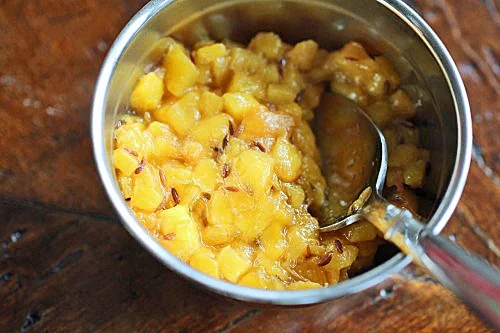
Add honey and chilies to a small saucepan.  Cook on low for a half hour, remove from the heat, and let cool and infuse another 20 minutes.  Strain if you want to.

For the squash toast:

Preheat the oven to 425° F.

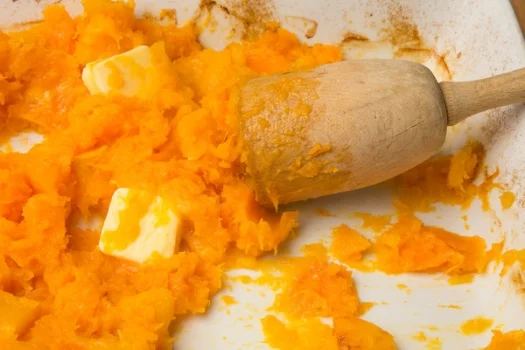
To roast the squash, generously coat with oil, sprinkle with salt and pepper and roast flesh side down for about 30-40 minutes until mashable.

Spoon out squash into a bowl and add shallots, jalapeño, cilantro, and lime juice.  Mix together and adjust seasoning.

To assemble the squash toasts, slather a tablespoon or so of cream cheese on the toasts.  Top with a spoonful of the squash mixture and sprinkle a few toasted pepitas on top.

These are best enjoyed with the squash is warm.


tags: squash toast, avocado toast, squash toast recipe, how to infuse honey, hot honey recipe, chipotle honey
categories: all 2, blog, recipes, side dishes-1, vegetarian, breakfast-1
Thursday 10.22.15
Posted by Aliya LeeKong
 

Handmade Pasta: How-To + Recipe

HANDMADE PASTA: HOW-TO + RECIPE

If pizza is my ultimate comfort food, pasta is a very close second.  I actually haven’t made pasta from scratch for a really long time and, lately, with the weather getting cooler and the fact that I'm going to serve it at my pop-up in a few weeks, I’ve been wanting to break out my pasta roller and get started.  I bought a couple cookbooks for inspiration to get me started.  The dough recipe is actually super simple, and I find myself wondering why I don’t make pasta from scratch more often at home instead of buying it at the store.  Oh right, time! That little thing that tends to escape all of us...But if you are planning on having a dinner party, nothing is more impressive than serving a plate of homemade tagliolini!  And it's something you can make in advance and cook quickly while your guests are enjoying a drink (or two...). 


MAKING THE DOUGH

There are two types of dough when making pasta; one for the different shapes of noodles (spaghetti, tagliatelle, fettuccini etc…) and one for filled pastas (ravioli, tortellini, agnolotti etc…).  The only differences between these two is that the filled pasta dough just adds a little bit more liquid to make the dough more pliable for making shapes and is a bit thinner since you are often double layering it. 

My go-to recipe is pretty simple:

Serves 6-8

2 cups 00 or all purpose flour

2 eggs + 3 yolks

1 1/2 tablespoons water

1/2 teaspoon salt

Mixing is very simple. Just create a mound with the flour ( “00” is the most commonly used in Italy, but all purpose works just as well) pour all the liquid (whole eggs, yolks, water) in the center and slowly, with a fork, combine everything until the dough starts to come together and is not sticky.  Now comes the hard part: kneading!  You want to knead the dough for at least 10-15 minutes, doesn’t sound like a huge task but it is essential to create a smooth pasta dough.  You will see as you knead the dough the roughness when the dough first comes together starts to disappear the more you work the dough.  Once the dough is nice and smooth, form in to a ball and cover with plastic wrap and let it rest.  If you're rolling it right away, you can allow rest it for 30 minutes at room temperature.  If you're rolling it later, keep it in the fridge and allow the dough to come back up to room temperature just before.  Because of the eggs in the dough, you want to use this within 24hrs to ensure freshness or freeze it for later use. 


HAND ROLL OR MACHINE?

Having a pasta machine is essential to rolling out the dough.  You can, of course, do it with a rolling pin, but it will take a lot more time and effort, not to mention a lot of upper body and arm strength!  The process of kneading alone makes my arms and hands ache, but the result is just too delicious to give up on.  There's also just something soothing about the process of rolling out the dough with a machine, going through every size on the rollers and then creating your pasta shape.  The key is to start the pasta dough on the largest setting of the machine and work down from there, cutting the dough and doing it in batches. 

Start by cutting the dough into quarters.  Flatten the quarter piece a bit and put the dough through the largest setting, once through. Fold the dough on itself (take both ends fold over and meet in the middle) rotate 90 degrees and put through the machine on the same setting again - you basically just want to get a rectangular shape to start.  Raise or lower the setting (depending on the machine) and run through again.  You want to get thinner and thinner, running the dough once at each incremental setting.  If it gets too long, cut it in half and roll each piece separately.  After the dough has made its way through, I usually end on the second to last setting for stuffed pastas or the third to last for thick noodles.


SAUCES AND FILLINGS

And now for the good stuff: the filling and the sauces!  First, though, a note on cooking.  In boiling, heavily salted water, fresh pasta only takes 1 to 2 minutes to cook, so if you spend the time up front, know that, at the very least, you are saving on cook time! 

For my pop-up, I'm doing a roasted maitake mushroom pasta with pickled chilies, garlic and some Egyptian Dukkah.  I know - major and not so traditional.  BUT I love a good simple tomato sauce with noodles, and this recipe is such a great go to.  There are so many others to choose from; Bolognese, avocado-basil pesto, and classic brown butter and sage.  The possibilities are endless - it really just depends what mood you are in!  Same with choosing the filling for stuffed pastas, you can go the traditional route and do a ricotta filled ravioli or go with the season and do a pumpkin ravioli for fall, a pea ravioli for spring etc…

The important part is to make sure you have all the essential tools to create and roll out the perfect dough - the rest you can just make up as you go along!  That is the fun part after all..

Enjoy!


tags: how to make pasta, pasta how to, how to roll pasta, how to make ravioli, ravioli recipe, homemade pasta recipe
categories: all 2, holiday, lifestyle, main dishes, side dishes-1, vegetarian, traditions
Friday 10.16.15
Posted by Aliya LeeKong
 

The Very Versatile Winter Squash

THE VERY VERSATILE WINTER SQUASH

The leaves are changing colors, the air has a cool crisp smell to it and the farmers' market is booming with a ton of winter squashes.  Nothing says cold weather comfort food than a great squash soup, roasted root vegetables with your Sunday supper or a nice, warming Indian curry.  The only difficulty is choosing which squash to use in your dish!  I put together a few of my favorite ways to bring some warmth to your dinner table this winter.


SOUPS

The first weekend of October has passed, and the heating has kicked in.  You know winter is looming around the corner, and the upside is that it’s perfect soup-making (and eating!) weather.  Everyone loves a great squash soup; they are so versatile, being sweet and savory, and take easily to different cuisines depending on the spices you use.  My Sopa de Flor de Calabaza (Squash Blossom Soup), inspired by a traditional Mexican soup, is a delicious, silky and rich soup without any cream that uses butternut squash.   Another warm and comforting soup is my Pumpkin Soup with Garam Masala & Creme Fraiche.  This soup uses the traditional South Asian spice blend, garam masala (it’s spicy and full-flavored but has no real heat to it), and the warming spices in the blend pair perfectly with pumpkin.


ROASTED

Roasting squash is a no brainer, and cut into pieces, a good squash only needs about 20 to 30 minutes in a 400° F oven.  Of course, the old standby butternut is fantastic here, but kabocha, which is an Asian variety of winter squash, is also delicious.  It has a strong and sweet flavor that pairs well with spices.  Delicata is another great options because it has super thin skin and is really easy to peel. 

Above is a photo from my cookbook for a savoury, winter vegetable crumble; roasted squash on its own would be delicious with a salty, Parmesan-laced crumble topping..  The great thing about roasted squash is you can eat it as is, purée it (see below), stuff it before roasting, make it into a hash by itself or with sweet potatoes or even toss it into a salad that day or the next!  I personally love this Miso Harissa Delicata Squash salad recipe.


PURÉES

Photo: NYTimes

Photo: NYTimes

Another great use for winter squashes is purées.  They make a great substitute for the stand-by mashed potato side and are beyond easy to make.  This recipe is the most basic - a great building block in your kitchen arsenal that you can tailor to your tastes.  A few ideas: add roasted garlic, truffle oil, chopped olives, pickled chilies or sprinkle with za'atar to make it extra special.


CURRY

Photo: Indian Simmer

Photo: Indian Simmer

To me, nothing is more satisfy or warming to the soul than curling up on the couch with my pajamas, a good movie, or book, and a hearty bowl of curry and rice.   Curries originate from the Indian subcontinent and Southeast Asia.  They can be wet or dry with wet curries resembling stews in a significant amount of sauce and dry curries cooked with little liquid that evaporates and leaves a coating on the ingredients. Curries usually involve a variety of spices with the main spices being turmeric, coriander, and cumin on the Indian side of things; chili is always a player.  Southeast Asian curries make use of different chili pastes and other herbs, aromatics and spices like kaffir, lemongrass, and galangal.  Lucky for us, squashes play well with all different types of curry.  Check out this one for Acorn Squash with Fenugreek, Chili, and Amchur.


PASTA

Photo: Reclaiming Provincial

Photo: Reclaiming Provincial

When the weather turns cool, who doesn’t love coming home to lasagna or a big bowl of pasta on the table?  To make traditional lasagna a bit more interesting, try adding some squash in between the lush layers of pasta, cheese and sauce. OR get a bit more advanced and try this gnocchi.  If gluten isn't your thing, spaghetti squash makes a fantastic substitute.  Raw, it looks just like other squashes on the inside, but after it is cooked the insides fall out in ribbons resembling spaghetti.  This recipe uses the spaghetti squash as the star of the “pasta dish”.


DESSERTS & BREADS

Being such a versatile vegetable, squashes can also find themselves in the dessert category.  Hello…..pumpkin pie anyone!? But don’t just let the pumpkins have all the fun in the pies, butternut and acorn squash can hold their own in this category too!  Try my bread recipe using butternut squash with apples and maple to make a delicious moist bread to serve with afternoon tea.

Enjoy!


tags: butternut squash recipes, butternut squash bread, squash recipes, how to cook squash, how to roast squash, butternut squash soup, squash soup, spaghetti squash recipes
categories: all 2, holiday, lifestyle, main dishes, man-friendly, quick & easy, recipes, soups, soups & salads, vegetarian, side dishes-1
Thursday 10.08.15
Posted by Aliya LeeKong
 

Grilled Lamb Sirloin Tacos with Corn, Pickled Cherry Peppers & Chipotle Crema

View fullsize tacos4.jpg
View fullsize tacos3.jpg
View fullsize tacos2.jpg
View fullsize taco1.jpg
View fullsize tacos5.jpg

GRILLED LAMB SIRLOIN TACOS WITH CORN, PICKLED CHERRY PEPPERS & CHIPOTLE CREMA

Last weekend, a friend of mine, Molly Tavoletti, stopped by (who you may know from her drool-worthy Instagram!).  In any case, we got to talking, drinking wine, and I whipped up a few of these lamb sirloin tacos for us to munch on during girl (and career and wine and life...) talk on that beautiful, sunny Brooklyn afternoon.

I know there aren't a ton of lamb sirloin recipes out there, but it really has become for me my new duck breast.  It's meaty and rich with a gorgeous fat cap that crisps.  On the grill, the smokiness adds such depth of flavor and, of course, that signature char. 

When you bite into a taco, you want flavor AND texture.  This one has grilled corn for sweetness, a bit of shredded red cabbage for crunch, homemade pickled cherry peppers for acidity and heat, and a lovely chipotle crema for tang, smokiness and silkiness. 

Enjoy!

Ingredients

Serves 4 to 6

For the tacos:

Wood chips wrapped in foil (optional; I like to use applewood)

Canola Oil

2 ears corn

Kosher salt & freshly ground black pepper

2 (8 oz) lamb sirloins

8 corn tortillas

½ cup shredded red cabbage

¼ cup pickled cherry peppers

¼ cup cilantro, leaves only

For the sauce (yields a bit more than a cup):           

8 oz Mexican crema or crème fraiche

2 to 3 chipotles in adobo (canned)

1 garlic clove

Kosher salt to taste

Procedure

Preheat the grill to medium-high (400-450° F).  Place the foil-wrapped wood chips on the grill, if using, making sure you’ve cut holes for the smoke to escape.  Oil the grill well.

For the corn: I prefer roasting them in their husks in a 400° F oven for 25 to 30 minutes prior to grilling.  This keeps them really tender and moist, and the husks and silk just slip right off.  Then, I brush them with oil and season with salt and pepper before finishing them on the grill for 5 minutes, just to char the outside.  You can also grill them from start to finish – after removing their husks and silk, 15 to 20 minutes in a closed grill, turning every 5 minutes or so.  Cut corn from the cobs.

For the lamb: Coat with oil and season generously with salt and pepper.  Place fat cap-side down on the grill and grill for 8 to 10 minutes, depending on the thickness of the piece, turning once midway through cooking.  The internal temp should be around 130° F, but basically it should feel like the fleshy part of your palm for medium-rare.  Cook longer if you prefer medium to well done lamb.  Transfer the lamb to a cutting board and rest for 5 minutes under a foil tent.  Slice thinly against the grain for the tacos.

Brush the corn tortillas lightly with oil and grill for 2 to 3 minutes flipping a few times just to warm through.

For the sauce: While the lamb is resting, to a food processor, add the crema or crème fraiche along with the chipotles in adobo and garlic.  Process until smooth and adjust seasoning if necessary.

To assemble the tacos: Spread a bit of the crema in the middle of the tortilla.  Pile on a slice or two lamb.  Top with a spoonful or two of the grilled corn, shredded cabbage, a few pickled cherry peppers, and a few cilantro leaves.


tags: taco recipe, lamb tacos, chipotle crema, how to pickle peppers, molly tavoletti
categories: all 2, main dishes, man-friendly, quick & easy, recipes
Wednesday 09.30.15
Posted by Aliya LeeKong
 

7 Ways to Preserve the Season

7 WAYS TO PRESERVE THE SEASON

This past weekend, shopping at my local farmers' market, I noticed that the fall squashes have now arrived.  As much as I love the cooler weather, I will really miss the abundance of local fresh berries and summer fruit and vegetables.  Funny enough, you can still find a lot of gorgeous peaches, tomatoes, and other summer fruit still lingering.  This transition has got me thinking about different ways of preserving, something that's in every culture around the world and has existed for centuries.  It's not only a way to enjoy those flavors later in the next season but is also a fantastic way to reduce waste (and save some $ to boot)....


PICKLING

2015-09-18 02.16.59.jpg

Pickling is always a great way to preserve vegetables (and even some fruits)!  I have messed around with pickles from so many different cuisines - from traditional Indian pickles in mustard oil to Italian giardiniera to a quick, spicy Haitian pickled cabbage, called pikliz that I love!  I always have a few pickles in my fridge to dress up everything from Sunday eggs to a nice seared piece of fish.  If you've been on my Instagram, you are probably over it with my pickled cherry pepper obsession....


CHUTNEYS

Chutneys are another savory way of preserving fruits and vegetables. They have both sweet and sour flavors and are great for those holiday cheese platters, to enjoy with a winter roast or as a condiment to take that sandwich to the next level.  Personally, with it still being grill weather, this smoked peach chutney is absolutely to die for on pork chops, with some fromage d'affinois, or on your morning toast.


BLANCH AND FREEZE

What if you want to keep it simple?  Easy, just blanch and freeze your vegetables in resealable bags.  Think vegetables in the freezer section of the grocery store, only yours are directly from the source!  These will make for a much tastier version of stir fry in the dead of winter, I promise you. 

Just have a pot of salted, boiling water (should taste like the sea), an ice bath (ice with cold water) and lots of resealable bags ready and you are set.  Drop in the boiling water until the veggies are still crisp but that raw taste is gone.   Then submerge in ice bath to stop the cooking and keep the vibrant color.  Don't hold in the ice bath too long or all the vitamins and minerals (the healthy stuff) will seep out.  You just want the veggies to be cold.  Drain, dry off, portion in to bags and place in the freezer.  Super simple!


HERB SALTS

If you’re like me and you love having fresh herbs around the house, you are probably wondering how to use up those plants before they start to wilt (and die).  There is, of course, the go to method of freezing herbs in ice cube trays (either in broth, butter, water or oil), but another fun way to preserve them is to turn the herbs into salts. 

You take a bunch of basil, rosemary or any single or combination of herbs you want and process in a food processor with some kosher salt.  Then, transfer to a parchment-lined baking sheet and dry out the mixture in a low temp oven around 225°F for an hour or two until crumbly.  Then back in the food processor to make more fine (only, if you want) and voila! Instant herb salts for your pantry! 

Of course, these are delicious on different meats or a roast chicken.  But pack some in a little bottle, and you have the perfect hostess gift!  Remember to store the salt in an airtight container, and it will keep for about 3 months.


JAMS

Photo: Huffington Post

Photo: Huffington Post

Now, for my favorite fruits which have a growing season of only a month or two, at best: fresh berries and stone fruit!  It's the best day of the year when you finally see rows and rows of these at the market, and the saddest day when you realize their season is over...Luckily this year seemed to last longer than last, and my pantry has a ton of jam to show for it.  At first it was just a couple jars for me, and then I started thinking holiday gifts!! 

People sometimes get intimidated by jam making - have the right ratio of sugar and pectin to set it and give that traditional, jammy texture.  But it can be as simple as fruit, lemon juice and sugar like in this Strawberry Preserve recipe from Blackberry Farm.  and, don't forget! Jam can also be savory.  I created this Chili Jam recipe when I worked for a restaurant, and it went on everything from our lamb burgers to a cheese toast!

Note:  If you frequent your farmers market, ask them if they have any bruised or over ripened fruit. This is perfect for jam and also will most likely be discounted!


PRESERVE IN ALCOHOL

Photo: Bon Appetit

Photo: Bon Appetit

Running out of jam ideas?  Alcohol is also an incredible preservative.

I preserved my cherries from July in brandy using a simple ratio: for 1 pint jar filled with cherries, fill 2/3rds with sugar and then pour brandy to 1/4 “ from the rim.  Shake the jar a bit to dissolve the sugar and store in a cool dark place until you're ready to use.  Add a stick of cinnamon or a used vanilla bean for a bit of extra flavor. 

These brandied cherries are perfect ladles over a (big!) bowl of vanilla ice cream or poured over a holiday bundt cake.  You can also infuse flavors in the alcohol by simmering with vanilla or cinnamon. 

Not an alcohol drinker?  Simply try this recipe from Bon Appetit which preserves the cherries in syrup.


SHRUBS

Shrubs are another, lesser known way of preserving summer fruits, though you can do this with many, other fruits throughout the year too.  It's basically a fruit-forward drinking vinegar, that are excellent with some club sode but also make a great cocktail base, year-round.  I made one recently with strawberries, peaches and basil.

Enjoy!


tags: preserves, jams, chutneys, pickles, shrubs, shrub recipe
categories: all 2, condiments, recipes, side dishes-1, vegetarian
Friday 09.25.15
Posted by Aliya LeeKong
 

Strawberry-Peach Basil Drinking Vinegar (Shrub)

View fullsize shrub2.jpg
View fullsize shrub3.jpg
View fullsize shrub5.jpg
View fullsize shrub4a.jpg
View fullsize shrub1.jpg

STRAWBERRY-PEACH BASIL DRINKING VINEGAR

The summer has been ridiculously hot!  and, for me, the perfect thirst quencher has a few things: (1) it has to be cold (obvi...). (2) it needs acid - think lemonade!  some sort of tart bite to it.  (3) and a hint of sweetness (4) sometimes, bubbles help! 

In a lot of different cultures, instead of citrus fruits, vinegar is used to add that touch of sour.  Whether it's Irani sekanjabin, a simple syrup infused with vinegar and mint, Greek posca made with vinegar, water and herbs, Asian drinking vinegars or simply the various cultural adages that drinking vinegar has health benefits, it's sort of been around for a long time, and, if you live in Brooklyn like me, some variation may just be in your corner bodega....

Shrub is the name given to the American colonial era version of the drink, and the modern versions of this drink often have fruits.  Mine has strawberries and peaches, and, not just any strawberries and peaches - the most bruised and battered ones!  Yes, this is an amazing way to utilize the fruits that are still good but may not make it to your fruit plate or win any beauty contests.  Typically, you sort of mix everything together (i.e. cold brew it) and let the flavor develop over a week or two.  For the impatient ones among us, myself included, I cook the fruit down with raw honey (in lieu of sugar) and herbs (here, a gorge, purple basil that has been growing like a weed in my garden).  I finish it off with some raw apple cider vinegar, and once cooled and strained, it's ready to go!

There are a million different combinations you can make with this recipe - different fruits, different herbs, and even different vinegars.  I take a few tablespoons of this over ice and top it off with some club soda (and sometimes vodka...) for the ultimate refreshing summer drink!

Enjoy!

Ingredients

Yields approximately 2 1/2 cups

1 cup strawberries, hulled and quartered

1 cup peaches, pitted and diced

8-9 leaves basil (purple or green)

1/2 - 2/3 cup raw honey (adjust to your sweetness preference)

1 cup raw apple cider vinegar

Procedure

In a medium pot, bring strawberries, peaches, basil, honey, and 1 cup of water up to a boil. Lower to a simmer and simmer for about 3 to 5 minutes until the fruit breaks down. Remove from the heat, add the vinegar and let the mixture cool to room temperature.

Strain, pressing all of the juice out of the fruits as you do, and refrigerate. It should keep for about a month (or even longer, though I never have any after that point!).

I take about 4 tablespoons of the shrub over ice and top with a 1/2 cup of club soda or even fresh coconut water for a great drink.

tags: shrub recipe, vinegar tonic recipe, drinking vinegar recipe, sekanjabin
categories: all 2, blog, drinks & cocktails, quick & easy, recipes
Wednesday 08.26.15
Posted by Aliya LeeKong
 

Peak Season Corn: Buying/Cooking Tips + 6-Ingredient Salad

PEAK SEASON CORN: BUYING / COOKING TIPS + 6-INGREDIENT SALAD AND OTHER RECIPES

Corn is summer, and at no other point in the year is it as sweet and tasty as it is now.  This is all my family is eating right now and in so many different ways.  I wanted to give you guys a few tips on how to maximize your corn experience - from choosing the right cobs, cooking and shucking them, to a simple "how-to" corn salad and other recipes.

BUYING TIPS: Buying the right corn can make all the difference because corn gets starchy and loses sweetness after it's picked.  Obviously, you want freshly-picked corn with bright, plump kernels, but you don't have to peel back the husks and peek to check them.  

  • Look for bright green cobs where the husk is tight over the corn.

  • The silks at the end should be brown and slightly tacky and damp - if they are black and/or dried, the corn is a bit older.

  • Feel for the kernels through the husk to make sure they are plump.

  • Finally, check the top for wormholes and avoid any where it looks like they may have gotten through.

COOKING AND SHUCKING: I put these two together because I'm sharing with you my favorite way of cooking corn.  Some prefer boiling which requires shucking the cobs first and getting rid of all of that pesky silk before cooking.  Go for it if that's what you like (or if you want to give the kids something to do)! 

I personally prefer a quick roast in the husks.  25 minutes at 400˚F in the oven (right on the rack) or on the grill set up for indirect heat makes sure you have super moist, flavorful kernels.  The plus side?  Once they are cool enough to handle, all of the silk slides right off with the husks.  No mess!  I then eat them straight from the cob, cut them off for a salad (see below) or toss them back on the hot side of the grill for a little char right before serving!

6-INGREDIENT CORN SALAD "HOW-TO": Corn salad shouldn't be something that requires exact measurements.  Here is what generally goes into my corn salads.

  • Corn - cooked and off the cob (see roasting in the husks above).  For a modest side, I figure 1 cob per person.

  • Peppers - hot, sweet, roasted, pickled.  Add enough to add color.

  • Another surprise ingredient - Go seasonal with grape tomatoes, radishes, zucchini or arugula.  Think starchy with potatoes, lima/cannelini beans or even couscous or bulghur.  Again, enough to add color and mix to the salad.

  • Onion - shallots, red onion, scallion, Vidalia - raw, charred, caramelized, roasted.  Just enough for flavor.  You can overdo here, but not really under-do.

  • Herbs - basil, chives, cilantro, parsley, mint, tarragon.  Choose one or use a few to layer flavor.  You can't really go wrong.

  • Acid - cider vinegar, lime or lemon juice, sherry vinegar, pickled pepper juice.  A few splashes.

That's it!  Mix them together in a bowl and season with salt and freshly ground black pepper.  Taste and add whatever is missing from above.  Let the flavors marry for a few minutes before serving - it will taste even better the next day!

Looking for other recipes?  Check out a few other ones I love.....

CORN WITH GREEN CHILI BUTTER & TOASTED COCONUT


corn pudding pic1.jpg

SMOKY, SPICY CORN PUDDING


SOPA DE FLOR DE CALABAZA (SQUASH BLOSSOM SOUP)


Enjoy!!


tags: farm fresh corn, corn salad recipe, how to buy corn, shucking corn, corn buying tips
categories: all 2, recipes, salads, soups & salads, vegetarian, side dishes-1
Wednesday 08.19.15
Posted by Aliya LeeKong
 

Sugar Plum & Currant Torte

View fullsize plum1.jpg
View fullsize plum2.jpg
View fullsize plum3.jpg
View fullsize plum4.jpg

SUGAR PLUM & CURRANT TORTE

I am forever going on and on about the market at this time of year and how truly beautiful, bright and flavorful all of the fruit is, and this post is no exception!  I found some gorgeous sugar plums and tart currants and set off to bake on a Sunday - nothing too complicated, just a tad decadent, and delicious for days into the week.

What I ended up with is this torte, a true summer dessert (and sometimes breakfast!).  This is perfect for cake novices because the batter is just so easy.  It comes together in less than 10 minutes and is virtually fool-proof.

A few points: I happened to make this gluten-free, but if you only have all purpose flour on hand, go ahead and replace the flours with an equal amount of it; just drop down the baking powder to 1 teaspoon.  Also, I don't use a ton of sugar here, so the key is using super sweet plums to offset the tartness of the currants. Taste before baking!

Enjoy!

Ingredients

Serves 6 to 8

½ cup oat flour

½ cup brown rice flour

¼ cup almond flour

1 ½ teaspoons baking powder

pinch of salt

1 stick unsalted butter, room temperature

¾ cup coconut, palm, unrefined, or plain old white sugar

2 eggs, room temperature

10 sugar plums, halved and pitted

½ cup red currants

raw honey + cinnamon

Procedure

Preheat the oven to 350˚ F.

In a medium bowl, mix together the flours, baking powder and salt.

With a stand or hand mixer, cream the butter with the sugar.  To the sweet butter, add the eggs one at a time until incorporated.  With the mixer on low, add in the flour until just incorporated.

Transfer the batter to a greased 9-inch cake or pie tin.  Layer the plum halves (skin side up) and currants.  Brush the plums with a bit of raw honey and sprinkle cinnamon all over.

Bake for 40 to 45 minutes until a toothpick inserted comes out clean.  Cool completely before unmolding.

tags: plum torte recipe, sugar plums, torte recipe, how to make plum torte, desserts, plum dessert
categories: all 2, breads & cakes, breakfast, desserts
Tuesday 08.11.15
Posted by Aliya LeeKong
 

Haitian (Quick) Pikliz

View fullsize pikliz1.jpg
View fullsize pikliz2.jpg
View fullsize pikliz3.jpg
View fullsize pikliz4.jpg

HAITIAN (QUICK) PIKLIZ

As of late, I've been feeling like pickled foods are everything (and said as much to Food Republic this week!).  They add just the right amount of vibrancy and acidity to certain dishes, and this pikliz, a Haitian version, is no different.  Haitian pikliz is a traditional condiment for the country - typically cabbage, onions, sweet and hot peppers, and spices soaked in vinegar and lime juice.  It's tart with serious heat and depth of flavor. 

My version is a bit different - rather than soaking the vegetables and waiting 3 to 5 days to eat it, I use a quick pickling technique that allows you to wait until it's cooled and enjoy right away.  I also add a bit of daikon radish (totally optional) for a bit of extra crunch.  The key to the incredible flavor is scotch bonnet peppers, typically a five alarm fire in your mouth.  Don't let the scotch bonnet peppers scare you though - it's not like they are light work, but they won't burn your tongue off either here; the vinegar tames them.

This has been my staple for grilling season - kind of like coleslaw but with the benefit of hot sauce.  Whole fish charred on the grill topped with this pikliz has been a weeknight fave.  It goes great with chicken and especially pork, because it helps cut the fat.  In Haiti, it's often paired with fried pork called griot (my recipe: here).  Crunchy, fragrant, acidic, with that heat and flavor of the peppers...

Also, a pet peeve of mine...don't let the pickling liquid go to waste!  A little pour in eggs, soups, a stir fry or a rice dish adds just the right kick.  Enjoy!

Ingredients

Yields a 1 quart mason jar

2 cups green cabbage, thinly sliced (I used savoy, the light green leaves only)

½ cup daikon radish, thinly sliced (optional)

1 small white onion, thinly sliced

1 medium carrot, grated

2 small sweet peppers or ½ bell pepper, thinly sliced

4-5 scotch bonnet, seeded and thinly sliced

2 scallions, thinly sliced

5 garlic cloves, minced

1 ½ cups raw cider vinegar

juice of ½ lime

1 ½ teaspoons kosher salt

1 scant teaspoon unrefined sugar

14 black peppercorns

4 whole cloves

Procedure

To a 1 quart mason jar, add the cabbage, daikon radish (if using), onion, carrot sweet and hot peppers, scallion and garlic.  It will probably be overflowing, but press down all of the vegetables as best as you can.

In a medium saucepan, bring the cider vinegar, lime juice, salt, sugar, peppercorns and cloves up to a boil.  Remove from heat and pour over the vegetables.  Close the jar and let cool to room temperature before using.  You can eat right away.

At this point you can refrigerate to store, but I like to keep it at room temperature for an extra day for a bit of fermentation and then refrigerate.  It should keep for about 3 weeks.


tags: haitian pikliz recipe, pikliz recipe, how to pickle cabbage, pickled cabbage, haitian cooking
categories: all 2, condiments, side dishes-1, vegetarian
Wednesday 07.29.15
Posted by Aliya LeeKong
 

My Top 5 Beach Picnic Recipes

MY TOP 5 BEACH PICNIC RECIPES

For those of us that don't live steps from the water, going to the beach means lugging around a lot of stuff (and just forget it if you have kids!).  The last thing you want when you are remembering 3 different sunscreens, beach blankets, chairs and towels is to get too complicated on the food side of things.  So I thought I would share some of my favorite beach picnic recipes to keep it simple and delicious.

BLUEBERRY-HIBISCUS SMASH

You have to stay hydrated while at the beach, and this is delicious with or without the vodka.  Blueberries, mint, lemon and hibiscus tea - It's tart, lightly sweet and super thirst-quenching.

RED LENTIL DUMPLINGS

LOVE these red lentil dumplings from 101 Cookbooks.  The lentils are blended with roasted tomatoes, smoked paprika and garlic and wrapped up in potsticker wrappers.  These are protein-packed but not too bulky for beach-eating, and I love that they taste great (and keep) at room temperature.

ISRAELI COUSCOUS SALAD WITH LEMON, FENNEL AND BASIL

The key to a great beach salad is one that can stand up to the warm weather and doesn't get all wilty.  This salad is great because the fennel adds that perfect bite, basil and lemon give it brightness, and the couscous adds a bit of bulk to keep you satisfied.

BAKED SWEET POTATO CHIPS

Whether it's for the car ride or while you're lazing, something salty and crunchy is always in order, and I happen to love this recipe for baked sweet potato chips.  You basically slice up sweet potatoes, and all the work happens while they dehydrate in the oven...

DARK CHOCOLATE, CINNAMON & OATMEAL COOKIES

At the end of the day after no one can see or care about your bloat, indulge in these amazing cookies.  These are my most treasured, favorite cookie recipe ever and a go-to whenever I'm craving chocolate chip cookies.  Crispy edges, chewy, oatmeal-y bite inside, bitter dark chocolate offset with a hint of cinnamon - the best!

tags: beach recipes, picnic ideas, what to bring to the beach, easy salads
categories: all 2, lifestyle, quick & easy, salads, soups & salads
Wednesday 07.22.15
Posted by Aliya LeeKong
 

Berry Picking + Blueberry, Raw Honey & Coconut Fool

BERRY PICKING + BLUEBERRY, RAW HONEY & COCONUT FOOL

This past weekend, I drove out to Ochs Orchard an hour and a half outside NYC to pick some berries and, really, to take my little girl berry picking for the first time.  This is a gorgeous pick-your-own farm that had blueberries, raspberries and cherries that day (call for availability before going always!), and we had an incredible time.  What's super cute about this farm is that they have a donkey and goat that you can pet and feed and also a farm store with serious ice cream (and heavenly raw honey).  It's definitely worth the drive out and made for an exhausting day for my little one!

View fullsize coconut9.jpg
View fullsize coconut4.jpg
View fullsize coconut5.jpg
View fullsize coconut6.jpg
View fullsize coconut8.jpg
View fullsize coconut10.jpg

Coming home with a glut of berries means I've been messing around with recipes and preserving this week.  What I love is that they are so sweet, whatever I've made I use minimal sugar.  I wanted to make a non-dairy frozen dessert, so I decided to go the coconut route.  Did you realize you can whip coconut cream, the semi-solid, thick layer in coconut milk?  I did not!  and so I set off whipping coconut cream, cooking down the blueberries to concentrate the juices and folding them in with a bit of honey.  The result was a delicious blueberry, raw honey and coconut fool (a fool is an English dessert which usually has fruit folded into whipped cream or other custard).

I really loved it in it's chilled, custard-like state; all of the flavors really stood out that way - the creaminess of the coconut, the slightly tart and sweet, syrupy blueberries and the floral, raw honey.  I cooked the blueberries down with a bit of sherry vinegar and honey, and it really brought out all that signature blueberry flavor.  BUT I still wanted to see what happened if I froze it...and so I did.  It made for a delicious semifreddo though the blueberries and low sugar content made it a bit more icy than I prefer.  Verdict on the semifreddo: flavor on point, texture not the best.  So the recipe I'm sharing is for the fool.  Feel free to enjoy it however you want!

View fullsize coconut12.jpg
View fullsize coconut3.jpg
View fullsize coconut 13.jpg
View fullsize coconut11.jpg
View fullsize coconut2.jpg
View fullsize coconut1.jpg

Ingredients

Yields 1 9” x 5”  loaf pan

Blueberry mixture:

2 ¾ cups blueberries

2 tablespoons raw honey, plus more for drizzling

2 tablespoons sherry vinegar

3 tablespoons water

a pinch of salt

Fool base:

4 cans coconut milk, chilled in the fridge overnight

2 tablespoons confectioner’s sugar

1 teaspoon vanilla extract

1 teaspoon cinnamon

Procedure

A few things to do ahead of time:  (1) make sure to chill the coconut milk overnight in the fridge to solidify the coconut cream; and (2) chill the whipping bowl and whisk or whisk attachment in the fridge for a half hour or so before using (will help it whip up).

Heat blueberries with honey and vinegar over medium heat.  Simmer covered for 5 minutes until the blueberries break down and then simmer uncovered another 4 to 5 minutes until the juice thickens.  Cool completely (and it will continue to thicken as it cools).

Open the chilled cans of coconut milk and take out the top, solid layer of coconut cream only, leaving behind the water.  Whip the coconut cream in the chilled bowl with confectioner’s sugar, vanilla and cinnamon for 3 to 4 minutes using either a stand/hand mixer or straight arm strength. 

Layer half of the coconut mixture in the loaf pan.  Drizzle all over with raw honey and half of the blueberry mixture.  Top with the remaining whipped coconut cream and repeat. Take a butter knife and make swirls to incorporate the layers.  Chill for a minimum of 4 hours before serving. 

You can also freeze it if you want to go the semifreddo route!


tags: how to whip coconut milk, coconut whipped cream, coconut desserts, blueberry fool, blueberry desserts, raw honey dessert, coconut fool recipe, berry picking NYC
categories: all 2, desserts, lifestyle, quick & easy, recipes
Thursday 07.16.15
Posted by Aliya LeeKong
 

Grilled Butterflied Chicken with Charred Jalapeño Sauce

View fullsize chicken3.jpg
View fullsize chicken1.jpg
View fullsize jalapenos1.jpg
View fullsize chicken2.jpg

GRILLED BUTTERFLIED CHICKEN WITH CHARRED JALAPEÑO SAUCE

Once it gets hot out, grilling becomes my go-to for weeknight dinners (and weekend entertaining!).  It's simple, healthy and you can grill just about anything.  I know because I do throw on everything - from your standard barbecue fare to split romaine hearts to potatoes.  A good, grilled chicken is second-to-none, crispy, seasoned skin with tender, smoky meat underneath - and the butterflying technique means you get both of your wishes: evenly cooked meat plus super crackly skin.  Plus, it's easy, and there's no marination or brining necessary to have delicious grilled chicken.

This sauce (like many other recipes!) came out of a need to use up what I had.  I went to the market, and I didn't find any poblanos, which were my first choice.  But they shouldn't have been!  The jalapeños are perfect here, and the sauce has a spicy, acidic kick and a creamy (with no cream..) texture.  It's perfect with this chicken, but I could also see this with a pork chop, a lamb sirloin or even a whole grilled fish.  Happy grilling!

Enjoy!

Ingredients

Serves 4

For the chicken:

Handful of wood chips wrapped in foil ( optional; I like to use applewood)

1 whole chicken, 3 ½ to 4 lbs

2 teaspoons garlic powder

2 teaspoons sweet paprika

1 teaspoon onion powder

1 teaspoon dried oregano leaves

½ teaspoons ground black pepper

Canola oil

Kosher salt

For the sauce (yields approx. 2/3 cup):

8 jalapenos, whole

3-4 pickled cherry peppers along with 4-5 tablespoons of the pickling liquid

1 garlic clove

1 ½ teaspoons honey

Small handful of cilantro (stems + leaves)

Kosher salt and freshly ground pepper, to taste

Canola oil

Procedure

Set up your grill for indirect grilling, either piling charcoal on one side or turning only half the burners on.  I like the inside of my grill to linger around 400-450˚ F.  We're going to cook the chicken on the side without direct heat for the majority of the time and then finish it over the high heat to crisp the skin and get that char.  This is a good time to throw on the wood chips as well which will give a great smoky flavor to the chicken, but it's totally optional.

For the chicken: Butterflying a chicken isn't as complicated as it sounds.  Start with the chicken breast-side down and have some kitchen shears by your side.  Starting at the bottom of the bird, cut along each side of the backbone straight through the ribs to the neck opening.  Set aside the backbone and giblets and reserve for making stock.  Take each side of the flaps in front of you and open the chicken up flat.  Flip onto the other side and press down on the breastbone to flatten (you'll hear a crack at some point!).  Done.

Mix together the garlic powder, sweet paprika, onion powder, oregano, and black pepper.  Coat the chicken lightly in oil and sprinkle the dry rub all over.  Your hands are already messy, so just go ahead and rub it in good.  Then, season generously with salt all over.

Make sure to oil your grill as well, and place the chicken breast up on the side without the charcoal or the burners.  I like to face the legs towards the heat source and the neck side away since the legs typically take a bit longer.  Cover your grill and cook for 30 to 40 minutes.  I like to check for doneness with a cake tester or (very) small knife inserted at the thigh joint - if inserted to the bone and pulled out it's hot, the meat is done.  You can conversely make sure it's cooked to about 150-155˚ F.   For the last 3 to 5 minutes, I flip the bird over, skin and breast side down, over the direct heat side of the grill.  This makes sure you get that thin, crispy skin.

Allow the bird to rest for about 5 to 7 minutes before carving.

For the sauce: While the bird is cooking, throw the jalapeños right over the direct heat side and char on all side.  The skin should turn black and blistered.  Transfer to a plastic bag while it cools.  When cool enough to handle, use a paper towel to rub off the charred skin.  Then, with a knife, remove the stem, ribs and seeds.  Chop roughly.

Transfer the jalapeños to a blender and add the pickled cherry peppers, pickling liquid, garlic, honey and cilantro.  Season with salt and pepper.  Run the blender and then stream in the oil as needed to create the sauce.  I like to just get the blade moving and make sure the sauce is uniform and not too thick.  It should look creamy and coat a spoon.  Remember to taste and adjust the seasoning if necessary.

Serve the chicken hot with the sauce on the side. 

tags: grilled chicken recipe, grilled chicken, grilled whole chicken, grilled butterflied chicken, roasted jalapeno, roasted pepper sauce, chicken with peppers
categories: all 2, condiments, man-friendly, recipes, main dishes
Wednesday 07.08.15
Posted by Aliya LeeKong
 

Strawberry Rhubarb Crumble with Ancient Grain Oatmeal + Coconut Sugar

View fullsize straw4.jpg
View fullsize straw1.jpg
View fullsize straw2.jpg
View fullsize straw3.jpg

I have been slightly losing my mind over the strawberries that have just gotten to the market, and so I've been playing around with variations on crumbles.  I particularly love this one with rhubarb because strawberry and rhubarb are just so classic together, but, also, using peak season fruit means I can bake with a lot less sugar - the berries taste like candy! 

The filling gets an ingredient that you usually don't see in a crumble: sherry vinegar.  The vinegar really brightens and intensifies that berry flavor in a unique way.  I let the fruit marinate for a bit before topping and throwing into the oven.  And in lieu of an all purpose flour crumble topping, I use a bit of brown rice flour and an ancient grain oatmeal that has gluten-free oats, amaranth, and hemp amongst other ingredients.  When I set out to make this recipe, I actually wanted to create a breakfast crumble I could give my little girl, and this does double duty - for breakfast or a simple dessert.  I also used coconut sugar here - an unrefined sugar with a lot of antioxidants and lower glycemic effect; it's a bit sweeter than white sugar, so I used a lot less than other recipes you'll see out there.

Breakfast or not, this crumble is decadent - sweet ripe fruit with bits of sliced almonds topped with a buttery, crumb topping.  Full-bodied and deeply flavored - breakfast never tasted so good!

Enjoy!

Ingredients

Serves 6 to 8 / Yields (1) 9 1/2-inch pie dish

For the filling:

1 quart strawberries, hulled and halved (about 4 cups chopped)

5-6 stalks rhubarb (about a ½ lb), diced into ½ inch pieces

½ teaspoon vanilla extract

2 teaspoons (good quality) sherry vinegar

2 ½  tablespoons coconut sugar

2 tablespoons cornstarch

1/3 cup sliced almonds

For the crumb topping:

½ cup brown rice flour

½ cup ancient grain oatmeal (rolled oats work great here too)

1 teaspoon baking powder

¼ cup coconut sugar

½ teaspoon cinnamon

¼ tsp salt

7 tablespoons cold unsalted butter, cut into cubes (plus a bit more for greasing)

Procedure

Preheat the oven to 375° F.

In a medium bowl, mix together all of the filling ingredients.  Let marinate 10-15 minutes while preparing the topping.

In a food processor, add the flour, oatmeal, baking powder, sugar, cinnamon and salt.  Pulse until uniformly mixed.  Scatter the cold cubes of butter and pulse until a coarse meal forms.  Don't let it run for too long because the butter will warm up and start to clump.

Grease a 9 ½-inch pie dish with a bit of butter and place on a baking sheet (to catch any juicy overflow).  Add the strawberry-rhubarb mixture.  Top with the crumb topping and bake for 35 minutes until the fruit is bubbling and the crumble topping has browned up.

Serve warm as is for breakfast or with a bit of ice cream or whipped cream for dessert.


tags: gluten free, gluten free baking, crumble recipe, crisp, strawberry rhubarb crumble, strawberry rhubarb crisp, strawberry pie, desserts
categories: all 2, breakfast, desserts
Tuesday 06.02.15
Posted by Aliya LeeKong
 

7 Healthy Substitutions

7 HEALTHY SUBSTITUTIONS

At this point in the year, my mind always starts to turn away from winter stews and comfort food (umm, pizza) and towards the lighter and brighter.  Food and healthy choices are truly a game of inches, so I wanted to share a few of my go-to, healthy substitutions, stuff I do on an everyday basis at home to help offset my splurg-y meals out.  One of my requirements as a cook, though, is that I can't miss what I'm substituting - it still has to taste amazing and fulfill whatever sense (taste, texture) gets activated.  So hopefully you guys will like these subs as much as I do...

AVOCADO INSTEAD OF MAYO

I like to pulse an avocado or two in the processor with a bit of salt and lime to get a smooth, creamy and slightly whipped avocado crema.  Mayo is not missed.


SWAP OUT OATS FOR AMARANTH OR QUINOA AT BREAKFAST

Breakfast for me is where I stuff in as much nutrition as I can!  I love using cooked amaranth or quinoa for an easy breakfast pudding.  Add a bit of milk of your choice to the cooked grain, some chia or even ground flax seeds, sliced almonds or other nuts, berries/fruit, and you have a super satisfying meal in no time.  Much better than store bought cereal!


WHOLE GRAINS INSTEAD OF BREAD OR BREADCRUMBS

When I'm making meatloaf or meatballs, I like to use cooked bulghur, oats, or a short grain brown rice (slighly overcooked) as my binding agent in lieu of soaking bread in milk or using breadcrumbs.  The texture is amazing, and it just makes the meal more nutrient-dense.  Love it.


VEGAN BANANA ICE CREAM FOR DESSERT

I'm an ice cream snob, and there are obviously times when a pint of Mint Chip is called for.  But when I know I need to keep it light, I whir up some frozen, sliced banana pieces in the processor with a bit of cinnamon to make vegan "ice cream."  After it gets kind of icy / shredded, the processor warms it up and it turns into a super, whipped custard (and a bit of water or almond milk can get the blade moving if it's taking too long).  It really is delicious - creamy, sweet and light; it hits the ice cream-craving texture spot on.  AND you can make endless variations.  Add frozen berries for more of a sorbet feel, vanilla bean to go traditional or peanut butter and raw cacao for a peanut butter cup treat. 


DATES OR CINNAMON FOR SWEETNESS

I use these in totally different ways, so it may have been misleading to put them together.  Dates (particularly the Medjool type) are my go-to for smoothies, muffins and cake batter - they have a caramelized sweetness that is hard to rival.  Cinnamon is just what I put in coffee or my homemade almond milk to add some (blood sugar-balancing) sweetness; it's kind of a brain trick and takes some weaning off the real thing, especially when it comes to coffee, but it's worth it.  Sugar gives you wrinkles (which is enough to send me screaming), so sub where you can.


MAPLE SUGAR RATHER THAN REFINED

If you must (and there are times that you MUST), using maple sugar rather than the refined, white sort is amazing.  Full of antioxidants and lower on the glycemic index, this is my option for baking for my little one.  Check it out in this Butternut Squash & Apple Bread recipe.


OAT + BROWN RICE + ALMOND FLOUR INSTEAD OF AP

Also, in that recipe, I use a great, gluten-free mix of flours instead of all-purpose.  Really, since no one in my family has a gluten allergy / intolerance, I'm motivated again by nutrition - more fiber, higher vitamin / mineral content, full of good fats.  And, again, I don't miss the AP here - this bread is just as good, if not better, with this healthy flour mix.


Enjoy!


tags: healthy, gluten free, gluten free baking, healthy substitutions, avocado mayo
categories: all 2, lifestyle
Wednesday 04.22.15
Posted by Aliya LeeKong
 

Blueberry-Hibiscus Smash

View fullsize drink1.jpg
View fullsize drink2.jpg
View fullsize drink3.jpg

BLUEBERRY-HIBISCUS SMASH

It feels like the long wait is over and the warmth has finally arrived!  I've been doing fam brunches for the past couple weeks - inviting friends to come by when they can on a Sunday, cooking up a storm, and letting the day linger as we all eat and chat and have a few cocktails.  One of my favorite things to do is make a huge pitcher of (unsweetened) hibiscus tea ahead of time; it's the perfect mixer.  I love combining it with freshly squeezed juice from the market or from whatever I have on hand for an arnold palmer of sorts.  With a great, infused simple syrup (ginger, mint, rose, clove), I have endless variations for both mocktails and cocktails.

For this cocktail, I keep it super simple - muddling together mint, fresh blueberries, and lemon.  Honey sweetens it up a bit, and, of course, the hibiscus tea adds tartness.  The smash was created as a simpler version of the mint julep - it only requires a bit of muddling rather than making a mint simple syrup or extract.  It was originally made with whiskey, but there are tons of versions with vodka, rum and gin.  For this one I flip flop between using rum and vodka (I can't decide which I like better!), so pick your own poison and enjoy!

Ingredients

Yields one cocktail

6 or 7 mint leaves

8 or 9 blueberries, divided

2 lemon slices

2 teaspoons honey

4 ounces unsweetened, hibiscus tea*

2 ounces vodka or rum

Procedure

In a cocktail shaker, muddle together the mint leaves with the 4 or 5 blueberries and the lemon slices to release the juices and oils.  Add the honey, hibiscus tea, and spirit and shake well to combine.

Transfer to a rocks glass filled halfway with ice and garnish with the remaining blueberries and a mint sprig.

*For loose hibiscus tea, my ratio is 1 cup dried hibiscus leaves per 10 cups water.  I generally let mine sit overnight before straining,

tags: cocktails, tea cocktail, cocktail recipe, mocktail recipe, hibiscus
categories: all 2, drinks & cocktails, quick & easy, holiday, recipes
Thursday 04.16.15
Posted by Aliya LeeKong
 

My Current Faves

MY CURRENT FAVES

What I love about writing for my blog is that it's as much about sharing with everyone out there as it is a way for me to document my own inspirations and path, really.  I wanted to start a new section called "My Current Faves" that will be a handful of things I'm loving right now.  They could be anything from food to beauty to a new website I came across.  Hope you guys enjoy!

SERVING SET THAT LOOKS WAY MORE EXPENSIVE THAN IT REALLY IS:

Resplendent Serving Set | Anthropologie


PERFUME I FANTASIZE THAT I NATURALLY SMELL LIKE:

Maison Francis Kurkdjian Oud Silk Mood | Net-A-Porter


MOOD LIGHTING FOR OUTDOOR ENTERTAINING:

Meredith Brass Lanterns | Pottery Barn


DAILY THERAPY TO COMBAT COCKTAILS WITH THE GIRLS:

Liquid Chlorophyll | Vitacost


ALL-PURPOSE (AND NATURAL) CREAM FOR BOTH BABY GIRL AND ME:

Egyptian Magic Skin Cream | Birchbox


DAILY READING FOR GLOBAL CULTURAL FINDS:

Protein

tags: current faves, lifestyle, egyptian magic, serving set, outdoor lanterns
categories: all 2, lifestyle
Thursday 04.02.15
Posted by Aliya LeeKong
 

Scenes From Roma

SCENES FROM ROMA

I was on my computer perusing my photos and came across these, photos I took while in and around Rome a few months back.  For me, I always pull inspiration from my travels and looking through photos helps jog my memory - a smell, a dish I ate (or cooked), the vibrancy of the market. 

Many of these were taken in Campo di Fiori, an incredible produce, fish and flower market that has been held daily since the mid- to late-1800's.  I hung out with a fellow cookbook author that day - we shopped for groceries and went back to her incredible apartment in Trastevere to cook and chat.  I run these scenes through my mind as I'm thinking up new dishes and go through my notes to figure out what I learned and loved.

I'm also posting these photos because I'm missing the market colors of warmer weather and can't wait until this winter breaks (first day of Spring or not...)!  Enjoy....


View fullsize rome16.jpg
View fullsize rome4.jpg
View fullsize rome15.jpg
View fullsize rome14.jpg
View fullsize rome1.jpg
View fullsize rome13.jpg
View fullsize rome12.jpg
View fullsize rome3.jpg
View fullsize rome2.jpg
View fullsize rome11.jpg
View fullsize rome10.jpg
View fullsize rome9.jpg
View fullsize rome7.jpg
View fullsize rome8.jpg
View fullsize rome6.jpg
View fullsize rome5.jpg
tags: rome, roma, italy, italian food, campo di fiori, trastevere
categories: all 2, travel
Thursday 03.19.15
Posted by Aliya LeeKong
 

Currant, Pistachio & Coconut Overnight Oats

View fullsize oats1.jpg
View fullsize oats2.jpg
View fullsize oats3.jpg

CURRANT, PISTACHIO & COCONUT OVERNIGHT OATS

I've been seeing overnight oats recipes everywhere for the past few months, and I finally broke down and tried making some myself.  Love them!!  My brain takes some time to turn on in the morning, and this takes all the guesswork out of breakfast, for me and my little one (FYI, when I first gave them to her, it was the quietest I've seen her; she dug in!!).  There could be nothing easier than throwing a bunch of ingredients into a mason jar, shaking and letting them sit overnight - no cooking.  And it's a complete blank slate; you can literally layer any flavors you want.

Breakfast, for me, is a way to cram in as many nutrients as I can.  The day can kind of slip by you, so I like to make sure I have at least packed my morning with protein and vitamins.  I went a bit Middle Eastern-inspired here with fruity currants (raisins or sultanas would be great too), pistachios and some dried, unsweetened coconut.  A bit of cinnamon, vanilla and ground cardamom make all of the flavors pop, and I added some chia seeds for protein, Omega-3s and hydration.  I also used a combination of milk and yogurt to bloom the oats, and I love how the currants and pistachios plump up a bit.  Pick any milk you like for this - almond, fresh coconut or any nut milk would be delicious here.  If you want the pistachios to have more crunch to them, leave them out and layer them the morning after.

Enjoy!

Ingredients

Yields 2 to 3 servings (depending on your appetite!)

1 cup old-fashioned rolled oats

3 tablespoons dried currants (or 1/4 cup raisins/sultanas)

3 tablespoons unsalted, shelled raw pistachios

2 1/2 tablespoons dried, unsweetened coconut

2 teaspoons chia seeds

1/2 teaspoon ground cinnamon

1/4 teaspoon ground cardamom

Pinch ground vanilla bean (or 1/2 teaspoon vanilla extract)

1 cup milk (cow's, nut, coconut, etc)

1/2 cup yogurt

Procedure

In a mason jar or bowl, add all of the ingredients.  Shake or stir until well-combined.  Cover and refrigerate overnight.  That's it!

If you want, you can heat them a bit over the stove the next morning if you like your oats warm.  I actually love them straight out of the fridge...These keep for a few days, but I prefer making it daily.


tags: best overnight oats, overnight oats recipe, how to make overnight oats, coconut recipes, breakfast recipes
categories: all 2, breakfast, vegetarian
Friday 03.06.15
Posted by Aliya LeeKong
 

My Pantry Essentials

MY PANTRY ESSENTIALS

Ok, so admittedly this isn't your typical pantry!  While there are definitely elements of what you need to cook great food - fat, salt, acid, spices - my essentials here are what I personally use to take my food to the next level.  Some of these are basic building blocks (roasted garlic, cultured butter), others are my preferences to the traditional (harissa for chili paste, sherry vinegar rather than, say, balsamic) and then some are unique ingredients that have extreme versatility and use (pomegranate molasses, za'atar).  So let me do a little explaining to share why when you come to my kitchen, you will always find these ingredients, and how they can add to your own culinary arsenal...

View fullsize pomegranate molasses pic1 copy.jpeg
View fullsize harissa.jpg
View fullsize roasted garlic pic1 copy.jpeg
View fullsize sherry vinegar.jpg
View fullsize aleppo.jpg
View fullsize dairy_vbc_cultured_butter.jpg
View fullsize zaatar pic2 copy.jpeg
View fullsize tamari.jpg
View fullsize mexican-chocolate-500x333.jpg
View fullsize truffle salt.jpg
View fullsize squash 3.jpg
View fullsize smoked-spanish-bittersweet-paprika-by-safinter.jpg

POMEGRANATE MOLASSES

The word "molasses" always brings to mind the dark, sticky, by-product of the sugar process, but, in other parts of the world, the flavor of peak season fruit is captured as fruit molasses.  Fruit molasses (pomegranates, figs, grapes, dates, etc) is made by cooking down fresh juice until it reduces to a syrup - I actually show how to make your own in my cookbook.  Pomegranate is one of my favorites because it has that beautiful sweet flavor coupled with a nice tart bite.  For me, a good pomegranate molasses is like a great balsamic vinegar - fantastic in vinaigrettes, a beautiful marinade and sauce for chicken or ribs, and just as delicious drizzled over berries or ice cream.  I never run out of ways to use this stuff (pom martini anyone?) and always have a bottle or two on hand.


HARISSA

Harissa is my absolute, go-to chili paste, though I still have love for sriracha!  I make a homemade version myself, and it has my ideal heat level (not scorching) and flavor.  This North African sauce has gotten really popular, and you can pretty easily find a bottle at most specialty stores and gourmet grocers.  The uses are endless - incredible as a roast chicken marinade, mixed with honey as a sweet and spicy salad dressing base, perfect for a spicy mayo, mixed with cheese and stuffed into olives, and any other way you usually use hot sauce.  Each version of harissa has its own unique spice blend, so what's nice is it adds complexity to simple dishes (without much work).


ROASTED GARLIC

I'm like literally giving away all of my secrets.  I roast garlic every week and use it wherever I would normally use raw garlic.  It's just garlic, only waaaay better.  Roasting garlic (which is as simple as cutting off the tops, slathering with oil and sprinkling with salt, wrapping in foil and roasting at 400° F for an hour) takes garlic to another level - another deeper, nuttier, less sharp, caramelized level. You could eat the cloves as they are, and they can be mashed right into a paste.  So rub them onto a steak before grilling, make the best garlic bread of your life, give your soups or stews new depth, throw them into mashed potatoes, mac and cheese, rice, your morning eggs...you get it.


SHERRY VINEGAR

If I were to have a house vinegar, this would be it.  I'm pretty sensitive to extremes of flavor - too salty, too sweet, and, in the case of vinegars, too acidic.  Sherry vinegar has acidity, but it's not overbearing.  It's balanced with a honeyed sweetness and complexity of flavor, so it adds more than face-puckering tartness.  There are three types - vinagre de Jerez, vinagre de Jerez Reserva and vinagre de Jerez Gran Reserva (in order of how long the vinegar has been aged).  The middle one is what I use day-to-day - to deglaze my pan-roasted brussels, drizzled on my spiced, butternut squash soup, for a crazy beurre blanc.  The Gran Reserva is perfect to finish a piece of fish or for a cheese plate - it's a bit more expensive but you only need a few drops to add incredible flavor.


ALEPPO CHILI FLAKES

Aleppo chilies are my all-around favorite chili flake for cooking, and I've talked about them in depth in the past.  Aleppo chilies come from Syria and are comparable in heat and flavor to ancho chilies - they're fruity, moderately hot, with smoky undertones that come from a process of being sundried.  The heat is immediate, and it lingers a bit. 


dairy_vbc_cultured_butter.jpg

CULTURED BUTTER

What IS the deal with cultured butter you may be asking?  What you generally find in the refrigerator aisle of the grocery is basic butter, cream that has been churned into a solid, sometimes with the addition of salt.  But back in the day, that cream used to sit a bit, ferment, grow a bit of bacteria before being churned, and the result was slightly tangy, nutty, rich cultured butter.  Some small companies are now producing this old-school butter (sometimes called "European-style"), and it's just, frankly, better butter.  The flavor is amazing (kind of like that ideal, butter taste), but also, it's a bit higher in fat, which is what you want for baking to produce tender, fluffy cakes and biscuits. 


ZA'ATAR

Za'atar is my stuck-on-a-desert-island-and-can-only-bring-one-spice-blend choice.  To me, it's like a more interesting Herbes de Provence - the basic blend has dried za'atar (or thyme), sesame seeds, and sumac, and because of these, it is at once herbaceous, nutty and tart.  I make my own blend, the simplest version (the one in this compound butter), because it allows me to layer in other flavors as I see fit, but the store-bought stuff is still amazing.  Again, you will always see a jar of this in my pantry because I go through it - for my weekly roast chicken, on my garlic bread, sprinkled on a salad or roasted veggies, mixed with a bit of oil as a dip for flatbread, in my aioli.  Once you start using za'atar, you kind of start to wonder how you seasoned food before you had it.  It's that good.


TAMARI

Tamari is your upgrade to soy sauce.  Both are made from fermented soy beans, but soy sauce generally comes from a mixture of soy beans and roasted wheat.  Tamari, on the other hand, is the by-product of miso and little to no wheat is used in the process (making it a great, gluten-free option).  The main differences are in texture and taste, with tamari being a bit thicker, richer, smooth and less salty.  This is an easy switch.


MEXICAN CHOCOLATE

Yet another ingredient I keep in my pantry is Mexican chocolate - thick, sugary-cinnamon tablets of sweet dark chocolate.  That should be reason enough for why this chocolate is included on my list because it is sooo easy to snack on this stuff like it's going out of style.  But beyond straight consumption, I also love cooking with it - for killer hot chocolate or a mocha, in a simple pot de crème or chocolate sauce, for a chocolate bread pudding, shaved on top of ice cream, baked into a cake.  It's a bit drier than traditional chocolate, so it works well when combined with a liquid like cream, and when baking, make sure to up the moisture factor with sour cream, buttermilk of crème fraiche.


TRUFFLE SALT

There are not too many things that rival the flavor of truffles.  When my husband and I first met and we went grocery shopping, he nearly fell over when he saw what truffle oil costed.  But after one truffled meal, I caught him on his own truffling take-out!!  I certainly don't advise that, but I will say that as of late my taste buds have been preferring truffled salt over the other methods.  It's expensive, but a little goes a long way here.  It's great to finish a piece of steak or fish and adds that truffled flavor without the synthetic flavors you can often find in the oils and butters.  When my girlfriends come over, I put this to great use and make a homemade, truffle-honey butter popcorn... 


MAPLE SUGAR

Lately, my cooking sugar of choice has been maple sugar.  It's a sugar from the maple tree that tastes a lot like the syrup; it's also unrefined, full of antioxidants and minerals and has a lower glycemic impact.  I use a bit less than white or brown sugar when I'm baking, and I think the flavor is out of this world.


PIMENTÓN DE LA VERA (SMOKED SPANISH PAPRIKA)

Cooking requires a skillful layering of flavors, and this spice gives heat, smoke and a bit of bitterness.  Peppers from the La Vera region in Spain are oakwood-smoked and dried before being milled, and the spice comes in three heat levels so you can choose what works for your palate.  When I want to add smokiness without going through the effort of physically smoking something, this ingredient gets thrown in - to almost all of my dry rubs, to amp up a gratin, my shakshouka, and even pasta (bacon-less carbonara!).  

Hope you guys enjoy this exotic pantry - would love to hear from you what makes your list!

tags: pantry, modern pantry, pantry essentials, cultured butter, pomegranate molasses, harissa
categories: all 2, spices, lifestyle
Friday 02.27.15
Posted by Aliya LeeKong
 

(Coconut) Daal with Super Greens

View fullsize soup1.jpg
View fullsize soup4.jpg
View fullsize soup3.jpg
View fullsize soup2.jpg

(COCONUT) DAAL WITH SUPER GREENS

This frigid weather in NYC combined with a lingering cold has me thinking about (and making!) my favorite soups and stews.  As soon as the weather turns, I make a batch of soup each week to fill in for lunch or dinner where necessary.  It's one pot cooking at its best; soup tastes better as it sits, is a great way to pack a lot of nutrients into a bowl, AND is, quite frankly, the easiest way to use up random vegetables and ingredients you have lying around.

This is a twist on my mom's lentils, daal, which are spiced, nuanced and creamy.  Daal was a staple in our household, and when I go home to visit, there is always some in the fridge to remind me of my childhood.  In this soup, I make the lentils a bit more dilute and add in any greens I have lying around - kale, baby spinach, chard, a super greens blend - to up the cold-fighting vitamins.  I sometimes add in a bit of coconut milk for silkiness, and if I need a bit more bulk, I throw in some cooked rice, bulghur or quinoa. 

What I love is that this is a really satisfying soup, but it also couldn't be easier to make.  The lentils simply need to boil with a bit of turmeric for 20 to 25 minutes.  Sauté the spices, aromatics and greens on the side in one pan, toss in and let simmer another 5 minutes.  That's it.  Enjoy!

Ingredients

Serves 4 to 6

1 cup split lentils (I prefer a combination of red and yellow), picked through and rinsed thoroughly

½ teaspoon ground turmeric

2-3 tablespoons ghee or canola oil

1 teaspoon black or brown mustard seeds

½ teaspoon cumin seeds

1 shallot, minced

1 or two small green chilies, seeded and minced

3-4 garlic cloves, minced

½ teaspoon ginger, minced

½ teaspoon ground cumin

½ teaspoon ground coriander

1 plum tomato, seeded and chopped

1 bunch kale, baby spinach, chard or 2 handfuls of a super greens blend, washed

13.5 ounces fresh homemade, raw or canned light coconut milk (optional)

salt, black pepper, and lemon juice to taste

1 small handful of cilantro, finely chopped

Procedure

In a large pot or dutch oven, add the lentils, turmeric and 4 cups of water.  Bring up to a boil, lower to a simmer and simmer partially covered for 25 to 30 minutes until lentils are soft and break apart easily.  Add in another 1/2 cup of water if too much has evaporated and the lentils look thick.

Heat a medium-sized pan over medium high heat.  Add the ghee or oil and the mustard and cumin seeds.  When they start to sputter and pop, lower the heat to medium low and add the shallot, chili, garlic, ginger and ground spices.  Cook until the shallots are translucent and the spices smell toasted.  Add the tomato and a bit of water so the spices don't burn.  When the tomato starts to break down, add in the greens and let wilt slightly. 

Throw the vegetable mixture into the lentils.  If using, add in the coconut milk here as well.  Simmer for another 5 minutes for the flavors to combine, and then season generously with salt and pepper.  The lentils can take a decent amount of salt for the flavor to really pop, and I like to alternate with squeezes of lemon juice to get the right acid / salt balance.  Finish with the chopped cilantro.


tags: soup recipes, winter soups, daal, indian cooking, Indian recipes, coconut milk recipe
categories: all 2, soups, soups & salads, recipes, vegetarian
Friday 02.20.15
Posted by Aliya LeeKong
 
Newer / Older