X

Sign up to receive exclusive recipes, tips, updates and other goodies from Aliya!

  • Home
  • Blog
    • All
    • Recipes
    • Spices + Ingredients
    • Lifestyle, etc.
    • Travel
  • The Cookbook
  • The App
  • Media
    • All Media
    • Video
  • About
  • Passions
Aliya LeeKong
  • Home
  • Blog
    • All
    • Recipes
    • Spices + Ingredients
    • Lifestyle, etc.
    • Travel
  • The Cookbook
  • The App
  • Media
    • All Media
    • Video
  • About
  • Passions

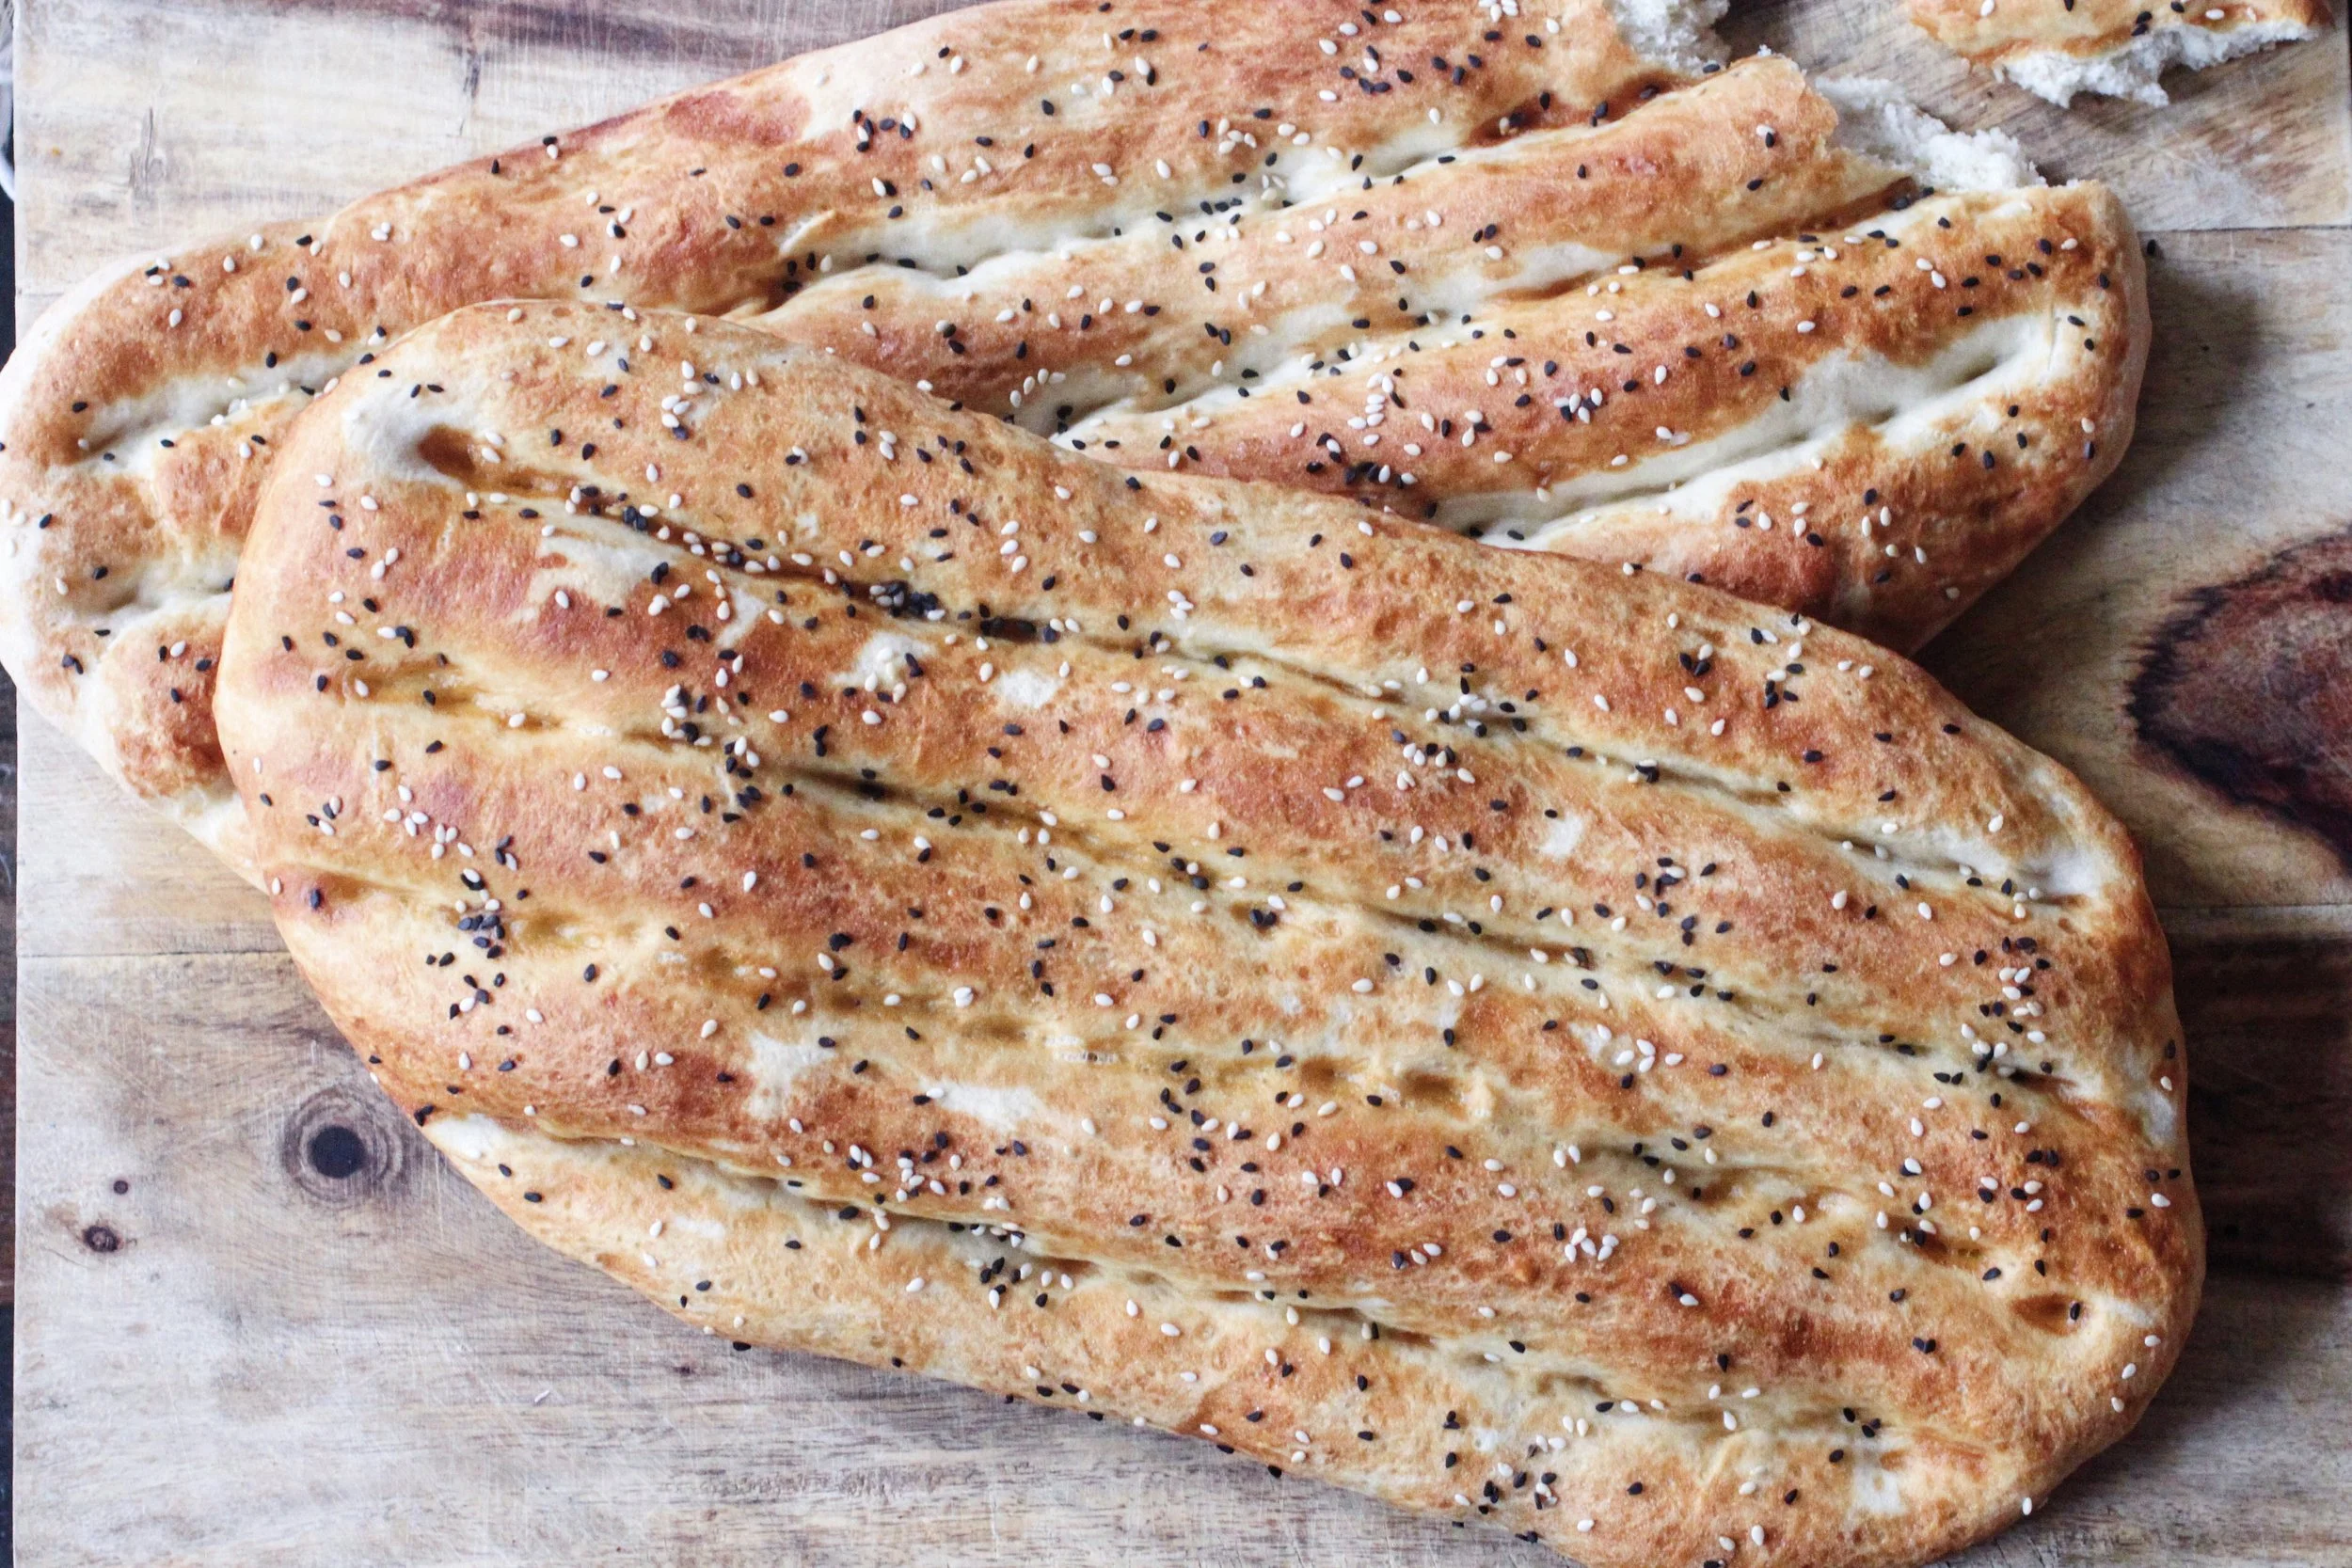
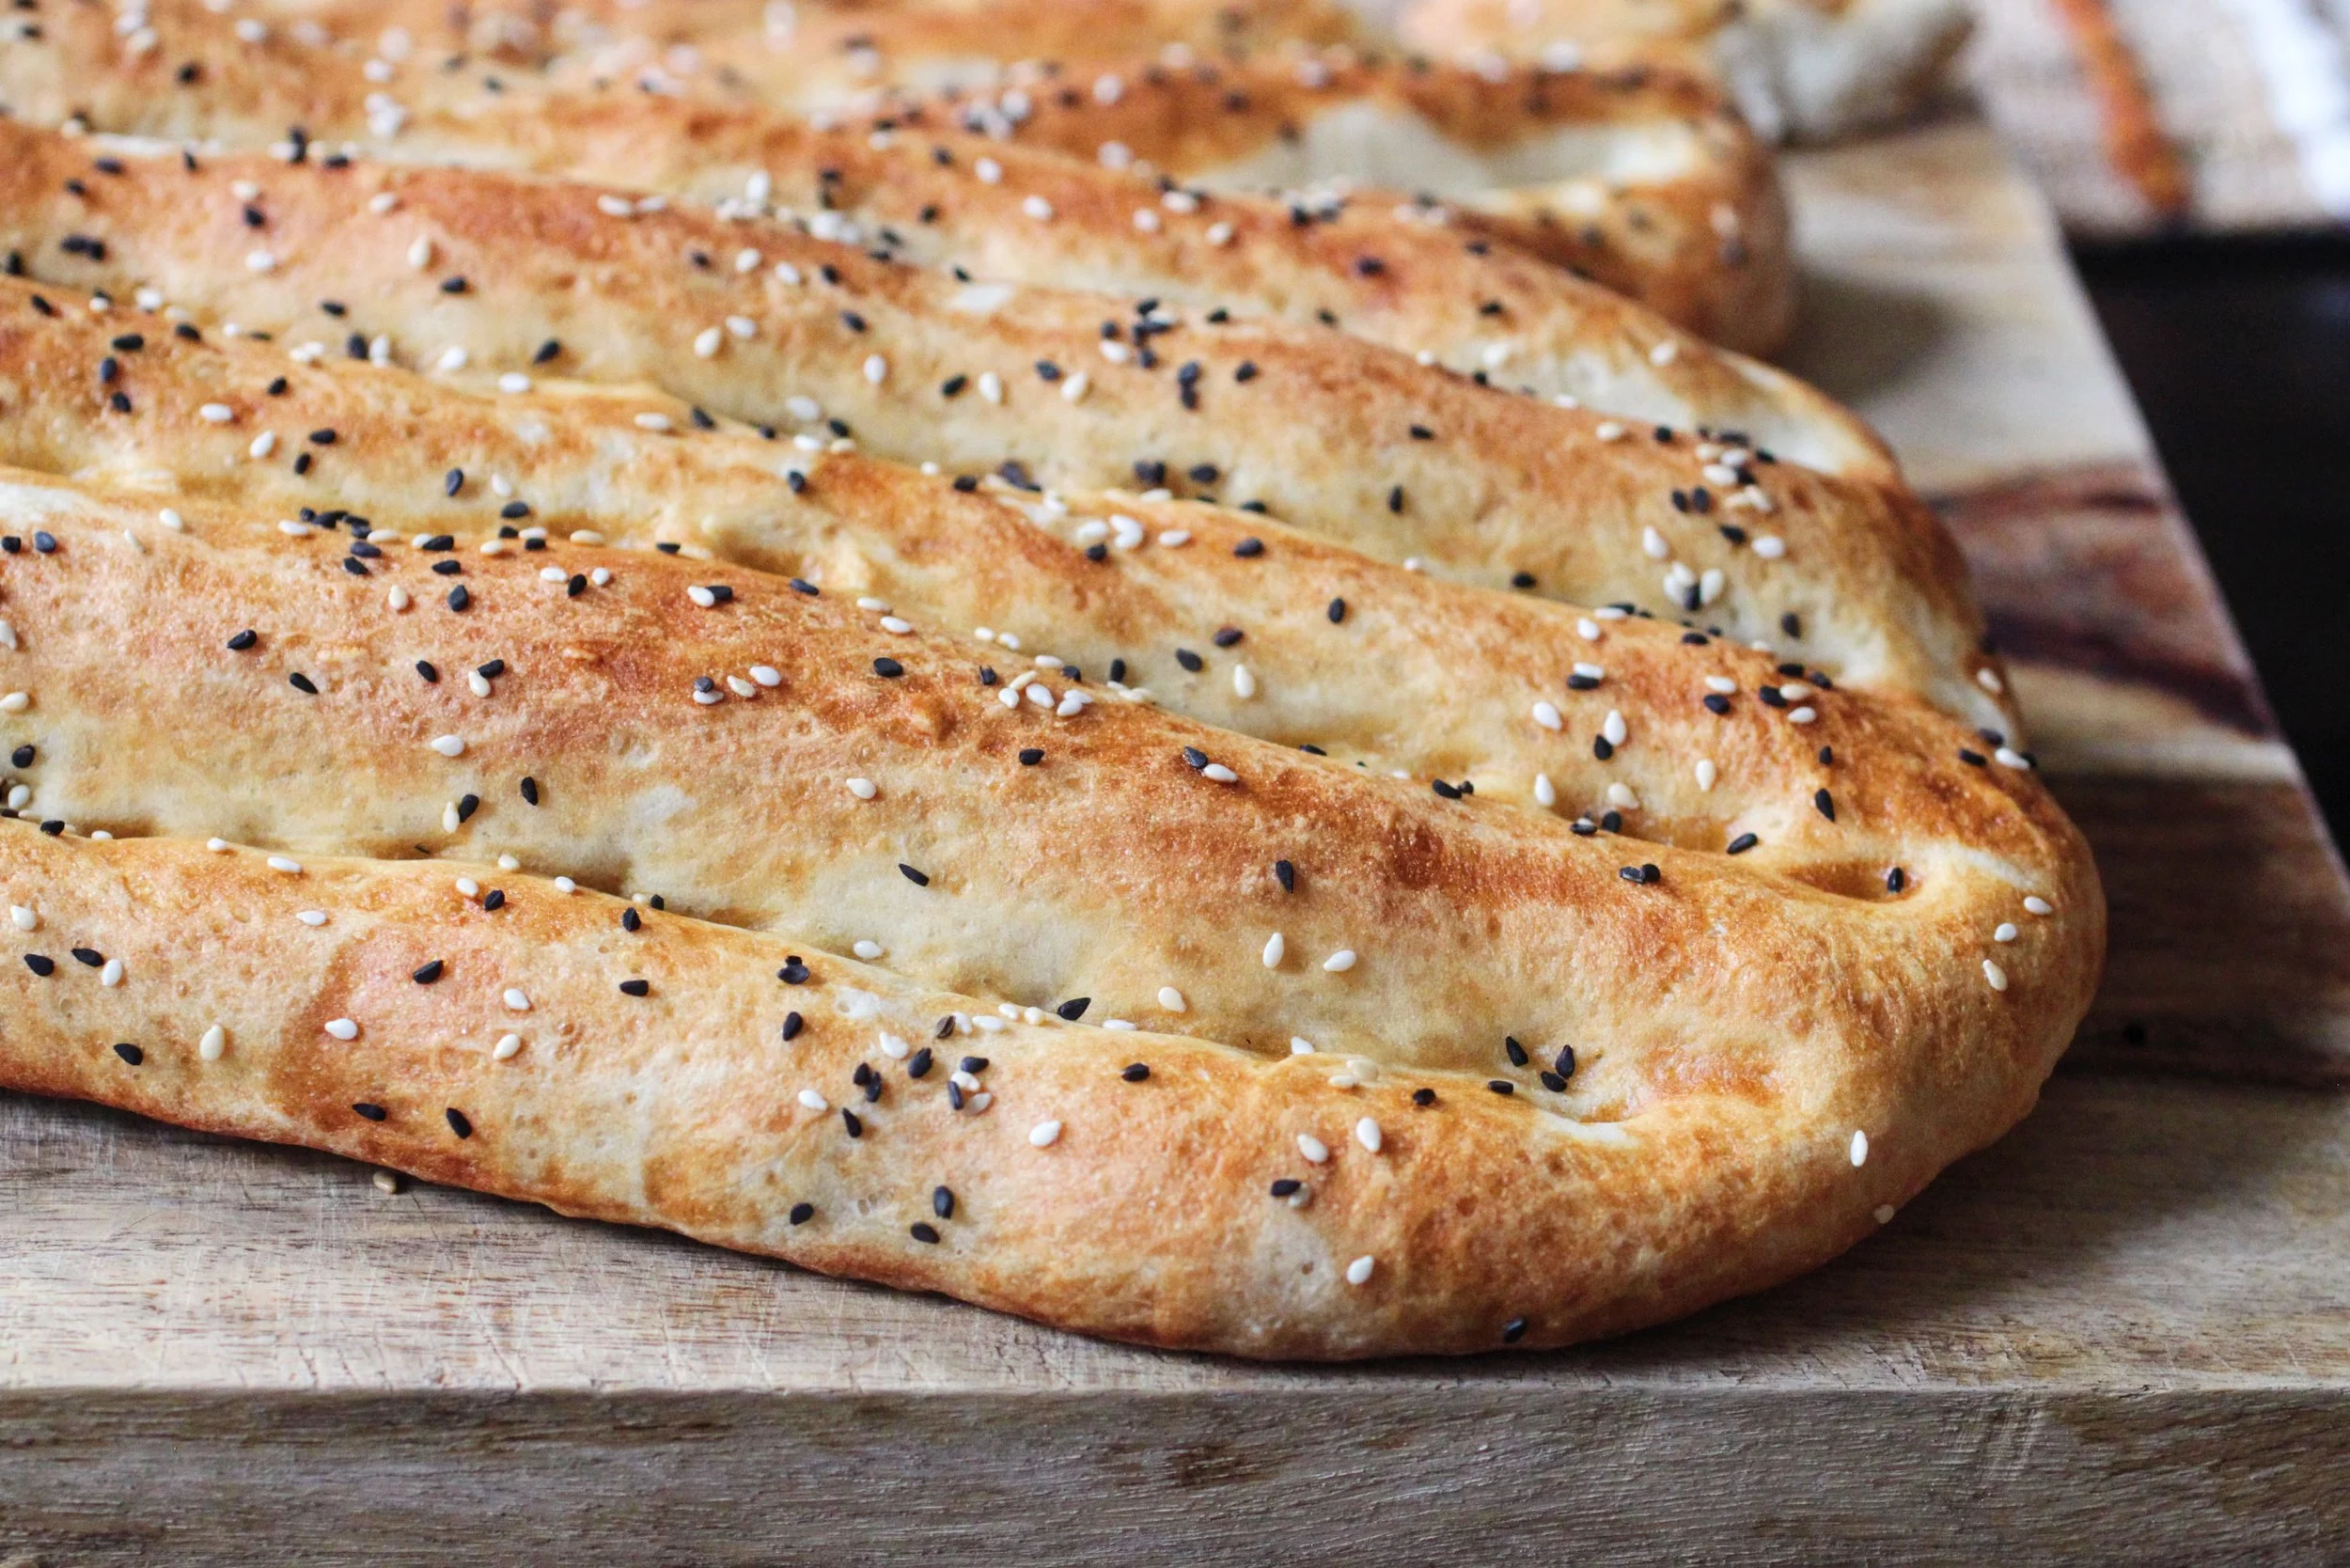
Nan-e Barbari (Persian Flatbread)

View fullsize File May 03, 11 08 40 AM.jpeg
View fullsize File May 03, 11 08 18 AM.jpeg

NAN-E BARBARI

I know - I've been going a bit bread and baking crazy on here.  But THIS!  Nan-e barbari, more commonly known as Persian flatbread, is a very thick flatbread that is popular in Iran.  It is similar to Indian naan in shape and cooking technique, but is pretty unique and spectacular with it's grooves and coating of nigella and sesame seeds.  I call it "statement bread".

Nan-e barbari requires 2 rises but literally cooks within 20 minutes on a well heated stone in the oven.  There is also a paste that the bread is coated with called a roomal that gives the bread its crispy texture and golden brown color.  This flatbread is most commonly eaten as a breakfast bread, served with a type of feta cheese, clotted cream or jam, but I love it fresh out of the oven with dinner - to scoop up a curry or stew or hug some grilled kebabs.

I use a preheated pizza stone to bake this, but you can also use a cookie sheet.  Just know that you might not get as nice a crunch on the bottom of the flatbread.

Enjoy!

For the Dough:
1 packet active dry yeast
1 ¾ cup lukewarm water
2 teaspoons sugar
3 ¾ - 4 cups bread flour (plus more for coating pizza peel)
2 1/2 teaspoons salt

For the Paste (Roomal):
2 teaspoons all-purpose flour
1/2 teaspoon baking soda
1/2 cup water
pinch of sugar

Garnish: nigella seeds and/or white sesame seeds

In the bowl of a mixer fitted with the dough hook attachment, add the yeast, water and sugar and let stand for 10 minutes until it begins to foam.  If it doesn’t begin to foam at this point, your yeast may be bad and the dough may not rise properly.  With the mixer on low, slowly add the bread flour and salt until a shaggy dough forms.  Put the mixer on medium and let knead until a soft, smooth dough has formed (5 to 7 minutes).  You may get a little sticking to the bottom - that’s ok!  Remove the dough from the mixing bowl, form in to a ball and place in a lightly greased bowl to rise in a warm area, covered, for about an hour or until it doubles in size.

Once the dough has risen, punch the dough down and separate into two equal pieces. Shape each dough into a long oval.  Place each oval on a parchment lined cookie sheet and cover with plastic wrap to allow to rise for another 30 - 45 minutes.  

While the dough is on its second rise, preheat the oven to 450° F and allow the pizza stone to heat for 30 minutes or more on the bottom shelf. 

You can also start making the roomal. In a small saucepan over medium heat, combine all of the roomal ingredients and bring to a light boil.  Reduce heat to low and cook until the paste coats the back of your spoon and has deepened in color.  Remove from heat and set aside.

If you have a pizza peel/paddle, lightly coat with flour and place one of the pieces of dough on it (you can also use the back of a cookie sheet or a cookie sheet that has no raised sides). Make sure the dough can easily slide off so you have no issues when transferring it to the hot pizza stone.  Press down on the dough and release some of the air.  Using the side of your pinky finger, gently press down the length of the dough to make the grooves, trying not to go all the way through the dough.  Do this about 4-5 times. You can also go back over the grooves with your fingers if you want a deeper indent - up to you!  Brush the dough all over with the roomal and sprinkle with the nigella seeds and/or sesame seeds.  

Gently slide the bread on to the preheated pizza stone and cook in the oven for about 15 - 20 minutes until golden brown.  While the first piece of dough is cooking, prepare the other half.  
Barbari is best served warm, or at room temp. 

tags: flatbread recipe, pizza dough recipe, Persian flatbread, nan-e barbari, naan recipe
categories: all 5, breads & cakes, breakfast-1, recipes, traditions, vegetarian-2
Wednesday 05.03.17
Posted by Aliya LeeKong
 

Yemen Honeycomb Bread (Khaliat Nahal)

View fullsize Yemeni honeycomb bread.jpeg
View fullsize File Mar 15, 7 37 15 PM.jpeg

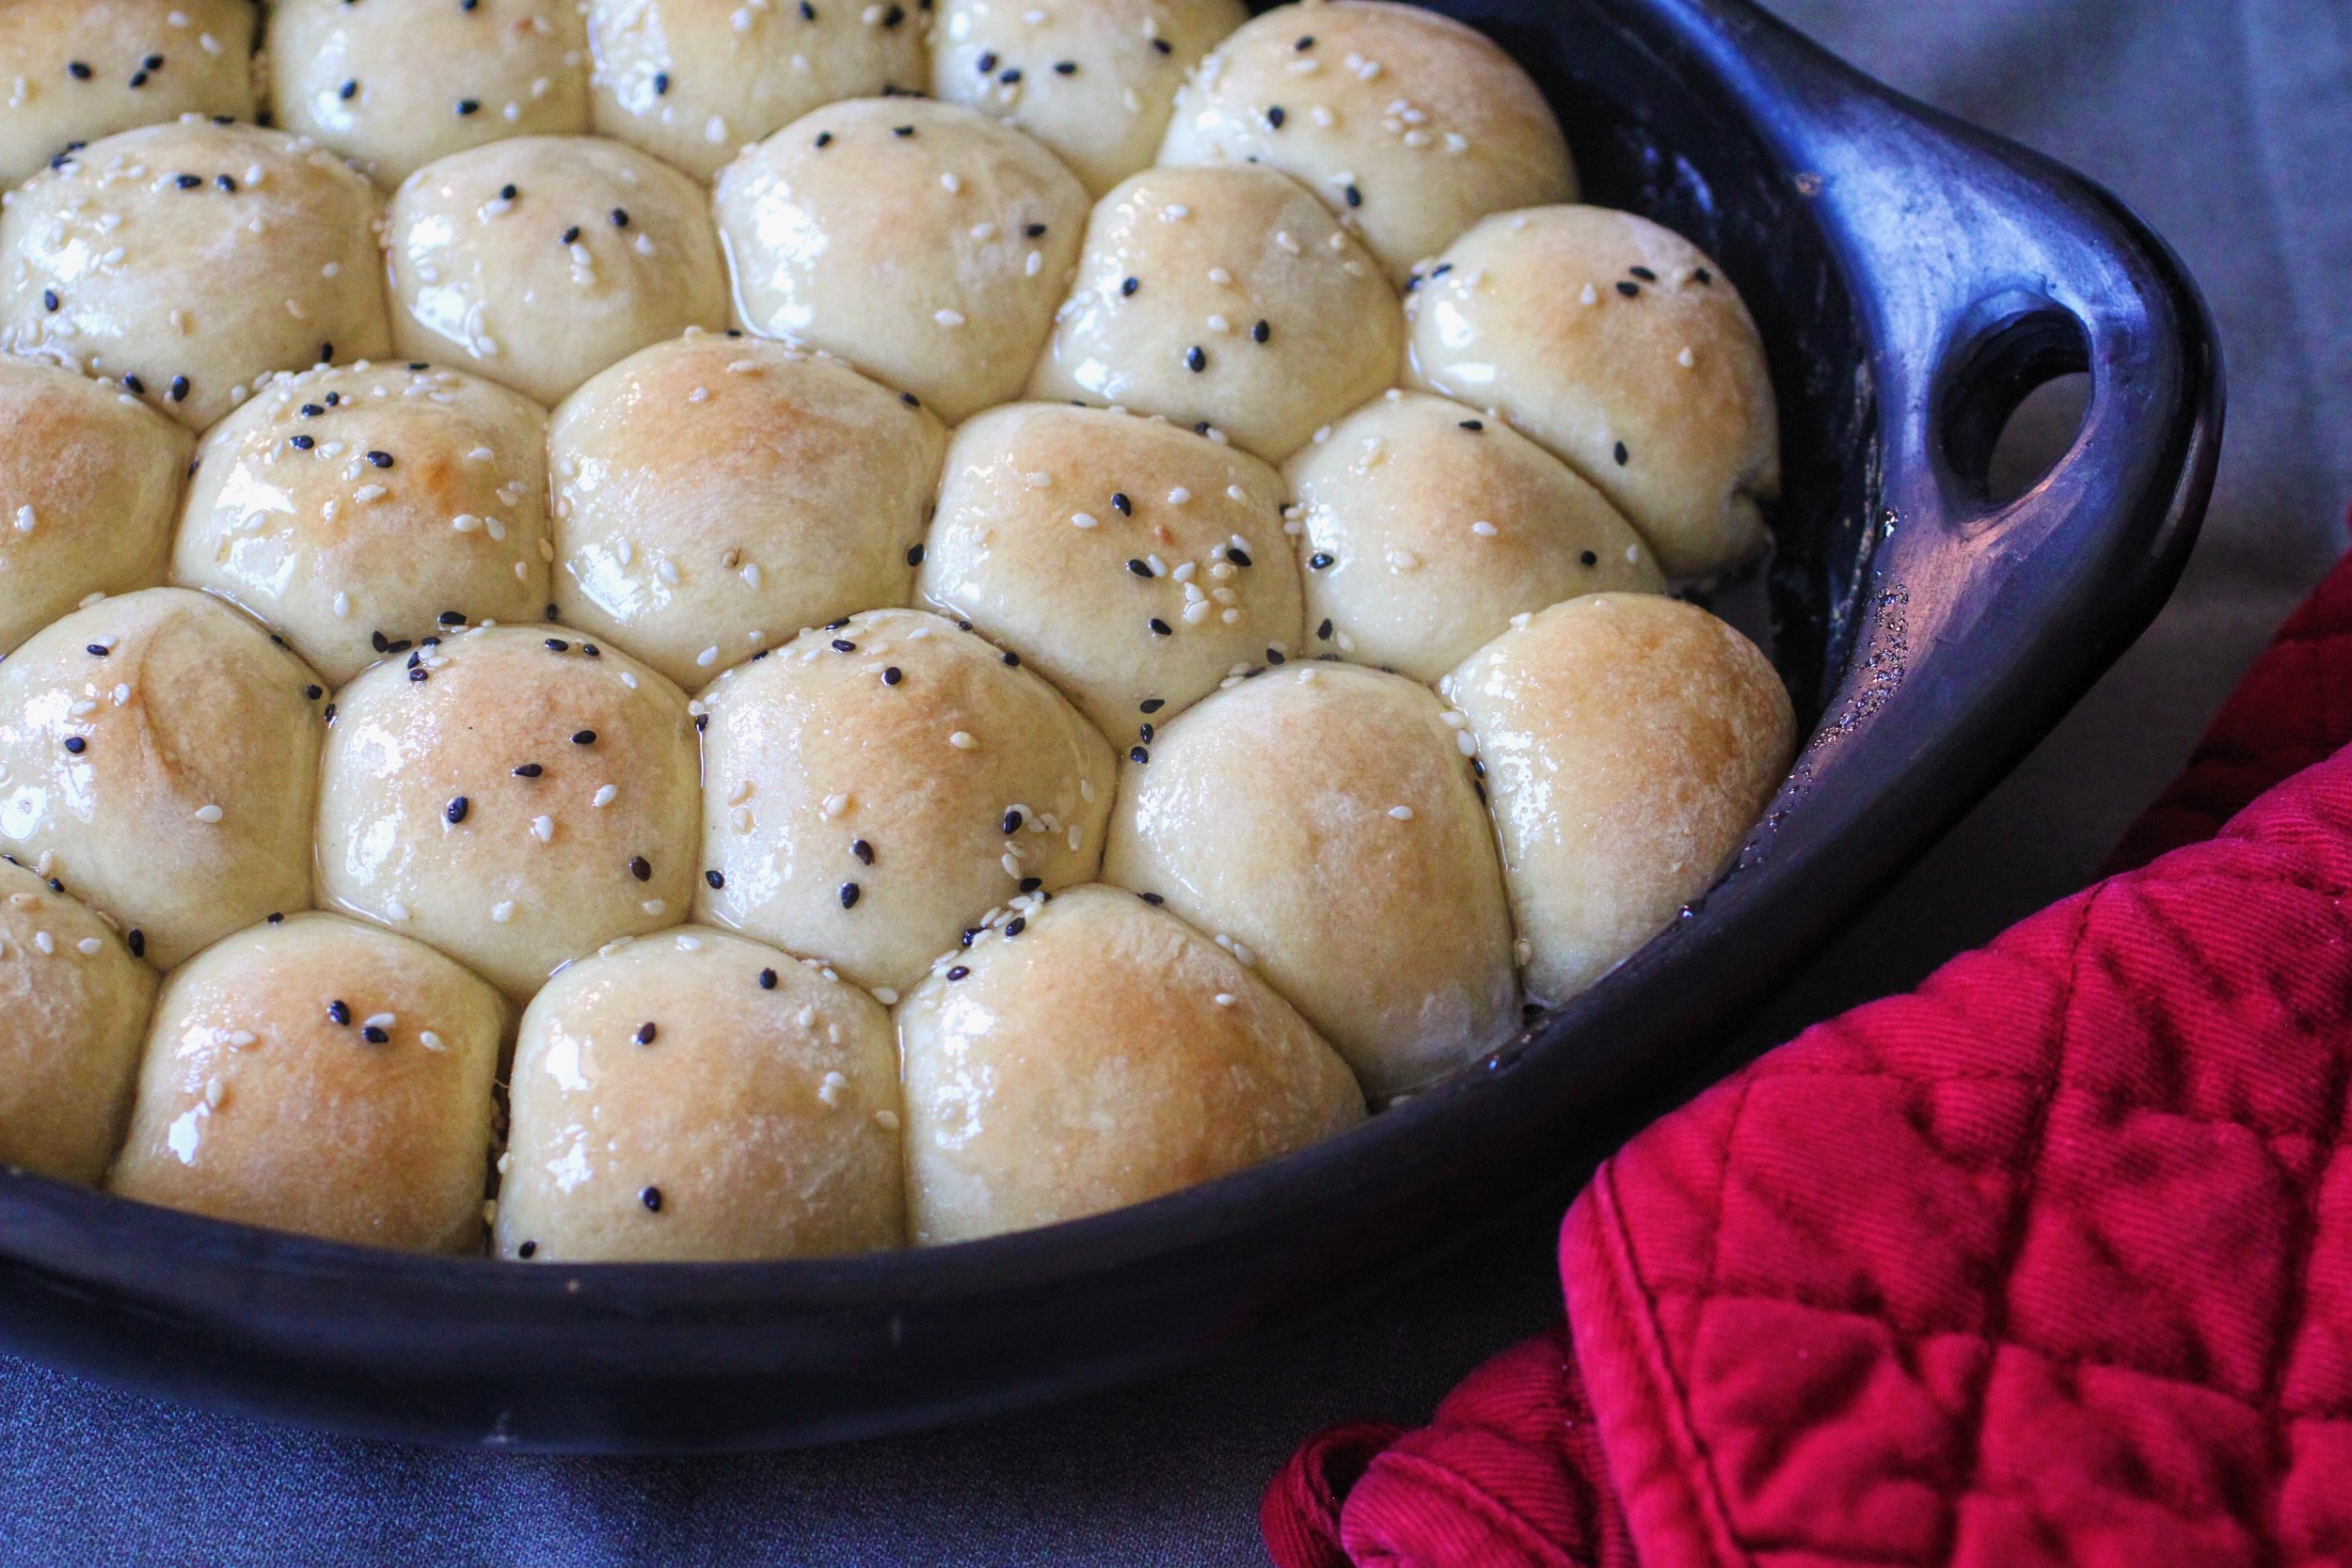
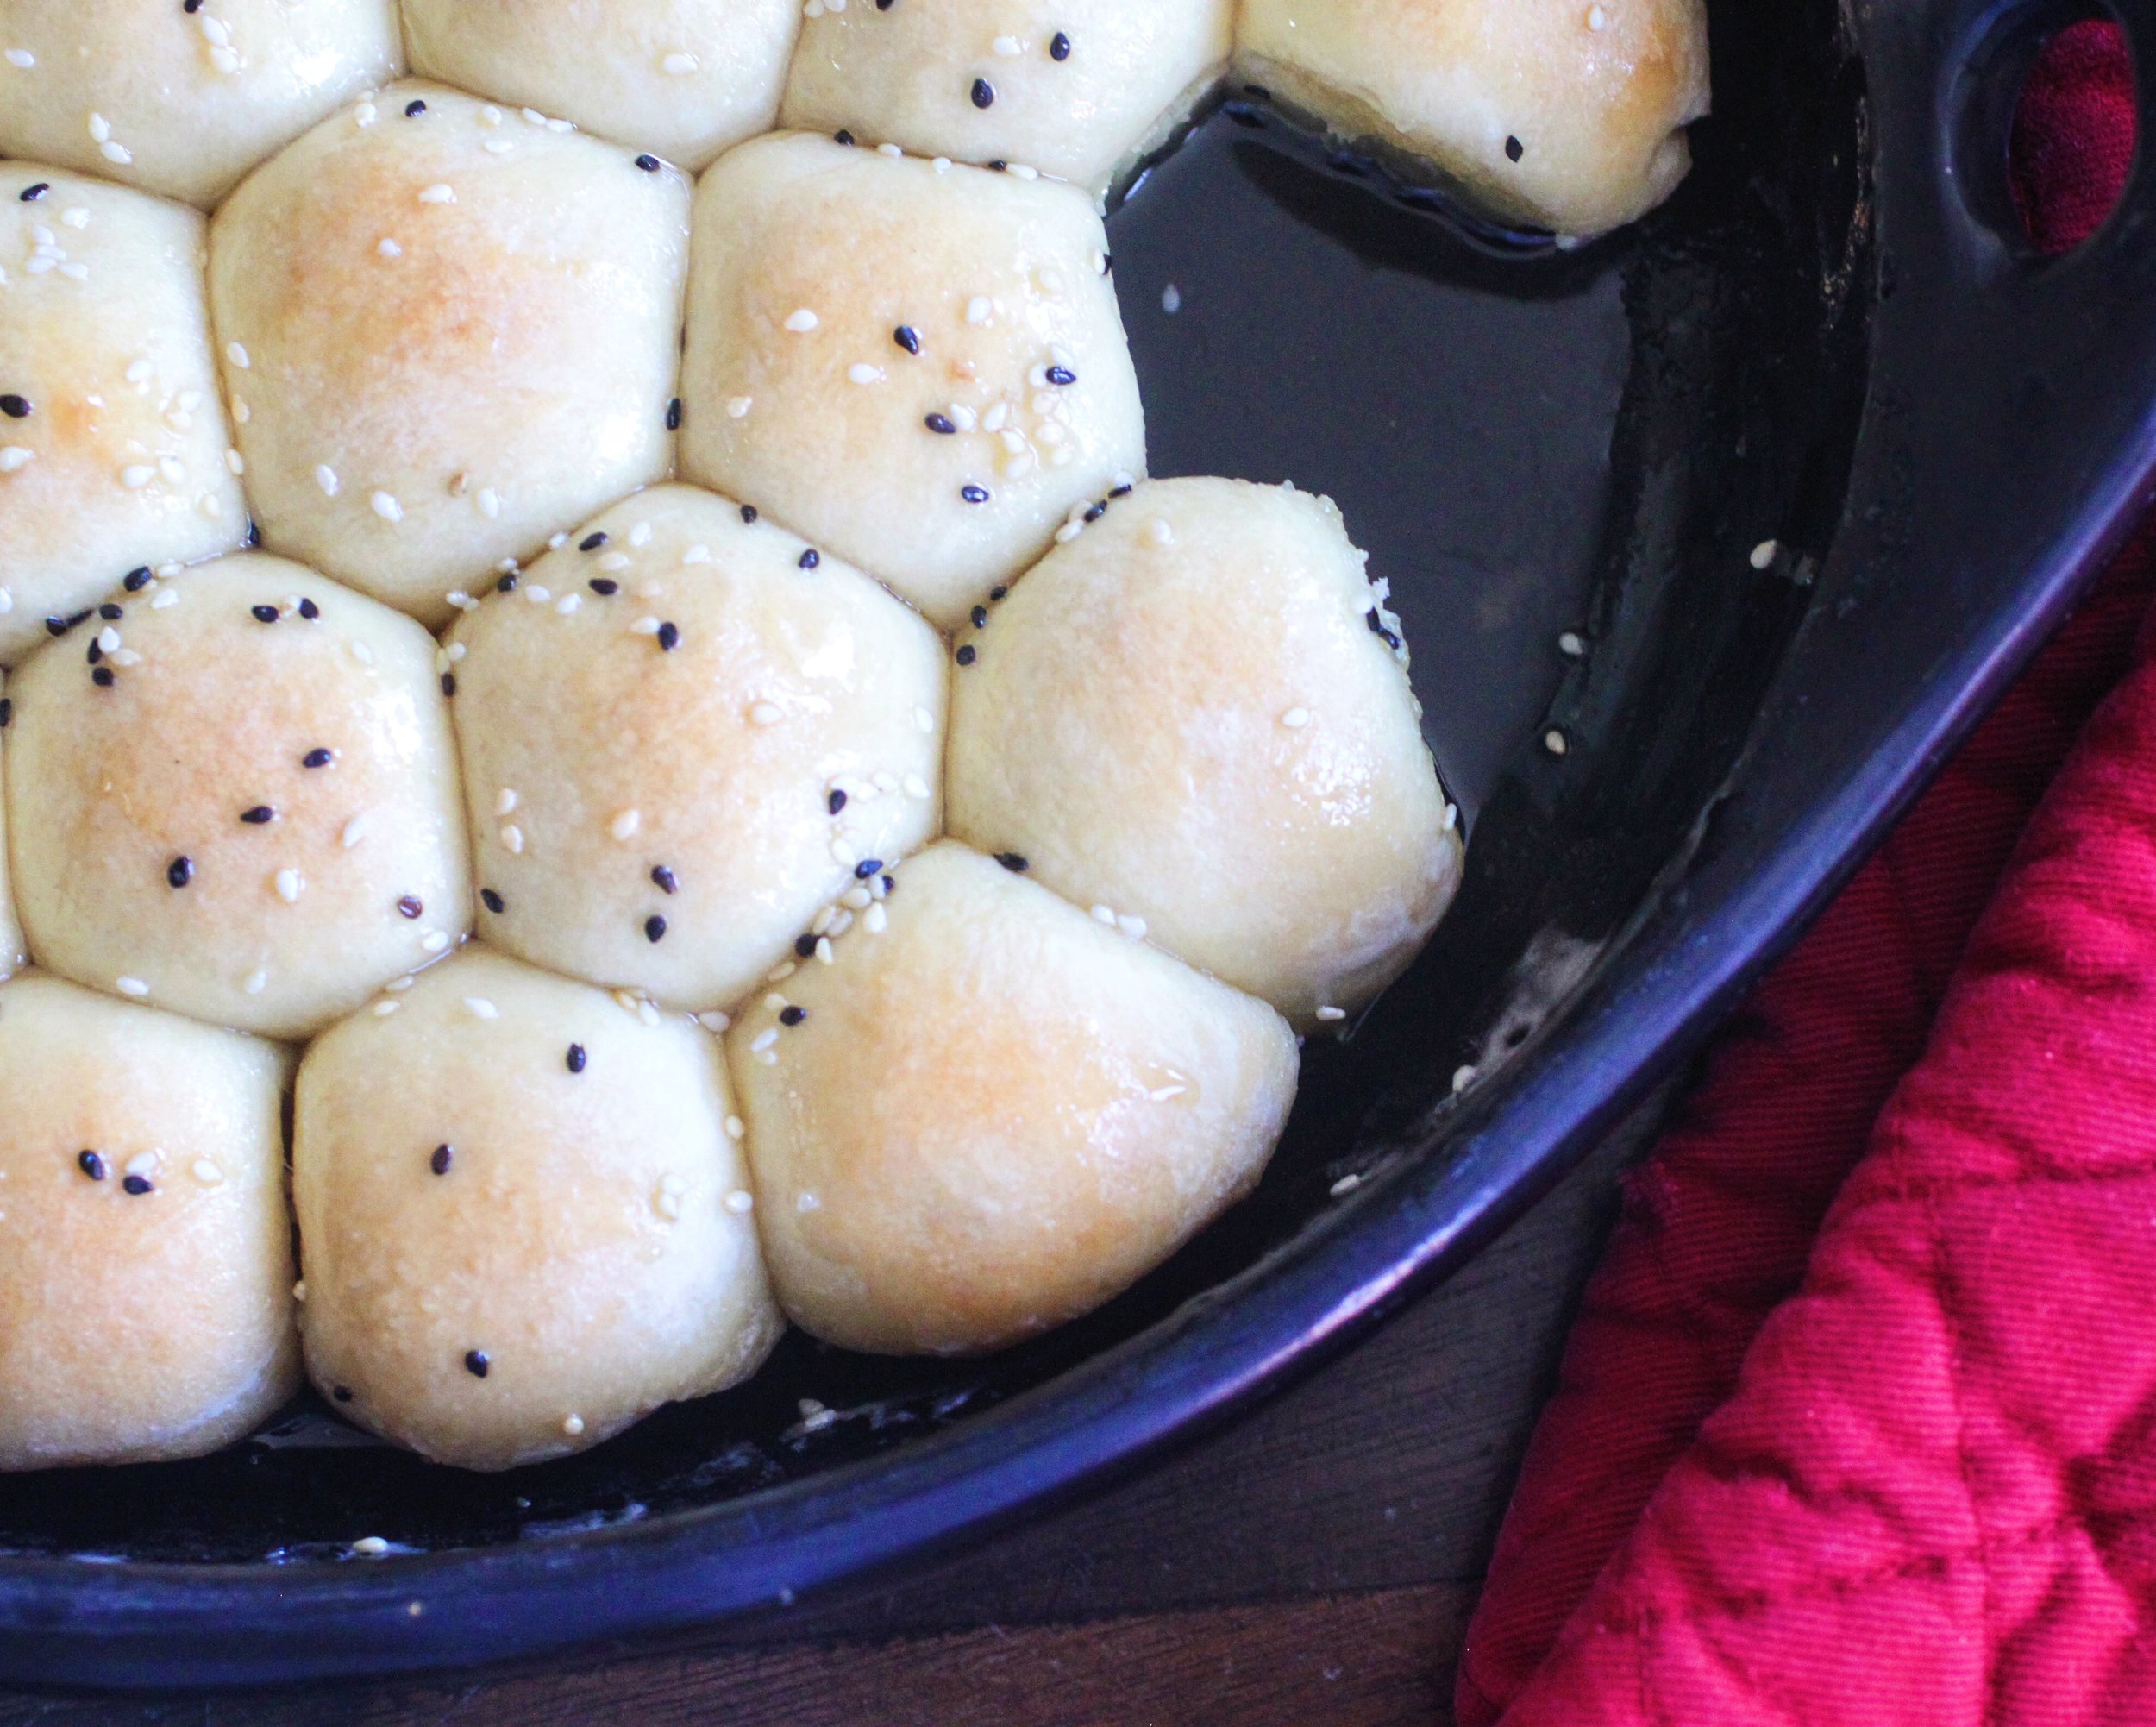
YEMEN HONEYCOMB BREAD (KHALIAT NAHAL)

For the last few months, I've been feeling a bit overwhelmed by the political climate and a tenor of hate that's been seeping into conversations, news, social media, everywhere.  It feels like the floodgates have opened, and bigotry has been given a safe space to be expressed. 

A bit heavy, I know, but I can't deny how I've been feeling.

Though for sure, everyone is welcome at my table (it's my go to hashtag :) and that's plain to see in all of the recipes and stories I have here on my blog, as of late, I’ve been cooking food from the (now) 6 banned Muslim countries.  Some dishes are as familiar as an old friend; others are a tentative handshake with someone new.  From Irani Javaher Polow, a jeweled rice which comingles in my memory with Pakistani rice dishes from my childhood, to Yemeni Khaliat Nahal, honeycomb bread rolls filled with cheese and glazed with a sweet, orange blossom-scented syrup (recipe here!), each dish is a bit of resistance.  I’m doing it in part to raise awareness, but it's truly my way through: my personal means of processing this concerted exclusion. Of my parents.  Of me.  Of my daughter. Of so many others.

Ingredients

Yields 32 rolls

For the bread:

¼ cup lukewarm water

1 (¾) ounce packet yeast (active dry or instant)

¾ cup milk

7 tablespoons butter, softened, divided

¼ cup sugar

2 teaspoons salt

1 egg, beaten

3 ¾ to 4 cups all purpose flour

1 (8 oz) package of cream cheese, cut into 32 squares

1 tablespoon black and white sesame seeds, for garnish

For the glaze:

1/3 cup water

1 cup sugar

1 tablespoon honey

1 tablespoon orange blossom water

For the rolls: I make this recipe in a stand mixer, but you can easily do this by hand.  Start with the lukewarm water in the bowl of the stand mixer and sprinkle the packet of yeast over.  Mix gently to combine and let sit 5 minutes or so while you prepare the other ingredients.

In a medium pot, bring the milk up to a simmer and add 5 tablespoons of the butter, the sugar and salt.  Simmer for a minute, just until the butter melts and remove from the heat.  This should not be scalding, so let it cool for a bit before adding to the mixture.

Add the egg and 3 ¾ cups of flour to the yeast mixture and mix together with a fork.  Slowly pour in the milk mixture, using the fork to make a shaggy dough.  Using the dough hook attachment (or your hands), knead for about 3-4 minutes.  The dough should be soft and a bit tacky but should NOT stick to your hands.  If it's sticky, keep adding flour in tablespoon increments until you have a non-sticky consistency.  When you pull up the dough hook, the dough should slide right off.

Grease a 12 inch pie pan or cast iron skillet.  Divide the dough into 32 even-sized pieces. Flatten each piece and place a cream cheese square in the middle.  Form in to ball and place in the greased pan.  Once all the balls have been rolled,  cover with a kitchen towel and let rise for 1 hour.  Preheat oven to 375˚ F.

After the rise, brush the rolls generously with the remaining 2 tablespoons of melted butter, sprinkle with sesame seeds, and bake for 25 to 30 minutes.

For the glaze: Add the water and sugar to a saucepan and bring to a boil over medium-heat (until the sugar has dissolved).  Remove from the heat and whisk in the honey and orange blossom water.  Let cool while the rolls are baking.

Once the rolls are done, pour the glaze over the rolls while they are hot.  Enjoy!

tags: yemenite recipes, yemen recipes, yemen honeycomb bread, khaliat nahal
categories: appetizers 1, blog, breads & cakes, breakfast-1, desserts, recipes, traditions, all 5
Friday 03.17.17
Posted by Aliya LeeKong
 

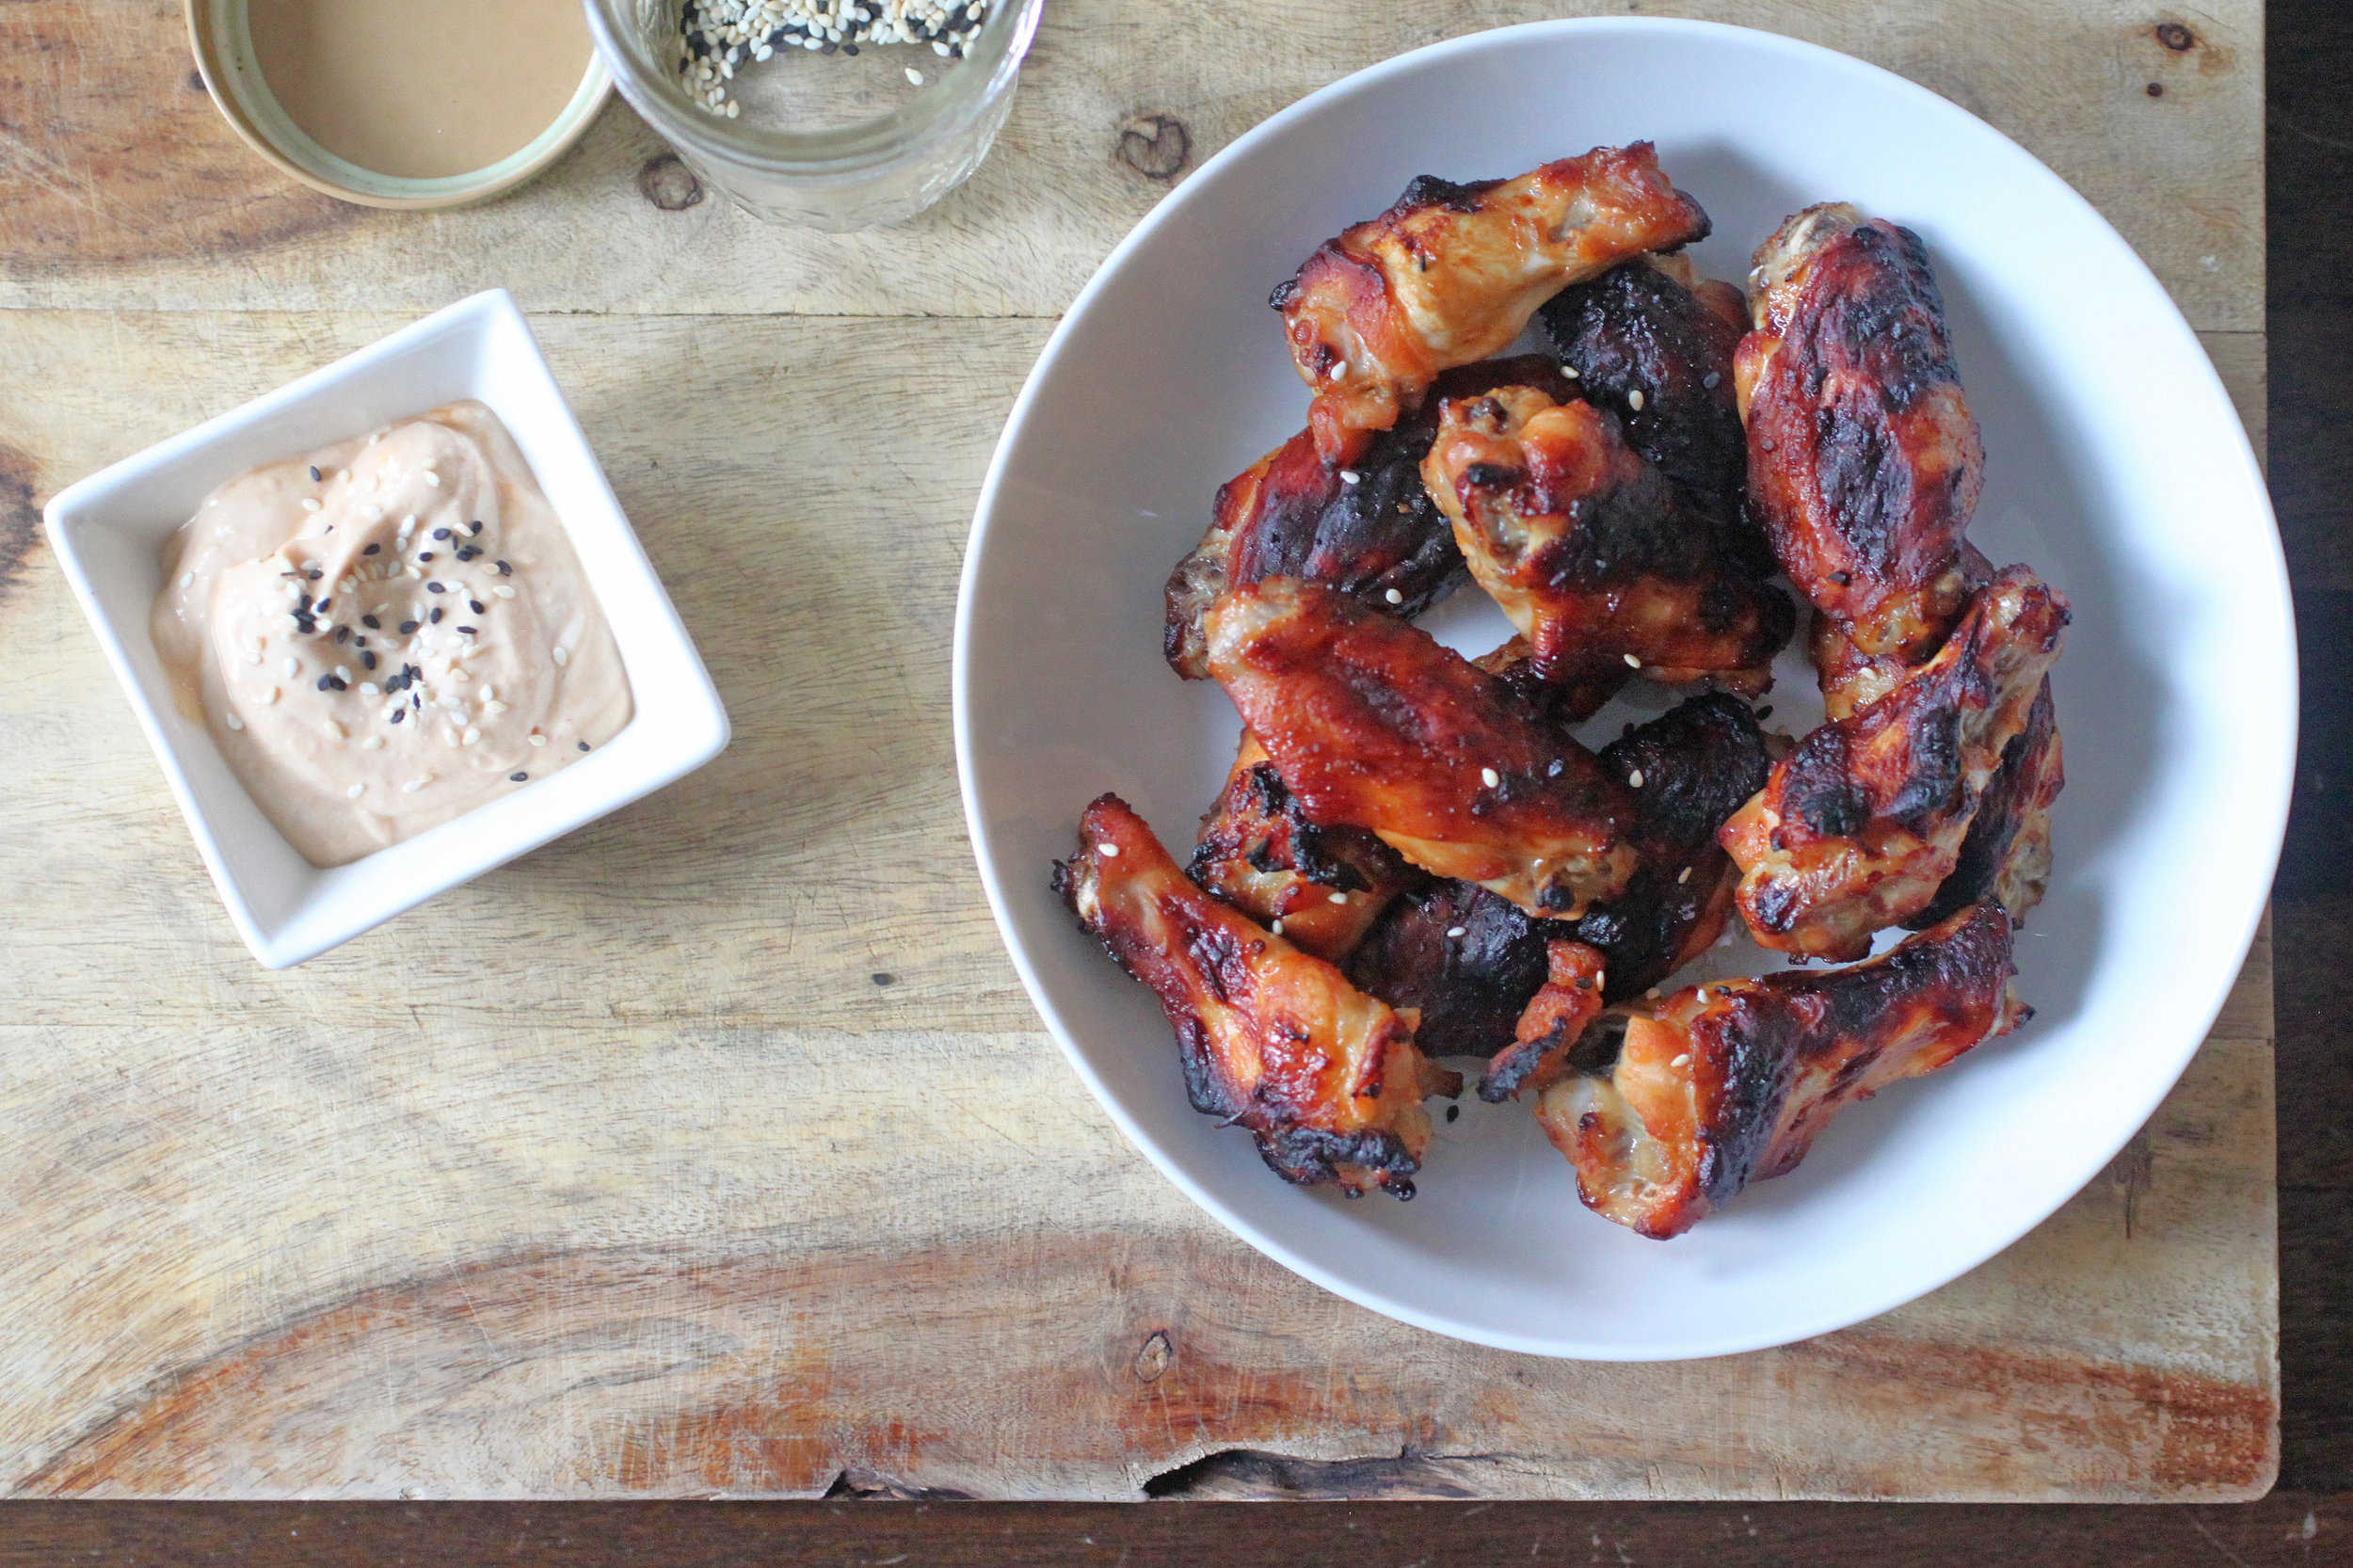
Crispy Miso (Baked!) Wings

wing2.jpg
wing1.jpg
wing3.jpg

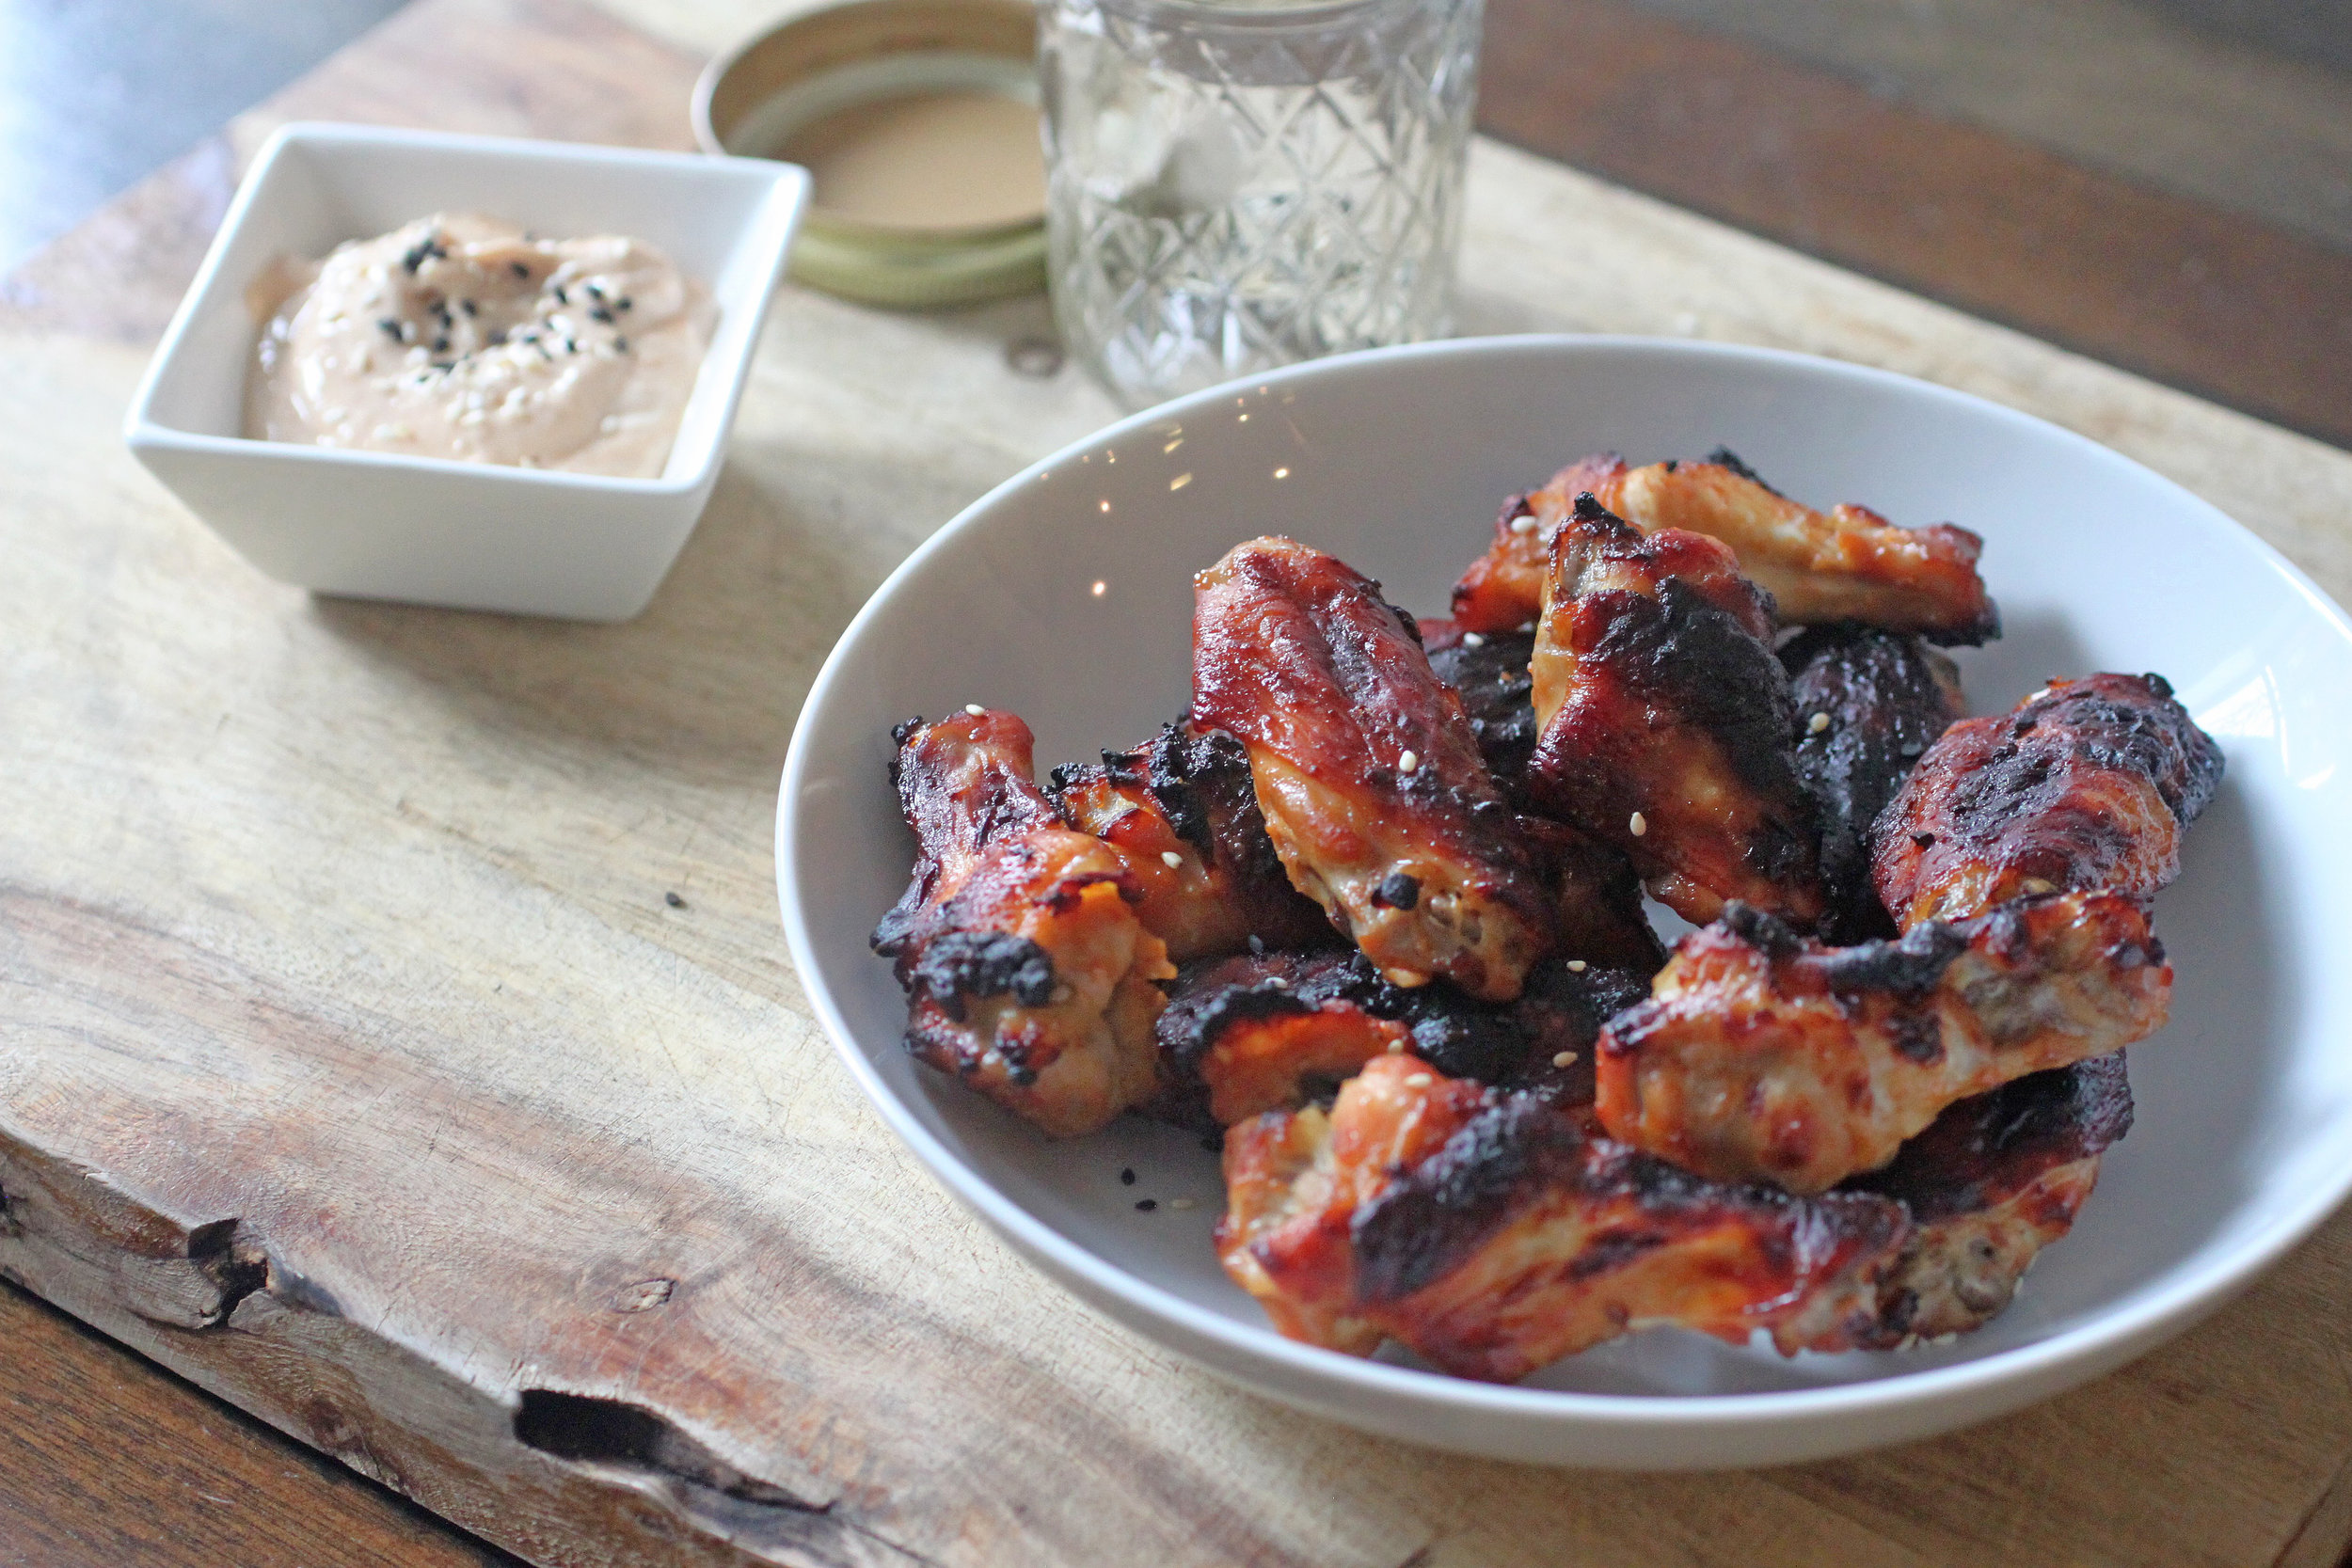
CRISPY MISO (BAKED!) WINGS

Super Bowl = wings!  And these are what I'm making.  The spread, for me, is what it's all about…..eating "bad" (but oh-so-good) food.  I figured it was time for me to up my wing game, and I’ve been slightly obsessed with putting white miso paste in everything lately.  There are a ton of varieties of miso, and you can find it in any Asian grocery store in the refrigerated section.  I use it in salad dressings, marinades for fish, meat and, of course, in my baked wings recipe. 

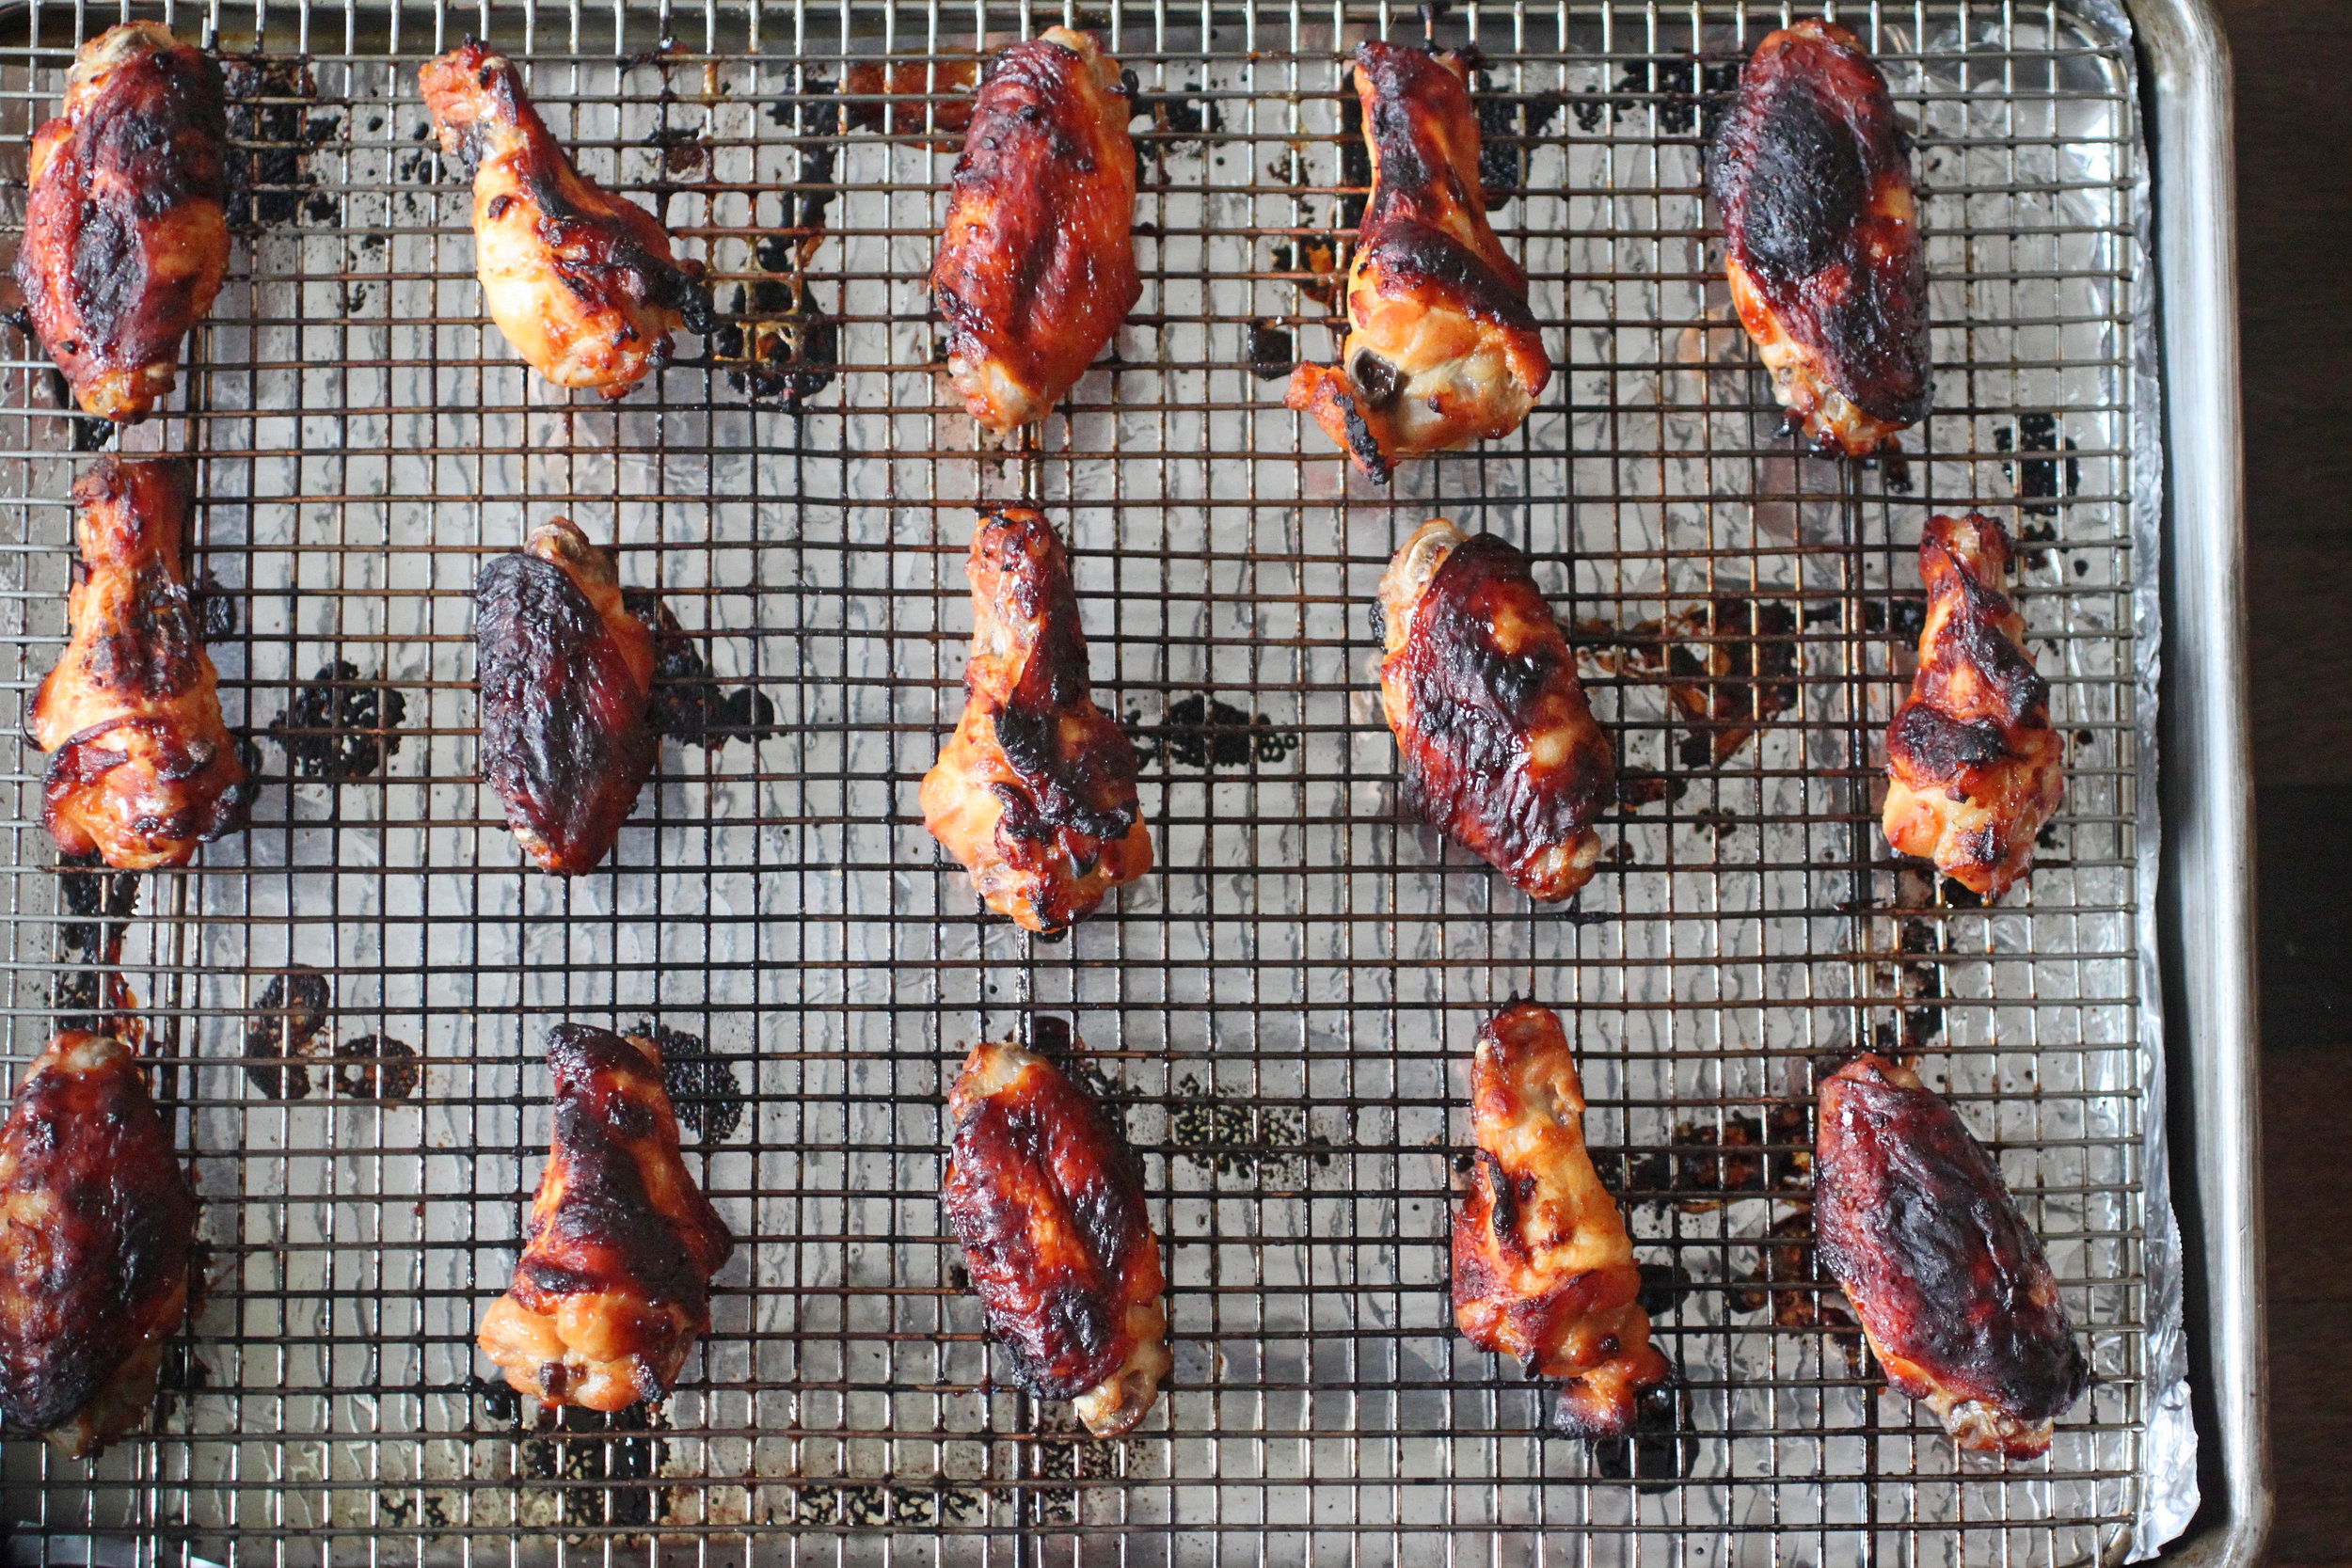
I LOVE some good wings, but I wasn’t so into deep-frying them and making a splattered mess of my kitchen.  But you can still get them crispy in the oven.   If you crank it up high enough and cook the wings on a rack over a sheet tray - the chicken skin fat will render out, they'll stay tender AND the skin will crisp up nicely!  These are slightly sweet, umami, and with a great kick.  Enjoy!

Serves 6

For the marinade + wings:

½ cup white miso paste

¼ cup plus two tablespoons mirin

3-4 tablespoons sriracha (plus more if you want extra heat)

3 tablespoons soy sauce

2 tablespoons sesame oil

1 tablespoon brown sugar

½ teaspoon rice wine vinegar

4 garlic cloves, finely chopped

3 lbs chicken wings, tips removed, drummettes and flats separated

Kosher salt

Toasted sesame seeds, for garnish

For the dipping sauce:

½ cup sour cream

½ lime, juiced

small handful of cilantro, chopped

Extra sriracha, to taste

For the marinade:  In a bowl, whisk together the miso, mirin, sriracha, soy, sesame oil, brown sugar and rice wine vinegar.  Set aside/refrigerate a half cup for the dipping sauce.  Add the minced garlic to the marinade and toss the wings with it until they are thoroughly coated.  Transfer to a plastic bag and refrigerate for a minimum of 5 hours and preferably overnight.

For the wings: Preheat oven to 400° F.  Put a wire rack over a baking sheet and set aside.

Transfer the marinated wings to a colander to drain, and then wipe off any excess.  The marinade can burn, so you want it dry-ish.  Season the wings with salt and transfer to the rack over the baking sheet.  Bake the wings for about 40 minutes, rotating half way through cooking..

For the dipping sauce: In another bowl, add the reserved marinade and mix with the sour cream, lime juice, cilantro and more sriracha, depending on your heat preference.  

Serve hot with the dipping sauce and sprinkled with toasted sesame seeds!

tags: super bowl recipes, what to cook for the super bowl, Super Bowl, wings, crispy wings, best chicken wings recipe
categories: all 4, appetizers 1, blog, main dishes, man-friendly, quick & easy, recipes
Wednesday 02.01.17
Posted by Aliya LeeKong
 

Nigella + Sesame Seed Granola

Photo Jan 13, 5 47 32 AM.jpg
Photo Jan 13, 5 46 52 AM.jpg
Photo Jan 13, 5 43 52 AM.jpg
Photo Jan 13, 5 45 26 AM.jpg

NIGELLA + SESAME SEED GRANOLA

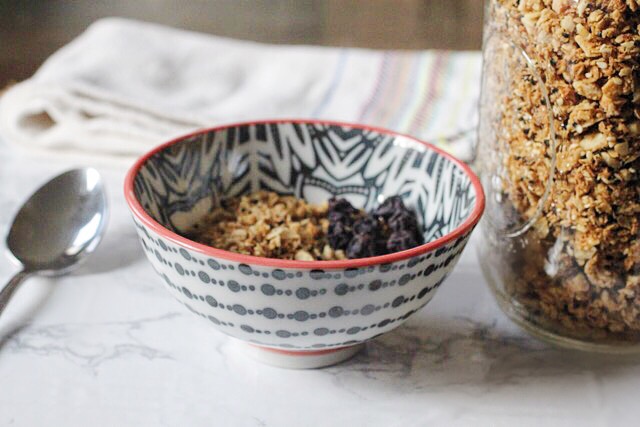
In keeping up with the New Year's goals of choosing healthier options, I’ve been craving granola a lot lately.  While I was in Venice of all places over the holidays, I had the most incredible (yes, incredible) granola I've ever tasted.  I wanted to recreate it and thought, well, how hard is it really to make my own granola!?  Why have I never thought about doing this before?  So, I grabbed a bunch of ingredients that I thought would recreate the flavors of that granola and decided to try this at home!  And let me tell you……It’s soooo easy.

The trick to a good granola is to cook it low and slow. The hardest part is really choosing your ingredients!  There are so many choices out there. I did a simple granola recipe below (albeit with nigella and sesame seeds) but next time I may add some rice puffs to the mix and maybe switch it up with dried strawberries.  It really depends on your flavor preference.  Also, if you prefer a granola that has more clusters, you can up the maple syrup and not mix the granola as much during cooking.  If you want very cluster-y granola, you can stir in some egg whites before cooking to achieve that.   

This is not like any other granola I've tasted.  It's nutty, sweet and roasted in flavor but with the sharp bite of the nigella seeds.  It is BEST made with ghee (does anything taste worse with butter?), but a neutral oil works well here too.  Enjoy!

Ingredients

Yields 7 cups

1 cup raw, unsalted cashews

3 cups organic rolled oats

1 cup sliced almonds

1 cup shredded, unsweetened coconut

¼ cup plus 2 tablespoons sesame seeds (white, black or a combo)

3 tablespoons nigella seeds

3 tablespoons maple, palm or light brown sugar

½ teaspoon kosher salt

½ cup pure maple syrup

¼ cup ghee or neutral oil (grapeseed, canola or sunflower)

1 cup dried fruit, diced (optional)


Preheat oven to 300° F.  Place a layer of parchment on a large cookie sheet and set aside.

I like to grind up some of the ingredients first for a more even texture.  To the bowl of a food processor, add the cashews and pulse a few times.  Add in the oats and almonds and pulse until you get an even, crumbly texture.

In a large bowl, combine the oat mixture with the coconut, sesame seeds, nigella seeds, sugar and salt.  Stir to combine all of the ingredients.  Pour the maple syrup and oil over the raw granola.  Mix until evenly coated and taste to make sure everything tastes to your liking. 

Spread the mixture on the prepared baking sheet evenly and transfer to the oven. Stir the mixture every 10-15 minutes or so to make sure everything is browning evenly.  It should take about 40-45 minutes total, depending on your oven.  If you are adding in the dried fruit, add it in during the last 10-15 minutes of cooking so it gets a bit drier and doesn’t make the granola soggy during storage.

Remove from the oven and let dry out on a rack until cool. Store in a mason jar; it should last for about 2 weeks or so.

Enjoy with yogurt and fresh fruit or as a cereal with almond milk!


tags: granola, homemade granola, how to make your own granola, nigella seeds, nigella seed granola
categories: all 4, breakfast-1, condiments, lifestyle-1, quick & easy, recipes
Wednesday 01.18.17
Posted by Aliya LeeKong
 

New Year (does not) = No Carbs

NEW YEAR (DOES NOT) = NO CARBS

With the arrival of the New Year, we are always guilted in to making the same New Years resolution of dieting, juicing, and detoxing after holiday food binging.  But in all honesty, I feel that drastically changing your diet is just a temporary fix.  I think nutrition is a game of inches, and as Oprah says, ‘I LOVE bread!’  I’m with her ALL the way on that statement...

With that being said, it is good to take a step back after indulging (umm, heavily....) over the holidays and fitting in some healthier options to your diet.  No one says you have to go carb free!  It’s definitely harder in the cold winter months to think and be healthy when all you want is warm comfort food (and pizza...), so I put together some healthier options that have some seasonal ingredients to help you get off to a good start to the New Year! Enjoy!


COCONUT DAAL WITH SUPER GREENS


OVERNIGHT OATS WITH CURRANTS, PISTACHIOS & COCONUT


HOMEMADE CHICKEN THIGH SHOYU RAMEN


BETTER SALAD!


POISSON YASSA


SWISS CHARD "LEAVES"


USE-YOUR-VEGGIES QUINOA SOUP

tags: new year's, new years resolutions, healthy, healthy substitutions, what to eat in 2017
categories: all 4, holiday, recipes
Thursday 01.05.17
Posted by Aliya LeeKong
 

Homemade Chicken Thigh Shoyu Ramen

View fullsize Photo Dec 09, 1 52 57 AM.jpg
View fullsize Photo Dec 09, 1 54 59 AM.jpg
View fullsize Photo Dec 09, 1 55 07 AM.jpg

HOMEMADE CHICKEN THIGH SHOYU RAMEN

Secretly, when I go out of town, my husband goes to the store and buys instant ramen noodles.  He won't admit it or mention it when I'm gone, but I come back to the evidence stuffed in our trash can...

I decided to try to make ramen from scratch and outdo the store bought stuff!  Although, traditional ramen can take up to 3 days to make a proper broth, etc., I was not up to that task.  I was a bit under the weather and wanted this ramen to do double duty as my medicinal chicken soup.  SO I decided to do a delicious homemade chicken stock, infuse it with a little kombu and finish it with a shoyu-based tare.  All of the terms are a bit confusing, but Serious Eats does a great breakdown of all of the different types of ramen.
The best part of ramen are the fixings! What to put in your ramen? I used crispy chicken thighs, sliced red chilies, bean sprouts, baby bok choy, corn, scallions and some enoki mushrooms, and this kept it super fresh and light.  Whenever I’m in the Japanese store getting ingredients, I also pick up a few packs of fish balls from the freezer section.  These are made from fish paste, cook up quickly and taste delicious in ramen, particularly if you just make a simple dashi base (water + kombu + bonito flakes).  But you can get creative here: leftover chicken, spinach, ground beef, pork belly……whatever you want!  Enjoy!

Ingredients

Serves 4 to 6

For the Dashi and Tare:

2 quarts homemade or store-bought chicken stock

1 (10” x 4”) piece of kombu, wiped clean with a damp cloth

¼ cup shoyu (Japanese soy sauce)

2 tablespoons mirin

3 tablespoons sake

For the Ramen:

3 tablespoons canola oil, plus more if necessary

4 – 6 boneless chicken thighs, skin-on and room temperature

6 garlic cloves, minced

3 tablespoons toasted sesame oil

4-6 (3 oz) packages dried ramen noodles (if using fresh or homemade, replace each 3 oz dried with 5 oz. fresh)**

2 to 3 pieces baby bok choy, halved

½ cup enoki mushrooms, cleaned

3 large eggs, soft boiled*

2 scallions, thinly sliced

2 small red chilies, thinly sliced

2/3 cup corn, cooked

Salt, to taste

Other optional garnishes: togarashi, nori sheets, menma (fermented bamboo shoots), white pepper

Preheat the oven to 400° F.

For the dashi and tare:

Place the 2 quarts stock in a large pot and add the kombu.  Let soak 30 minutes.  Slowly, bring the stock up to a simmer and simmer for 6 minutes.  Remove the kombu and discard.  Reserve the stock in the pot until ready to serve.

In a separate bowl, combine the shoyu, mirin and sake and set aside.

For the Ramen:

In a large sauté pan, heat the canola oil over medium-high heat.  Make sure the chicken thighs are very dry and season on both sides with salt.  Place the thighs skin-side down in the hot pan and lower the heat to medium.  Cook for about 5 to 7 minutes until the skin crisps.  Flip and cook another minute.  Transfer to a sheet pan and finish in the oven for 10 minutes.  Let rest about 5 minutes and then slice the thighs to desired thickness.

In the same pan, add the minced garlic.  If the thighs haven’t rendered enough fat/drippings, add a little more oil, just enough to coat the garlic.  Cook for another 3 to 4 minutes until browned.  Strain infused oil into a bowl and add the sesame oil.  If you want, you can also blend the oil with the garlic to make it extra potent.  Set aside until ready to serve.

Heat a large pot of water.  Boil noodles per package directions until al dente.  Drain.

To Assemble:

Bring infused stock up to a boil and add the shoyu mixture.

Divide the cooked noodles and broth between the bowls.  Top with the sliced chicken, bok choy, enoki mushrooms, eggs, scallions, sliced chilies and corn.  Drizzle a teaspoon or two of the garlic sesame oil over each bowl.

Serve immediately.

*Eggs should be boiled only for about 7 minutes.  The yolk shouldn’t be completely set.

**If you are up to the task, making your own ramen noodles from scratch can be fun.  Ramen noodles aren’t just your average pasta noodle - they have to be able to stand up to sitting in a bowl of hot broth and keeping their signature chewy texture.  If you were to use a regular pasta dough, the noodles would be overcooked by the time you got through the entire bowl. 

What gives ramen noodles their texture and color, believe it or not, is the addition of one particular ingredient: Kansui, or alkaline minerals.  It’s difficult to find this ingredient if you don’t have a good Japanese store near you, but you can make it at home, I bet you have it in your pantry right now!  Baking soda. All you have to do is bake the soda for an hour at a low temp to change the properties from bicarbonate to carbonate.  It’s really that simple!

For the Noodles:

3 g baking soda
150 g lukewarm water
2 g sea salt
300 g all purpose flour

Preheat the oven to 250° F.  Sprinkle the baking soda on a sheet tray and bake it in oven for about an hour.  You can bake more than the recipe amount and keep the excess stored in an airtight jar indefinitely. 

Mix the water, baked baking soda and salt in a bowl until dissolved.  Measure flour into another bowl, and then add the water mixture.  Combine together and make a very flaky loose, crumbly dough.  Form mixture in to a ball and knead for about 5-10 minutes. 

The dough will be a lot more tough than pasta dough, and that is exactly what you want.  After the dough is smooth, wrap and keep at room temp for an hour. 

Cut the dough into 4- 6 pieces. You can then break out the pasta machine and roll the dough until the 2nd to last setting.  I cheat and put my dough through the spaghetti attachment instead of cutting by hand….up to you.
 

tags: ramen, homemade ramen, how to make ramen
categories: all 4, blog, main dishes, recipes, soups, soups & salads, traditions
Wednesday 12.14.16
Posted by Aliya LeeKong
 

Oxtail Mafé

View fullsize File Nov 21, 2 09 18 PM.jpg
View fullsize File Nov 21, 2 09 39 PM.jpg
View fullsize File Nov 21, 2 09 57 PM.jpg

OXTAIL MAFÉ

There is nothing I love more than walking in to the aroma of a delicious homemade dinner that has been simmering for hours.  When the weather gets brisk and the market is full of squash and root veggies, I love braising - short ribs, lamb shanks, oxtail. 

I am a bit old school about braising and love to take my time developing every bit of flavor:  a serious brown on the meat, a slow sweat of all of the aromatics, 3 + hours of low and slow cooking in the oven.  In a time crunch though, there's nothing like a slow cooker!  Many dishes in the slow cooker allow you to just throw everything in one pot, turn it on and go, but I prefer to quickly sear or sauté whatever I am cooking,to get more flavor out it, and then throw it in the pot. 

When it comes to oxtail, which is what this recipe is all about, I loooove West Indian-style - sweet, spicy, with a good dose of salt pork and some scotch bonnet heat. 

I decided to break out and do something a little different.  When you work in kitchens you find yourself surrounded by many different cultural backgrounds and this leads to epic family meals!  One of my most memorable was being in the kitchen with a line cook from Senegal.  When it was her turn for family, she made the most amazing foods, my most favorite was her Chicken Mafé (basically a chicken and peanut stew).  I still crave it to this day! I remember her saying she uses beef at home…so why not oxtails!? 

Below is my take on her dish, it’s best with rice or fonio (a West African grain)…pretty much anything to sop up the yummy sauce with!  I'm now not sure which is my favorite way to make oxtail....Enjoy!

Yields 4 to 6 servings

3 tablespoons canola oil

2 ½ pounds oxtail, cut into segments

1 large yellow onion, diced

1 medium bell pepper, diced

1 Scotch bonnet pepper or habanero pepper, minced or kept whole if you want less heat

3-4 cloves of garlic, minced

2 tablespoons tomato paste

1 can diced tomatoes, fire-roasted

3/4 cup peanut butter, all natural

1 quart chicken or beef stock

2 tablespoons Fish sauce

2 tablespoons red wine vinegar

1 tablespoon soy sauce (optional)

1 medium sweet potato, cut into 1" dice

1-2 Yukon gold potatoes, cut into 1" dice

1/2 bunch cilantro, finely chopped for garnish

1/2 cup peanuts, roughly chopped for garnish (optional)

Salt and freshly ground pepper, to taste

Preheat oven to 325° F.

In a dutch oven, heat oil over medium-high heat.  Dry off oxtails, season generously with salt and pepper and sear for 2 to 3 minutes per side.  Work in batches so you don't crowd the pan.  Remove the oxtails and set aside in a plate or tray.

Reduce heat to medium and throw in the onion, bell pepper, and habanero or scotch bonnet if cut up (if whole, wait).  Sauté for about 5-7 minutes until everything has softened.  Add in the minced garlic and cook another 30 seconds or so.  Add in the tomato paste and sauté for another minute.

Now, add in the diced tomatoes, peanut butter, stock, fish sauce and soy sauce (if using).  If you are keeping the habanero or scotch bonnet pepper whole, this is the place to add that in as well.  Turn up the temperature and bring up to a boil.  Make sure the peanut butter is evenly mixed into the stew.

Nestle the oxtail into the stew making sure they are fully covered.  Pour in any juices that accumulated in the plate or tray where the oxtail were.  Cover and place into the oven.  Cook for 2 1/2 hours.

Remove from the oven and stir in the sweet and regular potatoes. Cover and place back into the oven for another 45 minutes.

Serve hot over rice or fonio garnished with chopped cilantro and peanuts.


tags: oxtail recipe, how to cook oxtail, west indian oxtail, chicken mafe, senegalese food
categories: all 4, holiday, main dishes, man-friendly, recipes, traditions
Wednesday 11.30.16
Posted by Aliya LeeKong
 

The Ultimate Thanksgiving Turkey

THE ULTIMATE THANKSGIVING TURKEY

Photo: Food52

I feel as if I've been walking around in a fog, and, now, Thanksgiving is basically a week away!  When did this happen?  I always think that Thanksgiving is far enough away that I have plenty of time to plan and then all of a sudden, it's just here.  This year, I definitely don't want to go the traditional route with a turkey.  We did this amazing, marinated, dry-brined, spatchcocked turkey last year out on our grill to free up oven space.  It was AMAZING - super moist and evenly cooked with crispy, crackling skin.

Turkey can be so hit or miss with the main complaint being that it's too dry.  Brining is the best way to ensure that the turkey will stay moist and flavorful!  The only decision left is a dry brine vs. a wet brine.  Using a dry brine is basically pre-salting the turkey without any water.  Some say that this is the better method (it definitely saves space in the fridge...), and while it doesn’t always guarantee as juicy a bird as a wet brine, it does offer a much crispier skin when cooked.  The turkey sits in the fridge, uncovered, with the dry salt brine mix for up to 3 days prior to cooking.  The salt mixture will draw out the moisture from the bird.  The salt is then dissolved in this liquid and reabsorbed which helps to break down any tough proteins making it tender, juicy and flavorful.

With a wet brine, you add water to the equation and need a bag big enough to house the turkey and a pan (for a just in case the bag bursts scenario).  This just means more room needed in the fridge that, quite frankly not a lot of us have around this time of year!  The turkey then bathes in the brine for up to 3 days and (I think) creates a juicer outcome. 

I’ve used both techniques in the past and honestly, I think the choice for brining depends on the cooking method.  For a traditional roast turkey, I say go with the wet brine - for the longer cooking time, you need the brine to plump up the moisture content.  For a spatchcocked turkey, though, that cooks in far less time, I think a dry brine is the best way to go - you get the moisture you need and perfectly crisped skin!

What I love about both brines is that you can add whatever spices you want to create a personalized mix.  In the past, I have played around with allspice berries, juniper berries, fresh (or dry) herbs, garlic chipotle peppers (grinded), citrus zest (orange, lemon, lime, etc…), star anise, cardamom…..you get the idea.  All you need to know is the ratio of salt to water for a wet brine (about 2- 2 1/2 cups salt to 1 gallon of water).  For a dry brine, I use a 1/2 cup kosher salt with 2 tablespoons baking powder as a ratio and don't always use all of that salt, depending on the size of the turkey.  

A few things: Always default to kosher salt here as this method needs the larger crystals to work; regular table salt is not ideal for this recipe.  Also, this is only good for a non-kosher, non-treated, fresh turkey.  If you aren't buying a fresh one, make sure you read the label to see if it's been pre-treated.

Finally, remember that there is no need to re-salt the turkey once you are ready to put it in the oven!  Usually with the wet brine, I rinse the turkey in and out and pat dry before stuffing it and putting it in the oven.  With the dry brine, I don’t rinse but only pat the skin dry before roasting. 

Here are a few recipe ideas to get you started with your Thanksgiving Feast!

SPATCHCOCKED ROAST TURKEY

Photo: Food52


SLOW-ROASTED TURKEY RECIPE

Photo: Food52


DRY-BRINED TURKEY

Photo: NYTimes


SLOW-SMOKED AND SPICE-BRINED TURKEY

Photo: Saveur


JAMAICAN JERK TURKEY

Photo: Chef and Steward


tags: Thanksgiving ideas, Thanksgiving recipes, thanksgiving turkey recipe
categories: all 4, holiday, lifestyle-1, main dishes, man-friendly, recipes, traditions
Tuesday 11.15.16
Posted by Aliya LeeKong
 

Chipotle-Miso Butternut Squash Soup

CHIPOTLE-MISO butternut SQUASH SOUP


I know, I know - chipotle plus miso??  Obviously, this has no root in real tradition, but those flavors together are literally incredible, something I first played around with in my mind before putting them together.  I love creating new soup recipes during squash season - that sweetness is the perfect canvas for spices and flavor.  Squash creates such a lush, smooth, silky texture without even adding any cream so it’s the perfect option for dairy-free days.  

The recipe below is for a spiced butternut squash soup, but you can easily substitute pumpkin, honeynut or kabocha squash for this recipe.  Most soups call for roasting the squash first, but I skip that step here.  The cubed, raw squash cooks up while it's simmering with all of the great flavors here.  I love the smokiness and heat of the chipotle mixed with the umami and sweetness of the miso.  Such a great, quick weeknight meal.  I served it along with my pan de coco (coconut bread subbing coconut milk in this recipe)….sooooooo good!

Serves 4 to 6

2-3 tablespoons unsalted butter
1 medium onion, diced
1 shallot, diced
3 cloves garlic, minced
1/2 teaspoon brown sugar
1 butternut squash, halved and seeded and cut into a 1-inch dice (optional: save the seeds for garnish)*
1/4 cup mirin**
4 cups vegetable or chicken stock
2 tablespoons white shiro miso**
1 chipotle in adobo (canned)
Salt and lemon juice, to taste
chopped chives, for garnish

In a soup pot, melt butter over medium-low heat.   Add onion and shallot
with a pinch of salt and cook for 5 to 7 minutes until translucent.  Add the
garlic and the brown sugar and cook for another minute.

Add in the cubed squash along with the mirin and cook for 2 to 3 minutes
until the wine has mostly absorbed.  Add the stock and bring up to a simmer.
Simmer for 35 minutes, partially covered, until all of the squash are
tender.

Add in the miso and chipotle and transfer to a blender or use a hand blender
to puree to your desired consistency.  Season with salt and adjust acidity with lemon juice if necessary..

Serve sprinkled with chives & toasted seeds (if using).

* To toast the squash seeds, preheat oven to 350 degrees.  Clean seeds of any pulp and dry on paper towels. Toss the seeds with oil, salt, cumin and smoked paprika.  Toast in oven until golden brown about 10-15 minutes.  Let cool on a tray and set aside for garnish on soup.

** Mirin is a type of Japanese rice wine.  This along with the miso can be found at Whole Foods or a specialty / Asian grocer.

tags: squash recipes, squash soup, how to make squash soup, butternut squash soup, butternut squash recipes, best butternut squash recipe ever
categories: all 4, appetizers 1, main dishes-1, man-friendly, quick & easy, recipes, soups, soups & salads, vegetarian-2
Wednesday 11.02.16
Posted by Aliya LeeKong
 

Breaking the Fast After Yom Kippur

BREAKING THE FAST AFTER YOM KIPPUR

Yom Kippur is arguably the most important holiday in the Jewish calendar.  It marks the end of the 10 day celebration of Rosh Hashanah (Jewish New Year) and translates to the “Day of Atonement”.  The day is set aside to atone for the sins of the past year with a complete 25- hour fast.  The fasting begins just before sunset the day before and goes until the next evening.  At sunset on Yom Kippur, you have a “Breaking Fast” meal that usually includes all types of breads, cured meats and food that were cooked the day before since during fasting you are not allowed to do any work (even cooking)! 

With this in my mind, I thought about easy breaking fast food, a homemade coconut bread recipe as well as some different ways to do lox.


CONCORD GRAPE HAND PIES 

These are beyond easy!  This is grape season, so just halve and remove the seeds from the sweetest grapes you can find.  Roll out a sheet of homemade puff pastry and use a pastry cutter or overturned glass to cut out rounds.  Place a small mount of the halved grapes in each circle.  Fold the circle in half to make a semi circle and use a fork to press the edges down tightly.  Paint with an egg wash and bake at 400° F for about 25 minutes.  Done!


PAN DE COCO (WITH A TWIST)

Pan de coco is a Dominican bread that's usually a bit more flat.  I combined it with my basic bread roll recipe, adding yeast to make it fluffy and light.  Think a Parker House roll and Pan de Coco had a baby.  It's soooo good.

Yields 16 rolls

¼ cup lukewarm water

(1) ¾ ounce packet yeast (active dry)

3 tablespoons butter, plus more for greasing and melting

¼ cup honey

2 ½ teaspoons salt

1 cup coconut milk

1 egg, beaten

4 – 4 ¼ cups all purpose flour

½ cup coconut flakes

Flake salt, for sprinkling


I make this recipe in a stand mixer, but you can easily do this by hand.  Start with the lukewarm water in the bowl of the stand mixer and sprinkle the packet of yeast over.  Mix gently to combine and let sit 5 minutes or so while you prepare the other ingredients.

In a medium pot, melt the butter.  Add the honey, salt and coconut milk and heat gently until warmed through and uniform.  Remove from the heat.  (It shouldn’t simmer but should be warm to the touch.)

Add the egg and 3 ¾ cups of flour to the yeast mixture and mix together with a fork.  Slowly pour in the milk mixture, using the fork to make a shaggy dough.  Using the dough hook attachment (or your hands), knead for about 3-4 minutes.  The dough should be soft and a bit tacky but should NOT stick to your hands.  If it's sticky, keep adding flour in tablespoon increments until you have the right, non-sticky consistency.

For rolls, divide the dough into 16 even-sized balls and place in a heavily greased, 9-inch cake tin.  Cover with a kitchen towel and let rise 45 minutes.  Preheat oven to 375˚ F.

After the rise, brush the rolls generously with melted butter, sprinkle with coconut flakes and bake for 30 to 35 minutes.  Brush again with butter once out of the oven and sprinkle with a little salt.  Enjoy hot!


LOX 2 WAYS

Photo: Food & Wine

Asian Salt & Sweet Lox

1 lb salmon filet, trimmed and all pin bones removed
1 cup soy sauce
1 tablespoon dark brown sugar
1/4 cup mirin
1 or 2 fresh chilies (thai, serrano, depends on your heat tolerance), roughly chopped
1 inch fresh ginger, roughly chopped
1 bunch cilantro, roughly chop (1/2 for cure, 1/2 for creme fraiche)
1 cup crème fraiche
1/2 lime, juiced

Place salmon in a large ziploc bag on a cookie (just in case the bag leaks).  Whisk together the soy sauce, sugar and mirin until the sugar dissolves.  Pour the mixture in the bag and add in the chilies, ginger and cilantro.  Let as much air out of the bag as possible and seal.  Put another cookie sheet on top and weight down with cans or something else heavy.  Place in the fridge and let sit for 24-48 hours.  After, rinse the filet under cold water until the filet is clean.  Pat dry with paper towels and let it dry out a bit in the fridge before slicing. 

Chop the remaining cilantro a bit more finely.  In a bowl, mix together the crème fraiche with the lime juice and finely chopped cilantro.  Slice the salmon with a sharp knife, serve with thecrème fraiche and enjoy!


Traditional Lox

1 lb salmon filet, trimmed and all pin bones removed
1/3 cup kosher salt
1/3 cup sugar
1/2 bunch fresh dill, finely chopped
3 lemons, zested
2 tablespoons smoke powder (optional)

Place salmon in a large ziploc bag on a cookie (just in case the bag leaks).  Mix together the remaining ingredients.  Pat the mixture onto both sides of the salmon.  Let as much air out of the bag as possible and seal.  Put another cookie sheet on top and weight down with cans or something else heavy.  Place in the fridge and let sit for 24-48 hours.  After, rinse the filet under cold water until the filet is clean.  Pat dry with paper towels and let it dry out a bit in the fridge before slicing.  Enjoy!


tags: Yom Kippur recipes, break fast recipes, breaking the fast, bread recipe
categories: all 4, appetizers 1, breads & cakes, blog, breakfast-1, desserts-1, holiday, lifestyle-1, quick & easy, recipes, traditions
Wednesday 10.12.16
Posted by Aliya LeeKong
 

Not Just Apple Pie + Lamb Shanks!

NOT JUST APPLE PIE + LAMB SHANKS!

There’s nothing better than apple picking on a cool Fall weekend with the fam!  As I get older, I totally geek out about stuff like that (who knew?).  Now, if only the weather would cooperate...I have my favorite spot up in Warwick, NY, which, coincidentally, also happens to be a vineyard with wine tasting.  Because tipsy apple picking is even better!  Just joking (sort of). 

View fullsize apple3.jpg
View fullsize apple4.jpg
View fullsize apple2.jpg

There are so many different varieties of apples to choose from that I’m so glad they have maps and descriptions of each apple.  I tend to get overly excited and end up with WAY too many apples when I get home!  So after lugging pounds of different apple varieties home, I'm always thinking about what to do besides, of course, the mandatory pie or crisp.  I love a good apple butter to keep for later, and I freeze off batches of applesauce for the chickadee. 

I put together a few ideas for you, and, further down, is a yummy recipe for Honey-Braised Lamb Shanks with Butternut Squash and Apples, which is basically a tagine and seriously delicious.  Enjoy!


APPLE PIE WITH STAR ANISE BROWN BUTTER


BUTTERNUT SQUASH & APPLE BREAD WITH MAPLE & CARDAMOM


PISCO SOUR APPLE


SWEET APPLE COUSCOUS


HONEY-BRAISED LAMB SHANKS WITH BUTTERNUT SQUASH AND APPLES

This lamb dish is based on North African tagines, which slow-braise lamb and other meats with both sweet and salty elements. While many tagines feature apricots, prunes, or raisins, I thought seasonal butternut squash and apples would provide the perfect sweet counterbalance to the spiced braise.  I use lamb shank here because I love the flavor and the end result – spoonable, fall-off-the-bone meat in a rich stew.

Ingredients

2-3 tablespoons canola oil

2 ½ pounds lamb shanks (approximately 2 shanks), room temperature

1 large onion, cut into a medium dice

4 cloves garlic, minced

½ teaspoon ground ginger

large pinch saffron

1 ½ teaspoons cinnamon

4 cups beef or chicken stock

1 tablespoon honey

2 cups butternut squash, cut into a ¾” inch dice

1 ½ cups honeycrisp or fuji apple, cut into a ¾” inch dice

¼ cup sliced almonds, toasted

1 ½ teaspoons sesame seeds, toasted

Salt and freshly ground pepper

Preheat the oven to 325° F.

Heat a Dutch oven or large pot over medium-high heat.  Add the oil, season the shanks generously with salt and freshly ground pepper, and sear 2 to 3 minutes per side to develop a nice brown.  Remove to a plate and reduce the heat to medium-low.

Add the onion and a bit of salt and sauté for 5 to 7 minutes until the onions are translucent.  Add the garlic, ginger, saffron and cinnamon and sauté for another 30 seconds to a minute until fragrant.  Nestle the lamb shanks back in the pot, and add in the stock and the honey.  Cover, bring up to a boil and then place in the oven.

Cook for 2 hours and 15 minutes and then remove from the oven.  Toss in the squash, apples and half of the almonds.  Cover and put back in the oven for the next 45 minutes to an hour. The meat should be spoonable, basically falling off the bone.

Serve hot, garnished with the remaining toasted, sliced almonds and sesame seeds.  This is great alongside couscous.

tags: apple picking, apple recipes, what to do with apples, apple pie recipe, apple cake, lamb tagine, lamb shanks
categories: all 4, blog, holiday, lifestyle-1, main dishes, man-friendly, recipes, traditions, sweet & savoury
Thursday 09.22.16
Posted by Aliya LeeKong
 

Rose-Scented Falooda

View fullsize falooda3.jpg
View fullsize falooda2.jpg
View fullsize falooda1.jpg

ROSE-SCENTED FALOODA

This weekend kicked off the start of Eid Al Adha (or Feast of Sacrifice).  For those that are unfamiliar, it's the second of the two Muslim holy holidays and is considered the most holy, the other being Eid Al-Fitr, celebrating the end of Ramadan.

Although this holiday is considered the "Salty Eid" with savoury dishes being the mainstay of the celebration, it made me think about a sweet drink I grew up having at the sweet shops when I travelled.  Falooda is a rose-scented, sweet milk that is flecked with sweet basil seeds (tukmaria), a cornstarch vermicelli and ice cream.  It's such a distinct taste memory, an Indo-Pakistani bubble milk tea of sorts for a reference point, and was always a treat. 

I thought it would be fun to recreate and also do it a bit more naturally (to give to my little one!).  I used a rice vermicelli because falooda sev, the traditional cornstarch noodle, was too hard to find.  In lieu of a pre-fab, pre-sweeted rose syrup, I made my own to control for sweetness, but, by all means, it tastes great using either.  Finally, I used a touch of kewra essence because that flavor is part of my childhood, but it's totally optional (and also not the easiest to find).

Basil seeds, by the way, are very similar to chia seeds.  When you soak them, they swell and become gelatinous.  Like chia, they are considered a superfood, but, theoretically, you could sub in chia if they are too tough to find. 

Serves 4

2 teaspoons basil seeds

1/3 cup white or brown rice vermicelli, broken into 1- to 2-inch pieces

2 cups milk (whole, skim, almond, coconut)

3 tablespoons rose syrup*

1 1/2 tablespoons kewra essence (optional)

4 medium scoops ice cream (vanilla, honey, pistachio, or any flavor you think fits here)

In a small bowl, cover the basil seeds with water and let sit 5 to 10 minutes.  They will swell up, so you may need to add a bit more water.  Strain.

Cook the vermicelli per the package instructions - usually about 3 minutes in boiling (unsalted!) water.  Strain and transfer to an ice bath (water and ice) to cool down immediately and stop cooking.  Strain once cooled.

To the milk, stir in the rose syrup and kewra essence, if using.

Divide the basil seeds and vermicelli between 4 glasses.  Top with the rose milk and finish with a scoop of ice cream.  Serve immediately with a straw and a spoon!


*For the rose syrup, in a medium pot, bring 1 1/2 cups water, 1 cup dried rose petals and 1 cup white sugar (if using a natural brown sugar like palm or coconut, change this to 3/4 cup) up to a boil.  Remove from the heat, cover, and let steep until it cools to room temperature.  Strain, using the back of the spoon to press through as much of the liquid (and flavor) from the rose petals as possible.  Add a few tablespoons of rose water to intensify the flavor if need be - it all depends on the strength of the rose petals you're using.

tags: falooda recipe, natural falooda, kewra, rosewater, rose syrup recipe, how to make rose simple syrup, eid foods
categories: all 4, desserts, drinks & cocktails, holiday, quick & easy, recipes, traditions
Wednesday 09.14.16
Posted by Aliya LeeKong
 

Labor Day Loungin'

LABOR DAY LOUNGIN'

I honestly can't believe I am already talking about Labor Day - literally, wasn't it just Memorial Day the other weekend??  The end of summer is always so nostalgic and filled with a sense of anticipation, and, somehow, each year, it speeds up the older (....umm, mature?) you get.  Either way, another summer has come and gone, and now it's time to max out and celebrate the last weekend of summer!!

If you are planning on grilling, which I definitely am, you can look back at these essential grilling tips (not to mention this killer whole grilled chicken with jalapeño sauce recipe).  My focus for this post is going to be on cocktails, because, quite frankly, I'm going to need a few to say goodbye to summer.  Not that I don't absolutely love Fall and looking forward to all of the holidays.....Back to cocktails - remember that chili post from last week?  Well, I took an open bottle of vodka and threw in a few jalapeños for a spicy cocktail this weekend.  Here are a few more that made my list - enjoy!


COCONUT CHILI MOJITO

Photo: francoiselaprune.com


STRAWBERRY-PEACH BASIL SHRUB 

Just add your favorite spirit - vodka, rum, pisco and tequila all work beautifully here.


CRUSHED BLACKBERRY MOSCOW MULE

Photo: What Gaby's Cooking


FROSÉ (FROZEN ROSÉ) 

Photo: Bon Appetit


ST. LUCIAN RUM PUNCH (MY OLD STANDBY!)


POMEGRANATE FIG SMASH

Photo: Saveur

tags: summer cocktails, labor day weekend cocktails, what to drink on labor day, rum punch recipe
categories: all 4, blog, drinks & cocktails, holiday, recipes
Thursday 09.01.16
Posted by Aliya LeeKong
 

Aged Hot Sauce & Other Things to do with Chili Peppers

AGED HOT SAUCE & OTHER THINGS TO DO WITH CHILI PEPPERS

I am slightly obsessed with hot sauce (I mean, obsessed).  I put that ish on everything.  Sometimes, I carry a small bottle in my purse because, you know, you just never know when you’ll need it...Right now, the market is bursting with all types of peppers, and there are so many different ways to make hot sauce or spice up ordinary kitchen condiments. Making your own hot sauce at home really isn’t that hard of a task.  You can do a quick stove top method (basic cooked), ferment in a salt brine solution for a few weeks (fermented/aged), or a quick pickle like my Haitian quick pikliz.

Fermented hot sauces might sound like something new, but they are in so many different cultures - super Southern (think Tobasco) and Asian (sriracha and kimchi to a certain degree) to name a few.  I personally like to make a green sauce and a red sauce. My green sauce is always a mix of serranos, jalapeños, and poblano peppers, roughly chopped.  I add some chopped onion, garlic and green bell peppers to round out the heat, pack it all in a jar and add a simple salt brine (1 1/2 cups water to 1 tablespoon salt).  Everything should be submerged, so if you're doing this at home, weight down if you must.  Initially, I cover the jar with muslin cloth, secured by a rubber band, and I let sit it sit on the counter for about a week to two weeks, stirring daily.  You will notice little bubbles (fermentation), but if white mold forms, skim it off.   You can ferment for as long as you like really - Tobasco takes 3 years!  I have experimented from a week to 8 weeks, so it's more about personal taste.

For the red sauce, I use hot cherry peppers, a couple scotch bonnets, and other red chilies like Fresnos or thai chilies.  Again, add onion, garlic and red bell peppers to round out the heat.  Same finish as the green sauce.  The hardest part is the waiting.  Also, I highly recommend wearing gloves when dealing with all these hot peppers!

Another fun way to experiment is with the salts in the brine or spices.  Think: a smoked, black Hawaiian sea salt or Himalayan pink. Spices like coriander, cloves, all spice, ginger, mustard seeds,  and even herbs will add great flavor.

After the peppers have fermented, I like to strain the pepper mix, reserving the brine.  Then, I purée adding back in the brine and a touch of vinegar until I reach the right consistency and flavor.  You can leave it like this, slightly chunky, or strain for a thinner hot sauce. Note: If the sauce is a little too hot you can add some sugar to smooth it out.   Finally, transfer to an airtight jar and store in the fridge.

Another great way to use up peppers from the market is to infuse them in vinegars or oils to make some kick-ass salad dressings!  For vinegars, I like to buy the tall thin glass jars with the pour spout and fill them with Thai bird chilies or any skinny peppers, really, that fit in the jar.  Then, it’s up to you which type of vinegar you want to infuse - no cooking necessary!  Fill the jar and let it sit for a week or more to infuse.  It's so simple - just make sure the chilies are covered by the liquid or they could mold. 

For the oil, I like to simmer canola or grapeseed oil on a low heat with garlic and spices.  Then, pour the hot oil over fresh or dried chilies and let sit until cool.  Strain and voilá!

Enjoy!!


tags: aged chili sauce, fermented chili sauce recipe, how to ferment chili peppers, pickled chili peppers
categories: all 4, blog, condiments, lifestyle-1, quick & easy, recipes
Wednesday 08.24.16
Posted by Aliya LeeKong
 

Japanese-Inspired 5-Ingredient Cheesecake

View fullsize cheesecake 3.jpg
View fullsize cheesecake2.jpg
View fullsize cheesecake1.jpg

JAPANESE-INSPIRED 5-INGREDIENT CHEESECAKE

The fact that National Cheesecake Day falls in the summertime is a bit odd to me.  That thick, tangy lusciousness somehow belongs during a time when you're not trying to eat light (and kill it in a bathing suit...).  BUT I recently tried a Japanese cheesecake, which is also called a Cotton cheesecake (because of how light and fluffy it is).  Think if an angel food cake and a cheesecake had a baby....Turns out, this crustless, spongy creation is the perfect summer dessert.

I set out to create a simplified version of it because summer desserts should be a bit easy.  I wanted a canvas, a simple cake, to showcase seasonal ingredients as its topping.  This cake is 5 ingredients, and the hardest step is just whipping the egg whites to stiff peaks and folding into the batter.  Other than that, foolproof!  I used yuzu juice as the acid in keeping with the Japanese theme and because it has a touch of salinity, which I looooove, but lemon juice or even key lime juice would be a great substitute.

When I’m indecisive about a topping for my cheesecake, my favorite go to is a whipped sour cream topping.  The tangy tartness of the sour cream with the bite of the creamy, sweet cheesecake is one of the more surprising taste combinations.  Who would have thought sour cream with cheesecake would be a thing!?  And it’s super simple to make.  For a more basic recipe I use sour cream, confectioner’s sugar and vanilla extract.  Just throw it all into the Kitchenaid and whip 'til smooth or whisk in a bowl if you don’t like lugging out your stand mixer. 

There were so many blueberries at my Saturday's farmers' market, so I thought I would test out a blueberry sauce with my cheesecake.  This recipe combines the blueberries with one of my favorite herbs, lemon verbena.  It’s a super simple sauce and starts off like you would a jam.  Instead of letting it boil down til thick, you simply take off the heat and let cool.  I like to steep the lemon verbena in boiling water to really bring out the flavor and then use the water when making the sauce.  In a sauce pan, mix the blueberries, corn starch, and sugar until the blueberries start to release their juices.  Gradually stir in the lemon verbena water and bring to a simmer.  Let cook for 5-10 minutes until desired consistency and some of the berries start to burst.  Turn off heat and let cool to room temperature.

Here's the 5-ingredient cheesecake recipe - enjoy!

Yields (1) 9-inch cake

1 can sweetened condensed milk
8 ounces cream cheese, room temp
6 eggs, room temp and separated
2 ½ tablespoons cornstarch
1 tablespoon yuzu, lemon or key lime juice

Preheat the oven to 350° F.

In a large bowl, whisk together condensed milk and cream cheese.  Fold in yolks, cornstarch and yuzu/lemon juice.

In a separate bowl, whip egg whites to stiff peaks.  Add a little bit of the egg whites to the cream cheese mixture to lighten and then fold in the rest in 3 increments.  Transfer to a greased, parchment-lined 9-inch cake tin or springform pan.  Place in a roasting pan and pour boiling water in the pan to halfway up the cake tin (if using a springform, make sure to wrap in foil all over to keep the water from seeping in.

Bake for 40 minutes.  Then, turn off the oven and leave the cheesecake in the oven for another 15 minutes.  Remove and let cool completely before refrigerating.  Refrigerate at least hours before serving.


tags: cheesecake recipes, japanese cheesecake, easy cheesecake recipe, cotton cheesecake, desserts
categories: all 4, desserts, holiday, quick & easy, recipes, traditions
Wednesday 07.27.16
Posted by Aliya LeeKong
 

Honey Frozen Custard with Cherry-Currant Swirl

ice cream5.jpg
ice cream1.jpg
ice cream2.jpg
ice cream3.jpg
ice cream4.jpg

HONEY FROZEN CUSTARD WITH CHERRY-CURRANT SWIRL

As far as desserts go, I'd be perfectly content to eat ice cream all summer long (and maybe the occasional fruit tart or two)!  It's a past time for my daughter and I to take the walk over to Fort Grace
 in our neighborhood, grab a cone or two (likely with sprinkles) and leisurely stroll back home. 

But I have to admit, as time has gone on and, you know, being a mother and all, I get more and more focused on sourcing my ingredients and trying to make as many treats from scratch as I can.  With the help of a good ice cream maker or an ice cream attachment to your stand mixer, making your own ice cream is really not that tough AND you can control your ingredients - whether for health reasons or simply to tailor to your own tastes.  Not to mention, it's badass.

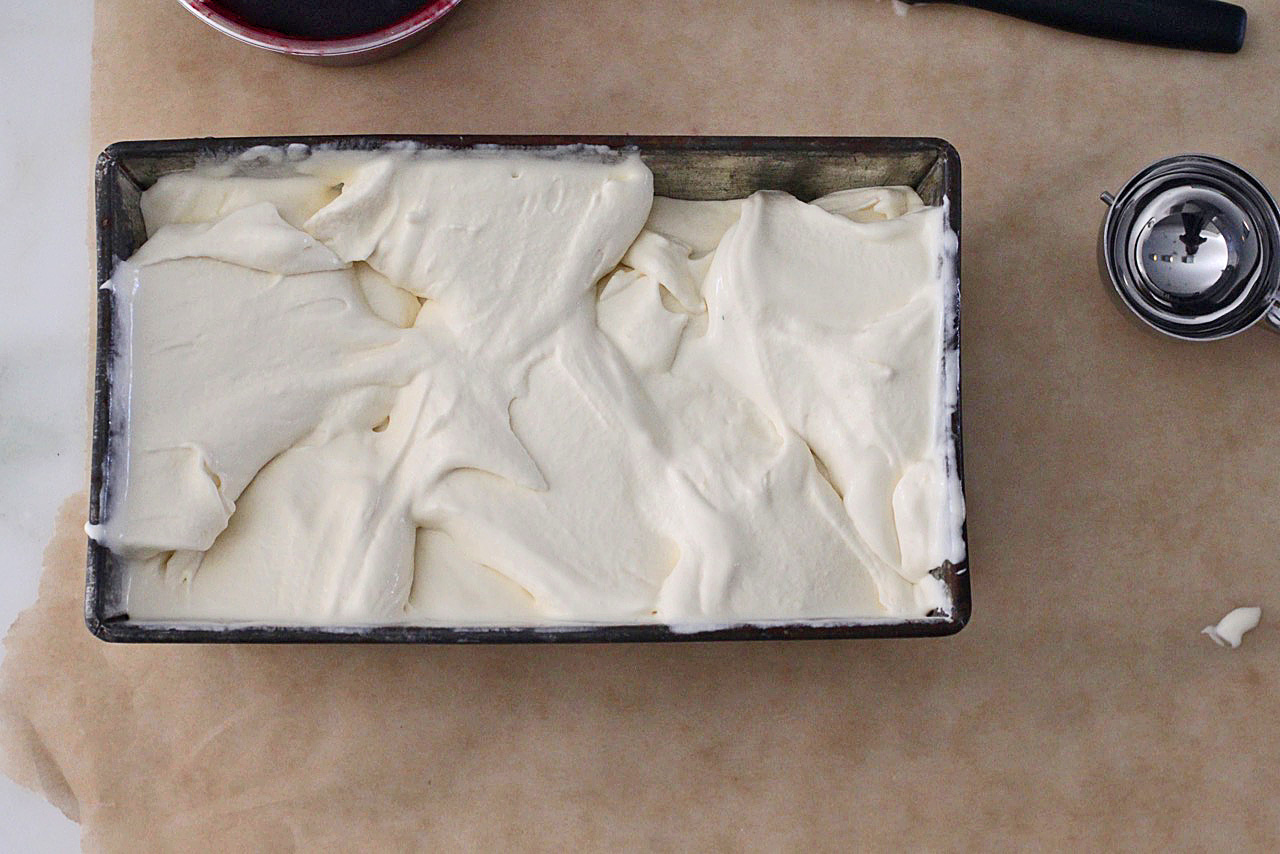
This is really a frozen custard, not quite ice cream, which is to say it has more yolks than tradition dictates and is a bit higher on the cream side.  The result: luscious, whipped, soft serve-style ice cream that keeps its fluffiness even after freezing for some time.  I used (raw / local) honey to sweeten here, in lieu of sugar, which adds to that silky texture as well.  You could easily use the base to make so many different flavors - I sometimes add cinnamon and toasted pecans to it for a totally different take.

With a glut of cherries and both red and black currants in my house, this sauce was an easy and rewarding way to use them all up!  I didn't even pit the cherries - just threw them all in a pot, knowing I was going to strain away the solids at the end.  If you have pitted cherries, you could easily just blend this mixture up in a good blender for a bit of texture instead of straining, but, remember, you'll probably have a bit more than the recipe calls for.

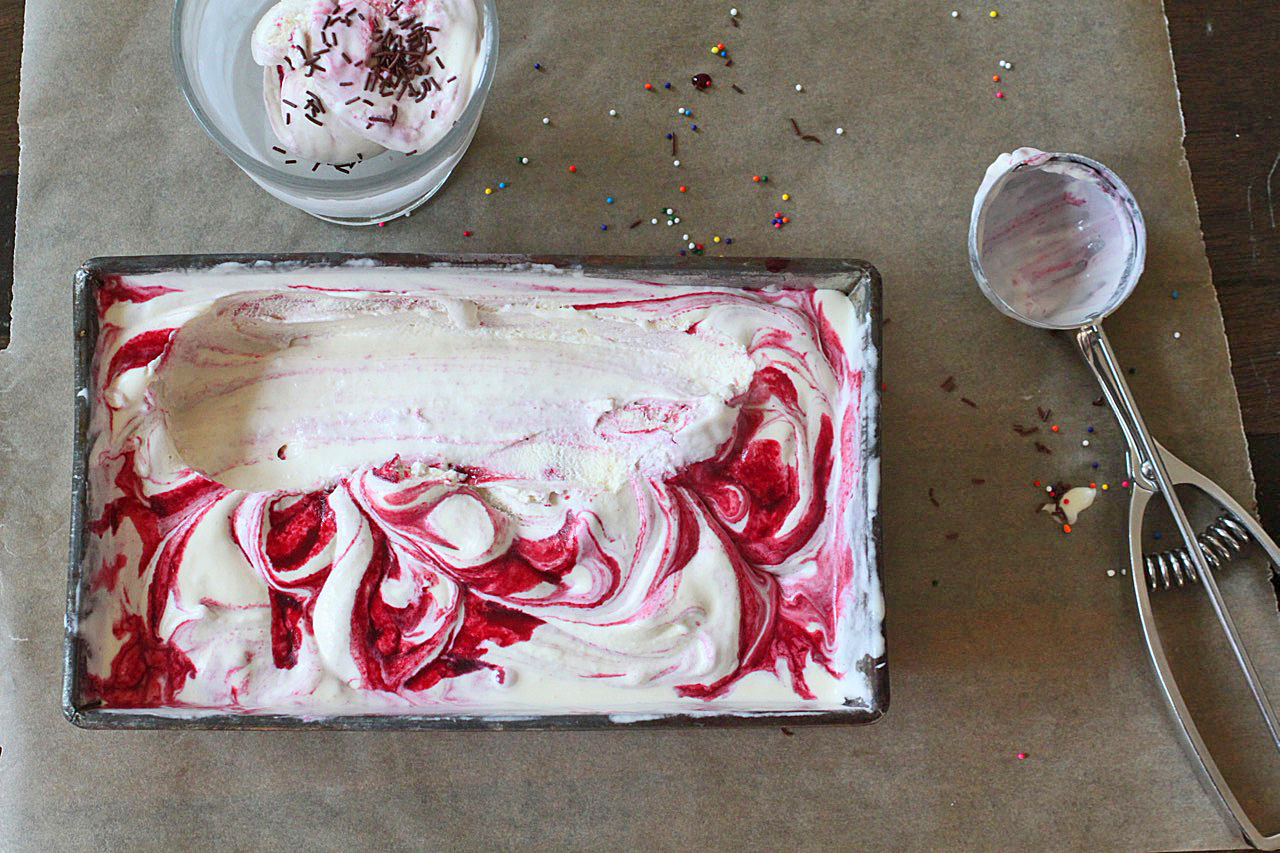
I love the combination of red fruits and cream - that creamsicle-like flavor, and this tastes AH-MAZING with a bit of chocolate, whether a sauce, some dark chocolate pieces or sprinkles.   Enjoy!

Ingredients

Yields about 2 pints

Frozen Custard Base:

1 cup milk

2 cups heavy cream

½ cup + 2 tablespoons honey

½ teaspoon vanilla extract

1/8 teaspoon salt

6 large egg yolks

Cherry-Currant Swirl:

1 cup red and/or black currants

1 cup cherries, stems removed (pitted or not, doesn’t matter)

2 tablespoons honey

1 tablespoon sherry vinegar

3 tablespoons water

a pinch of salt

For the ice cream base:  In a medium saucepan, bring milk, heavy cream, honey, vanilla and salt up to a simmer and remove from the heat.  Whisk the egg yolks in a heatproof mixing bowl.  Temper the yolks by adding a little of the milk mixture to them and beating in between until a third of the milk mixture has been added.  Return the milk-yolk mixture to the saucepan and place back over low heat.  Cook, stirring frequently, until the mixture thickens and coats the back of a spoon.  Strain and cool completely in the fridge (4 to 8 hours).

For the cherry-currant swirl:  Heat the currants and cherries with the honey, vinegar, water and salt over medium heat.  Simmer covered for 5 minutes until the fruit breaks down and then simmer uncovered another 4 to 5 minutes until the juice thickens.  Strain through a fine mesh strainer, pressing against the solids until all of the juice is through.  Cool completely (and it will continue to thicken as it cools) in the fridge.

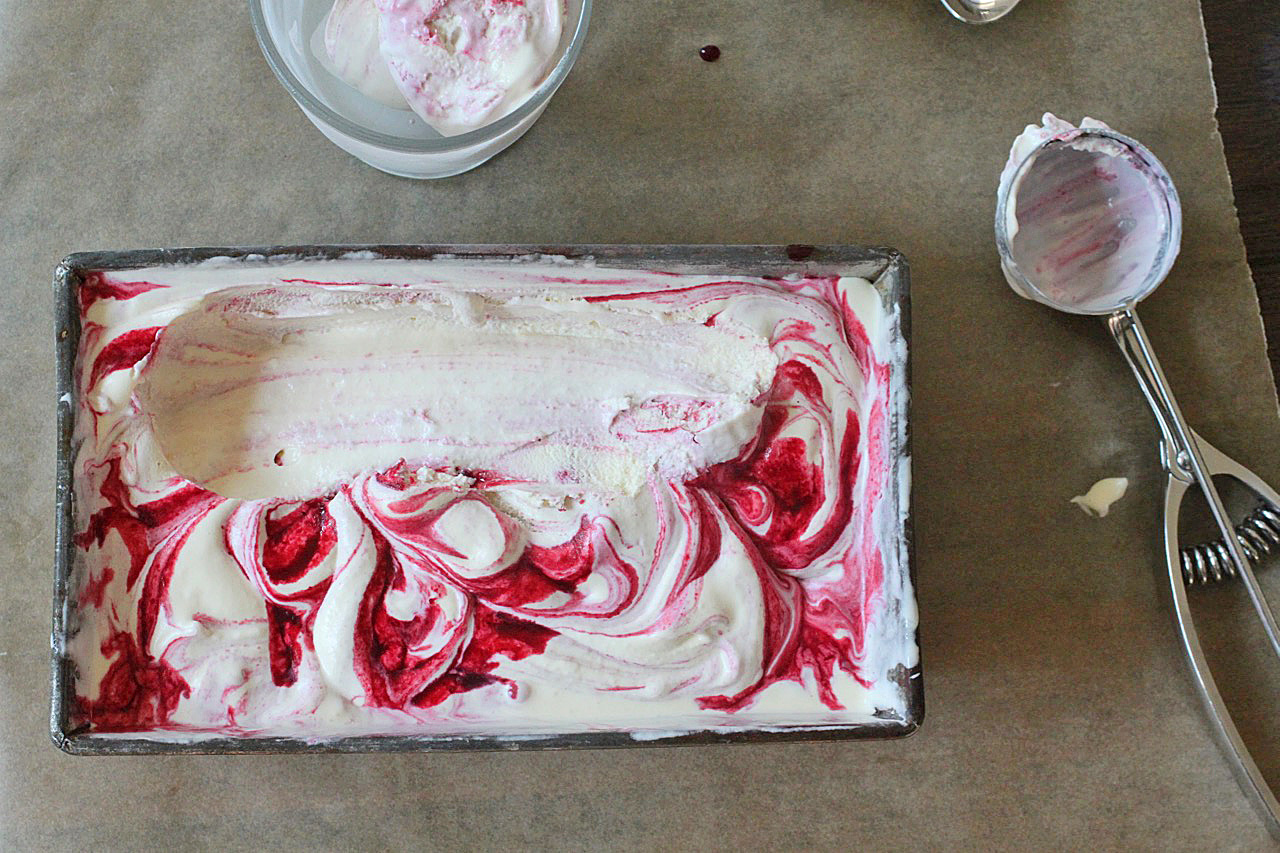
To finish: Pour ice cream base into an ice cream maker or ice cream stand mixer attachment and process according to the manufacturer’s directions.  It usually takes about 25 to 30 minutes.  Transfer half of the ice cream into a container.  Pour half of the currant-cherry mixture on top and use a knife or small offset spatula to form swirls.  Repeat with the other half of the ice cream and sauce on top.

Serve immediately soft serve-style or freeze to firm it up a bit (will still be fluffy and soft) with or without sprinkles!

tags: ice cream recipe, frozen custard recipe, how to make ice cream, honey ice cream, swirl ice cream recipe
categories: all 4, blog, desserts, recipes
Wednesday 07.13.16
Posted by Aliya LeeKong
 

Summer = Fish Tacos

SUMMER = FISH TACOS

I. Love. Tacos.  Tacos are the ultimate - easy food with literally endless combinations.  Summer is all about simplicity and lightness, so my favorite by far this time of year are fish tacos.  From grilled red snapper to lightly breaded mahi mahi or a nice “meaty” grilled swordfish, there’s nothing better for an easy weeknight meal (or for entertaining).  The hardest part is deciding on toppings!

The Baha-style, fried ones here took no time to whip up.  I never use a recipe, so I'm just going to tell you what I do.  For 4-6 people, take a 1 ¼ - 1 ½ lbs flaky white fish (snapper, mahi mahi, grouper, etc) and portion into strips.  Basicallly, make sure the size of the fish strip fits into your taco as one or two strips.  Divide a cup of flour evenly between two bowls.  Season one of the bowls with salt, pepper, paprika and any other powdered spices you like until it tastes good.  To the other bowl, whisk in beer until it has the consistency of wet paint. 

Dip the fish strips first into the flour bowl, shake off excess and dip into the beer batter.  Let any extra drip off and fry in about an inch to an inch and a half of oil (at 350° F) until golden brown (generally 3-5 minutes).  Transfer pieces to a paper towel-lined plate and sprinkle with some salt.  Make sure to fry in batches and not crowd the pan too much.

In terms of toppings, the combination for my lamb tacos are my go to, especially the chipotle crema, but, here, I just used some pickled shallot, cabbage, fresh chile, green onion, and cilantro.  My sauce was a smoked habanero crema (mayo/crema + smoked habanero sauce), but you can literally stir together mayo/crema/crème fraiche with any hot sauce you like until it tastes good. 

Since it's summer, my smoked peach chutney is another topping that would be ridiculous on some fish tacos.  The sweet, smokey flavors of the peach pairs perfectly with any fish dish.  Or you can do a simple pico de gallo (diced tomatoes, red onion, cilantro, jalapeño and lime juice), super easy and refreshing. 

Feel free to use soft or hard tacos.  I'm partial to corn tortillas myself.  Enjoy!


tags: fish tacos, how to make fish tacos, Baha-style fish tacos, baha fish taco recipe
categories: all 4, lifestyle-1, main dishes, quick & easy, recipes, traditions
Wednesday 07.06.16
Posted by Aliya LeeKong
 

Summer Fruit Tart Addiction

SUMMER FRUIT TART ADDICTION

Honestly, summer is my favorite time of year...I love when the weather turns warm and days (and daylight!) so long; attitudes feel more carefree and New York City comes alive.  The farmer's markets are always flush with fruits and vegetables, and, this weekend, it was overflowing with all sorts of berries (raspberries, blueberries, gooseberries, cherries, currants & strawberries). To me, this just signifies the official start of summer, and, if you follow my IG you'll know this to be true, I invariably have some form of a fruit tart on my counter throughout this time.  I wanted to share with you some go-to's - easy options so you can freestyle your own tarts this summer.


CRUSTS

I have 3 go-to crusts that I use depending on my mood, if I plan to bake the filling and who I’m hosting! 

(1) I love a classic, homemade tart dough (recipe: here).  I keep mine a bit low on the sugar, so I can use it for sweet and savoury crusts.  Doubling the recipe is key and allows you to freeze some to have for later.   This is a great dough to use for both a filling you have to cook or one you don't have to cook.

(2) Of course, already-made and frozen puff pastry is another way to go.  Who doesn’t love that flakey, buttery crust? Mixed with a layer of pastry cream and fresh fruit....This is what I use for my South African Milk Tart (pictured below).  I like to do an initial blind-bake and then fill - this weights it down so it doesn't puff too much.

(3) My third is for my gluten-free friends - a super easy, gluten-free pecan crust. 

You take 1 ½ cups raw pecans and pulse in a food processor until chopped.  Throw in 2 tablespoons unsalted, melted butter, 1 tablespoon honey,  ¼ teaspoon salt, ½ teaspoon ground cinnamon, and 1 egg white and pulse until a fine meal.  It will be a bit wet.  Press into a tart shell and bake at 375° F for 15 minutes.  Done.


CUSTARD FILLING

(1) Baked custard - One of my favorite tarts is this South African Milk Tart.  The creaminess of the cooked custard filling with the berries on top……sooo good.  It's not too egg-y and has a hint of cinnamon.  I love that the beaten egg whites also lighten the custard.

(2) Stovetop custard - I also love to make a quick stovetop custard (or pastry cream) instead of the baked custard in the milk tart recipe.  All you need is some sugar, eggs yolks, corn starch, vanilla bean and milk!  Ok, so sometimes I substitute the milk for Champagne or a nice Prosecco….  The process is simple:

In a medium pot, simmer 2 cups milk with a vanilla bean cut in half and seeds scraped out in to milk and remove from the heat. 

Separately, bring a pot of water to boil for your double boiler. In a metal bowl, whisk 4 egg yolks with 1/3 cup sugar until the mixture is a nice pale yellow.  Add ¼ cup cornstarch and whisk away any lumps.  Slowly stir in the warmed milk mixture and fit the bowl over the boiling water (without letting it touch the water) and constantly stir until the consistency starts to thicken. 

Remove from heat and cover the top directly with plastic wrap and let come to room temp before using.  You can also whip some cream and fold into this pastry cream to make it lighter.

(3) No-cook cream filling - A final option is to make a no cook cream filling and keep the tart refrigerated.  This is a bit like a lightened panna cotta.  Bloom 1 teaspoon gelatin in 2 tablespoons cold water.  Whip 1 cup heavy cream to soft peaks with 2 tablespoons regular or coconut sugar (you can make this sweeter if you like. taste and adjust).  Add in 1 teaspoon vanilla and fold in 4 ounces of mascarpone cheese.  Quickly blast the gelatin-water mixture in the microwave for 5 seconds or so until it's melted and fold that into the cream mixture as well.  It sets up very quickly in the fridge - just make sure to use it in a completely cooled tart or it will melt away!


FILL AND ASSEMBLY

Unless you are baking your custard, the tart shells should be blind-baked and cooled before you assemble.

Now, in terms of what goes on top, this is the time for you to experiment and be creative.  Seriously, whatever is the sweetest and in season works, and experiment to see how you like to arrange your fruits.  I looove cape gooseberries, but apricots and strawberries pair so well together.  It will all go!

If you want some extra sheen, microwave a bit of apricot preserves and paint the fruit with it.  You can also just simply sift a bit of powdered sugar too - up to you....

Enjoy!


tags: summer fruits, how to make a fruit tart, summer fruit tart recipe
categories: all 4, blog, desserts, holiday, lifestyle-1, recipes
Wednesday 06.22.16
Posted by Aliya LeeKong
 

FATHER'S DAY GRILLING

FATHER'S DAY GRILLING

Father's Day falls in such a sweet spot of the year - the weather is always perfect and who doesn’t love a little family gathering outside!?  My plan to celebrate this weekend will be an afternoon of easy grilling - I can't go wrong keeping it a lil' meat-centric.  :) Below are some great grilling recipes to give you some ideas for this weekend.  Enjoy!


GRILLED BUTTERFLIED CHICKEN WITH CHARRED JALAPENO SAUCE


GRILLED LAMB SIRLOIN TACOS WITH CORN, PICKLED CHERRY PEPPERS AND CHIPOTLE CREMA


SALT & PEPPER BABYBACK RIBS

Photo: Food52


GRILLED PORK BANH MI

Photo: Food & Wine


GRILLED SHRIMP WITH KIMCHI-MISO BUTTER

Photo: Rasa Malaysia


GRILLED AVOCADO SALAD WITH GREEN GODDESS DRESSING

Photo: Salt & Wind


CORN WITH GREEN CHILI BUTTER & COCONUT


TAHINI OREOS

Photo: My Name is Yeh


RUM SWIZZLE

Photo: Bon Appetit

tags: father's day, what to cook for father's day, grilling ideas, what to grill for father's day, father's day brunch
categories: all 4, blog, lifestyle-1, man-friendly, recipes, salads, side dishes-1, soups & salads, main dishes-1
Wednesday 06.15.16
Posted by Aliya LeeKong
 

Strawberry Season, a Pickle, & a Jam!

STRAWBERRY SEASON, A PICKLE & A JAM!

Well….it took forever, but it has finally arrived: strawberry season.  This little window only lasts about a month up here, and I try to get out to the fields to pick my own, when possible.  Right now, I have literally the sweetest strawberries I've ever tasted sitting in the fridge.  They are so good, just by themselves, but if you’re like me (and get a bit overly excited about berry picking...), you end up with strawberry overload!

I decided to mess around with some flavors for a new strawberry jam using some fresh basil from my garden and a vanilla bean.  Strawberries and basil are a match literally made in heaven.  I don't prefer my jam overly sweet, so I just add sugar (unrefined) until it tastes like it’s enough.  There isn't a specific recipe because, of course, it depends how many strawberries you have left, but here are a few guidelines: (1) Clean and quarter berries and let them heat up in a saucepan with a couple tablespoons of lemon juice until they start to release their liquid.  (2) Once there is some liquid in the pan, add the sugar, basil and a vanilla bean and then let it all simmer until it thickens.  Remember, when it cools, it will thicken up a bit more.  (3) Use the stems from the basil (cause that’s where all the flavor is) and wrap them in a cheesecloth sachet.  You can also tear up or chiffonade the leaves and add them to the strawberries.  (4) Add some pectin powder if you like, to speed up this process.  Ultimately, you can cool and use right away or transfer to sterilized jars and vacuum seal for later.

This year, I also wanted to experiment pickling green strawberries.  It’s a different kind of pickling liquid then you might think - less vinegar, a little more sugar and a lot of flavor!  The green strawberries turn a bit sweet, slightly tart and still retain a nice bite.  These pickled strawberry makes them a perfect addition to any summer salad or cheese plate.  Enjoy!

Photo: We You They Ate

Pickled Green Strawberries
Yields 2 pint jars

2 pints green strawberries, cleaned and hulled (cut in half or sliced, if you like)

1 cup water

½ cup rice wine vinegar

2 ½ tablespoons sugar

1 tablespoon honey

2 teaspoons kosher salt

1 ½ tablespoons coriander seeds

1 tablespoon black peppercorns

4 Kaffir lime leaves

2 (1" x ½") pieces lime rind


Divide the strawberries between the two mason jars and set aside. 

In a saucepan over medium heat, bring the rest of the ingredients to a simmer until the all of the sugar, salt and honey has dissolved.  Let cool to room temperature before pouring into the jars with the strawberries.  Let sit in the fridge over night for the best flavor.


tags: strawberries, strawberry recipes, pickled green strawberries, strawberry jam, how to pickle strawberries
categories: all 4, condiments, lifestyle-1, quick & easy, recipes, side dishes-1, vegetarian-2
Wednesday 06.08.16
Posted by Aliya LeeKong
 
Newer / Older