X

Sign up to receive exclusive recipes, tips, updates and other goodies from Aliya!

  • Home
  • Blog
    • All
    • Recipes
    • Spices + Ingredients
    • Lifestyle, etc.
    • Travel
  • The Cookbook
  • The App
  • Media
    • All Media
    • Video
  • About
  • Passions
Aliya LeeKong
  • Home
  • Blog
    • All
    • Recipes
    • Spices + Ingredients
    • Lifestyle, etc.
    • Travel
  • The Cookbook
  • The App
  • Media
    • All Media
    • Video
  • About
  • Passions

Link Love: Diwali Sweets

LINK LOVE: DIWALI SWEETS

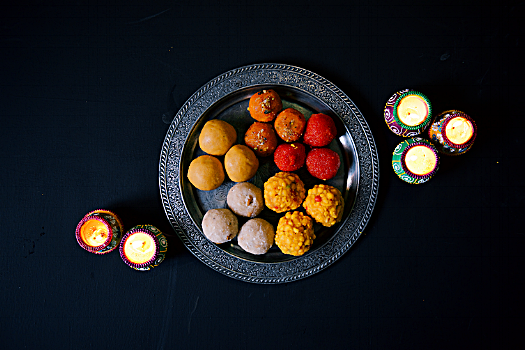
This weekend starts the ancient celebration of Diwali, the Festival of Lights.  Diwali is arguably the most significant Hindu celebration, marking the Hindu New Year.  This celebration of life happens in autumn, after the last summer harvest, to celebrate good over evil, light over dark, and hope over despair…The preparations and rituals last over a 5-day period and, amongst other things,  lamps and candles (diyas) are lit inside and outside of the home.  Gifts are exchanged, and families feast during this time, but the most important part of the food celebration is the sweet desserts (or mithai). 

Mithai were always a mystery to me growing up - they were always so beautiful, brightly colored and sometimes touched with gold leaf.  I wanted to show some link love with some of the best mithai recipes out there.  Enjoy!


GULAB JAMUN

Photo: Veg Recipes of India


CHOCOLATE BURFI

Photo: Indian Simmer


CHICKPEA FLOUR (BESAN) LADDU

Photo: Food52


SHAHI TUKRA

Photo: Maunika Gowardhan


DULCE DE LECHE BARFI

Photo: My Tamarind Kitchen


COCONUT LADDU

tags: Diwali, diwali sweets, mithai recipes, Indian sweets, Indian sweet recipes, Indian recipes, South Asian recipes
categories: all 4, blog, desserts-1, holiday, lifestyle-1, traditions
Thursday 10.27.16
Posted by Aliya LeeKong
 

Breaking the Fast After Yom Kippur

BREAKING THE FAST AFTER YOM KIPPUR

Yom Kippur is arguably the most important holiday in the Jewish calendar.  It marks the end of the 10 day celebration of Rosh Hashanah (Jewish New Year) and translates to the “Day of Atonement”.  The day is set aside to atone for the sins of the past year with a complete 25- hour fast.  The fasting begins just before sunset the day before and goes until the next evening.  At sunset on Yom Kippur, you have a “Breaking Fast” meal that usually includes all types of breads, cured meats and food that were cooked the day before since during fasting you are not allowed to do any work (even cooking)! 

With this in my mind, I thought about easy breaking fast food, a homemade coconut bread recipe as well as some different ways to do lox.


CONCORD GRAPE HAND PIES 

These are beyond easy!  This is grape season, so just halve and remove the seeds from the sweetest grapes you can find.  Roll out a sheet of homemade puff pastry and use a pastry cutter or overturned glass to cut out rounds.  Place a small mount of the halved grapes in each circle.  Fold the circle in half to make a semi circle and use a fork to press the edges down tightly.  Paint with an egg wash and bake at 400° F for about 25 minutes.  Done!


PAN DE COCO (WITH A TWIST)

Pan de coco is a Dominican bread that's usually a bit more flat.  I combined it with my basic bread roll recipe, adding yeast to make it fluffy and light.  Think a Parker House roll and Pan de Coco had a baby.  It's soooo good.

Yields 16 rolls

¼ cup lukewarm water

(1) ¾ ounce packet yeast (active dry)

3 tablespoons butter, plus more for greasing and melting

¼ cup honey

2 ½ teaspoons salt

1 cup coconut milk

1 egg, beaten

4 – 4 ¼ cups all purpose flour

½ cup coconut flakes

Flake salt, for sprinkling


I make this recipe in a stand mixer, but you can easily do this by hand.  Start with the lukewarm water in the bowl of the stand mixer and sprinkle the packet of yeast over.  Mix gently to combine and let sit 5 minutes or so while you prepare the other ingredients.

In a medium pot, melt the butter.  Add the honey, salt and coconut milk and heat gently until warmed through and uniform.  Remove from the heat.  (It shouldn’t simmer but should be warm to the touch.)

Add the egg and 3 ¾ cups of flour to the yeast mixture and mix together with a fork.  Slowly pour in the milk mixture, using the fork to make a shaggy dough.  Using the dough hook attachment (or your hands), knead for about 3-4 minutes.  The dough should be soft and a bit tacky but should NOT stick to your hands.  If it's sticky, keep adding flour in tablespoon increments until you have the right, non-sticky consistency.

For rolls, divide the dough into 16 even-sized balls and place in a heavily greased, 9-inch cake tin.  Cover with a kitchen towel and let rise 45 minutes.  Preheat oven to 375˚ F.

After the rise, brush the rolls generously with melted butter, sprinkle with coconut flakes and bake for 30 to 35 minutes.  Brush again with butter once out of the oven and sprinkle with a little salt.  Enjoy hot!


LOX 2 WAYS

Photo: Food & Wine

Asian Salt & Sweet Lox

1 lb salmon filet, trimmed and all pin bones removed
1 cup soy sauce
1 tablespoon dark brown sugar
1/4 cup mirin
1 or 2 fresh chilies (thai, serrano, depends on your heat tolerance), roughly chopped
1 inch fresh ginger, roughly chopped
1 bunch cilantro, roughly chop (1/2 for cure, 1/2 for creme fraiche)
1 cup crème fraiche
1/2 lime, juiced

Place salmon in a large ziploc bag on a cookie (just in case the bag leaks).  Whisk together the soy sauce, sugar and mirin until the sugar dissolves.  Pour the mixture in the bag and add in the chilies, ginger and cilantro.  Let as much air out of the bag as possible and seal.  Put another cookie sheet on top and weight down with cans or something else heavy.  Place in the fridge and let sit for 24-48 hours.  After, rinse the filet under cold water until the filet is clean.  Pat dry with paper towels and let it dry out a bit in the fridge before slicing. 

Chop the remaining cilantro a bit more finely.  In a bowl, mix together the crème fraiche with the lime juice and finely chopped cilantro.  Slice the salmon with a sharp knife, serve with thecrème fraiche and enjoy!


Traditional Lox

1 lb salmon filet, trimmed and all pin bones removed
1/3 cup kosher salt
1/3 cup sugar
1/2 bunch fresh dill, finely chopped
3 lemons, zested
2 tablespoons smoke powder (optional)

Place salmon in a large ziploc bag on a cookie (just in case the bag leaks).  Mix together the remaining ingredients.  Pat the mixture onto both sides of the salmon.  Let as much air out of the bag as possible and seal.  Put another cookie sheet on top and weight down with cans or something else heavy.  Place in the fridge and let sit for 24-48 hours.  After, rinse the filet under cold water until the filet is clean.  Pat dry with paper towels and let it dry out a bit in the fridge before slicing.  Enjoy!


tags: Yom Kippur recipes, break fast recipes, breaking the fast, bread recipe
categories: all 4, appetizers 1, breads & cakes, blog, breakfast-1, desserts-1, holiday, lifestyle-1, quick & easy, recipes, traditions
Wednesday 10.12.16
Posted by Aliya LeeKong
 

Global Holiday Cookies

GLOBAL HOLIDAY COOKIES

Holidays = cookies, and we are fast approaching that time of year where you are either getting your baking skills ready for holiday parties and family get togethers or you’re thinking about yummy gifts for your friends and co-workers.  Because, honestly, it’s impossible to buy everyone presents this time of year, but it's sooo easy to bake delicious cookies for them!  To keep it interesting, I like to make different types of cookies for the holidays and incorporate some from around the world.  The following are just a few to get started on your lists - click through for the recipes.  There are so many to choose from - happy baking!

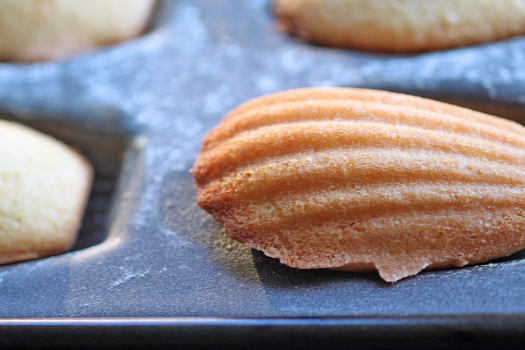
KOURABIEDES-INSPIRED MADELEINES

madeleine.jpg

Nothing is more impressive than nailing a great madeleine.  This traditional French small cake is unmistakeable with its distinctive shell-like shape and delicate, cake-y textures.  Kourabiedes are a Greek shortbread that's usually had around the holiday - almond-scented and perfumed with rosewater, and that was the inspiration for this combo cookie.  They are best served right away and warm, so I would use these for a holiday party rather than as a gift.


SOUTH AMERICAN ALFAJORES

Photo credit: Food52

Photo credit: Food52

Although alfajores originated in Spain, the South American version is twice as good, namely because the cookies sandwich dulce de leche.  These can be chocolate-coated, dusted with coconut, or holiday-decorated and are the perfect gift!


DOUBLE CHOCOLATE MINT COOKIES

These are the ultimate double chocolate mint cookies - brownie-rich, chocolate chip cookies scented with peppermint.  The dough freezes really well too.


ITALIAN RAINBOW COOKIES

Photo: Bon Appetit

Photo: Bon Appetit

Rainbow cookies are a childhood favorite and one I love to make around the holidays.  They do take a couple days (just to set the layers and cool) but the end result is equally impressive as it is yummy!   Originally colored to represent the Italian flag by Italian - American immigrants, you can play around with the (all natural...) food coloring to the occasion.  A little more red and green for the holidays please!


TURKISH BAKLAVA

Okay, so baklava isn't technically a cookie, but it really doesn't matter.  My recipe for these is the easiest out there!


WEST INDIAN CASSAVA PONE

Okay, okay!  This isn't a typical cookie either!  But this is a beautiful cake that I make into squares.  Pone is a super dense, slightly gummy cake, and in different West Indian countries, I’ve seen pone made with root vegetables – cassava here but also carrots and sweet potato.  It always has coconut, and some even have pumpkin and raisins.  Cinnamon, nutmeg, and a touch of black pepper makes this complete holiday fare.


AUSTRIAN LINZER COOKIES

Photo: Love, Cake

Photo: Love, Cake

An Austrian favorite that is seen around the holidays is the linzer cookie.  These are sandwich cookies with jam in the middle and cutouts in the center to peek at the filling, usually hearts but I like to do Christmas trees, stars or candy canes for the holidays.  Also, a good time to use the preserves you made earlier this year!


PUERTO RICAN MANTECADITOS CON GUAYABA (ALMOND SHORTBREAD WITH GUAVA)

Photo: The Noshery

Photo: The Noshery

Jam-filled and thumbrint cookies are one of my favorites, and I love that these use guava paste in lieu of other preserves.  It's a totally unique flavor - tart and sweet - and an unexpected twist, and yet they have such a traditional look about them.


SOUTH AFRICAN CRUNCHIES

Photo: Cakespy

Photo: Cakespy

These are classic, South African cookies - crunchy (of course), buttery and coconut-ty.  These are a one bowl, easy cookie to make, so great if you need to feed a crowd.


SWEDISH GINGERBREAD COOKIES

Photo: Saveur

Photo: Saveur

Really, not much needs to be said about these.  Gingerbread (wo)men, different holiday shapes - these are a must!


Enjoy!!

tags: holiday cookie recipes, holiday baking, cookie recipes, global cookie recipes, international cookie recipes, 12 days of cookies, national cookie day
categories: all 3, breads & cakes, holiday, lifestyle, recipes, desserts-1
Thursday 12.03.15
Posted by Aliya LeeKong
 

Cookies and Milk (not that kind…)

View fullsize AliyaLeeKong_CookiesandMilk.jpg
View fullsize cookie2-500x165.jpg
View fullsize cookie3-500x333.jpg

Cookies and Milk (not that kind…)

So a bunch of my girlfriends had babies this year, and all of them are nursing in lieu of using formula.  As a mom, I know tips and tricks are always really helpful, so I thought I would create this recipe as a gift to all my fellow mommies out there.  It’s a cookie loaded with incredibly healthy and natural ingredients like wheat germ and flax that taste amazing (and also happen to help boost supply for nursing moms)…

Another girlfriend of mine introduced me to lactation cookies, and I just thought why spend on a biweekly order when you can make ahead and freeze as much as you want!  Galactagogues are foods, herbs, etc. that help promote lactation – these cookies have oats, flax, and brewer’s yeast, all of which are great at boosting your milk supply.  Brewer’s yeast is not to be confused with regular old, active dry yeast used in baking.  This type of yeast is the kind that’s used in beer-making, is rich in minerals, protein, and B vitamins, and can be found in powder form at the health food store.

Otherwise, these cookies taste great and are fine for the whole family to eat (without milk-producing consequences!).  I love chocolate and dried fruit in mine, but you can play around with the add-ons because the recipe is pretty forgiving.  Enjoy!


Ingredients

Yields approximately 2 dozen cookies (size-dependent)

1 ¼ cup oats

½  cup all-purpose flour

¼ cup wheat germ

¼ cup ground flax seed

3 tablespoons brewers yeast

½ tsp baking soda

¼ tsp baking powder

½ tsp ground cinnamon

½ tsp salt

1 stick unsalted butter, room temperature

¼ cup vegetable shortening

1/3  cup white sugar

½ cup light brown sugar

1 egg, room temperature

1 tsp vanilla extract

1 ¼ cup dark chocolate chunks or chips

¾ cup dried cranberries or cherries

Procedure


Preheat oven to 350° F.  Line two baking sheets with parchment paper or silpats.

In a bowl, mix together oats, flour, wheat germ, flax, brewer’s yeast, baking soda, baking powder, cinnamon and salt.

In the bowl of a stand mixer or with a hand mixer using a paddle attachment, cream together butter, shortening and both sugars.  Add the egg and vanilla extracts.   Add oat mixture and mix until almost completely incorporated.  It should mostly be sticking to the paddle at this point.  Scrape down, add in chips and dried fruit and mix for another 15 to 20 seconds until uniform.

At this point, I like to turn the cookie dough out onto plastic wrap, form into a cylinder, and freeze for about 10 minutes.  This makes it easier to cut into even sized, round cookies.  Conversely, you can just drop rounded spoonfuls a few inches apart onto prepared baking sheets.

Bake for 11 to 13 minutes depending on how chewy or crunchy or what size you made the cookies.  Cool on the baking sheets for 5 minutes and then transfer to wire racks to cool completely.

categories: recipes, all, desserts-1
Wednesday 07.17.13
Posted by Liz Neilson
 

My Breakfast Clafoutis

View fullsize clafouti-pic1-500x333.jpg
View fullsize clafouti-pic2-500x333.jpg

My Breakfast Clafoutis

Lately, I’ve been craving desserts on a daily basis, and so in an effort not to get too crazy, I’ve been searching out healthier alternatives to satisfy my sweet tooth.  I made these as a fast and healthy weeknight dessert, but the leftovers quickly became my morning snack over the following days.  And why not?   Eggs, milk, fruit and almonds?  Perfect breakfast food!

These are decently healthier than the last version of clafoutis I posted with Amarena cherries and dark chocolate…which are delicious!  But, here, I used lowfat milk instead of heavy cream and made them gluten free with the addition of almond flour in lieu of all-purpose.  Everything (except the berries) gets whirred in a blender before a short rest period, so these are super quick to make and can’t be easier for clean up.

I don’t put a ton of sugar in these since I have them for breakfast, so you may need to sweeten them up a bit more if you like it on the sweet side or finish with a bit of powdered sugar or an extra drizzle of honey.  If you are using peak season berries, they should be plenty sweet – I use frozen berries in the off-season months myself.  Enjoy!

Ingredients

Yields 6 6-ounce ramekins

3 eggs

3/4 cup milk, lowfat or otherwise

1 tbsp vanilla extract

2 tsps almond extract

¼ cup honey or light brown sugar

¼ tsp salt

1/3 cup almond flour

1 ½ cups berries (blueberries, raspberries, strawberries or some combination)

cooking spray, for greasing

powdered sugar, for garnish (optional)

Procedure

Preheat oven to 375° F.

In a blender, blend together eggs, milk, extracts, honey and salt.  Add flour and blend for 10 seconds.  Scrape down the sides and blend for another 10 to 15 seconds until flour is incorporated and there are no lumps.  Rest batter in the refrigerator for a minimum of 15 minutes and up to overnight.

Grease the ramekins, and place on a large baking sheet.  Place ¼ cup of mixed berries in each ramekin and top with an even amount of batter in each.

Transfer baking sheet into the oven and bake for 23-25 minutes until lightly browned, raised and the custard is set.  Remove and let cool slightly before serving.   Dust with powdered sugar, if desired.

tags: Clafoutis, breakfast, brunch, berries, gluten free
categories: all, breakfast, recipes, breads & cakes, desserts-1
Tuesday 04.09.13
Posted by Aliya LeeKong
 

Guava & Sweet Cheese Crèpes

View fullsize crepe-pic1-500x367.jpg
View fullsize crepe-pic2-500x333.jpg
View fullsize crepe-pic3-500x333.jpg
View fullsize crepe-pic4-500x333.jpg

Guava & Sweet Cheese Crèpes

That was fast!  I mentioned a few days ago in my post about guava paste and the popular pairing of it with soft, creamy cheese in various Latin American dishes like empanadas, turnovers and tarts.  As I was writing that post, I was dreaming of just how to marry the two, and this weekend gave me the perfect opportunity to test out that savoury combo. I thought a paper-thin crèpe would be the perfect vehicle, and so it was…

I used here what has become one of my favorite cheeses of all time – fromager d’affinois.  It’s a cow’s milk cheese that resembles Brie, with about 65% butterfat and an edible rind – it’s buttery, supple, creamy and goes incredibly well with fruit, jams and jellies.  That creaminess makes for the perfect crèpe filling alongside the sweet guava paste.

Now, the process of making crèpes can seem really intimidating, but it’s seriously like riding a bike. And, no matter how long you’ve been doing it, just forget about that first one (and possibly the second), pour and whirl with confidence, and the rest will come out like magic once you get that wrist work down.

This crepe batter is a great neutral one that would work for both sweet or salty fillings (with or without the cinnamon).  So to enhance the sweetness a bit for this dish, I drizzle a touch of honey on top and throw in some toasted almonds for a bit of texture and a nutty crunch.  This is a satisfying treat, perfect for breakfast, dessert, or an elegant afternoon tea.  What’s great is that this dish can be prepped ahead of time and thrown in the oven right before serving – makes it great for entertaining.  Enjoy!

Ingredients

Serves 8 to 10

For the crèpes (yields 8 to 10 crèpes):

3/4 cup whole milk

¼ cup water

2 large eggs

1 cup all-purpose flour

¼ tsp kosher salt

1 tsp sugar

½ tsp cinnamon

½ tsp vanilla extract

3 tablespoons unsalted butter, melted

melted butter for cooking

For the filling and garnish:

Guava paste

Soft cheese like fromager d’affinois, brie or your favorite triple-crème

Honey

Toasted almond slices

Procedure

Preheat oven to 375° F.

In a blender, mix all of the crèpe ingredients and pulse until fully blended and foamy.  Rest batter in the refrigerator at least an hour.  Strain batter.

Heat a non-stick pan over medium heat.  Brush pan with melted butter.  Pour crèpe batter, a little less than ¼ cup, into the pan while turning the pan to coat the bottom.  Cook for one minute or until the edges become crispy and start to brown.  Carefully, flip and cook for a little less than a minute.  Keep crèpes stacked together on a plate or cutting board until all of the batter has been used.

Place a crèpe on a cutting board.  Place a thin sliver of cheese in the center and a sliver of the guava paste on top of it.  Fold crepe and place seam-side down on a greased baking sheet.  Bake for 8 to 10 minutes until cheese is melted and guava paste is soft.

Serve warm, drizzled with honey and sprinkled with toasted almond slices.

tags: Crèpes, guava, guava paste, sweet cheese
categories: all-2, breakfast, recipes, desserts-1
Monday 10.24.11
Posted by Aliya LeeKong
 

Cinnamon-Passion Fruit Fool

View fullsize fool-pic1-500x333.jpg
View fullsize fool-pic2-500x333.jpg
View fullsize fool-pic3-500x166.jpg

Cinnamon-Passion Fruit Fool

When the weather is hot and beautiful fresh fruits abound, I always turn to a fruit fool as dessert.  A classic British dessert, a fool is quite simply puréed fruit and a bit of sugar folded in with fluffy whipped cream. They are light, no fuss, and always highlight the flavors of the season.

There are umpteen variations and shortcuts for this dish – from the type of fruit (gooseberries, strawberries, peaches) to using a frozen purée or pre-fab whipped cream.  You really can’t go wrong with this one.  With the fragrant passion fruits in season right now, this latest incarnation of a fool became doubly inspired by a staple Brazilian dessert, mousse de maracujá.  Maracujá is Portuguese for passion fruit, and the Brazilian version uses thick cream, sweetened condensed milk, and sometimes gelatin.

This dessert literally could not be easier.  Passion fruits are basically already puréed, so you simply have to split and remove the pulp; you can, of course, use a frozen purée if you can’t find fresh.  I sweeten the passion fruit pulp with a bit of sugar, add a squeeze of lime juice for brightness and a bit of cinnamon because I think it really brings out the signature flavor of the fruit.  Fold all of that into whipped cream, and that’s it!  It’s shockingly delicious.  My fussy I-only-eat-meat-and-no-dessert husband went to town on a few bowls after initially, begrudgingly taste-testing.  Light, fluffy, tart, sweet – this might be my favorite, easy summer dessert.  Enjoy!

Ingredients

4 passion fruits, seeds and pulp removed to a bowl*

squeeze of lime juice

1 tsp cinnamon

½ cup sugar

2 cups heavy cream, cold

Procedure

In a bowl, mix together thoroughly all except a few tablespoons of the passion fruit seeds and pulp, the squeeze of lime juice, cinnamon and ¼ cup of the sugar.

In another bowl using a stand or hand mixer, beat the heavy cream with the other ¼ cup of sugar until stiff peaks form.  Fold the passion fruit mixture carefully into the sweetened whipped cream.  I like to add a third at a time and not overmix to avoid collapsing the fluffy cream.

Spoon mixture into dessert glasses and top with a few of the reserved passion fruit seeds and a bit of juice / pulp.  I like to refrigerate for a bit before serving, but it can be eaten straight away.

*Slice the top off of a passion fruit, and use a spoon to remove all of the seeds and pulp to be used.  You could also substitute about one cup of thawed, frozen passion fruit purée.


tags: cinnamon, passion fruit, fool, desserts, recipes for summer
categories: recipes, all-3, desserts-1
Monday 07.25.11
Posted by Aliya LeeKong
 

“Morir Soñando” Semifreddo

View fullsize semifreddo-pic11-500x345.jpg
View fullsize semifreddo-pic2-500x333.jpg
View fullsize semifreddo-pic3-again-500x167.jpg

“Morir Soñando” Semifreddo

Food phases.  I don’t know if any of you have them, but I go through periods of craving where I want the same thing over and over again.  In college, I had this extended phase with Dominican food.  For dinner, I would trek out to an area of town where there was a big Latin American community.  The Dominican spots were amazing!  And for like $5, you would get a heaping plate of stewed chicken, saffron rice and fried plaintains with garlic.  I was a bit obsessed (and had the resulting 15 lbs to show for it…), and would always order a morir soñando, an orange creamsicle-like drink, to go with my meal.

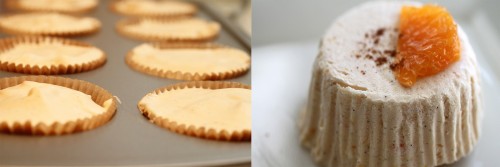
Morir soñando translates to “to die dreaming.”  How romantic is that?  That pretty much sums up the deliciousness of this drink – orange juice blended with evaporated milk, sugar and ice and sometimes vanilla and cinnamon.  I was thinking about a dessert that captures these flavors best and decided on a semifreddo.

For those of you that don’t have an ice cream maker / attachment (or do but no desire to deal with it…), a semifreddo, Italian for “half cold”, is the perfect, delicate, frozen, ice cream-like treat and requires no extra equipment.  The custard requires a bit of finesse, but once you’ve mastered it, it’s like riding a bike.

Here, I spike the custard with concentrated blood orange juice (you can use any orange you like) and cinnamon and then fold in a vanilla-bean whipped cream.  A few hours in the freezer and you have an elegant dessert.  It’s a great do-ahead item; I plan to freeze it in popsicle forms this summer to grab as a treat out of the freezer.  Enjoy!

Ingredients

Yields 12 servings (using a standard muffin tin)

10 small blood oranges or any orange you like, juiced (approximately 1 ½ cups of juice)

1 cinnamon stick

8 egg yolks

1/2 cup sugar

pinch of salt

½ tsp orange zest

1 ¾ cup heavy cream, cold

1 vanilla bean, split and scraped

Procedure

In a small saucepan, bring orange juice with the cinnamon stick up to a simmer and let reduce 2/3rdsuntil you have about a ½ cup of concentrated juice.  Set aside to cool.

Prepare an ice bath and set aside.  Bring a saucepan with a few inches of water up to a simmer over medium heat.  In a medium bowl, whisk together yolks, sugar, salt, zest and cooled, concentrated orange juice.  Set bowl over the simmering saucepan of water to form a double boiler. Make sure the bottom of the bowl doesn’t touch the water but sits comfortably on top. Whisk continuously until the mixture becomes frothy, thick and creamy.  This could take anywhere from 4 to 6 minutes.  An instant-read thermometer should register 160 F, but you can also eyeball it and see that the mixture will more than double in size when it’s ready.  Set bowl over ice bath to cool completely.

Using a stand or hand mixer, beat heavy cream with vanilla until the peaks are firm.  Carefully, fold whipped cream into the cooled egg yolk custard.  Incorporate completely but try not to deflate the mixture.

Line a standard muffin tin with cupcake liners.  Carefully, scoop semifreddo mixture into cupcake liners and level off the tops.  Wrap tin in saran wrap and freeze for a minimum of 6 hours.  An alternative would be to freeze in ramekins in which you plan to serve the semifreddo.

Serve soon after removing from the freezer (because it begins to melt quickly) and garnish with a little cinnamon and orange supremes/pieces.

* Remember to refrigerate whipped cream if not using immediately.  The custard must be completely cooled before folding in the cream.

tags: “Morir Soñando” Semifreddo, Semifreddo, custard, recipes for summer, citrus, blood orange
categories: all-3, recipes, desserts-1
Monday 06.06.11
Posted by Aliya LeeKong
 

Rhubarb-Kewra Granita

View fullsize rhubarb-pic1-500x333.jpg
View fullsize rhubarb-pic2-500x333.jpg
View fullsize rhubarb-pic3-500x166.jpg
View fullsize rhubarb-pic4-500x333.jpg

Rhubarb-Kewra Granita

I mentioned screw pine extract (kewra) a few weeks back and its intoxicating, floral perfume.  When I spotted some beautiful rhubarb at the greenmarket, I just knew it was a match made in heaven.  As the weather has been warming up, I thought a spiked granita would be a great way to showcase both of the flavors.

Granitas are awesome because they are great for lazy cooking days.  They require so little – water or juice, fruit or another base ingredient, sugar, any other fun items you want to throw in, and a freezer.  No ice cream maker is necessary, and in a few hours, you have a lovely frozen treat.  I added a bit of vodka to make mine, but it can totally be left out for a kid-friendly/nonalcoholic version.

Screw pine, which is used in Asian and Middle Eastern cooking, is found in both sweet and savoury dishes.  When sweet, the dish is often a milk-based dessert – a fantastic way to feature the delicious scent.  But, truthfully, it’s really complimentary to fruits and balanced the tartness of the seasonal rhubarb here perfectly.

Here, I cooked the rhubarb down with some sugar and lemon juice, puréed, strained, and added the kewra and vodka.  Ridiculously easy.  A few hours of freezing and scraping with a fork, and the granita was complete – crunchy, melt-on-your-tongue ice, sweet, tart and floral.  Enjoy!

Ingredients

Serves 6 to 8

3 ½ cups rhubarb, cut into ½” pieces (approximately 5 to 6 stalks)

2 ½ cups water

1 cup sugar

generous squeeze of lemon juice

3 tbsps screw pine extract

¼ cup vodka (completely optional but nice)

Procedure

In a medium pot, add rhubarb, water, sugar, and lemon juice.  Bring up to a simmer and simmer covered for 3 to 5 minutes until rhubarb basically falls apart.

Transfer to a blender and purée until smooth.  (Be careful when blending hot items!  Hold down the top with a towel.)  Strain mixture through a fine mesh strainer (cheesecloth-lined preferably) in a bowl.  Add screw pine extract and vodka, if using.

Transfer mixture to a metal baking dish – I used a 12”x14.5”x2.5 inch lasagna pan – and place uncovered in the freezer.  Remove after an hour and use a fork to scrape / disrupt the ice crystals.  Repeat process every 45 minutes for the next 3 or 4 hours until completely frozen and desired texture.

Cover with plastic wrap if not serving immediately.

tags: rhubarb, kewra, granita
categories: drinks & cocktails, recipes, all-4, desserts-1
Monday 05.09.11
Posted by Aliya LeeKong
 

Amarena Cherry & Dark Chocolate Clafoutis

View fullsize amarena-pic11-500x333.jpg
View fullsize amarena-pic2-500x333.jpg
View fullsize amarena-pic3-500x166.jpg

Amarena Cherry & Dark Chocolate Clafoutis

I am showing you all of my cards today.  A secret of mine is whenever I am having guests over and haven’t given dessert much thought, I fall back on my old standby of dark chocolate and cherries.  I create a dessert – a tart, a pudding, a trifle, whatever – where I can work in those flavors, often with heavy doses of cream.  I think it started from childhood, where black forest was my birthday cake of choice (yes…every year).  It’s such a beautiful combination and, I think, a real crowd pleaser.

I have already professed my love for all things amarena cherry, so when trying to think of delicious ways to cook with them, I decided to (1) keep it simple and (2) not resist the urge to combine them with dark chocolate.  On the first point, I went with a clafouti because cherries in clafoutis are a time-honored, classic tradition.  Of course, I then had to go and grate dark chocolate all over them.

Clafoutis should be part of your culinary arsenal.  The sweetened, crepe-like batter takes literally minutes to make in your blender, and you can use most fruits you like – cherries, blueberries, strawberries, plums.  The fruit is spread in a baking dish or, like here, in individual ramekins, batter is poured in, into the oven and, within the hour, you have a beautiful, custardy, fruity dessert.  Here, I drain Amarena cherries (in syrup) in lieu of fresh fruit, since it’s not quite the season yet.  I also reduced the sugar amount because of that, so bump it up if you are using fresh fruit.  I love the shaved dark chocolate as well – just gives it a nice finish.  Enjoy!

Ingredients

Yields 6 6-ounce ramekins

2 eggs

1/2 cup heavy cream

1 tbsp vanilla extract

2 tsps almond extract

3 tbsps light brown sugar

1/8 tsp salt

¼ cup all purpose flour, sifted

butter and white sugar for greasing/dusting ramekins

1 cup Amarena cherries, drained of syrup

dark chocolate for grating

confectioner’s sugar, for garnish (optional)

Procedure

Preheat oven to 375° F.

In a blender, blend together eggs, heavy cream, extracts, sugar and salt.  Add flour and blend for 10 seconds.  Scrape down the sides and blend for another 10 to 15 seconds until flour is incorporated and there are no lumps.  Rest batter in the refrigerator for 15 minutes.

Grease the ramekins and lightly dust with sugar, shaking out any excess, and place on a large baking sheet.  Spread the cherries evenly between the ramekins.  Pour batter evenly into the six ramekins.  Using a microplane or other grater, grate dark chocolate (to your desired level) over each.

Transfer baking sheet into the oven and bake for 15 to 20 minutes until lightly browned.  Remove and let cool slightly before serving.   Dust with powdered sugar, if desired.


tags: Clafoutis, Amarena Cherry, dark chocolate
categories: all-4, recipes, desserts-1
Monday 04.18.11
Posted by Aliya LeeKong
 

Arabic Coffee Panna Cotta

View fullsize coffee-panna-cotta-pic1-500x333.jpg
View fullsize coffee-panna-cotta-pic2-500x333.jpg
View fullsize coffee-panna-cotta-pic3-500x167.jpg

Arabic Coffee Panna Cotta

Panna cotta is one of my all-time favorite desserts to serve when I’m having people over.  It’s incredibly elegant, and, though it sounds fancy, shamefully easy to make (what  your guests don’t know, won’t…).  It’s one of those do-ahead-and-forget-about-it dishes that always comes out rich, creamy, and crowd-pleasing.  I made this a few years ago for a massive Thanksgiving feast we had.  The night before, I was struggling for time and a delicious dessert.  I quickly whipped up the panna cotta mixture, poured it into champagne flutes, and was all set!

If you’ve ever had a cup of Arabic or Turkish coffee, that slightly menthol taste comes from cardamom.  I grew up drinking coffee that was steeped with both cardamom and cinnamon, a tradition that’s found throughout the Middle East, North Africa and South Asia (check out this recipe on the Republic of Brown!).  To me, the combination of cardamom and coffee flavors is distinctively beautiful.  In some versions, saffron and clove are added, but I kept it a bit simple here.  Feel free to experiment.

What’s nice about panna cotta is that it requires zero baking.  Simply heat up the liquid, infuse it with flavors, and use gelatin to work its magic while it cools in the fridge.  Here, the heavy cream takes on the coffee, vanilla bean (the lovely specks!), cardamom, and cinnamon flavors.  I don’t like mine super sweet, so taste and add more sugar if you need.  A quick chill, some chocolate espresso beans (I’ve also used tasty amaretti cookies) for garnish, and that’s it…simple, luscious, decadent.  Enjoy!

Ingredients

Serves 4 to 6

2 cups heavy cream

½ cup espresso or very strong coffee

½ vanilla bean, split and scraped

3 cardamom pods, split open w/seeds

1 cinnamon stick

¼ cup sugar

¾ envelope gelatin powder

chocolate-covered espresso beans, crushed (for garnish)

Procedure

In a medium saucepan over medium heat, bring heavy cream, coffee, vanilla bean, cardamom, cinnamon, and sugar up to a boil and immediately turn off the heat.  (Be careful that it doesn’t boil over.)  Cover and let steep for 5 minutes.

In a small bowl, ladle some of the heavy cream mixture.  Add the gelatin powder, and whisk to dissolve completely.  Pour the mixture back into the pot, and whisk to ensure even distribution.  Strain mixture to remove whole spices and any leftover gelatin and pour into ramekins, espresso cups, or little pots de crème .  Cover with plastic wrap and refrigerate for a minimum of 5 hours.

Serve chilled with crushed espresso beans on top.

tags: Arabic coffee, panna cotta, recipes for entertaining, entertaining a crowd
categories: all-4, recipes, desserts-1
Monday 02.21.11
Posted by Aliya LeeKong
 

Valentine’s Day & Fig Sundaes

View fullsize vday-pic1-500x333.jpg
View fullsize vday-pic2-500x166.jpg
View fullsize vday-pic3-500x333.jpg

Valentine’s Day & Fig Sundaes

Valentine’s Day.  It signifies different things to different people, and, for many, it’s completely meaningless.  I think of it as a day to celebrate someone or people you love – partner, girlfriend, boyfriend, family, or friends.  Since it’s coming up next week, I started to think about a menu from recipes on the site that would work well if you happen to be cooking for someone or even for a group.  I also came up with a delicious dessert, vanilla sundaes topped with sweet wine-poached figs and toasted almonds – it’s light-hearted enough for an early paramour, fun for a family (sans wine for kids!), and all about love for that someone special.

I think a great Valentine’s menu would start with spiced sunchoke soup.  Sunchokes are still in season, and this dish is an easy do-ahead one for an elegant starter.  For the main course, I’d go with berbere-spiced lamb chops and freekeh with summer squash and brown butter (using winter squash, of course).  The lamb is super easy.  I like to sear ahead and then finish in the oven while everyone’s eating the starter.  Also, the vegetables for the freekeh can be roasted a day ahead and reheated once thrown into the freekeh.

This dessert was very much an accident.  I had eaten some beautiful sweet cheese-stuffed Turkish apricots that inspired me to do something similar with dried figs.  I thought it would turn out artful and pretty, but my version sort of looked stuffy to me.  The figs are cooked in a sweet white or dessert wine until glazed, and you end up with this honey-wine-fig-infused syrup.  Drizzled over vanilla ice cream with the poached figs and a sprinkling of some toasted, nutty almond slices – heaven!  If you ask me, a sundae as a Valentine’s Day dessert wins in my book.  Oh, and figs and almonds also happen to be aphrodisiacs…  Enjoy!

Ingredients

Serves 4

1 ½ cups Sauternes, Riesling, or any dessert/sweet white wine you like

½ cup water

2 tbsps sugar

2 tbsps honey

¼ tsp lemon zest

½ lb (8 to 10) dried figs (I used Calimyrna figs but Black Missions are also great)

1/3 cup sliced almonds, toasted

vanilla ice cream

Procedure

In a saucepan, bring the wine, water, sugar, honey, and lemon zest to a boil.  Boil for 5 minutes uncovered.  Add the figs, cover and boil for another 10 minutes to plump up (they will significantly).  Remove the cover and boil for another 10-15 minutes until the liquid reduces to a syrup consistency.

Top ice cream with figs, a drizzle of syrup, and a sprinkle of the toasted sliced almonds.

tags: fig sundaes, holiday recipes, Valentine's Day, fig recipes
categories: all-4, recipes, desserts-1
Wednesday 02.09.11
Posted by Aliya LeeKong
 

The Fastest Baklava Recipe Ever

View fullsize baklava-pic1-500x282.jpg
View fullsize baklava-pic2-500x333.jpg
View fullsize baklava-pic3-500x333.jpg
View fullsize baklava-pic4-500x166.jpg

The Fastest Baklava Recipe Ever

I love a rich and fulfilling cooking process and usually don’t mind taking my time. But, authentic baklava is one of the most labor-intensive desserts as proven during my trip to Turkey.  I got a hands-on cooking lesson in homemade baklava, and it’s an insanely beautiful and lengthy process. Yufka dough, similar to the store-bought phyllo we get here, comprises the layers, and each baklava has 100 of them.  Yes, 100 sheets are rolled out to create this delicious dessert.

A few things struck me as I first made balls with the dough, then rolled out 6 or 7 individually to small discs, then placed the 7 on top of each other and rolled those out to the full size (not nearly as quickly or skillfully as the ladies showing me…how many more times?).  Typically, baklava recipes require painting each sheet of pastry with butter before placing the next layer on top, which is more than tricky with the thin phyllo.  But these ladies didn’t do that – they cut the layered pastry dough into little squares and then poured the butter all over…genius!

I decided to adopt this method using store-bought phyllo, and the result is the fastest baklava ever.  Layer phyllo and chopped nuts, cut carefully, cover with clarified butter, bake, douse in syrup.  That’s it!  This syrup is simple, incredibly delicious and with my personal twist of vanilla bean.  Baklava is undoubtedly sweet, but I think this one hits just the right amount of sweetness with lovely honey, vanilla, and cinnamon undertones. I make mine into bite-sized little squares so as not to overindulge…It’s fantastic to do ahead as the flavor gets better, and it keeps for about 5 days at room temperature.  Enjoy!

Ingredients

Yields 1 9-inch round cake pan

Pastry:

¼ cup unsalted walnuts, lightly toasted

¼ cup unsalted almonds, lightly toasted

¼ cup unsalted pistachios, lightly toasted

2 tbsps light brown sugar

½ tsp ground cinnamon

¼ tsp salt

pinch of ground cloves

2 sticks of unsalted butter, clarified*

1 box phyllo dough, thawed (1 lb)

honey

Syrup:

½ cup honey

½ cup water

½ cup sugar

1 vanilla bean, split and scraped

1 (1-inch) piece of lemon or orange rind

Preheat oven to 400° F.  Grease a 9-inch cake pan.

Phyllo dough dries out pretty quickly, so, in lieu of using a damp cloth on top of the dough and going back and forth, I suggest working quickly and having all of your other ingredients for the pastry ready to go.   The most difficult part will be (carefully!) cutting the pastry before adding the butter and baking.  You need a sharp knife and a bit of patience.

Place walnuts, almonds, pistachios, brown sugar, cinnamon, salt, and cloves in a food processor, and pulse until finely chopped (not powder).

Place all of the phyllo sheets on a clean cutting board.  You have to cut the sheets to fit the cake pan.  Take the cake tin and place it on top of all of the sheets at the furthest corner possible.  Use a sharp pairing knife to cut around the tin.  Then, move the cake pan to the opposite diagonal and cut around the remaining phyllo.  You should have two, even-layered circles of phyllo dough.  If the phyllo dough is just a tad short, and it’s not exact – don’t sweat it.  Use the slightly smaller layers for the bottom part and no one knows the wiser!

You are going to make three layers of phyllo and two of nuts.  Place one of the layered circles into the greased cake pan to form the bottom.  Cover with half of the nut mixture and drizzle a little honey in very thin streams across all of the nuts.  Divide the other layered circle into two equal halves of layers.  Place one of them over the nuts, and then again cover with the remaining half of the nut mixture and a little honey.  Place the final layers of phyllo on top.

Carefully, cut down the pastry 5 times across in equal widths.  Turn the tin 90?, and repeat the process.   Immediately, drizzle the clarified butter over the pastry so that the entire top and edges are covered.  Let sit for 2 minutes so that all of the butter soaks down.

Bake for 15 minutes.  Lower the heat to 325° F, and bake for another 40 minutes.

Make the syrup in the last 10 to 15 minutes of baking.  Combine all of the syrup ingredients in a saucepan and bring up to a boil.   Lower immediately to a simmer, simmer for 5 to 7 minutes, stirring often until slightly thickened, and remove from the heat discarding the vanilla bean and rind.  Be careful – it can foam up, so stirring will help prevent it from overflowing.  Also, sugar is extremely hot when heated like this so avoid the temptation to dip your finger and taste…

Remove baklava from the oven.  Carefully, re-cut the baklava along the same lines you cut before.  Pour the warm syrup evenly over the hot baklava, and let cool completely and uncovered.  All of the syrup should soak into the pastry.  The baklava tastes better if it sits longer, so I advise making it the night before you plan to serve it.

Baklava can be stored at room temperature for about 5 days.  Make sure it has completely cooled before covering to keep a good texture.

*Because of the quick method we’re using, you don’t want the milk solids from the butter to burn on the top of the baklava, so it only takes a few minutes to clarify the butter.  You basically want to melt the butter on low and simmer for a few minutes.  The water will evaporate, and the milk solids will settle to the bottom.  Skim the foam off the top, and the butter should be relatively clear.  When you use the butter, decant it – that is, pour it without letting any of the milk solids that are settled at the bottom pour into your container.

tags: easy desserts, easy baklava recipe, fast baklava recipe, baklava
categories: all-5, recipes, desserts-1
Tuesday 01.18.11
Posted by Aliya LeeKong
 

Sweet Bread

View fullsize sweet-bread-pic1-500x333.jpg
View fullsize sweet-bread-pic2-500x333.jpg
View fullsize sweet-bread-pic3-500x166.jpg

Sweet Bread

Welcome back! I hope that everyone had a really fantastic holiday season and New Year.  I just got back from an eye-opening culinary adventure in Turkey – exploring everything from traditional bread baking in a tandoor to how to make luscious strained Turkish yogurt to watching a woman in a village create her signature bergamot and mandarin preserves.  I’ll be posting more about Turkey in the coming weeks, but I did put a ton of pictures on Facebook if you want to check them out.

On to the usual…Sweet bread is one of those universal foods.  A quick google will generate recipes anywhere from a Romanian version to Italian panettone to Portuguese sweet bread or even our all-American banana bread.  Some include yeast and others are more of a quick bread, much like one I did a few months back.

This version is a West Indian tradition and is like a cross between a fruit cake and a bread loaf.  I’ve also seen it called coconut bread, and, although it pops up a lot around the holidays, it’s an all-occasion treat.  I love to make it for breakfast on a Sunday – a nice buttered slice of this loaf with hot coffee and fresh fruit is the perfect light meal.

Many versions of this bread I’ve seen include mixed peel, which are candied peels and fruits, a typical ingredient in fruitcake.  I like to substitute good old lemon, lime or orange zest – the flavor is natural, more subtle, and less candy-like (which makes me feel better when I have it for breakfast…).   This is a beautiful, not-too-sweet-loaf that works with afternoon coffee or even with a little vanilla sauce for dessert.  Enjoy!

Ingredients

Yields 1 8½” x 4¼” x 2¾” loaf pan

Bread:

2 cups all-purpose flour

1 ½ tsps baking powder

½ tsp baking soda

½ tsp salt

½ tsp cinnamon

¼ tsp nutmeg

¼ cup golden raisins

¼ cup dried currants

¼ cup chopped maraschino cherries

1 ½ cups grated fresh coconut

¼ tsp lemon, lime, or orange zest

½ stick unsalted butter, room temperature

1 cup sugar

2 eggs

½ tsp vanilla extract

1 tsp almond extract

2/3 cup milk

Glaze:

1 tbsp sugar

1 tbsp boiling water

Procedure

Preheat oven to 325° F.

In a bowl, sift together flour, baking powder, baking soda, salt, cinnamon and nutmeg.  Whisk ingredients to combine thoroughly.

In another bowl, combine raisins, currants, cherries, coconut, and zest.

In the bowl of a stand mixer or with a hand mixer, using the paddle attachment, cream together the butter and sugar.  With the mixer on low, add the eggs one at a time until incorporated.  Add in the extracts.

With the mixer on low, add 1/3rd of the flour mixture followed by ¼ cup of the milk.  Scrape down and repeat process another two times.  Add the dried fruit and coconut mixture, and make sure everything is fully incorporated.

Transfer to a greased loaf pan and bake for 60 to 70 minutes until an inserted toothpick comes out clean.

For the glaze, melt the sugar in the boiling water and brush onto sweet bread.  Place back in the oven for another minute or two just to develop the sheen.

Cool before unmolding and serving.

tags: sweet bread recipes, West Indian sweet bread, West Indian traditions
categories: all-5, breads & cakes, recipes, desserts-1
Monday 01.10.11
Posted by Aliya LeeKong
 

Mango Cheesecake

View fullsize mango-pic1-500x333.jpg
View fullsize mango-pic2-500x333.jpg
View fullsize mango-pic3-500x333.jpg

Mango Cheesecake

I love this recipe.  This is surprisingly easy and straight forward to make, and mango cheesecake is one of those sleeper hits.  People who “don’t like cheesecake” will even love it.  And what I love is that it’s a fantastic do-ahead dessert for parties.  It’s always better to make this the night before, so it has a full 8 hours to cool.

I actually made it for my holiday party on Friday night but shrunk it down to miniature version.  It was the perfect poppable dessert – a creamy mango cheesecake in 1.5” pastry shell with a bit of glaze and a sweet raspberry on top.  These were inhaled – always estimate a 3-4x multiple of the number of party attendees!

The graham cracker crust is crisp and buttery, and the cheesecake comes out with a beautiful, silky, creamy texture, bright with sweet mango flavor.  I love the extra flavor and texture of this super simple glaze too.  I used alphonso mango puree because these mangoes, to me, have a truly rich, signature mango flavor.  If you are doing the tiny version, they only take 15 minutes in the oven and don’t need the water bath.  Enjoy!

Ingredients

Yields 1 9-inch springform pan

Crust:

2 cups graham cracker crumbs

1 ½ sticks of butter, melted

Filling:

2 (8-ounce) packages cream cheese, room temperature

1 cup whole milk ricotta cheese, room temperature

¾ cup sugar

4 eggs, room temperature

2 ¼ cups mango puree, preferably Ratna (from the ethnic grocer; alphonso mangoes)

Glaze:

Another ½ cup or so of mango puree

Sugar

lemon

Procedure

Preheat oven to 350° F

Wrap the springform pan tightly in foil all the way around.  You want to create a seal since we’re going to submerge it in water for cooking.  Generously grease all of the inside surfaces of the pan.

In a food processor, process crumbs with melted butter until sand-like texture.  Press firmly into the bottom of the pan and bake for 15 minutes.  Cool completely.

Blend cream cheese and ricotta with sugar until smooth and then add mango puree and eggs.  Pour mixture over cooled crust and place in a roasting pan.  We’re going to bake this in a water bath.  Add boiling water to the roasting pan until it reaches halfway up the sides of the cake pan.  Bake for an hour and 30 minutes or until slightly jiggles but starts to pull from the sides.  Cool at least 8 hours before serving.

Take remainder mango puree and add a little water in a saucepan.  Reduce by half and add sugar and lemon to taste.  The glaze should coat a spoon.  Cool completely and pour over cheesecake before serving.

tags: mango recipes, cheesecake recipes, easy desserts, holiday baking, holiday recipes
categories: all-5, breads & cakes, recipes, desserts-1
Monday 12.20.10
Posted by Aliya LeeKong
 

Pear-Anise Cake

View fullsize pear-cake-pic1-500x333.jpg
View fullsize pear-cake-pic2-500x333.jpg
View fullsize pear-cake-pic3-500x333.jpg

Pear-Anise Cake

Whenever I head down to visit my parents in Florida, my mom bakes this incredible apple loaf cake.  Moist, cinnamon-ey, bursting with soft, baked chunks of apple.  Warmed up with a scoop of vanilla ice cream (um, on the couch in some sweats…) – it is pure, luxurious comfort.

I thought I’d recreate a version of this loaf cake using delicious, seasonal winter pears instead of apples.  Returning from Goa, I brought back a ton of spices – turmeric, massive cinnamon sticks, woodsy black cardamom, and some beautiful anise seed.  The anise struck me as an ideal compliment to sweet, ripened pears, AND I’ve been looking for an excuse to use that Pernod liqueur that’s been sitting on the shelf for who knows how long.

I used Bosc pears here because they hold up really well to cooking and don’t turn to complete mush.  I always ripen my pears in a bag on the counter before using them to get the peak flavor because most of the ones at the farmers’ market are unripe when you get them.  Also, I macerated the diced pears with Pernod and sugar before adding to the cake batter – the liquid that’s released develops beautiful flavor in the cake and adds moisture.  Theoretically, you could leave out the Pernod as long as you still macerate the pears with sugar and enough liquid is released – but I’m disclaiming that I haven’t tried it that way so you’re on your own!  The result is a fine crumb loaf cake that is moist, full of pear flavor, scented with licorice-anise.  Enjoy!

Ingredients

Yields 1 8½” x 4¼” x 2¾” loaf pan

3 cups peeled, cored and diced bosc pears

3 tbsps Pernod liqueur

1 ¼ cups light brown sugar

1 ½ cups all-purpose flour

½ tsp salt

½ tsp cinnamon

¾ tsp anise seed, crushed (with a mortar and pestle)

½ tsp baking soda

2 tsps baking powder

½ stick butter, room temperature

1 tsp vanilla

2 eggs, room temperature

Procedure

Preheat oven to 375° F.

Place diced pears in a bowl and add Pernod along with 2 tablespoons of the sugar.   Stir to combine and let stand to macerate for 15 minutes.

In another bowl, sift together flour with salt, spices, baking soda and baking powder.

In a stand mixer, cream together remaining sugar and butter.  With mixer on medium-low, add vanilla and then the eggs one at a time.  Turn mixer down to low, and add in the dry ingredients, stopping to scrape down the sides.  Mix until almost combined.  Add in the pears with any liquid that’s accumulated and mix until thoroughly combined.

Pour batter into a greased loaf pan, and bake for 45 minutes or until a toothpick inserted into the center comes out clean.

tags: pear cake, anise recipes, pear desserts, pear-anise recipes
categories: all-5, breads & cakes, recipes, desserts-1
Wednesday 11.17.10
Posted by Aliya LeeKong
 

Sweet Apple Couscous

View fullsize couscous-pic1-500x333.jpg
View fullsize couscous-pic2-500x333.jpg
View fullsize couscous-pic3-500x333.jpg
View fullsize couscous-pic4-500x333.jpg

Sweet Apple Couscous

I sort of jumped the gun and went apple picking this past weekend.  I couldn’t help myself.  I’m a sucker for fall, the first cool change of temperature and all the apple picking, pumpkin patch wandering, and wine-tasting (I threw that in there…).  It’s a bit early in the season, so where I usually come back with several different varieties I ended up with who-knows-how-many pounds of Honeycrisps.  They are literally overflowing in my kitchen, so I’m pressed to find ways to use them up…Luckily, they are delicious, the perfect balance of sweet and tart, and hold up well to cooking.

Couscous, while a North African staple, has truly become popularized and is found throughout parts of France, Spain, Portugal, Italy, Eastern Europe, and across the Middle East.  Here, in the States, I’ve seen it creep onto dinner tables because of its incredible versatility and high nutritional content compared to rice and pasta.  North African cooking, particularly Moroccan, is full of sweet and savoury dishes – with spices like cardamom or cinnamon bridging the gap.  So couscous as a sweet side dish or a dessert does exist, though I surely haven’t seen any Berber recipes with apples…

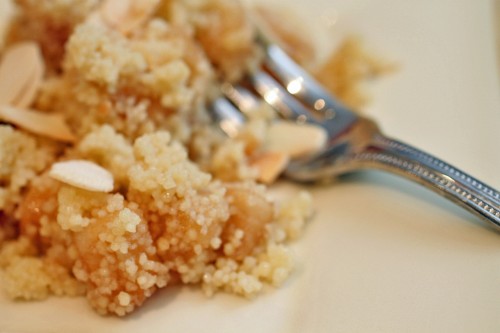
For this dish, I was inspired by (obviously) the mass of apples in my kitchen, the sweet couscous recipes of North Africa involving dried fruits and nuts, and even the rice puddings of American and South Asian cultures (though this has no cream or milk).  This dish is extraordinarily simple, healthy and delicious.  It’s basically cooking a warm, buttery apple pie filling, folding it in to light, fluffy, sweetened couscous, and topping it with nutty, crunchy thin almond slices.  The textures are beautiful and who can resist the combination of apples and cinnamon.  A great fall dish… enjoy!

Ingredients

Serves 4 to 6

2-3 tbsps butter

5 cups apples, peeled, cored, and cut into a small/medium dice

½ cup brown sugar

¾ tsp cinnamon

¼ tsp nutmeg

¼ tsp salt

½ tsp vanilla extract

2 cups couscous*

2 cups water

3 tbsps butter

1/3 cup sugar

½ tsp salt

½ cup sliced almonds, toasted

Procedure

Place a skillet on the stove over medium heat and melt the butter.  When the foam subsides, add the diced apples and stir to coat.  Turn temperature slightly down and cook on medium-low heat for 10 minutes, stirring every few minutes to make sure the apples evenly cook.  Add brown sugar, cinnamon, nutmeg, salt, and vanilla to the apples and stir to coat.  Cook for another 5 minutes.  The apples should be soft but still hold their shape (not complete mush).

In a casserole dish, spread couscous out to an even layer.  Cooking it in this type of dish will increase surface area and keep the resulting texture light and fluffy.  In a saucepan, bring water, butter, sugar and salt to a boil.  Pour over couscous, stir briefly with a fork, cover tightly with plastic wrap, and let sit 5 minutes.  After the 5 minutes, remove the plastic wrap and fluff couscous with a fork – the butter should keep the grains separate and prevent any clumping.

In the same dish or another serving bowl, mix together the couscous with the apple mixture and top with the toasted sliced almonds.  Serve warm.

*I used the typical, plain, non-whole wheat, pre-steamed variety from the grocery store.  Be careful not to use the tri-color type, which has spinach and tomato flavoring, or Israeli couscous, which is larger and requires a longer cooking time.

tags: couscous, sweet couscous, apple couscous, recipes for fall, apple recipes
categories: all-6, desserts-1, side dishes, vegetarian, recipes, breakfast
Wednesday 09.22.10
Posted by Aliya LeeKong
 

Pomegranate-Rose Milk Pudding

View fullsize pom-pudding-pic1-500x333.gif
View fullsize pom-pudding-pic2-500x166.jpg
View fullsize pom-pudding-pic3a-500x166.jpg
View fullsize pom-pudding-pic3-500x333.jpg

Pomegranate-Rose Milk Pudding

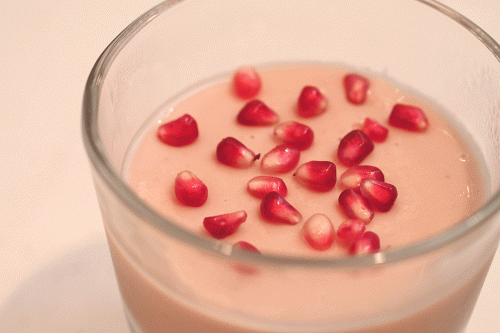
A few weeks back, I read two separate articles that helped inspire this dish.  One discussed Sephardic culinary traditions that originated in North Africa, and the other addressed using rose water in modern cooking.  Milk pudding thickened with rice flour, and often scented with rose water, is a traditional North African and Middle Eastern dish called malabi (in Israel), sutlage (in Turkey and the Balkans) or muhallabeya (in North Africa and rest of the Middle East).  With the Jewish New Year passing and Yom Kippur coming up, I thought this could be a beautiful, sweet dish for the Break Fast meal.

Before starting this dish, I decided to dig a bit deeper and chatted with a friend of mine whose family comes from Sephardic culture, and she clued me in on a few things.  First, her family eats something sweet immediately after the fast to get their blood sugar up.  She also said her family clears the table after, so a dish like this, which has dairy, is totally fine.  For a parve version, coconut milk (regular, lite or even half diluted with water) would work well as a substitute for milk.

But it was the symbolism I found even more interesting.  Pomegranates have special significance because the number of seeds in the fruit corresponds with the mitzvots, or commandments of the Torah.  Fascinating!  Also, I plated these in individual, circular bowls to signify the full circle of the coming year, another symbolic gesture.

After all of the importance, the taste just seems secondary…but thank goodness because it is tasty!  The fruity tartness of the pomegranate is offset by the sweet milk and the vanilla notes, and the rose comes later…almost like you are smelling it rather than tasting it.  I love sprinkling the pomegranate arils on top for a juicy crunch to offset the texture of the pudding.  This is delicious regardless of time of year!  Enjoy…

Ingredients

Yields 4 to 6 servings

3 pomegranates, juiced, or 3/4 cup unsweetened pomegranate juice*

½ cup rice flour

4 cups milk

½ cup + 2 tbsps sugar

½ tsp vanilla extract

1 ½ tbsps rosewater

½ tsp salt

1 tbsp pomegranate molasses (optional)

Procedure

Place a medium-sized bowl over a pot of simmering water (not touching the water and at a medium heat) or use a double-boiler for this recipe.

In a small bowl, add the rice flour to the pomegranate juice in increments, whisking until thoroughly combined.  You don’t want any lumps.

Heat the milk in the top of the double boiler.  You should see bubbles around the edges, but the milk shouldn’t be boiling.  Add pomegranate juice with rice flour, sugar, vanilla extract, rosewater, salt, and pomegranate molasses if using.  Cook for 15 to 20 minutes until thickened.

Again, there shouldn’t be any lumps, so blend with a hand blender if you happen to have a few.  Ladle into serving cups or one large bowl and chill in the refrigerator for 4 to 5 hours.

Serve garnished with pomegranate arils.

*For the recipe, I seeded (messily…) 3 pomegranates, blended the arils, and strained out the juice.  You can more easily do this in a juicer if you have one.  If using bottled pomegranate juice, it’s definitely more concentrated than juicing the fruit, so I wouldn’t add the optional pomegranate molasses.  Also, be careful of the sweetness if the pomegranate juice has added sugars…

tags: pomegranate, milk pudding, Yom Kippur recipes, pudding, sweet pudding, pomegranate-rose, rosewater
categories: all-6, breakfast, desserts-1, recipes
Monday 09.13.10
Posted by Aliya LeeKong
 

Melon-Orange Blossom Gelato

View fullsize melon-gelato-pic1-500x333.jpg
View fullsize melon-gelato-pic2-500x333.jpg
View fullsize melon-gelato-pic3-500x333.jpg

Melon-Orange Blossom Gelato

Ice cream is somewhat of a problem for me.  You might find me on any given night at home, with a pint of mint chip or vanilla swiss almond on the couch circa 11 p.m.  Or walking in Soho, stopping at the Van Leeuwen truck for their earl grey.  Or at Cones grabbing some corn ice cream in the West Village.  Or inhaling mochi in single bites at Nobu.  Or…get the picture? In the winter, I crave the super creamy, bitter coffee flavors with chunks of chocolate, but the summer leads me to lighter, more subtle ones.  Therein lies the inspiration for a light-as-air, delicately-flavored, slightly floral melon-orange blossom gelato.

I’ve mentioned orange blossom water in a previous post, and it is a flavor that is found throughout Middle Eastern foods, particularly the desserts.  That said, it can be found in Mediterranean cuisine as well as French – it’s often used to flavor madeleines. The water is distilled from the blossoms of the sour orange tree, which is also known as the bitter orange or Seville orange tree.  Since it’s from the blossoms, the flavor is certainly more floral than fruity – quite exceptional, really.

Although I call this a gelato, it’s only because it’s lower in fat and lighter in texture than ice cream.  It’s truly a cross between a sorbet and a gelato because of the high water content of the melons.  It’s extraordinarily light – like a milky ice that melts when it hits your tongue spreading the soft melon flavor while the perfume of the orange blossom hits you at the end.  One thing I’d like to say about orange blossom water – each brand is very different.  The one I’m using now is a bit diluted, so, in this case (and, quite frankly, whenever a recipe calls for it), add a bit less and check for flavoring before adding more.  The flavor can be a bit cloying in excess.  Enjoy!

Ingredients

Yields approximately 2 quarts

1 ¾ cups heavy whipping cream

1 cup whole milk

½ tsp kosher salt

¼ cup sugar

¼ cup honey

2 tbsps orange blossom water

½ tsp orange zest

1 medium melon (approx. 1 ¼ lbs), seeded and cut into small cubes

1 squeeze of fresh lemon juice

Procedure

Place cream and milk in a saucepan.  Add salt, sugar, honey, orange blossom water, and orange zest.  Bring mixture up to a boil.  Once it starts boiling, turn off the heat, cover, and let steep for 10 to 15 minutes.

Place cut melon and a squeeze of lemon juice in a blender, and blend on high for a few minutes until completely pureed.  Strain cream mixture into a container, add melon puree, and refrigerate for at least 6 hours or even overnight.  You want the mixture to be the same temperature as the refrigerator or under 40° F.

Process ice cream in an ice cream maker per instructions.

If you don’t have an ice cream maker, place chilled mixture in a baking dish and place in the freezer.  After 40 minutes, take it out and stir it up with a whisk, or (best) a hand-mixture to incorporate air and until a uniform texture.  Place back in the freezer and repeat this every 30 minutes.  After about 2 ½ to 3 hours, the ice cream should be good to go.

tags: melon gelato, orange blossom gelato, orange blossom water, melon desserts, recipes for summer
categories: desserts-1, all-7
Monday 08.30.10
Posted by Aliya LeeKong
 

Deadly Cape Malva Pudding

View fullsize malva-pic1-500x333.jpg
View fullsize Malva-pic2-500x333.jpg
View fullsize malva-pic3-500x333.jpg
View fullsize Malva-pic3-rev-500x168.jpg

Deadly Cape Malva Pudding

In a previous post on luscious bobotie, I mentioned some fun cooking I did while travelling around South Africa and a dessert I had there, Cape Malva pudding.  When Americans think pudding, it’s usually the sweet, cornstarch-thickened milk kind or, more often, the Jell-O sort.  But, historically, puddings are sweet or savoury and actually take a more solid form (like a Yorkshire or even a bread pudding).  In Europe or in places where Europeans migrated, these sorts of puddings are really popular, and this one is Dutch in origin, brought to South Africa sometime after the Dutch East India Company established Cape Town in the 1600’s.

At some point during try # 572 (exaggeration but it took me fooorever to create a recipe that I was 100% happy with), I was texting with a girlfriend who spent some time modeling in South Africa.  She’s always interesting to talk to because she was born in Somalia, spent the early part of her life in Kenya, and then grew up in Seattle.  She has travelled all over the world, and unlike the rest of us, can eat things like Malva pudding and still stay thin enough to model!  Anyway, when I mentioned that I was making it, she wrote back one word: DEADLY.  Can’t wait until she comes to New York in a few weeks so I can attempt to fatten her up with this…:)

This dessert is, indeed, deadly, the type that gets even better the next day.  The result is slightly spongy, super moist and buttery, with an amazing caramelized exterior.  The sauce is thin and meant to be poured over the pudding to soak in and give it added moisture and flavor.  I used brandy in my sauce, but Amarula would be fantastic here.  The sauce can easily be made as is without the alcohol if you’re serving this to kids, and it’s still lovely.  Malva pudding is typically served in the Cape warm and with a side of custard (as if it needs anything else!).  Devonshire cream, mascarpone, whipped cream, or even ice cream are the perfect accompaniments.  Delicious.  Enjoy!

Ingredients

Yields 1 10-12 cup Bundt or ring-shaped cake pan

Pudding:

1 ½ cups flour

1 ½ tbsps baking soda

2 tsps baking powder

3/4 tsp salt

3 tbsps butter, softened at room temperature

1 ½ cups sugar

4 eggs, room temperature

2 tbsps red wine vinegar, room temperature

3 ½ tbsps apricot jam, room temperature

2 tsps vanilla extract

1 ½ cups milk, room temperature

Sauce:

¾ cup fresh cream

½ cup sugar

½ stick butter

1/3 cup water

1 tsp vanilla extract

1 – 2 tbsps brandy (whatever works for your tipsy scale)

Procedure

Preheat the oven to 350° F.

In a bowl, sift together the flour, baking soda, baking powder and salt.  Set aside.

All ingredients should be at room temperature.  In a stand mixer with a paddle attachment, cream together butter and sugar.  With the mixer still running, add eggs one at a time.  Once incorporated, add vinegar, apricot jam, and vanilla extract.  With the mixer on low, add one third of the flour mixture and then one third of the milk.  Repeat process two more times.

At this point, I stop the mixer and scrape down the sides.  Then, I turn it back on long enough to make sure that all of the flour is incorporated.  You don’t want to over mix and develop the glutens in the flour, but you do want to make sure that there are no dry spots in the mixture.

Pour into a heavily greased and well-floured Bundt, or other ring-shaped pan (single piece – no detachments – and preferably non-stick) or baking dish of your choice.  It should come up a little over halfway the size of the dish as it will rise significantly.  Bake at 350° F for 45 minutes, longer if needed – until an inserted cake tester or toothpick comes out clean.  The outside should be well caramelized.

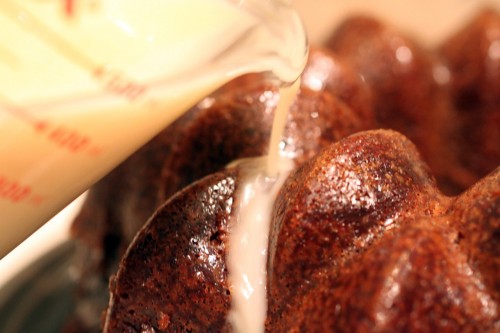
For the sauce, simply heat all of the ingredients in a small saucepan, whisking to make sure all of the sugar is dissolved.  Keep warm until you are ready to pour.  If you let this sit too long, a skin will form on top.  If this happens, just strain before pouring.

If you are unmolding the pudding, cool for about 15 minutes, run a knife around the edge if necessary and turn onto a plate.  Poke holes all over the pudding with a knife or a skewer, and slowly pour or spoon the sauce over all sides.  You want the sauce to soak in everywhere.  If you pour too quickly, the sauce will just pool and will make only the bottom part of the pudding moist.

If you are not unmolding, simply poke holes all over and pour the sauce right in.

tags: cape malva pudding, South African food, South African cooking, South African recipes
categories: breads & cakes, recipes, desserts-1, all-7
Monday 08.23.10
Posted by Aliya LeeKong
 
Newer / Older