X

Sign up to receive exclusive recipes, tips, updates and other goodies from Aliya!

  • Home
  • Blog
    • All
    • Recipes
    • Spices + Ingredients
    • Lifestyle, etc.
    • Travel
  • The Cookbook
  • The App
  • Media
    • All Media
    • Video
  • About
  • Passions
Aliya LeeKong
  • Home
  • Blog
    • All
    • Recipes
    • Spices + Ingredients
    • Lifestyle, etc.
    • Travel
  • The Cookbook
  • The App
  • Media
    • All Media
    • Video
  • About
  • Passions

Japanese-Inspired 5-Ingredient Cheesecake

View fullsize cheesecake 3.jpg
View fullsize cheesecake2.jpg
View fullsize cheesecake1.jpg

JAPANESE-INSPIRED 5-INGREDIENT CHEESECAKE

The fact that National Cheesecake Day falls in the summertime is a bit odd to me.  That thick, tangy lusciousness somehow belongs during a time when you're not trying to eat light (and kill it in a bathing suit...).  BUT I recently tried a Japanese cheesecake, which is also called a Cotton cheesecake (because of how light and fluffy it is).  Think if an angel food cake and a cheesecake had a baby....Turns out, this crustless, spongy creation is the perfect summer dessert.

I set out to create a simplified version of it because summer desserts should be a bit easy.  I wanted a canvas, a simple cake, to showcase seasonal ingredients as its topping.  This cake is 5 ingredients, and the hardest step is just whipping the egg whites to stiff peaks and folding into the batter.  Other than that, foolproof!  I used yuzu juice as the acid in keeping with the Japanese theme and because it has a touch of salinity, which I looooove, but lemon juice or even key lime juice would be a great substitute.

When I’m indecisive about a topping for my cheesecake, my favorite go to is a whipped sour cream topping.  The tangy tartness of the sour cream with the bite of the creamy, sweet cheesecake is one of the more surprising taste combinations.  Who would have thought sour cream with cheesecake would be a thing!?  And it’s super simple to make.  For a more basic recipe I use sour cream, confectioner’s sugar and vanilla extract.  Just throw it all into the Kitchenaid and whip 'til smooth or whisk in a bowl if you don’t like lugging out your stand mixer. 

There were so many blueberries at my Saturday's farmers' market, so I thought I would test out a blueberry sauce with my cheesecake.  This recipe combines the blueberries with one of my favorite herbs, lemon verbena.  It’s a super simple sauce and starts off like you would a jam.  Instead of letting it boil down til thick, you simply take off the heat and let cool.  I like to steep the lemon verbena in boiling water to really bring out the flavor and then use the water when making the sauce.  In a sauce pan, mix the blueberries, corn starch, and sugar until the blueberries start to release their juices.  Gradually stir in the lemon verbena water and bring to a simmer.  Let cook for 5-10 minutes until desired consistency and some of the berries start to burst.  Turn off heat and let cool to room temperature.

Here's the 5-ingredient cheesecake recipe - enjoy!

Yields (1) 9-inch cake

1 can sweetened condensed milk
8 ounces cream cheese, room temp
6 eggs, room temp and separated
2 ½ tablespoons cornstarch
1 tablespoon yuzu, lemon or key lime juice

Preheat the oven to 350° F.

In a large bowl, whisk together condensed milk and cream cheese.  Fold in yolks, cornstarch and yuzu/lemon juice.

In a separate bowl, whip egg whites to stiff peaks.  Add a little bit of the egg whites to the cream cheese mixture to lighten and then fold in the rest in 3 increments.  Transfer to a greased, parchment-lined 9-inch cake tin or springform pan.  Place in a roasting pan and pour boiling water in the pan to halfway up the cake tin (if using a springform, make sure to wrap in foil all over to keep the water from seeping in.

Bake for 40 minutes.  Then, turn off the oven and leave the cheesecake in the oven for another 15 minutes.  Remove and let cool completely before refrigerating.  Refrigerate at least hours before serving.


tags: cheesecake recipes, japanese cheesecake, easy cheesecake recipe, cotton cheesecake, desserts
categories: all 4, desserts, holiday, quick & easy, recipes, traditions
Wednesday 07.27.16
Posted by Aliya LeeKong
 

Sugar Plum & Currant Torte

View fullsize plum1.jpg
View fullsize plum2.jpg
View fullsize plum3.jpg
View fullsize plum4.jpg

SUGAR PLUM & CURRANT TORTE

I am forever going on and on about the market at this time of year and how truly beautiful, bright and flavorful all of the fruit is, and this post is no exception!  I found some gorgeous sugar plums and tart currants and set off to bake on a Sunday - nothing too complicated, just a tad decadent, and delicious for days into the week.

What I ended up with is this torte, a true summer dessert (and sometimes breakfast!).  This is perfect for cake novices because the batter is just so easy.  It comes together in less than 10 minutes and is virtually fool-proof.

A few points: I happened to make this gluten-free, but if you only have all purpose flour on hand, go ahead and replace the flours with an equal amount of it; just drop down the baking powder to 1 teaspoon.  Also, I don't use a ton of sugar here, so the key is using super sweet plums to offset the tartness of the currants. Taste before baking!

Enjoy!

Ingredients

Serves 6 to 8

½ cup oat flour

½ cup brown rice flour

¼ cup almond flour

1 ½ teaspoons baking powder

pinch of salt

1 stick unsalted butter, room temperature

¾ cup coconut, palm, unrefined, or plain old white sugar

2 eggs, room temperature

10 sugar plums, halved and pitted

½ cup red currants

raw honey + cinnamon

Procedure

Preheat the oven to 350˚ F.

In a medium bowl, mix together the flours, baking powder and salt.

With a stand or hand mixer, cream the butter with the sugar.  To the sweet butter, add the eggs one at a time until incorporated.  With the mixer on low, add in the flour until just incorporated.

Transfer the batter to a greased 9-inch cake or pie tin.  Layer the plum halves (skin side up) and currants.  Brush the plums with a bit of raw honey and sprinkle cinnamon all over.

Bake for 40 to 45 minutes until a toothpick inserted comes out clean.  Cool completely before unmolding.

tags: plum torte recipe, sugar plums, torte recipe, how to make plum torte, desserts, plum dessert
categories: all 2, breads & cakes, breakfast, desserts
Tuesday 08.11.15
Posted by Aliya LeeKong
 

Strawberry Rhubarb Crumble with Ancient Grain Oatmeal + Coconut Sugar

View fullsize straw4.jpg
View fullsize straw1.jpg
View fullsize straw2.jpg
View fullsize straw3.jpg

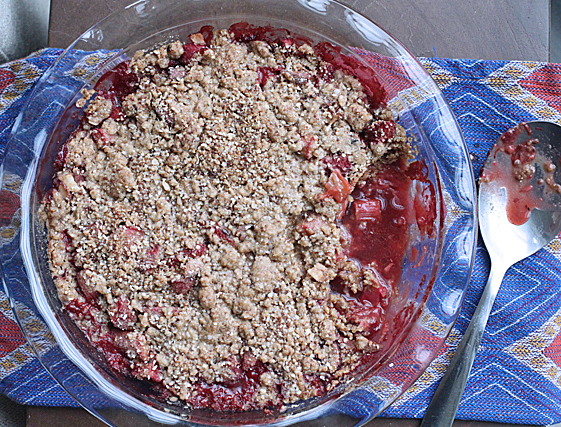
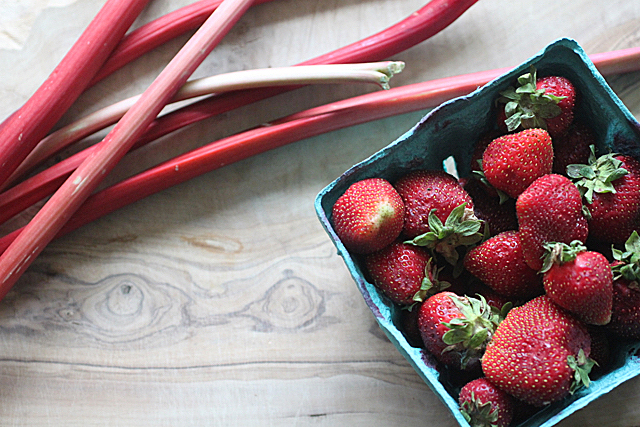
I have been slightly losing my mind over the strawberries that have just gotten to the market, and so I've been playing around with variations on crumbles.  I particularly love this one with rhubarb because strawberry and rhubarb are just so classic together, but, also, using peak season fruit means I can bake with a lot less sugar - the berries taste like candy! 

The filling gets an ingredient that you usually don't see in a crumble: sherry vinegar.  The vinegar really brightens and intensifies that berry flavor in a unique way.  I let the fruit marinate for a bit before topping and throwing into the oven.  And in lieu of an all purpose flour crumble topping, I use a bit of brown rice flour and an ancient grain oatmeal that has gluten-free oats, amaranth, and hemp amongst other ingredients.  When I set out to make this recipe, I actually wanted to create a breakfast crumble I could give my little girl, and this does double duty - for breakfast or a simple dessert.  I also used coconut sugar here - an unrefined sugar with a lot of antioxidants and lower glycemic effect; it's a bit sweeter than white sugar, so I used a lot less than other recipes you'll see out there.

Breakfast or not, this crumble is decadent - sweet ripe fruit with bits of sliced almonds topped with a buttery, crumb topping.  Full-bodied and deeply flavored - breakfast never tasted so good!

Enjoy!

Ingredients

Serves 6 to 8 / Yields (1) 9 1/2-inch pie dish

For the filling:

1 quart strawberries, hulled and halved (about 4 cups chopped)

5-6 stalks rhubarb (about a ½ lb), diced into ½ inch pieces

½ teaspoon vanilla extract

2 teaspoons (good quality) sherry vinegar

2 ½  tablespoons coconut sugar

2 tablespoons cornstarch

1/3 cup sliced almonds

For the crumb topping:

½ cup brown rice flour

½ cup ancient grain oatmeal (rolled oats work great here too)

1 teaspoon baking powder

¼ cup coconut sugar

½ teaspoon cinnamon

¼ tsp salt

7 tablespoons cold unsalted butter, cut into cubes (plus a bit more for greasing)

Procedure

Preheat the oven to 375° F.

In a medium bowl, mix together all of the filling ingredients.  Let marinate 10-15 minutes while preparing the topping.

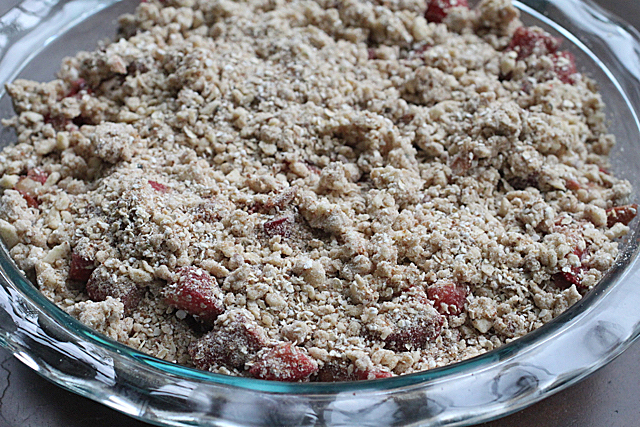
In a food processor, add the flour, oatmeal, baking powder, sugar, cinnamon and salt.  Pulse until uniformly mixed.  Scatter the cold cubes of butter and pulse until a coarse meal forms.  Don't let it run for too long because the butter will warm up and start to clump.

Grease a 9 ½-inch pie dish with a bit of butter and place on a baking sheet (to catch any juicy overflow).  Add the strawberry-rhubarb mixture.  Top with the crumb topping and bake for 35 minutes until the fruit is bubbling and the crumble topping has browned up.

Serve warm as is for breakfast or with a bit of ice cream or whipped cream for dessert.


tags: gluten free, gluten free baking, crumble recipe, crisp, strawberry rhubarb crumble, strawberry rhubarb crisp, strawberry pie, desserts
categories: all 2, breakfast, desserts
Tuesday 06.02.15
Posted by Aliya LeeKong
 

Matcha Crème Brûlée

View fullsize green-tea1-500x333.jpg
View fullsize green-tea2-500x354.jpg
View fullsize green-tea3-500x333.jpg

Matcha Crème Brûlée

Crème brûlée is one of those fancy desserts that shockingly don’t take a ton of ingredients or time to make. I’m always playing around with the basic goodness , and this green tea version is a new favorite – light, delicately-scented, and simple.

The key ingredient here is matcha, a finely milled green tea powder that you can pick up at specialty, gourmet, and Japanese grocers. I love this stuff and all you really need is a teaspoon or so to transform a basic dessert or cake into something a bit more special. Beyond using it here, it’s delicious in crèpe batter, shortbread cookies, cheesecake and simple vanilla cupcakes….it’s fantastic to add to baked items because you don’t need to adjust your wet-dry ratios at all.

Enjoy!

Ingredients
Yields 4-5 (5-inch) oval ramekins
2 cups heavy creaam
1 teaspoon matcha green tea powder
1 vanilla bean, split and scraped
¼ tsp salt
5 egg yolks
1/4 cup sugar plus extra, for brulée
2 tablespoons honey

Procedure

Preheat the oven to 325° F.

In a saucepan, heat heavy cream, matcha powder, vanilla bean, and salt.  Bring mixture up to a boil on medium heat.  Remove from heat, cover, and let steep 15 minutes.

In a medium bowl or stand mixer, whisk egg yolks, 1/4 cup sugar, and honey until well blended and light yellow in color.  It should look very creamy at this point.

Strain cream mixture through a fine sieve and add it in small amounts to the yolks, whisking after each addition.  You want to slowly bring up the temperature of the yolks (not scramble).  Transfer custard to a measuring cup or something that pours easily.

Place paper towels in one or  two different baking dishes (depending on size) and set the ramekins inside.  Carefully, pour the custard ¾ of the way up into the ramekins.  Then, add boiling water to the baking dishes so that it comes about halfway up the sides of the ramekins.  I bake these in a water bath, and the paper towels help the ramekins from sliding around and also help reduce the risk of splash as you pour the water into the dishes.

Bake at 325° F for 35 minutes.  It should still jiggle slightly.  Remove from water bath and let cool at room temperature for 10 minutes.  Cover in plastic wrap (don’t let it touch the surface), and chill in the refrigerator for at least 2 hours in order to set the custard.

Coat the top of the custard in each ramekin with a layer of sugar.  Turn over to remove excess.  Carefully, using a torch, brûlée the sugar, working in circles evenly over the ramekins.

Note: if you use larger or deeper ramekins, the cooking time will inevitably be longer.  The key things are the water bath and also that it still jiggles when it comes out.  You want smooth, creamy custard, not overcooked and curd-like.

tags: desserts, creme brulee, easy desserts, matcha, green tea desserts
categories: recipes, desserts, all 2
Monday 03.03.14
Posted by Liz Neilson
 

South African Milk Tart with Fruits

View fullsize tart-pic1-500x361.jpg
View fullsize tart-pic4-500x333.jpg
View fullsize tart-pic3-500x222 (1).jpg

South African Milk Tart with Fruits

I tried a really delicious milk tart a few years back when I was visiting Capetown and was hooked!  This is one of those ubiquitous desserts in South Africa that’s served throughout the country, on all sorts of occasions and every cook has his or her own secrets.  Melktart (meaning, literally, milk tart…) is a tradition that came from the Dutch settlers in the country, a custard-based tart scented with cinnamon delivered in a flaky pastry crust.

I am one of those people that have fruit tart cravings.  I will take a gorgeous tart with a pastry cream filling and topped with fruit over a straight fruit pie any day.  For some reason, I feel like the creaminess balances out the acidity in the fruit and with a flaky crust creates a perfect dessert. For me, the idea of putting fruit on top of a milk tart seemed perfectly natural (though it’s not usually done there).

Also, I semi-cheated and used puff pastry for the crust – how I could go on about the benefits of puff pastry!!  I’ve made it before from scratch, and it’s definitely a process.   Puff pastry tastes good, and those guys who’ve created the frozen versions have mastered it – why mess with perfection here?  This crust comes together easily, and it’s a few less steps you have to take to make an equally delicious tart.

So, now about milk tart itself.  The filling is basically a custard with hints of cinnamon, almond, and (my addition) vanilla.  The cornstarch helps to thicken the custard and make sure it’s not too eggy – you don’t want a crème brulée tart here!  The beaten egg whites lighten the batter and add an airy quality to the finished product.  The result is a beautiful, creamy, vanilla-specked filling with that caramelized top in a gorgeous flaky crust – the fruit just adds another lovely layer of flavor.  This is perfect for a dinner party (impressive too!) or even a ladies lunch.  Enjoy!

Ingredients

Yields 1 9-inch fluted tart / Serves 6 to 8

Crust:

½ package frozen puff pastry (1 sheet), defrosted

1 egg beaten with a bit of heavy cream for egg wash

Wax paper and dry beans to weight down

Filling:

1 ½ cups whole milk

½ tsp salt

1 stick cinnamon

1 vanilla bean, split and scraped

½ tsp almond essence

½ cup heavy cream

¼ cup cornstarch

1 ½ tbsps unsalted butter

2 eggs, separated

½ cup + 2 tbsps confectioner’s sugar

½ tsp cinnamon ground

Topping:

Sliced or whole fruit of choice: strawberries, blueberries, raspberries, kumquats, cape gooseberries, etc.

Procedure

For the crust:

Preheat the oven to 350° F convection / 375° F convention.

Let’s start by rolling out and blind-baking the crust.  On a floured surface, roll the sheet of puff pastry out just enough so it will cover the inside of the tart pan and have some overlap.   Place it carefully in the 9-inch, fluted tart shell and press it into the corners and sides.  Trim the excess.  Place a piece of wax paper across the top of the tart so it covers the sides.  Add dried beans to weight down the crust and refrigerate for 15 minutes while you start on the filling.

Place in the oven and bake for 20 minutes.  Take the crust out of the oven, remove the weights, and brush with the egg wash.  Put back in the oven for another 5 minutes until golden.  Set aside until ready to fill and leave the oven on.

For the filling:

In a small saucepan, bring the milk, salt, cinnamon stick, vanilla bean, and almond essence up to boil.  Lower immediately to a simmer.  In a small bowl, whisk together the heavy cream with the cornstarch making sure there aren’t any lumps.  Add this to the milk mixture along with the butter and stir until the mixture thickens.  Remove from the heat.

Make sure the egg yolks are in a larger-sized bowl because you’ll be adding the milk mixture to them.  You want to start by adding a little bit of the milk mixture and stirring or whisking to incorporate.   Continue to do this a little at a time until the milk mixture is completely incorporated – we do this to avoid cooking the yolks and having bits of it in the tart.  Let this mixture cool to closer to body temperature before moving on to the next step.

In another bowl, beat the egg whites with the ½ cup of confectioner’s sugar until soft peaks form – should be light and fluffy.  Add a spoonful or two of the milk custard to the egg whites and incorporate.  Carefully, fold the egg whites into the milk custard to lighten it up.  Be careful not to overmix or you will deflate it significantly.

Add this filling to the tart shell.  Mix together the last 2 tablespoons of confectioner’s sugar with cinnamon and sprinkle on top of the tart.  This will develop into a nice brown crust on top.

Bake for 10 minutes, and then lower the temperature 25 degrees and bake another 15 minutes.  Don’t be surprised if it puffs up during cooking – it will reduce down as it cools.  Cool on a rack and top with fruits of your choice.

This tart can be served warm or cold, but since I added the fruits I thought I’d keep it on the cooler side myself.

tags: milk tart, desserts, fruit, special occasion, south african
categories: desserts, recipes, all -1
Monday 05.14.12
Posted by Aliya LeeKong
 

Sweet Avocado-Chocolate Tart (No Bake!)

View fullsize avocado-pic1-500x333(1).jpg
View fullsize avocado-pic2-500x333.jpg
View fullsize avocado-pic3-500x166.jpg

Sweet Avocado-Chocolate Tart (No Bake!)

Avocados as dessert?  Yes, yes, and yes.  I am still reminiscing about my trip to Brazil, and there, avocados (which are fruits, mind you…) are often eaten as a dessert – sometimes sprinkled with lime juice and sugar and other times blended with cream or condensed milk to produce a thick pudding, amongst other ways.  In the U.S., we have gone so far as to add them to milk shakes or protein shakes, why not take it a step further and embrace this creamy fruit as dessert-worthy…

I picked up this beautiful, long, rectangular tart mold recently and had been itching to use it.  That said, if I’m being completely honest, I have to have the baking bug to go that extra mile and bake a tart from scratch.  This is a no-bake tart!  You merely have to press buttered, cookie crumbs into the mold and freeze for a few minutes to set.  It doesn’t get easier.

Add to that the filling is a breeze – a few ingredients thrown into a food processor to do the work – and this may be the easiest tart you’ve ever made.  It sets up in a few hours so could easily be thrown together before a dinner party.  Avocado season has begun and will run through the summer, and this is the perfect icebox treat to keep around for summer entertaining.  The avocado pairs with chocolate beautifully – sweet, creamy with the bitter, chocolaty crunch from the crust…Enjoy!

Ingredients

Yields 1 13 ¾” x 4 1/2 “ x 1” tart

Crust:

1 ½ sticks unsalted butter

2 ¼ cups chocolate cookie crumbs (from Oreos without the center filling or other chocolate wafer cookies

1 tsp kosher salt

Filling:

4 oz mascarpone cheese

½ can sweetened condensed milk

½ tsp vanilla extract

Squeeze of lime juice

2 ripe avocados, pitted

Garnish (optional):

fresh whipped cream

shaved bittersweet chocolate

Procedure

Melt butter in a medium saucepan.  Add cookie crumbs and a ½ teaspoon of the salt and mix with a fork until fully incorporated.  Press evenly into the tart pan going up the sides as well.  Place in the freezer for 10 minutes.

To the bowl of a food processor, add the mascarpone, sweetened condensed milk, vanilla extract, the other ½ teaspoon of kosher salt, squeeze of lime juice and spoon in the avocado flesh.  Process until thick, creamy and uniform consistency.

Spoon avocado mixture into the tart shell and smooth with a spatula.  Refrigerate for a minimum of two hours, though this can definitely be made a day or two ahead.  When unmolding, let the tart sit at room temperature for 20 to 30 minutes first, so that it loosens easily.

Serve slightly chilled with a dollop of whipped cream and some shavings of chocolate.

tags: desserts, avocado desserts, no bake desserts
categories: desserts, recipes, all -1
Monday 04.02.12
Posted by Aliya LeeKong
 

Cinnamon-Passion Fruit Fool

View fullsize fool-pic1-500x333.jpg
View fullsize fool-pic2-500x333.jpg
View fullsize fool-pic3-500x166.jpg

Cinnamon-Passion Fruit Fool

When the weather is hot and beautiful fresh fruits abound, I always turn to a fruit fool as dessert.  A classic British dessert, a fool is quite simply puréed fruit and a bit of sugar folded in with fluffy whipped cream. They are light, no fuss, and always highlight the flavors of the season.

There are umpteen variations and shortcuts for this dish – from the type of fruit (gooseberries, strawberries, peaches) to using a frozen purée or pre-fab whipped cream.  You really can’t go wrong with this one.  With the fragrant passion fruits in season right now, this latest incarnation of a fool became doubly inspired by a staple Brazilian dessert, mousse de maracujá.  Maracujá is Portuguese for passion fruit, and the Brazilian version uses thick cream, sweetened condensed milk, and sometimes gelatin.

This dessert literally could not be easier.  Passion fruits are basically already puréed, so you simply have to split and remove the pulp; you can, of course, use a frozen purée if you can’t find fresh.  I sweeten the passion fruit pulp with a bit of sugar, add a squeeze of lime juice for brightness and a bit of cinnamon because I think it really brings out the signature flavor of the fruit.  Fold all of that into whipped cream, and that’s it!  It’s shockingly delicious.  My fussy I-only-eat-meat-and-no-dessert husband went to town on a few bowls after initially, begrudgingly taste-testing.  Light, fluffy, tart, sweet – this might be my favorite, easy summer dessert.  Enjoy!

Ingredients

4 passion fruits, seeds and pulp removed to a bowl*

squeeze of lime juice

1 tsp cinnamon

½ cup sugar

2 cups heavy cream, cold

Procedure

In a bowl, mix together thoroughly all except a few tablespoons of the passion fruit seeds and pulp, the squeeze of lime juice, cinnamon and ¼ cup of the sugar.

In another bowl using a stand or hand mixer, beat the heavy cream with the other ¼ cup of sugar until stiff peaks form.  Fold the passion fruit mixture carefully into the sweetened whipped cream.  I like to add a third at a time and not overmix to avoid collapsing the fluffy cream.

Spoon mixture into dessert glasses and top with a few of the reserved passion fruit seeds and a bit of juice / pulp.  I like to refrigerate for a bit before serving, but it can be eaten straight away.

*Slice the top off of a passion fruit, and use a spoon to remove all of the seeds and pulp to be used.  You could also substitute about one cup of thawed, frozen passion fruit purée.


tags: cinnamon, passion fruit, fool, desserts, recipes for summer
categories: recipes, all-3, desserts-1
Monday 07.25.11
Posted by Aliya LeeKong