X

Sign up to receive exclusive recipes, tips, updates and other goodies from Aliya!

  • Home
  • Blog
    • All
    • Recipes
    • Spices + Ingredients
    • Lifestyle, etc.
    • Travel
  • The Cookbook
  • The App
  • Media
    • All Media
    • Video
  • About
  • Passions
Aliya LeeKong
  • Home
  • Blog
    • All
    • Recipes
    • Spices + Ingredients
    • Lifestyle, etc.
    • Travel
  • The Cookbook
  • The App
  • Media
    • All Media
    • Video
  • About
  • Passions

New Year (does not) = No Carbs

NEW YEAR (DOES NOT) = NO CARBS

With the arrival of the New Year, we are always guilted in to making the same New Years resolution of dieting, juicing, and detoxing after holiday food binging.  But in all honesty, I feel that drastically changing your diet is just a temporary fix.  I think nutrition is a game of inches, and as Oprah says, ‘I LOVE bread!’  I’m with her ALL the way on that statement...

With that being said, it is good to take a step back after indulging (umm, heavily....) over the holidays and fitting in some healthier options to your diet.  No one says you have to go carb free!  It’s definitely harder in the cold winter months to think and be healthy when all you want is warm comfort food (and pizza...), so I put together some healthier options that have some seasonal ingredients to help you get off to a good start to the New Year! Enjoy!


COCONUT DAAL WITH SUPER GREENS


OVERNIGHT OATS WITH CURRANTS, PISTACHIOS & COCONUT


HOMEMADE CHICKEN THIGH SHOYU RAMEN


BETTER SALAD!


POISSON YASSA


SWISS CHARD "LEAVES"


USE-YOUR-VEGGIES QUINOA SOUP

tags: new year's, new years resolutions, healthy, healthy substitutions, what to eat in 2017
categories: all 4, holiday, recipes
Thursday 01.05.17
Posted by Aliya LeeKong
 

The Festival of Lights

THE FESTIVAL OF LIGHTS

This year, Christmas and Hanukkah land on the same day, and this has me thinking about lots of shared traditions and stories....and, of course, dessert!  If you have ever had the pleasure of enjoying a traditional Jewish meal on one of their many holidays, you understand the connection.  There’s nothing more extravagant and plentiful than a homemade Jewish feast and just when you think you can’t eat any more after dinner, the table gets cleared and rows and rows of sweet treats are placed in front of you!  From rugelach (my daughter's fave) to chocolate-covered matzo to coconut macaroons, it’s truly amazing for a dessert lover. 

For Hanukkah, the main dessert is sufganiyot, which is effectively a cultural jelly doughnut!  For the Festival of Lights, sufganiyot symbolizes the burning lamps in the ancient holy temple in Jerusalem.  Below is a fantastic recipe for these treats as well as a few others to round out the holiday table.  Enjoy and a very happy holiday season to you all!


STRAWBERRY SUFGANIYOT

Photo: Bon Appetit


THE BEST RUGELACH!

Photo: The Kitchn


BETTER CHOCOLATE BABKA

Photo: Smitten Kitchen


BLACK SESAME DONUTS WITH DATE MOLASSES


BLACK AND WHITE COOKIES

Photo: Chai & Home


COCONUT MACAROONS

Photo: Food & Wine

tags: hanukkah dessert recipes, babka recipe, rugelach recipe, how to make rugelach, sufganiyot recipe
categories: all 4, blog, breads & cakes, desserts, holiday, traditions
Wednesday 12.21.16
Posted by Aliya LeeKong
 

Holiday Gifts for 2016!

HOLIDAY GIFTS for 2016!

If I'm being honest, I'm kind of in a panic with holiday shopping!  I'm traveling the week before Christmas and am down to the wire in picking out gifts and getting them delivered in time.  I should have started planning before Thanksgiving (which is kind of insane...).  In any case, I wanted to share my picks for the holidays, many of which are on my own wish list....


DOUBLE DUTY: WALNUT HANDLED PIZZA ROCKER

Photo: Food52

Though God knows I'd get enough use out of this cutting through pizza, I would actually love this rocking knife for my daily prep, namely mincing things like garlic, onions, or herbs!


UNIQUE POTTERY: STEM VESSEL

Photo: Marite Acosta

I love pottery, and this vase is so amazing!  Perfect for getting individual stems and creating your own unique arrangements for your house.


ONE-OF-A-KIND: SPALTED MAPLE CHEESE BOARD

Photo: Nershi Woodworks

Hand-turned, one-of-a-kind pieces in upstate New York - boards, espresso tampers, bowls, stirrers.  They even do custom pieces, and their instagram is gorgeous!


SKIN SAVERS: THE ASSEMBLY

Photo: Leland Francis

I’m loving this new line of oils and soaps from Leland Francis, and now they have all three as a little gift package.  Such a great way to pamper your skin in the cold winter months!


SMART AT-HOME SOUS VIDE: JOULE

Photo: ChefSteps

There’s nothing better than being able to cook food perfectly all the way through.  There's nothing worse, in my opinion, than over-cooked steak or under-cooked chicken.  But this little kitchen gadget allows you to cook anything perfectly, restaurant-style,...AND you can use an app to control the process! 


THE ULTIMATE SPLURGE FOR THE COOK: CUT TRAY

Photo: Malle W. Trousseau

This set is like the ultimate gift for the home cook and a true splurge.  Luckily, you can buy most of the items standalone - they are all artisan-made and many have lifetime guarantees.


EXOTIC INTERIORS: MOSAIC STANDING LAMP

Photo: Grand Bazaar NYC

I love mosaic anything, and these lamps are just gorgeous with all their color!  If you are in the NYC area, you can check out their booth at the Bryant Park Holiday Market.


COOKBOOKS BECAUSE.  COOKBOOKS!

Photos: Amazon

It’s a known fact that I have an obsession with cookbooks!  You can never have enough inspiration surrounding you!  Here are some of my faves this year.


GIVING = GIVING BACK

Gorgeous, fair trade, artisan-made,  All Across Africa has an incredible mission and beautiful products as well.  From baskets to jewelry to kitchen goods, you really can't go (or do!) wrong shopping here.


Happy Shopping!


tags: holiday shopping, holiday gift ideas 2016, gifts for the cook, culinary gifts, kitchen gifts
categories: all 4, blog, holiday, lifestyle-1
Thursday 12.08.16
Posted by Aliya LeeKong
 

Oxtail Mafé

View fullsize File Nov 21, 2 09 18 PM.jpg
View fullsize File Nov 21, 2 09 39 PM.jpg
View fullsize File Nov 21, 2 09 57 PM.jpg

OXTAIL MAFÉ

There is nothing I love more than walking in to the aroma of a delicious homemade dinner that has been simmering for hours.  When the weather gets brisk and the market is full of squash and root veggies, I love braising - short ribs, lamb shanks, oxtail. 

I am a bit old school about braising and love to take my time developing every bit of flavor:  a serious brown on the meat, a slow sweat of all of the aromatics, 3 + hours of low and slow cooking in the oven.  In a time crunch though, there's nothing like a slow cooker!  Many dishes in the slow cooker allow you to just throw everything in one pot, turn it on and go, but I prefer to quickly sear or sauté whatever I am cooking,to get more flavor out it, and then throw it in the pot. 

When it comes to oxtail, which is what this recipe is all about, I loooove West Indian-style - sweet, spicy, with a good dose of salt pork and some scotch bonnet heat. 

I decided to break out and do something a little different.  When you work in kitchens you find yourself surrounded by many different cultural backgrounds and this leads to epic family meals!  One of my most memorable was being in the kitchen with a line cook from Senegal.  When it was her turn for family, she made the most amazing foods, my most favorite was her Chicken Mafé (basically a chicken and peanut stew).  I still crave it to this day! I remember her saying she uses beef at home…so why not oxtails!? 

Below is my take on her dish, it’s best with rice or fonio (a West African grain)…pretty much anything to sop up the yummy sauce with!  I'm now not sure which is my favorite way to make oxtail....Enjoy!

Yields 4 to 6 servings

3 tablespoons canola oil

2 ½ pounds oxtail, cut into segments

1 large yellow onion, diced

1 medium bell pepper, diced

1 Scotch bonnet pepper or habanero pepper, minced or kept whole if you want less heat

3-4 cloves of garlic, minced

2 tablespoons tomato paste

1 can diced tomatoes, fire-roasted

3/4 cup peanut butter, all natural

1 quart chicken or beef stock

2 tablespoons Fish sauce

2 tablespoons red wine vinegar

1 tablespoon soy sauce (optional)

1 medium sweet potato, cut into 1" dice

1-2 Yukon gold potatoes, cut into 1" dice

1/2 bunch cilantro, finely chopped for garnish

1/2 cup peanuts, roughly chopped for garnish (optional)

Salt and freshly ground pepper, to taste

Preheat oven to 325° F.

In a dutch oven, heat oil over medium-high heat.  Dry off oxtails, season generously with salt and pepper and sear for 2 to 3 minutes per side.  Work in batches so you don't crowd the pan.  Remove the oxtails and set aside in a plate or tray.

Reduce heat to medium and throw in the onion, bell pepper, and habanero or scotch bonnet if cut up (if whole, wait).  Sauté for about 5-7 minutes until everything has softened.  Add in the minced garlic and cook another 30 seconds or so.  Add in the tomato paste and sauté for another minute.

Now, add in the diced tomatoes, peanut butter, stock, fish sauce and soy sauce (if using).  If you are keeping the habanero or scotch bonnet pepper whole, this is the place to add that in as well.  Turn up the temperature and bring up to a boil.  Make sure the peanut butter is evenly mixed into the stew.

Nestle the oxtail into the stew making sure they are fully covered.  Pour in any juices that accumulated in the plate or tray where the oxtail were.  Cover and place into the oven.  Cook for 2 1/2 hours.

Remove from the oven and stir in the sweet and regular potatoes. Cover and place back into the oven for another 45 minutes.

Serve hot over rice or fonio garnished with chopped cilantro and peanuts.


tags: oxtail recipe, how to cook oxtail, west indian oxtail, chicken mafe, senegalese food
categories: all 4, holiday, main dishes, man-friendly, recipes, traditions
Wednesday 11.30.16
Posted by Aliya LeeKong
 

Native American Heritage Day

NATIVE AMERICAN HERITAGE DAY

While Thanksgiving has long been my favorite holiday, I (unfortunately) haven't given it a ton of thought beyond a time for family and friends to get together, reset, eat, and share some beautiful moments.  The reality is the history of Thanksgiving is not so rosy, so I think I would be remiss not to pay homage to the Natives of our country.

Native American Heritage Day is the day after Thanksgiving, and it has me reminiscing about my trip to the Four Corners and the Navajo women I met and made fry bread with.  It often baffles me that Native American food is so elusive to the average person (myself included!), particularly when you think about how so many of our Thanksgiving tables originated with Natives teaching us about farming.  And when you think about it, it’s really just farm to table…right!?  They cooked according to their regions and what the land provided for them.

Over the past couple years, more and more chefs have been trying to revive this cuisine around America; it is, after all, the true heritage of this country.  As with other countries and their native cuisines, there are many different types of Native American foods based on regional tribal differences. Many cherish fry bread, and then there are some that refuse to make it because of the history of how it was born.  Eater had a great article about Native American food last summer that's a good read.

Here are a few Native recipes to get you started - enjoy!

NAVAJO FRY BREAD


CEDAR-PLANKED SALMON WITH MAPLE GLAZE AND MUSTARD MASHED POTATOES

Photo: Epicurious


WILD RICE WITH CRANBERRIES

Photo: Merci Mama


MAQUE CHOUX

Photo; Maque Choux


CORN HUSK BREAD

Photo: Cooking with Mama


THREE SISTERS STEW

Photo: NYTimes

tags: native american culture, native american food, native american heritage day, national native american heritage month
categories: all 4, appetizers 1, breads & cakes, holiday, main dishes, lifestyle-1, soups & salads, soups, traditions, vegetarian-2
Friday 11.25.16
Posted by Aliya LeeKong
 

The Ultimate Thanksgiving Turkey

THE ULTIMATE THANKSGIVING TURKEY

Photo: Food52

I feel as if I've been walking around in a fog, and, now, Thanksgiving is basically a week away!  When did this happen?  I always think that Thanksgiving is far enough away that I have plenty of time to plan and then all of a sudden, it's just here.  This year, I definitely don't want to go the traditional route with a turkey.  We did this amazing, marinated, dry-brined, spatchcocked turkey last year out on our grill to free up oven space.  It was AMAZING - super moist and evenly cooked with crispy, crackling skin.

Turkey can be so hit or miss with the main complaint being that it's too dry.  Brining is the best way to ensure that the turkey will stay moist and flavorful!  The only decision left is a dry brine vs. a wet brine.  Using a dry brine is basically pre-salting the turkey without any water.  Some say that this is the better method (it definitely saves space in the fridge...), and while it doesn’t always guarantee as juicy a bird as a wet brine, it does offer a much crispier skin when cooked.  The turkey sits in the fridge, uncovered, with the dry salt brine mix for up to 3 days prior to cooking.  The salt mixture will draw out the moisture from the bird.  The salt is then dissolved in this liquid and reabsorbed which helps to break down any tough proteins making it tender, juicy and flavorful.

With a wet brine, you add water to the equation and need a bag big enough to house the turkey and a pan (for a just in case the bag bursts scenario).  This just means more room needed in the fridge that, quite frankly not a lot of us have around this time of year!  The turkey then bathes in the brine for up to 3 days and (I think) creates a juicer outcome. 

I’ve used both techniques in the past and honestly, I think the choice for brining depends on the cooking method.  For a traditional roast turkey, I say go with the wet brine - for the longer cooking time, you need the brine to plump up the moisture content.  For a spatchcocked turkey, though, that cooks in far less time, I think a dry brine is the best way to go - you get the moisture you need and perfectly crisped skin!

What I love about both brines is that you can add whatever spices you want to create a personalized mix.  In the past, I have played around with allspice berries, juniper berries, fresh (or dry) herbs, garlic chipotle peppers (grinded), citrus zest (orange, lemon, lime, etc…), star anise, cardamom…..you get the idea.  All you need to know is the ratio of salt to water for a wet brine (about 2- 2 1/2 cups salt to 1 gallon of water).  For a dry brine, I use a 1/2 cup kosher salt with 2 tablespoons baking powder as a ratio and don't always use all of that salt, depending on the size of the turkey.  

A few things: Always default to kosher salt here as this method needs the larger crystals to work; regular table salt is not ideal for this recipe.  Also, this is only good for a non-kosher, non-treated, fresh turkey.  If you aren't buying a fresh one, make sure you read the label to see if it's been pre-treated.

Finally, remember that there is no need to re-salt the turkey once you are ready to put it in the oven!  Usually with the wet brine, I rinse the turkey in and out and pat dry before stuffing it and putting it in the oven.  With the dry brine, I don’t rinse but only pat the skin dry before roasting. 

Here are a few recipe ideas to get you started with your Thanksgiving Feast!

SPATCHCOCKED ROAST TURKEY

Photo: Food52


SLOW-ROASTED TURKEY RECIPE

Photo: Food52


DRY-BRINED TURKEY

Photo: NYTimes


SLOW-SMOKED AND SPICE-BRINED TURKEY

Photo: Saveur


JAMAICAN JERK TURKEY

Photo: Chef and Steward


tags: Thanksgiving ideas, Thanksgiving recipes, thanksgiving turkey recipe
categories: all 4, holiday, lifestyle-1, main dishes, man-friendly, recipes, traditions
Tuesday 11.15.16
Posted by Aliya LeeKong
 

Link Love: Diwali Sweets

LINK LOVE: DIWALI SWEETS

This weekend starts the ancient celebration of Diwali, the Festival of Lights.  Diwali is arguably the most significant Hindu celebration, marking the Hindu New Year.  This celebration of life happens in autumn, after the last summer harvest, to celebrate good over evil, light over dark, and hope over despair…The preparations and rituals last over a 5-day period and, amongst other things,  lamps and candles (diyas) are lit inside and outside of the home.  Gifts are exchanged, and families feast during this time, but the most important part of the food celebration is the sweet desserts (or mithai). 

Mithai were always a mystery to me growing up - they were always so beautiful, brightly colored and sometimes touched with gold leaf.  I wanted to show some link love with some of the best mithai recipes out there.  Enjoy!


GULAB JAMUN

Photo: Veg Recipes of India


CHOCOLATE BURFI

Photo: Indian Simmer


CHICKPEA FLOUR (BESAN) LADDU

Photo: Food52


SHAHI TUKRA

Photo: Maunika Gowardhan


DULCE DE LECHE BARFI

Photo: My Tamarind Kitchen


COCONUT LADDU

tags: Diwali, diwali sweets, mithai recipes, Indian sweets, Indian sweet recipes, Indian recipes, South Asian recipes
categories: all 4, blog, desserts-1, holiday, lifestyle-1, traditions
Thursday 10.27.16
Posted by Aliya LeeKong
 

Breaking the Fast After Yom Kippur

BREAKING THE FAST AFTER YOM KIPPUR

Yom Kippur is arguably the most important holiday in the Jewish calendar.  It marks the end of the 10 day celebration of Rosh Hashanah (Jewish New Year) and translates to the “Day of Atonement”.  The day is set aside to atone for the sins of the past year with a complete 25- hour fast.  The fasting begins just before sunset the day before and goes until the next evening.  At sunset on Yom Kippur, you have a “Breaking Fast” meal that usually includes all types of breads, cured meats and food that were cooked the day before since during fasting you are not allowed to do any work (even cooking)! 

With this in my mind, I thought about easy breaking fast food, a homemade coconut bread recipe as well as some different ways to do lox.


CONCORD GRAPE HAND PIES 

These are beyond easy!  This is grape season, so just halve and remove the seeds from the sweetest grapes you can find.  Roll out a sheet of homemade puff pastry and use a pastry cutter or overturned glass to cut out rounds.  Place a small mount of the halved grapes in each circle.  Fold the circle in half to make a semi circle and use a fork to press the edges down tightly.  Paint with an egg wash and bake at 400° F for about 25 minutes.  Done!


PAN DE COCO (WITH A TWIST)

Pan de coco is a Dominican bread that's usually a bit more flat.  I combined it with my basic bread roll recipe, adding yeast to make it fluffy and light.  Think a Parker House roll and Pan de Coco had a baby.  It's soooo good.

Yields 16 rolls

¼ cup lukewarm water

(1) ¾ ounce packet yeast (active dry)

3 tablespoons butter, plus more for greasing and melting

¼ cup honey

2 ½ teaspoons salt

1 cup coconut milk

1 egg, beaten

4 – 4 ¼ cups all purpose flour

½ cup coconut flakes

Flake salt, for sprinkling


I make this recipe in a stand mixer, but you can easily do this by hand.  Start with the lukewarm water in the bowl of the stand mixer and sprinkle the packet of yeast over.  Mix gently to combine and let sit 5 minutes or so while you prepare the other ingredients.

In a medium pot, melt the butter.  Add the honey, salt and coconut milk and heat gently until warmed through and uniform.  Remove from the heat.  (It shouldn’t simmer but should be warm to the touch.)

Add the egg and 3 ¾ cups of flour to the yeast mixture and mix together with a fork.  Slowly pour in the milk mixture, using the fork to make a shaggy dough.  Using the dough hook attachment (or your hands), knead for about 3-4 minutes.  The dough should be soft and a bit tacky but should NOT stick to your hands.  If it's sticky, keep adding flour in tablespoon increments until you have the right, non-sticky consistency.

For rolls, divide the dough into 16 even-sized balls and place in a heavily greased, 9-inch cake tin.  Cover with a kitchen towel and let rise 45 minutes.  Preheat oven to 375˚ F.

After the rise, brush the rolls generously with melted butter, sprinkle with coconut flakes and bake for 30 to 35 minutes.  Brush again with butter once out of the oven and sprinkle with a little salt.  Enjoy hot!


LOX 2 WAYS

Photo: Food & Wine

Asian Salt & Sweet Lox

1 lb salmon filet, trimmed and all pin bones removed
1 cup soy sauce
1 tablespoon dark brown sugar
1/4 cup mirin
1 or 2 fresh chilies (thai, serrano, depends on your heat tolerance), roughly chopped
1 inch fresh ginger, roughly chopped
1 bunch cilantro, roughly chop (1/2 for cure, 1/2 for creme fraiche)
1 cup crème fraiche
1/2 lime, juiced

Place salmon in a large ziploc bag on a cookie (just in case the bag leaks).  Whisk together the soy sauce, sugar and mirin until the sugar dissolves.  Pour the mixture in the bag and add in the chilies, ginger and cilantro.  Let as much air out of the bag as possible and seal.  Put another cookie sheet on top and weight down with cans or something else heavy.  Place in the fridge and let sit for 24-48 hours.  After, rinse the filet under cold water until the filet is clean.  Pat dry with paper towels and let it dry out a bit in the fridge before slicing. 

Chop the remaining cilantro a bit more finely.  In a bowl, mix together the crème fraiche with the lime juice and finely chopped cilantro.  Slice the salmon with a sharp knife, serve with thecrème fraiche and enjoy!


Traditional Lox

1 lb salmon filet, trimmed and all pin bones removed
1/3 cup kosher salt
1/3 cup sugar
1/2 bunch fresh dill, finely chopped
3 lemons, zested
2 tablespoons smoke powder (optional)

Place salmon in a large ziploc bag on a cookie (just in case the bag leaks).  Mix together the remaining ingredients.  Pat the mixture onto both sides of the salmon.  Let as much air out of the bag as possible and seal.  Put another cookie sheet on top and weight down with cans or something else heavy.  Place in the fridge and let sit for 24-48 hours.  After, rinse the filet under cold water until the filet is clean.  Pat dry with paper towels and let it dry out a bit in the fridge before slicing.  Enjoy!


tags: Yom Kippur recipes, break fast recipes, breaking the fast, bread recipe
categories: all 4, appetizers 1, breads & cakes, blog, breakfast-1, desserts-1, holiday, lifestyle-1, quick & easy, recipes, traditions
Wednesday 10.12.16
Posted by Aliya LeeKong
 

Not Just Apple Pie + Lamb Shanks!

NOT JUST APPLE PIE + LAMB SHANKS!

There’s nothing better than apple picking on a cool Fall weekend with the fam!  As I get older, I totally geek out about stuff like that (who knew?).  Now, if only the weather would cooperate...I have my favorite spot up in Warwick, NY, which, coincidentally, also happens to be a vineyard with wine tasting.  Because tipsy apple picking is even better!  Just joking (sort of). 

View fullsize apple3.jpg
View fullsize apple4.jpg
View fullsize apple2.jpg

There are so many different varieties of apples to choose from that I’m so glad they have maps and descriptions of each apple.  I tend to get overly excited and end up with WAY too many apples when I get home!  So after lugging pounds of different apple varieties home, I'm always thinking about what to do besides, of course, the mandatory pie or crisp.  I love a good apple butter to keep for later, and I freeze off batches of applesauce for the chickadee. 

I put together a few ideas for you, and, further down, is a yummy recipe for Honey-Braised Lamb Shanks with Butternut Squash and Apples, which is basically a tagine and seriously delicious.  Enjoy!


APPLE PIE WITH STAR ANISE BROWN BUTTER


BUTTERNUT SQUASH & APPLE BREAD WITH MAPLE & CARDAMOM


PISCO SOUR APPLE


SWEET APPLE COUSCOUS


HONEY-BRAISED LAMB SHANKS WITH BUTTERNUT SQUASH AND APPLES

This lamb dish is based on North African tagines, which slow-braise lamb and other meats with both sweet and salty elements. While many tagines feature apricots, prunes, or raisins, I thought seasonal butternut squash and apples would provide the perfect sweet counterbalance to the spiced braise.  I use lamb shank here because I love the flavor and the end result – spoonable, fall-off-the-bone meat in a rich stew.

Ingredients

2-3 tablespoons canola oil

2 ½ pounds lamb shanks (approximately 2 shanks), room temperature

1 large onion, cut into a medium dice

4 cloves garlic, minced

½ teaspoon ground ginger

large pinch saffron

1 ½ teaspoons cinnamon

4 cups beef or chicken stock

1 tablespoon honey

2 cups butternut squash, cut into a ¾” inch dice

1 ½ cups honeycrisp or fuji apple, cut into a ¾” inch dice

¼ cup sliced almonds, toasted

1 ½ teaspoons sesame seeds, toasted

Salt and freshly ground pepper

Preheat the oven to 325° F.

Heat a Dutch oven or large pot over medium-high heat.  Add the oil, season the shanks generously with salt and freshly ground pepper, and sear 2 to 3 minutes per side to develop a nice brown.  Remove to a plate and reduce the heat to medium-low.

Add the onion and a bit of salt and sauté for 5 to 7 minutes until the onions are translucent.  Add the garlic, ginger, saffron and cinnamon and sauté for another 30 seconds to a minute until fragrant.  Nestle the lamb shanks back in the pot, and add in the stock and the honey.  Cover, bring up to a boil and then place in the oven.

Cook for 2 hours and 15 minutes and then remove from the oven.  Toss in the squash, apples and half of the almonds.  Cover and put back in the oven for the next 45 minutes to an hour. The meat should be spoonable, basically falling off the bone.

Serve hot, garnished with the remaining toasted, sliced almonds and sesame seeds.  This is great alongside couscous.

tags: apple picking, apple recipes, what to do with apples, apple pie recipe, apple cake, lamb tagine, lamb shanks
categories: all 4, blog, holiday, lifestyle-1, main dishes, man-friendly, recipes, traditions, sweet & savoury
Thursday 09.22.16
Posted by Aliya LeeKong
 

Rose-Scented Falooda

View fullsize falooda3.jpg
View fullsize falooda2.jpg
View fullsize falooda1.jpg

ROSE-SCENTED FALOODA

This weekend kicked off the start of Eid Al Adha (or Feast of Sacrifice).  For those that are unfamiliar, it's the second of the two Muslim holy holidays and is considered the most holy, the other being Eid Al-Fitr, celebrating the end of Ramadan.

Although this holiday is considered the "Salty Eid" with savoury dishes being the mainstay of the celebration, it made me think about a sweet drink I grew up having at the sweet shops when I travelled.  Falooda is a rose-scented, sweet milk that is flecked with sweet basil seeds (tukmaria), a cornstarch vermicelli and ice cream.  It's such a distinct taste memory, an Indo-Pakistani bubble milk tea of sorts for a reference point, and was always a treat. 

I thought it would be fun to recreate and also do it a bit more naturally (to give to my little one!).  I used a rice vermicelli because falooda sev, the traditional cornstarch noodle, was too hard to find.  In lieu of a pre-fab, pre-sweeted rose syrup, I made my own to control for sweetness, but, by all means, it tastes great using either.  Finally, I used a touch of kewra essence because that flavor is part of my childhood, but it's totally optional (and also not the easiest to find).

Basil seeds, by the way, are very similar to chia seeds.  When you soak them, they swell and become gelatinous.  Like chia, they are considered a superfood, but, theoretically, you could sub in chia if they are too tough to find. 

Serves 4

2 teaspoons basil seeds

1/3 cup white or brown rice vermicelli, broken into 1- to 2-inch pieces

2 cups milk (whole, skim, almond, coconut)

3 tablespoons rose syrup*

1 1/2 tablespoons kewra essence (optional)

4 medium scoops ice cream (vanilla, honey, pistachio, or any flavor you think fits here)

In a small bowl, cover the basil seeds with water and let sit 5 to 10 minutes.  They will swell up, so you may need to add a bit more water.  Strain.

Cook the vermicelli per the package instructions - usually about 3 minutes in boiling (unsalted!) water.  Strain and transfer to an ice bath (water and ice) to cool down immediately and stop cooking.  Strain once cooled.

To the milk, stir in the rose syrup and kewra essence, if using.

Divide the basil seeds and vermicelli between 4 glasses.  Top with the rose milk and finish with a scoop of ice cream.  Serve immediately with a straw and a spoon!


*For the rose syrup, in a medium pot, bring 1 1/2 cups water, 1 cup dried rose petals and 1 cup white sugar (if using a natural brown sugar like palm or coconut, change this to 3/4 cup) up to a boil.  Remove from the heat, cover, and let steep until it cools to room temperature.  Strain, using the back of the spoon to press through as much of the liquid (and flavor) from the rose petals as possible.  Add a few tablespoons of rose water to intensify the flavor if need be - it all depends on the strength of the rose petals you're using.

tags: falooda recipe, natural falooda, kewra, rosewater, rose syrup recipe, how to make rose simple syrup, eid foods
categories: all 4, desserts, drinks & cocktails, holiday, quick & easy, recipes, traditions
Wednesday 09.14.16
Posted by Aliya LeeKong
 

Labor Day Loungin'

LABOR DAY LOUNGIN'

I honestly can't believe I am already talking about Labor Day - literally, wasn't it just Memorial Day the other weekend??  The end of summer is always so nostalgic and filled with a sense of anticipation, and, somehow, each year, it speeds up the older (....umm, mature?) you get.  Either way, another summer has come and gone, and now it's time to max out and celebrate the last weekend of summer!!

If you are planning on grilling, which I definitely am, you can look back at these essential grilling tips (not to mention this killer whole grilled chicken with jalapeño sauce recipe).  My focus for this post is going to be on cocktails, because, quite frankly, I'm going to need a few to say goodbye to summer.  Not that I don't absolutely love Fall and looking forward to all of the holidays.....Back to cocktails - remember that chili post from last week?  Well, I took an open bottle of vodka and threw in a few jalapeños for a spicy cocktail this weekend.  Here are a few more that made my list - enjoy!


COCONUT CHILI MOJITO

Photo: francoiselaprune.com


STRAWBERRY-PEACH BASIL SHRUB 

Just add your favorite spirit - vodka, rum, pisco and tequila all work beautifully here.


CRUSHED BLACKBERRY MOSCOW MULE

Photo: What Gaby's Cooking


FROSÉ (FROZEN ROSÉ) 

Photo: Bon Appetit


ST. LUCIAN RUM PUNCH (MY OLD STANDBY!)


POMEGRANATE FIG SMASH

Photo: Saveur

tags: summer cocktails, labor day weekend cocktails, what to drink on labor day, rum punch recipe
categories: all 4, blog, drinks & cocktails, holiday, recipes
Thursday 09.01.16
Posted by Aliya LeeKong
 

Japanese-Inspired 5-Ingredient Cheesecake

View fullsize cheesecake 3.jpg
View fullsize cheesecake2.jpg
View fullsize cheesecake1.jpg

JAPANESE-INSPIRED 5-INGREDIENT CHEESECAKE

The fact that National Cheesecake Day falls in the summertime is a bit odd to me.  That thick, tangy lusciousness somehow belongs during a time when you're not trying to eat light (and kill it in a bathing suit...).  BUT I recently tried a Japanese cheesecake, which is also called a Cotton cheesecake (because of how light and fluffy it is).  Think if an angel food cake and a cheesecake had a baby....Turns out, this crustless, spongy creation is the perfect summer dessert.

I set out to create a simplified version of it because summer desserts should be a bit easy.  I wanted a canvas, a simple cake, to showcase seasonal ingredients as its topping.  This cake is 5 ingredients, and the hardest step is just whipping the egg whites to stiff peaks and folding into the batter.  Other than that, foolproof!  I used yuzu juice as the acid in keeping with the Japanese theme and because it has a touch of salinity, which I looooove, but lemon juice or even key lime juice would be a great substitute.

When I’m indecisive about a topping for my cheesecake, my favorite go to is a whipped sour cream topping.  The tangy tartness of the sour cream with the bite of the creamy, sweet cheesecake is one of the more surprising taste combinations.  Who would have thought sour cream with cheesecake would be a thing!?  And it’s super simple to make.  For a more basic recipe I use sour cream, confectioner’s sugar and vanilla extract.  Just throw it all into the Kitchenaid and whip 'til smooth or whisk in a bowl if you don’t like lugging out your stand mixer. 

There were so many blueberries at my Saturday's farmers' market, so I thought I would test out a blueberry sauce with my cheesecake.  This recipe combines the blueberries with one of my favorite herbs, lemon verbena.  It’s a super simple sauce and starts off like you would a jam.  Instead of letting it boil down til thick, you simply take off the heat and let cool.  I like to steep the lemon verbena in boiling water to really bring out the flavor and then use the water when making the sauce.  In a sauce pan, mix the blueberries, corn starch, and sugar until the blueberries start to release their juices.  Gradually stir in the lemon verbena water and bring to a simmer.  Let cook for 5-10 minutes until desired consistency and some of the berries start to burst.  Turn off heat and let cool to room temperature.

Here's the 5-ingredient cheesecake recipe - enjoy!

Yields (1) 9-inch cake

1 can sweetened condensed milk
8 ounces cream cheese, room temp
6 eggs, room temp and separated
2 ½ tablespoons cornstarch
1 tablespoon yuzu, lemon or key lime juice

Preheat the oven to 350° F.

In a large bowl, whisk together condensed milk and cream cheese.  Fold in yolks, cornstarch and yuzu/lemon juice.

In a separate bowl, whip egg whites to stiff peaks.  Add a little bit of the egg whites to the cream cheese mixture to lighten and then fold in the rest in 3 increments.  Transfer to a greased, parchment-lined 9-inch cake tin or springform pan.  Place in a roasting pan and pour boiling water in the pan to halfway up the cake tin (if using a springform, make sure to wrap in foil all over to keep the water from seeping in.

Bake for 40 minutes.  Then, turn off the oven and leave the cheesecake in the oven for another 15 minutes.  Remove and let cool completely before refrigerating.  Refrigerate at least hours before serving.


tags: cheesecake recipes, japanese cheesecake, easy cheesecake recipe, cotton cheesecake, desserts
categories: all 4, desserts, holiday, quick & easy, recipes, traditions
Wednesday 07.27.16
Posted by Aliya LeeKong
 

July 4th BBQ Sides

JULY 4TH BBQ SIDES

The last thing I want to do on a hot summer day is turn my oven on - I’m sure you all understand!  When entertaining on a gorgeous summer day, I like to keep my sides simple and easy to toss together so I'm not stuck in the kitchen all afternoon while my guests are enjoying the outdoors.  With July 4th creeping up this weekend, I’ve gathered a few ideas that may make an appearance at my BBQ this weekend.  Enjoy!


6-INGREDIENT CORN SALAD


KOREAN POTATO SALAD (GAMJA SALAD)

Photo: Two Red Bowls


NASI ULAM (MALAYSIAN MIXED HERB RICE)

Photo: Rasa Malaysia


SOUTH AFRICAN CHAKALAKA

Photo: Immaculate Bites


FREEKEH WITH SUMMER SQUASH AND BROWN BUTTER


TAHINI ROASTED (OR GRILLED) BROCCOLI


ROASTED CUMIN CARROT, RADISH & AVOCADO SALAD

Photo: Salt & Wind

tags: bbq sides, july 4th sides, global bbq sides
categories: all 4, blog, holiday, lifestyle-1, side dishes-1
Wednesday 06.29.16
Posted by Aliya LeeKong
 

Summer Fruit Tart Addiction

SUMMER FRUIT TART ADDICTION

Honestly, summer is my favorite time of year...I love when the weather turns warm and days (and daylight!) so long; attitudes feel more carefree and New York City comes alive.  The farmer's markets are always flush with fruits and vegetables, and, this weekend, it was overflowing with all sorts of berries (raspberries, blueberries, gooseberries, cherries, currants & strawberries). To me, this just signifies the official start of summer, and, if you follow my IG you'll know this to be true, I invariably have some form of a fruit tart on my counter throughout this time.  I wanted to share with you some go-to's - easy options so you can freestyle your own tarts this summer.


CRUSTS

I have 3 go-to crusts that I use depending on my mood, if I plan to bake the filling and who I’m hosting! 

(1) I love a classic, homemade tart dough (recipe: here).  I keep mine a bit low on the sugar, so I can use it for sweet and savoury crusts.  Doubling the recipe is key and allows you to freeze some to have for later.   This is a great dough to use for both a filling you have to cook or one you don't have to cook.

(2) Of course, already-made and frozen puff pastry is another way to go.  Who doesn’t love that flakey, buttery crust? Mixed with a layer of pastry cream and fresh fruit....This is what I use for my South African Milk Tart (pictured below).  I like to do an initial blind-bake and then fill - this weights it down so it doesn't puff too much.

(3) My third is for my gluten-free friends - a super easy, gluten-free pecan crust. 

You take 1 ½ cups raw pecans and pulse in a food processor until chopped.  Throw in 2 tablespoons unsalted, melted butter, 1 tablespoon honey,  ¼ teaspoon salt, ½ teaspoon ground cinnamon, and 1 egg white and pulse until a fine meal.  It will be a bit wet.  Press into a tart shell and bake at 375° F for 15 minutes.  Done.


CUSTARD FILLING

(1) Baked custard - One of my favorite tarts is this South African Milk Tart.  The creaminess of the cooked custard filling with the berries on top……sooo good.  It's not too egg-y and has a hint of cinnamon.  I love that the beaten egg whites also lighten the custard.

(2) Stovetop custard - I also love to make a quick stovetop custard (or pastry cream) instead of the baked custard in the milk tart recipe.  All you need is some sugar, eggs yolks, corn starch, vanilla bean and milk!  Ok, so sometimes I substitute the milk for Champagne or a nice Prosecco….  The process is simple:

In a medium pot, simmer 2 cups milk with a vanilla bean cut in half and seeds scraped out in to milk and remove from the heat. 

Separately, bring a pot of water to boil for your double boiler. In a metal bowl, whisk 4 egg yolks with 1/3 cup sugar until the mixture is a nice pale yellow.  Add ¼ cup cornstarch and whisk away any lumps.  Slowly stir in the warmed milk mixture and fit the bowl over the boiling water (without letting it touch the water) and constantly stir until the consistency starts to thicken. 

Remove from heat and cover the top directly with plastic wrap and let come to room temp before using.  You can also whip some cream and fold into this pastry cream to make it lighter.

(3) No-cook cream filling - A final option is to make a no cook cream filling and keep the tart refrigerated.  This is a bit like a lightened panna cotta.  Bloom 1 teaspoon gelatin in 2 tablespoons cold water.  Whip 1 cup heavy cream to soft peaks with 2 tablespoons regular or coconut sugar (you can make this sweeter if you like. taste and adjust).  Add in 1 teaspoon vanilla and fold in 4 ounces of mascarpone cheese.  Quickly blast the gelatin-water mixture in the microwave for 5 seconds or so until it's melted and fold that into the cream mixture as well.  It sets up very quickly in the fridge - just make sure to use it in a completely cooled tart or it will melt away!


FILL AND ASSEMBLY

Unless you are baking your custard, the tart shells should be blind-baked and cooled before you assemble.

Now, in terms of what goes on top, this is the time for you to experiment and be creative.  Seriously, whatever is the sweetest and in season works, and experiment to see how you like to arrange your fruits.  I looove cape gooseberries, but apricots and strawberries pair so well together.  It will all go!

If you want some extra sheen, microwave a bit of apricot preserves and paint the fruit with it.  You can also just simply sift a bit of powdered sugar too - up to you....

Enjoy!


tags: summer fruits, how to make a fruit tart, summer fruit tart recipe
categories: all 4, blog, desserts, holiday, lifestyle-1, recipes
Wednesday 06.22.16
Posted by Aliya LeeKong
 

Mother's Day Breakfast in Bed

MOTHER'S DAY BREAKFAST IN BED

There’s nothing better than enjoying breakfast in bed, especially if you weren’t the one that prepared it!  So why not treat mom this Sunday to a lovely, lazy morning with a deliciously home cooked meal! (Anybody from my house getting the hint?? :)  As a child, this was my favorite way to spoil my mom (with Dad’s help….sometimes).  I put together a bunch of my favorite breakfast/brunch recipes below to help you plan your Mother’s Day feast!


HEIRLOOM TOMATO SHAKSHUKA


FLATBREAD WITH SMOKED TROUT, RADISHES & HERBS

Photo: Bon Appetit


MY FAVORITE CHAI


BLUEBERRY CREPES WITH VANILLA ICE CREAM

Photo: Flourishing Foodie


ROASTED ASPARAGUS WITH POACHED EGG AND LEMON MUSTARD

Photo: Food52


SPICED RICOTTA HOTCAKES WITH POMEGRANATE MOLASSES


BUBBLE TEA OATMEAL (!)

Photo: Two Red Bowls


RHUBARB, RASPBERRY AND ORANGE FLOWER WATER GALETTE

Photo: Cannelle et Vanille


PINEAPPLE COCONUT WATER

Photo: 101 Cookbooks

tags: mother's day, mother's day recipes, mother's day breakfast
categories: all 3, breakfast-1, blog, holiday, lifestyle-1, recipes, traditions
Wednesday 05.04.16
Posted by Aliya LeeKong
 

Link Love: Step Up Your Easter Cooking

LINK LOVE: STEP UP YOUR EASTER COOKING

Easter is such a fun holiday to cook for! With the beginning of Spring, the meal just signifies all the good, fresh food to come!  So, with this in mind, I wanted to share some of the recipes that have been inspiring me this year (because I'm honestly still on the fence for my menu)!  Enjoy!


SLOW ROASTED LAMB PAPPARDELLE WITH GARDEN PEAS & MINT

Photo: What Katie Ate

Photo: What Katie Ate


GRILLED LAMB WITH HARICOT VERT AND COCONUT MILK BROTH

Photo: Brooklyn Supper

Photo: Brooklyn Supper


FRESH HAM WITH HONEY & CLOVES

Photo: Saveur

Photo: Saveur


CACIO E PEPE POTATOES

Photo: Bon Appetit

Photo: Bon Appetit


POTATO LEEK AU GRATIN

Photo: Food52

Photo: Food52


SIMPLY SAUTEED GARLICKY PEA SHOOTS

Photo: A Little Yumminess

Photo: A Little Yumminess


FARRO & ASPARAGUS SALAD WITH SESAME-MISO DRESSING

Photo: Two Red Bowls

Photo: Two Red Bowls


SKY HIGH LEMON MERINGUE PIE

Photo: A Beautiful Mess

Photo: A Beautiful Mess


MOLTEN HALVA LAVA CAKES


KOMBUCHA HOLIDAY PUNCH

Photo: 101 Cookbooks

Photo: 101 Cookbooks

tags: Easter recipes, holiday recipes, what to make for Easter, link love
categories: all 3, appetizers 1, blog, drinks & cocktails, holiday, lifestyle-1, main dishes, man-friendly, recipes, traditions
Wednesday 03.23.16
Posted by Aliya LeeKong
 

Not-So-Traditional Irish Soda Bread

View fullsize soda bread2.jpg
View fullsize soda bread1.jpg
View fullsize sodabread3.jpg

NOT-SO-TRADITIONAL IRISH SODA BREAD

I love indulging in a warm, baked-from-scratch loaf of bread.  But let's be honest: making it at home can be a long (see: tedious) task what with the letting the yeast rise, punching down, rising again...but that's why the quick bread was invented!  Quick breads are basically any breads that don't use yeast to rise - like banana bread.  With St. Patty’s Day just around the corner, I thought a take on the traditional Irish soda bread would be fun.

Irish soda bread is usually made with a few simple ingredients: flour (wheat or white), baking soda, buttermilk and salt. Once you have those basics, you can expand with any seeds, citrus, dried fruits you want to create a not-so-traditional soda bread.  This recipe is a slightly modified version of one from a great friend/chef, Tamsin Kelly, who makes this with her family for St. Patrick's Day.  I love the combination of caraway seeds, orange zest, and dried currants in this recipe, but you can substitute however you like (raisins, fennel seeds, etc…)!  Enjoy!

Yields (1) 9-inch cake tin 

4 cups plus 3 - 4 tablespoons all purpose flour
3 tablespoons white sugar
¾ teaspoon salt
1 ½ teaspoons baking soda
½ stick unsalted butter, cold and cubed
1 ½ cups buttermilk*
1 large egg, beaten
1 cup dried currants
2 tablespoons caraway seeds
zest of 1 orange


Preheat the oven to 350º F.  

To the bowl of food processor, add the 4 cups plus 3 tablespoons of flour, sugar, salt and baking soda.  Pulse until mixed.  Sprinkle the cold, cubed butter on top and pulse until the mixture resembles a coarse meal. 

Whisk the buttermilk with the egg and slowly add to the flour mixture, pulsing until the dough forms.  Pulse in the currants, caraway seeds and orange zest.  If the dough is too sticky, add another tablespoon of flour.  Do not overmix or it will toughen up!  You just want the flour blended, and you are ready to go.

I like to cook mine in a greased cast iron skillet or you can use a greased, 9-inch round cake tin.  Score an “X” in the dough (about 1/2” thick) and place in the middle of the oven for 60 minutes or until a toothpick comes out clean.  Rotate the dough halfway through cooking.  When done, transfer to a wire rack to cool.

Make sure to enjoy with a nice, rich, salty Irish butter!!

*I hardly ever buy buttermilk for a recipe since I always have milk, vinegar and lemon juice laying around.  For every cup of milk, use 1 tablespoon distilled white vinegar or lemon juice.  Just mix together and let sit for about 5 to 10 minutes.  It will thicken slightly and look a bit curdled and then it's ready to go!

tags: irish soda bread, quick bread recipe, how to make irish soda bread
categories: all 3, breads & cakes, breakfast-1, holiday, quick & easy, recipes, sweet & savoury, traditions
Wednesday 03.09.16
Posted by Aliya LeeKong
 

Tagliatelle with Maitake Mushrooms, Pickled Chilies & Egyptian Dukkah

View fullsize maitake pasta 2.jpg
View fullsize maitake pasta 1.jpg

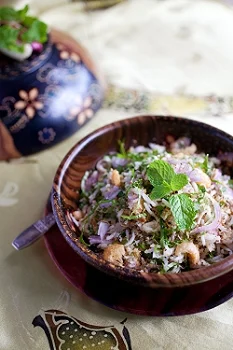
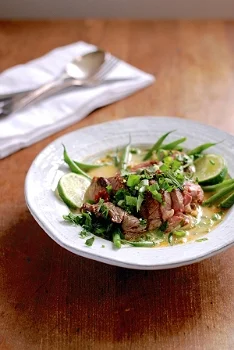
TAGLIATELLE WITH MAITAKES, PICKLED CHILIES & EGYPTIAN DUKKAH

Winter and pasta for me go hand-in-hand, and, as always, I love to get a little experimental with flavor combos.

Maitake mushrooms are such a favorite – they are meaty and nutty (and have actually replaced my weekend bacon, if you can believe!).  I did a pop-up dinner at a little store in my neighborhood in Brooklyn, and I created this dish for the dinner.  Hard, pan-roasting the mushrooms and finishing them with butter and salt make them irresistable and is a key step in the recipe.  They need a proper sear to bring out what’s best in this dish.  

The sauce is super thin and easy and gets an extra hit from the pickled pepper juice.  I top up the pasta with some of the actual pickled peppers, chopped cilantro, and Egyptian dukkah, a gorgeous nut and spice blend with coriander that complements the mushrooms beautifully. 

This can be as homemade or not as you want.  You can use my fresh pasta recipe or store-bought.  You can pickle your own cherry peppers or grab a jar at the grocer.  And the spice blend, Egyptian dukkah, can be bought from a specialty store, or you can use my recipe below - it stores for a month, so have fun sprinkling it on salads, a nice, seared piece of fish or on your next rice bowl.  Enjoy!

Serves 6

1 pound fresh or dried tagliatelle

1-2 tablespoons canola oil

4-5 tablespoons unsalted , divided

2 (8 ounce) maitake mushrooms, hand torn into bite-sized pieces

1 shallot, finely chopped

3 cloves fresh or roasted garlic, minced

¼ cup white wine

¾ cup chicken broth

1/3 cup heavy cream

¼ cup pasta water

scant ¼ cup pickled cherry peppers, juice reserved

small handful of fresh cilantro, finely chopped

2 tablespoons Egyptian dukkah

salt & freshly ground black pepper, to taste

Bring a large pot of water up to a boil and season generously with salt until the water tastes salty.  Add the pasta and cook until tender but still a bit firm to the bite, about 8 to 10 minutes if dry or according to package directions if fresh. Drain pasta reserving ¼ cup of the pasta cooking water.

While the pasta is cooking, heat a large skillet over high heat.  Add the tablespoon of canola oil, and when the oil starts to smoke, add the maitake mushrooms in a single layer.  If they don’t all fit, you may need to repeat the process depending on the size of your skillet.  Cook for 2 to 3 minutes.  The cooked side of the mushroom should be golden brown and crispy.  Flip the mushrooms and throw in 2 tablespoons of the unsalted butter.  Season the mushrooms generously and cook for another 2 minutes.  Remove mushrooms using tongs to a paper towel-lined plate.   If repeating, use the other tablespoon of canola oil and only 1 more tablespoon of butter. 

Lower the heat to medium-low, add another tablespoon of butter and the shallots and garlic with a bit of salt.  Let cook for 3 to 4 minutes until the shallots are translucent.  Increase the heat to medium-high and pour in the white wine.  Reduce until most of the wine has evaporated and the shallots are almost dry.  Then, add in the chicken broth, heavy cream, and pasta water.  Reduce in half.  The sauce should coat a spoon but shouldn’t be too thick. 

Remove the sauce from the heat and swirl in a final tablespoon of butter along with 2 teaspoons of the pickled cherry pepper juice.  Taste and adjust seasoning.  Throw in the pasta, maitakes and chopped cilantro and toss to coat.

Serve immediately garnished with a few pickled cherry peppers and about 1 teaspoon of Egyptian dukkah per plate.

Egyptian Dukkah

Yields approx 1 ½ cups

¼ cup hazelnuts, roughly crushed

¼ cup pistachios, roughly crushed

½ cup white sesame seeds

¼ cup coriander seeds

2 tablespoons white cumin seeds

2 tablespoons fennel seeds

2 tablespoons dried mint

pinch of chili powder

½ teaspoon black pepper

1 ½ teaspoons salt

Preheat the oven to 350° F.  As opposed to toasting in the skillet, I like to toast this blend up in the oven so the nuts and spices toast evenly.   

Line a baking sheet with parchment paper.  Add the hazelnuts, pistachios and all of the seeds and make sure they are in a single layer.  Toast for 8 to 10 minutes – you should smell a really nutty fragrance.

Transfer toasted nuts and spices to a mortar and pestle or a spice / coffee grinder. I like a slightly rough texture for this, so grind until there are still bits and pieces and it’s not completely powder. 

Combine with the dried mint, chili powder, black pepper and salt.  Store in an airtight container, preferably in a cool spot – it will keep for about a month.


tags: pasta recipe, homemade pasta recipe, mushroom pasta, egyptian dukkah, how to make egyptian dukkah
categories: all 3, appetizers 1, blog, holiday, main dishes, man-friendly, recipes, vegetarian, spices
Wednesday 02.24.16
Posted by Aliya LeeKong
 

3-Ingredient Chocolate Truffles

View fullsize truff4.jpg
View fullsize truff1.jpg
View fullsize truff2.jpg
View fullsize truff3.jpg
View fullsize truff5.jpg

3-INGREDIENT CHOCOLATE TRUFFLES

With Valentine's Day just a few days away, chocolate is on the brain.  Nothing says “I love you” more than a double decker box of chocolates…but making your own chocolate truffles is way simpler than most people think (and who doesn't prefer a handmade gift?). 

This is a super simple, 3-ingredient recipe to get you started to make decadent, silky, chocolate truffles.  Then, if you want, you can tailor to your preferences.  I'm including options for flavorings to add to the base or leave the recipe as is and just coat the truffles in a different ways (think cocoa powder, crushed pistachios, shredded coconut, etc…).  Enjoy!

Yields approximately 2 dozen truffles

12 ounces dark, semisweet or milk chocolate chips, roughly chopped (1 bag)
3/4 cup heavy cream
1/4 tsp salt

Place the chopped chocolate in a large mixing bowl.  In a saucepan, bring the heavy cream and salt to a simmer, just enough to dissolve the salt and watch that it doesn't boil over.  Pour the cream over the chocolate and allow to sit for 5 minutes before stirring.  Stir until the chocolate has melted and the mixture is smooth (this is also the time to add any liquid ingredients for flavor).

Allow to cool at room temperature for an hour.  Using a teaspoon or a small cookie scoop, scoop the truffles onto parchment paper.  Place in the fridge for 10 to 15 minutes to firm up a bit.  Roll in the palm of your hands to get them perfect (but quickly or they will start to melt!).  Roll them in whatever toppings you like and enjoy!

Mix-ins: 1/2 teaspoon vanilla extract, 2 tablespoons liqueur (coffee, rum, Grand Marnier, kirsch), 1 tablespoon orange blossom water, 1 tablespoon espresso, 1 1/2 teaspoons peppermint extract

To Coat: cocoa powder (with or without cinnamon, cardamom, etc), sweetened or unsweetened shredded coconut, crushed nuts (hazelnuts, almonds, pistachios), sprinkles, flake sea salt (just a pinch on top!)


tags: Valentine's Day, Valentine's Day gift, what to give for Valentine's day, chocolate, chocolate recipes, chocolate desserts, chocolate truffles
categories: all 3, blog, desserts, holiday, lifestyle-1, quick & easy, recipes
Friday 02.12.16
Posted by Aliya LeeKong
 

5 Champagne Cocktails to Ring in the New Year

5 CHAMPAGNE COCKTAILS TO RING IN THE NEW YEAR

With Christmas out of the way it is now time to focus on New Year's!  I usually head out of NYC for New Year's Eve, escape the madness, and have a quiet one with my family somewhere (preferably warm!). But, when I'm here, I love having a fun evening in with friends and family.  The thought of going out and dealing with all the crowds just isn’t my thing.  Besides, who doesn’t love a party with little finger bites to snack on along with some champagne cocktails!?  Keeping it super simple is key, and I want to share some easy, champagne cocktails with you - the best way to end the holiday season!


FRENCH 75

Photo: Tuxedo No. 2

The French 75 is a classic and super simple - gin, simple, lemon juice + champagne.  You can't go wrong with this one.


SORREL CHAMPAGNE COCKTAIL

This is hands-down one of my favorite champagne cocktails to make and is always a feature at my events.  Sorrel is a sweetened, hibiscus drink scented with cloves and cinnamon that hails from the West Indies.  I love to make a sorrel simple syrup and top with champagne for a gorgeous, sweet-tart, rose-colored cocktail.  Take 1 cup dried hibiscus flowers + 1 cup sugar + 1 cup water and bring up to a boil - if you want to up the ante, throw in a cinnamon stick and 4 whole cloves.  Remove from the heat and let steep 20 minutes.  Strain and cool the syrup.   Add 2 oz. of the cooled syrup to a champagne flute and top with the champagne of your choice!


GRAPEFRUIT AND GINGER SPARKLER

Photo: Serious Eats

With only 3 ingredients, grapefruit juice + Domaine de Canton ginger liqueur + champagne, this drink is easy, elegant and tasty.  Although I'm not a grapefruit eater myself, a touch of grapefruit in a cocktail (think: paloma) adds the perfect bitter note.  The ginger liqueur adds just the right amount of sweetness, and the whole thing goes down really easy....a bit too easy if you know what I mean.


FEEL THIS COCKTAIL

Photo: The Drink Blog

The basis for this cocktail is again citrus because 'tis the season.  Orange juice + lime juice form the base.  Add a little vodka, brown simple syrup, and champagne and top with raspberries to keep it festive! 


CHAMPAGNE SORBET FLOATERS

When in doubt, go to your grocery store (or local bodega...), pick up a pint or two of your favorite sorbet and throw it on top of champagne, prosecco, sparkline wine, cava or whatever you are serving.  It will look gorgeous, and, as the sorbet melts, it will infuse your champagne with fruity sweetness!


Wishing everyone a very happy New Year's and all the best in 2016!!!

tags: champagne cocktails, new years eve recipes, what to serve on new years eve, cocktail recipe, cocktails
categories: all 3, drinks & cocktails, holiday, lifestyle, quick & easy, recipes
Tuesday 12.29.15
Posted by Aliya LeeKong
 
Newer / Older