X

Sign up to receive exclusive recipes, tips, updates and other goodies from Aliya!

  • Home
  • Blog
    • All
    • Recipes
    • Spices + Ingredients
    • Lifestyle, etc.
    • Travel
  • The Cookbook
  • The App
  • Media
    • All Media
    • Video
  • About
  • Passions
Aliya LeeKong
  • Home
  • Blog
    • All
    • Recipes
    • Spices + Ingredients
    • Lifestyle, etc.
    • Travel
  • The Cookbook
  • The App
  • Media
    • All Media
    • Video
  • About
  • Passions

Crispy Miso (Baked!) Wings

wing2.jpg
wing1.jpg
wing3.jpg

CRISPY MISO (BAKED!) WINGS

Super Bowl = wings!  And these are what I'm making.  The spread, for me, is what it's all about…..eating "bad" (but oh-so-good) food.  I figured it was time for me to up my wing game, and I’ve been slightly obsessed with putting white miso paste in everything lately.  There are a ton of varieties of miso, and you can find it in any Asian grocery store in the refrigerated section.  I use it in salad dressings, marinades for fish, meat and, of course, in my baked wings recipe. 

I LOVE some good wings, but I wasn’t so into deep-frying them and making a splattered mess of my kitchen.  But you can still get them crispy in the oven.   If you crank it up high enough and cook the wings on a rack over a sheet tray - the chicken skin fat will render out, they'll stay tender AND the skin will crisp up nicely!  These are slightly sweet, umami, and with a great kick.  Enjoy!

Serves 6

For the marinade + wings:

½ cup white miso paste

¼ cup plus two tablespoons mirin

3-4 tablespoons sriracha (plus more if you want extra heat)

3 tablespoons soy sauce

2 tablespoons sesame oil

1 tablespoon brown sugar

½ teaspoon rice wine vinegar

4 garlic cloves, finely chopped

3 lbs chicken wings, tips removed, drummettes and flats separated

Kosher salt

Toasted sesame seeds, for garnish

For the dipping sauce:

½ cup sour cream

½ lime, juiced

small handful of cilantro, chopped

Extra sriracha, to taste

For the marinade:  In a bowl, whisk together the miso, mirin, sriracha, soy, sesame oil, brown sugar and rice wine vinegar.  Set aside/refrigerate a half cup for the dipping sauce.  Add the minced garlic to the marinade and toss the wings with it until they are thoroughly coated.  Transfer to a plastic bag and refrigerate for a minimum of 5 hours and preferably overnight.

For the wings: Preheat oven to 400° F.  Put a wire rack over a baking sheet and set aside.

Transfer the marinated wings to a colander to drain, and then wipe off any excess.  The marinade can burn, so you want it dry-ish.  Season the wings with salt and transfer to the rack over the baking sheet.  Bake the wings for about 40 minutes, rotating half way through cooking..

For the dipping sauce: In another bowl, add the reserved marinade and mix with the sour cream, lime juice, cilantro and more sriracha, depending on your heat preference.  

Serve hot with the dipping sauce and sprinkled with toasted sesame seeds!

tags: super bowl recipes, what to cook for the super bowl, Super Bowl, wings, crispy wings, best chicken wings recipe
categories: all 4, appetizers 1, blog, main dishes, man-friendly, quick & easy, recipes
Wednesday 02.01.17
Posted by Aliya LeeKong
 

Homemade Chicken Thigh Shoyu Ramen

View fullsize Photo Dec 09, 1 52 57 AM.jpg
View fullsize Photo Dec 09, 1 54 59 AM.jpg
View fullsize Photo Dec 09, 1 55 07 AM.jpg

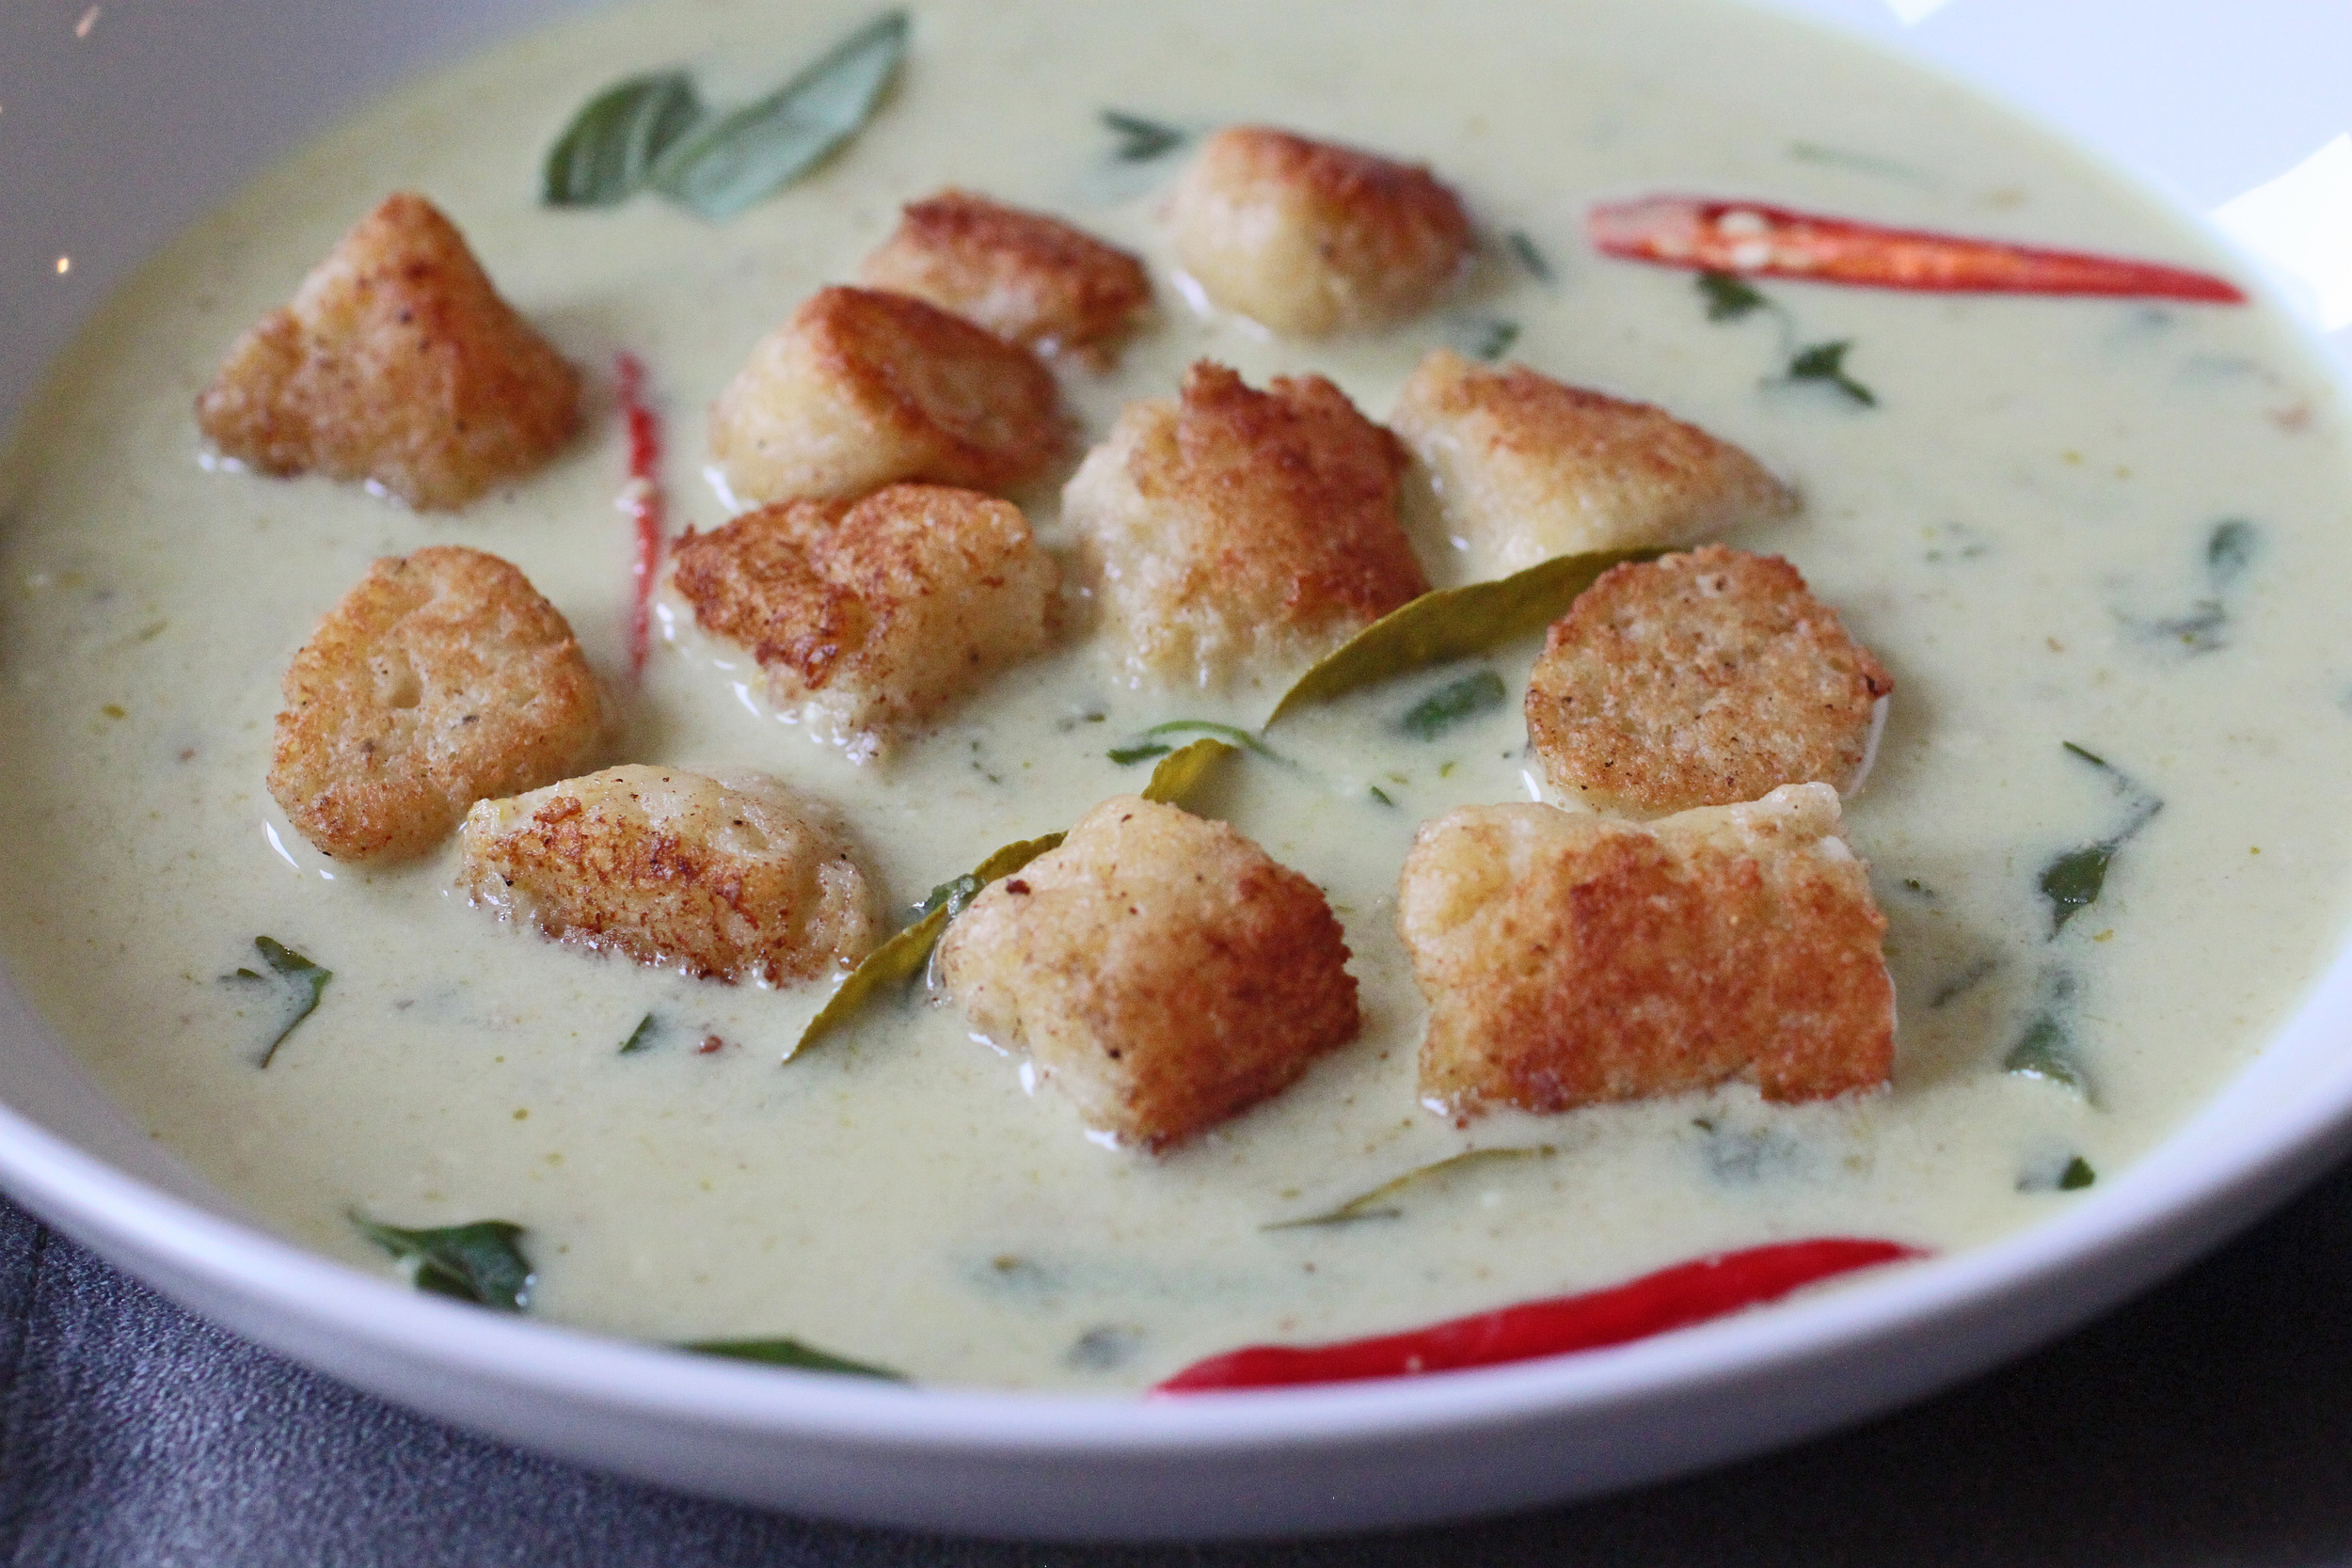
HOMEMADE CHICKEN THIGH SHOYU RAMEN

Secretly, when I go out of town, my husband goes to the store and buys instant ramen noodles.  He won't admit it or mention it when I'm gone, but I come back to the evidence stuffed in our trash can...

I decided to try to make ramen from scratch and outdo the store bought stuff!  Although, traditional ramen can take up to 3 days to make a proper broth, etc., I was not up to that task.  I was a bit under the weather and wanted this ramen to do double duty as my medicinal chicken soup.  SO I decided to do a delicious homemade chicken stock, infuse it with a little kombu and finish it with a shoyu-based tare.  All of the terms are a bit confusing, but Serious Eats does a great breakdown of all of the different types of ramen.

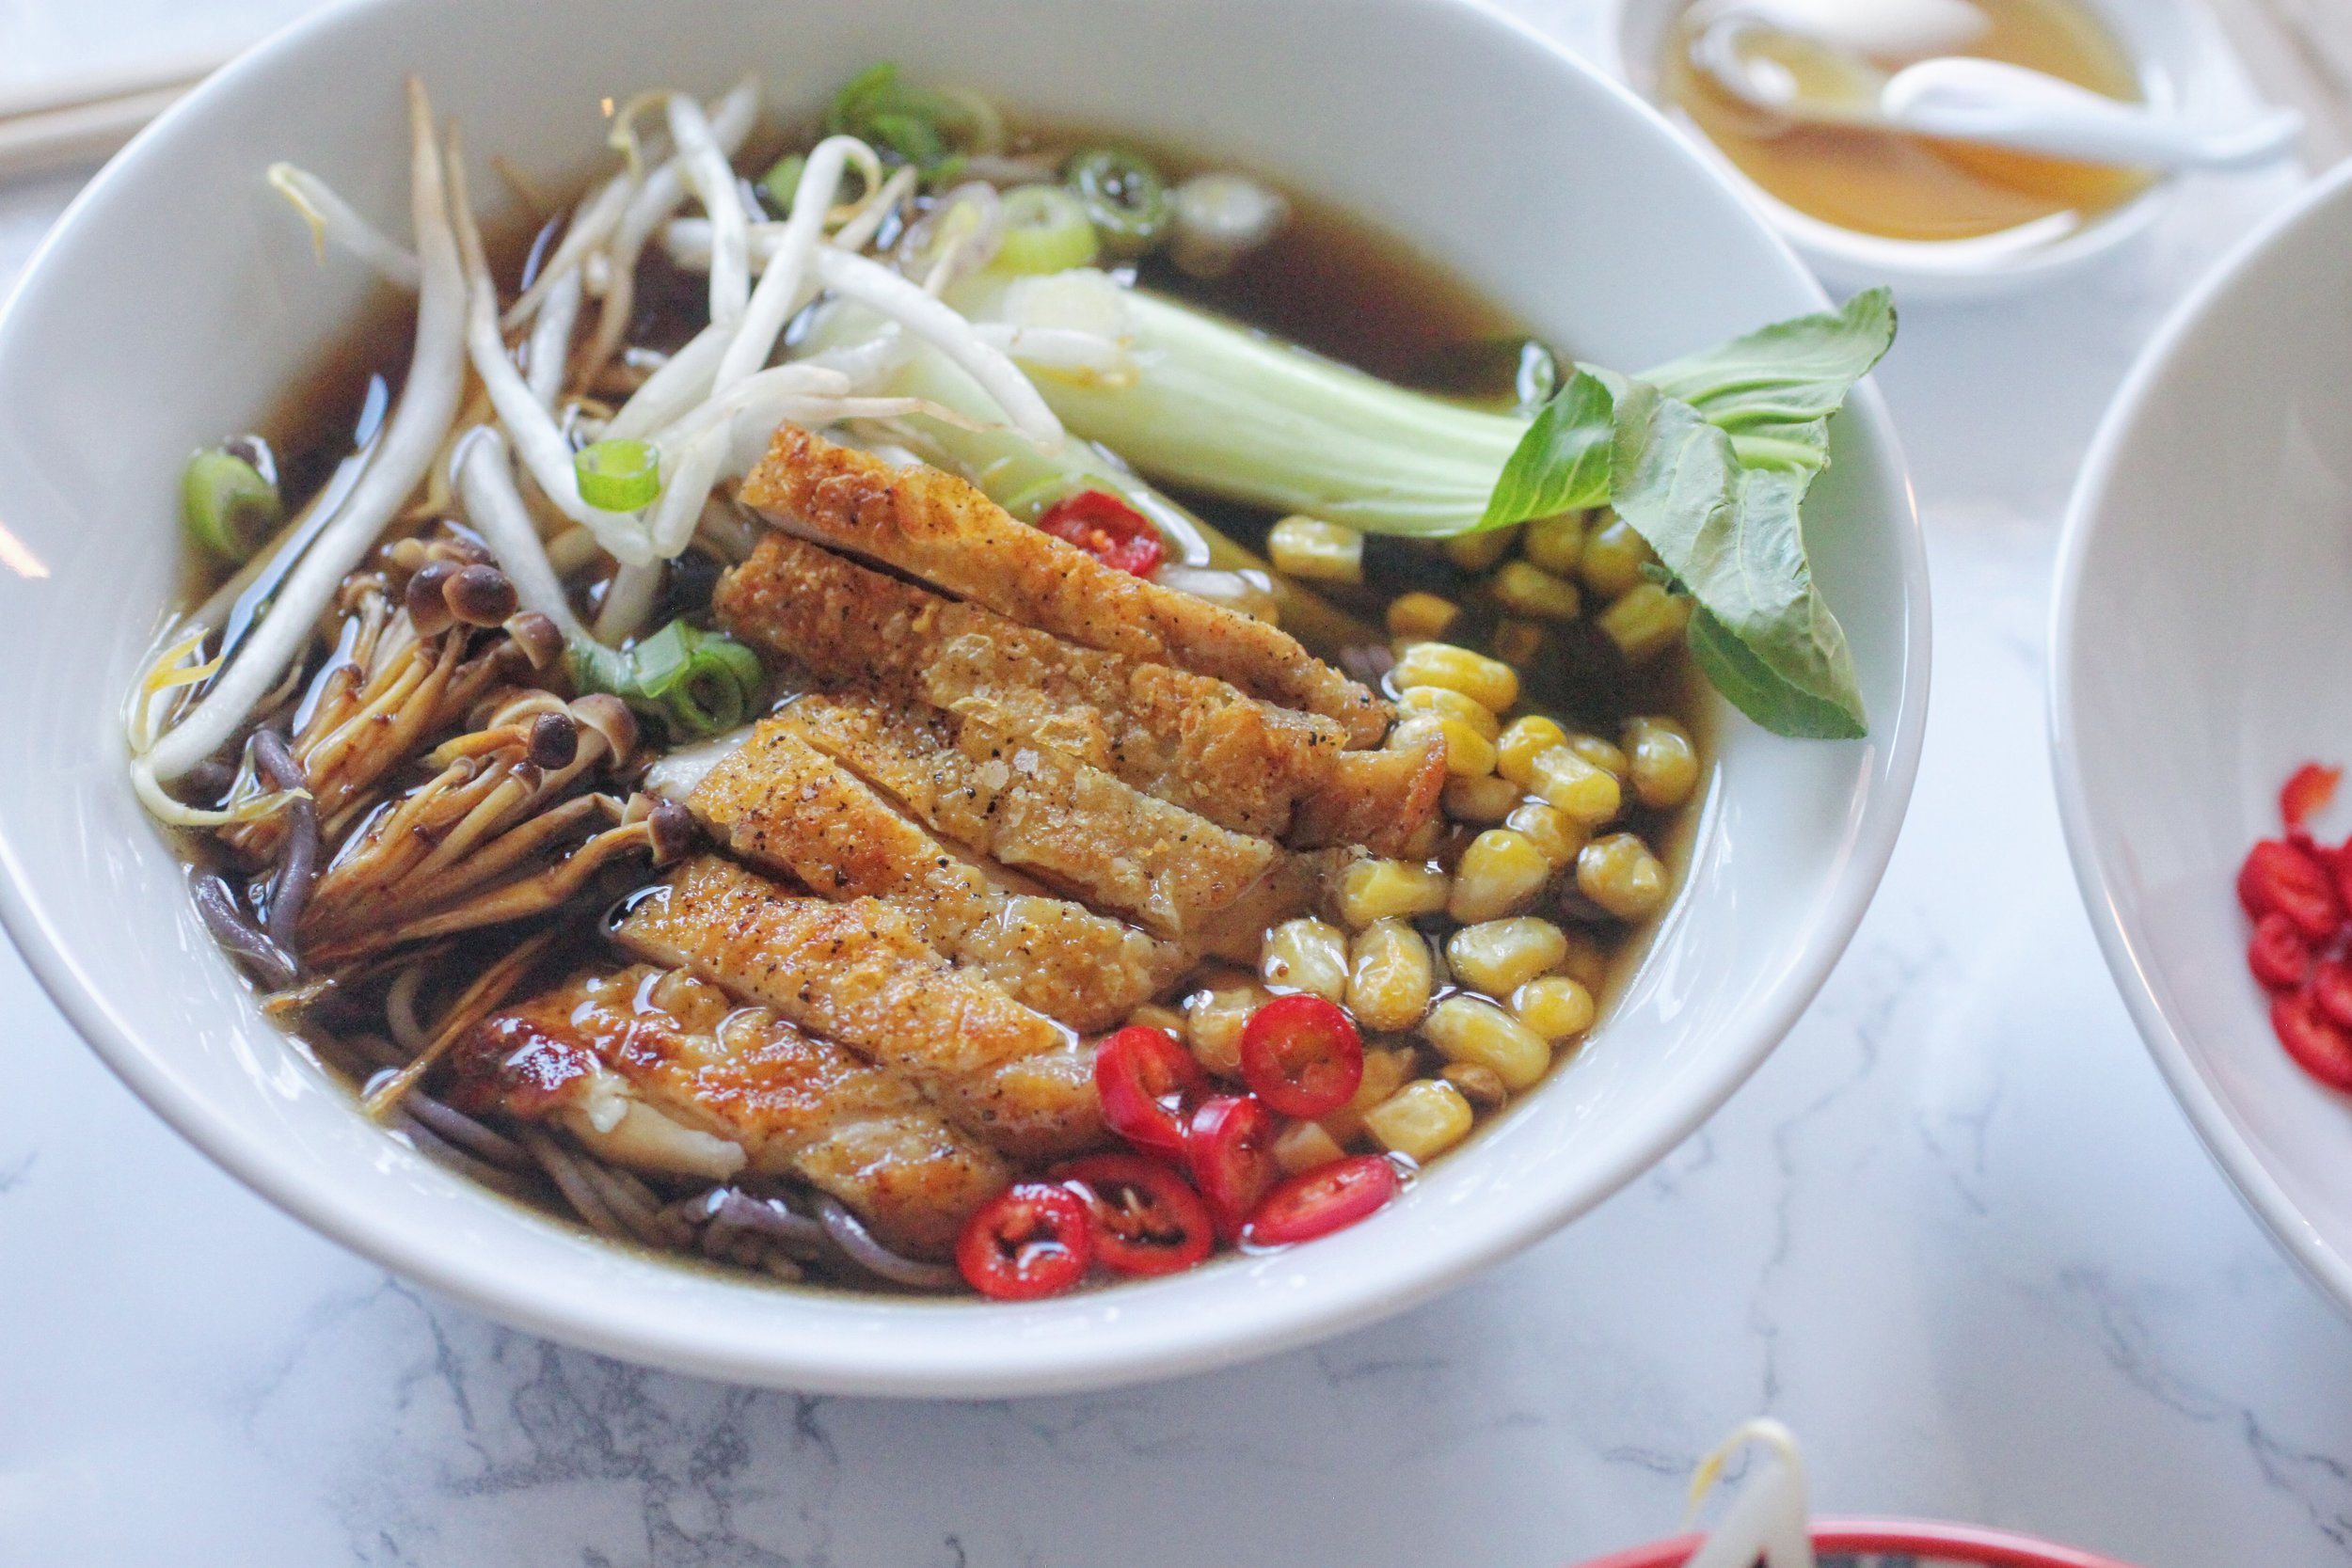
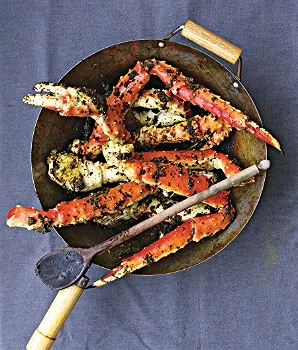
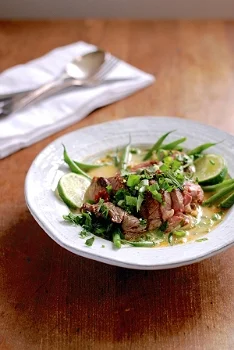
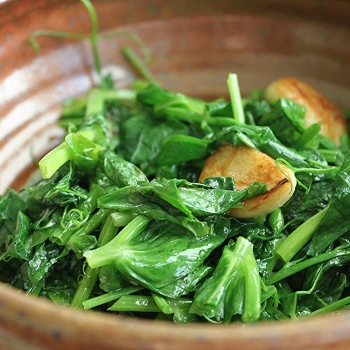
The best part of ramen are the fixings! What to put in your ramen? I used crispy chicken thighs, sliced red chilies, bean sprouts, baby bok choy, corn, scallions and some enoki mushrooms, and this kept it super fresh and light.  Whenever I’m in the Japanese store getting ingredients, I also pick up a few packs of fish balls from the freezer section.  These are made from fish paste, cook up quickly and taste delicious in ramen, particularly if you just make a simple dashi base (water + kombu + bonito flakes).  But you can get creative here: leftover chicken, spinach, ground beef, pork belly……whatever you want!  Enjoy!

Ingredients

Serves 4 to 6

For the Dashi and Tare:

2 quarts homemade or store-bought chicken stock

1 (10” x 4”) piece of kombu, wiped clean with a damp cloth

¼ cup shoyu (Japanese soy sauce)

2 tablespoons mirin

3 tablespoons sake

For the Ramen:

3 tablespoons canola oil, plus more if necessary

4 – 6 boneless chicken thighs, skin-on and room temperature

6 garlic cloves, minced

3 tablespoons toasted sesame oil

4-6 (3 oz) packages dried ramen noodles (if using fresh or homemade, replace each 3 oz dried with 5 oz. fresh)**

2 to 3 pieces baby bok choy, halved

½ cup enoki mushrooms, cleaned

3 large eggs, soft boiled*

2 scallions, thinly sliced

2 small red chilies, thinly sliced

2/3 cup corn, cooked

Salt, to taste

Other optional garnishes: togarashi, nori sheets, menma (fermented bamboo shoots), white pepper

Preheat the oven to 400° F.

For the dashi and tare:

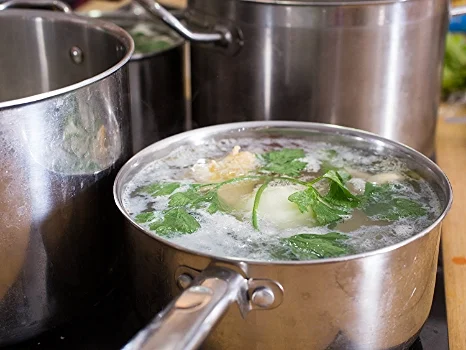
Place the 2 quarts stock in a large pot and add the kombu.  Let soak 30 minutes.  Slowly, bring the stock up to a simmer and simmer for 6 minutes.  Remove the kombu and discard.  Reserve the stock in the pot until ready to serve.

In a separate bowl, combine the shoyu, mirin and sake and set aside.

For the Ramen:

In a large sauté pan, heat the canola oil over medium-high heat.  Make sure the chicken thighs are very dry and season on both sides with salt.  Place the thighs skin-side down in the hot pan and lower the heat to medium.  Cook for about 5 to 7 minutes until the skin crisps.  Flip and cook another minute.  Transfer to a sheet pan and finish in the oven for 10 minutes.  Let rest about 5 minutes and then slice the thighs to desired thickness.

In the same pan, add the minced garlic.  If the thighs haven’t rendered enough fat/drippings, add a little more oil, just enough to coat the garlic.  Cook for another 3 to 4 minutes until browned.  Strain infused oil into a bowl and add the sesame oil.  If you want, you can also blend the oil with the garlic to make it extra potent.  Set aside until ready to serve.

Heat a large pot of water.  Boil noodles per package directions until al dente.  Drain.

To Assemble:

Bring infused stock up to a boil and add the shoyu mixture.

Divide the cooked noodles and broth between the bowls.  Top with the sliced chicken, bok choy, enoki mushrooms, eggs, scallions, sliced chilies and corn.  Drizzle a teaspoon or two of the garlic sesame oil over each bowl.

Serve immediately.

*Eggs should be boiled only for about 7 minutes.  The yolk shouldn’t be completely set.

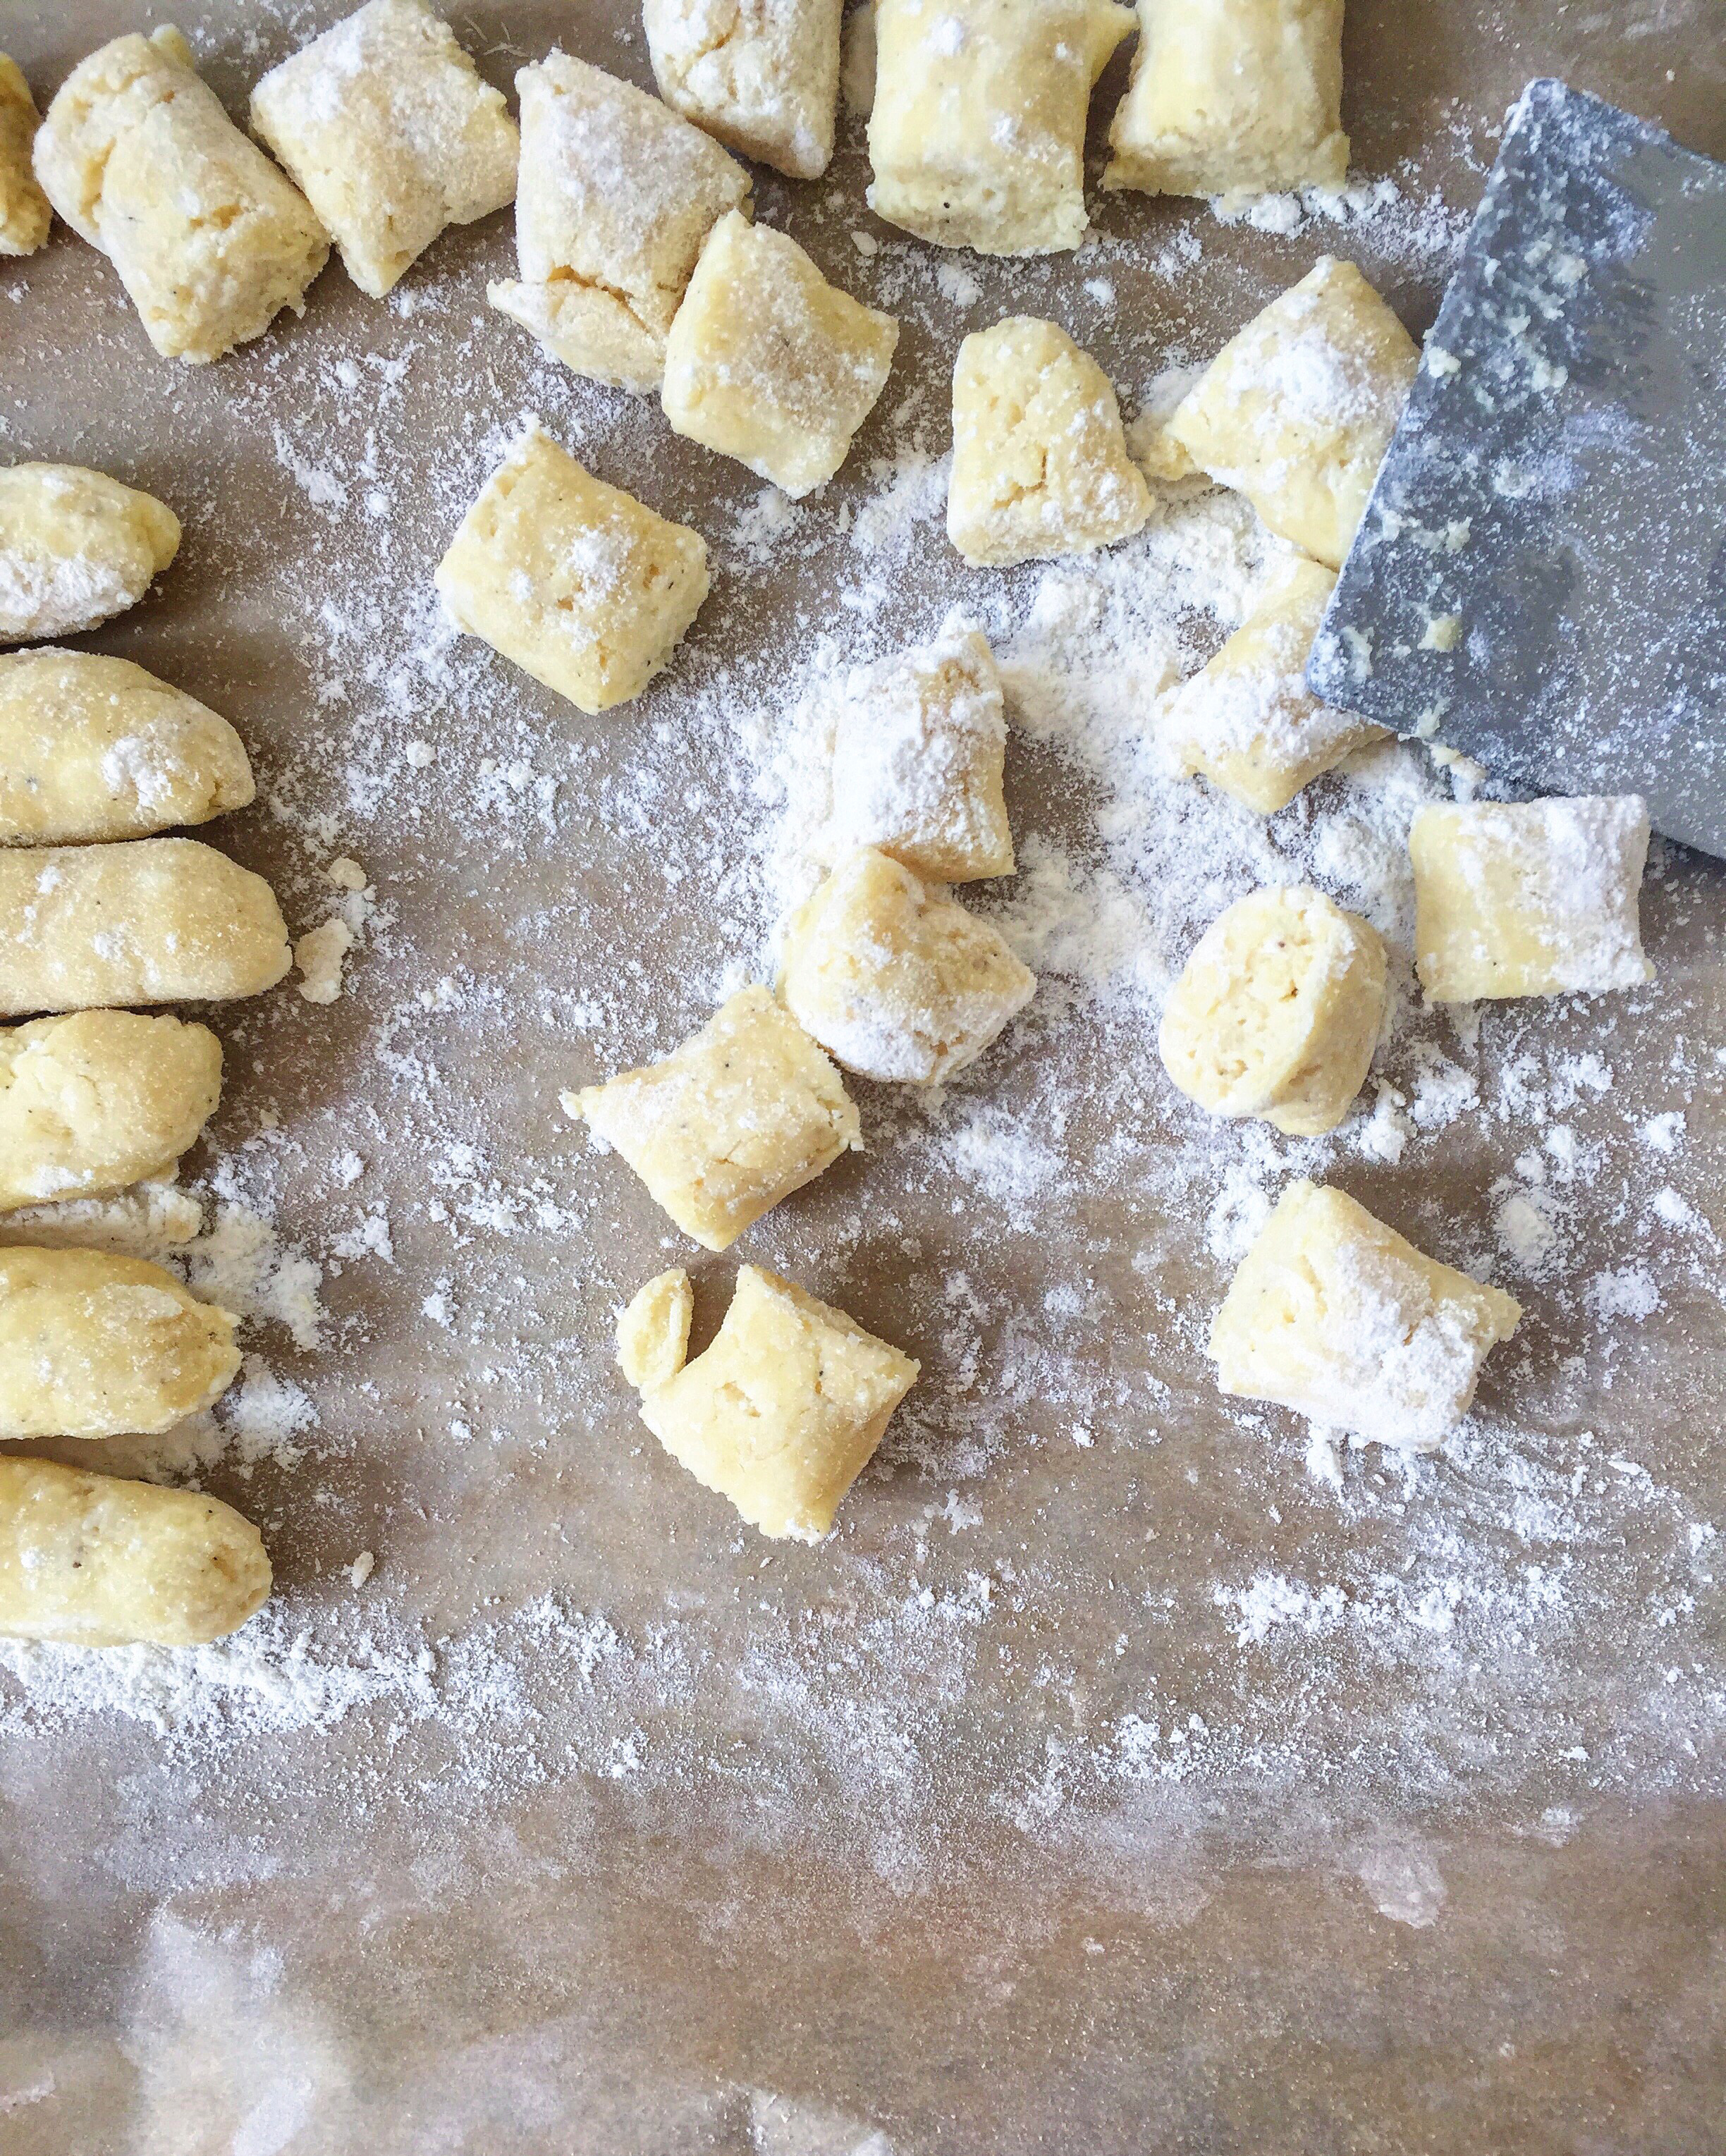
**If you are up to the task, making your own ramen noodles from scratch can be fun.  Ramen noodles aren’t just your average pasta noodle - they have to be able to stand up to sitting in a bowl of hot broth and keeping their signature chewy texture.  If you were to use a regular pasta dough, the noodles would be overcooked by the time you got through the entire bowl. 

What gives ramen noodles their texture and color, believe it or not, is the addition of one particular ingredient: Kansui, or alkaline minerals.  It’s difficult to find this ingredient if you don’t have a good Japanese store near you, but you can make it at home, I bet you have it in your pantry right now!  Baking soda. All you have to do is bake the soda for an hour at a low temp to change the properties from bicarbonate to carbonate.  It’s really that simple!

For the Noodles:

3 g baking soda
150 g lukewarm water
2 g sea salt
300 g all purpose flour

Preheat the oven to 250° F.  Sprinkle the baking soda on a sheet tray and bake it in oven for about an hour.  You can bake more than the recipe amount and keep the excess stored in an airtight jar indefinitely. 

Mix the water, baked baking soda and salt in a bowl until dissolved.  Measure flour into another bowl, and then add the water mixture.  Combine together and make a very flaky loose, crumbly dough.  Form mixture in to a ball and knead for about 5-10 minutes. 

The dough will be a lot more tough than pasta dough, and that is exactly what you want.  After the dough is smooth, wrap and keep at room temp for an hour. 

Cut the dough into 4- 6 pieces. You can then break out the pasta machine and roll the dough until the 2nd to last setting.  I cheat and put my dough through the spaghetti attachment instead of cutting by hand….up to you.
 

tags: ramen, homemade ramen, how to make ramen
categories: all 4, blog, main dishes, recipes, soups, soups & salads, traditions
Wednesday 12.14.16
Posted by Aliya LeeKong
 

Oxtail Mafé

View fullsize File Nov 21, 2 09 18 PM.jpg
View fullsize File Nov 21, 2 09 39 PM.jpg
View fullsize File Nov 21, 2 09 57 PM.jpg

OXTAIL MAFÉ

There is nothing I love more than walking in to the aroma of a delicious homemade dinner that has been simmering for hours.  When the weather gets brisk and the market is full of squash and root veggies, I love braising - short ribs, lamb shanks, oxtail. 

I am a bit old school about braising and love to take my time developing every bit of flavor:  a serious brown on the meat, a slow sweat of all of the aromatics, 3 + hours of low and slow cooking in the oven.  In a time crunch though, there's nothing like a slow cooker!  Many dishes in the slow cooker allow you to just throw everything in one pot, turn it on and go, but I prefer to quickly sear or sauté whatever I am cooking,to get more flavor out it, and then throw it in the pot. 

When it comes to oxtail, which is what this recipe is all about, I loooove West Indian-style - sweet, spicy, with a good dose of salt pork and some scotch bonnet heat. 

I decided to break out and do something a little different.  When you work in kitchens you find yourself surrounded by many different cultural backgrounds and this leads to epic family meals!  One of my most memorable was being in the kitchen with a line cook from Senegal.  When it was her turn for family, she made the most amazing foods, my most favorite was her Chicken Mafé (basically a chicken and peanut stew).  I still crave it to this day! I remember her saying she uses beef at home…so why not oxtails!? 

Below is my take on her dish, it’s best with rice or fonio (a West African grain)…pretty much anything to sop up the yummy sauce with!  I'm now not sure which is my favorite way to make oxtail....Enjoy!

Yields 4 to 6 servings

3 tablespoons canola oil

2 ½ pounds oxtail, cut into segments

1 large yellow onion, diced

1 medium bell pepper, diced

1 Scotch bonnet pepper or habanero pepper, minced or kept whole if you want less heat

3-4 cloves of garlic, minced

2 tablespoons tomato paste

1 can diced tomatoes, fire-roasted

3/4 cup peanut butter, all natural

1 quart chicken or beef stock

2 tablespoons Fish sauce

2 tablespoons red wine vinegar

1 tablespoon soy sauce (optional)

1 medium sweet potato, cut into 1" dice

1-2 Yukon gold potatoes, cut into 1" dice

1/2 bunch cilantro, finely chopped for garnish

1/2 cup peanuts, roughly chopped for garnish (optional)

Salt and freshly ground pepper, to taste

Preheat oven to 325° F.

In a dutch oven, heat oil over medium-high heat.  Dry off oxtails, season generously with salt and pepper and sear for 2 to 3 minutes per side.  Work in batches so you don't crowd the pan.  Remove the oxtails and set aside in a plate or tray.

Reduce heat to medium and throw in the onion, bell pepper, and habanero or scotch bonnet if cut up (if whole, wait).  Sauté for about 5-7 minutes until everything has softened.  Add in the minced garlic and cook another 30 seconds or so.  Add in the tomato paste and sauté for another minute.

Now, add in the diced tomatoes, peanut butter, stock, fish sauce and soy sauce (if using).  If you are keeping the habanero or scotch bonnet pepper whole, this is the place to add that in as well.  Turn up the temperature and bring up to a boil.  Make sure the peanut butter is evenly mixed into the stew.

Nestle the oxtail into the stew making sure they are fully covered.  Pour in any juices that accumulated in the plate or tray where the oxtail were.  Cover and place into the oven.  Cook for 2 1/2 hours.

Remove from the oven and stir in the sweet and regular potatoes. Cover and place back into the oven for another 45 minutes.

Serve hot over rice or fonio garnished with chopped cilantro and peanuts.


tags: oxtail recipe, how to cook oxtail, west indian oxtail, chicken mafe, senegalese food
categories: all 4, holiday, main dishes, man-friendly, recipes, traditions
Wednesday 11.30.16
Posted by Aliya LeeKong
 

Native American Heritage Day

NATIVE AMERICAN HERITAGE DAY

While Thanksgiving has long been my favorite holiday, I (unfortunately) haven't given it a ton of thought beyond a time for family and friends to get together, reset, eat, and share some beautiful moments.  The reality is the history of Thanksgiving is not so rosy, so I think I would be remiss not to pay homage to the Natives of our country.

Native American Heritage Day is the day after Thanksgiving, and it has me reminiscing about my trip to the Four Corners and the Navajo women I met and made fry bread with.  It often baffles me that Native American food is so elusive to the average person (myself included!), particularly when you think about how so many of our Thanksgiving tables originated with Natives teaching us about farming.  And when you think about it, it’s really just farm to table…right!?  They cooked according to their regions and what the land provided for them.

Over the past couple years, more and more chefs have been trying to revive this cuisine around America; it is, after all, the true heritage of this country.  As with other countries and their native cuisines, there are many different types of Native American foods based on regional tribal differences. Many cherish fry bread, and then there are some that refuse to make it because of the history of how it was born.  Eater had a great article about Native American food last summer that's a good read.

Here are a few Native recipes to get you started - enjoy!

NAVAJO FRY BREAD


CEDAR-PLANKED SALMON WITH MAPLE GLAZE AND MUSTARD MASHED POTATOES

Photo: Epicurious


WILD RICE WITH CRANBERRIES

Photo: Merci Mama


MAQUE CHOUX

Photo; Maque Choux


CORN HUSK BREAD

Photo: Cooking with Mama


THREE SISTERS STEW

Photo: NYTimes

tags: native american culture, native american food, native american heritage day, national native american heritage month
categories: all 4, appetizers 1, breads & cakes, holiday, main dishes, lifestyle-1, soups & salads, soups, traditions, vegetarian-2
Friday 11.25.16
Posted by Aliya LeeKong
 

The Ultimate Thanksgiving Turkey

THE ULTIMATE THANKSGIVING TURKEY

Photo: Food52

I feel as if I've been walking around in a fog, and, now, Thanksgiving is basically a week away!  When did this happen?  I always think that Thanksgiving is far enough away that I have plenty of time to plan and then all of a sudden, it's just here.  This year, I definitely don't want to go the traditional route with a turkey.  We did this amazing, marinated, dry-brined, spatchcocked turkey last year out on our grill to free up oven space.  It was AMAZING - super moist and evenly cooked with crispy, crackling skin.

Turkey can be so hit or miss with the main complaint being that it's too dry.  Brining is the best way to ensure that the turkey will stay moist and flavorful!  The only decision left is a dry brine vs. a wet brine.  Using a dry brine is basically pre-salting the turkey without any water.  Some say that this is the better method (it definitely saves space in the fridge...), and while it doesn’t always guarantee as juicy a bird as a wet brine, it does offer a much crispier skin when cooked.  The turkey sits in the fridge, uncovered, with the dry salt brine mix for up to 3 days prior to cooking.  The salt mixture will draw out the moisture from the bird.  The salt is then dissolved in this liquid and reabsorbed which helps to break down any tough proteins making it tender, juicy and flavorful.

With a wet brine, you add water to the equation and need a bag big enough to house the turkey and a pan (for a just in case the bag bursts scenario).  This just means more room needed in the fridge that, quite frankly not a lot of us have around this time of year!  The turkey then bathes in the brine for up to 3 days and (I think) creates a juicer outcome. 

I’ve used both techniques in the past and honestly, I think the choice for brining depends on the cooking method.  For a traditional roast turkey, I say go with the wet brine - for the longer cooking time, you need the brine to plump up the moisture content.  For a spatchcocked turkey, though, that cooks in far less time, I think a dry brine is the best way to go - you get the moisture you need and perfectly crisped skin!

What I love about both brines is that you can add whatever spices you want to create a personalized mix.  In the past, I have played around with allspice berries, juniper berries, fresh (or dry) herbs, garlic chipotle peppers (grinded), citrus zest (orange, lemon, lime, etc…), star anise, cardamom…..you get the idea.  All you need to know is the ratio of salt to water for a wet brine (about 2- 2 1/2 cups salt to 1 gallon of water).  For a dry brine, I use a 1/2 cup kosher salt with 2 tablespoons baking powder as a ratio and don't always use all of that salt, depending on the size of the turkey.  

A few things: Always default to kosher salt here as this method needs the larger crystals to work; regular table salt is not ideal for this recipe.  Also, this is only good for a non-kosher, non-treated, fresh turkey.  If you aren't buying a fresh one, make sure you read the label to see if it's been pre-treated.

Finally, remember that there is no need to re-salt the turkey once you are ready to put it in the oven!  Usually with the wet brine, I rinse the turkey in and out and pat dry before stuffing it and putting it in the oven.  With the dry brine, I don’t rinse but only pat the skin dry before roasting. 

Here are a few recipe ideas to get you started with your Thanksgiving Feast!

SPATCHCOCKED ROAST TURKEY

Photo: Food52


SLOW-ROASTED TURKEY RECIPE

Photo: Food52


DRY-BRINED TURKEY

Photo: NYTimes


SLOW-SMOKED AND SPICE-BRINED TURKEY

Photo: Saveur


JAMAICAN JERK TURKEY

Photo: Chef and Steward


tags: Thanksgiving ideas, Thanksgiving recipes, thanksgiving turkey recipe
categories: all 4, holiday, lifestyle-1, main dishes, man-friendly, recipes, traditions
Tuesday 11.15.16
Posted by Aliya LeeKong
 

Not Just Apple Pie + Lamb Shanks!

NOT JUST APPLE PIE + LAMB SHANKS!

There’s nothing better than apple picking on a cool Fall weekend with the fam!  As I get older, I totally geek out about stuff like that (who knew?).  Now, if only the weather would cooperate...I have my favorite spot up in Warwick, NY, which, coincidentally, also happens to be a vineyard with wine tasting.  Because tipsy apple picking is even better!  Just joking (sort of). 

View fullsize apple3.jpg
View fullsize apple4.jpg
View fullsize apple2.jpg

There are so many different varieties of apples to choose from that I’m so glad they have maps and descriptions of each apple.  I tend to get overly excited and end up with WAY too many apples when I get home!  So after lugging pounds of different apple varieties home, I'm always thinking about what to do besides, of course, the mandatory pie or crisp.  I love a good apple butter to keep for later, and I freeze off batches of applesauce for the chickadee. 

I put together a few ideas for you, and, further down, is a yummy recipe for Honey-Braised Lamb Shanks with Butternut Squash and Apples, which is basically a tagine and seriously delicious.  Enjoy!


APPLE PIE WITH STAR ANISE BROWN BUTTER


BUTTERNUT SQUASH & APPLE BREAD WITH MAPLE & CARDAMOM


PISCO SOUR APPLE


SWEET APPLE COUSCOUS


HONEY-BRAISED LAMB SHANKS WITH BUTTERNUT SQUASH AND APPLES

This lamb dish is based on North African tagines, which slow-braise lamb and other meats with both sweet and salty elements. While many tagines feature apricots, prunes, or raisins, I thought seasonal butternut squash and apples would provide the perfect sweet counterbalance to the spiced braise.  I use lamb shank here because I love the flavor and the end result – spoonable, fall-off-the-bone meat in a rich stew.

Ingredients

2-3 tablespoons canola oil

2 ½ pounds lamb shanks (approximately 2 shanks), room temperature

1 large onion, cut into a medium dice

4 cloves garlic, minced

½ teaspoon ground ginger

large pinch saffron

1 ½ teaspoons cinnamon

4 cups beef or chicken stock

1 tablespoon honey

2 cups butternut squash, cut into a ¾” inch dice

1 ½ cups honeycrisp or fuji apple, cut into a ¾” inch dice

¼ cup sliced almonds, toasted

1 ½ teaspoons sesame seeds, toasted

Salt and freshly ground pepper

Preheat the oven to 325° F.

Heat a Dutch oven or large pot over medium-high heat.  Add the oil, season the shanks generously with salt and freshly ground pepper, and sear 2 to 3 minutes per side to develop a nice brown.  Remove to a plate and reduce the heat to medium-low.

Add the onion and a bit of salt and sauté for 5 to 7 minutes until the onions are translucent.  Add the garlic, ginger, saffron and cinnamon and sauté for another 30 seconds to a minute until fragrant.  Nestle the lamb shanks back in the pot, and add in the stock and the honey.  Cover, bring up to a boil and then place in the oven.

Cook for 2 hours and 15 minutes and then remove from the oven.  Toss in the squash, apples and half of the almonds.  Cover and put back in the oven for the next 45 minutes to an hour. The meat should be spoonable, basically falling off the bone.

Serve hot, garnished with the remaining toasted, sliced almonds and sesame seeds.  This is great alongside couscous.

tags: apple picking, apple recipes, what to do with apples, apple pie recipe, apple cake, lamb tagine, lamb shanks
categories: all 4, blog, holiday, lifestyle-1, main dishes, man-friendly, recipes, traditions, sweet & savoury
Thursday 09.22.16
Posted by Aliya LeeKong
 

Summer = Fish Tacos

SUMMER = FISH TACOS

I. Love. Tacos.  Tacos are the ultimate - easy food with literally endless combinations.  Summer is all about simplicity and lightness, so my favorite by far this time of year are fish tacos.  From grilled red snapper to lightly breaded mahi mahi or a nice “meaty” grilled swordfish, there’s nothing better for an easy weeknight meal (or for entertaining).  The hardest part is deciding on toppings!

The Baha-style, fried ones here took no time to whip up.  I never use a recipe, so I'm just going to tell you what I do.  For 4-6 people, take a 1 ¼ - 1 ½ lbs flaky white fish (snapper, mahi mahi, grouper, etc) and portion into strips.  Basicallly, make sure the size of the fish strip fits into your taco as one or two strips.  Divide a cup of flour evenly between two bowls.  Season one of the bowls with salt, pepper, paprika and any other powdered spices you like until it tastes good.  To the other bowl, whisk in beer until it has the consistency of wet paint. 

Dip the fish strips first into the flour bowl, shake off excess and dip into the beer batter.  Let any extra drip off and fry in about an inch to an inch and a half of oil (at 350° F) until golden brown (generally 3-5 minutes).  Transfer pieces to a paper towel-lined plate and sprinkle with some salt.  Make sure to fry in batches and not crowd the pan too much.

In terms of toppings, the combination for my lamb tacos are my go to, especially the chipotle crema, but, here, I just used some pickled shallot, cabbage, fresh chile, green onion, and cilantro.  My sauce was a smoked habanero crema (mayo/crema + smoked habanero sauce), but you can literally stir together mayo/crema/crème fraiche with any hot sauce you like until it tastes good. 

Since it's summer, my smoked peach chutney is another topping that would be ridiculous on some fish tacos.  The sweet, smokey flavors of the peach pairs perfectly with any fish dish.  Or you can do a simple pico de gallo (diced tomatoes, red onion, cilantro, jalapeño and lime juice), super easy and refreshing. 

Feel free to use soft or hard tacos.  I'm partial to corn tortillas myself.  Enjoy!


tags: fish tacos, how to make fish tacos, Baha-style fish tacos, baha fish taco recipe
categories: all 4, lifestyle-1, main dishes, quick & easy, recipes, traditions
Wednesday 07.06.16
Posted by Aliya LeeKong
 

Red Snapper with Lemon, Onions, Mustard & Habañero (Poisson Yassa)

View fullsize fish1_edited-2.jpg
View fullsize fish3.jpg
View fullsize fish2.jpg

RED SNAPPER WITH LEMON, ONIONS, MUSTARD & HABAÑERO (POISSON YASSA)

Summer has officially begun, and with that, besides grilling it up, I like to go a bit lighter.  This recipe is for a Senegalese-inspired fish, poisson yassa.  Fish (here, I used snapper) is marinated with onions, garlic, lemon, bay, mustard and habañero pepper.  After a quick sear of the fish and sauté of the onion mixture, it's all placed in the oven to bake and for the flavors to mingle. 

The flavor is so amazing - with the sweetness of the caramelized onions, the tart bite of the mustard and lemon, and the heat from the habañero.  I love that this preparation can also be used for chicken and lamb with obvious changes to cooking times.  Enjoy!

Serves 4

4 white onions, thinly sliced

5 garlic cloves, minced

Juice and zest of 2 lemons

1 habañero pepper, seeded, ribbed and thinly sliced

¼ cup canola or olive oil, plus more for cooking

¼ cup cider vinegar

1 ½ tablespoons Dijon mustard

1 tablespoons soy sauce

1 bay leaf, fresh or dried

4 filets red snapper (1 ½ - 2 lbs)

salt and freshly ground pepper

2 tablespoons unsalted butter

Handful of fresh herbs, finely chopped (parsley, chives, cilantro)

In a bowl, mix together the onions, garlic, lemon juice and zest, habañero pepper, oil, vinegar, mustard, soy and bay leaf.  This is the marinade for the fish.  Transfer to a plastic bag or baking dish and make sure the fish is thoroughly coated.  Marinate for a minimum of 30 minutes but preferably a few hours.

Preheat oven to 350° F.

Remove filets from the marinade (reserving the marinade), dry off and season with salt and pepper.

In a large cast iron skillet, heat enough oil to coat the bottom of the pan along with the butter over medium-high heat.  When hot, add the snapper skin-side down.  Cook for 3 minutes and remove to a plate (skin-side up).

Add the onion marinade mixture (juices and all!) to the skillet, reduce the heat slightly and cook for 6-8 minutes until the onions start to soften.  Remove from the heat, nestle the snapper filets in the onion mixture, cover with foil and transfer to the oven for 15 minutes.

Garnish with fresh herbs before serving.  It's traditionally served over rice, but I also love it with some crusty bread.


tags: fish recipe, poisson yassa, senegalese food, african cooking
categories: all 4, blog, main dishes, man-friendly, quick & easy, recipes, traditions
Wednesday 06.01.16
Posted by Aliya LeeKong
 

All About Crab Season + Crispy Spiced Crab Cakes

ALL ABOUT CRAB SEASON + CRISPY SPICED CRAB CAKES


I’ve previously expressed my undying love for crabs with this delicious recipe , and I just wanted to re-emphasize this love (ok…obsession!)  with the fact that soft shell crab season is just around the corner.  Crab is one of those delicate ingredients, sweet and flaky,  but can take on so many different preparations - deep-frying, pan-frying, baking, boiling, in a salad, soup, pasta, or rice dish.  For me, the marriage of crab with spices and butter is absolute heaven!!

Here are a bunch of crab recipes to experiment with along with my favorite, crispy, spiced crab cakes!


SOFT SHELL CRAB WITH CURRY BUTTER


Photo: NYTimes

Even though we are able to have crabs all year round, the soft shell crab is one of the varieties that has a true farming season (mid May - September, depending on the temperatures of the water).  During this time, the blue crab is molting its shell in order to grow in to a new, larger one.  When the crab loses (pretty much ejects itself from) its shell, they have to be taken out of the water immediately and harvested before they begin to grow their new, hard shell…you know the one that takes forever to crush and get to the juicy, delicious meat.  

As with most shellfish, it’s best to purchase live and take home immediately. Taking home a lobster and throwing in a pot of boiling water, or (gasp) sticking a knife in the head before throwing in said boiling water is a whole lot easier (in the sense of being humane and having less guilt) than cutting off the face of the soft shell crab, ripping out the gills from behind the face and then removing the apron on the underside of the crab….you tell me!  But, if you are adventurous in your cooking and you choose to tackle this task, this is a great step by step for cleaning them at home (and good luck to you, I will continue to have my local fishmonger clean them for me…thanks!).


SINGAPOREAN BLACK PEPPER SNOW CRAB

Photo: Saveur

I will never forget when I was vacationing in Hawaii having dinner at this completely ordinary looking restaurant and ordering a variety of sushi, one of which was a crab roll.  Crab roll - what comes to mind? The fake crab meat that's good...but not great.  When the food arrived, the crab roll was ridiculous, not to mention all the other sushi!  I’m talking fresh, amazing, shredded snow crab meat explosion wrapped in seaweed.  My mouth is watering just thinking about this meal again.  If you have the chance to experience fresh, just caught snow crab you should definitely jump at the chance.  This recipe is a delicious, simple way to enjoy the legs as well.


TRINIDAD CALLALOO WITH CRAB

Photo: Caribbean Pot


CRACKED DUNGENESS CRAB WITH LEMONGRASS, BLACK PEPPER & BASIL
 

Photo: My Recipes

Unfortunately, due to this crazy weather we have been having this year (thanks El Nino), Dungeness crab season has had a late start on the West coast.  The season finally kicked off at the end of March and ends in June. I love the sweetness of this crab meat - it complements different flavors so well and also is just perfect on its own with a bit of drawn butter.


STONE CRABS

Stone crabs are one of my favorite types, and especially since I found out how they are harvested.  The crabs are caught and one claw is removed and then the bodies thrown back in the water to regrow their claws (allowing it to have one to fend off predators).  How amazing!  As with most crab legs, these are great just steamed with a great mustard sauce or clarified butter.


CRAB CAKES WITH MUSTARD SEEDS & PARSNIPS

Serves 4-6; Yields 15 to 16 crab cakes

1 medium parsnip, peeled and cut into a medium dice

2-3 tablespoons canola oil plus more for frying

1 teaspoon mustard seeds

8 curry leaves (optional)

1 large shallot, finely minced

1-2 red and/or green chiles, finely chopped (ex. red jalapeno, jalapeno, thai)

3 - 4 garlic cloves

1 pound jumbo lump or lump crabmeat, drained and picked through for any shells

¾ cup breadcrumbs

1 egg, lightly beaten

½ teaspoon salt

¼ teaspoon freshly ground black pepper

handful of fresh herbs (chives, cilantro, parsley), roughly chopped

1 tablespoon unsalted butter for frying

kosher salt to taste

In a medium pot, cover parsnips with cold water by about 1 inch.  Bring up to a boil and cook for 6-8 minutes until fork tender.  Drain and pass through a ricer (best) or mash with a potato masher and let cool. 

While the parsnips are cooking, heat 2 tablespoons of oil in a medium saucepan over medium high heat.  Add mustard seeds and curry leaves if using, and, when they start to pop, reduce the heat to medium-low and add the shallots, chili and garlic.  Saute for 2 to 3 minutes until the shallots are translucent, remove and let cool.

In a medium bowl, combine crab with the pureed parsnips, the shallot mixture, breadcrumbs, egg, salt, pepper and herbs.  Form into 2 ¼ inch patties and let chill in the refrigerator for 15 minutes.

In a large sauté pan, heat 1/8” of oil with 1 tablespoon of butter.  Fry each crab cake 1-2 minutes per side until golden brown and removed to a papertowel-lined plate to drain.

Finish crab cakes with a sprinkle of salt as soon as they are out of the oil and serve hot.

Freezing: These guys freeze really well, and I love to make a double batch to keep some on hand for a quick weeknight meal.  Just let them thaw for a few hours in the fridge before frying up!


tags: soft-shell crab, soft shell crab recipes, how to cook crab, singaporean black pepper crab, crab cake recipe, crab cakes
categories: all 3, appetizers 1, blog, main dishes, quick & easy, recipes
Wednesday 05.18.16
Posted by Aliya LeeKong
 

Smoked Ricotta Gnocchi with Ramps, Favas & Thai Green Curry

View fullsize gnocchi4.jpg
View fullsize gnocchi2.jpg
View fullsize gnocchi1.jpg
View fullsize gnocchi3.jpg

SMOKED RICOTTA GNOCCHI WITH RAMPS, FAVAS & THAI GREEN CURRY

Inspiration can come from anywhere, and this dish started because I bought a tub of smoked ricotta and it loomed in the fridge.  There were some stray egg yolks as well, and I thought about how I could use it all up: a ricotta tart, savoury cheesecake...but ultimately landed on making gnocchi.

When I mentioned it to my girlfriend, she told me a secret her grandma used for her gnocchi, which she said were the ultimate.  Potato flakes!  Instant. Mashed. Potatoes.  And her grandma was a genius!  So in playing around with making the ricotta gnocchi, I added some in, and light, fluffy (without any dough-y taste) gnocchi resulted. 

I also happened to be working on a spring thai curry with ramps and favas and dipped one of the butter-browned gnocchi in because why not.  So this dish!

If you scroll down, you may decide that there is an insane amount of work to make this dish.  But I think what's great is that there are elements to play around with to do from scratch or decide not to:  You can use store-bought gnocchi.  You can make the gnocchi with regular ricotta instead of smoked.  You can just make the curry and throw some fish and shrimp in (which is what I did with the leftover curry!).  You can leave out some of the hard-to-find Thai ingredients and still have an amazing dish.  I've played around with all of these, and it's still damn good.

And this Thai green curry is everything you want in a Thai curry - super spicy (seriously not for the faint of heart) with that beautiful lemongrass-ginger-kaffir lime fragrance and brightness from Thai basil.  And it only takes 10 minutes to make.  So so good...

Enjoy!

Serves 4 to 6

Ingredients

For the gnocchi:

8-ounce container ricotta cheese, preferably whole milk

1 egg yolk

1 egg

½ cups freshly grated Parmesan, plus more for serving

1 ½ tsp kosher salt, plus more

Freshly ground black pepper

1 cup potato flakes

¼ cup "00" or all purpose flour

½ stick unsalted butter

For the curry:

2 cans (13.5 ounces) coconut milk  (full fat)

4 tablespoons Thai green curry paste*

½ cup water

1½ teaspoons palm / coconut sugar or brown sugar

6 kaffir lime leaves

4 ramps, top leaves chopped and bottom stems left in tact (about 1 ½ inches at the bottom)

1 lemongrass stalk, outer leaves removed and inner stalk finely chopped (optional)

½ inch piece of galangal, thinly sliced (optional)

¼ cup fava beans, shelled & peeled

2/3 cup green beans, snipped and halved

1 tbsp fish sauce

Garnishes: handful of chopped fresh cilantro, handful of chopped Thai basil and 4 halved Thai chilies


For the gnocchi:

Set a large pot of water on the fire to bring up to a boil while you are prepping the gnocchi.  Remember to salt the water heavily once it’s up to a boil.

First, you want to dry out the ricotta a bit.  You can drain or just blot your ricotta with paper towels depending on how much moisture it has.

In a bowl, mix together the ricotta, egg yolk, egg, Parmesan, salt and some freshly ground black pepper using a wooden spoon or a spatula.  You want the mixture to be uniform.  Add in the potato flakes and flour and fold until incorporated.

On a floured surface, mold dough into a circular disc.  Cut into 4 quadrants using a pastry cutter or a knife.   Roll each quadrant out into a 12-inch cylinder and then cut into 8 to 10 gnocchi. 

You can cook these right away or freeze to cook later.  If you are freezing to cook later, let them freeze on a floured baking sheet with space in between each gnocchi before putting them in plastic bags.  That way, they won’t stick together.

Add gnocchi gently to the boiling, salted water and cook for about 3 minutes or until the gnocchi float for about 30 seconds.   If you are cooking all of these, I wouldn’t do them all at the same time – break it up into 3 rounds of boiling. 

If you are cooking from frozen, add on an extra minute or two and follow the same rule for floating.

For the curry:

Start with the canned coconut milk.  Don’t shake the cans before using! You want to take the thickened coconut cream from the top of one can and sauté in a medium saucepan.  Saute for about 6 to 8 minutes over medium-high heat until it breaks and looks a bit curdled.  Add the Thai green curry paste and sauté for another 5 minutes.  You want to cook out any rawness in the curry paste.

Add in the remaining coconut milk, water, palm sugar, kaffir lime leaves, ramps, lemongrass and galangal (if using), and bring up to a boil.  Simmer for 5 minutes.

Add in the fava beans and green beans and simmer another 5 minutes.

Remove from the heat, and add in the fish sauce, Thai basil, cilantro and chilies.  Cover and let sit 5 to 10 minutes to infuse.

To serve:

In a skillet, melt the butter until it browns.  Add in the gnocchi and sauté for about 1 minute per side to crispy brown.  Drain on a paper towel-lined plate and sprinkle with a bit of salt.

Spoon the curry into the bowls and top with the gnocchi and extra basil and cilantro, if desired.

*I like Maesri.

tags: how to make gnocchi, ricotta gnocchi recipe, best ricotta gnocchi recipe, thai green curry recipe, spring thai green curry, how to make thai green curry
categories: all 3, appetizers 1, blog, main dishes, man-friendly, recipes, vegetarian
Wednesday 04.27.16
Posted by Aliya LeeKong
 

Link Love: Step Up Your Easter Cooking

LINK LOVE: STEP UP YOUR EASTER COOKING

Easter is such a fun holiday to cook for! With the beginning of Spring, the meal just signifies all the good, fresh food to come!  So, with this in mind, I wanted to share some of the recipes that have been inspiring me this year (because I'm honestly still on the fence for my menu)!  Enjoy!


SLOW ROASTED LAMB PAPPARDELLE WITH GARDEN PEAS & MINT

Photo: What Katie Ate

Photo: What Katie Ate


GRILLED LAMB WITH HARICOT VERT AND COCONUT MILK BROTH

Photo: Brooklyn Supper

Photo: Brooklyn Supper


FRESH HAM WITH HONEY & CLOVES

Photo: Saveur

Photo: Saveur


CACIO E PEPE POTATOES

Photo: Bon Appetit

Photo: Bon Appetit


POTATO LEEK AU GRATIN

Photo: Food52

Photo: Food52


SIMPLY SAUTEED GARLICKY PEA SHOOTS

Photo: A Little Yumminess

Photo: A Little Yumminess


FARRO & ASPARAGUS SALAD WITH SESAME-MISO DRESSING

Photo: Two Red Bowls

Photo: Two Red Bowls


SKY HIGH LEMON MERINGUE PIE

Photo: A Beautiful Mess

Photo: A Beautiful Mess


MOLTEN HALVA LAVA CAKES


KOMBUCHA HOLIDAY PUNCH

Photo: 101 Cookbooks

Photo: 101 Cookbooks

tags: Easter recipes, holiday recipes, what to make for Easter, link love
categories: all 3, appetizers 1, blog, drinks & cocktails, holiday, lifestyle-1, main dishes, man-friendly, recipes, traditions
Wednesday 03.23.16
Posted by Aliya LeeKong
 

Tagliatelle with Maitake Mushrooms, Pickled Chilies & Egyptian Dukkah

View fullsize maitake pasta 2.jpg
View fullsize maitake pasta 1.jpg

TAGLIATELLE WITH MAITAKES, PICKLED CHILIES & EGYPTIAN DUKKAH

Winter and pasta for me go hand-in-hand, and, as always, I love to get a little experimental with flavor combos.

Maitake mushrooms are such a favorite – they are meaty and nutty (and have actually replaced my weekend bacon, if you can believe!).  I did a pop-up dinner at a little store in my neighborhood in Brooklyn, and I created this dish for the dinner.  Hard, pan-roasting the mushrooms and finishing them with butter and salt make them irresistable and is a key step in the recipe.  They need a proper sear to bring out what’s best in this dish.  

The sauce is super thin and easy and gets an extra hit from the pickled pepper juice.  I top up the pasta with some of the actual pickled peppers, chopped cilantro, and Egyptian dukkah, a gorgeous nut and spice blend with coriander that complements the mushrooms beautifully. 

This can be as homemade or not as you want.  You can use my fresh pasta recipe or store-bought.  You can pickle your own cherry peppers or grab a jar at the grocer.  And the spice blend, Egyptian dukkah, can be bought from a specialty store, or you can use my recipe below - it stores for a month, so have fun sprinkling it on salads, a nice, seared piece of fish or on your next rice bowl.  Enjoy!

Serves 6

1 pound fresh or dried tagliatelle

1-2 tablespoons canola oil

4-5 tablespoons unsalted , divided

2 (8 ounce) maitake mushrooms, hand torn into bite-sized pieces

1 shallot, finely chopped

3 cloves fresh or roasted garlic, minced

¼ cup white wine

¾ cup chicken broth

1/3 cup heavy cream

¼ cup pasta water

scant ¼ cup pickled cherry peppers, juice reserved

small handful of fresh cilantro, finely chopped

2 tablespoons Egyptian dukkah

salt & freshly ground black pepper, to taste

Bring a large pot of water up to a boil and season generously with salt until the water tastes salty.  Add the pasta and cook until tender but still a bit firm to the bite, about 8 to 10 minutes if dry or according to package directions if fresh. Drain pasta reserving ¼ cup of the pasta cooking water.

While the pasta is cooking, heat a large skillet over high heat.  Add the tablespoon of canola oil, and when the oil starts to smoke, add the maitake mushrooms in a single layer.  If they don’t all fit, you may need to repeat the process depending on the size of your skillet.  Cook for 2 to 3 minutes.  The cooked side of the mushroom should be golden brown and crispy.  Flip the mushrooms and throw in 2 tablespoons of the unsalted butter.  Season the mushrooms generously and cook for another 2 minutes.  Remove mushrooms using tongs to a paper towel-lined plate.   If repeating, use the other tablespoon of canola oil and only 1 more tablespoon of butter. 

Lower the heat to medium-low, add another tablespoon of butter and the shallots and garlic with a bit of salt.  Let cook for 3 to 4 minutes until the shallots are translucent.  Increase the heat to medium-high and pour in the white wine.  Reduce until most of the wine has evaporated and the shallots are almost dry.  Then, add in the chicken broth, heavy cream, and pasta water.  Reduce in half.  The sauce should coat a spoon but shouldn’t be too thick. 

Remove the sauce from the heat and swirl in a final tablespoon of butter along with 2 teaspoons of the pickled cherry pepper juice.  Taste and adjust seasoning.  Throw in the pasta, maitakes and chopped cilantro and toss to coat.

Serve immediately garnished with a few pickled cherry peppers and about 1 teaspoon of Egyptian dukkah per plate.

Egyptian Dukkah

Yields approx 1 ½ cups

¼ cup hazelnuts, roughly crushed

¼ cup pistachios, roughly crushed

½ cup white sesame seeds

¼ cup coriander seeds

2 tablespoons white cumin seeds

2 tablespoons fennel seeds

2 tablespoons dried mint

pinch of chili powder

½ teaspoon black pepper

1 ½ teaspoons salt

Preheat the oven to 350° F.  As opposed to toasting in the skillet, I like to toast this blend up in the oven so the nuts and spices toast evenly.   

Line a baking sheet with parchment paper.  Add the hazelnuts, pistachios and all of the seeds and make sure they are in a single layer.  Toast for 8 to 10 minutes – you should smell a really nutty fragrance.

Transfer toasted nuts and spices to a mortar and pestle or a spice / coffee grinder. I like a slightly rough texture for this, so grind until there are still bits and pieces and it’s not completely powder. 

Combine with the dried mint, chili powder, black pepper and salt.  Store in an airtight container, preferably in a cool spot – it will keep for about a month.


tags: pasta recipe, homemade pasta recipe, mushroom pasta, egyptian dukkah, how to make egyptian dukkah
categories: all 3, appetizers 1, blog, holiday, main dishes, man-friendly, recipes, vegetarian, spices
Wednesday 02.24.16
Posted by Aliya LeeKong
 

Superbowl Sunday Essentials

SUPERBOWL SUNDAY ESSENTIALS

I love Superbowl Sunday, but, if I'm being honest, it has little to do with football!  it’s an excuse to have a few friends over for a nice relaxed appetizer party, watch good commercials, and enjoy a little entertainment at halftime!  Is that terrible?  Anyway, I wanted to share what I'll be cooking this Sunday...Enjoy!


HARISSA-CHEESE STUFFED FRIED OLIVES

I know, deep-frying is kind of a pain, but if you have the oil out and are going to do wings anyway, you might as well get some bang for your buck.  And these fried olives
 are amazing!!  Pitted olives filled with a bit of harissa-scented ricotta and cream cheese, rolled in panko and parm and fried to crunchy-creamy finish....my man complains that I make food that's too refined for a football party, but...then he eats these anyway!


BAKED JALAPEÑO POPPERS

Photo: Recipe Girl

Photo: Recipe Girl

So if you don't want to fry, this is just the right snack, and who doesn't love jalapeño poppers? They've always been one of my favorite bar foods, but over the years I’ve learned to create my own and somewhat healthier version (baked, not fried, and super easy)!  Slice the peppers in half, and take out the seeds and the ribs.  In a bowl mix some shredded cheddar and Monterey jack cheese with Mexican oregano, granulated garlic, granulated onion, smoked paprika, chopped cilantro and a little cumin.  Toss together and stuff in the pepper halves. Dip the halves in flour, then egg wash, then some panko; bake in 400 degree oven until tender or follow the recipe above.


BAKED TRINI WONTONS

Another recipe for the frying-averse: my baked Trini wontons.  Think wonton skins filled with ground pork (or whatever meat you like) that have the best of Asian and West Indian flavors.  Garlic, ginger, soy but also habanero, lime zest and cilantro.   Seriously yummy and great to keep in your freezer for impromptu parties.


VEGETABLE SAMOSAS

Photo: Rasa Malaysia

Photo: Rasa Malaysia

Vegetable samosas are the perfect vegetarian appetizers - little packets of crisp dough filled with cumin- and chili-scented potatoes.  These require a bit of work but are so worth it!


QUESO FUNDIDO

Photo: Bon Appetit

Photo: Bon Appetit

Nothing beats a a hot, melty, cheesy dip at a Superbowl party and this recipe gives you exactly that and then some!  What is better than dipping your tortilla chip in a bowl of melted cheddar with tomatoes, chorizo and fresh cilantro?  Yea....I can’t think of anything else either.


KOREAN-STYLE WINGS

Photo: Food52

Photo: Food52

And, finally, the wings!  Superbowl isn't Superbowl without wings, and though there's nothing wrong with the old-standby, hot wings, why not try something new? These are genius, oven-baked but with the crisp texture you love in a fried wing.  The sauce comes together by stirring together a few ingredients in a bowl - tamari, rice vinegar, ginger, chili flakes, etc.  It's seriously one of the easiest (and tastiest) wing recipes out there. 

Have fun this weekend!

tags: Super Bowl, what to cook for the super bowl, super bowl recipes, wings, crispy wings
categories: all 3, appetizers, lifestyle-1, main dishes, recipes, man-friendly
Wednesday 02.03.16
Posted by Aliya LeeKong
 

Why You Should Be Roasting a Chicken Every Week

WHY YOU SHOULD BE ROASTING A CHICKEN EVERY WEEK

There’s nothing more satisfying than having a plan of attack for dinner for the entire week, but we all know that doesn’t happen too often.  Planning ahead takes too much...planning, and we frequently find ourselves at the grocery store on Wednesday with no idea what to make!  One of the things I love to do is roast a chicken at the beginning of the week.  That way, I have the option of using the cooked chicken over the next few days in fun and creative ways AND cutting down my prep and cooking time.  Feeding only 2 “1/2” people in my home, a 4-5 lb chicken can go a loooong way! 

MONDAY: BUTTERFLIED ROASTED CHICKEN

Last week, I started off the week with Harissa-Butter Roasted Chicken with Chickpeas, Cauliflower and Onions....the harissa-butter rub in combo with the schmaltz made the chickpea-cauliflower mix one of the more delicious things I've tasted in a loooong time!  A lot of people asked for this recipe, so I'm going to give you the shorthand.  Cooking the chicken “spatchcocked” or butterflied means removing the backbone (and the sternum) of the bird and flattening it out before cooking.  This allows the chicken to roast faster than the traditional technique (30 - 45 min vs 1 - 1 1/2 hours!) as well as more evenly, and the skin is also more exposed for yummy crunchiness! But remember to save the backbone and sternum for stock later!

Basically, butterfly a chicken (technique: here in a grilled butterflied chicken recipe) and preheat the oven to 450˚ F (sometimes I walk on the wild side and go up to 500˚ F).  Combine a half stick of softened, unsalted butter with 3 tablespoons harissa and rub all over the bird.  Sprinkle with salt and pepper.  In a roasting pan, toss together 2 cans drained/rinsed chickpeas, a chopped onion, 3 or 4 cloves regular or roasted garlic, a half head of cauliflower chopped into florets, a bit of oil and salt and pepper.  Layer the chicken on top of the veg, breast-side up, and pop into the oven legs first.  After 5 minutes, drop the temperature to 400˚ F and continue roasting for another 40-45 minutes until done.  I like to check for done-ness with a cake tester or (very) small knife inserted at the thigh joint - if when inserted to the bone and pulled out it's hot, the meat is done.  You can conversely make sure it's cooked to about 150-155˚ F.    


Photo: What's Gaby Cooking

TACO TUESDAY: SHREDDED CHICKEN TACOS!

Who doesn’t love Taco Tuesday!?  Such a quick and easy dinner….AND the chicken is already cooked.  Just shred and sauté with a little butter, cumin, and coriander!  Or not.  You do need salsa though, and I love to make a fresh salsa for my tacos.  For this, I take a couple dried guajillo chiles, ancho and some serranos, a chopped onion, a couple smashed garlic cloves and place in a saucepan with enough water to cover the chiles.  Bring to a boil and then let sit for 20 minutes or so before blending in a food processor or vitamix.  When I'm blending, I add a couple tomatoes, lime juice for acidity and season (if you want to add a little smokiness to it, I sometimes add a few canned chipotles in adobo sauce; another staple in my pantry).  Once the sauce is smooth, heat a couple tablespoons of oil in a saucepan and add the sauce and simmer for 20 minutes.  Super easy, super authentic Mexican salsa!  I also love to whip up a fresh pico de gallo (diced red or white onion, cilantro, tomatoes, fresh jalapeños, and lime juice). And of course some avocado, cotija cheese and thinly sliced fresh radishes for a nice crunchy topping.  


WEDNESDAY: CHICKEN & WILD MUSHROOM PASTA WITH EGYPTIAN DUKKAH

Pasta is another simple dinner for the workweek.  Fresh pasta is my go-to, I always have some tucked away in my freezer, but fresh store bought is just as good!  I like a wide flat noodle like pappardelle for this recipe.  The flavor for this dish really comes from the Egyptian Dukkah spice topping.  I also like to have this fresh (and have the recipe in my cookbook), but you can find it in many specialty spice stores. 

You can toast hazelnuts, pistachios and various spices (coriander seeds, cumin seeds, fennel, dried mint, black pepper, salt) then crush with a mortar and pestle of throw in a blender. Hard sear the mushrooms in a hot pan and set aside. The sauce is simple: sautéed shallots and garlic until soft, add heavy cream then simmer and reduce until thickened (add a little lemon juice for some acidity and to brighten the sauce if you like).  Then add the shredded chicken and mushrooms, once the pasta is cooked, toss in the sauce with a little of the pasta water to move around if you find the sauce too thick.  Serve the pasta with the Egyptian Dukkah spice sprinkled on top and, if you like heat, with some pickled hot cherry peppers.


Photo: Organic Life

Photo: Organic Life

THURSDAY: CURRIED CHICKEN SALAD SANDWICHES

Curried chicken salad is now everywhere, and that is my inspiration for Thursday’s dinner!  By this point, most of the meat is almost gone, hopefully there is enough left to whip up a little chicken salad.  I like to take my basic chicken salad recipe (diced shallots, celery (peeled and diced), mayo, lemon juice, chopped chives, salt and pepper) and kick it up a notch by adding golden raisins, toasted curry powder and a couple tablespoons of mango chutney (you can find in specialty stores and some major grocery stores: Major Grey’s Mango Chutney). Serve this with a side of salt and vinegar potato chips or a simple green salad with a lemon vinaigrette!  And if you happen to pick up a croissant in the morning, stuff it between that and thank me later!


Photo: Serious Eats

Photo: Serious Eats

FRIDAY: CHICKEN BROTH

Nothing comes close to homemade chicken stock.  This should be a freezer staple, and having the leftover chicken carcass plus the original backbone and sternum makes this a cinch.  You just simmer these with onions, carrots, celery, garlic and parsley for an hour an a half - could not be easier.  Here are some good ratios for it.  

Enjoy!

tags: how to roast a chicken, chicken recipes, what to do with leftover chicken, harissa roast chicken
categories: all 3, blog, main dishes, recipes
Thursday 01.21.16
Posted by Aliya LeeKong
 

Feast of the Seven Fishes (Italian and Beyond!)

FEAST OF THE SEVEN FISHES (ITALIAN AND BEYOND!)

It’s only a few days to Christmas and time to commit to a decision on what to make for your holiday dinner (if you haven't already!).  The thought of turkey makes you cringe, with good reason….so what else is there to make?  In my house, the go-to for Christmas dinner is always a plump, juicy roast (think standing rib roast or rack of lamb), but this year I am inspired by the ‘Feast of the Seven Fishes’, which is a traditional Italian celebration on Christmas Eve.  This meal typically consists of 7 seafood and fish dishes but I've seen some families have upwards of 10! I'm sticking to 3 or 4, thank you.  After enduring a 3 day food coma from Thanksgiving, the thought of an array of light seafood dishes for Christmas sounds delicious and not overly filling (not to mention getting a kick start on that New Year's resolution of eating healthy!).


FIRST COURSE: EASY APPETIZER

I like to have a couple simple snacks ready for when guests arrive.  Everyone always arrives hungry and ready to eat, and this means they can snack and stay out of the kitchen! ;)  Small bites or spreads are best for this feast since there are many more courses to come, so try to keep it simple and easy to make ahead!  I love this Peruvian Clams à la Parmesana recipe that's in my cookbook.  I learned about these in Lima, clams with a little chili paste, garlic and pisco and then topped with buttery-parmesan breadcrumbs.  You can assemble them ahead of time and pop them in when guests arrive - they only take 3 minutes under the broiler!  These Quinoa-Crusted Shrimp are another great, healthy option.


SECOND COURSE: RAW BAR OR SEAFOOD SALAD

Photo: Food & Wine

Photo: Food & Wine

For me, nothing beats a great raw bar to truly showcase the flavors of the sea.  Stone crabs, cooked lobster, or gorgeous jumbo shrimp served with a flavorful cocktail or tarator sauce are showstoppers.  Pair with a seasonal salad (think: fennel, mache, oranges and pomegranate) with a bit of balsamic and oil.


THIRD COURSE: HEARTY, WHOLE FISH

This course and the next should be the big dishes, the ones that showcase the entire meal.  A whole fish, such as red snapper or striped bass would be perfect here with a couple side dishes to go along.  A whole fish doesn't have to be daunting, and salt-crusting is the perfect technique! Take 4 cups kosher salt plus 8 egg whites and thoroughly mix together.  Make a bed on the baking pan with the salt mixture, lay the fish on top and add a thick coating on top, patting down to seal it all around.  Roast for 25 to 30 minutes at 400° F.  Crack open the salt layer with a spoon and peel back the skin for the most tender, flavorful (not salty I swear!) fish you've had.  Serve with your favorite chili-garlic sauce, chermoula or a lemon-basil vinaigrette.


FOURTH COURSE: PASTA OR, IN MY CASE, PAELLA!

If we were creating a traditional Feast of the Seven Fishes, this course would showcase a pasta dish.  But, since the feast is just a guideline to this epic meal, I am choosing to replace the pasta with a delicious seafood paella recipe.  The key to a great paella is the rice!  You can use short grain rice but if you can find it, bomba rice is what most fine-dining restaurants use and is the traditional rice for this dish.  And remember, you want that crunchy rice on the bottom of the pan….that’s the best part!


FIFTH COURSE: SOUP OR SEAFOOD STEW

Photo: Saveur

Photo: Saveur

Yes, can you believe it?  We are still eating!  If you have room after consuming the previous courses, take it down a notch with a warm brothy seafood or fish soup. This recipe for Ginger Crab is nothing short of amazing and is the type of food I grew up eating - food particular to the East Coast of Africa that blends all that's amazing about African, Indian and Arab foods.   


FINALLY: PALATE CLEANSER + DESSERT!

Ok, so I’m combining the last two courses because I just don’t think I can eat anymore at this point!  A great palate cleanser could be a simple citrus sorbet or semifreddo.  The traditional dessert with this feast is an array of Italian cookies, but since we are skipping the sixth course, I’ve decided to do a decadent South African Cape Malva pudding, a moist, butter-y cake with caramelized edges steeped in a warm brandy sauce.  Done!


Enjoy! 


tags: feast of the seven fishes recipes, feast of the seven fishes, seafood recipes, what to make for christmas, christmas recipes
categories: all 3, appetizers 1, blog, holiday, main dishes, man-friendly, quick & easy, recipes, traditions
Wednesday 12.23.15
Posted by Aliya LeeKong
 

Handmade Pasta: How-To + Recipe

HANDMADE PASTA: HOW-TO + RECIPE

If pizza is my ultimate comfort food, pasta is a very close second.  I actually haven’t made pasta from scratch for a really long time and, lately, with the weather getting cooler and the fact that I'm going to serve it at my pop-up in a few weeks, I’ve been wanting to break out my pasta roller and get started.  I bought a couple cookbooks for inspiration to get me started.  The dough recipe is actually super simple, and I find myself wondering why I don’t make pasta from scratch more often at home instead of buying it at the store.  Oh right, time! That little thing that tends to escape all of us...But if you are planning on having a dinner party, nothing is more impressive than serving a plate of homemade tagliolini!  And it's something you can make in advance and cook quickly while your guests are enjoying a drink (or two...). 


MAKING THE DOUGH

There are two types of dough when making pasta; one for the different shapes of noodles (spaghetti, tagliatelle, fettuccini etc…) and one for filled pastas (ravioli, tortellini, agnolotti etc…).  The only differences between these two is that the filled pasta dough just adds a little bit more liquid to make the dough more pliable for making shapes and is a bit thinner since you are often double layering it. 

My go-to recipe is pretty simple:

Serves 6-8

2 cups 00 or all purpose flour

2 eggs + 3 yolks

1 1/2 tablespoons water

1/2 teaspoon salt

Mixing is very simple. Just create a mound with the flour ( “00” is the most commonly used in Italy, but all purpose works just as well) pour all the liquid (whole eggs, yolks, water) in the center and slowly, with a fork, combine everything until the dough starts to come together and is not sticky.  Now comes the hard part: kneading!  You want to knead the dough for at least 10-15 minutes, doesn’t sound like a huge task but it is essential to create a smooth pasta dough.  You will see as you knead the dough the roughness when the dough first comes together starts to disappear the more you work the dough.  Once the dough is nice and smooth, form in to a ball and cover with plastic wrap and let it rest.  If you're rolling it right away, you can allow rest it for 30 minutes at room temperature.  If you're rolling it later, keep it in the fridge and allow the dough to come back up to room temperature just before.  Because of the eggs in the dough, you want to use this within 24hrs to ensure freshness or freeze it for later use. 


HAND ROLL OR MACHINE?

Having a pasta machine is essential to rolling out the dough.  You can, of course, do it with a rolling pin, but it will take a lot more time and effort, not to mention a lot of upper body and arm strength!  The process of kneading alone makes my arms and hands ache, but the result is just too delicious to give up on.  There's also just something soothing about the process of rolling out the dough with a machine, going through every size on the rollers and then creating your pasta shape.  The key is to start the pasta dough on the largest setting of the machine and work down from there, cutting the dough and doing it in batches. 

Start by cutting the dough into quarters.  Flatten the quarter piece a bit and put the dough through the largest setting, once through. Fold the dough on itself (take both ends fold over and meet in the middle) rotate 90 degrees and put through the machine on the same setting again - you basically just want to get a rectangular shape to start.  Raise or lower the setting (depending on the machine) and run through again.  You want to get thinner and thinner, running the dough once at each incremental setting.  If it gets too long, cut it in half and roll each piece separately.  After the dough has made its way through, I usually end on the second to last setting for stuffed pastas or the third to last for thick noodles.


SAUCES AND FILLINGS

And now for the good stuff: the filling and the sauces!  First, though, a note on cooking.  In boiling, heavily salted water, fresh pasta only takes 1 to 2 minutes to cook, so if you spend the time up front, know that, at the very least, you are saving on cook time! 

For my pop-up, I'm doing a roasted maitake mushroom pasta with pickled chilies, garlic and some Egyptian Dukkah.  I know - major and not so traditional.  BUT I love a good simple tomato sauce with noodles, and this recipe is such a great go to.  There are so many others to choose from; Bolognese, avocado-basil pesto, and classic brown butter and sage.  The possibilities are endless - it really just depends what mood you are in!  Same with choosing the filling for stuffed pastas, you can go the traditional route and do a ricotta filled ravioli or go with the season and do a pumpkin ravioli for fall, a pea ravioli for spring etc…

The important part is to make sure you have all the essential tools to create and roll out the perfect dough - the rest you can just make up as you go along!  That is the fun part after all..

Enjoy!


tags: how to make pasta, pasta how to, how to roll pasta, how to make ravioli, ravioli recipe, homemade pasta recipe
categories: all 2, holiday, lifestyle, main dishes, side dishes-1, vegetarian, traditions
Friday 10.16.15
Posted by Aliya LeeKong
 

The Very Versatile Winter Squash

THE VERY VERSATILE WINTER SQUASH

The leaves are changing colors, the air has a cool crisp smell to it and the farmers' market is booming with a ton of winter squashes.  Nothing says cold weather comfort food than a great squash soup, roasted root vegetables with your Sunday supper or a nice, warming Indian curry.  The only difficulty is choosing which squash to use in your dish!  I put together a few of my favorite ways to bring some warmth to your dinner table this winter.


SOUPS

The first weekend of October has passed, and the heating has kicked in.  You know winter is looming around the corner, and the upside is that it’s perfect soup-making (and eating!) weather.  Everyone loves a great squash soup; they are so versatile, being sweet and savory, and take easily to different cuisines depending on the spices you use.  My Sopa de Flor de Calabaza (Squash Blossom Soup), inspired by a traditional Mexican soup, is a delicious, silky and rich soup without any cream that uses butternut squash.   Another warm and comforting soup is my Pumpkin Soup with Garam Masala & Creme Fraiche.  This soup uses the traditional South Asian spice blend, garam masala (it’s spicy and full-flavored but has no real heat to it), and the warming spices in the blend pair perfectly with pumpkin.


ROASTED

Roasting squash is a no brainer, and cut into pieces, a good squash only needs about 20 to 30 minutes in a 400° F oven.  Of course, the old standby butternut is fantastic here, but kabocha, which is an Asian variety of winter squash, is also delicious.  It has a strong and sweet flavor that pairs well with spices.  Delicata is another great options because it has super thin skin and is really easy to peel. 

Above is a photo from my cookbook for a savoury, winter vegetable crumble; roasted squash on its own would be delicious with a salty, Parmesan-laced crumble topping..  The great thing about roasted squash is you can eat it as is, purée it (see below), stuff it before roasting, make it into a hash by itself or with sweet potatoes or even toss it into a salad that day or the next!  I personally love this Miso Harissa Delicata Squash salad recipe.


PURÉES

Photo: NYTimes

Photo: NYTimes

Another great use for winter squashes is purées.  They make a great substitute for the stand-by mashed potato side and are beyond easy to make.  This recipe is the most basic - a great building block in your kitchen arsenal that you can tailor to your tastes.  A few ideas: add roasted garlic, truffle oil, chopped olives, pickled chilies or sprinkle with za'atar to make it extra special.


CURRY

Photo: Indian Simmer

Photo: Indian Simmer

To me, nothing is more satisfy or warming to the soul than curling up on the couch with my pajamas, a good movie, or book, and a hearty bowl of curry and rice.   Curries originate from the Indian subcontinent and Southeast Asia.  They can be wet or dry with wet curries resembling stews in a significant amount of sauce and dry curries cooked with little liquid that evaporates and leaves a coating on the ingredients. Curries usually involve a variety of spices with the main spices being turmeric, coriander, and cumin on the Indian side of things; chili is always a player.  Southeast Asian curries make use of different chili pastes and other herbs, aromatics and spices like kaffir, lemongrass, and galangal.  Lucky for us, squashes play well with all different types of curry.  Check out this one for Acorn Squash with Fenugreek, Chili, and Amchur.


PASTA

Photo: Reclaiming Provincial

Photo: Reclaiming Provincial

When the weather turns cool, who doesn’t love coming home to lasagna or a big bowl of pasta on the table?  To make traditional lasagna a bit more interesting, try adding some squash in between the lush layers of pasta, cheese and sauce. OR get a bit more advanced and try this gnocchi.  If gluten isn't your thing, spaghetti squash makes a fantastic substitute.  Raw, it looks just like other squashes on the inside, but after it is cooked the insides fall out in ribbons resembling spaghetti.  This recipe uses the spaghetti squash as the star of the “pasta dish”.


DESSERTS & BREADS

Being such a versatile vegetable, squashes can also find themselves in the dessert category.  Hello…..pumpkin pie anyone!? But don’t just let the pumpkins have all the fun in the pies, butternut and acorn squash can hold their own in this category too!  Try my bread recipe using butternut squash with apples and maple to make a delicious moist bread to serve with afternoon tea.

Enjoy!


tags: butternut squash recipes, butternut squash bread, squash recipes, how to cook squash, how to roast squash, butternut squash soup, squash soup, spaghetti squash recipes
categories: all 2, holiday, lifestyle, main dishes, man-friendly, quick & easy, recipes, soups, soups & salads, vegetarian, side dishes-1
Thursday 10.08.15
Posted by Aliya LeeKong
 

Grilled Lamb Sirloin Tacos with Corn, Pickled Cherry Peppers & Chipotle Crema

View fullsize tacos4.jpg
View fullsize tacos3.jpg
View fullsize tacos2.jpg
View fullsize taco1.jpg
View fullsize tacos5.jpg

GRILLED LAMB SIRLOIN TACOS WITH CORN, PICKLED CHERRY PEPPERS & CHIPOTLE CREMA

Last weekend, a friend of mine, Molly Tavoletti, stopped by (who you may know from her drool-worthy Instagram!).  In any case, we got to talking, drinking wine, and I whipped up a few of these lamb sirloin tacos for us to munch on during girl (and career and wine and life...) talk on that beautiful, sunny Brooklyn afternoon.

I know there aren't a ton of lamb sirloin recipes out there, but it really has become for me my new duck breast.  It's meaty and rich with a gorgeous fat cap that crisps.  On the grill, the smokiness adds such depth of flavor and, of course, that signature char. 

When you bite into a taco, you want flavor AND texture.  This one has grilled corn for sweetness, a bit of shredded red cabbage for crunch, homemade pickled cherry peppers for acidity and heat, and a lovely chipotle crema for tang, smokiness and silkiness. 

Enjoy!

Ingredients

Serves 4 to 6

For the tacos:

Wood chips wrapped in foil (optional; I like to use applewood)

Canola Oil

2 ears corn

Kosher salt & freshly ground black pepper

2 (8 oz) lamb sirloins

8 corn tortillas

½ cup shredded red cabbage

¼ cup pickled cherry peppers

¼ cup cilantro, leaves only

For the sauce (yields a bit more than a cup):           

8 oz Mexican crema or crème fraiche

2 to 3 chipotles in adobo (canned)

1 garlic clove

Kosher salt to taste

Procedure

Preheat the grill to medium-high (400-450° F).  Place the foil-wrapped wood chips on the grill, if using, making sure you’ve cut holes for the smoke to escape.  Oil the grill well.

For the corn: I prefer roasting them in their husks in a 400° F oven for 25 to 30 minutes prior to grilling.  This keeps them really tender and moist, and the husks and silk just slip right off.  Then, I brush them with oil and season with salt and pepper before finishing them on the grill for 5 minutes, just to char the outside.  You can also grill them from start to finish – after removing their husks and silk, 15 to 20 minutes in a closed grill, turning every 5 minutes or so.  Cut corn from the cobs.

For the lamb: Coat with oil and season generously with salt and pepper.  Place fat cap-side down on the grill and grill for 8 to 10 minutes, depending on the thickness of the piece, turning once midway through cooking.  The internal temp should be around 130° F, but basically it should feel like the fleshy part of your palm for medium-rare.  Cook longer if you prefer medium to well done lamb.  Transfer the lamb to a cutting board and rest for 5 minutes under a foil tent.  Slice thinly against the grain for the tacos.

Brush the corn tortillas lightly with oil and grill for 2 to 3 minutes flipping a few times just to warm through.

For the sauce: While the lamb is resting, to a food processor, add the crema or crème fraiche along with the chipotles in adobo and garlic.  Process until smooth and adjust seasoning if necessary.

To assemble the tacos: Spread a bit of the crema in the middle of the tortilla.  Pile on a slice or two lamb.  Top with a spoonful or two of the grilled corn, shredded cabbage, a few pickled cherry peppers, and a few cilantro leaves.


tags: taco recipe, lamb tacos, chipotle crema, how to pickle peppers, molly tavoletti
categories: all 2, main dishes, man-friendly, quick & easy, recipes
Wednesday 09.30.15
Posted by Aliya LeeKong
 

Grilled Butterflied Chicken with Charred Jalapeño Sauce

View fullsize chicken3.jpg
View fullsize chicken1.jpg
View fullsize jalapenos1.jpg
View fullsize chicken2.jpg

GRILLED BUTTERFLIED CHICKEN WITH CHARRED JALAPEÑO SAUCE

Once it gets hot out, grilling becomes my go-to for weeknight dinners (and weekend entertaining!).  It's simple, healthy and you can grill just about anything.  I know because I do throw on everything - from your standard barbecue fare to split romaine hearts to potatoes.  A good, grilled chicken is second-to-none, crispy, seasoned skin with tender, smoky meat underneath - and the butterflying technique means you get both of your wishes: evenly cooked meat plus super crackly skin.  Plus, it's easy, and there's no marination or brining necessary to have delicious grilled chicken.

This sauce (like many other recipes!) came out of a need to use up what I had.  I went to the market, and I didn't find any poblanos, which were my first choice.  But they shouldn't have been!  The jalapeños are perfect here, and the sauce has a spicy, acidic kick and a creamy (with no cream..) texture.  It's perfect with this chicken, but I could also see this with a pork chop, a lamb sirloin or even a whole grilled fish.  Happy grilling!

Enjoy!

Ingredients

Serves 4

For the chicken:

Handful of wood chips wrapped in foil ( optional; I like to use applewood)

1 whole chicken, 3 ½ to 4 lbs

2 teaspoons garlic powder

2 teaspoons sweet paprika

1 teaspoon onion powder

1 teaspoon dried oregano leaves

½ teaspoons ground black pepper

Canola oil

Kosher salt

For the sauce (yields approx. 2/3 cup):

8 jalapenos, whole

3-4 pickled cherry peppers along with 4-5 tablespoons of the pickling liquid

1 garlic clove

1 ½ teaspoons honey

Small handful of cilantro (stems + leaves)

Kosher salt and freshly ground pepper, to taste

Canola oil

Procedure

Set up your grill for indirect grilling, either piling charcoal on one side or turning only half the burners on.  I like the inside of my grill to linger around 400-450˚ F.  We're going to cook the chicken on the side without direct heat for the majority of the time and then finish it over the high heat to crisp the skin and get that char.  This is a good time to throw on the wood chips as well which will give a great smoky flavor to the chicken, but it's totally optional.

For the chicken: Butterflying a chicken isn't as complicated as it sounds.  Start with the chicken breast-side down and have some kitchen shears by your side.  Starting at the bottom of the bird, cut along each side of the backbone straight through the ribs to the neck opening.  Set aside the backbone and giblets and reserve for making stock.  Take each side of the flaps in front of you and open the chicken up flat.  Flip onto the other side and press down on the breastbone to flatten (you'll hear a crack at some point!).  Done.

Mix together the garlic powder, sweet paprika, onion powder, oregano, and black pepper.  Coat the chicken lightly in oil and sprinkle the dry rub all over.  Your hands are already messy, so just go ahead and rub it in good.  Then, season generously with salt all over.

Make sure to oil your grill as well, and place the chicken breast up on the side without the charcoal or the burners.  I like to face the legs towards the heat source and the neck side away since the legs typically take a bit longer.  Cover your grill and cook for 30 to 40 minutes.  I like to check for doneness with a cake tester or (very) small knife inserted at the thigh joint - if inserted to the bone and pulled out it's hot, the meat is done.  You can conversely make sure it's cooked to about 150-155˚ F.   For the last 3 to 5 minutes, I flip the bird over, skin and breast side down, over the direct heat side of the grill.  This makes sure you get that thin, crispy skin.

Allow the bird to rest for about 5 to 7 minutes before carving.

For the sauce: While the bird is cooking, throw the jalapeños right over the direct heat side and char on all side.  The skin should turn black and blistered.  Transfer to a plastic bag while it cools.  When cool enough to handle, use a paper towel to rub off the charred skin.  Then, with a knife, remove the stem, ribs and seeds.  Chop roughly.

Transfer the jalapeños to a blender and add the pickled cherry peppers, pickling liquid, garlic, honey and cilantro.  Season with salt and pepper.  Run the blender and then stream in the oil as needed to create the sauce.  I like to just get the blade moving and make sure the sauce is uniform and not too thick.  It should look creamy and coat a spoon.  Remember to taste and adjust the seasoning if necessary.

Serve the chicken hot with the sauce on the side. 

tags: grilled chicken recipe, grilled chicken, grilled whole chicken, grilled butterflied chicken, roasted jalapeno, roasted pepper sauce, chicken with peppers
categories: all 2, condiments, man-friendly, recipes, main dishes
Wednesday 07.08.15
Posted by Aliya LeeKong
 

North African-Spiced Chicken Thighs with Oranges, Marcona Almonds, & Summer Vegetables

View fullsize chicken-pic1-500x333.jpg
View fullsize chicken-pic2-500x333.jpg
View fullsize chicken-pic3-500x166.jpg

North African-Spiced Chicken Thighs with Oranges, Marcona Almonds, & Summer Vegetables

Crispy, chicken thighs, as of late, are fast becoming one of my favorite weeknight meals.  I cycle through trends in cooking like a lot of people and I just can’t resist how easy and fulfilling these are.  I’ve tried countless different spice blends and ways of cooking them (my friends and husband are partial to my Cajun ones…) but I love the flavor in these North African-inspired ones.

The technique I use here is a go to – crisp the thighs, cook the vegetables in the flavored chicken fat, layer the chicken back on top, throw it all in the oven and prep a salad, make the table or do whatever else you need to do!  The result is beautifully, tender chicken with really flavorful vegetables.  I love this method.

The North African blend here is called ras el hanout.  I’ll write more about this later this week but think of it like a Moroccan curry.  The roasted cumin powder – white cumin seeds I toast up in a pan before grinding to a powder – creates a lovely, smoky undertone.  The cinnamon adds a bit of sweetness, the black pepper rounds it out, and I love the gentle aroma of the saffron here.  When these spices mingle with the julienned zucchini and squash, the natural sweetness in the vegetables really come through, highlighted by the orange slices and zest.  The almonds plump and add a nutty bite.  When the season warms a bit I like to throw in some gorgeous grape or cherry tomatoes as well….Enjoy!

Ingredients

Serves 4 to 6

4 or 5 zucchini or summer squash, julienned

1½ – 1¾ tsp salt

2 lbs chicken thighs, skin-on with bone (4 to 6 thights)

2 tsp paprika

2 tsp ground cumin, toasted*

½ tsp cinnamon

¼ tsp turmeric

½ tsp ground ginger

2 tsp ground black pepper

¼ tsp cayenne pepper

pinch saffron

1 tsp unsalted butter

2 tsps vegetable oil

1 onion, julienned or finely chopped

2 cloves garlic, minced

¼ cup raw, unsalted marcona almonds, toasted

small bunch of thyme

5 or 6 thin slices of orange (~1/4 of an orange)

1 tsp orange zest

Salt to taste

Procedure

Preheat the oven to 400° F and place the rack on the top shelf.

For the zucchini, I like to use my mandoline fitted with the julienne attachment.   You can also use a food processor or quite simply a knife to do this.  In a large bowl, mix together the julienned zucchini / squash with ½ to ¾ teaspoon of salt and place in a colander over a bowl or in the sink.  You want to remove as much water as possible, so let sit for 15 minutes and then wring out the vegetables using a kitchen towel, paper towels and your hands.

Let the chicken thighs come up to room temperature.  Mix together the paprika, cumin, cinnamon, turmeric, ground ginger, black pepper, cayenne, saffron and 1 teaspoon of the salt.  Season chicken thighs on both sides with the spice blend – I personally add a bit more salt than this but I want to leave it up to you how salty you want these.  Heat a large pan over medium-high heat.  Add butter and oil and place thighs skin-side down in the pan.  Let cook for 3 to 4 minutes until the skin turns crisp.  Be careful not to let the heat creep up too high or the spices will burn.  Flip thighs and let cook another 2 minutes.  Remove to a plate and set aside.

Reduce heat to medium and pour off excess fat.  Add onions and garlic with a bit more salt to draw out the moisture and cook for a minute.  Switch off heat and add julienned zucchini, almonds and thyme and toss together.  Layer slices of orange around the outside of the pan and place the thighs on top of the bed of vegetables.  Sprinkle with orange zest and place on the top rack of the oven and cook for 20 to 25 minutes (until the juices run clear out of the chicken.

Serve chicken thighs hot with a side of the vegetables.

Note: The thighs should stay crisp but this depends on how much moisture is coming off the vegetables.  If not, I have in the past popped them back in a clean sauté pan with a bit of oil for a minute over medium-high heat to crisp them back up.

*For this blend, I like to take whole cumin seeds and toast them in a pan over a low flame until they deepen in color and are fragrant.  I then grind this to a powder.

tags: chicken thighs, marcona almonds, summer vegetables
categories: all, recipes, main dishes
Monday 06.18.12
Posted by Aliya LeeKong
 
Newer / Older