X

Sign up to receive exclusive recipes, tips, updates and other goodies from Aliya!

  • Home
  • Blog
    • All
    • Recipes
    • Spices + Ingredients
    • Lifestyle, etc.
    • Travel
  • The Cookbook
  • The App
  • Media
    • All Media
    • Video
  • About
  • Passions
Aliya LeeKong
  • Home
  • Blog
    • All
    • Recipes
    • Spices + Ingredients
    • Lifestyle, etc.
    • Travel
  • The Cookbook
  • The App
  • Media
    • All Media
    • Video
  • About
  • Passions

All About Crab Season + Crispy Spiced Crab Cakes

ALL ABOUT CRAB SEASON + CRISPY SPICED CRAB CAKES


I’ve previously expressed my undying love for crabs with this delicious recipe , and I just wanted to re-emphasize this love (ok…obsession!)  with the fact that soft shell crab season is just around the corner.  Crab is one of those delicate ingredients, sweet and flaky,  but can take on so many different preparations - deep-frying, pan-frying, baking, boiling, in a salad, soup, pasta, or rice dish.  For me, the marriage of crab with spices and butter is absolute heaven!!

Here are a bunch of crab recipes to experiment with along with my favorite, crispy, spiced crab cakes!


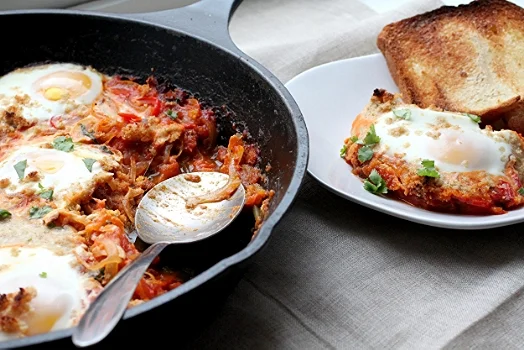
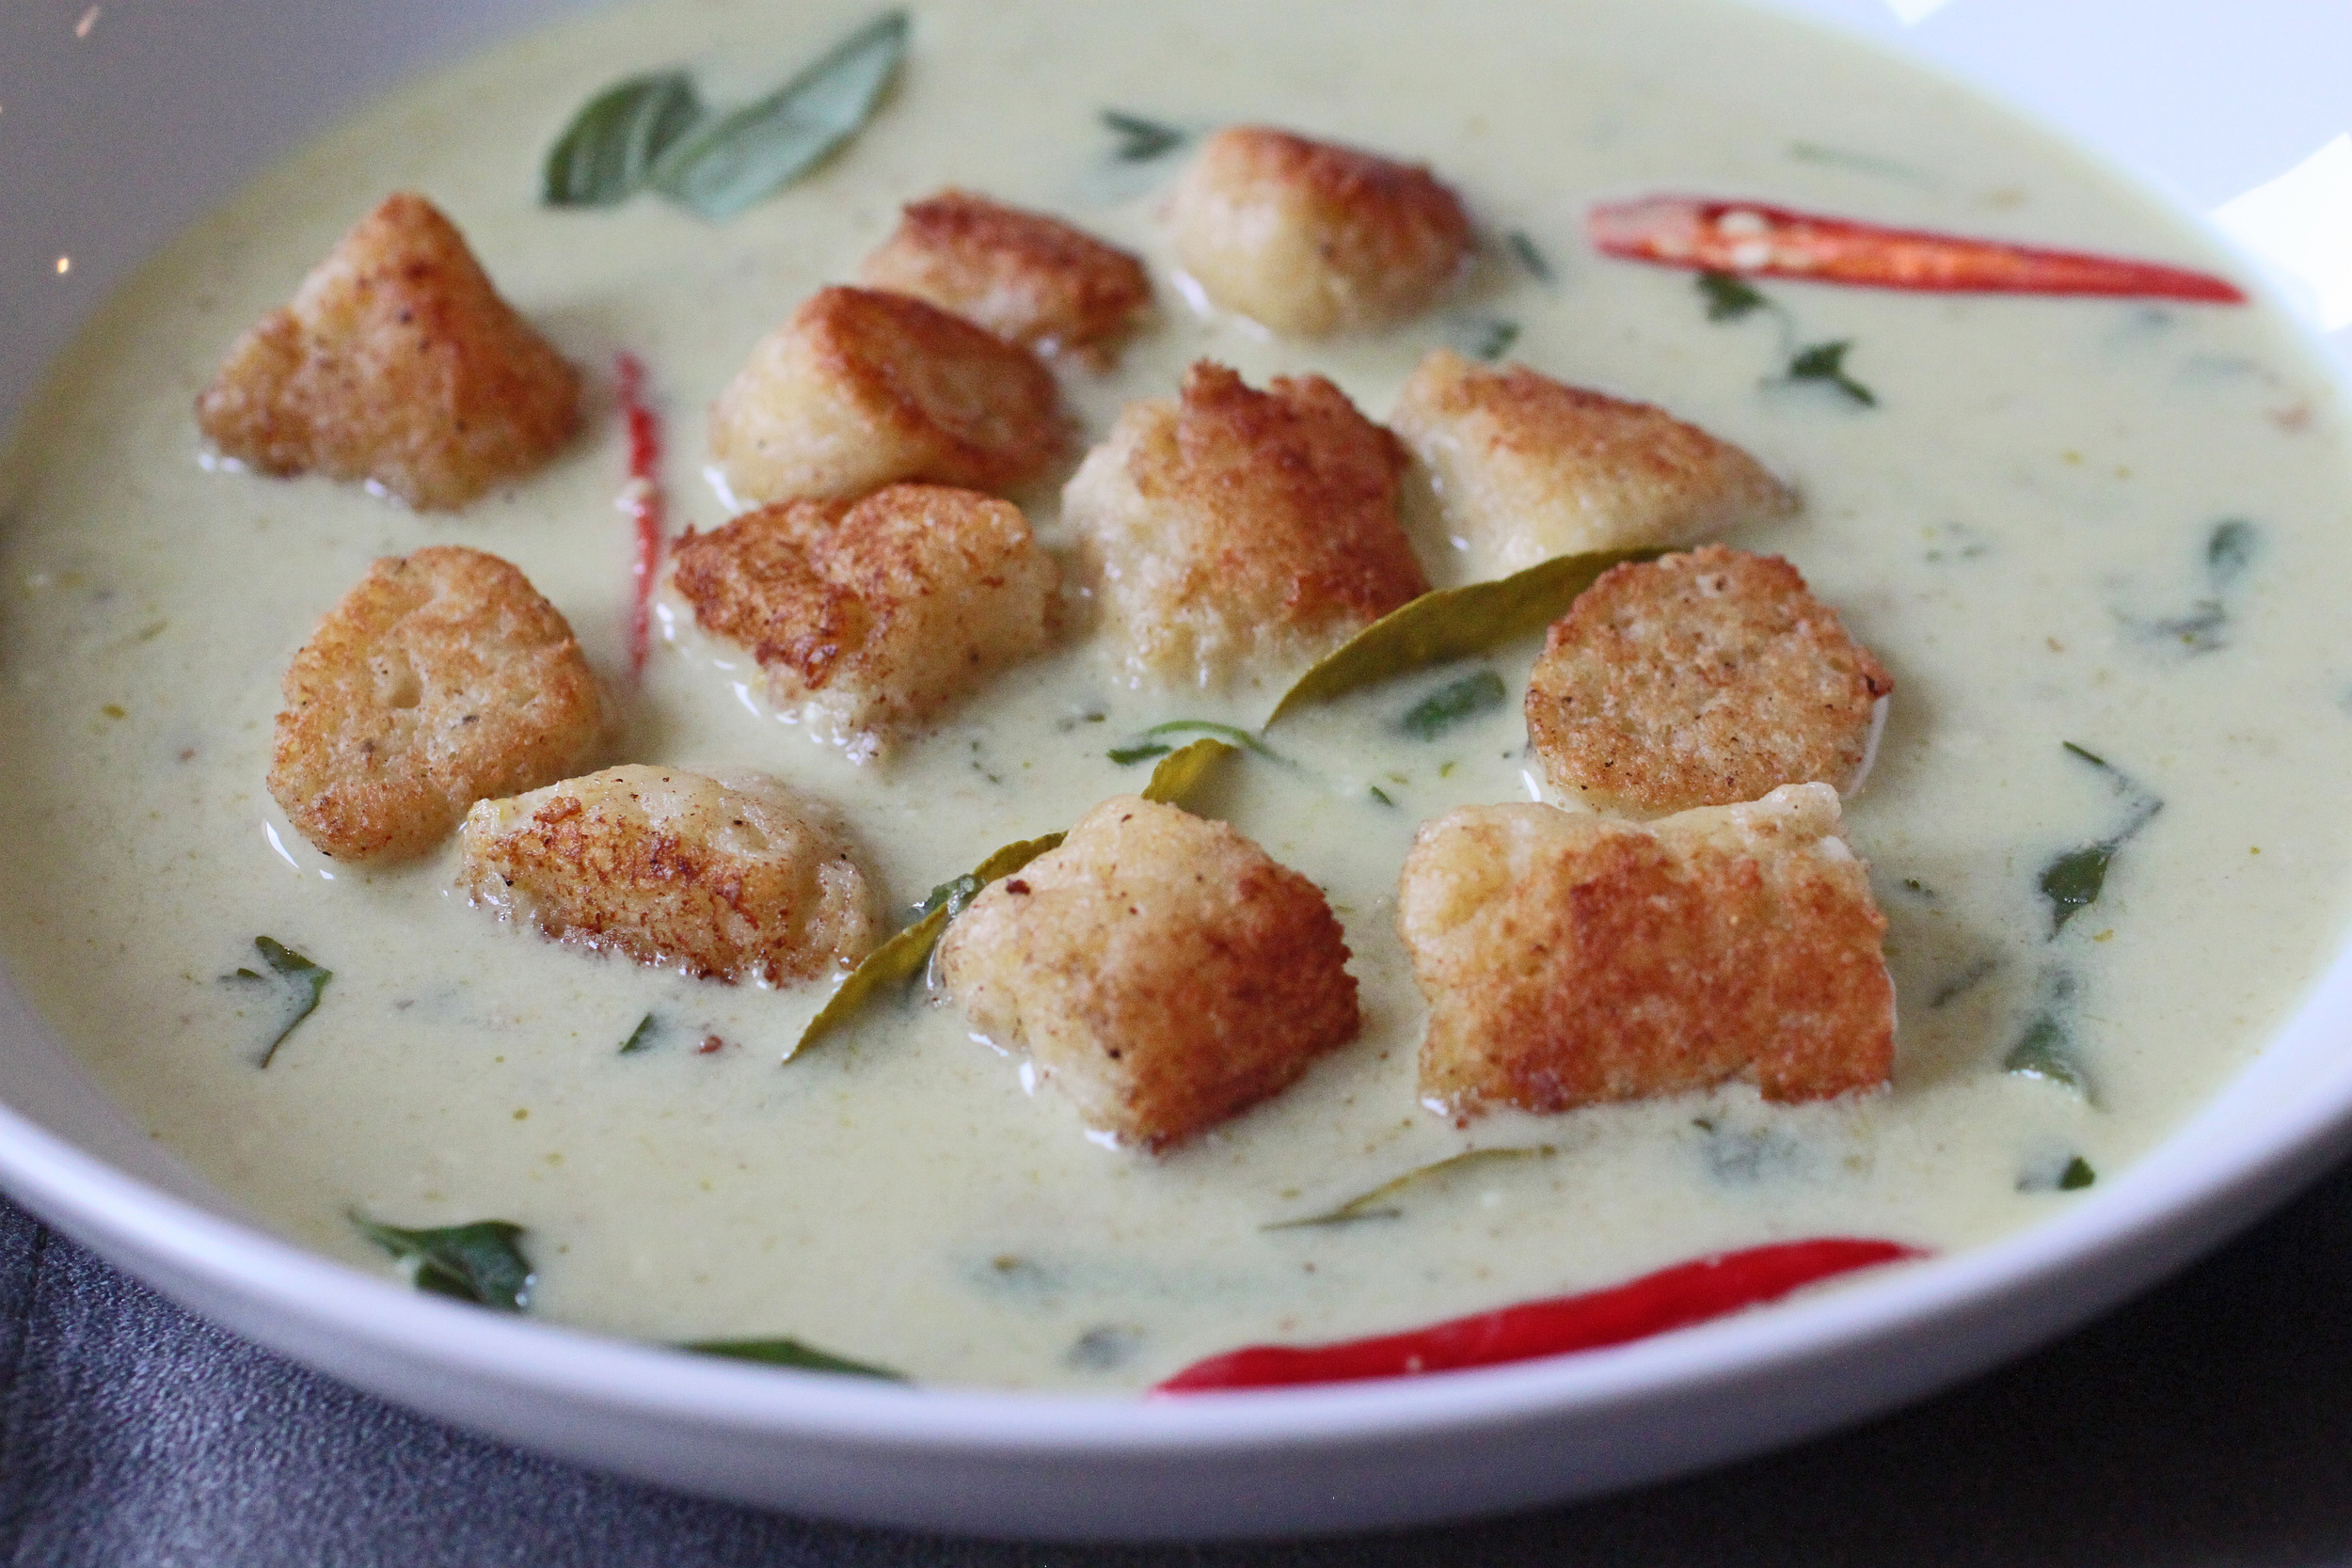
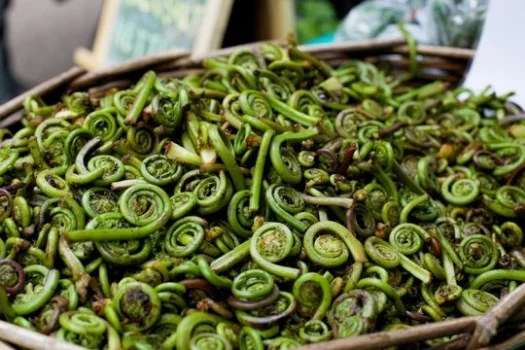
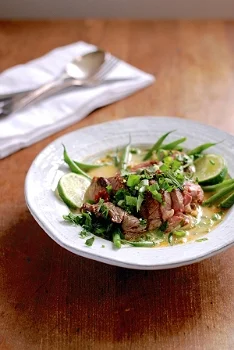
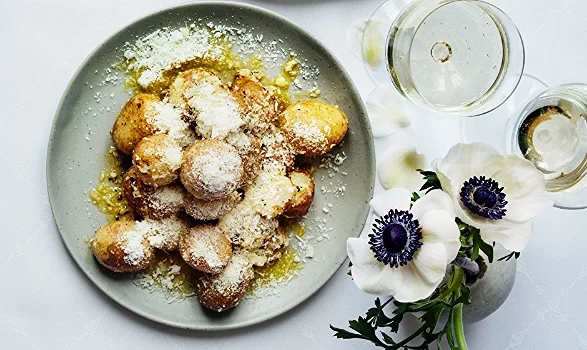
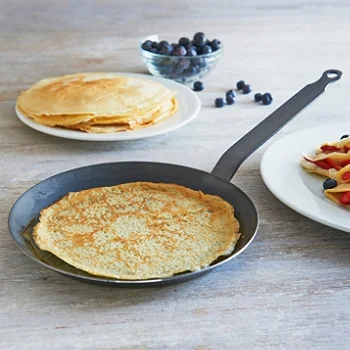
SOFT SHELL CRAB WITH CURRY BUTTER
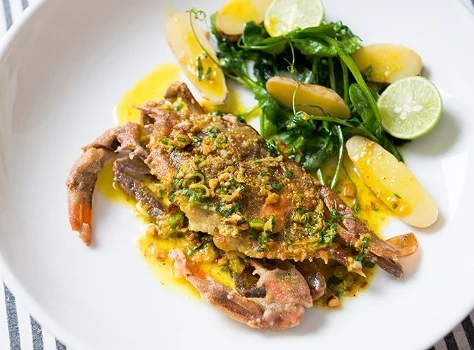
 

Photo: NYTimes

Even though we are able to have crabs all year round, the soft shell crab is one of the varieties that has a true farming season (mid May - September, depending on the temperatures of the water).  During this time, the blue crab is molting its shell in order to grow in to a new, larger one.  When the crab loses (pretty much ejects itself from) its shell, they have to be taken out of the water immediately and harvested before they begin to grow their new, hard shell…you know the one that takes forever to crush and get to the juicy, delicious meat.  

As with most shellfish, it’s best to purchase live and take home immediately. Taking home a lobster and throwing in a pot of boiling water, or (gasp) sticking a knife in the head before throwing in said boiling water is a whole lot easier (in the sense of being humane and having less guilt) than cutting off the face of the soft shell crab, ripping out the gills from behind the face and then removing the apron on the underside of the crab….you tell me!  But, if you are adventurous in your cooking and you choose to tackle this task, this is a great step by step for cleaning them at home (and good luck to you, I will continue to have my local fishmonger clean them for me…thanks!).
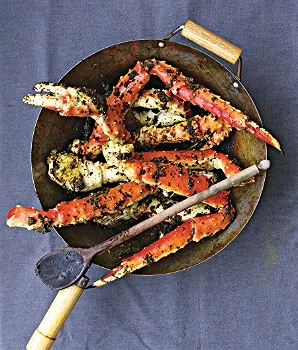
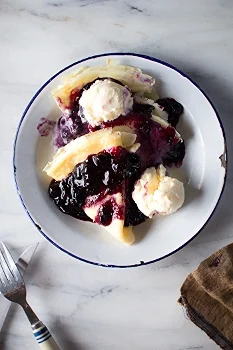
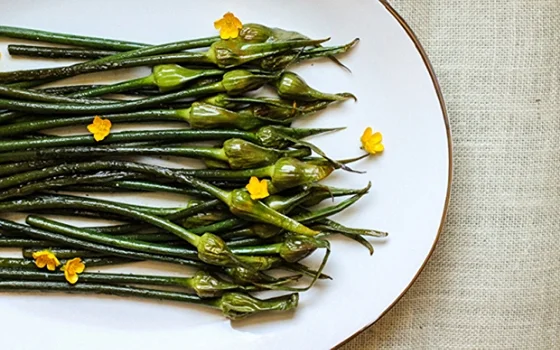


SINGAPOREAN BLACK PEPPER SNOW CRAB

Photo: Saveur

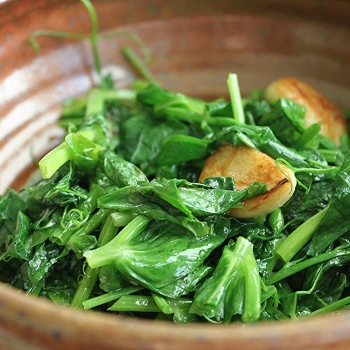
I will never forget when I was vacationing in Hawaii having dinner at this completely ordinary looking restaurant and ordering a variety of sushi, one of which was a crab roll.  Crab roll - what comes to mind? The fake crab meat that's good...but not great.  When the food arrived, the crab roll was ridiculous, not to mention all the other sushi!  I’m talking fresh, amazing, shredded snow crab meat explosion wrapped in seaweed.  My mouth is watering just thinking about this meal again.  If you have the chance to experience fresh, just caught snow crab you should definitely jump at the chance.  This recipe is a delicious, simple way to enjoy the legs as well.


TRINIDAD CALLALOO WITH CRAB

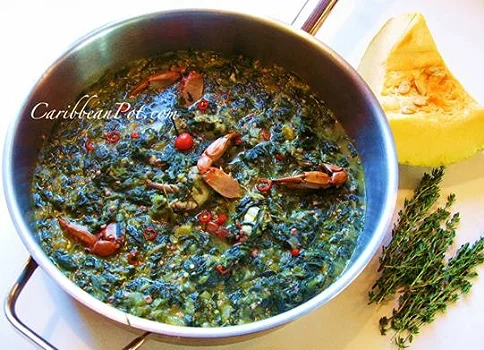
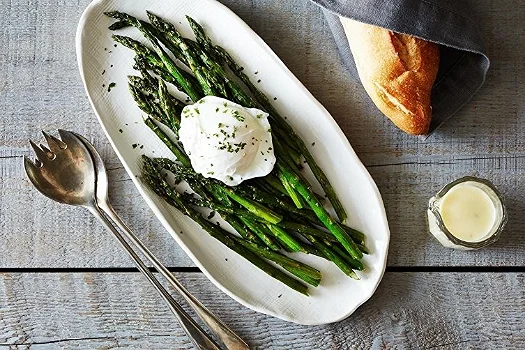
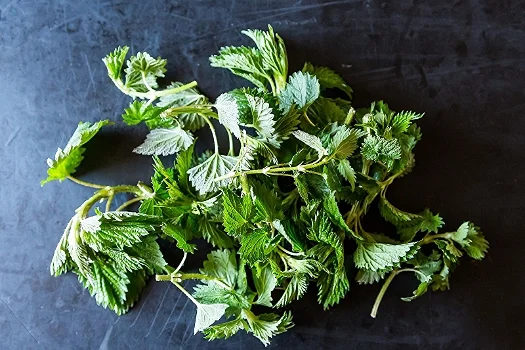
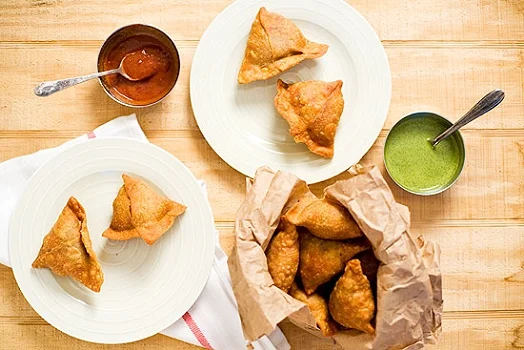
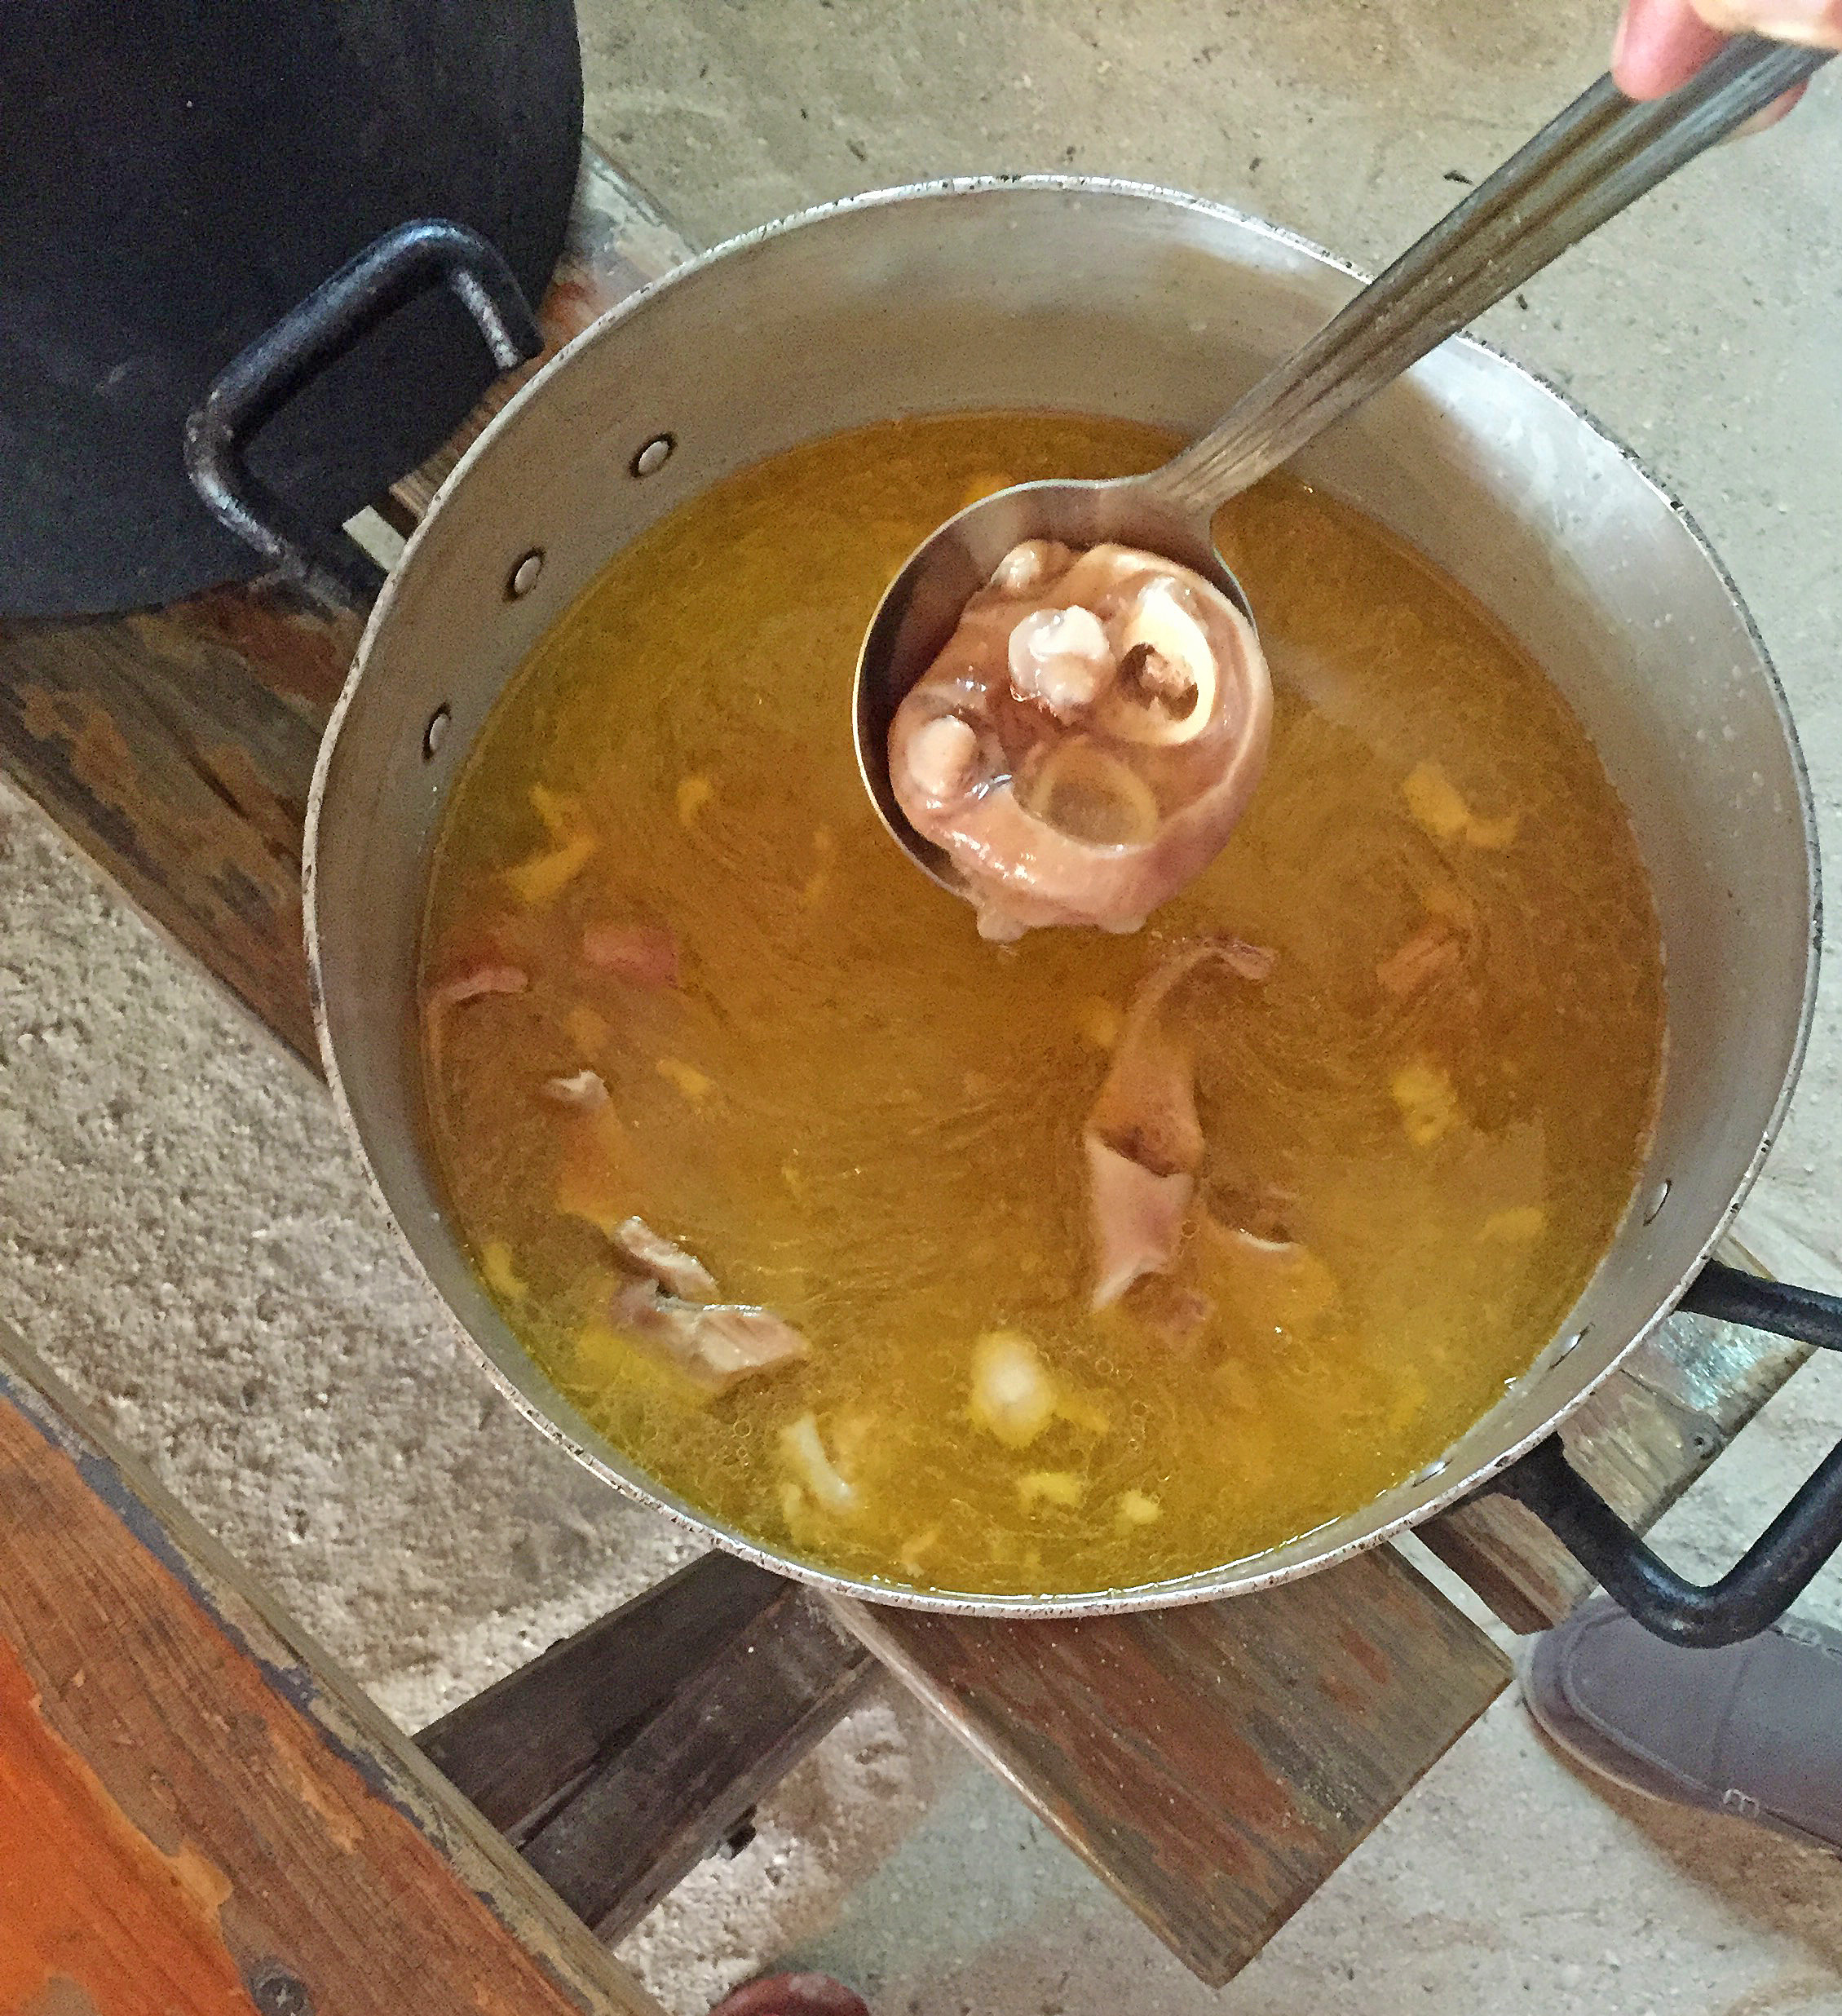
Photo: Caribbean Pot
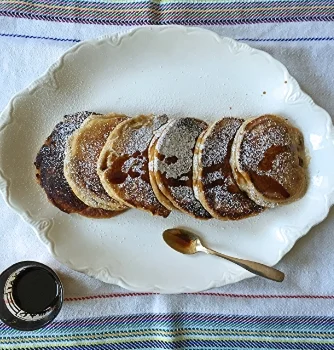
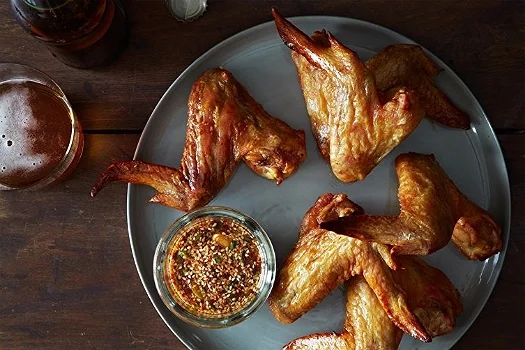


CRACKED DUNGENESS CRAB WITH LEMONGRASS, BLACK PEPPER & BASIL
 

Photo: My Recipes

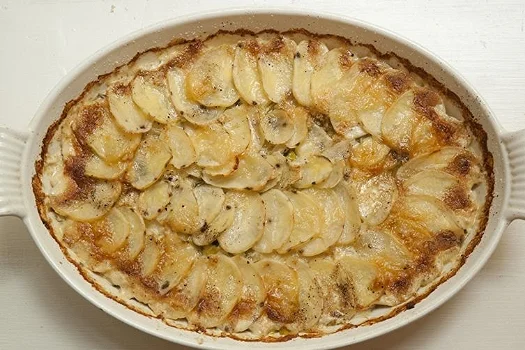
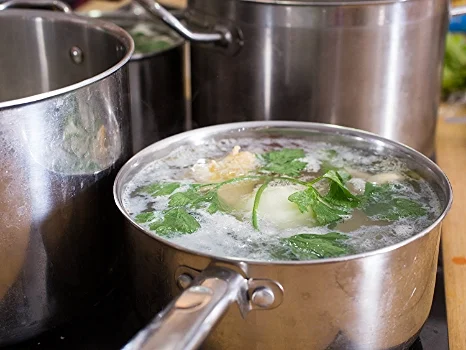
Unfortunately, due to this crazy weather we have been having this year (thanks El Nino), Dungeness crab season has had a late start on the West coast.  The season finally kicked off at the end of March and ends in June. I love the sweetness of this crab meat - it complements different flavors so well and also is just perfect on its own with a bit of drawn butter.
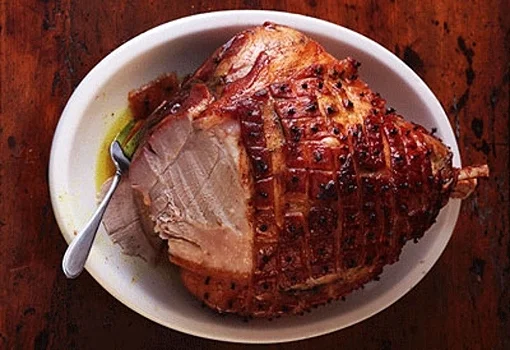
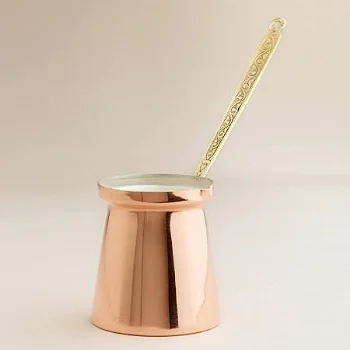


STONE CRABS

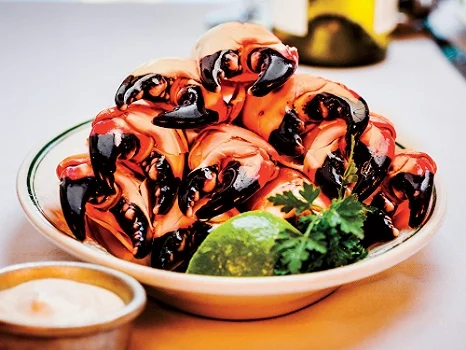
Stone crabs are one of my favorite types, and especially since I found out how they are harvested.  The crabs are caught and one claw is removed and then the bodies thrown back in the water to regrow their claws (allowing it to have one to fend off predators).  How amazing!  As with most crab legs, these are great just steamed with a great mustard sauce or clarified butter.


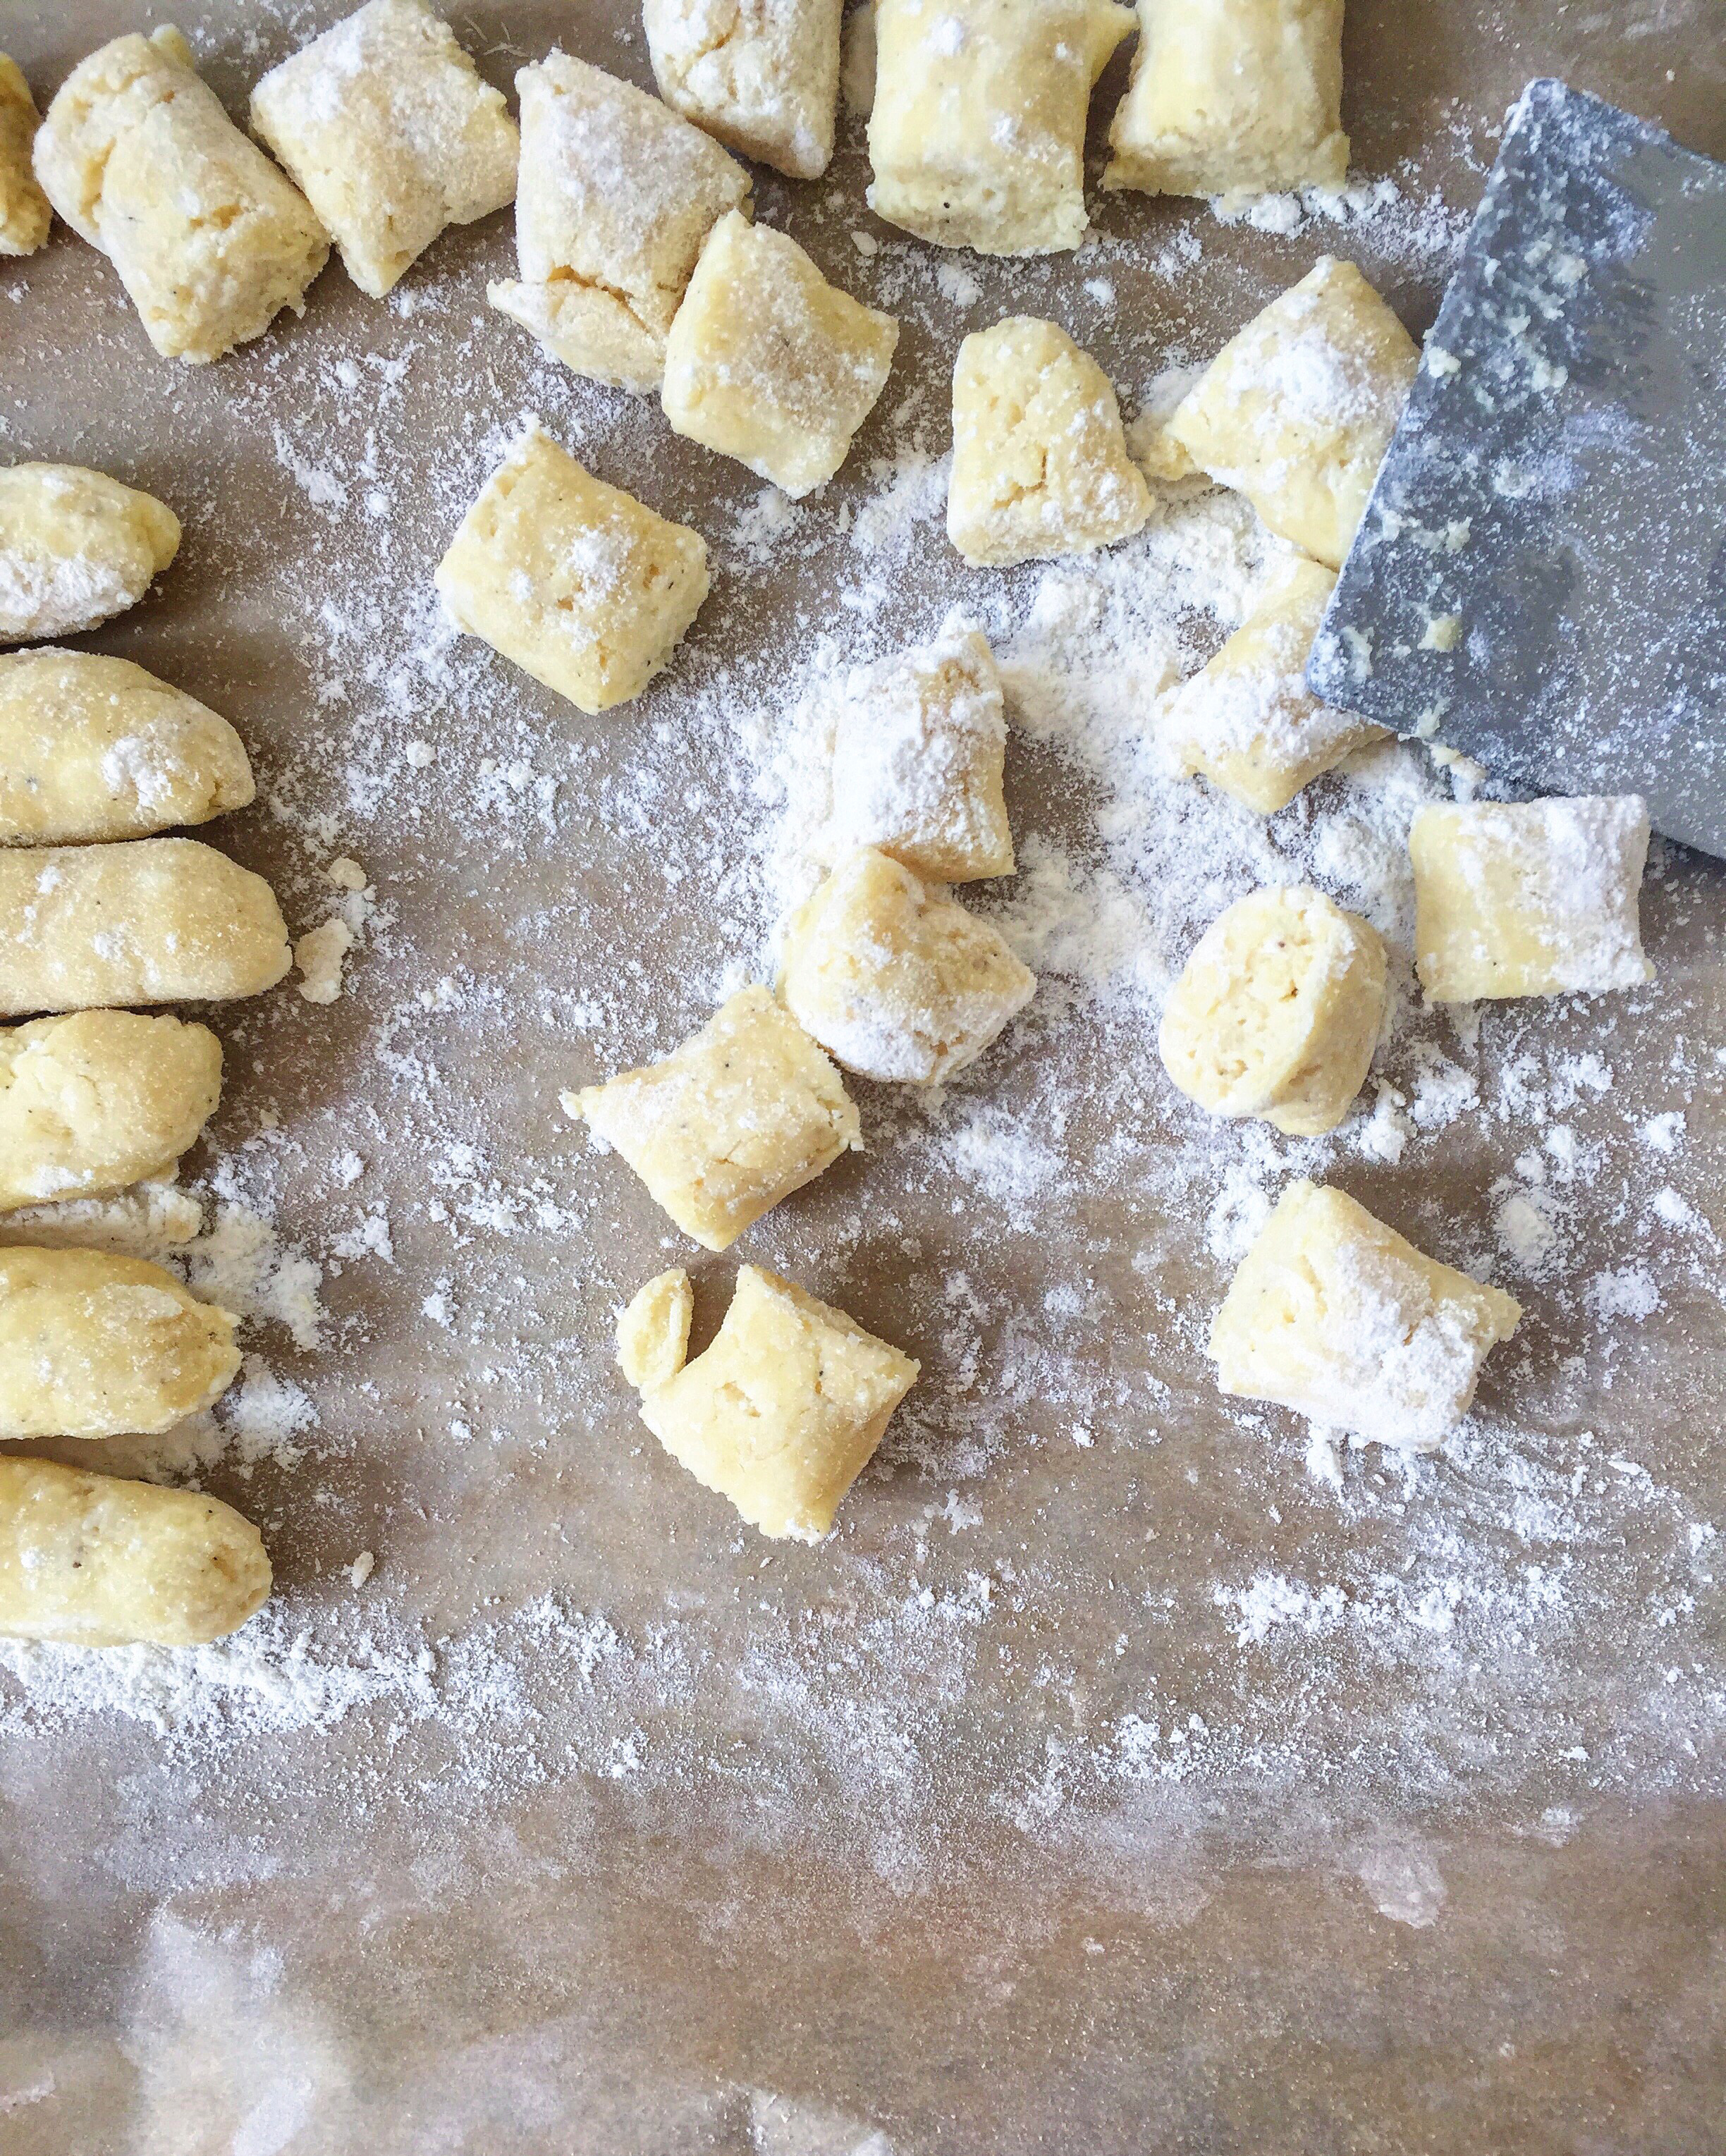
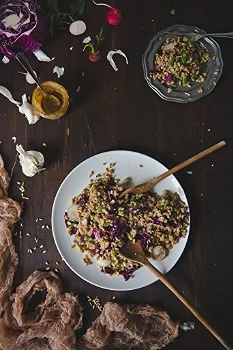
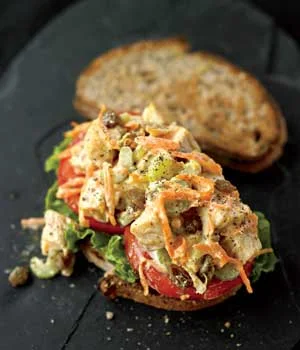
CRAB CAKES WITH MUSTARD SEEDS & PARSNIPS

Serves 4-6; Yields 15 to 16 crab cakes

1 medium parsnip, peeled and cut into a medium dice

2-3 tablespoons canola oil plus more for frying

1 teaspoon mustard seeds

8 curry leaves (optional)

1 large shallot, finely minced

1-2 red and/or green chiles, finely chopped (ex. red jalapeno, jalapeno, thai)

3 - 4 garlic cloves

1 pound jumbo lump or lump crabmeat, drained and picked through for any shells

¾ cup breadcrumbs

1 egg, lightly beaten

½ teaspoon salt

¼ teaspoon freshly ground black pepper

handful of fresh herbs (chives, cilantro, parsley), roughly chopped

1 tablespoon unsalted butter for frying

kosher salt to taste

In a medium pot, cover parsnips with cold water by about 1 inch.  Bring up to a boil and cook for 6-8 minutes until fork tender.  Drain and pass through a ricer (best) or mash with a potato masher and let cool. 

While the parsnips are cooking, heat 2 tablespoons of oil in a medium saucepan over medium high heat.  Add mustard seeds and curry leaves if using, and, when they start to pop, reduce the heat to medium-low and add the shallots, chili and garlic.  Saute for 2 to 3 minutes until the shallots are translucent, remove and let cool.

In a medium bowl, combine crab with the pureed parsnips, the shallot mixture, breadcrumbs, egg, salt, pepper and herbs.  Form into 2 ¼ inch patties and let chill in the refrigerator for 15 minutes.

In a large sauté pan, heat 1/8” of oil with 1 tablespoon of butter.  Fry each crab cake 1-2 minutes per side until golden brown and removed to a papertowel-lined plate to drain.

Finish crab cakes with a sprinkle of salt as soon as they are out of the oil and serve hot.

Freezing: These guys freeze really well, and I love to make a double batch to keep some on hand for a quick weeknight meal.  Just let them thaw for a few hours in the fridge before frying up!


tags: soft-shell crab, soft shell crab recipes, how to cook crab, singaporean black pepper crab, crab cake recipe, crab cakes
categories: all 3, appetizers 1, blog, main dishes, quick & easy, recipes
Wednesday 05.18.16
Posted by Aliya LeeKong
 

Mother's Day Breakfast in Bed

MOTHER'S DAY BREAKFAST IN BED

There’s nothing better than enjoying breakfast in bed, especially if you weren’t the one that prepared it!  So why not treat mom this Sunday to a lovely, lazy morning with a deliciously home cooked meal! (Anybody from my house getting the hint?? :)  As a child, this was my favorite way to spoil my mom (with Dad’s help….sometimes).  I put together a bunch of my favorite breakfast/brunch recipes below to help you plan your Mother’s Day feast!


HEIRLOOM TOMATO SHAKSHUKA


FLATBREAD WITH SMOKED TROUT, RADISHES & HERBS

Photo: Bon Appetit


MY FAVORITE CHAI


BLUEBERRY CREPES WITH VANILLA ICE CREAM

Photo: Flourishing Foodie


ROASTED ASPARAGUS WITH POACHED EGG AND LEMON MUSTARD

Photo: Food52


SPICED RICOTTA HOTCAKES WITH POMEGRANATE MOLASSES


BUBBLE TEA OATMEAL (!)

Photo: Two Red Bowls


RHUBARB, RASPBERRY AND ORANGE FLOWER WATER GALETTE

Photo: Cannelle et Vanille


PINEAPPLE COCONUT WATER

Photo: 101 Cookbooks

tags: mother's day, mother's day recipes, mother's day breakfast
categories: all 3, breakfast-1, blog, holiday, lifestyle-1, recipes, traditions
Wednesday 05.04.16
Posted by Aliya LeeKong
 

Smoked Ricotta Gnocchi with Ramps, Favas & Thai Green Curry

View fullsize gnocchi4.jpg
View fullsize gnocchi2.jpg
View fullsize gnocchi1.jpg
View fullsize gnocchi3.jpg

SMOKED RICOTTA GNOCCHI WITH RAMPS, FAVAS & THAI GREEN CURRY

Inspiration can come from anywhere, and this dish started because I bought a tub of smoked ricotta and it loomed in the fridge.  There were some stray egg yolks as well, and I thought about how I could use it all up: a ricotta tart, savoury cheesecake...but ultimately landed on making gnocchi.

When I mentioned it to my girlfriend, she told me a secret her grandma used for her gnocchi, which she said were the ultimate.  Potato flakes!  Instant. Mashed. Potatoes.  And her grandma was a genius!  So in playing around with making the ricotta gnocchi, I added some in, and light, fluffy (without any dough-y taste) gnocchi resulted. 

I also happened to be working on a spring thai curry with ramps and favas and dipped one of the butter-browned gnocchi in because why not.  So this dish!

If you scroll down, you may decide that there is an insane amount of work to make this dish.  But I think what's great is that there are elements to play around with to do from scratch or decide not to:  You can use store-bought gnocchi.  You can make the gnocchi with regular ricotta instead of smoked.  You can just make the curry and throw some fish and shrimp in (which is what I did with the leftover curry!).  You can leave out some of the hard-to-find Thai ingredients and still have an amazing dish.  I've played around with all of these, and it's still damn good.

And this Thai green curry is everything you want in a Thai curry - super spicy (seriously not for the faint of heart) with that beautiful lemongrass-ginger-kaffir lime fragrance and brightness from Thai basil.  And it only takes 10 minutes to make.  So so good...

Enjoy!

Serves 4 to 6

Ingredients

For the gnocchi:

8-ounce container ricotta cheese, preferably whole milk

1 egg yolk

1 egg

½ cups freshly grated Parmesan, plus more for serving

1 ½ tsp kosher salt, plus more

Freshly ground black pepper

1 cup potato flakes

¼ cup "00" or all purpose flour

½ stick unsalted butter

For the curry:

2 cans (13.5 ounces) coconut milk  (full fat)

4 tablespoons Thai green curry paste*

½ cup water

1½ teaspoons palm / coconut sugar or brown sugar

6 kaffir lime leaves

4 ramps, top leaves chopped and bottom stems left in tact (about 1 ½ inches at the bottom)

1 lemongrass stalk, outer leaves removed and inner stalk finely chopped (optional)

½ inch piece of galangal, thinly sliced (optional)

¼ cup fava beans, shelled & peeled

2/3 cup green beans, snipped and halved

1 tbsp fish sauce

Garnishes: handful of chopped fresh cilantro, handful of chopped Thai basil and 4 halved Thai chilies


For the gnocchi:

Set a large pot of water on the fire to bring up to a boil while you are prepping the gnocchi.  Remember to salt the water heavily once it’s up to a boil.

First, you want to dry out the ricotta a bit.  You can drain or just blot your ricotta with paper towels depending on how much moisture it has.

In a bowl, mix together the ricotta, egg yolk, egg, Parmesan, salt and some freshly ground black pepper using a wooden spoon or a spatula.  You want the mixture to be uniform.  Add in the potato flakes and flour and fold until incorporated.

On a floured surface, mold dough into a circular disc.  Cut into 4 quadrants using a pastry cutter or a knife.   Roll each quadrant out into a 12-inch cylinder and then cut into 8 to 10 gnocchi. 

You can cook these right away or freeze to cook later.  If you are freezing to cook later, let them freeze on a floured baking sheet with space in between each gnocchi before putting them in plastic bags.  That way, they won’t stick together.

Add gnocchi gently to the boiling, salted water and cook for about 3 minutes or until the gnocchi float for about 30 seconds.   If you are cooking all of these, I wouldn’t do them all at the same time – break it up into 3 rounds of boiling. 

If you are cooking from frozen, add on an extra minute or two and follow the same rule for floating.

For the curry:

Start with the canned coconut milk.  Don’t shake the cans before using! You want to take the thickened coconut cream from the top of one can and sauté in a medium saucepan.  Saute for about 6 to 8 minutes over medium-high heat until it breaks and looks a bit curdled.  Add the Thai green curry paste and sauté for another 5 minutes.  You want to cook out any rawness in the curry paste.

Add in the remaining coconut milk, water, palm sugar, kaffir lime leaves, ramps, lemongrass and galangal (if using), and bring up to a boil.  Simmer for 5 minutes.

Add in the fava beans and green beans and simmer another 5 minutes.

Remove from the heat, and add in the fish sauce, Thai basil, cilantro and chilies.  Cover and let sit 5 to 10 minutes to infuse.

To serve:

In a skillet, melt the butter until it browns.  Add in the gnocchi and sauté for about 1 minute per side to crispy brown.  Drain on a paper towel-lined plate and sprinkle with a bit of salt.

Spoon the curry into the bowls and top with the gnocchi and extra basil and cilantro, if desired.

*I like Maesri.

tags: how to make gnocchi, ricotta gnocchi recipe, best ricotta gnocchi recipe, thai green curry recipe, spring thai green curry, how to make thai green curry
categories: all 3, appetizers 1, blog, main dishes, man-friendly, recipes, vegetarian
Wednesday 04.27.16
Posted by Aliya LeeKong
 

My Current Faves

MY CURRENT FAVES

Just want to share with you guys a few things I'm loving right now that span the kitchen, body and mind.  Many of these would make great Mother's Day gifts too....Enjoy!


A TEAPOT ALMOST TOO BEAUTIFUL TO DRINK FROM

Babylon Blossoms Goldstar Teapot Large | T2

Babylon Blossoms Goldstar Teapot Large | T2

I wandered into this store on Prince and Crosby in downtown Manhattan and was totally in love with everything.  It was pretty hard for me to pick one image to share here.  They have a beautiful Moroccan-inspired collection of teapots, and I really love the 'tea for one' sets - waaay better than pouring hot water over a bag in a mug.  Their matcha is also incredible; I cook with it.  My mom is definitely getting something from here for Mother's Day!


FOR THE CAKESTAND OBSESSED (ME...)

Walnut Cake Stand | Food52

Walnut Cake Stand | Food52


A FITNESS TRACKER THAT'S ACCESSORY-WORTHY

UP2 by Jawbone

UP2 by Jawbone


ART THAT REFLECTS RACE + CULTURE + IDENTITY

Toyin Ojih Odutola

Toyin Ojih Odutola

Love what this Nigerian-born, America-residing artist is doing.  Definitely checking her out at the Brooklyn museum later this month.


BECAUSE MAKING INFUSED OILS / LIQUORS / VINEGARS IS DOPE

Mason Jar Infuser | William Sonoma

Mason Jar Infuser | William Sonoma


BEAUTIFYING THE WAY YOU SERVE SPICES

Striped Marble Serveware | Anthropologie

Striped Marble Serveware | Anthropologie


SUCCULENTS AS WALL-ART

Set of 2 Trigg Small Wall Vases | CB2

Set of 2 Trigg Small Wall Vases | CB2


GOOD READS

The Queen of the Night

I heard the author speak and read a chapter from the book at a MacDowell event a few weeks back and was transported.  This is what I'm reading at every free moment!

tags: mothers day gifts, holiday gift ideas, Global Kitchen, art
categories: all 3, lifestyle-1
Wednesday 04.20.16
Posted by Aliya LeeKong
 

Wild Spring!

WILD SPRING: FORAGING SPRING'S FIRST ARRIVALS

When you work in a kitchen and the season changes from winter to spring, there is nothing more exciting than seeing all of the spring (green!) produce coming in.  The beginning of spring is all about edibles foraged in the wild, and these are not your every day vegetables that you see year-round in the grocery store.  For me, they are the most delicious part of the season.  I've only seen a few of these at the market this week, but keep an eye out!  They will all pop up soon and have pretty short seasons (less than 2 months).


RAMPS

Ramps, also known as wild leeks, are probably my favorite of the spring foraged greens.  They have a big leafy top and a skinny bottom with a little bulb and a bold garlicky-onion flavor.  The leaves are great sautéed in olive oil with salt and pepper or marinated in olive oil and thrown on the grill.  The bottoms are delicious pickled with a simple pickling liquid.  I recently came across a recipe to use both the stem and greens in a compound butter; what a genius idea to savor the flavor for months to come! 


FIDDLEHEAD FERNS

Photo: The Kitchn

Photo: The Kitchn


Fiddlehead ferns are another early spring, short season veg.  These cute little pinwheels are the beginning of a fern plant.  They are delicious when cooked, but unlike other veggies, you can’t eat them raw.  Treat them as you would asparagus when it comes to eating them on their own (blanching, sautéing, steaming).  They are also great in pasta and rice dishes and are even perfect as a curry.


GARLIC SCAPES

Garlic scapes are the top of the garlic plant that is above ground.  They are harvested from the plant in order to focus all of its energy on the bulb below the surface to produce flavorful garlic.  Scapes have a very mild, garlicky flavor to them and are delicious raw or cooked.  You can substitute them in dishes for scallions or even pickle them like ramps - there are endless ways to cook them.


STINGING NETTLE

Photo: Food52

Photo: Food52

Have you ever touched a plant and had a crazy, stinging pain in your hand as if you had been stung by about 20 fire ants?  I have, while on vacation in England, and it was not fun.  And now this plant, the stinging nettle, has been popping up in menus everywhere making me have flashbacks!  Luckily, the stinging goes away once the plant is cooked, and nettles are delicious (and healthy) when cooked!  Nettles make a great substitute for spinach, are delicious in omelettes and work really well in a pesto! 


SPRING ONIONS


Spring onions are very young onions that are picked before they mature.  They look like scallions but have a more rounded bottom to them.  These onions have a much milder flavor and are delicious eaten both raw or cooked.  They are great tossed in olive oil, salt and pepper and thrown straight on the grill or sauté and add them to any recipe that calls for onions ( think soups, tarts, breads!)  


MORELS

The only non-green edibles on this list are morels, gorgeous mushrooms with a deep earthy and umami flavor.  You want to find ones that are on the firmer side, and deep-cleaning these is a must!  Their crevices hide more dirt than you can imagine, so soaking them in cold, salted water helps draw everything out.  After that, they don't need much though they shouldn't be consumed raw - a little butter-poaching is always delicious or even a quick sauté with some ramps or spring onions.  Butter and cream seem to bring out what's best in this mushroom; this pan butter-fry method is amazing, and I love them in a pasta.


Enjoy!


tags: spring garlic, recipes for spring, how to cook morel mushrooms, garlic scapes, fiddlehead fern recipes
categories: all 3, lifestyle-1, blog
Wednesday 04.13.16
Posted by Aliya LeeKong
 

A Bread Dough You Can Use for Everything

View fullsize Photo Mar 28, 5 47 10 PM.jpg
View fullsize Photo Mar 28, 4 14 47 PM.jpg
View fullsize Photo Apr 03, 12 42 45 PM.jpg
View fullsize Photo Jan 17, 12 27 40 PM.jpg

A BREAD DOUGH YOU CAN USE FOR EVERYTHING

Lately, I've been mildly obsessed with baking my own bread and not just your basic quick bread: the real stuff with yeast and what not.  It always seemed so time-consuming - brioches with 5 steps and 2 rising times, cinnamon buns that proof in the refrigerator overnight, sourdoughs with starters, weighing ingredients, waiting for them to rise....(I hope I haven't talked you out of reading on!)

Well, this recipe is none of those.  It's what I call my "universal" bread dough - a simple bread dough that requires only (1) 45-minute rise and can be used to make everything from soft, buttery, fluffy rolls, to cheese-stuffed buns or even pull-apart bread.  It's weeknight bread.  It's weekend-morning-made-THAT-morning bread.  It's guests-are-about-to-arrive bread.  It's everything.

I'm going to share the basic recipe and then some thoughts for ways to transform it.  I'm still experimenting myself with it...like every few days, so expect some more versions of this on Insta!

Yields 16 rolls

¼ cup lukewarm water

(1) ¾ ounce packet yeast (active dry)

1 cup milk

¼ cup honey

3 tablespoons butter, plus more for greasing and melting

2 teaspoons salt

1 egg, beaten

3 ¾ to 4 cups all purpose or "00" flour*

Flake salt, for sprinkling


I make this recipe in a stand mixer, but you can easily do this by hand.  Start with the lukewarm water in the bowl of the stand mixer and sprinkle the packet of yeast over.  Mix gently to combine and let sit 5 minutes or so while you prepare the other ingredients.

In a medium pot, bring the milk up to a simmer and add the honey, butter and salt.  Simmer for a minute or two, just until the butter melts and remove from the heat.

Add the egg and 3 ¾ cups of flour to the yeast mixture and mix together with a fork.  Slowly pour in the milk mixture, using the fork to make a shaggy dough.  Using the dough hook attachment (or your hands), knead for about 3-4 minutes.  The dough should be soft and a bit tacky but should NOT stick to your hands.  If it's sticky, keep adding flour in tablespoon increments until you have the right, non-sticky consistency.

For rolls, divide the dough into 16 even-sized balls and place in a greased, 9-inch cake tin.  Cover with a kitchen towel and let rise 45 minutes.  Preheat oven to 375˚ F.

After the rise, brush the rolls generously with melted butter and bake for 30 to 35 minutes.  Brush again with butter once out of the oven and sprinkle with a little flake salt.  Enjoy hot!

*For the rolls, I used all purpose flour, but for the savoury buns, I used 00 flour, which yielded a more delicate, fluffier texture.

Some fun options:

(1) Before baking, but after brushing with butter, sprinkle with spices!  Thing za'atar, an everything bagel spice blend (!!), furikake, simple nigella seeds...

(2) To make the savoury buns, roll out the dough into an 18"x12" rectangle and place it in front of you with one of the longer sides near you (a horizontal rectangle).  Mix together a stick of unsalted, room temperature butter with a half packet of softened, Boursin cheese.  You could also use regular cream cheese and then add in your own garlic, roasted garlic, chives, other herbs.  Spread this mixture all over the dough and sprinkle with a bit of salt.  You can also use other cheeses here by themselves or in addition to the cream cheese - mozzarella, a mexican blend....Roll the dough, starting with long side near you to form a cylinder, and then place in the freezer for five to ten minutes to make it easier to cut.  Use a serrated knife and cut the rolls into 1 ½-inch thick rolls.  Place cut side down in the greased tin.  Let rise an hour.  Brush with butter and bake at 375˚ F for closer to 40 minutes, until the buns are uniformly golden brown. 

(3) For pull apart bread, roll into a 6"x14" rectangle and cut into 12 pieces.  Spread the butter / cheese mixture on 11 of the pieces.  Stack layers horizontally in a parchment-lined loaf pan, ending with the non-buttered piece to book-end.  Cover and let rise.  Spread the remaining butter-cheese mixture on top with a sprinkle of salt before baking.  Bake at 375˚ F for closer to 35 to 40 minutes until golden brown.  Cover towards the end of baking if the cheese is browning too much.  (By the way, the photo to the side is a pull-apart cinnamon scone bread, but just wanted to give everyone an idea for what it could look like!)

Enjoy!!


tags: how to make bread, bread dough recipe, cheesy pull apart bread recipe, savory buns recipe, cheese buns recipe
categories: all 3, appetizers 1, breads & cakes, breakfast-1, side dishes-1, vegetarian
Wednesday 04.06.16
Posted by Aliya LeeKong
 

Hello Spring, Goodbye Peak Season Citrus

HELLO SPRING, GOODBYE PEAK SEASON CITRUS

With the arrival of all the fresh spring produce, we often forget the fact that the citrus season is coming to an end.  I mean, you can get lemons, limes, oranges, grapefruit etc. all year round, so why would you miss it?  But the citrus family goes far beyond those 4 common fruits.  Below are a few of my favorites and how I like to preserve them until they are back in season next winter!


MEYER LEMONS

Meyer lemons are a hybrid of a lemon and a mandarin or orange.  These guys are my go-to for salad dressings (and cocktails) because of their sweetness and when I don’t want that acidic, lemon-y taste that a regular lemon gives me.  You can find them in your grocery store in the winter but, lately, they've become more popular and can be found year round in most specialty stores.  They have a more orange tinge to their flesh as opposed to their “parent” the regular yellow lemon and are a bit softer.  Preserving lemons in the traditional, Moroccan style is really easy and adds amazing, bright flavor to recipes.  All you need is a bunch of lemons (Meyer or otherwise), jars and salt!  Although they are traditional in tagines, stews and savoury dishes, a preserved lemon curd is another great use for them.


KUMQUATS

Photo: BBC Good Food

Photo: BBC Good Food

These little, olive-sized fruits are amazing - they are super healthy for you, and I grew up with a kumquat tree in my backyard.  I remember trying them at intervals as they ripened and went from really tart to a floral sweetness.  As opposed to the other citrus fruits, you can pop them in your mouth, peel and all.  The have a lightly sweet, tangy flavor and are packed full of vitamin C and fiber.  These are probably one of my favorite citrus fruits and when I can find them in the stores I buy a bunch to preserve them and make marmalades or chutneys…or both!  


BLOOD ORANGES

These beautiful, blood red-colored oranges are my favorite flavor for fresh squeezed OJ or for the Dominican drink, morir sonando.  They are the primary orange grown in Italy, so you will find many Italian recipes with it as a main ingredient (i.e. ricotta cakes, gelato, Italian soda).  They often have a sweet bite to them but can also be very tart, which makes them perfect for a fresh bite in your salad.  You can preserve them much the same way you do lemons or Meyer lemons or go the chutney/marmalade/curd route, but I also loooove this recipe for orangecello, an orange-y take on limoncello!  It's genius to throw in a vanilla bean.


POMELOS

Photo: Food52

Photo: Food52

Also known as the Chinese grapefruit, these guys are much larger than your average grapefruit; they also have a much milder, sweeter flavor to them as well.  They are native to South and Southeast Asia (I ate my way through them in the form of salads when I was Thailand) and can be found in most asian grocery stores.  They go great in a simple noodle dish, on seafood and are perfect for any citrus-y cocktail.  For these, making a candied peel is a great way to preserve their flavor.


SUMO CITRUS

Photo: The Kitchn

Photo: The Kitchn

I am now addicted to these delicious ‘oranges’, but unfortunately their season just ended! Sumos are a hybrid between a navel orange and a mandarin.  Larger than your average orange, much easier to peel, super sweet and juicy, I haven’t had a bad one yet!  They took 30 years to develop in Japan and were only available in California but they have finally made their way to the East Coast during their short season.  You could add these to any recipe that calls for citrus…..sure.  But every time I buy these in the store I eat them so fast they don’t make it in to my cooking! 


Enjoy!

tags: winter citrus, preserved lemons, how to make preserved lemons, kumquats, pomelos, peak season citrus, marmalade, chutney, orangecello
categories: all 3, blog, lifestyle-1, recipes, traditions
Wednesday 03.30.16
Posted by Aliya LeeKong
 

Link Love: Step Up Your Easter Cooking

LINK LOVE: STEP UP YOUR EASTER COOKING

Easter is such a fun holiday to cook for! With the beginning of Spring, the meal just signifies all the good, fresh food to come!  So, with this in mind, I wanted to share some of the recipes that have been inspiring me this year (because I'm honestly still on the fence for my menu)!  Enjoy!


SLOW ROASTED LAMB PAPPARDELLE WITH GARDEN PEAS & MINT

Photo: What Katie Ate

Photo: What Katie Ate


GRILLED LAMB WITH HARICOT VERT AND COCONUT MILK BROTH

Photo: Brooklyn Supper

Photo: Brooklyn Supper


FRESH HAM WITH HONEY & CLOVES

Photo: Saveur

Photo: Saveur


CACIO E PEPE POTATOES

Photo: Bon Appetit

Photo: Bon Appetit


POTATO LEEK AU GRATIN

Photo: Food52

Photo: Food52


SIMPLY SAUTEED GARLICKY PEA SHOOTS

Photo: A Little Yumminess

Photo: A Little Yumminess


FARRO & ASPARAGUS SALAD WITH SESAME-MISO DRESSING

Photo: Two Red Bowls

Photo: Two Red Bowls


SKY HIGH LEMON MERINGUE PIE

Photo: A Beautiful Mess

Photo: A Beautiful Mess


MOLTEN HALVA LAVA CAKES


KOMBUCHA HOLIDAY PUNCH

Photo: 101 Cookbooks

Photo: 101 Cookbooks

tags: Easter recipes, holiday recipes, what to make for Easter, link love
categories: all 3, appetizers 1, blog, drinks & cocktails, holiday, lifestyle-1, main dishes, man-friendly, recipes, traditions
Wednesday 03.23.16
Posted by Aliya LeeKong
 

How to Make Your Every Day Salad Taste Good

HOW TO MAKE YOUR EVERY DAY SALAD TASTE GOOD

With spring on its way, I’m getting super impatient waiting for the fresh greens and veggies that are about to explode at the farmers' markets.  For me, and I feel like a lot of others, when the weather gets warmer I start to crave lighter, healthier foods.  The thought of a winter pot roast just isn’t doing it for me anymore.  But, truthfully, I'm not the biggest salad person!  I have, however, mastered how to dress up a salad (in a healthy way) to make it more appealing to a big eater like me, combining flavors and textures to make it crave-worthy.  Thought I would share a few of these tips with you guys!


THE BEST MIX-INS

You've got the greens - now what?  I think the perfect salad has a great raw base but works in one or two cooked elements.  Roasted beets and salad always seem to go hand in hand with me; a mixture of golden and red roasted with shallot, garlic, olive oil, fresh thyme and marjoram are the best.  If you aren't a beet fan, roasted sweet potatoes, squash, fennel, cherry tomatoes or asparagus are delicious.  A simple blanching of veggies (cauliflower, broccoli, green beans, etc…) is easy too - bring water to a boil, salt heavily, add veggies for a minute or two max depending on how large the cuts are and then shock the drained veggies in ice water.  You just want to get rid of that raw bite and keep the vibrant colors.  I love to keep blanched veggies in the fridge to throw into salads or even a fried rice....ok, back to salads! :) 


HERB IT UP

Fresh herbs are aromatic, healthy and go a long way in adding flavor with just a light chop and toss in (cilantro, parley, basil, dill, mint!)  There's this one stall at my local market that has amazing micro greens and mustard greens.  I love the spicy bite I get when I have a mixture of mustards greens with my regular green mix….such a great surprise.  Mint and cilantro are my favorite combo though - they just add such brightness and cut some of the bitterness of other greens.


MAKE A KILLER DRESSING

Photo: Teacher-Chef.com

Photo: Teacher-Chef.com

The dressing makes all the difference.  I always have olive oil, sherry vinegar, dijon mustard and lemons on hand.  A super simple vinaigrette and always a hit! 

We don't always think of oils as important, but it can completely change the flavor of a dressing.  Lately, I've been using grapeseed oil for a more milder flavor than EVOO; for me, I find extra virgin gets bitter so easily.  Other great oils are avocado oil (it has a faint aniseed flavor to it), hazelnut oil, walnut, macadamia and, of course, sesame oil.  Infused oils also add great flavor - think rosemary, garlic, and, of course, truffle.

Once you have the base of your vinaigrette figured out you can then add other ingredients to create a creamy dressing without the cream.  Mustard is an incredible emulsifier, the ingredient that makes a dressing thick, but there are so many other things you can add to do that.   My current fave is tossing some roasted shallots and garlic in the blender with dijon, sherry vinegar and grapeseed oil - so tangy and delicious.  Other great ingredients for a creamy dressing without the cream are tahini, miso, yogurt, avocado, and almond butter (or any nut butter, really).  Also, jam or jelly makes a great emulsifier, so if you like a touch of sweetness, try a tablespoon or two of currant or berry preserves.


ADD SOMETHING PICKLED

Pickled chilies are a staple in my fridge. I pretty much put them on everything I eat, so why not salad?  A little sour and a little heat….sooo good!  Olives are a no brainer - nice plump, juicy kalamata or green, stuffed with blue cheese.  Capers are a nice little pop of salty goodness which, by the way, are made even more delicious if you deep fry them!  You can also do a quick pickle of other veggies like radishes, red onion and daikon for a nice crunchy texture, or, if you are a bit experimental, of dried fruit.  Pickled raisins, sultanas or even cherries add a great sweet-sour bite.


CROUTON ALTERNATIVES

Love the crunchy topping of croutons but don’t want to eat the bread!?  There are lots of crunchy alternatives.  Of course, nuts are always a great option, but my latest experiment was with red quinoa.  I simply soaked as usual for 10-15 minutes and baked it in the oven until crispy!  You can also do it on the stove top.  Buckwheat is another great grain to toast up - some grocers even sell it toasted.  Sev is also a great crunchy alternative.  It is an Indian snack made out of seasoned chick pea flour paste and deep fried.  They come in various sizes, but are very thin…thinner than the crunchy chow mien noodles you usually see on “Asian” salads. 


TOP IT OFF WITH A SPICE BLEND

I often see people add salt and pepper to their salads before eating, so why not make a spice blend to give it more depth of flavor.  Egyptian Dukkah is always a great go-to.  Za'atar (usually a combination of sumac, sesame seeds and thyme) adds a sort of tangy and nutty flavor to any dish.  Advieh is a Persian spice mix usually containing dried rose petals, cardamon, cinnamon and cumin, so warming and aromatic. You can find these spice blends at the store if you aren’t the spice blending type of person.  I also stock up on Japanese rice seasoning blends (furikake) for a quick shake of flavor on my salad.  They usually have bonito flakes, dried seaweed and sesame seeds in them adding a little saltiness to your salad.  

Enjoy!


tags: how to make a good salad, how to make salad taste better, creamy dressing with no cream, salad dressing ideas
categories: all 3, appetizers 1, lifestyle-1, quick & easy, salads, soups & salads, vegetarian
Wednesday 03.16.16
Posted by Aliya LeeKong
 

Not-So-Traditional Irish Soda Bread

View fullsize soda bread2.jpg
View fullsize soda bread1.jpg
View fullsize sodabread3.jpg

NOT-SO-TRADITIONAL IRISH SODA BREAD

I love indulging in a warm, baked-from-scratch loaf of bread.  But let's be honest: making it at home can be a long (see: tedious) task what with the letting the yeast rise, punching down, rising again...but that's why the quick bread was invented!  Quick breads are basically any breads that don't use yeast to rise - like banana bread.  With St. Patty’s Day just around the corner, I thought a take on the traditional Irish soda bread would be fun.

Irish soda bread is usually made with a few simple ingredients: flour (wheat or white), baking soda, buttermilk and salt. Once you have those basics, you can expand with any seeds, citrus, dried fruits you want to create a not-so-traditional soda bread.  This recipe is a slightly modified version of one from a great friend/chef, Tamsin Kelly, who makes this with her family for St. Patrick's Day.  I love the combination of caraway seeds, orange zest, and dried currants in this recipe, but you can substitute however you like (raisins, fennel seeds, etc…)!  Enjoy!

Yields (1) 9-inch cake tin 

4 cups plus 3 - 4 tablespoons all purpose flour
3 tablespoons white sugar
¾ teaspoon salt
1 ½ teaspoons baking soda
½ stick unsalted butter, cold and cubed
1 ½ cups buttermilk*
1 large egg, beaten
1 cup dried currants
2 tablespoons caraway seeds
zest of 1 orange


Preheat the oven to 350º F.  

To the bowl of food processor, add the 4 cups plus 3 tablespoons of flour, sugar, salt and baking soda.  Pulse until mixed.  Sprinkle the cold, cubed butter on top and pulse until the mixture resembles a coarse meal. 

Whisk the buttermilk with the egg and slowly add to the flour mixture, pulsing until the dough forms.  Pulse in the currants, caraway seeds and orange zest.  If the dough is too sticky, add another tablespoon of flour.  Do not overmix or it will toughen up!  You just want the flour blended, and you are ready to go.

I like to cook mine in a greased cast iron skillet or you can use a greased, 9-inch round cake tin.  Score an “X” in the dough (about 1/2” thick) and place in the middle of the oven for 60 minutes or until a toothpick comes out clean.  Rotate the dough halfway through cooking.  When done, transfer to a wire rack to cool.

Make sure to enjoy with a nice, rich, salty Irish butter!!

*I hardly ever buy buttermilk for a recipe since I always have milk, vinegar and lemon juice laying around.  For every cup of milk, use 1 tablespoon distilled white vinegar or lemon juice.  Just mix together and let sit for about 5 to 10 minutes.  It will thicken slightly and look a bit curdled and then it's ready to go!

tags: irish soda bread, quick bread recipe, how to make irish soda bread
categories: all 3, breads & cakes, breakfast-1, holiday, quick & easy, recipes, sweet & savoury, traditions
Wednesday 03.09.16
Posted by Aliya LeeKong
 

Spiced Ricotta Hotcakes with Pomegranate Molasses

View fullsize hotcakes4.jpg
View fullsize hotcakes1.jpg
View fullsize hotcakes2.jpg
View fullsize hotcakes3.jpg

SPICED RICOTTA HOTCAKES WITH POMEGRANATE MOLASSES

During the week for breakfast, if I'm being honest, I slurp down a protein shake before I run out the door.  I know, I know - breakfast is the most important meal, but I just can't manage it.  I think about food constantly - carefully planning for weeknight dinners, quick lunches and the perfect snacks.  And, of course, then I go all out for big, family dinners, holidays, and....brunch!!

These hotcakes are my latest, favorite addition to the brunch arsenal, and are everything you could want in a pancake.  Light, fluffy and almost custard-y from the ricotta, and with a spiced nuance from cinnamon, cardamom and (yes!) a touch of black pepper.  They aren't too sweet, either, which, for me, is important when it comes to pancakes.  Pomegranate molasses adds a tart counterbalance to the creaminess, not to mention a touch of fruity sweetness.  Oh, and they could not be easier to make...Enjoy!

Yields 8 pancakes

1 cup flour

1 ½ tablespoons sugar

1 teaspoon baking powder

¾ teaspoon ground cinnamon

½ teaspoon ground cardamom

¼ teaspoon salt

pinch finely ground black pepper

1 cup ricotta cheese*

2/3 cup milk

2 eggs, separated

½ teaspoon vanilla extract

butter for griddle

powdered sugar, for sprinkling

pomegranate molasses, for drizzling

In one bowl, whisk together the flour, sugar, baking powder, cinnamon, cardamom, salt and pepper.  In another, mix thoroughly the ricotta, milk, egg yolks and vanilla.  Stir the dry ingredients into the wet until just combined. 

Lightly beat the egg whites and fold into the batter.  Let the batter rest about 5 minutes.

Heat a griddle or cast iron of medium-high heat.  Add butter to just coat the surface of the griddle.  Use a ¼ (dry) measuring cup to pour equal amounts of batter and work in batches.  Cook for 3 minutes on one side; flip and cook another 2 to 3 minutes on the other side.

Serve hot, sprinkled with powdered sugar and drizzled with pomegranate molasses.

*My ricotta was on the drier side.  If there is a lot of liquid, I suggest drain it a bit with some cheesecloth and a strainer to keep it from changing the batter texture.


tags: hotcakes recipe, ricotta pancake recipe, how to make hotcakes, ricotta hotcakes recipe
categories: all 3, quick & easy, recipes, blog, breakfast-1
Wednesday 03.02.16
Posted by Aliya LeeKong
 

Tagliatelle with Maitake Mushrooms, Pickled Chilies & Egyptian Dukkah

View fullsize maitake pasta 2.jpg
View fullsize maitake pasta 1.jpg

TAGLIATELLE WITH MAITAKES, PICKLED CHILIES & EGYPTIAN DUKKAH

Winter and pasta for me go hand-in-hand, and, as always, I love to get a little experimental with flavor combos.

Maitake mushrooms are such a favorite – they are meaty and nutty (and have actually replaced my weekend bacon, if you can believe!).  I did a pop-up dinner at a little store in my neighborhood in Brooklyn, and I created this dish for the dinner.  Hard, pan-roasting the mushrooms and finishing them with butter and salt make them irresistable and is a key step in the recipe.  They need a proper sear to bring out what’s best in this dish.  

The sauce is super thin and easy and gets an extra hit from the pickled pepper juice.  I top up the pasta with some of the actual pickled peppers, chopped cilantro, and Egyptian dukkah, a gorgeous nut and spice blend with coriander that complements the mushrooms beautifully. 

This can be as homemade or not as you want.  You can use my fresh pasta recipe or store-bought.  You can pickle your own cherry peppers or grab a jar at the grocer.  And the spice blend, Egyptian dukkah, can be bought from a specialty store, or you can use my recipe below - it stores for a month, so have fun sprinkling it on salads, a nice, seared piece of fish or on your next rice bowl.  Enjoy!

Serves 6

1 pound fresh or dried tagliatelle

1-2 tablespoons canola oil

4-5 tablespoons unsalted , divided

2 (8 ounce) maitake mushrooms, hand torn into bite-sized pieces

1 shallot, finely chopped

3 cloves fresh or roasted garlic, minced

¼ cup white wine

¾ cup chicken broth

1/3 cup heavy cream

¼ cup pasta water

scant ¼ cup pickled cherry peppers, juice reserved

small handful of fresh cilantro, finely chopped

2 tablespoons Egyptian dukkah

salt & freshly ground black pepper, to taste

Bring a large pot of water up to a boil and season generously with salt until the water tastes salty.  Add the pasta and cook until tender but still a bit firm to the bite, about 8 to 10 minutes if dry or according to package directions if fresh. Drain pasta reserving ¼ cup of the pasta cooking water.

While the pasta is cooking, heat a large skillet over high heat.  Add the tablespoon of canola oil, and when the oil starts to smoke, add the maitake mushrooms in a single layer.  If they don’t all fit, you may need to repeat the process depending on the size of your skillet.  Cook for 2 to 3 minutes.  The cooked side of the mushroom should be golden brown and crispy.  Flip the mushrooms and throw in 2 tablespoons of the unsalted butter.  Season the mushrooms generously and cook for another 2 minutes.  Remove mushrooms using tongs to a paper towel-lined plate.   If repeating, use the other tablespoon of canola oil and only 1 more tablespoon of butter. 

Lower the heat to medium-low, add another tablespoon of butter and the shallots and garlic with a bit of salt.  Let cook for 3 to 4 minutes until the shallots are translucent.  Increase the heat to medium-high and pour in the white wine.  Reduce until most of the wine has evaporated and the shallots are almost dry.  Then, add in the chicken broth, heavy cream, and pasta water.  Reduce in half.  The sauce should coat a spoon but shouldn’t be too thick. 

Remove the sauce from the heat and swirl in a final tablespoon of butter along with 2 teaspoons of the pickled cherry pepper juice.  Taste and adjust seasoning.  Throw in the pasta, maitakes and chopped cilantro and toss to coat.

Serve immediately garnished with a few pickled cherry peppers and about 1 teaspoon of Egyptian dukkah per plate.

Egyptian Dukkah

Yields approx 1 ½ cups

¼ cup hazelnuts, roughly crushed

¼ cup pistachios, roughly crushed

½ cup white sesame seeds

¼ cup coriander seeds

2 tablespoons white cumin seeds

2 tablespoons fennel seeds

2 tablespoons dried mint

pinch of chili powder

½ teaspoon black pepper

1 ½ teaspoons salt

Preheat the oven to 350° F.  As opposed to toasting in the skillet, I like to toast this blend up in the oven so the nuts and spices toast evenly.   

Line a baking sheet with parchment paper.  Add the hazelnuts, pistachios and all of the seeds and make sure they are in a single layer.  Toast for 8 to 10 minutes – you should smell a really nutty fragrance.

Transfer toasted nuts and spices to a mortar and pestle or a spice / coffee grinder. I like a slightly rough texture for this, so grind until there are still bits and pieces and it’s not completely powder. 

Combine with the dried mint, chili powder, black pepper and salt.  Store in an airtight container, preferably in a cool spot – it will keep for about a month.


tags: pasta recipe, homemade pasta recipe, mushroom pasta, egyptian dukkah, how to make egyptian dukkah
categories: all 3, appetizers 1, blog, holiday, main dishes, man-friendly, recipes, vegetarian, spices
Wednesday 02.24.16
Posted by Aliya LeeKong
 

The Art of Blending Your Own Tea

THE ART OF BLENDING YOUR OWN TEA

There’s nothing better than staying in on a cold winter day with a great book and a warming cup of tea, and, with the temps outside here in NYC reaching the negatives this past weekend, that’s exactly what I did!  When I make tea, I tend to do a bit more than 1 bag and go.  I have my own sachets and add a little of this and that until I get what I want.  This weekend in the bitter cold was a bit of assam with a little earl grey with blue flowers and a star anise pod.  Blending your own tea is so fun and personal (not to mention makes great, handmade hostess gifts) - thought I would share a few thoughts on how to do it!


CHOOSE A BASE

The first part of the tea blending process is choosing your base tea flavor.  The most common are Black Tea (full-bodied, strong), green tea (mild, earthy almost grassy flavor), white Tea (mild and sweet), and oolong (floral and aromatic).  I'm also a big fan of rooiboos tea, which is a red tea with a mild, sweet flavor that doesn't have any caffeine.  Any of these bases can be bought online or in a specialty store and should makeup the majority of your tea mixture.  Depending on which base you choose you can then start to add other ingredients (citrus, fruity, florals, spices).  It may seem a little daunting at first, but just think of the tea combinations you see at the grocery store (like green tea peppermint, black tea cardamon) and then build from there!


HOW TO PAIR WITH OTHER FLAVORS

Now for the fun part! Creating different blends...  Think of the flavor and strength of the base tea and blend from there.  Black tea is a very bold tea and pairs well with other bold flavors: citrus, hibiscus, chocolate.  A mild green tea can lean towards the typical Asian flavors: ginger, lemongrass; whereas, a bolder green tea can be paired with light fruity flavors: blackberry, pomegranate, lemon.  White tea is a more delicate one to pair with, so I lean towards orange blossom or fresh mint with a little light spice.  Rooibos I love to blend with a bit of vanilla bean powder and rose.

You can use other dried teas (chamomile, lemon balm, rose hips, hibiscus, rose), fresh herbs (mint, basil, sage) and fresh fruit rinds and aromatics (lemon, orange, apple peel, ginger, lemongrass).  Start with a little, maybe a teaspoon, and add to your taste preference.


DON'T FORGET THE SPICE!

You know me, I can never resist a bit of spice.  Cardamom and black tea are a match made in heaven.  Star anise pods, cinnamon sticks, cloves and leftover vanilla beans are perfect and can go with both bold and milder teas.


HOW MUCH, HOW HOT & HOW LONG

Generally, my rule of thumb for teas is I use less tea when the leaves are smaller and a bit more when the leaves are bigger.  Vague, I know!  But for 8 ounces of water, if the tea is dense and tightly packed (think black tea or gunpowder green), I use 1 to 2 teaspoons.  If it's very loose with big leaves (white tea or hibiscus), I use about 2 to 3 teaspoons. 

Water temperature is important too.  For black, dark oolong, herbal/fruity and rooiboos teas, use boiling water for 3 to 5 minutes.  For white, green, and green oolong, stick to water that was boiled and has had some time to cool down - still hot but not scorching.  These teas usually only need 2 to 3 minutes to brew.

Enjoy and happy blending!

tags: tea recipes, how to blend your own tea, the art of tea blending, the perfect cup of tea
categories: all 3, blog, drinks & cocktails, lifestyle-1, quick & easy, recipes
Wednesday 02.17.16
Posted by Aliya LeeKong
 

3-Ingredient Chocolate Truffles

View fullsize truff4.jpg
View fullsize truff1.jpg
View fullsize truff2.jpg
View fullsize truff3.jpg
View fullsize truff5.jpg

3-INGREDIENT CHOCOLATE TRUFFLES

With Valentine's Day just a few days away, chocolate is on the brain.  Nothing says “I love you” more than a double decker box of chocolates…but making your own chocolate truffles is way simpler than most people think (and who doesn't prefer a handmade gift?). 

This is a super simple, 3-ingredient recipe to get you started to make decadent, silky, chocolate truffles.  Then, if you want, you can tailor to your preferences.  I'm including options for flavorings to add to the base or leave the recipe as is and just coat the truffles in a different ways (think cocoa powder, crushed pistachios, shredded coconut, etc…).  Enjoy!

Yields approximately 2 dozen truffles

12 ounces dark, semisweet or milk chocolate chips, roughly chopped (1 bag)
3/4 cup heavy cream
1/4 tsp salt

Place the chopped chocolate in a large mixing bowl.  In a saucepan, bring the heavy cream and salt to a simmer, just enough to dissolve the salt and watch that it doesn't boil over.  Pour the cream over the chocolate and allow to sit for 5 minutes before stirring.  Stir until the chocolate has melted and the mixture is smooth (this is also the time to add any liquid ingredients for flavor).

Allow to cool at room temperature for an hour.  Using a teaspoon or a small cookie scoop, scoop the truffles onto parchment paper.  Place in the fridge for 10 to 15 minutes to firm up a bit.  Roll in the palm of your hands to get them perfect (but quickly or they will start to melt!).  Roll them in whatever toppings you like and enjoy!

Mix-ins: 1/2 teaspoon vanilla extract, 2 tablespoons liqueur (coffee, rum, Grand Marnier, kirsch), 1 tablespoon orange blossom water, 1 tablespoon espresso, 1 1/2 teaspoons peppermint extract

To Coat: cocoa powder (with or without cinnamon, cardamom, etc), sweetened or unsweetened shredded coconut, crushed nuts (hazelnuts, almonds, pistachios), sprinkles, flake sea salt (just a pinch on top!)


tags: Valentine's Day, Valentine's Day gift, what to give for Valentine's day, chocolate, chocolate recipes, chocolate desserts, chocolate truffles
categories: all 3, blog, desserts, holiday, lifestyle-1, quick & easy, recipes
Friday 02.12.16
Posted by Aliya LeeKong
 

Superbowl Sunday Essentials

SUPERBOWL SUNDAY ESSENTIALS

I love Superbowl Sunday, but, if I'm being honest, it has little to do with football!  it’s an excuse to have a few friends over for a nice relaxed appetizer party, watch good commercials, and enjoy a little entertainment at halftime!  Is that terrible?  Anyway, I wanted to share what I'll be cooking this Sunday...Enjoy!


HARISSA-CHEESE STUFFED FRIED OLIVES

I know, deep-frying is kind of a pain, but if you have the oil out and are going to do wings anyway, you might as well get some bang for your buck.  And these fried olives
 are amazing!!  Pitted olives filled with a bit of harissa-scented ricotta and cream cheese, rolled in panko and parm and fried to crunchy-creamy finish....my man complains that I make food that's too refined for a football party, but...then he eats these anyway!


BAKED JALAPEÑO POPPERS

Photo: Recipe Girl

Photo: Recipe Girl

So if you don't want to fry, this is just the right snack, and who doesn't love jalapeño poppers? They've always been one of my favorite bar foods, but over the years I’ve learned to create my own and somewhat healthier version (baked, not fried, and super easy)!  Slice the peppers in half, and take out the seeds and the ribs.  In a bowl mix some shredded cheddar and Monterey jack cheese with Mexican oregano, granulated garlic, granulated onion, smoked paprika, chopped cilantro and a little cumin.  Toss together and stuff in the pepper halves. Dip the halves in flour, then egg wash, then some panko; bake in 400 degree oven until tender or follow the recipe above.


BAKED TRINI WONTONS

Another recipe for the frying-averse: my baked Trini wontons.  Think wonton skins filled with ground pork (or whatever meat you like) that have the best of Asian and West Indian flavors.  Garlic, ginger, soy but also habanero, lime zest and cilantro.   Seriously yummy and great to keep in your freezer for impromptu parties.


VEGETABLE SAMOSAS

Photo: Rasa Malaysia

Photo: Rasa Malaysia

Vegetable samosas are the perfect vegetarian appetizers - little packets of crisp dough filled with cumin- and chili-scented potatoes.  These require a bit of work but are so worth it!


QUESO FUNDIDO

Photo: Bon Appetit

Photo: Bon Appetit

Nothing beats a a hot, melty, cheesy dip at a Superbowl party and this recipe gives you exactly that and then some!  What is better than dipping your tortilla chip in a bowl of melted cheddar with tomatoes, chorizo and fresh cilantro?  Yea....I can’t think of anything else either.


KOREAN-STYLE WINGS

Photo: Food52

Photo: Food52

And, finally, the wings!  Superbowl isn't Superbowl without wings, and though there's nothing wrong with the old-standby, hot wings, why not try something new? These are genius, oven-baked but with the crisp texture you love in a fried wing.  The sauce comes together by stirring together a few ingredients in a bowl - tamari, rice vinegar, ginger, chili flakes, etc.  It's seriously one of the easiest (and tastiest) wing recipes out there. 

Have fun this weekend!

tags: Super Bowl, what to cook for the super bowl, super bowl recipes, wings, crispy wings
categories: all 3, appetizers, lifestyle-1, main dishes, recipes, man-friendly
Wednesday 02.03.16
Posted by Aliya LeeKong
 

New Year, New Kitchen

NEW YEAR, NEW KITCHEN

The start of a New Year always has people thinking of ways for a fresh start, whether it be dieting, working out, eating healthy etc… And when it comes to giving your kitchen a makeover or a refresh, people often stock up on gadgets and gizmos and things to make kitchen life speedier and more efficient.  Nothing wrong with that!  But I want to share with you some cooking tools and gadgets from around the world, time-tested and true.  These are subtle tweaks to your arsenal that will help elevate your game - there's a reason they've been around so long.  Enjoy!


Photo: Emile Henri

Photo: Emile Henri

EMILE HENRY CHARCOAL TAGINE

A tagine is a popular North African dish named after the pot that it's cooked in, a spiced braise that has a balanced sweetness.  And the design of the pot is what helps the slow cooking of this dish; with its dome-shaped lid, the tagine makes sure all of that steam and condensation stays in the pot, making everything inside come out wonderfully tender and fall-off-the-bone-ish.  This particular tagine (my favorite!), can be used on the stovetop, which is great for browning in the pan, and in the oven, for the low and slow process - think short ribs, coq au vin, beans, rice or...a tagine!


Photo: William Sonoma

Photo: William Sonoma

MOLCAJETE

I have an obsession with mortar and pestles.  I always find a new one when I'm traveling and can never resist bringing it home with me!  They are great for hand grinding spices, making pestos, but this molcajete, a Mexican m&p, is perfect for making guacamole and doubles as a gorgeous serving bowl.   This traditional one is made from basalt rock, which has a super rough surface, making it ideal for grinding and mixing ingredients.


Photo: Petit World Citizen


MASALA DABBA

A masala dabba is a traditional Indian spice box and happens to be one of my earliest childhood, cooking memories.  My mom still has the one she used when I was growing up, and I remember being mesmerized by the idea that this box totally transforms food.  I could never figure out how she knew, without measuring, what the right amounts would be.  Thank goodness I inherited that! :)  A masala dabba usually holds around seven different spices, keeping them fresh in light-proof stainless steel and with two covers.  They're so useful in Indian cooking, which requires a decent number of spices per dish.  But for your kitchen, it doesn’t necessarily have to hold Indian spices - just fill it with the spices you find yourself using the most on a daily basis like I do.  My top seven: ground cumin, ground coriander, granulated garlic, granulated onion, Pimentón de la Vera, fine Tellicherry black pepper (though I still fresh grind all the time), and Aleppo chili flakes. 


PASTA ROLLER

This is a great set from Food52 - a pasta roller and drying rack.  I love making fresh pasta, it’s so quick and easy and the entire process is oddly soothing and calming.  Not to mention the sense of accomplishment of creating a completely homemade meal!  


Photo: Amazon

Photo: Amazon

JAPANESE MANDOLINE

Peep into Michelin-starred kitchens, and you'll see most cooks keep a Japanese mandoline in their knife kit.  This tool is vital to the very thin cuts and perfectly, julienned strips of vegetables that appear on your plate.  It can slice thinner and more evenly than any of us could with a knife.  It's perfect for slicing onions, salad vegetables, shredding for coleslaw, potatoes for chips or a gratin, apples for a tatin.  This one is all you need.  The bigger bulkier ones just take up prime cabinet space and cost a lot more!


CRÈPE PAN  

You need a good crèpe pan to make beautiful crèpes, and, since I don't make them daily, this is not a splurge item for me.  I love these blue steel ones because they are affordable and season over time.  You could easily have these do double duty for crispy chicken thighs or salmon or even to heat tortillas. 


Photo: World Market

Photo: World Market

TURKISH IBRIK

Old school coffee didn't require aeropress-ing or siphoning or anything other than good grounds, water and something to heat them in.  You don't need Turkish coffee to enjoy your ibrik, but you do want very fine grounds.  Drop in a cracked cardamom pod for authentic taste.

tags: kitchen gadgets from around the world, Global Kitchen, tagine, molcajete, ibrik
categories: all 3, lifestyle-1
Wednesday 01.27.16
Posted by Aliya LeeKong
 

Why You Should Be Roasting a Chicken Every Week

WHY YOU SHOULD BE ROASTING A CHICKEN EVERY WEEK

There’s nothing more satisfying than having a plan of attack for dinner for the entire week, but we all know that doesn’t happen too often.  Planning ahead takes too much...planning, and we frequently find ourselves at the grocery store on Wednesday with no idea what to make!  One of the things I love to do is roast a chicken at the beginning of the week.  That way, I have the option of using the cooked chicken over the next few days in fun and creative ways AND cutting down my prep and cooking time.  Feeding only 2 “1/2” people in my home, a 4-5 lb chicken can go a loooong way! 

MONDAY: BUTTERFLIED ROASTED CHICKEN

Last week, I started off the week with Harissa-Butter Roasted Chicken with Chickpeas, Cauliflower and Onions....the harissa-butter rub in combo with the schmaltz made the chickpea-cauliflower mix one of the more delicious things I've tasted in a loooong time!  A lot of people asked for this recipe, so I'm going to give you the shorthand.  Cooking the chicken “spatchcocked” or butterflied means removing the backbone (and the sternum) of the bird and flattening it out before cooking.  This allows the chicken to roast faster than the traditional technique (30 - 45 min vs 1 - 1 1/2 hours!) as well as more evenly, and the skin is also more exposed for yummy crunchiness! But remember to save the backbone and sternum for stock later!

Basically, butterfly a chicken (technique: here in a grilled butterflied chicken recipe) and preheat the oven to 450˚ F (sometimes I walk on the wild side and go up to 500˚ F).  Combine a half stick of softened, unsalted butter with 3 tablespoons harissa and rub all over the bird.  Sprinkle with salt and pepper.  In a roasting pan, toss together 2 cans drained/rinsed chickpeas, a chopped onion, 3 or 4 cloves regular or roasted garlic, a half head of cauliflower chopped into florets, a bit of oil and salt and pepper.  Layer the chicken on top of the veg, breast-side up, and pop into the oven legs first.  After 5 minutes, drop the temperature to 400˚ F and continue roasting for another 40-45 minutes until done.  I like to check for done-ness with a cake tester or (very) small knife inserted at the thigh joint - if when inserted to the bone and pulled out it's hot, the meat is done.  You can conversely make sure it's cooked to about 150-155˚ F.    


Photo: What's Gaby Cooking

TACO TUESDAY: SHREDDED CHICKEN TACOS!

Who doesn’t love Taco Tuesday!?  Such a quick and easy dinner….AND the chicken is already cooked.  Just shred and sauté with a little butter, cumin, and coriander!  Or not.  You do need salsa though, and I love to make a fresh salsa for my tacos.  For this, I take a couple dried guajillo chiles, ancho and some serranos, a chopped onion, a couple smashed garlic cloves and place in a saucepan with enough water to cover the chiles.  Bring to a boil and then let sit for 20 minutes or so before blending in a food processor or vitamix.  When I'm blending, I add a couple tomatoes, lime juice for acidity and season (if you want to add a little smokiness to it, I sometimes add a few canned chipotles in adobo sauce; another staple in my pantry).  Once the sauce is smooth, heat a couple tablespoons of oil in a saucepan and add the sauce and simmer for 20 minutes.  Super easy, super authentic Mexican salsa!  I also love to whip up a fresh pico de gallo (diced red or white onion, cilantro, tomatoes, fresh jalapeños, and lime juice). And of course some avocado, cotija cheese and thinly sliced fresh radishes for a nice crunchy topping.  


WEDNESDAY: CHICKEN & WILD MUSHROOM PASTA WITH EGYPTIAN DUKKAH

Pasta is another simple dinner for the workweek.  Fresh pasta is my go-to, I always have some tucked away in my freezer, but fresh store bought is just as good!  I like a wide flat noodle like pappardelle for this recipe.  The flavor for this dish really comes from the Egyptian Dukkah spice topping.  I also like to have this fresh (and have the recipe in my cookbook), but you can find it in many specialty spice stores. 

You can toast hazelnuts, pistachios and various spices (coriander seeds, cumin seeds, fennel, dried mint, black pepper, salt) then crush with a mortar and pestle of throw in a blender. Hard sear the mushrooms in a hot pan and set aside. The sauce is simple: sautéed shallots and garlic until soft, add heavy cream then simmer and reduce until thickened (add a little lemon juice for some acidity and to brighten the sauce if you like).  Then add the shredded chicken and mushrooms, once the pasta is cooked, toss in the sauce with a little of the pasta water to move around if you find the sauce too thick.  Serve the pasta with the Egyptian Dukkah spice sprinkled on top and, if you like heat, with some pickled hot cherry peppers.


Photo: Organic Life

Photo: Organic Life

THURSDAY: CURRIED CHICKEN SALAD SANDWICHES

Curried chicken salad is now everywhere, and that is my inspiration for Thursday’s dinner!  By this point, most of the meat is almost gone, hopefully there is enough left to whip up a little chicken salad.  I like to take my basic chicken salad recipe (diced shallots, celery (peeled and diced), mayo, lemon juice, chopped chives, salt and pepper) and kick it up a notch by adding golden raisins, toasted curry powder and a couple tablespoons of mango chutney (you can find in specialty stores and some major grocery stores: Major Grey’s Mango Chutney). Serve this with a side of salt and vinegar potato chips or a simple green salad with a lemon vinaigrette!  And if you happen to pick up a croissant in the morning, stuff it between that and thank me later!


Photo: Serious Eats

Photo: Serious Eats

FRIDAY: CHICKEN BROTH

Nothing comes close to homemade chicken stock.  This should be a freezer staple, and having the leftover chicken carcass plus the original backbone and sternum makes this a cinch.  You just simmer these with onions, carrots, celery, garlic and parsley for an hour an a half - could not be easier.  Here are some good ratios for it.  

Enjoy!

tags: how to roast a chicken, chicken recipes, what to do with leftover chicken, harissa roast chicken
categories: all 3, blog, main dishes, recipes
Thursday 01.21.16
Posted by Aliya LeeKong
 

7 Whole Grains To Get You Healthy for the New Year

Photo: The Kitchn

7 WHOLE GRAINS TO GET YOU HEALTHY FOR THE NEW YEAR

Starting off the New Year, everyone vows to eat healthy and workout more (as evidenced by the surge of gym goers I’ve been seeing lately at mine!).   But instead of focusing on that new and improved juice cleanse (because, honestly, there’s no way I am just drinking juices for 7 days straight! and let's not even discuss the sugar content....), I’d rather search for REAL food that's healthy(ish) and tasty.  It's a game of inches!  One area with which I loooove to experiment is with new, delicious grains that are a healthy alternative to your everyday rice, quinoa, or even breakfast oats.  There are so many more varieties with different textures to choose from than we think, so some of these you may not have heard of!  Below are just a few I wanted to highlight.


FREEKEH

Freekeh is a roasted green wheat that's found throughout the Middle East (and your local Whole Foods!).  It’s harvested young and then roasted in the fields over an open fire, giving it a smokiness.  It's often referred to as a “new” ancient grain (ha!) and has slowly been taking the spotlight away from quinoa because it is far more nutritional (low in fat, high in protein & fiber!).  I love the nuttiness and bite of this grain, and it takes on spices beautifully.  This recipe is a pilaf with roasted squash, spices like cinnamon and coriander, and a hint of brown butter (I did say healthyish..)..


TEFF

Photo: One Green Planet

Photo: One Green Planet

Teff is a grain the size of poppy seeds that’s usually ground into flour to make breads.  It's a key ingredient in Ethiopian cooking, primarily to make injera, a fermented, spongy flatbread used to serve and eat Ethiopian stews and dishes.  Teff has become popular because it's gluten-free, a complete protein and can sustain just about any climate and region.  It's great for baking - banana bread, brownies, you name it.  It's also delicious, whole, added into soup, stews, or a winter chili.


AMARANTH

Photo: Nutraingredients

Photo: Nutraingredients

Amaranth dates as far back as the Aztecs.  It was their staple food and an integral part of their culture.   This little grain is a gluten-free complete protein powerhouse, just like teff.  It can be used in both sweet and savory dishes and is super easy to cook: boil water, add the amaranth, cook 10-20 minutes and drain.  Seriously, that simple.  Once cooked, amaranth is amazing added to salads, incorporated into desserts or stirred into soups.  I love it in lieu of morning oats, with some almond milk, cinnamon, and fresh berries.  Also, little known fact, it can be popped like popcorn!  So good!


RYE BERRIES

Photo: The Realistic Nutritionist

Photo: The Realistic Nutritionist

Rye is one of those grains that has mainly been grown as a cover crop by farmers to bring back the nutrients to the soil that was lost to a previous “cash” crop.  It wasn’t until recently that cooks have been using up these grains, so they don't go to waste in feed slash farmers can make a profit on these previously not-so-popular crops.  Rye berries can be ground into flour for breads or boiled like rice.  I’ve been cooking them in my rice cooker using a 3:1 ratio of water to berries.  This cooking method gives the berries such a nice, popping texture and the grains are perfect to mix in with whatever ingredients you like (avocado, roasted peppers, corn, etc…). 


WHEAT BERRIES

Photo: Wikipedia

Photo: Wikipedia

Wheat berries look similar to rye, but are a bit shorter in length.  It's a common side dish in France, taking the place of the rice or corn, and these little berries are where whole wheat flour comes from.  Some say that soaking these berries before cooking (like overnight) will speed up the cooking process (it takes about 45-50 minutes to cook).  I personally like to toast the berries in the oven or in the pot to be cooked in before I add the water to give a little more flavor.  


FARRO

Photo: The Classical Kitchen

Photo: The Classical Kitchen

Cooked similarly to amaranth, farro is really popular in Italian cuisine.  It's actually a group of 3 wheat species (emmer, spelt and the lesser known einkorn).  Farro is really hearty, and is on menus all over NYC, mainly in salads and in soups.   But I personally love it cooked like risotto with mushrooms, shallots and garlic...it's very similar to barley, so it makes a great substitute for those recipes.


BUCKWHEAT

Photo: BBC Good Food

Photo: BBC Good Food

Buckwheat is super trendy, but it's a good thing it has the great flavor it does to back it up!  It's, hands down, my new favorite topping on salads when it's been toasted - totally replacing my love of croutons, which is kind of a big deal.  This is another one of those hidden gems of a cover crop that farmers use that are now becoming popular in the kitchen.  This grain can also be cooked in water (similar to farro and amaranth). You can drain the water and create a loose grain for salads or you can keep some liquid and also serve it almost “risotto” style.  Either way is delicious and obviously using stocks is tastier than just plain water.  I also personally love using buckwheat flour to make crèpes, like in this recipe.


Enjoy and happy cooking!

tags: whole grain sides, whole grains, buckwheat recipes, teff, amaranth, rye berries, how to cook with wheat berries
categories: all 3, spices
Thursday 01.14.16
Posted by Aliya LeeKong
 

New Year's in Belize

NEW YEARS IN BELIZE

This past week, I got to spend some much-needed family time in and around Ambergris Caye, Belize.  The water and beach were my main agenda (ha!), but, of course, I couldn't leave without spending some time getting to know a bit more about Belizean cooking.

Susanna Arceo started the restaurant, El Fogon, in her home,  built out to look like the kitchen she grew up in - a thatched roof, dirt floor, benches (to accomodate all the kids!) and, of course, the open, wood-fired grill.  The food is super authentic, a lot of old school stews and beans cooked right on the fire (mangrove wood fueled with coconut husks!), and this is one of the few places that does it right in town. 

Recado rojo is the main spice blend, a paste really with achiote, cumin, Mexican oregano, black pepper and tongue-numbing allspice (and some others) usually dissolved in a bit of vinegar, water and/or juice.  That's the marinade for any of the meats that go on the grill or in the stews - chicken, pork, beef, venison, and even gibnut. 

Just wanted to share some of the pictures of my experience there and about town over the holidays!  Happy New Year's to you all!

View fullsize bz1.jpg
View fullsize bz4.jpg
View fullsize bz5.jpg
View fullsize bz2.jpg
View fullsize bz6.jpg
View fullsize bz3.jpg
View fullsize bz11.jpg
View fullsize bz9.jpg
View fullsize bz12.jpg
View fullsize bz13.jpg
View fullsize bz8.jpg
View fullsize bz15.jpg
View fullsize bz7.jpg
View fullsize bz14.jpg
View fullsize bz16.jpg
tags: new year's, belize, ambergris caye, belizean travel, belizean food, recado rojo, achiote
categories: all 3, blog, travel, traditions
Thursday 01.07.16
Posted by Aliya LeeKong
 

5 Champagne Cocktails to Ring in the New Year

5 CHAMPAGNE COCKTAILS TO RING IN THE NEW YEAR

With Christmas out of the way it is now time to focus on New Year's!  I usually head out of NYC for New Year's Eve, escape the madness, and have a quiet one with my family somewhere (preferably warm!). But, when I'm here, I love having a fun evening in with friends and family.  The thought of going out and dealing with all the crowds just isn’t my thing.  Besides, who doesn’t love a party with little finger bites to snack on along with some champagne cocktails!?  Keeping it super simple is key, and I want to share some easy, champagne cocktails with you - the best way to end the holiday season!


FRENCH 75

Photo: Tuxedo No. 2

The French 75 is a classic and super simple - gin, simple, lemon juice + champagne.  You can't go wrong with this one.


SORREL CHAMPAGNE COCKTAIL

This is hands-down one of my favorite champagne cocktails to make and is always a feature at my events.  Sorrel is a sweetened, hibiscus drink scented with cloves and cinnamon that hails from the West Indies.  I love to make a sorrel simple syrup and top with champagne for a gorgeous, sweet-tart, rose-colored cocktail.  Take 1 cup dried hibiscus flowers + 1 cup sugar + 1 cup water and bring up to a boil - if you want to up the ante, throw in a cinnamon stick and 4 whole cloves.  Remove from the heat and let steep 20 minutes.  Strain and cool the syrup.   Add 2 oz. of the cooled syrup to a champagne flute and top with the champagne of your choice!


GRAPEFRUIT AND GINGER SPARKLER

Photo: Serious Eats

With only 3 ingredients, grapefruit juice + Domaine de Canton ginger liqueur + champagne, this drink is easy, elegant and tasty.  Although I'm not a grapefruit eater myself, a touch of grapefruit in a cocktail (think: paloma) adds the perfect bitter note.  The ginger liqueur adds just the right amount of sweetness, and the whole thing goes down really easy....a bit too easy if you know what I mean.


FEEL THIS COCKTAIL

Photo: The Drink Blog

The basis for this cocktail is again citrus because 'tis the season.  Orange juice + lime juice form the base.  Add a little vodka, brown simple syrup, and champagne and top with raspberries to keep it festive! 


CHAMPAGNE SORBET FLOATERS

When in doubt, go to your grocery store (or local bodega...), pick up a pint or two of your favorite sorbet and throw it on top of champagne, prosecco, sparkline wine, cava or whatever you are serving.  It will look gorgeous, and, as the sorbet melts, it will infuse your champagne with fruity sweetness!


Wishing everyone a very happy New Year's and all the best in 2016!!!

tags: champagne cocktails, new years eve recipes, what to serve on new years eve, cocktail recipe, cocktails
categories: all 3, drinks & cocktails, holiday, lifestyle, quick & easy, recipes
Tuesday 12.29.15
Posted by Aliya LeeKong
 
Newer / Older