X

Sign up to receive exclusive recipes, tips, updates and other goodies from Aliya!

  • Home
  • Blog
    • All
    • Recipes
    • Spices + Ingredients
    • Lifestyle, etc.
    • Travel
  • The Cookbook
  • The App
  • Media
    • All Media
    • Video
  • About
  • Passions
Aliya LeeKong
  • Home
  • Blog
    • All
    • Recipes
    • Spices + Ingredients
    • Lifestyle, etc.
    • Travel
  • The Cookbook
  • The App
  • Media
    • All Media
    • Video
  • About
  • Passions

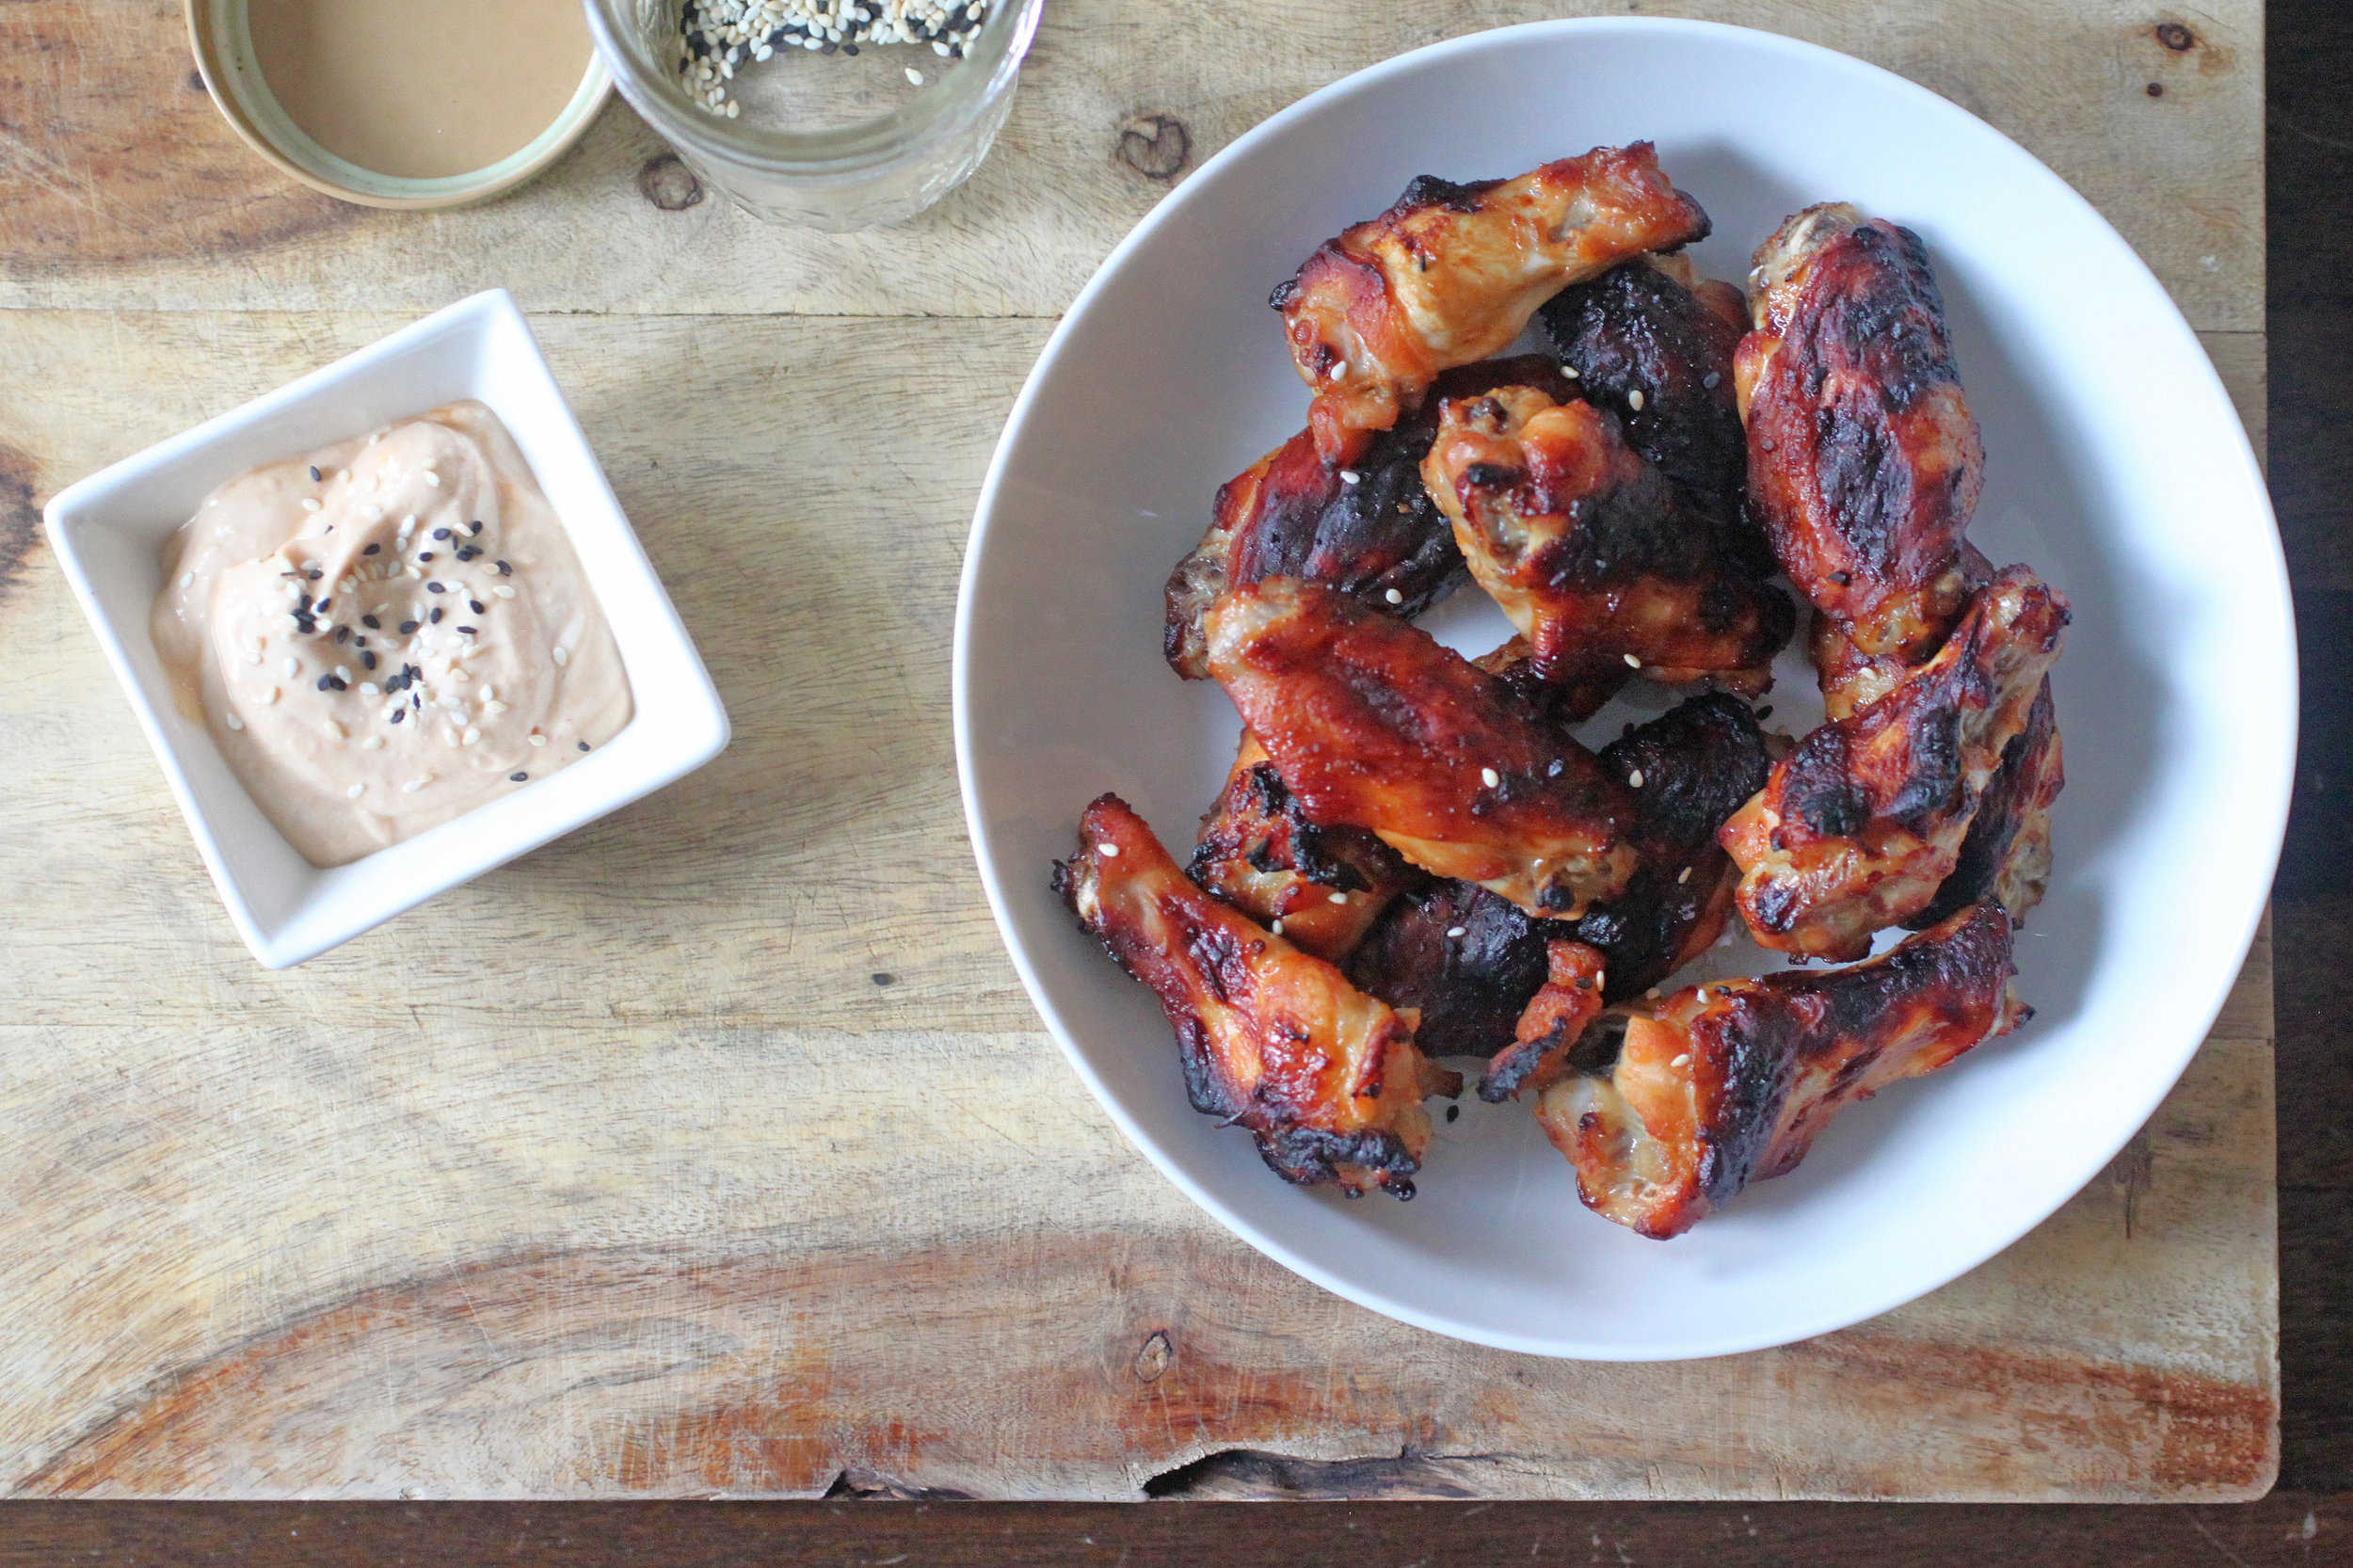
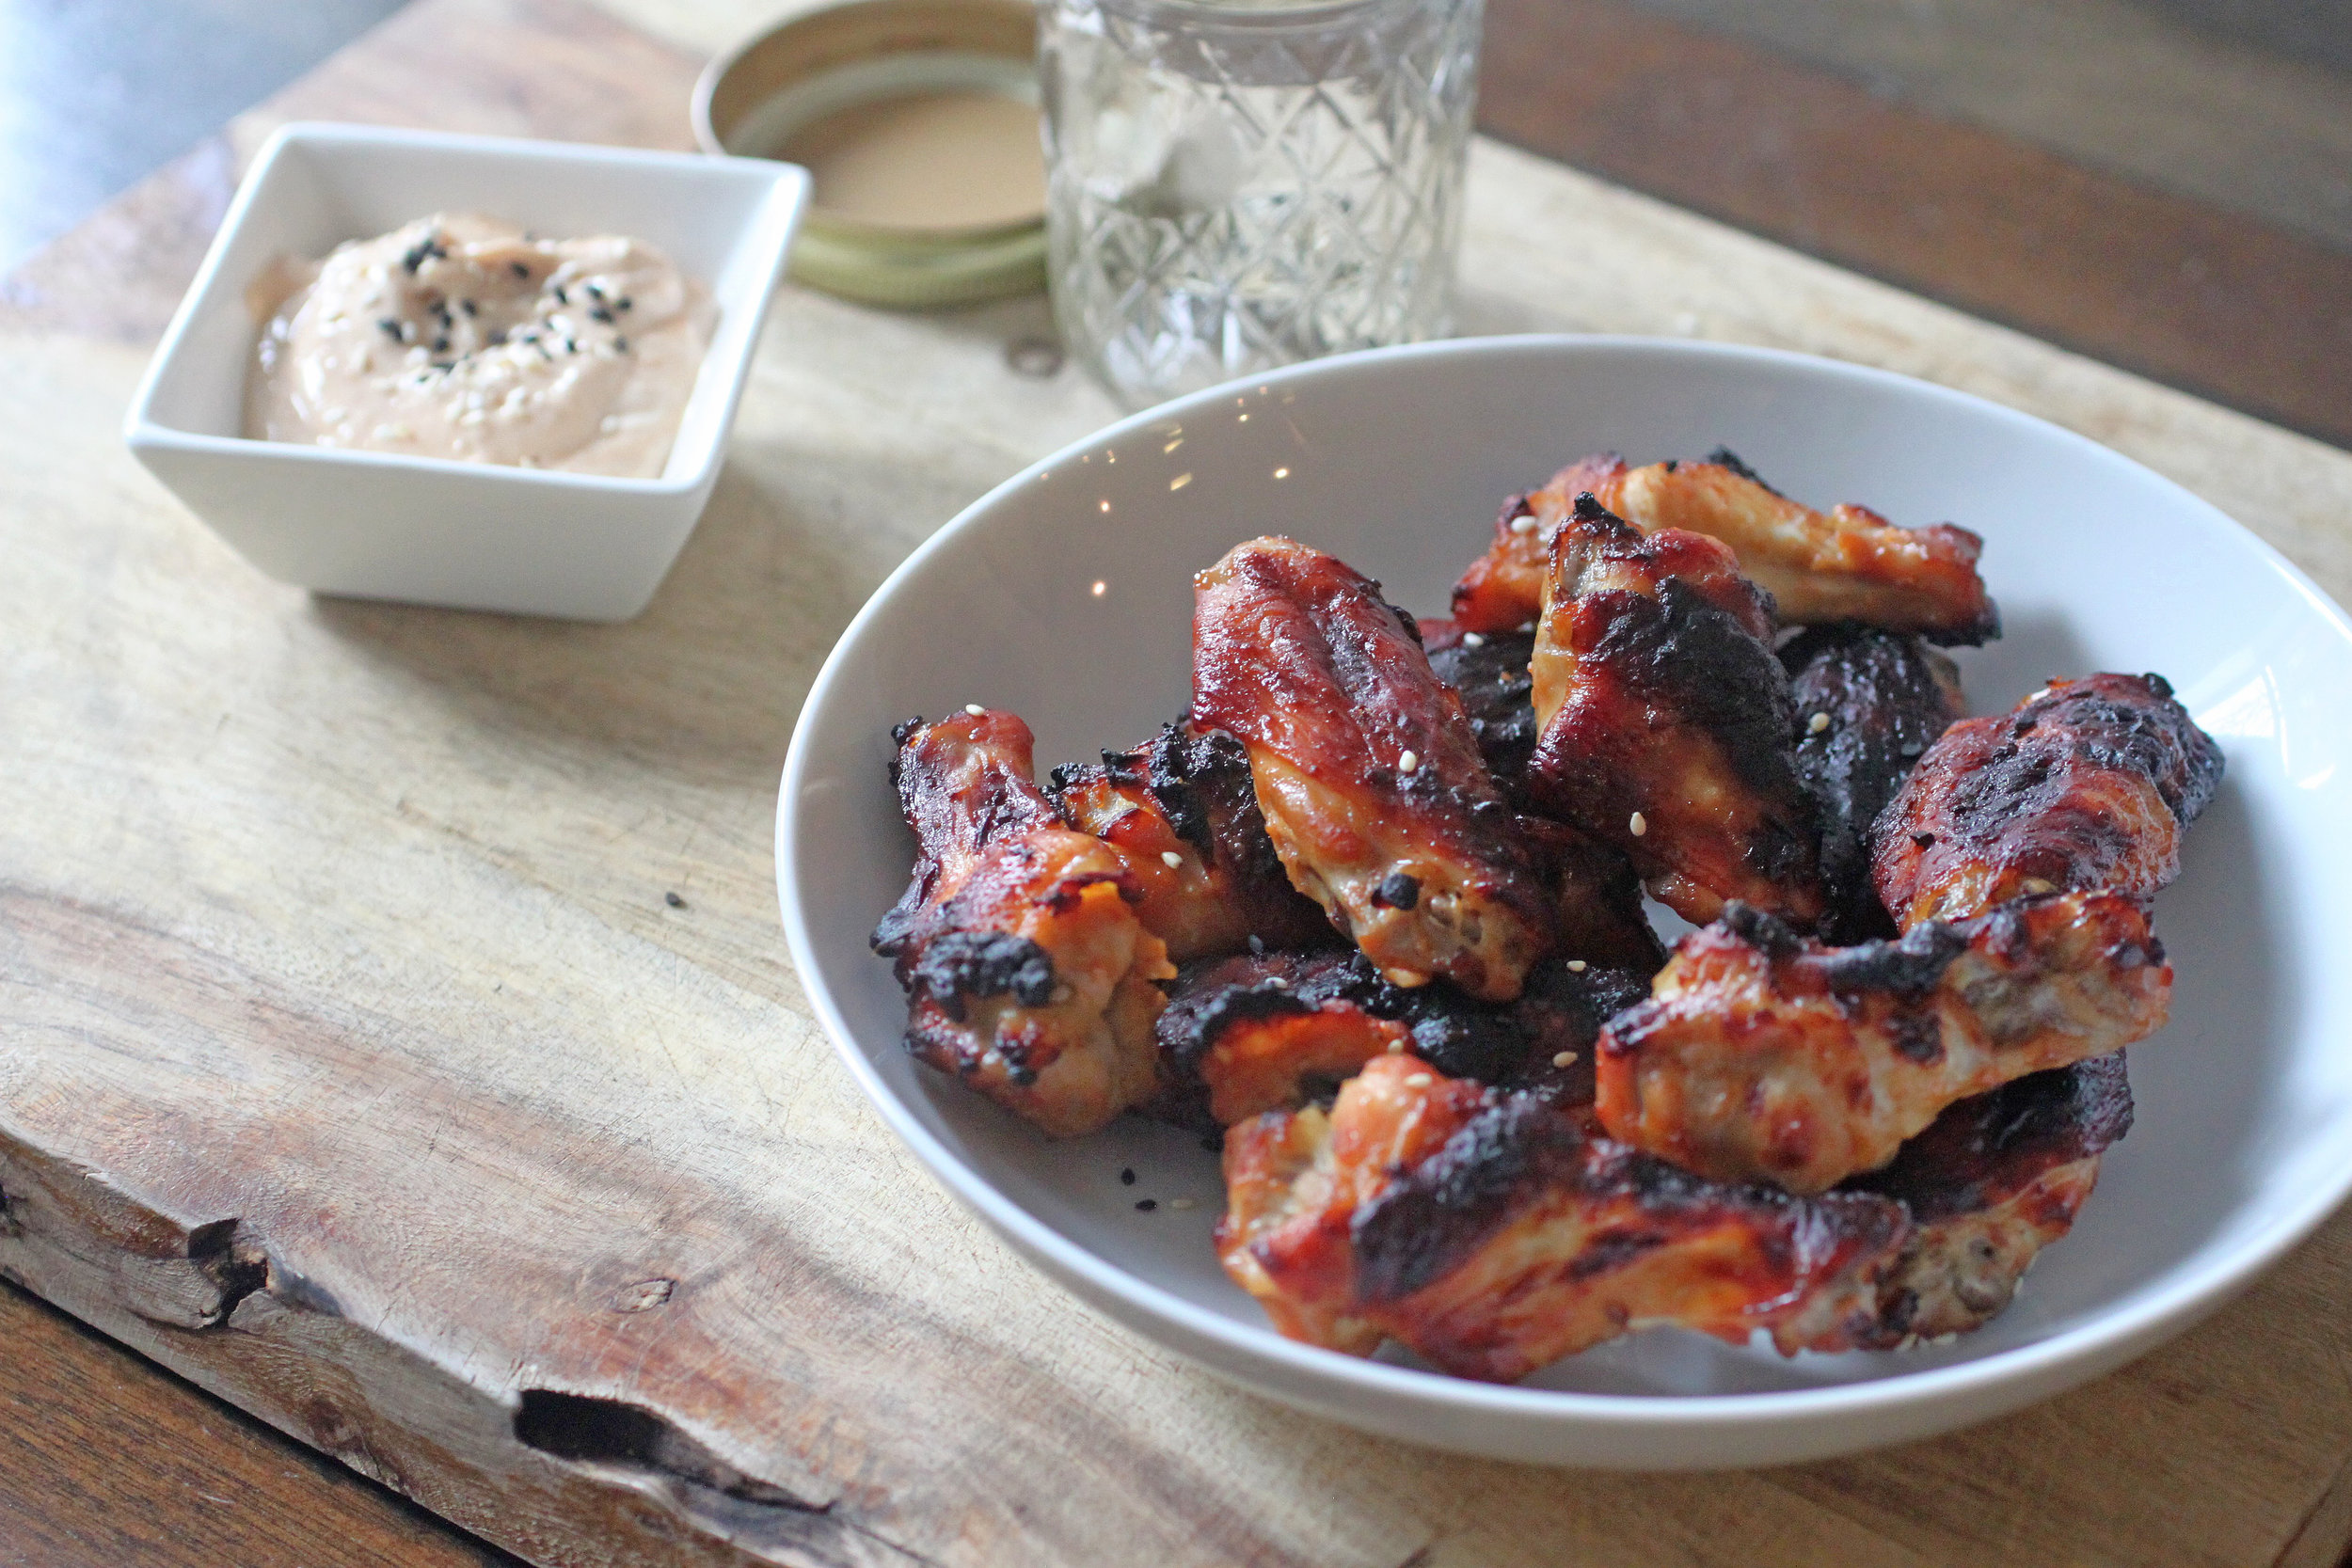
Crispy Miso (Baked!) Wings

wing2.jpg
wing1.jpg
wing3.jpg

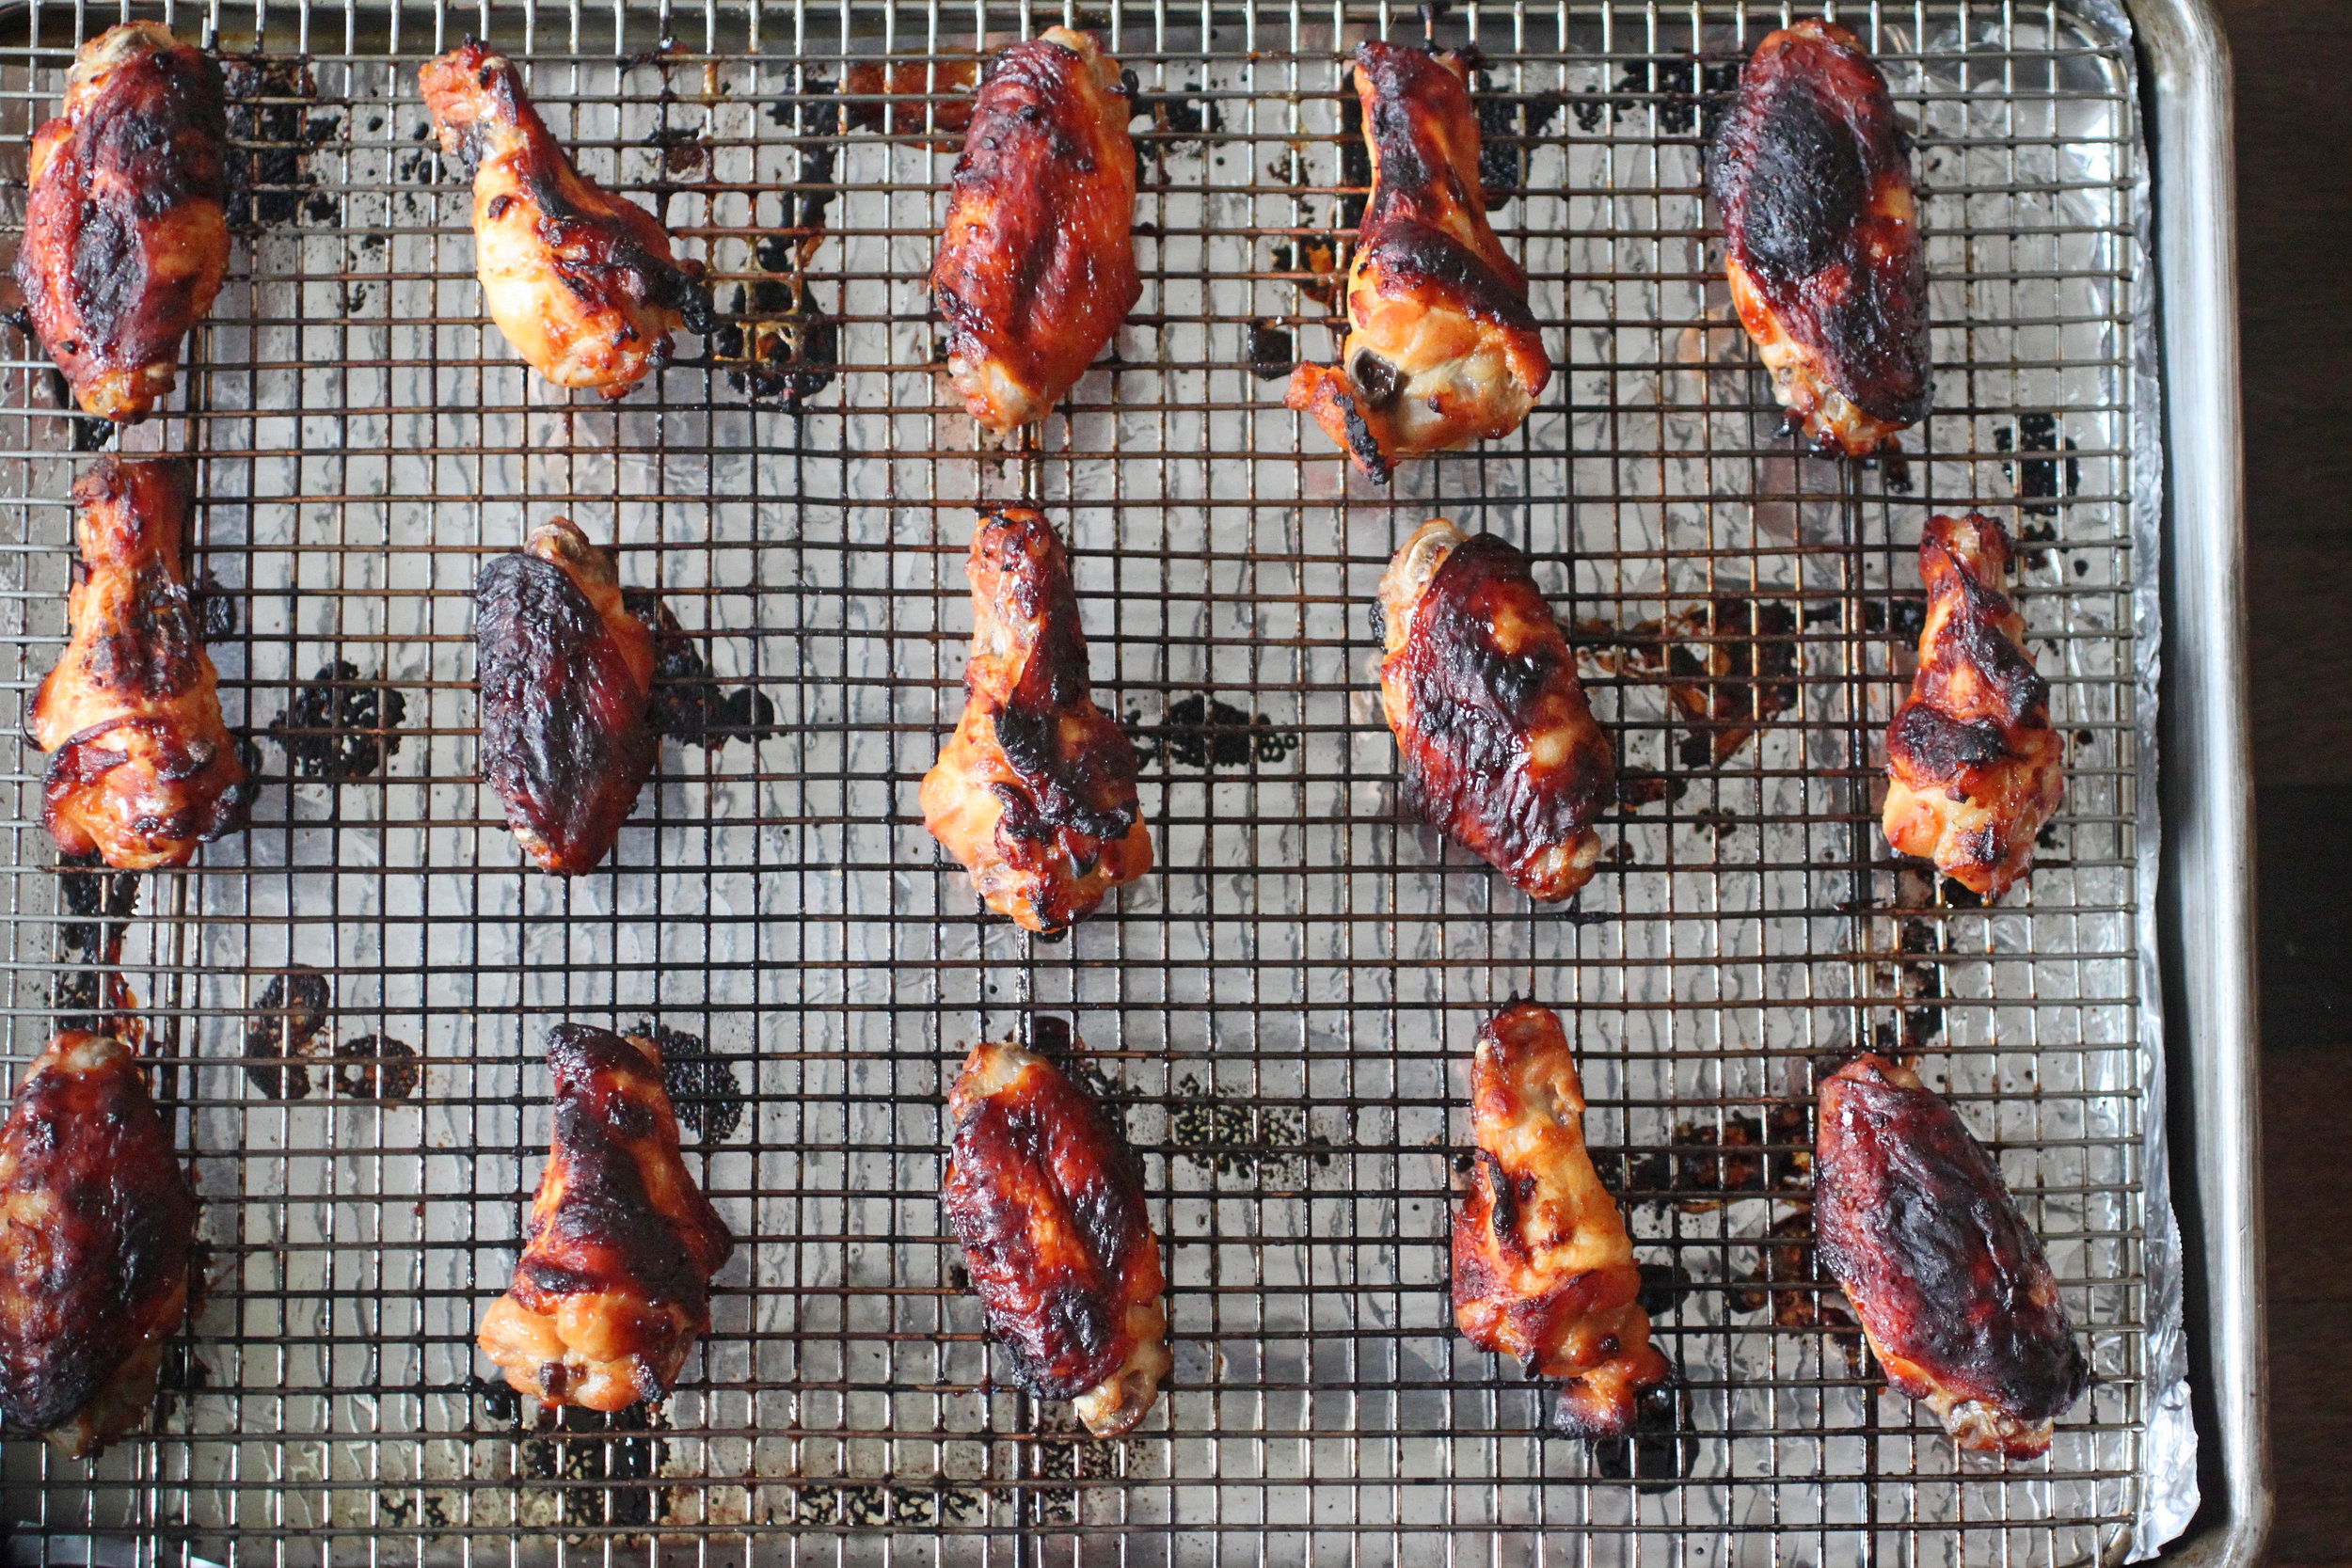
CRISPY MISO (BAKED!) WINGS

Super Bowl = wings!  And these are what I'm making.  The spread, for me, is what it's all about…..eating "bad" (but oh-so-good) food.  I figured it was time for me to up my wing game, and I’ve been slightly obsessed with putting white miso paste in everything lately.  There are a ton of varieties of miso, and you can find it in any Asian grocery store in the refrigerated section.  I use it in salad dressings, marinades for fish, meat and, of course, in my baked wings recipe. 

I LOVE some good wings, but I wasn’t so into deep-frying them and making a splattered mess of my kitchen.  But you can still get them crispy in the oven.   If you crank it up high enough and cook the wings on a rack over a sheet tray - the chicken skin fat will render out, they'll stay tender AND the skin will crisp up nicely!  These are slightly sweet, umami, and with a great kick.  Enjoy!

Serves 6

For the marinade + wings:

½ cup white miso paste

¼ cup plus two tablespoons mirin

3-4 tablespoons sriracha (plus more if you want extra heat)

3 tablespoons soy sauce

2 tablespoons sesame oil

1 tablespoon brown sugar

½ teaspoon rice wine vinegar

4 garlic cloves, finely chopped

3 lbs chicken wings, tips removed, drummettes and flats separated

Kosher salt

Toasted sesame seeds, for garnish

For the dipping sauce:

½ cup sour cream

½ lime, juiced

small handful of cilantro, chopped

Extra sriracha, to taste

For the marinade:  In a bowl, whisk together the miso, mirin, sriracha, soy, sesame oil, brown sugar and rice wine vinegar.  Set aside/refrigerate a half cup for the dipping sauce.  Add the minced garlic to the marinade and toss the wings with it until they are thoroughly coated.  Transfer to a plastic bag and refrigerate for a minimum of 5 hours and preferably overnight.

For the wings: Preheat oven to 400° F.  Put a wire rack over a baking sheet and set aside.

Transfer the marinated wings to a colander to drain, and then wipe off any excess.  The marinade can burn, so you want it dry-ish.  Season the wings with salt and transfer to the rack over the baking sheet.  Bake the wings for about 40 minutes, rotating half way through cooking..

For the dipping sauce: In another bowl, add the reserved marinade and mix with the sour cream, lime juice, cilantro and more sriracha, depending on your heat preference.  

Serve hot with the dipping sauce and sprinkled with toasted sesame seeds!

tags: super bowl recipes, what to cook for the super bowl, Super Bowl, wings, crispy wings, best chicken wings recipe
categories: all 4, appetizers 1, blog, main dishes, man-friendly, quick & easy, recipes
Wednesday 02.01.17
Posted by Aliya LeeKong
 

Oxtail Mafé

View fullsize File Nov 21, 2 09 18 PM.jpg
View fullsize File Nov 21, 2 09 39 PM.jpg
View fullsize File Nov 21, 2 09 57 PM.jpg

OXTAIL MAFÉ

There is nothing I love more than walking in to the aroma of a delicious homemade dinner that has been simmering for hours.  When the weather gets brisk and the market is full of squash and root veggies, I love braising - short ribs, lamb shanks, oxtail. 

I am a bit old school about braising and love to take my time developing every bit of flavor:  a serious brown on the meat, a slow sweat of all of the aromatics, 3 + hours of low and slow cooking in the oven.  In a time crunch though, there's nothing like a slow cooker!  Many dishes in the slow cooker allow you to just throw everything in one pot, turn it on and go, but I prefer to quickly sear or sauté whatever I am cooking,to get more flavor out it, and then throw it in the pot. 

When it comes to oxtail, which is what this recipe is all about, I loooove West Indian-style - sweet, spicy, with a good dose of salt pork and some scotch bonnet heat. 

I decided to break out and do something a little different.  When you work in kitchens you find yourself surrounded by many different cultural backgrounds and this leads to epic family meals!  One of my most memorable was being in the kitchen with a line cook from Senegal.  When it was her turn for family, she made the most amazing foods, my most favorite was her Chicken Mafé (basically a chicken and peanut stew).  I still crave it to this day! I remember her saying she uses beef at home…so why not oxtails!? 

Below is my take on her dish, it’s best with rice or fonio (a West African grain)…pretty much anything to sop up the yummy sauce with!  I'm now not sure which is my favorite way to make oxtail....Enjoy!

Yields 4 to 6 servings

3 tablespoons canola oil

2 ½ pounds oxtail, cut into segments

1 large yellow onion, diced

1 medium bell pepper, diced

1 Scotch bonnet pepper or habanero pepper, minced or kept whole if you want less heat

3-4 cloves of garlic, minced

2 tablespoons tomato paste

1 can diced tomatoes, fire-roasted

3/4 cup peanut butter, all natural

1 quart chicken or beef stock

2 tablespoons Fish sauce

2 tablespoons red wine vinegar

1 tablespoon soy sauce (optional)

1 medium sweet potato, cut into 1" dice

1-2 Yukon gold potatoes, cut into 1" dice

1/2 bunch cilantro, finely chopped for garnish

1/2 cup peanuts, roughly chopped for garnish (optional)

Salt and freshly ground pepper, to taste

Preheat oven to 325° F.

In a dutch oven, heat oil over medium-high heat.  Dry off oxtails, season generously with salt and pepper and sear for 2 to 3 minutes per side.  Work in batches so you don't crowd the pan.  Remove the oxtails and set aside in a plate or tray.

Reduce heat to medium and throw in the onion, bell pepper, and habanero or scotch bonnet if cut up (if whole, wait).  Sauté for about 5-7 minutes until everything has softened.  Add in the minced garlic and cook another 30 seconds or so.  Add in the tomato paste and sauté for another minute.

Now, add in the diced tomatoes, peanut butter, stock, fish sauce and soy sauce (if using).  If you are keeping the habanero or scotch bonnet pepper whole, this is the place to add that in as well.  Turn up the temperature and bring up to a boil.  Make sure the peanut butter is evenly mixed into the stew.

Nestle the oxtail into the stew making sure they are fully covered.  Pour in any juices that accumulated in the plate or tray where the oxtail were.  Cover and place into the oven.  Cook for 2 1/2 hours.

Remove from the oven and stir in the sweet and regular potatoes. Cover and place back into the oven for another 45 minutes.

Serve hot over rice or fonio garnished with chopped cilantro and peanuts.


tags: oxtail recipe, how to cook oxtail, west indian oxtail, chicken mafe, senegalese food
categories: all 4, holiday, main dishes, man-friendly, recipes, traditions
Wednesday 11.30.16
Posted by Aliya LeeKong
 

The Ultimate Thanksgiving Turkey

THE ULTIMATE THANKSGIVING TURKEY

Photo: Food52

I feel as if I've been walking around in a fog, and, now, Thanksgiving is basically a week away!  When did this happen?  I always think that Thanksgiving is far enough away that I have plenty of time to plan and then all of a sudden, it's just here.  This year, I definitely don't want to go the traditional route with a turkey.  We did this amazing, marinated, dry-brined, spatchcocked turkey last year out on our grill to free up oven space.  It was AMAZING - super moist and evenly cooked with crispy, crackling skin.

Turkey can be so hit or miss with the main complaint being that it's too dry.  Brining is the best way to ensure that the turkey will stay moist and flavorful!  The only decision left is a dry brine vs. a wet brine.  Using a dry brine is basically pre-salting the turkey without any water.  Some say that this is the better method (it definitely saves space in the fridge...), and while it doesn’t always guarantee as juicy a bird as a wet brine, it does offer a much crispier skin when cooked.  The turkey sits in the fridge, uncovered, with the dry salt brine mix for up to 3 days prior to cooking.  The salt mixture will draw out the moisture from the bird.  The salt is then dissolved in this liquid and reabsorbed which helps to break down any tough proteins making it tender, juicy and flavorful.

With a wet brine, you add water to the equation and need a bag big enough to house the turkey and a pan (for a just in case the bag bursts scenario).  This just means more room needed in the fridge that, quite frankly not a lot of us have around this time of year!  The turkey then bathes in the brine for up to 3 days and (I think) creates a juicer outcome. 

I’ve used both techniques in the past and honestly, I think the choice for brining depends on the cooking method.  For a traditional roast turkey, I say go with the wet brine - for the longer cooking time, you need the brine to plump up the moisture content.  For a spatchcocked turkey, though, that cooks in far less time, I think a dry brine is the best way to go - you get the moisture you need and perfectly crisped skin!

What I love about both brines is that you can add whatever spices you want to create a personalized mix.  In the past, I have played around with allspice berries, juniper berries, fresh (or dry) herbs, garlic chipotle peppers (grinded), citrus zest (orange, lemon, lime, etc…), star anise, cardamom…..you get the idea.  All you need to know is the ratio of salt to water for a wet brine (about 2- 2 1/2 cups salt to 1 gallon of water).  For a dry brine, I use a 1/2 cup kosher salt with 2 tablespoons baking powder as a ratio and don't always use all of that salt, depending on the size of the turkey.  

A few things: Always default to kosher salt here as this method needs the larger crystals to work; regular table salt is not ideal for this recipe.  Also, this is only good for a non-kosher, non-treated, fresh turkey.  If you aren't buying a fresh one, make sure you read the label to see if it's been pre-treated.

Finally, remember that there is no need to re-salt the turkey once you are ready to put it in the oven!  Usually with the wet brine, I rinse the turkey in and out and pat dry before stuffing it and putting it in the oven.  With the dry brine, I don’t rinse but only pat the skin dry before roasting. 

Here are a few recipe ideas to get you started with your Thanksgiving Feast!

SPATCHCOCKED ROAST TURKEY

Photo: Food52


SLOW-ROASTED TURKEY RECIPE

Photo: Food52


DRY-BRINED TURKEY

Photo: NYTimes


SLOW-SMOKED AND SPICE-BRINED TURKEY

Photo: Saveur


JAMAICAN JERK TURKEY

Photo: Chef and Steward


tags: Thanksgiving ideas, Thanksgiving recipes, thanksgiving turkey recipe
categories: all 4, holiday, lifestyle-1, main dishes, man-friendly, recipes, traditions
Tuesday 11.15.16
Posted by Aliya LeeKong
 

Chipotle-Miso Butternut Squash Soup

CHIPOTLE-MISO butternut SQUASH SOUP


I know, I know - chipotle plus miso??  Obviously, this has no root in real tradition, but those flavors together are literally incredible, something I first played around with in my mind before putting them together.  I love creating new soup recipes during squash season - that sweetness is the perfect canvas for spices and flavor.  Squash creates such a lush, smooth, silky texture without even adding any cream so it’s the perfect option for dairy-free days.  

The recipe below is for a spiced butternut squash soup, but you can easily substitute pumpkin, honeynut or kabocha squash for this recipe.  Most soups call for roasting the squash first, but I skip that step here.  The cubed, raw squash cooks up while it's simmering with all of the great flavors here.  I love the smokiness and heat of the chipotle mixed with the umami and sweetness of the miso.  Such a great, quick weeknight meal.  I served it along with my pan de coco (coconut bread subbing coconut milk in this recipe)….sooooooo good!

Serves 4 to 6

2-3 tablespoons unsalted butter
1 medium onion, diced
1 shallot, diced
3 cloves garlic, minced
1/2 teaspoon brown sugar
1 butternut squash, halved and seeded and cut into a 1-inch dice (optional: save the seeds for garnish)*
1/4 cup mirin**
4 cups vegetable or chicken stock
2 tablespoons white shiro miso**
1 chipotle in adobo (canned)
Salt and lemon juice, to taste
chopped chives, for garnish

In a soup pot, melt butter over medium-low heat.   Add onion and shallot
with a pinch of salt and cook for 5 to 7 minutes until translucent.  Add the
garlic and the brown sugar and cook for another minute.

Add in the cubed squash along with the mirin and cook for 2 to 3 minutes
until the wine has mostly absorbed.  Add the stock and bring up to a simmer.
Simmer for 35 minutes, partially covered, until all of the squash are
tender.

Add in the miso and chipotle and transfer to a blender or use a hand blender
to puree to your desired consistency.  Season with salt and adjust acidity with lemon juice if necessary..

Serve sprinkled with chives & toasted seeds (if using).

* To toast the squash seeds, preheat oven to 350 degrees.  Clean seeds of any pulp and dry on paper towels. Toss the seeds with oil, salt, cumin and smoked paprika.  Toast in oven until golden brown about 10-15 minutes.  Let cool on a tray and set aside for garnish on soup.

** Mirin is a type of Japanese rice wine.  This along with the miso can be found at Whole Foods or a specialty / Asian grocer.

tags: squash recipes, squash soup, how to make squash soup, butternut squash soup, butternut squash recipes, best butternut squash recipe ever
categories: all 4, appetizers 1, main dishes-1, man-friendly, quick & easy, recipes, soups, soups & salads, vegetarian-2
Wednesday 11.02.16
Posted by Aliya LeeKong
 

Not Just Apple Pie + Lamb Shanks!

NOT JUST APPLE PIE + LAMB SHANKS!

There’s nothing better than apple picking on a cool Fall weekend with the fam!  As I get older, I totally geek out about stuff like that (who knew?).  Now, if only the weather would cooperate...I have my favorite spot up in Warwick, NY, which, coincidentally, also happens to be a vineyard with wine tasting.  Because tipsy apple picking is even better!  Just joking (sort of). 

View fullsize apple3.jpg
View fullsize apple4.jpg
View fullsize apple2.jpg

There are so many different varieties of apples to choose from that I’m so glad they have maps and descriptions of each apple.  I tend to get overly excited and end up with WAY too many apples when I get home!  So after lugging pounds of different apple varieties home, I'm always thinking about what to do besides, of course, the mandatory pie or crisp.  I love a good apple butter to keep for later, and I freeze off batches of applesauce for the chickadee. 

I put together a few ideas for you, and, further down, is a yummy recipe for Honey-Braised Lamb Shanks with Butternut Squash and Apples, which is basically a tagine and seriously delicious.  Enjoy!


APPLE PIE WITH STAR ANISE BROWN BUTTER


BUTTERNUT SQUASH & APPLE BREAD WITH MAPLE & CARDAMOM


PISCO SOUR APPLE


SWEET APPLE COUSCOUS


HONEY-BRAISED LAMB SHANKS WITH BUTTERNUT SQUASH AND APPLES

This lamb dish is based on North African tagines, which slow-braise lamb and other meats with both sweet and salty elements. While many tagines feature apricots, prunes, or raisins, I thought seasonal butternut squash and apples would provide the perfect sweet counterbalance to the spiced braise.  I use lamb shank here because I love the flavor and the end result – spoonable, fall-off-the-bone meat in a rich stew.

Ingredients

2-3 tablespoons canola oil

2 ½ pounds lamb shanks (approximately 2 shanks), room temperature

1 large onion, cut into a medium dice

4 cloves garlic, minced

½ teaspoon ground ginger

large pinch saffron

1 ½ teaspoons cinnamon

4 cups beef or chicken stock

1 tablespoon honey

2 cups butternut squash, cut into a ¾” inch dice

1 ½ cups honeycrisp or fuji apple, cut into a ¾” inch dice

¼ cup sliced almonds, toasted

1 ½ teaspoons sesame seeds, toasted

Salt and freshly ground pepper

Preheat the oven to 325° F.

Heat a Dutch oven or large pot over medium-high heat.  Add the oil, season the shanks generously with salt and freshly ground pepper, and sear 2 to 3 minutes per side to develop a nice brown.  Remove to a plate and reduce the heat to medium-low.

Add the onion and a bit of salt and sauté for 5 to 7 minutes until the onions are translucent.  Add the garlic, ginger, saffron and cinnamon and sauté for another 30 seconds to a minute until fragrant.  Nestle the lamb shanks back in the pot, and add in the stock and the honey.  Cover, bring up to a boil and then place in the oven.

Cook for 2 hours and 15 minutes and then remove from the oven.  Toss in the squash, apples and half of the almonds.  Cover and put back in the oven for the next 45 minutes to an hour. The meat should be spoonable, basically falling off the bone.

Serve hot, garnished with the remaining toasted, sliced almonds and sesame seeds.  This is great alongside couscous.

tags: apple picking, apple recipes, what to do with apples, apple pie recipe, apple cake, lamb tagine, lamb shanks
categories: all 4, blog, holiday, lifestyle-1, main dishes, man-friendly, recipes, traditions, sweet & savoury
Thursday 09.22.16
Posted by Aliya LeeKong
 

FATHER'S DAY GRILLING

FATHER'S DAY GRILLING

Father's Day falls in such a sweet spot of the year - the weather is always perfect and who doesn’t love a little family gathering outside!?  My plan to celebrate this weekend will be an afternoon of easy grilling - I can't go wrong keeping it a lil' meat-centric.  :) Below are some great grilling recipes to give you some ideas for this weekend.  Enjoy!


GRILLED BUTTERFLIED CHICKEN WITH CHARRED JALAPENO SAUCE


GRILLED LAMB SIRLOIN TACOS WITH CORN, PICKLED CHERRY PEPPERS AND CHIPOTLE CREMA


SALT & PEPPER BABYBACK RIBS

Photo: Food52


GRILLED PORK BANH MI

Photo: Food & Wine


GRILLED SHRIMP WITH KIMCHI-MISO BUTTER

Photo: Rasa Malaysia


GRILLED AVOCADO SALAD WITH GREEN GODDESS DRESSING

Photo: Salt & Wind


CORN WITH GREEN CHILI BUTTER & COCONUT


TAHINI OREOS

Photo: My Name is Yeh


RUM SWIZZLE

Photo: Bon Appetit

tags: father's day, what to cook for father's day, grilling ideas, what to grill for father's day, father's day brunch
categories: all 4, blog, lifestyle-1, man-friendly, recipes, salads, side dishes-1, soups & salads, main dishes-1
Wednesday 06.15.16
Posted by Aliya LeeKong
 

Red Snapper with Lemon, Onions, Mustard & Habañero (Poisson Yassa)

View fullsize fish1_edited-2.jpg
View fullsize fish3.jpg
View fullsize fish2.jpg

RED SNAPPER WITH LEMON, ONIONS, MUSTARD & HABAÑERO (POISSON YASSA)

Summer has officially begun, and with that, besides grilling it up, I like to go a bit lighter.  This recipe is for a Senegalese-inspired fish, poisson yassa.  Fish (here, I used snapper) is marinated with onions, garlic, lemon, bay, mustard and habañero pepper.  After a quick sear of the fish and sauté of the onion mixture, it's all placed in the oven to bake and for the flavors to mingle. 

The flavor is so amazing - with the sweetness of the caramelized onions, the tart bite of the mustard and lemon, and the heat from the habañero.  I love that this preparation can also be used for chicken and lamb with obvious changes to cooking times.  Enjoy!

Serves 4

4 white onions, thinly sliced

5 garlic cloves, minced

Juice and zest of 2 lemons

1 habañero pepper, seeded, ribbed and thinly sliced

¼ cup canola or olive oil, plus more for cooking

¼ cup cider vinegar

1 ½ tablespoons Dijon mustard

1 tablespoons soy sauce

1 bay leaf, fresh or dried

4 filets red snapper (1 ½ - 2 lbs)

salt and freshly ground pepper

2 tablespoons unsalted butter

Handful of fresh herbs, finely chopped (parsley, chives, cilantro)

In a bowl, mix together the onions, garlic, lemon juice and zest, habañero pepper, oil, vinegar, mustard, soy and bay leaf.  This is the marinade for the fish.  Transfer to a plastic bag or baking dish and make sure the fish is thoroughly coated.  Marinate for a minimum of 30 minutes but preferably a few hours.

Preheat oven to 350° F.

Remove filets from the marinade (reserving the marinade), dry off and season with salt and pepper.

In a large cast iron skillet, heat enough oil to coat the bottom of the pan along with the butter over medium-high heat.  When hot, add the snapper skin-side down.  Cook for 3 minutes and remove to a plate (skin-side up).

Add the onion marinade mixture (juices and all!) to the skillet, reduce the heat slightly and cook for 6-8 minutes until the onions start to soften.  Remove from the heat, nestle the snapper filets in the onion mixture, cover with foil and transfer to the oven for 15 minutes.

Garnish with fresh herbs before serving.  It's traditionally served over rice, but I also love it with some crusty bread.


tags: fish recipe, poisson yassa, senegalese food, african cooking
categories: all 4, blog, main dishes, man-friendly, quick & easy, recipes, traditions
Wednesday 06.01.16
Posted by Aliya LeeKong
 

Essential Grilling Tips to Kick Off the Summer!

ESSENTIAL GRILLING TIPS TO KICK OFF THE SUMMER!

With the weather finally starting to warm up and the days getting longer, I can't wait to clean off my back porch and get my grill set up!  There’s nothing better than a little summer get-together with fresh salads, cocktails and grilled meats or fish.  I put together a few tips to help guide you through an easy grilling season...


CHARCOAL VS. GAS

This is the debate that sparks up at every BBQ get-together!  There aren't any real health differences cooking with either one, so it really just comes down to taste and preference.  Charcoal will give you more of a richer, smokier flavor whereas gas is a lot faster and a little less expensive to maintain.

I am partial to charcoal - the smoky flavor you get is so incredible, and for me, being close to the cooking process (thinking about heat and being intuitive about done-ness) is something I just love.  To start a charcoal grill, use a chimney, which makes it super easy to get the coals hot and ready to use.  Place paper or starter briquets on the underside of the chimney and then fill with charcoal.  Light the paper/briquets and let the coals catch fire, which should take around 20-25 minutes.  Dump out the charcoals into the grill when they have turned an ashy gray.  I'm not much for lighter fluid, so this is my favorite way. 


MAINTAINING YOUR GRILL

You want to oil the cold grates prior to grilling with a rag or paper towel.  This is basically the same as maintaining your cast iron pans at home - seasoning the grates will help to make the grill non-stick.

Also, always preheat the grill, and clean the grill while it is still hot before and after cooking.  The grill should be so hot that you can't keep your hand above it for more than 2 seconds. 


READY TO GRILL

A few points:

(1) Always let your meat come up to room temperature before grilling for a good 20-30 minutes.  This makes sure that your meat will cook evenly on the grill. 

(2) Season with spices or marinade overnight for the best flavor, but even a quick grill rub right before cooking makes for great flavor.  If you're using a marinade, make sure to pat the meat dry before cooking. 

(3) Save the basting of sauces towards the end of cooking so that they don’t burn the foods.  Most basting sauces contain brown sugar, tomato sauce, soy and other sugary ingredients that will char the meat before it is finished cooking. 

(4) Tongs and spatulas are the best tools to use when handling meat; never a grill fork as it releases all those good juices when you pierce the meat to turn.


LET'S GET COOKIN'!

The hardest thing to do while cooking?  Don’t touch the meat!  Let it sear and get those beautiful grill marks.  The meat will let you know when it is ready to be turned.  If you pick up the meat too early, it will stick to the grates.  After cooking, let the meat rest (about 5-15 minutes).  This way the juices will re-distribute.  If you cut into it right away, all the juices will flow out leaving you with a dry cut of meat. 

Using a meat thermometer is helpful, especially if you're grilling poultry.  I actually judge by the touch when I'm grilling red meat.  Use the skin on your hand between your thumb and your pointer finger as a guide.  The first pinch between the two fingers is soft and spongy – rare, ¼” back is a little spongy but springs back – medium, ½” back is firmer – well done.


GREAT GRILL ACCESSORIES

Photo: Sur La Table

Salt blocks are made from Himalayan salt, and they impart a subtle saltiness to foods and can be used directly on the grill. 


Photo: Amazon

Grill baskets are great for those foods that fall through the grates like asparagus, shrimp, onions etc…I love this one because I'm always cooking for a group and it's on the larger size.

Photo: Emile Henry

Pizza stones are amazing for making fresh pizza at home.  You can even stop by your local pizza place and ask to buy dough if you don’t have time to make your own.  This is actually what I own, and it works on the grill and in the oven.  What I love about this one is that you can cut directly on it making serving up that grilled pizza all the easier.


Photo: William Sonoma

Cedar planks & alder wood are amazing for grilling fish.  Not only do they keep the delicate fish from falling through the grates, they also infuse the fish with a rich, smokey flavor depending on the type of wood.  If you can find alder wood, the flavor is amazing!

tags: grilling tips, how to grill, grilling for memorial day, summer grill essentials
categories: all 4, blog, lifestyle-1, quick & easy, man-friendly
Monday 05.23.16
Posted by Aliya LeeKong
 

Smoked Ricotta Gnocchi with Ramps, Favas & Thai Green Curry

View fullsize gnocchi4.jpg
View fullsize gnocchi2.jpg
View fullsize gnocchi1.jpg
View fullsize gnocchi3.jpg

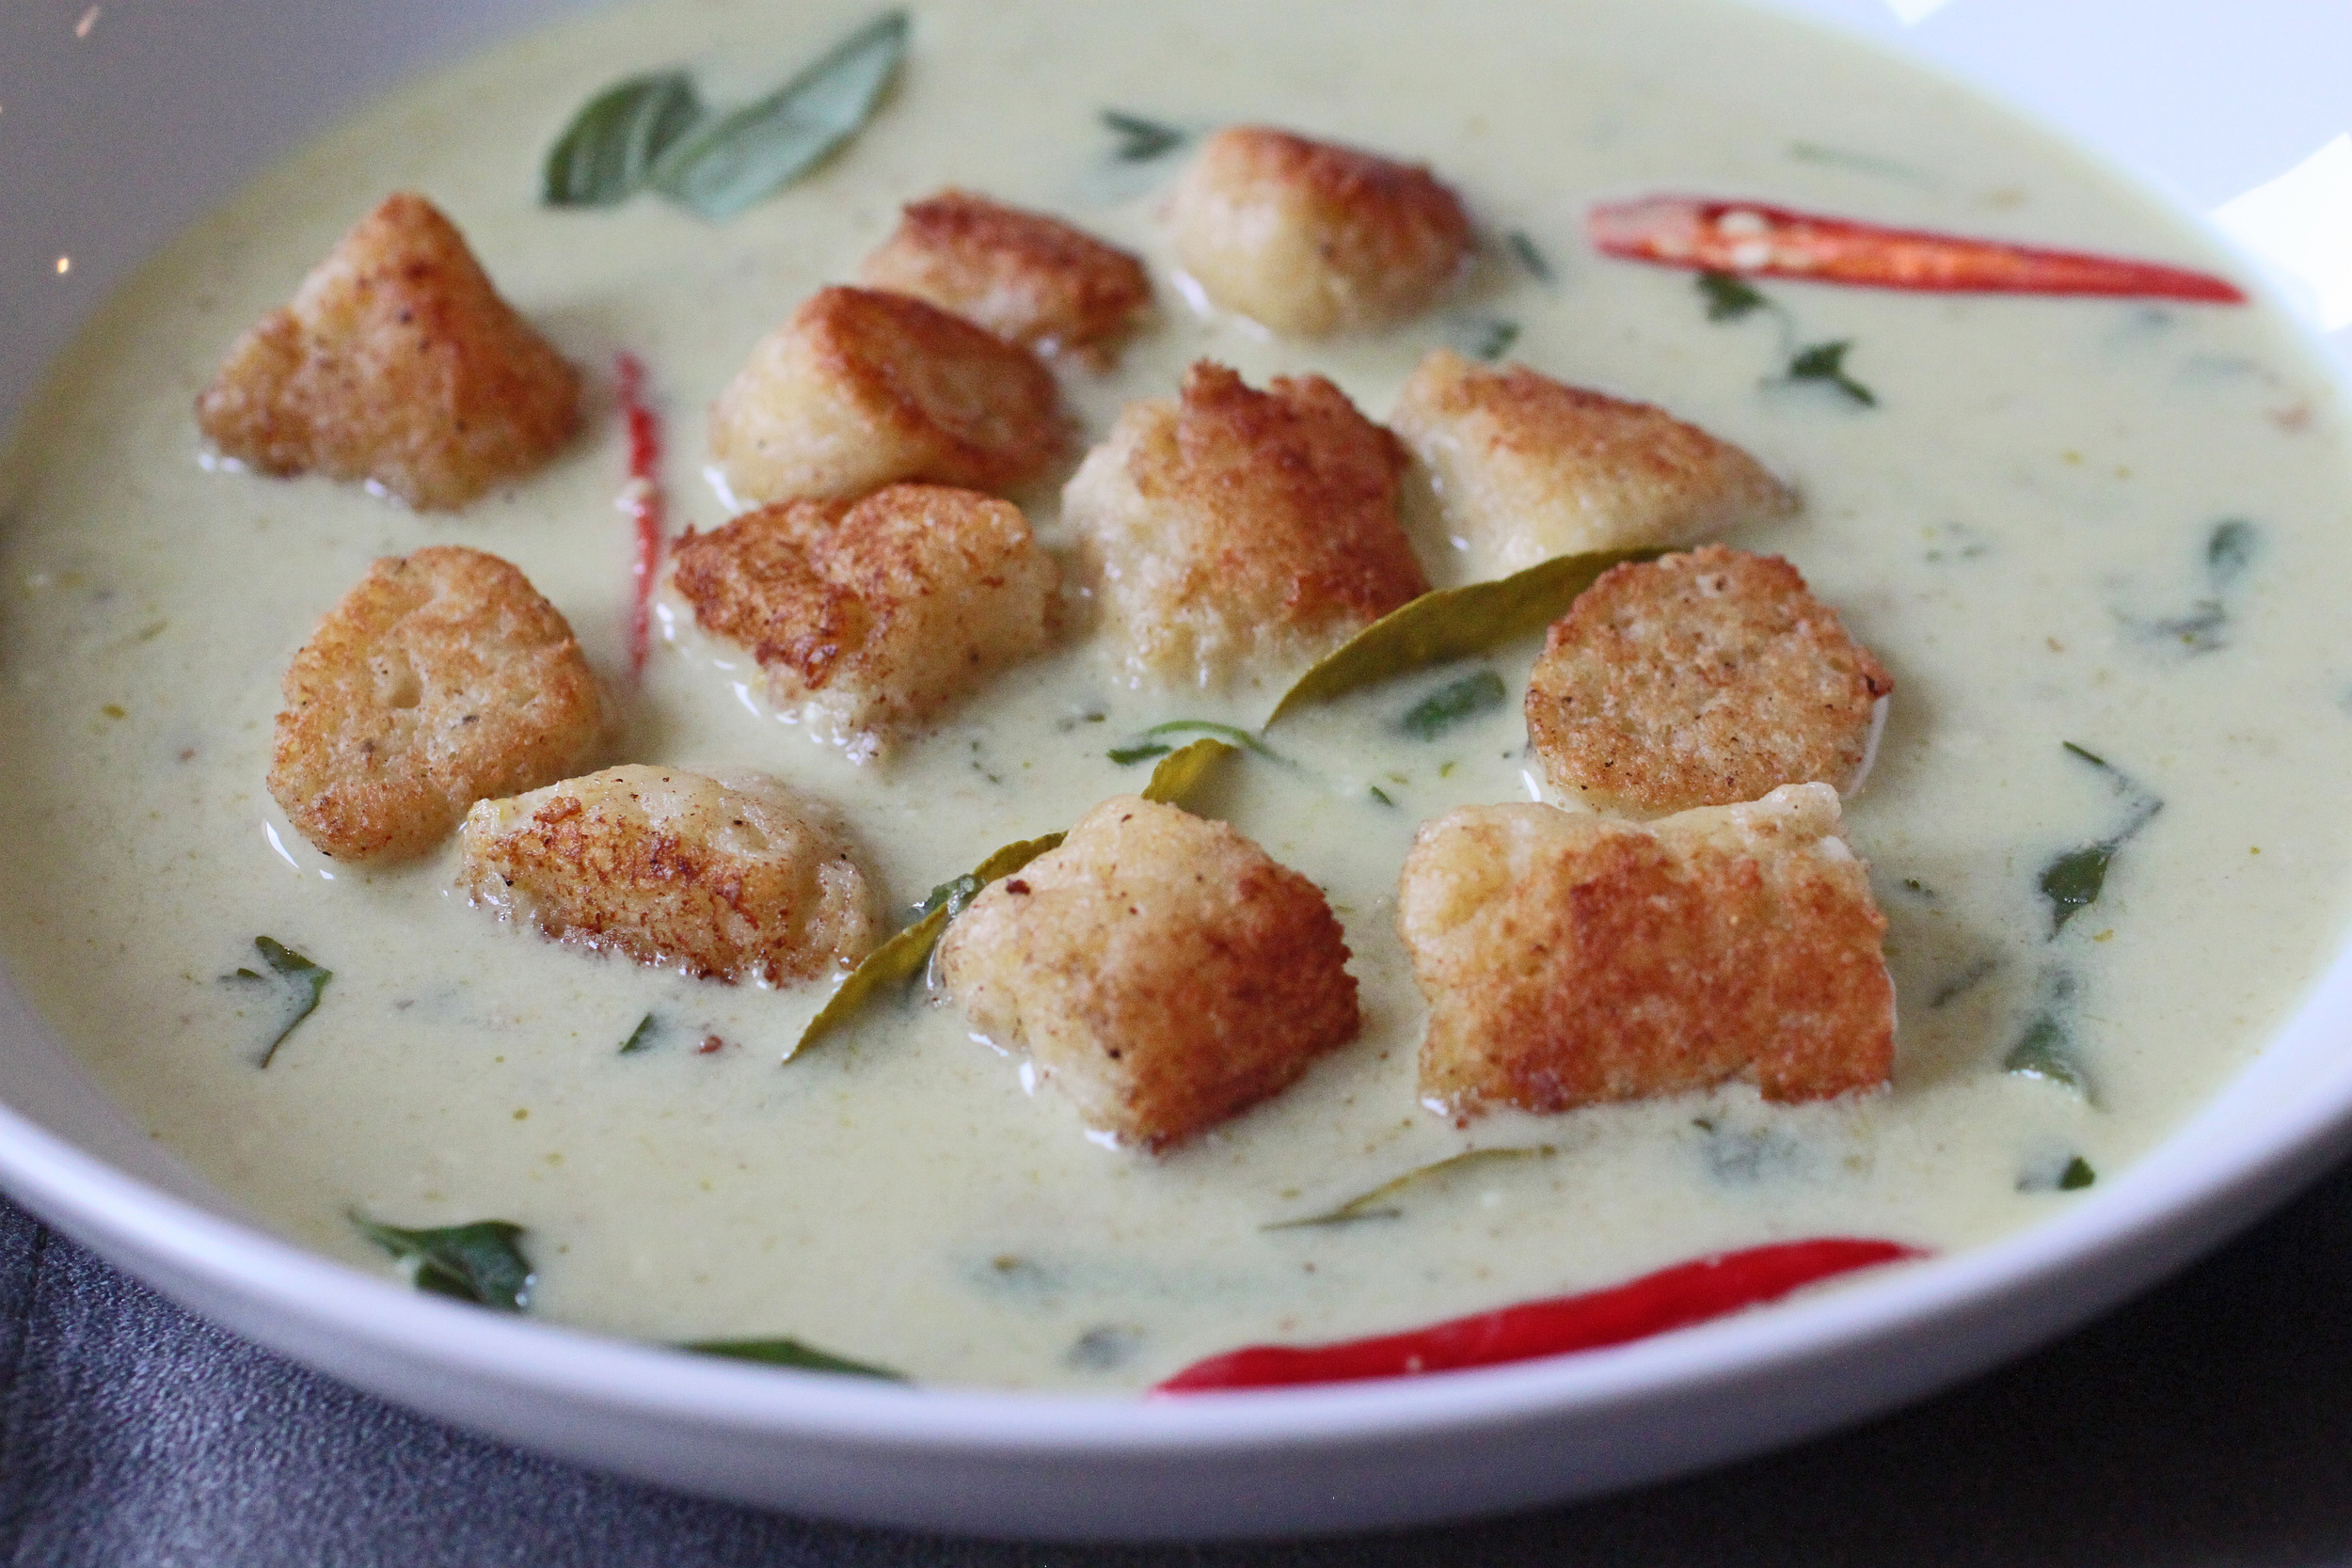
SMOKED RICOTTA GNOCCHI WITH RAMPS, FAVAS & THAI GREEN CURRY

Inspiration can come from anywhere, and this dish started because I bought a tub of smoked ricotta and it loomed in the fridge.  There were some stray egg yolks as well, and I thought about how I could use it all up: a ricotta tart, savoury cheesecake...but ultimately landed on making gnocchi.

When I mentioned it to my girlfriend, she told me a secret her grandma used for her gnocchi, which she said were the ultimate.  Potato flakes!  Instant. Mashed. Potatoes.  And her grandma was a genius!  So in playing around with making the ricotta gnocchi, I added some in, and light, fluffy (without any dough-y taste) gnocchi resulted. 

I also happened to be working on a spring thai curry with ramps and favas and dipped one of the butter-browned gnocchi in because why not.  So this dish!

If you scroll down, you may decide that there is an insane amount of work to make this dish.  But I think what's great is that there are elements to play around with to do from scratch or decide not to:  You can use store-bought gnocchi.  You can make the gnocchi with regular ricotta instead of smoked.  You can just make the curry and throw some fish and shrimp in (which is what I did with the leftover curry!).  You can leave out some of the hard-to-find Thai ingredients and still have an amazing dish.  I've played around with all of these, and it's still damn good.

And this Thai green curry is everything you want in a Thai curry - super spicy (seriously not for the faint of heart) with that beautiful lemongrass-ginger-kaffir lime fragrance and brightness from Thai basil.  And it only takes 10 minutes to make.  So so good...

Enjoy!

Serves 4 to 6

Ingredients

For the gnocchi:

8-ounce container ricotta cheese, preferably whole milk

1 egg yolk

1 egg

½ cups freshly grated Parmesan, plus more for serving

1 ½ tsp kosher salt, plus more

Freshly ground black pepper

1 cup potato flakes

¼ cup "00" or all purpose flour

½ stick unsalted butter

For the curry:

2 cans (13.5 ounces) coconut milk  (full fat)

4 tablespoons Thai green curry paste*

½ cup water

1½ teaspoons palm / coconut sugar or brown sugar

6 kaffir lime leaves

4 ramps, top leaves chopped and bottom stems left in tact (about 1 ½ inches at the bottom)

1 lemongrass stalk, outer leaves removed and inner stalk finely chopped (optional)

½ inch piece of galangal, thinly sliced (optional)

¼ cup fava beans, shelled & peeled

2/3 cup green beans, snipped and halved

1 tbsp fish sauce

Garnishes: handful of chopped fresh cilantro, handful of chopped Thai basil and 4 halved Thai chilies


For the gnocchi:

Set a large pot of water on the fire to bring up to a boil while you are prepping the gnocchi.  Remember to salt the water heavily once it’s up to a boil.

First, you want to dry out the ricotta a bit.  You can drain or just blot your ricotta with paper towels depending on how much moisture it has.

In a bowl, mix together the ricotta, egg yolk, egg, Parmesan, salt and some freshly ground black pepper using a wooden spoon or a spatula.  You want the mixture to be uniform.  Add in the potato flakes and flour and fold until incorporated.

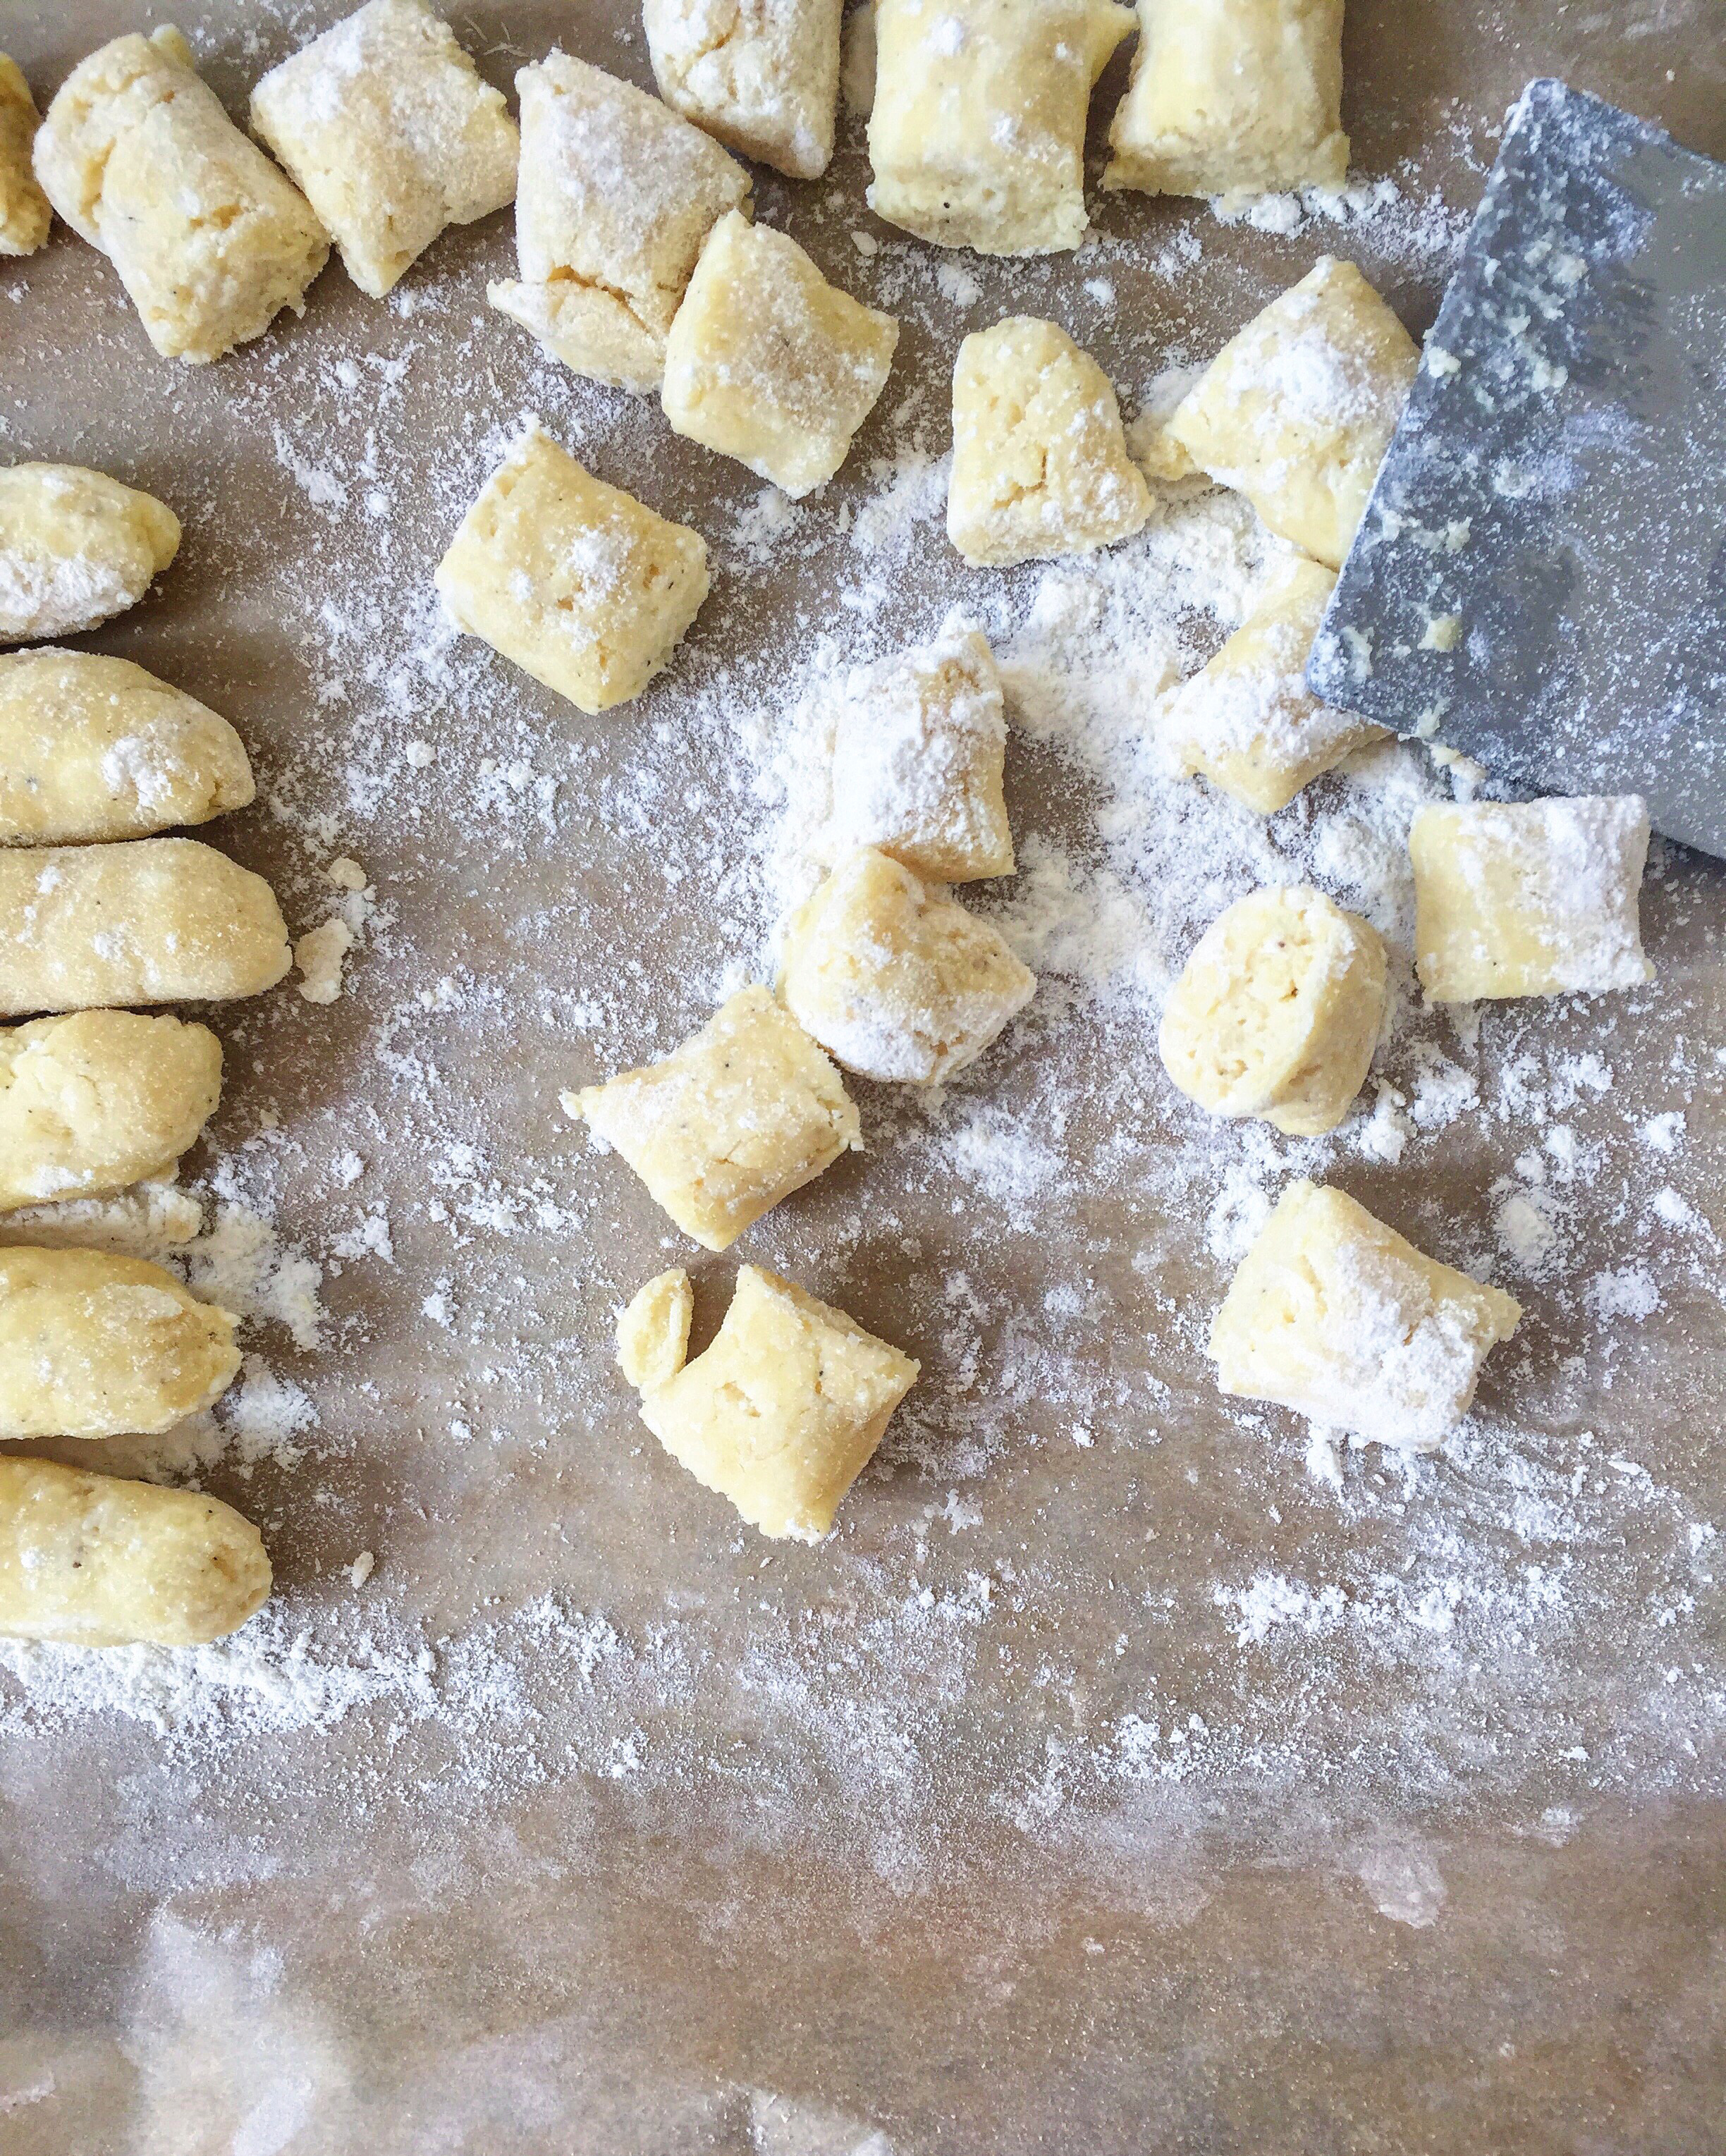
On a floured surface, mold dough into a circular disc.  Cut into 4 quadrants using a pastry cutter or a knife.   Roll each quadrant out into a 12-inch cylinder and then cut into 8 to 10 gnocchi. 

You can cook these right away or freeze to cook later.  If you are freezing to cook later, let them freeze on a floured baking sheet with space in between each gnocchi before putting them in plastic bags.  That way, they won’t stick together.

Add gnocchi gently to the boiling, salted water and cook for about 3 minutes or until the gnocchi float for about 30 seconds.   If you are cooking all of these, I wouldn’t do them all at the same time – break it up into 3 rounds of boiling. 

If you are cooking from frozen, add on an extra minute or two and follow the same rule for floating.

For the curry:

Start with the canned coconut milk.  Don’t shake the cans before using! You want to take the thickened coconut cream from the top of one can and sauté in a medium saucepan.  Saute for about 6 to 8 minutes over medium-high heat until it breaks and looks a bit curdled.  Add the Thai green curry paste and sauté for another 5 minutes.  You want to cook out any rawness in the curry paste.

Add in the remaining coconut milk, water, palm sugar, kaffir lime leaves, ramps, lemongrass and galangal (if using), and bring up to a boil.  Simmer for 5 minutes.

Add in the fava beans and green beans and simmer another 5 minutes.

Remove from the heat, and add in the fish sauce, Thai basil, cilantro and chilies.  Cover and let sit 5 to 10 minutes to infuse.

To serve:

In a skillet, melt the butter until it browns.  Add in the gnocchi and sauté for about 1 minute per side to crispy brown.  Drain on a paper towel-lined plate and sprinkle with a bit of salt.

Spoon the curry into the bowls and top with the gnocchi and extra basil and cilantro, if desired.

*I like Maesri.

tags: how to make gnocchi, ricotta gnocchi recipe, best ricotta gnocchi recipe, thai green curry recipe, spring thai green curry, how to make thai green curry
categories: all 3, appetizers 1, blog, main dishes, man-friendly, recipes, vegetarian
Wednesday 04.27.16
Posted by Aliya LeeKong
 

Link Love: Step Up Your Easter Cooking

LINK LOVE: STEP UP YOUR EASTER COOKING

Easter is such a fun holiday to cook for! With the beginning of Spring, the meal just signifies all the good, fresh food to come!  So, with this in mind, I wanted to share some of the recipes that have been inspiring me this year (because I'm honestly still on the fence for my menu)!  Enjoy!


SLOW ROASTED LAMB PAPPARDELLE WITH GARDEN PEAS & MINT

Photo: What Katie Ate

Photo: What Katie Ate


GRILLED LAMB WITH HARICOT VERT AND COCONUT MILK BROTH

Photo: Brooklyn Supper

Photo: Brooklyn Supper


FRESH HAM WITH HONEY & CLOVES

Photo: Saveur

Photo: Saveur


CACIO E PEPE POTATOES

Photo: Bon Appetit

Photo: Bon Appetit


POTATO LEEK AU GRATIN

Photo: Food52

Photo: Food52


SIMPLY SAUTEED GARLICKY PEA SHOOTS

Photo: A Little Yumminess

Photo: A Little Yumminess


FARRO & ASPARAGUS SALAD WITH SESAME-MISO DRESSING

Photo: Two Red Bowls

Photo: Two Red Bowls


SKY HIGH LEMON MERINGUE PIE

Photo: A Beautiful Mess

Photo: A Beautiful Mess


MOLTEN HALVA LAVA CAKES


KOMBUCHA HOLIDAY PUNCH

Photo: 101 Cookbooks

Photo: 101 Cookbooks

tags: Easter recipes, holiday recipes, what to make for Easter, link love
categories: all 3, appetizers 1, blog, drinks & cocktails, holiday, lifestyle-1, main dishes, man-friendly, recipes, traditions
Wednesday 03.23.16
Posted by Aliya LeeKong
 

Tagliatelle with Maitake Mushrooms, Pickled Chilies & Egyptian Dukkah

View fullsize maitake pasta 2.jpg
View fullsize maitake pasta 1.jpg

TAGLIATELLE WITH MAITAKES, PICKLED CHILIES & EGYPTIAN DUKKAH

Winter and pasta for me go hand-in-hand, and, as always, I love to get a little experimental with flavor combos.

Maitake mushrooms are such a favorite – they are meaty and nutty (and have actually replaced my weekend bacon, if you can believe!).  I did a pop-up dinner at a little store in my neighborhood in Brooklyn, and I created this dish for the dinner.  Hard, pan-roasting the mushrooms and finishing them with butter and salt make them irresistable and is a key step in the recipe.  They need a proper sear to bring out what’s best in this dish.  

The sauce is super thin and easy and gets an extra hit from the pickled pepper juice.  I top up the pasta with some of the actual pickled peppers, chopped cilantro, and Egyptian dukkah, a gorgeous nut and spice blend with coriander that complements the mushrooms beautifully. 

This can be as homemade or not as you want.  You can use my fresh pasta recipe or store-bought.  You can pickle your own cherry peppers or grab a jar at the grocer.  And the spice blend, Egyptian dukkah, can be bought from a specialty store, or you can use my recipe below - it stores for a month, so have fun sprinkling it on salads, a nice, seared piece of fish or on your next rice bowl.  Enjoy!

Serves 6

1 pound fresh or dried tagliatelle

1-2 tablespoons canola oil

4-5 tablespoons unsalted , divided

2 (8 ounce) maitake mushrooms, hand torn into bite-sized pieces

1 shallot, finely chopped

3 cloves fresh or roasted garlic, minced

¼ cup white wine

¾ cup chicken broth

1/3 cup heavy cream

¼ cup pasta water

scant ¼ cup pickled cherry peppers, juice reserved

small handful of fresh cilantro, finely chopped

2 tablespoons Egyptian dukkah

salt & freshly ground black pepper, to taste

Bring a large pot of water up to a boil and season generously with salt until the water tastes salty.  Add the pasta and cook until tender but still a bit firm to the bite, about 8 to 10 minutes if dry or according to package directions if fresh. Drain pasta reserving ¼ cup of the pasta cooking water.

While the pasta is cooking, heat a large skillet over high heat.  Add the tablespoon of canola oil, and when the oil starts to smoke, add the maitake mushrooms in a single layer.  If they don’t all fit, you may need to repeat the process depending on the size of your skillet.  Cook for 2 to 3 minutes.  The cooked side of the mushroom should be golden brown and crispy.  Flip the mushrooms and throw in 2 tablespoons of the unsalted butter.  Season the mushrooms generously and cook for another 2 minutes.  Remove mushrooms using tongs to a paper towel-lined plate.   If repeating, use the other tablespoon of canola oil and only 1 more tablespoon of butter. 

Lower the heat to medium-low, add another tablespoon of butter and the shallots and garlic with a bit of salt.  Let cook for 3 to 4 minutes until the shallots are translucent.  Increase the heat to medium-high and pour in the white wine.  Reduce until most of the wine has evaporated and the shallots are almost dry.  Then, add in the chicken broth, heavy cream, and pasta water.  Reduce in half.  The sauce should coat a spoon but shouldn’t be too thick. 

Remove the sauce from the heat and swirl in a final tablespoon of butter along with 2 teaspoons of the pickled cherry pepper juice.  Taste and adjust seasoning.  Throw in the pasta, maitakes and chopped cilantro and toss to coat.

Serve immediately garnished with a few pickled cherry peppers and about 1 teaspoon of Egyptian dukkah per plate.

Egyptian Dukkah

Yields approx 1 ½ cups

¼ cup hazelnuts, roughly crushed

¼ cup pistachios, roughly crushed

½ cup white sesame seeds

¼ cup coriander seeds

2 tablespoons white cumin seeds

2 tablespoons fennel seeds

2 tablespoons dried mint

pinch of chili powder

½ teaspoon black pepper

1 ½ teaspoons salt

Preheat the oven to 350° F.  As opposed to toasting in the skillet, I like to toast this blend up in the oven so the nuts and spices toast evenly.   

Line a baking sheet with parchment paper.  Add the hazelnuts, pistachios and all of the seeds and make sure they are in a single layer.  Toast for 8 to 10 minutes – you should smell a really nutty fragrance.

Transfer toasted nuts and spices to a mortar and pestle or a spice / coffee grinder. I like a slightly rough texture for this, so grind until there are still bits and pieces and it’s not completely powder. 

Combine with the dried mint, chili powder, black pepper and salt.  Store in an airtight container, preferably in a cool spot – it will keep for about a month.


tags: pasta recipe, homemade pasta recipe, mushroom pasta, egyptian dukkah, how to make egyptian dukkah
categories: all 3, appetizers 1, blog, holiday, main dishes, man-friendly, recipes, vegetarian, spices
Wednesday 02.24.16
Posted by Aliya LeeKong
 

Superbowl Sunday Essentials

SUPERBOWL SUNDAY ESSENTIALS

I love Superbowl Sunday, but, if I'm being honest, it has little to do with football!  it’s an excuse to have a few friends over for a nice relaxed appetizer party, watch good commercials, and enjoy a little entertainment at halftime!  Is that terrible?  Anyway, I wanted to share what I'll be cooking this Sunday...Enjoy!


HARISSA-CHEESE STUFFED FRIED OLIVES

I know, deep-frying is kind of a pain, but if you have the oil out and are going to do wings anyway, you might as well get some bang for your buck.  And these fried olives
 are amazing!!  Pitted olives filled with a bit of harissa-scented ricotta and cream cheese, rolled in panko and parm and fried to crunchy-creamy finish....my man complains that I make food that's too refined for a football party, but...then he eats these anyway!


BAKED JALAPEÑO POPPERS

Photo: Recipe Girl

Photo: Recipe Girl

So if you don't want to fry, this is just the right snack, and who doesn't love jalapeño poppers? They've always been one of my favorite bar foods, but over the years I’ve learned to create my own and somewhat healthier version (baked, not fried, and super easy)!  Slice the peppers in half, and take out the seeds and the ribs.  In a bowl mix some shredded cheddar and Monterey jack cheese with Mexican oregano, granulated garlic, granulated onion, smoked paprika, chopped cilantro and a little cumin.  Toss together and stuff in the pepper halves. Dip the halves in flour, then egg wash, then some panko; bake in 400 degree oven until tender or follow the recipe above.


BAKED TRINI WONTONS

Another recipe for the frying-averse: my baked Trini wontons.  Think wonton skins filled with ground pork (or whatever meat you like) that have the best of Asian and West Indian flavors.  Garlic, ginger, soy but also habanero, lime zest and cilantro.   Seriously yummy and great to keep in your freezer for impromptu parties.


VEGETABLE SAMOSAS

Photo: Rasa Malaysia

Photo: Rasa Malaysia

Vegetable samosas are the perfect vegetarian appetizers - little packets of crisp dough filled with cumin- and chili-scented potatoes.  These require a bit of work but are so worth it!


QUESO FUNDIDO

Photo: Bon Appetit

Photo: Bon Appetit

Nothing beats a a hot, melty, cheesy dip at a Superbowl party and this recipe gives you exactly that and then some!  What is better than dipping your tortilla chip in a bowl of melted cheddar with tomatoes, chorizo and fresh cilantro?  Yea....I can’t think of anything else either.


KOREAN-STYLE WINGS

Photo: Food52

Photo: Food52

And, finally, the wings!  Superbowl isn't Superbowl without wings, and though there's nothing wrong with the old-standby, hot wings, why not try something new? These are genius, oven-baked but with the crisp texture you love in a fried wing.  The sauce comes together by stirring together a few ingredients in a bowl - tamari, rice vinegar, ginger, chili flakes, etc.  It's seriously one of the easiest (and tastiest) wing recipes out there. 

Have fun this weekend!

tags: Super Bowl, what to cook for the super bowl, super bowl recipes, wings, crispy wings
categories: all 3, appetizers, lifestyle-1, main dishes, recipes, man-friendly
Wednesday 02.03.16
Posted by Aliya LeeKong
 

Feast of the Seven Fishes (Italian and Beyond!)

FEAST OF THE SEVEN FISHES (ITALIAN AND BEYOND!)

It’s only a few days to Christmas and time to commit to a decision on what to make for your holiday dinner (if you haven't already!).  The thought of turkey makes you cringe, with good reason….so what else is there to make?  In my house, the go-to for Christmas dinner is always a plump, juicy roast (think standing rib roast or rack of lamb), but this year I am inspired by the ‘Feast of the Seven Fishes’, which is a traditional Italian celebration on Christmas Eve.  This meal typically consists of 7 seafood and fish dishes but I've seen some families have upwards of 10! I'm sticking to 3 or 4, thank you.  After enduring a 3 day food coma from Thanksgiving, the thought of an array of light seafood dishes for Christmas sounds delicious and not overly filling (not to mention getting a kick start on that New Year's resolution of eating healthy!).


FIRST COURSE: EASY APPETIZER

I like to have a couple simple snacks ready for when guests arrive.  Everyone always arrives hungry and ready to eat, and this means they can snack and stay out of the kitchen! ;)  Small bites or spreads are best for this feast since there are many more courses to come, so try to keep it simple and easy to make ahead!  I love this Peruvian Clams à la Parmesana recipe that's in my cookbook.  I learned about these in Lima, clams with a little chili paste, garlic and pisco and then topped with buttery-parmesan breadcrumbs.  You can assemble them ahead of time and pop them in when guests arrive - they only take 3 minutes under the broiler!  These Quinoa-Crusted Shrimp are another great, healthy option.


SECOND COURSE: RAW BAR OR SEAFOOD SALAD

Photo: Food & Wine

Photo: Food & Wine

For me, nothing beats a great raw bar to truly showcase the flavors of the sea.  Stone crabs, cooked lobster, or gorgeous jumbo shrimp served with a flavorful cocktail or tarator sauce are showstoppers.  Pair with a seasonal salad (think: fennel, mache, oranges and pomegranate) with a bit of balsamic and oil.


THIRD COURSE: HEARTY, WHOLE FISH

This course and the next should be the big dishes, the ones that showcase the entire meal.  A whole fish, such as red snapper or striped bass would be perfect here with a couple side dishes to go along.  A whole fish doesn't have to be daunting, and salt-crusting is the perfect technique! Take 4 cups kosher salt plus 8 egg whites and thoroughly mix together.  Make a bed on the baking pan with the salt mixture, lay the fish on top and add a thick coating on top, patting down to seal it all around.  Roast for 25 to 30 minutes at 400° F.  Crack open the salt layer with a spoon and peel back the skin for the most tender, flavorful (not salty I swear!) fish you've had.  Serve with your favorite chili-garlic sauce, chermoula or a lemon-basil vinaigrette.


FOURTH COURSE: PASTA OR, IN MY CASE, PAELLA!

If we were creating a traditional Feast of the Seven Fishes, this course would showcase a pasta dish.  But, since the feast is just a guideline to this epic meal, I am choosing to replace the pasta with a delicious seafood paella recipe.  The key to a great paella is the rice!  You can use short grain rice but if you can find it, bomba rice is what most fine-dining restaurants use and is the traditional rice for this dish.  And remember, you want that crunchy rice on the bottom of the pan….that’s the best part!


FIFTH COURSE: SOUP OR SEAFOOD STEW

Photo: Saveur

Photo: Saveur

Yes, can you believe it?  We are still eating!  If you have room after consuming the previous courses, take it down a notch with a warm brothy seafood or fish soup. This recipe for Ginger Crab is nothing short of amazing and is the type of food I grew up eating - food particular to the East Coast of Africa that blends all that's amazing about African, Indian and Arab foods.   


FINALLY: PALATE CLEANSER + DESSERT!

Ok, so I’m combining the last two courses because I just don’t think I can eat anymore at this point!  A great palate cleanser could be a simple citrus sorbet or semifreddo.  The traditional dessert with this feast is an array of Italian cookies, but since we are skipping the sixth course, I’ve decided to do a decadent South African Cape Malva pudding, a moist, butter-y cake with caramelized edges steeped in a warm brandy sauce.  Done!


Enjoy! 


tags: feast of the seven fishes recipes, feast of the seven fishes, seafood recipes, what to make for christmas, christmas recipes
categories: all 3, appetizers 1, blog, holiday, main dishes, man-friendly, quick & easy, recipes, traditions
Wednesday 12.23.15
Posted by Aliya LeeKong
 

The Very Versatile Winter Squash

THE VERY VERSATILE WINTER SQUASH

The leaves are changing colors, the air has a cool crisp smell to it and the farmers' market is booming with a ton of winter squashes.  Nothing says cold weather comfort food than a great squash soup, roasted root vegetables with your Sunday supper or a nice, warming Indian curry.  The only difficulty is choosing which squash to use in your dish!  I put together a few of my favorite ways to bring some warmth to your dinner table this winter.


SOUPS

The first weekend of October has passed, and the heating has kicked in.  You know winter is looming around the corner, and the upside is that it’s perfect soup-making (and eating!) weather.  Everyone loves a great squash soup; they are so versatile, being sweet and savory, and take easily to different cuisines depending on the spices you use.  My Sopa de Flor de Calabaza (Squash Blossom Soup), inspired by a traditional Mexican soup, is a delicious, silky and rich soup without any cream that uses butternut squash.   Another warm and comforting soup is my Pumpkin Soup with Garam Masala & Creme Fraiche.  This soup uses the traditional South Asian spice blend, garam masala (it’s spicy and full-flavored but has no real heat to it), and the warming spices in the blend pair perfectly with pumpkin.


ROASTED

Roasting squash is a no brainer, and cut into pieces, a good squash only needs about 20 to 30 minutes in a 400° F oven.  Of course, the old standby butternut is fantastic here, but kabocha, which is an Asian variety of winter squash, is also delicious.  It has a strong and sweet flavor that pairs well with spices.  Delicata is another great options because it has super thin skin and is really easy to peel. 

Above is a photo from my cookbook for a savoury, winter vegetable crumble; roasted squash on its own would be delicious with a salty, Parmesan-laced crumble topping..  The great thing about roasted squash is you can eat it as is, purée it (see below), stuff it before roasting, make it into a hash by itself or with sweet potatoes or even toss it into a salad that day or the next!  I personally love this Miso Harissa Delicata Squash salad recipe.


PURÉES

Photo: NYTimes

Photo: NYTimes

Another great use for winter squashes is purées.  They make a great substitute for the stand-by mashed potato side and are beyond easy to make.  This recipe is the most basic - a great building block in your kitchen arsenal that you can tailor to your tastes.  A few ideas: add roasted garlic, truffle oil, chopped olives, pickled chilies or sprinkle with za'atar to make it extra special.


CURRY

Photo: Indian Simmer

Photo: Indian Simmer

To me, nothing is more satisfy or warming to the soul than curling up on the couch with my pajamas, a good movie, or book, and a hearty bowl of curry and rice.   Curries originate from the Indian subcontinent and Southeast Asia.  They can be wet or dry with wet curries resembling stews in a significant amount of sauce and dry curries cooked with little liquid that evaporates and leaves a coating on the ingredients. Curries usually involve a variety of spices with the main spices being turmeric, coriander, and cumin on the Indian side of things; chili is always a player.  Southeast Asian curries make use of different chili pastes and other herbs, aromatics and spices like kaffir, lemongrass, and galangal.  Lucky for us, squashes play well with all different types of curry.  Check out this one for Acorn Squash with Fenugreek, Chili, and Amchur.


PASTA

Photo: Reclaiming Provincial

Photo: Reclaiming Provincial

When the weather turns cool, who doesn’t love coming home to lasagna or a big bowl of pasta on the table?  To make traditional lasagna a bit more interesting, try adding some squash in between the lush layers of pasta, cheese and sauce. OR get a bit more advanced and try this gnocchi.  If gluten isn't your thing, spaghetti squash makes a fantastic substitute.  Raw, it looks just like other squashes on the inside, but after it is cooked the insides fall out in ribbons resembling spaghetti.  This recipe uses the spaghetti squash as the star of the “pasta dish”.


DESSERTS & BREADS

Being such a versatile vegetable, squashes can also find themselves in the dessert category.  Hello…..pumpkin pie anyone!? But don’t just let the pumpkins have all the fun in the pies, butternut and acorn squash can hold their own in this category too!  Try my bread recipe using butternut squash with apples and maple to make a delicious moist bread to serve with afternoon tea.

Enjoy!


tags: butternut squash recipes, butternut squash bread, squash recipes, how to cook squash, how to roast squash, butternut squash soup, squash soup, spaghetti squash recipes
categories: all 2, holiday, lifestyle, main dishes, man-friendly, quick & easy, recipes, soups, soups & salads, vegetarian, side dishes-1
Thursday 10.08.15
Posted by Aliya LeeKong
 

Grilled Lamb Sirloin Tacos with Corn, Pickled Cherry Peppers & Chipotle Crema

View fullsize tacos4.jpg
View fullsize tacos3.jpg
View fullsize tacos2.jpg
View fullsize taco1.jpg
View fullsize tacos5.jpg

GRILLED LAMB SIRLOIN TACOS WITH CORN, PICKLED CHERRY PEPPERS & CHIPOTLE CREMA

Last weekend, a friend of mine, Molly Tavoletti, stopped by (who you may know from her drool-worthy Instagram!).  In any case, we got to talking, drinking wine, and I whipped up a few of these lamb sirloin tacos for us to munch on during girl (and career and wine and life...) talk on that beautiful, sunny Brooklyn afternoon.

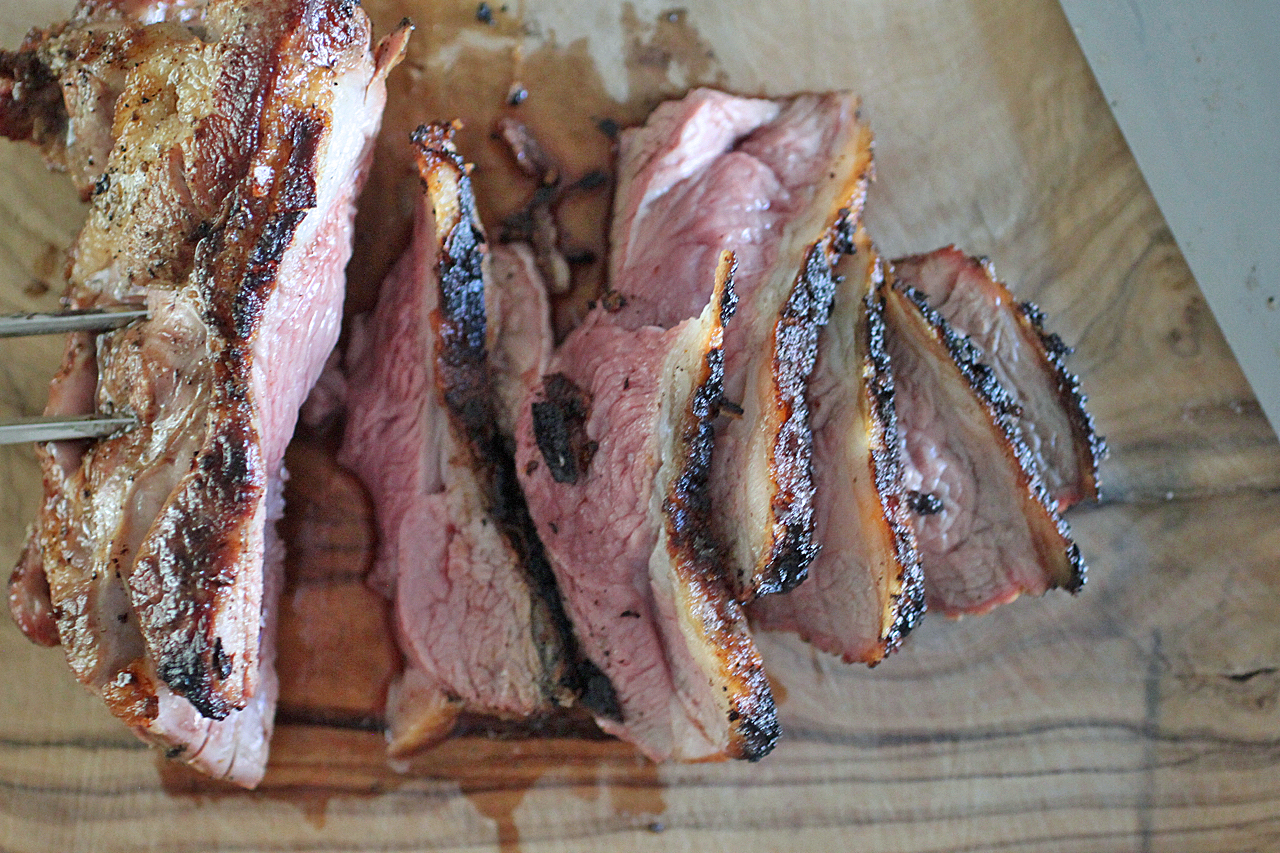
I know there aren't a ton of lamb sirloin recipes out there, but it really has become for me my new duck breast.  It's meaty and rich with a gorgeous fat cap that crisps.  On the grill, the smokiness adds such depth of flavor and, of course, that signature char. 

When you bite into a taco, you want flavor AND texture.  This one has grilled corn for sweetness, a bit of shredded red cabbage for crunch, homemade pickled cherry peppers for acidity and heat, and a lovely chipotle crema for tang, smokiness and silkiness. 

Enjoy!

Ingredients

Serves 4 to 6

For the tacos:

Wood chips wrapped in foil (optional; I like to use applewood)

Canola Oil

2 ears corn

Kosher salt & freshly ground black pepper

2 (8 oz) lamb sirloins

8 corn tortillas

½ cup shredded red cabbage

¼ cup pickled cherry peppers

¼ cup cilantro, leaves only

For the sauce (yields a bit more than a cup):           

8 oz Mexican crema or crème fraiche

2 to 3 chipotles in adobo (canned)

1 garlic clove

Kosher salt to taste

Procedure

Preheat the grill to medium-high (400-450° F).  Place the foil-wrapped wood chips on the grill, if using, making sure you’ve cut holes for the smoke to escape.  Oil the grill well.

For the corn: I prefer roasting them in their husks in a 400° F oven for 25 to 30 minutes prior to grilling.  This keeps them really tender and moist, and the husks and silk just slip right off.  Then, I brush them with oil and season with salt and pepper before finishing them on the grill for 5 minutes, just to char the outside.  You can also grill them from start to finish – after removing their husks and silk, 15 to 20 minutes in a closed grill, turning every 5 minutes or so.  Cut corn from the cobs.

For the lamb: Coat with oil and season generously with salt and pepper.  Place fat cap-side down on the grill and grill for 8 to 10 minutes, depending on the thickness of the piece, turning once midway through cooking.  The internal temp should be around 130° F, but basically it should feel like the fleshy part of your palm for medium-rare.  Cook longer if you prefer medium to well done lamb.  Transfer the lamb to a cutting board and rest for 5 minutes under a foil tent.  Slice thinly against the grain for the tacos.

Brush the corn tortillas lightly with oil and grill for 2 to 3 minutes flipping a few times just to warm through.

For the sauce: While the lamb is resting, to a food processor, add the crema or crème fraiche along with the chipotles in adobo and garlic.  Process until smooth and adjust seasoning if necessary.

To assemble the tacos: Spread a bit of the crema in the middle of the tortilla.  Pile on a slice or two lamb.  Top with a spoonful or two of the grilled corn, shredded cabbage, a few pickled cherry peppers, and a few cilantro leaves.


tags: taco recipe, lamb tacos, chipotle crema, how to pickle peppers, molly tavoletti
categories: all 2, main dishes, man-friendly, quick & easy, recipes
Wednesday 09.30.15
Posted by Aliya LeeKong
 

Grilled Butterflied Chicken with Charred Jalapeño Sauce

View fullsize chicken3.jpg
View fullsize chicken1.jpg
View fullsize jalapenos1.jpg
View fullsize chicken2.jpg

GRILLED BUTTERFLIED CHICKEN WITH CHARRED JALAPEÑO SAUCE

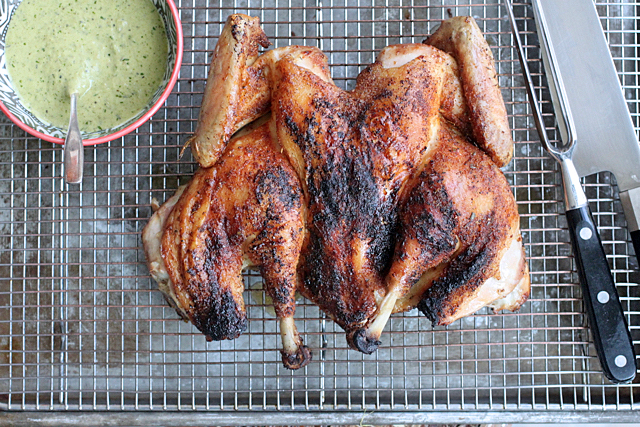
Once it gets hot out, grilling becomes my go-to for weeknight dinners (and weekend entertaining!).  It's simple, healthy and you can grill just about anything.  I know because I do throw on everything - from your standard barbecue fare to split romaine hearts to potatoes.  A good, grilled chicken is second-to-none, crispy, seasoned skin with tender, smoky meat underneath - and the butterflying technique means you get both of your wishes: evenly cooked meat plus super crackly skin.  Plus, it's easy, and there's no marination or brining necessary to have delicious grilled chicken.

This sauce (like many other recipes!) came out of a need to use up what I had.  I went to the market, and I didn't find any poblanos, which were my first choice.  But they shouldn't have been!  The jalapeños are perfect here, and the sauce has a spicy, acidic kick and a creamy (with no cream..) texture.  It's perfect with this chicken, but I could also see this with a pork chop, a lamb sirloin or even a whole grilled fish.  Happy grilling!

Enjoy!

Ingredients

Serves 4

For the chicken:

Handful of wood chips wrapped in foil ( optional; I like to use applewood)

1 whole chicken, 3 ½ to 4 lbs

2 teaspoons garlic powder

2 teaspoons sweet paprika

1 teaspoon onion powder

1 teaspoon dried oregano leaves

½ teaspoons ground black pepper

Canola oil

Kosher salt

For the sauce (yields approx. 2/3 cup):

8 jalapenos, whole

3-4 pickled cherry peppers along with 4-5 tablespoons of the pickling liquid

1 garlic clove

1 ½ teaspoons honey

Small handful of cilantro (stems + leaves)

Kosher salt and freshly ground pepper, to taste

Canola oil

Procedure

Set up your grill for indirect grilling, either piling charcoal on one side or turning only half the burners on.  I like the inside of my grill to linger around 400-450˚ F.  We're going to cook the chicken on the side without direct heat for the majority of the time and then finish it over the high heat to crisp the skin and get that char.  This is a good time to throw on the wood chips as well which will give a great smoky flavor to the chicken, but it's totally optional.

For the chicken: Butterflying a chicken isn't as complicated as it sounds.  Start with the chicken breast-side down and have some kitchen shears by your side.  Starting at the bottom of the bird, cut along each side of the backbone straight through the ribs to the neck opening.  Set aside the backbone and giblets and reserve for making stock.  Take each side of the flaps in front of you and open the chicken up flat.  Flip onto the other side and press down on the breastbone to flatten (you'll hear a crack at some point!).  Done.

Mix together the garlic powder, sweet paprika, onion powder, oregano, and black pepper.  Coat the chicken lightly in oil and sprinkle the dry rub all over.  Your hands are already messy, so just go ahead and rub it in good.  Then, season generously with salt all over.

Make sure to oil your grill as well, and place the chicken breast up on the side without the charcoal or the burners.  I like to face the legs towards the heat source and the neck side away since the legs typically take a bit longer.  Cover your grill and cook for 30 to 40 minutes.  I like to check for doneness with a cake tester or (very) small knife inserted at the thigh joint - if inserted to the bone and pulled out it's hot, the meat is done.  You can conversely make sure it's cooked to about 150-155˚ F.   For the last 3 to 5 minutes, I flip the bird over, skin and breast side down, over the direct heat side of the grill.  This makes sure you get that thin, crispy skin.

Allow the bird to rest for about 5 to 7 minutes before carving.

For the sauce: While the bird is cooking, throw the jalapeños right over the direct heat side and char on all side.  The skin should turn black and blistered.  Transfer to a plastic bag while it cools.  When cool enough to handle, use a paper towel to rub off the charred skin.  Then, with a knife, remove the stem, ribs and seeds.  Chop roughly.

Transfer the jalapeños to a blender and add the pickled cherry peppers, pickling liquid, garlic, honey and cilantro.  Season with salt and pepper.  Run the blender and then stream in the oil as needed to create the sauce.  I like to just get the blade moving and make sure the sauce is uniform and not too thick.  It should look creamy and coat a spoon.  Remember to taste and adjust the seasoning if necessary.

Serve the chicken hot with the sauce on the side. 

tags: grilled chicken recipe, grilled chicken, grilled whole chicken, grilled butterflied chicken, roasted jalapeno, roasted pepper sauce, chicken with peppers
categories: all 2, condiments, man-friendly, recipes, main dishes
Wednesday 07.08.15
Posted by Aliya LeeKong
 

Baked Trini Wontons

View fullsize wonton-pic1-500x333.jpg
View fullsize wonton-pic4-500x333.jpg

Baked Trini Wontons

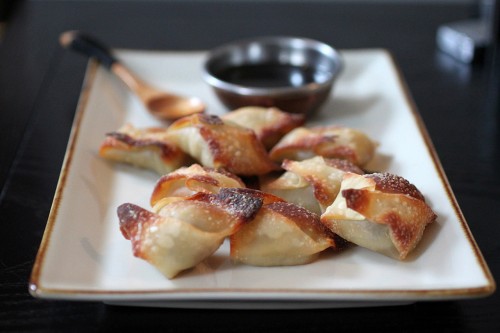
I’m just going to say it to get it out of the way.  Frying just tastes better.  It does.  There is no other way to get that perfect, even texture, signature crunch, and lovely fried flavor…BUT if you can pretend like fried wontons never existed or not do some sort of unfair comparison of a fried wonton vs. a baked one, these are absolutely delicious (and, of course, a little better for you and your waistline).

I first came across the fried and soup version of these because of my husband and his wonton cravings. The Chinese influence on Trinidad is evident here as it combines traditional Asian flavors with pops of West Indian influence – particularly the scotch bonnet or habanero.  What I love about this recipe is that it is ridiculously versatile – you can, of course, deep-fry these (as I do for company), keep them frozen and pop them in the oven for a weeknight appetizer for the family, throw a few of them into a brothy vegetable soup to cook with and add a bit of flavor, or even just use the stuffing mixture with some breadcrumbs for a nice, spicy pork meatball.  AND, if you want to use ground chicken, beef or shrimp instead of pork, the recipe still works great.

I got a bit crazy while making these and tested out the wontons at 25 degree intervals in the oven, on both convention and convection settings, to figure out which creates the best texture (crazy, I know, but effective!).  Deep-frying, because of the circulation of hot oil, cooks evenly and quickly, so I ended up going with a relatively high temperature (425° F) and using the convection setting (for circulating air) to yummy, crispy results.  These don’t take too long to cook, and what this does is prevent the wonton dough from getting too chewy, which seemed to happen at the lower temperatures.  Again, these do freeze up really easily, but make sure to bring to room temp before baking (if you’re frying, straight from the freezer is fine).  Easy weeknight app, little hors d’oeuvres for entertaining…this wonton is spicy, flavorful, crunchy and satisfying – Enjoy!

Ingredients

Yields 24 to 30 wontons

2 tbsps vegetable oil

1 large shallot, finely chopped

½ habanero pepper, seeded and minced

1 ½” piece of ginger, minced (~½ tsp)

1 scallion, minced

2-3 garlic cloves, minced

½ lb ground pork, room temperature

zest of 1 lime

¾ tsp soy sauce

½ tsp Worcestershire sauce

2 tbsps chopped fresh cilantro

salt and freshly ground black pepper

24-30 wonton skins

Olive oil or cooking spray

Procedure

Preheat the oven to 425° F on the convection setting for optimal texture.  If you don’t have an oven that has convection capabilities, preheat the regular oven to 450° F.

Heat a small pan over medium heat.  Add the vegetable oil and then add the shallot, pepper, ginger and scallion.  Add a little salt to draw out the moisture and sauté for 3 to 4 minutes until the shallot is translucent.  Add the minced garlic and sauté for another minute until the garlic is fragrant.  Remove from the heat and let cool.

Using a large bowl, mix together the pork with the cooled shallot mixture, lime zest, soy sauce, Worcestershire, cilantro and season with salt and freshly ground pepper (remember the soy and Worcestershire are salty so you might not need much).  You can always quickly sauté a tiny patty to check seasoning.

Set up a little work station for yourself with a cutting board, a small bowl with water, a towel to wipe your hands, the wonton skins, and the pork mixture.  I like to make these 3 to 5 at a time.

Lay out the wonton skins on your cutting board, and then spoon even amounts of the pork mixture in the center of each.  You don’t want to overstuff so test out the first one to see what the right amount of the pork mixture is.

Dip your fingertips in the water bowl, and then wipe across the four edges of the wonton skin with it so they’re wet.  Fold one corner over to the other and press down the corner and sides to form a triangle.  Don’t be afraid – press hard!  Or else your stuffing will ooze out.  Bring the other two edges up to meet, using more water if necessary, and press together. Place on a parchment-lined baking sheet that has been greased with either olive oil or spray.

Repeat until all of the wontons have been formed.  Spray each wonton or brush with olive oil and place in the oven.  Bake for 8 to 10 minutes until deep, golden brown.  Serve warm with your dipping sauce of choice.

*If you’ve frozen or refrigerated these, make sure they come up to room temperature before baking.

tags: wontons, baked snacks, pork
categories: all -1, appetizers, man-friendly, recipes, side dishes
Monday 03.05.12
Posted by Aliya LeeKong
 

My Classic Braised Short Ribs

View fullsize short-rib-pic1-500x333.jpg
View fullsize short-rib-pic2-500x333.jpg
View fullsize short-rib-pic3-500x168.jpg

My Classic Braised Short Ribs

Inevitably, there are certain dishes in a cook’s culinary arsenal that get whipped out from time to time and become their signature.  It’s usually something that’s a big crowd pleaser, that they can basically do in their sleep, and that fools others into thinking they slaved for hours making it.  The dish often becomes something close friends (close enough to get repeat dishes) associate that cook with, and other friends (who may not get the repeat) leave asking for a detailed recipe.  For me, and you can ask any of my friends, it’s my classic braised short ribs (I know, not exactly exotic, but damn good).

I happened to serve these at Thanksgiving this year, and, like any cook who is cooking from muscle memory and not a recipe, I decided to tweak my method a bit based on timing, what’s on hand.  I thought my short ribs were already delicious but this version outdid all the previous ones!  SO the time has come for me to actually write this recipe down, and I’m now sharing it with you.

When you look at any classic short rib recipe, there are some basic truths – sear the ribs, cook vegetables down, add wine and stock, simmer for hours.  Most of the recipes start with the ribs, salt and freshly ground pepper and go from there – and they are fantastic.  But what I did differently this year was simple – I marinated the ribs in some onions and garlic and a few spices the night before I cooked them…and it just took this dish to the next level!  This has now become my classic braised short ribs – rich, red wine-infused, flavorful, fall completely and utterly off the bone….Enjoy!

Ingredients

Serves 4 to 6

For the marinade:

1 onion, quartered

8 garlic cloves

1 small red chili pepper

1 ½ tsps whole black peppercorns

2 tsps Spanish paprika

¾ tsp onion powder

1 tsp garlic powder

¾ cup of vegetable oil

5 lbs short ribs, bone-in (5 to 6 ribs)

For the braise:

2 medium onions, cut into a medium dice

1 leek, thickly sliced

1 stalk celery, cut into a medium dice

5 – 6 garlic cloves, minced

1 small plum tomato, roughly chopped

1 cup red wine

small bunch thyme

1-2 fresh bay leaves

3 ½ cups chicken stock

2-4 tbsps heavy cream (optional)

vegetable oil

Kosher salt and freshly ground black pepper

Procedure

In the bowl of a food processor, add the onion, garlic, chili pepper, black peppercorns and ground spices.  Pulse until finely chopped, scraping down the sides.  With the food processor on, stream in the vegetable oil until a uniform paste forms.  Place short ribs in a resealable plastic bag and toss in the marinade.  Try to remove as much air as possible before resealing.  Move ribs around until all are coated with the marinade.  Refrigerate for a minimum of 6 hours.

Preheat oven to 325° F.

Remove ribs from the marinade, wiping off all excess (should be dry).  Let ribs come to room temperature.  Season all sides generously with salt and freshly ground pepper.

Heat a Dutch oven or heavy-bottomed pot over high heat.  Sear ribs in the pan for about 2 minutes per side to develop a nice brown.  You don’t want to overcrowd the pan, so it’s best to work in batches of 2 to 3 ribs at a time.  Set ribs aside and drain pan of any excess oil.

Turn heat down to medium-low and add onions, leeks, and celery with a bit of salt to draw out the moisture.  You want to cook the vegetables until they have softened and the onions are translucent, about 7 to 9 minutes.  Add the garlic and cook for about 30 seconds and then throw in the chopped tomato.  Cook for another 2 minutes.

Add red wine and use your wooden spoon or spatula to scrape the bottom of the pan.  You want to dislodge all of the brown bits from the bottom of the pan so they really flavor the cooking liquid.  Let the red wine simmer and reduce until the vegetables are almost dry.

Nestle the browned ribs back in the pot amongst the vegetables.  Don’t forget to throw in any accumulated juices from the plate where you were resting the ribs as well.  Add in the thyme, bay leaves, and chicken stock and increase the heat to bring it all up to a boil.

Immediately, cover tightly with a lid or foil-line and then place a lid on top.  Place pot in the oven and cook for 3 to 3 ½ hours until the meat is fork tender (or basically falling off the bone…).  Season to taste.

Now, these are absolutely delicious like this.  You have a number of choices depending on what kind of time you have:

(1) You can serve as is with a bit of the cooking liquid (thin).  Completely delicious.

(2) You can remove the ribs and skim off as much fat from the top of the cooking liquid using a ladle.  Then, reduce the liquid by half over a medium flame, strain through a mesh strainer into another pan, and add heavy cream to thicken.  The ribs can be simmered in this if you want to heat them up a bit.

(3) This is what I like to do.  I like to make the night before and cool the ribs in the cooking liquid.  The fat solidifies in the fridge, so it’s really easy to spoon off.  Then, I just follow #2.  I love to just throw the ribs back into the strained sauce and reheat.

tags: short ribs, braised short ribs, signature dishes
categories: all-2, main dishes, man-friendly, holiday, recipes
Monday 11.28.11
Posted by Aliya LeeKong
 

Popcorn + Homemade Furikake

View fullsize popcorn-pic11-500x333.jpg
View fullsize popcorn-pic2-500x333.jpg
View fullsize popcorn-pic31-500x165.jpg

Popcorn + Homemade Furikake

Popcorn (with, ahem, a goblet of red wine) is my signature comfort food; it’s what I crave after a hard day or if I’m settling down on the couch for a night of t.v. or to watch a movie.  A number of years back, I went through this Hawaiian Hurricane popcorn faze where I must have consumed this concoction of buttery popcorn with Japanese furikake and rice crackers on a daily basis for weeks on end.  As expected, I made myself sick and had to swear off the stuff, but a recent conversation with a friend (who is a homemade popcorn snob!) made me think revisiting the idea, on a healthier, homemade basis, might not be such a bad idea…

Furikake is a Japanese seasoning that is typically sprinkled on top of cooked rice but is truly an all-purpose condiment.  There are different versions with the core of roasted seaweed, sesame seeds, salt and sugar mixed in with other ingredients like bonito flakes, ground shiso leaf, dried egg, miso, salmon flakes, and powdered soy sauce.  It’s a truly umami experience, and once you try it, you start thinking of other ways to incorporate furikake into your cooking.

And, on top of popcorn, drizzled with butter – it’s perfect!  You get that crunch of the popcorn along with lovely butteriness, saltiness, a touch of sweet, nuttiness from the sesame and rice crackers, a (very pleasant) touch of fishiness from the bonito flakes, and that umami of the seaweed.  Consume this in moderation lest you fall into an addictive phase like I did.  This is an elevated version of popcorn worthy of being served at parties or simply as a special treat for the family.  Enjoy!

Ingredients

Yields approximately 14 cups (one big bowl)

4 tbsps vegetable or blended oil

½ cup popcorn kernels

4 tbsps unsalted butter

½ tsp soy sauce

4 tbsps furikake (see recipe below)

1 ¼ cups Japanese rice crackers (optional)

Procedure

In a medium-sized pot or large saucepan with a cover, add the oil so that it coats the bottom of the pan.  Add the popcorn, cover, and place over medium-high heat.  When the kernels start to pop, shake the pan until the popping slows to a few seconds between each pop.  Shaking the pan will help to prevent the popcorn from burning.

In a small saucepan, melt the butter and add the soy sauce and furikake.  If using, add the rice crackers to the popped popcorn, and pour the butter-soy-furikake mixture all over, tossing to coat.  Tranfer to a large bowl and serve warm.

Homemade Furikake Ingredients

Yields approximately 4 tbsps

3 tbsps roasted shredded seaweed*, torn into smaller pieces

¾ tsp bonito flakes**

1 ½ tsps black and/or white sesame seeds, toasted

1 tsp salt

1 tsp light brown sugar

Procedure

Mix all the ingredients together and store in an airtight container.

*If you can’t find this, you can roast nori or seaweed sheets in a skillet over medium heat until they turn crisp.  They can then easily be torn or crumbled into small pieces.

** Look for the smallest flakes to use here.  Bonito flakes are from a type of tuna that is cooked, smoked and dried.

tags: popcorn, homemade furikake, snacks, comfort food
categories: man-friendly, recipes, snacks, all-2, vegetarian-1
Monday 09.19.11
Posted by Aliya LeeKong
 

Saffron Fried Chicken

View fullsize fried-chicken-pic1-500x333.jpg
View fullsize fried-chicken-pic2-500x333.jpg
View fullsize fried-chicken-pic31-500x166.jpg
View fullsize fried-chicken-pic3-500x333.jpg

Saffron Fried Chicken

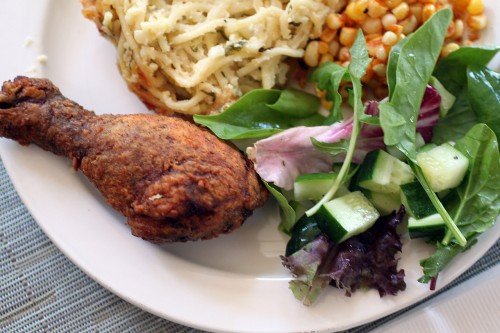
Is there anything more satisfying than biting into a salty, flavorful, crisp piece of fried chicken?  I know I have a particular weakness for the stuff (umm, it’s my post-workout week splurge) and if I head down to visit my family in Florida, driving by a particular chain that starts with a “P” and has the same name as an old children’s cartoon and NOT hitting the drive-thru is next to impossible. Perfecting fried chicken is not easy, and it’s taken me years, a bit of a fried chicken connoisseur myself, to create a recipe that I’m fully happy with.  Of course, leaving it well alone is not an option, so I created my own twist with saffron.

A friend of mine gave me this beautiful gift of Persian saffron that I am treasuring and using sparingly. Saffron is used in a lot of Middle Eastern and South Asian marinades, oftentimes with yoghurt, and it complements the flavor of chicken amazingly.  Fried chicken was my perfect reason to break into the saffron stash.

So the reality is that there are a few (worthwhile!) steps here.  I marinate the chicken in saffron buttermilk that serves to brine the chicken, make it even juicier, and deeply infuse it with all of the marinade ingredients – a pinch of saffron, garlic, a touch of mustard.  I then double dip the chicken to create a super-crisp crust, and let it air-dry while the meat loses its chill.  Finally, frying at the perfect temperature ensures fried chicken nirvana – crisp, flavorful, aromatic, tender and juicy.  Enjoy!

Ingredients

Yields 3 to 4 servings

1 (3 to 4 lb) broiler / fryer chicken, cut into 8 pieces

Marinade / Brine:

3 cups buttermilk

1 generous pinch saffron

2 eggs

3 cloves garlic

½ tsp dijon mustard

2 tbsps kosher salt

1 tbsp sugar

Crust:

1 cup all purpose flour

½ cup cornstarch

1 tsp kosher salt

1 tsp black pepper

1 ½ tsps garlic powder

1 ½ tsps onion powder

1 tsp paprika

pinch of cayenne pepper

Vegetable shortening or oil for frying

Procedure

In a small saucepan, heat a ½ cup of the buttermilk until it comes up to a simmer.  Add saffron and switch off heat.  Let it sit for 10 minutes.

Pour this mixture along with the remaining buttermilk and the rest of the marinade ingredients into a blender and blend on high until smooth.  Place chicken in a bowl or casserole dish and cover with the marinade.  Refrigerate for a minimum of 6 hours and up to 24.

In a large bowl, paper or plastic bag, combine the crust ingredients thoroughly.  Remove chicken from marinade and place in a colander for a few minutes to drain, reserving the marinade.  Dredge or shake chicken pieces individually in the flour mixture and place on a wire rack fitted over a baking sheet.

Dip chicken once more in the marinade, letting any excess drip off.  Coat again in the flour mixture and place back on the wire rack.  Let chicken sit on the rack for an hour to dry / come up to room temperature.

In a large, heavy-bottomed pot, heat 2 inches of oil to 350º F.  You actually want to fry the chicken at 325º F for the entire time, but the temperature will drop once you add it in.  Place chicken in the hot oil and fry for 13 to 17 minutes making sure the temperature stays at 325º F.  I like to take the wings out at 13 minutes , and fry the rest between 15 and 17 minutes depending on the size of the pieces and the type of meat.  White meat cooks faster than the dark meat, and fatter pieces will cook slower.  If the juices run clear, the chicken is cooked through.

Serve hot! It can be held uncovered in a 250º F  oven to stay warm, but it’s preferable to serve immediately.

tags: fried chicken, saffron, Persian saffron
categories: all-3, main dishes, man-friendly, recipes
Monday 07.18.11
Posted by Aliya LeeKong
 
Newer / Older