X

Sign up to receive exclusive recipes, tips, updates and other goodies from Aliya!

  • Home
  • Blog
    • All
    • Recipes
    • Spices + Ingredients
    • Lifestyle, etc.
    • Travel
  • The Cookbook
  • The App
  • Media
    • All Media
    • Video
  • About
  • Passions
Aliya LeeKong
  • Home
  • Blog
    • All
    • Recipes
    • Spices + Ingredients
    • Lifestyle, etc.
    • Travel
  • The Cookbook
  • The App
  • Media
    • All Media
    • Video
  • About
  • Passions

Happy Memorial Day + Strawberry-Chia Aqua Fresca

View fullsize aqua-pic1-500x333.jpg
View fullsize aqua-pic2-500x333.jpg

Happy Memorial Day + Strawberry-Chia Aqua Fresca

First off, Happy Memorial Day to everyone!  It’s the unofficial start of summer, and I am hanging out with friends and enjoying it – I hope you are too.  I wanted to start off the summer with something very simple, something you could even make today if you wanted.  It’s refreshing and is all about easy summer cooking and entertaining. – an aqua fresca.

I love when something in another language makes it sound so much more interesting or complex!  The reality is aqua fresca, or “fresh waters”, are traditional Latin American beverages that blend seasonal fruits and sometimes even grains or seeds with water and a touch of sugar or natural sweetener.  The succulent strawberries that have been staring at me in the market seemed a natural base for a refreshing drink, and I decided to include another popular aqua fresca ingredient: chia.

If you didn’t read my diatribe last week on chia seeds, you should if you are interested in all of the amazing health benefits of this superfood.  If not, they add a nice gelatinous texture to the drink and at the very least increase hydration on a hot day.  Enjoy!

Ingredients

Yields approximately 4 cups / Serves 4 to 6

1 lb fresh strawberries, washed and hulled

1-2 tbsps honey

2 cups cold water

Juice of 1 lime

4-6 tsps chia seeds

Procedure

In a blender, puree the strawberries with honey, water and lime juice.  Pass through a strainer.  Chill further if desired or pour into glasses.

I like to add the chia seeds, 1 teaspoon per serving, directly to the glasses and let sit in the aqua fresca for about 10 minutes to bloom.  The chia seeds will absorb some of the liquid and become gelatinous.   Serve with or without ice.

tags: chia, recipes for summer, aqua fresca, strawberries, drinks
categories: drinks & cocktails, recipes, all -1
Monday 05.28.12
Posted by Aliya LeeKong
 

Chia Seeds

View fullsize chia-pic1-500x333.jpg
View fullsize chia-pic2-500x333.jpg

Chia Seeds

Ok, so if you follow these posts, you’ve read about me toting around green juices and coming up with natural replacements for certain desserts out there.  Let’s not get too crazy – I’m not going full-on natural (note the butter and crème fraiche in my dish earlier this week…), but I am acknowledging my health a bit more now that I’m in my 30’s and want to take a bit better care (slash vanity wants me to hold back the aging process!).  My parents’ obsession with Dr. Oz adds fuel to the fire, and it seems like every week they are sending me tips on what to incorporate into my diet.  My mom the other day went OFF about chia seeds, and I won’t say I was skeptical(particularly if you are reading this, mom) but I wanted to dig a bit deeper…

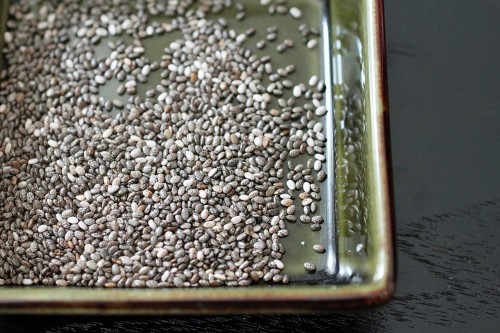
As always, she was right.  It’s like beyond a superfood, a super-super-superfood if you will!  A member of the mint family that is mainly grown for its seeds, this food has history – native to parts of Mexico and Guatemala, the Mayans and Aztecs used to grow it as a staple, using it to increase their stamina and energy levels, and knew what they were doing.  It’s a complete source of protein, has more calcium than skim milk on a per ounce basis, and is the richest plant source of Omega-3 (even higher than salmon!).

Soaking these little guys in water, the seeds swell up and become gelatinous (like basil seeds) actually holding 9 to 12 times their weight in water.  What this means is that they help prolong hydration and retain electrolytes in the body.  Before I get completely off my soapbox…they also prevent blood sugar spikes, help clean out the intestinal tract (a huge source of fiber) and are very high in antioxidants and other minerals.  There, I’m done.

They do have fat, fyi, for all you naysayers, so I’ll just give you that to criticize, but most seeds are rich in oils (think: flax).  And they can be eaten a number of different ways – ground into a flour to include in breads or sauces, sprouted like alfalfa, bloomed in water or liquids (think rice pudding-esque) or merely by themselves.

I personally have been adding them to my water with a bit of chlorophyll in the mornings as a pre-workout booster.  And I will be including them in next week’s recipe, so I thought I would brief you before you look at the recipe like “what the heck is that.”

Anyway, would love to hear if any of you guys have been eating this stuff…

tags: chia seeds, healthy
categories: all -1, spices
Thursday 05.24.12
Posted by Aliya LeeKong
 

Roasted Garlic, Cheese & Herb Baked Rice

View fullsize rice-pic1-500x333.jpg
View fullsize rice-pic2-500x333.jpg
View fullsize rice-pic3-500x166.jpg

Roasted Garlic, Cheese & Herb Baked Rice

This is not your every day, throw-in-the-oven-rather-than-on-the-stovetop rice.  My inspiration for this dish is Tah Chin, a Persian rice pilaf that layers saffron rice with chicken and bakes it to perfection.  The rice is bound with yoghurt and egg yolks and during its slow-baking process forms this beautiful crust where it hits the baking dish, not wholly unlike soccarat (which is the crusty layer found at the bottom or paella).  Suffice it to say, I veered a bit off of tradition with this version….

Many of the items are similar to the original – the long grain rice (though trying this with Valencia or Bomba rice sounds pretty alluring), saffron, yoghurt and egg yolks.  But that is where it ends!  I leave out the chicken and created this to be an easy (and slightly more elegant…) substitute for mac n’ cheese, a lovely casserole side.  Thus, I included some butter and crème fraiche for richness and tang, some cheeses for good measure, roasted garlic and herbs for depth of flavor.

It was truly an experiment, and I love the result…First of all, it’s beautiful! I plan to just leave the cutting board and knife out for people to help themselves at my next dinner party.   I warn you, however, to do this as close to serving time as possible.  It was all I could do to snap a few pics before my husband hacked off a third of it and ran off!  The smell of it drove him mad…the roasted garlic and cheese, creaminess and that crusty layer of rice – amazing.  Enjoy!

Ingredient

Yields (1) 9”x13” baking dish

3 cups long grain rice

3 tbsps kosher salt

½ stick unsalted butter

½ cup yoghurt

½ cup crème fraiche

pinch saffron

4 egg yolks

1 cup grated mozzarella cheese

¾ cup grated grana padano or parmigiano reggiano cheese

12-13 roasted garlic cloves

¾ cup chopped herbs

freshly ground black pepper

Procedure

Preheat oven to 350° F.

Rinse the rice in changes of hot water until the water runs clear.  In a medium pot, bring 6 cups of water up to a boil.  Add 1 ½ tablespoons of the salt and the washed rice.  Let cook 6 to 8 minutes (rice should start to soften but still be raw at the center), drain and rinse lightly.  Transfer to a large bowl.

In a small saucepan, melt butter with yoghurt and crème fraiche over medium heat.  When it starts to bubble, shut off the heat and add the saffron.  Let it bloom for 5 minutes.  Place the egg yolks in a medium bowl.  Add spoonfuls of the saffron mixture to the egg yolks stirring constantly – you want to bring the egg yolks up to temperature slowly.

To the drained rice, now add the saffron-egg yolk mixture, the cheeses, roasted garlic cloves, chopped herbs, the other 1 ½ tablespoons of salt and freshly ground black pepper to taste.  Combine thoroughly.

Grease a 9” x 13” baking pan and line the bottom with parchment paper.  Transfer the rice mixture to the baking pan, cover with foil and bake for 1 hour and 35 minutes.  Let cool slightly and then loosen the side of the rice from the dish.  Turn out onto a cutting board and serve hot in slices or squares as you choose.

tags: baked rice, saffron, vegetarian sides, roasted garlic, cheese
categories: all -1, side dishes, recipes, vegetarian-1
Monday 05.21.12
Posted by Aliya LeeKong
 

South African Milk Tart with Fruits

View fullsize tart-pic1-500x361.jpg
View fullsize tart-pic4-500x333.jpg
View fullsize tart-pic3-500x222 (1).jpg

South African Milk Tart with Fruits

I tried a really delicious milk tart a few years back when I was visiting Capetown and was hooked!  This is one of those ubiquitous desserts in South Africa that’s served throughout the country, on all sorts of occasions and every cook has his or her own secrets.  Melktart (meaning, literally, milk tart…) is a tradition that came from the Dutch settlers in the country, a custard-based tart scented with cinnamon delivered in a flaky pastry crust.

I am one of those people that have fruit tart cravings.  I will take a gorgeous tart with a pastry cream filling and topped with fruit over a straight fruit pie any day.  For some reason, I feel like the creaminess balances out the acidity in the fruit and with a flaky crust creates a perfect dessert. For me, the idea of putting fruit on top of a milk tart seemed perfectly natural (though it’s not usually done there).

Also, I semi-cheated and used puff pastry for the crust – how I could go on about the benefits of puff pastry!!  I’ve made it before from scratch, and it’s definitely a process.   Puff pastry tastes good, and those guys who’ve created the frozen versions have mastered it – why mess with perfection here?  This crust comes together easily, and it’s a few less steps you have to take to make an equally delicious tart.

So, now about milk tart itself.  The filling is basically a custard with hints of cinnamon, almond, and (my addition) vanilla.  The cornstarch helps to thicken the custard and make sure it’s not too eggy – you don’t want a crème brulée tart here!  The beaten egg whites lighten the batter and add an airy quality to the finished product.  The result is a beautiful, creamy, vanilla-specked filling with that caramelized top in a gorgeous flaky crust – the fruit just adds another lovely layer of flavor.  This is perfect for a dinner party (impressive too!) or even a ladies lunch.  Enjoy!

Ingredients

Yields 1 9-inch fluted tart / Serves 6 to 8

Crust:

½ package frozen puff pastry (1 sheet), defrosted

1 egg beaten with a bit of heavy cream for egg wash

Wax paper and dry beans to weight down

Filling:

1 ½ cups whole milk

½ tsp salt

1 stick cinnamon

1 vanilla bean, split and scraped

½ tsp almond essence

½ cup heavy cream

¼ cup cornstarch

1 ½ tbsps unsalted butter

2 eggs, separated

½ cup + 2 tbsps confectioner’s sugar

½ tsp cinnamon ground

Topping:

Sliced or whole fruit of choice: strawberries, blueberries, raspberries, kumquats, cape gooseberries, etc.

Procedure

For the crust:

Preheat the oven to 350° F convection / 375° F convention.

Let’s start by rolling out and blind-baking the crust.  On a floured surface, roll the sheet of puff pastry out just enough so it will cover the inside of the tart pan and have some overlap.   Place it carefully in the 9-inch, fluted tart shell and press it into the corners and sides.  Trim the excess.  Place a piece of wax paper across the top of the tart so it covers the sides.  Add dried beans to weight down the crust and refrigerate for 15 minutes while you start on the filling.

Place in the oven and bake for 20 minutes.  Take the crust out of the oven, remove the weights, and brush with the egg wash.  Put back in the oven for another 5 minutes until golden.  Set aside until ready to fill and leave the oven on.

For the filling:

In a small saucepan, bring the milk, salt, cinnamon stick, vanilla bean, and almond essence up to boil.  Lower immediately to a simmer.  In a small bowl, whisk together the heavy cream with the cornstarch making sure there aren’t any lumps.  Add this to the milk mixture along with the butter and stir until the mixture thickens.  Remove from the heat.

Make sure the egg yolks are in a larger-sized bowl because you’ll be adding the milk mixture to them.  You want to start by adding a little bit of the milk mixture and stirring or whisking to incorporate.   Continue to do this a little at a time until the milk mixture is completely incorporated – we do this to avoid cooking the yolks and having bits of it in the tart.  Let this mixture cool to closer to body temperature before moving on to the next step.

In another bowl, beat the egg whites with the ½ cup of confectioner’s sugar until soft peaks form – should be light and fluffy.  Add a spoonful or two of the milk custard to the egg whites and incorporate.  Carefully, fold the egg whites into the milk custard to lighten it up.  Be careful not to overmix or you will deflate it significantly.

Add this filling to the tart shell.  Mix together the last 2 tablespoons of confectioner’s sugar with cinnamon and sprinkle on top of the tart.  This will develop into a nice brown crust on top.

Bake for 10 minutes, and then lower the temperature 25 degrees and bake another 15 minutes.  Don’t be surprised if it puffs up during cooking – it will reduce down as it cools.  Cool on a rack and top with fruits of your choice.

This tart can be served warm or cold, but since I added the fruits I thought I’d keep it on the cooler side myself.

tags: milk tart, desserts, fruit, special occasion, south african
categories: desserts, recipes, all -1
Monday 05.14.12
Posted by Aliya LeeKong
 

My Homemade Nutella

View fullsize nutella-pic3-500x333.jpg
View fullsize nutella-pic2-500x333.jpg
View fullsize nutella-pic1-500x330.jpg

My Homemade Nutella

So, admittedly, I’ve been on a bit of a healthy kick lately – toting around awful looking bottles of green juice, trying to eat more raw foods and roughage, and avoiding alcohol (gasp!). A bit of a spring cleanse, if you will.  It’s been about two weeks (14 days, 11 hours and 33 minutes but who’s counting?), and I’m feeling pretty good.  For some reason, over the last few days, my sweet tooth has gone a bit haywire, so I decided to make something I crave pretty often…nutella!

Now, nutella is one of those items with which I avoid eye contact in the grocery store.  God forbid I bring a jar of it home, and it sits there longingly, just asking for me to take a spoon to it each time I go into the kitchen.  I grew up eating it on special breakfast occasions, a lusciously chocolate-y and nutty filling for crèpes, a tradition I’ve carried on to adulthood.  It’s popular for breakfast in Europe, where it’s touted as healthy!  Can you actually believe it??

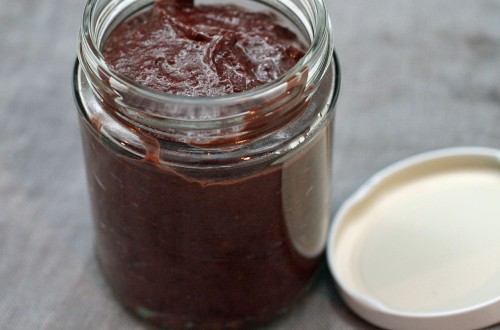
On closer inspection, it really isn’t that bad for you!  Nuts, skim milk, a bit of cocoa powder – I thought a homemade version could only be better.  I used a slightly healthier oil, hazelnut oil, in lieu of the palm oil used in the original version.  I also used a local honey instead of sugar.  I did add some real dark chocolate to mine, but I rationalized that 3.5 ounces spread out over a whole jar can’t be that bad for you, and isn’t dark chocolate an antioxidant anyway? This nutella is creamy, rich, and delicious and tastes just like the ingredients it’s made from (so use good ones!).  Enjoy!

Ingredients

¾ cup chopped hazelnuts, toasted*

¼ cup raw almonds, toasted*

2 tbsps hazelnut oil

1-3 tbsps local honey**

½ tsp vanilla extract

1 tbsp unsweetened cocoa powder

½ tsp kosher salt

½ cup skim milk

3.5 ounces semisweet or dark chocolate, chopped

Procedure

To the bowl of a food processor, add the toasted hazelnuts and almonds and process until a fine crumb.  Add the oil, honey, vanilla extract, cocoa powder and salt and process until a paste.

In a small saucepan, heat the milk and chocolate together until the chocolate is completely melted.  Add to the food processor and process until the nutella’s texture is smooth and creamy.  Cool and refrigerate.  This can be stored in the refrigerator for about a week.

*I chopped up the hazelnuts here to increase their surface area, so they toast up quicker.  You can easily toast the chopped hazelnuts and almonds together in a 350° F oven for 5 to 10 minutes.

**The variation in the amount of honey really depends on 2 things: (1) what type of chocolate you are using and (2) your personal preference for how sweet you want this.  I used a 70% dark chocolate and about 2 tablespoons, but if you are using a semisweet or even a milk chocolate, you may need less.  This is something that you can add at the end to taste if you like.

tags: dessert, healthy, raw, breakfast, nutella, almonds, chocolate, hazelnut
categories: breakfast, desserts, recipes, snacks, all -1
Monday 05.07.12
Posted by Aliya LeeKong
 

Seasoning Peppers!

View fullsize aji-pic1-500x357.jpg
View fullsize aji-pic2-500x333.jpg

Seasoning Peppers!

Earlier this week, I mentioned the St. Lucian version of salsa, souscaille, and this is an ingredient that’s sometimes included in it: seasoning peppers!  Such a practical name for these little guys as that is precisely what they do.  It’s true, they look a lot like the habanero or scotch bonnet pepper, and I had to do a double take when I first saw them. But these don’t even come close to the heat level of one of those peppers and truly season food with an incredible flavor.

These peppers are grown throughout Latin America and the Caribbean and are, more formally, aji dulce peppers.  The flavor is straight habanero without the heat – that tangy richness and sweetness and just a slight touch of heat.  The photo below was taken on the farm I visited where they grew them, and it felt insane to bite into a pepper that looked and smelled like a habanero and not flinch!

Aji dulce means “sweet pepper” and is a key ingredient in Latin American sofrito,  some cultures’ peas and rice (or rice and peas depending on where you’re from), Cuban black beans, Brazilian jams, and countless other West Indian and Latin dishes.  They aren’t the easiest to find, and I’m going to be exploring Latin markets until I find a supplier.  But my other plan is to look for a plant in the farmers’ market this summer when they come into season.

I would add these to…basically everything!  As it is, I cook with habaneros for the flavor, scraping out as much of the seeds and ribs as possible to reduce the heat level.  If I could achieve that flavor without the painful heat?  I’d be in heaven!  Thought I’d still use habaneros here and there… Salads, crab cakes, stir fries, morning eggs, macaroni pie….I’d lose my mind.

tags: seasoning peppers, aji dulce
categories: all -1, spices
Thursday 05.03.12
Posted by Aliya LeeKong
 

Rhubarb, Cucumber & Mint Salsa

View fullsize salsa-pic1-500x333.jpg
View fullsize rhubarb-pic2-500x333 (1).jpg
View fullsize salsa-pic3-500x333.jpg

Rhubarb, Cucumber & Mint Salsa

Increasingly, I’m realizing that every culture has its form of “salsa.”  When I was down in St. Lucia a few weeks back, I found out they have their version called souscaille.  In South Asian cuisines, it’s called kachumber, and in African cuisines, kachumbari.  At all points, it’s a fresh salad, often with onions or shallots, with acidity in the form of the juice or segments of citrus or vinegar.  I wanted to inject a little seasonality into my salsa this week, and spring’s tart rhubarb was the perfect add.

Rhubarb, contrary to popular belief, is a vegetable, and it has a crisp, fresh texture that’s somewhere between jicama and celery with a sourness that’s reminiscent of green apples.  I’ve played with it before in a dessert, a granita, but here I wanted to see what it could do from a savoury point of view.

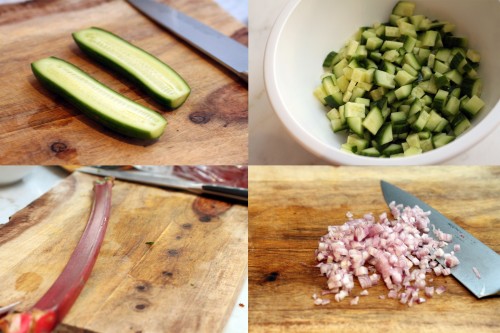
The cucumber and rhubarb meld together beautifully.  You have the cooling, soothing, watery cucumber contrasted with the tart bite of the rhubarb.  The shallots add mellow onion flavor and the fresh mint a bright finish.  It would be perfect on fish or shrimp tacos or a simply grilled chicken breast.  Enjoy!

Ingredients

Yields approximately 2 ½ cups

2 mini seedless cucumbers, cut into a small dice

1 stalk rhubarb, cut into small dice

1 shallot, finely chopped

juice of half a lime

½ tsp kosher salt

pinch cayenne pepper

pinch white sugar

small handful fresh mint, finely chopped

Procedure

In a small bowl, toss together the cucumbers, rhubarb and shallot.  Add the lime juice, salt, cayenne, sugar and mint mix thoroughly.

tags: rhubarb, salsa, recipes for spring
categories: all -1, condiments, recipes, side dishes, salads, soups & salads, vegetarian-1
Monday 04.30.12
Posted by Aliya LeeKong
 

Green Almonds

View fullsize green-almond-pic1-500x324.jpg

Green Almonds

I stumbled across these beauties the other day and had to share them with you fast!  Green almonds are one of the (fleeting) joys of spring available for somewhere between 4 and 8 weeks between April and June.  And they are exactly what you think: almonds that are not yet ripe, picked before the shell hardens and before they are traditionally ready to harvest, which usually happens in late summer or early fall.

The first thing that you notice about green almonds is their teardrop shape and that they have this lovely, soft, fuzzy exterior, which resembles the feel of peaches and apricots (they are actually related).  The inside houses a skinless, white, baby almond, that varies in texture with its maturity; when picked very early, the texture is more gelatinous, and, later, it begins to firm up and have more of a bite.  These can be eaten whole, as is, or shelled.  Whole, eating a green almond reminds me of biting into a more tart and meaty pea pod with that herbaceous, tannic and slightly fruity flavor.  Shelled, it’s more delicate, lacking the traditional almond flavor and with a milder, less tart flavor than the whole guy.

Almonds are native to the Middle East, so people there have been snacking on green almonds for centuries. Oftentimes, they are simply sprinkled with a bit of salt, but I’ve also seen them incorporated into rice dishes.  In Europe, these little guys get tucked into fruit preserves during the jarring process. Here, chefs have been using them in a myriad of ways – in soups, pestos, on greens.  They can be shaved over a salad or even fish – their mild flavor pairs beautifully with seafood.  I love them fried (who wouldn’t!) and sprinkled with a nice, flavored salt; smoked Maldon is amazing here.

I plan to veer away from savory this year and try them in a cream-based dessert.  Like on top of a budino or in a clafouti.  The main thing is to experiment with them and see how you like to eat them, but act fast before they disappear from the market…

categories: all -1, spices
Thursday 04.26.12
Posted by Aliya LeeKong
 

Kerala Shrimp Curry

View fullsize kerala-pic1-500x333.jpg
View fullsize kerala-2-500x333.jpg

Kerala Shrimp Curry

Most of the time, what I make for you guys is a very personal interpretation of a dish.  I think of it like my little fantasy, how I’d like to eat a dish regardless of its origin or culture and using ingredients I can get to.  I think everyone that loves to cook does this on some level – cooks things the way they like it.  But, there are times when I do crave the original!  That’s when I research (eating and reading) and try to recreate it from scratch, adjusting the spice level and seasoning where necessary but keeping to the unadulterated tradition as much as possible, which is the case with this Kerala-style shrimp curry.

This is actually a traditional curry I created for Junoon.  I did a ton of research and found out that in the south of India, in Kerala, they use this (very hard to come by) ingredient called kodampuli, which is also called Malabar or smoked tamarind.  And smoky is right – it’s used as a souring agent and has a tart, smoky, complex quality that I love!  That said, if you can’t find it, kokum or regular tamarind also works really well here to create that tart flavor.

People usually think curries are heavy, and they certainly can be.  I know I have to be in a mood to eat them. But not so with this one – despite the coconut milk, this curry feels a lot lighter.  The flavors are bright and fresh and not overly spiced.  There’s heat from the chilies, depth from the curry leaves, and that brightness from the cilantro.  I like to sear the shrimp and develop a nice brown on them before putting them into the curry.  Some simply fried shallots create a beautiful crunch on top and spooning this over some warm, basmati rice is pure heaven.  Enjoy!

Ingredients
Serves 4

4 pieces kodampuli*

3/4 cup boiling water

1 yellow onion, peeled and roughly chopped

2 shallots, peeled and roughly chopped

1 2.5-inch generous knob of ginger, peeled roughly chopped

8 cloves garlic, peeled

1 Thai green chili, stemmed

5-7 tablespoons coconut oil

2 teaspoons brown mustard seed

1 tsp white cumin seeds

pinch of fennel seeds

10 curry leaves

2-3 dried red chilies

¼ tsp Indian hot chili powder

½ tsp paprika

1 tsp turmeric

1 tsp ground coriander

1 tsp ground cumin

½ tsp garam masala

1 ½ cans coconut milk

1 ½ tsps palm sugar

squeeze of lemon juice

1 ½ lbs shrimp, cleaned and shelled

kosher salt and freshly ground pepper

small handful of cilantro, chopped

fried shallots (optional, as garnish)

grilled lime (optional, as garnish)

Procedure

In a metal or heat safe bowl, pour boiling water over the kodampuli.  After 10 minutes, remove one piece from the water.  Blend remaining in a blender and strain.  Set aside strained liquid and one piece.

To the bowl of a food processor, add the onion, shallot, ginger, garlic, and green chili.  Process to a smooth paste.

Heat 3 to 4 tablespoons of coconut oil in a medium pot over medium-high heat. When hot, add mustard seeds, cumin seeds, fennel seeds, curry leaves, and dried red chilies. Move around in the pot – it will sputter and pop so be careful!  Cook for about 30 seconds and then add the onion paste along with all of the dry spices.  Cook until the paste dries up and the onions turn golden brown, stirring to make sure it isn’t sticking too much or burning.

Add the single kodampuli, the strained liquid, the coconut milk, and the palm sugar.  Lower heat and simmer for 8 to 10 minutes until the sauce thickens. Squeeze in a bit of lemon juice, and adjust the seasoning here adding salt and freshly ground pepper as necessary.

Dry shrimp and season with salt and freshly ground pepper.  Heat a skillet over medium-high heat.  Add 2 to 3 tablespoons of coconut oil and sauté shrimp, working in batches if necessary.  Cook for 2 to 3 minutes, drain of excess oil and then transfer to the pot with the curry.

Add the cilantro to the curry right before serving and remember to remove the hot, dried red chilies so no one eats them!  Serve hot, preferably with basmati rice or naan, garnished with fried shallots and a grilled lime.

*Kodampuli is not the easiest to find, so you can substitute kokum or a piece of a tamarind block in its place.  You want a relatively tart liquid to flavor the curry.

tags: shrimp, curry, Junoon, Kerala
categories: all -1, main dishes, recipes
Monday 04.23.12
Posted by Aliya LeeKong
 

My Easter Stuffing

View fullsize stuffing-pic1-500x333.jpg
View fullsize stuffing-pic2-500x333.jpg

My Easter Stuffing

I always love cooking for holidays and get-togethers, and yesterday was no exception.  Usually, I decide the dishes way in advance and have a 3-day prep list in order to make my life easier and, quite frankly, less stressful for the event.  This Easter Sunday, not so much.  I bolted awake Saturday in a panic and interrogated my husband to figure out what to make.  His response was classic and came as no surprise in their usual casserole form: “shepherd’s pie and stuffing and I really don’t care what else you make.”

We ended up having a bunch of friends (whose family is not in the NYC area) over for the Sunday meal.  I’m used to stuffing for Thanksgiving when there’s actually a bird or something to be stuffed.  That said, who doesn’t love stuffing?  The weather is still cold, so I threw together some hearty ingredients that complemented the brined pork chops I served.

The foundation of the stuffing (besides the whole bread thing) is the bacon.  It adds that first layer of salty, smoky crunch, and I use its fat to cook the other vegetables.  The shiitakes add in that meaty, umami flavor and roasted leeks a signature, onion-like one.  For heat, I threw in a very generous pinch of Aleppo chili flakes, which are tangy, a bit sweet, with that kick.  I loved the results. If you want a vegetarian version, you can obviously omit the bacon and use vegetable stock in lieu of chicken stock; I’d use butter though for richness and maybe throw in some smoked paprika.  Crusty, moist, flavorful and pure comfort…enjoy!

Ingredients

Serves 6 to 8 / Yields (1) 2-quart baking dish

1 loaf challah bread, crusts removed, cut into cubes*

1 leek, white and light green parts only, thickly sliced

olive oil

kosher salt to taste

2 pieces of bacon, cut into a small dice

12-14 shiitake mushrooms, cleaned and stemmed, thinly sliced

1 shallot, finely chopped

3-4 garlic cloves, minced

very large pinch Aleppo chili flakes

¼ cup white wine

½ cup chicken stock

2 eggs, beaten

¼ cup heavy cream

1 ½ tsps chopped fresh thyme

small handful cilantro, finely chopped

freshly ground black pepper to taste

Procedure

Preheat oven to 400° F.

Transfer challah cubes to a large bowl and add the other ingredients as they are ready.

Toss leek with a bit of olive oil and salt and lay out on a baking sheet.  Roast in the oven for 15 to 20 minutes until starting to brown as you are prepping the rest of the ingredients.  Transfer to the bowl with the challah bread.

Heat a medium skillet over medium heat.  Add the bacon and cook stirring until the fat has rendered and the bacon has crisped up.  Using a slotted spoon, transfer the bacon to the challah bread reserving the fat in the pan.

Turn the heat up to high and when hot, add the shiitake mushrooms to the pan with the bacon fat.  Let them just sit there for a minute or two before stirring – you want to develop a nice brown on them.  Stir and add in the shallot, garlic, Aleppo and some salt to draw out the moisture.  Cook until the shallot is translucent.  Add the white wine and reduce until it’s almost all gone.  Add the chicken stock and let simmer for 1 minute.  Transfer the vegetables and liquid to the bowl with the challah bread.

Add the eggs, heavy cream and herbs to the bread as well and toss the whole mixture together.  You can add a bit more chicken stock if you find it isn’t moist enough.

Transfer stuffing to a greased baking dish and cover with foil.  Bake covered for 30 minutes.  Remove foil and bake uncovered for another 10 to 15 until crisp.

* I usually use brioche or challah for this and buy the bread the day before.  If the bread still has a lot of moisture, transfer the cubed pieces to a baking sheet and throw it in a 350° F oven for 5 to 10 minutes to crisp up.  You want them to be dry before adding the rest of the ingredients.

tags: Easter recipes, stuffing, shiitake mushrooms
categories: all -1, recipes, side dishes
Monday 04.09.12
Posted by Aliya LeeKong
 

Medjool Dates

View fullsize medjool-1-500x333.jpg
View fullsize medjool-2-500x333.jpg

Medjool Dates

I feel like dates have gotten a bad rap – conjuring thoughts of trail mix (not that there’s anything wrong with it…) and other dried fruit and nut products.  The image is a super dry, chewy nugget, indiscernible in true taste other than a vague sweetness – not really special or noteworthy.  I think this notion of date needs to be cleared up, particularly when it comes to one type, medjool dates…

A few months back I stayed with a friend in Bahrain who has 3 or 4 different types of date palm trees lining her pool and backyard, including medjool (dates are indigenous to the Middle East fyi).  Every year, she harvests the dates and goes through the preserving process.  For afternoon coffee, we’d sip strong Arabic coffee and have a serious, homemade date tasting!  It’s a longstanding tradition there.  Each one had a nuanced flavor and a soft, succulent texture….heavenly.

Medjool’s are prized for being the largest and most flavorful of the bunch.  They have a tender, melt-in-your-mouth character and are in no way reminiscent of the dried, tough dates in trail mix.  The flavor is sweet with overtones of caramel and chocolate.   A good date should be like dessert, albeit a bit healthier since it’s high in fiber and minterals (so healthy it’s often used to break fasts).

I have made many a date-doubting friend a believer!  I once removed the pit, stuffed them with chestnut cream and topped with bacon crumbles and pomegranate molasses for a party.  I didn’t make a ton of them thinking people would be anti-date…I was wrong and got cleaned out!  Although they are amazing on their own, they are also lovely in chutneys, broke into pieces as an ice cream topping, in a bbq sauce…the list goes on.

tags: Medjool dates
categories: all -1, spices
Thursday 04.05.12
Posted by Aliya LeeKong
 

Sweet Avocado-Chocolate Tart (No Bake!)

View fullsize avocado-pic1-500x333(1).jpg
View fullsize avocado-pic2-500x333.jpg
View fullsize avocado-pic3-500x166.jpg

Sweet Avocado-Chocolate Tart (No Bake!)

Avocados as dessert?  Yes, yes, and yes.  I am still reminiscing about my trip to Brazil, and there, avocados (which are fruits, mind you…) are often eaten as a dessert – sometimes sprinkled with lime juice and sugar and other times blended with cream or condensed milk to produce a thick pudding, amongst other ways.  In the U.S., we have gone so far as to add them to milk shakes or protein shakes, why not take it a step further and embrace this creamy fruit as dessert-worthy…

I picked up this beautiful, long, rectangular tart mold recently and had been itching to use it.  That said, if I’m being completely honest, I have to have the baking bug to go that extra mile and bake a tart from scratch.  This is a no-bake tart!  You merely have to press buttered, cookie crumbs into the mold and freeze for a few minutes to set.  It doesn’t get easier.

Add to that the filling is a breeze – a few ingredients thrown into a food processor to do the work – and this may be the easiest tart you’ve ever made.  It sets up in a few hours so could easily be thrown together before a dinner party.  Avocado season has begun and will run through the summer, and this is the perfect icebox treat to keep around for summer entertaining.  The avocado pairs with chocolate beautifully – sweet, creamy with the bitter, chocolaty crunch from the crust…Enjoy!

Ingredients

Yields 1 13 ¾” x 4 1/2 “ x 1” tart

Crust:

1 ½ sticks unsalted butter

2 ¼ cups chocolate cookie crumbs (from Oreos without the center filling or other chocolate wafer cookies

1 tsp kosher salt

Filling:

4 oz mascarpone cheese

½ can sweetened condensed milk

½ tsp vanilla extract

Squeeze of lime juice

2 ripe avocados, pitted

Garnish (optional):

fresh whipped cream

shaved bittersweet chocolate

Procedure

Melt butter in a medium saucepan.  Add cookie crumbs and a ½ teaspoon of the salt and mix with a fork until fully incorporated.  Press evenly into the tart pan going up the sides as well.  Place in the freezer for 10 minutes.

To the bowl of a food processor, add the mascarpone, sweetened condensed milk, vanilla extract, the other ½ teaspoon of kosher salt, squeeze of lime juice and spoon in the avocado flesh.  Process until thick, creamy and uniform consistency.

Spoon avocado mixture into the tart shell and smooth with a spatula.  Refrigerate for a minimum of two hours, though this can definitely be made a day or two ahead.  When unmolding, let the tart sit at room temperature for 20 to 30 minutes first, so that it loosens easily.

Serve slightly chilled with a dollop of whipped cream and some shavings of chocolate.

tags: desserts, avocado desserts, no bake desserts
categories: desserts, recipes, all -1
Monday 04.02.12
Posted by Aliya LeeKong
 

Tamarind

View fullsize tamarind-pic1-500x333.jpg
View fullsize tamarind-2-500x166.jpg

Tamarind

I grew up eating tamarind chutney all the time (and living in Florida, occasionally sipping a tamarindo from the corner store).  I realize that not everyone knows what tamarind looks, tastes, or feels like, and I wanted to give it a little shine.  It’s a fantastic ingredient for the enthusiastic cook and keeps for like ever in your fridge.

One amazing thing about tamarind is that it’s found in so many different cuisines!  It’s indigenous to Africa and eaten throughout the continent but has made its way into South Asian, East and Southeast Asian, Australian, Mexican and other Latin American cuisines.  The tamarind chutney I grew up eating is similarly prepared to the tamarind pulp in Mexican food that’s used in marinades, sweets and even soups.

The pods in the picture are ripe tamarind, and, within these is the sticky, reddish brown pulp that surrounds seeds and contains large, sinewy threads.  The flavor is somewhat like a date but far more sour and acidic and with less sweetness.  This is not the easiest stuff to find, so I’m also showing you the wet, seedless, Thai tamarind blocks that are my preferred tamarind to cook with and that I get from the Asian stores.  To extract the pulp, juice, or make a chutney, knobs of this block may be soaked in boiling water and then squeezed (with your best cooking tools, your hands!) and passed through a strainer.  You want to use a spoon or something to press the pulp against the strainer to get the most you can out of it.  You can then resoak the strained pulp to get a second juicing if you like.

If you cook the resulting liquid down, you’ll get the concentrate form of tamarind, which I haven’t shown and which is also in stores.  To me, it doesn’t have quite the same flavor as the home-extracted version but is completely legit to cook with.  Whether home-done or store-bought, this concentrate makes a fantastic base for a vinaigrette, adds tartness and depth as a marinade for grilled chicken breasts (a nice alternative to the balsamic versions out there), makes a killer version of lemonade, and generally adds a complex, sour quality to anything to which you add it.

tags: tamarind, tamarindo
categories: all -1, spices
Thursday 03.29.12
Posted by Aliya LeeKong
 

The Tea I Grew Up Drinking

View fullsize tea-pic1-500x333.jpg
View fullsize tea-pic2-500x333.jpg
View fullsize tea-pic3-500x166.jpg
View fullsize tea-pic4-500x166.jpg

The Tea I Grew Up Drinking

This past weekend I headed back home to Florida to visit my parents.  I love how easily you can just slide into old habits (well, food-related anyway!) – warm apple cake with vanilla ice cream upon arrival, fresh crèpes for breakfast, and other assorted dishes from food requests I made of my mom weeks ago in advance of the trip.  One thing that requires no request when I head down is a tea that was a staple in my household growing up – creamy, spiced, a touch sweet, and pure comfort.

You have no idea how hard it was to document this (seemingly simple) recipe!  The mere idea that I was going to record measurements and photograph spun the kitchen (my mom and myself included) completely out of order!  What normally happens by instinct, adding the tea leaves, sugar or milk for example (yes, all of the ingredients in the recipe…), became a tall task, and it somehow took us multiple takes to get this right.

Just look at what happened when we turned our back to confer on how much of the spices we added.  Milk explosion and a mess!

In any case, most people these days know about masala chai or just chai, which is the Hindi/Urdu word for “tea”.  The stuff in the supermarkets and the original masala chai have a ton of spices – clove, cinnamon, and even black pepper included – as well as a strong, distinctive taste.  This is notthat.  This is a black tea that’s brewed, lightly spiced with green cardamom and a touch of saffron, and simmered with milk until it’s thickened.  The result is creamy satisfaction and slightly decadent – the actual taste of the tea shines through (not just spices).  And for me?  It’s an easy way to remind myself of home.  Enjoy!

Ingredients

Serves 4

3 cups water

3 tbsps loose black tea (Assam, English Breakfast or whichever you like)

4 green cardamom pods, cracked

pinch saffron

4 tsps sugar (or to your taste level)

¾ cup whole milk

¾ cup evaporated milk

Procedure

In a kettle or small saucepan, bring water up to a boil.  Add black tea, cardamom, saffron and sugar and boil for 1 minute.  You may have to adjust the amount of black tea depending on the strength of what you are using.  I used an Assam tea here.  Also, you can do sugar to taste if you prefer.

Add both milks and bring up to a simmer.  Simmer uncovered for 20 to 25 minutes until the tea has thickened a bit.  Be careful not to let it boil over!

Strain and serve immediately.

tags: tea
categories: drinks & cocktails, recipes, all -1
Monday 03.26.12
Posted by Aliya LeeKong
 

Poha or Flattened Rice

View fullsize poha-pic1-500x333.jpg
View fullsize poha-pic2-500x333.jpg

Poha or Flattened Rice

I thought I would show you guys an ingredient I’ve been messing around with this week calledpoha. Indeed, it does look like fish food, but it’s actually raw rice that has been flattened to a thin, flake texture.  What this does is make it easy to digest, so you don’t really have to cook it!  Simply adding water or milk, whether cold or hot, will do, and the flakes will swell absorbing the water (and whatever flavors you add to it).  Think of it like instant mashed potato flakes for the South Asian diaspora

I learned about poha from a Nepalese friend, and it’s eaten throughout his home country as well as parts of North India and Bangladesh.  The rice is an easy, “fast” food and is often sold by street vendors, though many families use it as their staple breakfast food.  It’s super versatile – from a breakfast porridge reconstituted with water or milk (the end of the cornflakes bowl comes to mind) to lightly fried with mustard seeds, curry leaves, chilies, onions and potatoes.

What I love is how poha can be sweet or savoury.  Why slog for, okay, like 30 minutes or so making sweet, creamy rice pudding when you can make it in under 5 minutes with this stuff?  Simmer heavy cream and milk with sugar, raisins, cinnamon, vanilla, whatever spices you like – pour over poha, a few minutes soak time and voilá!   It also makes fantastic weeknight rice dishes (I’d make it like this pulao) in a fraction of the time.  Kind of genius.  And I’m also a bit fixated with deep-frying them and sprinkling them over foods as a crunchy garnish.

Have you ever cooked poha? What’s your favorite dish with it?

tags: poha, flattened rice
categories: all -1, spices
Thursday 03.22.12
Posted by Aliya LeeKong
 

Parsnip Cakes with Spring Garlic & Chile

View fullsize parsnip-pic1-500x333.jpg
View fullsize parsnip-pic2-500x333.jpg
View fullsize parsnip-pic3-500x222.jpg

Parsnip Cakes with Spring Garlic & Chile

Walking through the Union Square Greenmarket the other day (as the weather shifted from the low 40’s to the low 60’s), it felt to me that the season is being a bit ambivalent, unsure of whether it’s winter or spring.  Piled high were the hearty root vegetables of the winter – rutabagas, salsify and parsnips – next to the burgeoning spring crop with lovely spring garlic and rhubarb making an appearance.  I nabbed some of the spring garlic and for breakfast this Sunday created these little cakes, as an ode to this in-between season.

Parsnip is an incredibly flavorful and versatile vegetable.  The flavor is somewhere between a potato and a carrot, and it’s signature sweetness works beautifully with butter, spices, and heat. Spring garlic, on the other hand, is like a two-for-one sale – garlic and green onion flavor in one!  If you can’t find any, using a bit of garlic with leek or green onion works really well here too.

This recipe couldn’t be simpler or more forgiving – cook the parsnips til tender, add other ingredients, fry until golden.  You could easily use potatoes instead of parsnips here if you have them on hand.  I love these for breakfast with some scrambled eggs and a touch of sriracha to dip.  But these could also be a great dinner side to accompany roast chicken or a nice piece of fish.  A crisp bite with that sweet, creamy parsnip flavor, garlic, onion and the heat from the chilies…Enjoy!

Ingredients

Serves 4 to 6

2 lbs parsnips, peeled and cut into a medium dice

1-2 red and/or green chilies, finely chopped (red jalapeno, jalapeno, Thai)

2 spring garlic shoots, finely chopped (approximately 1/3 cup)

½ cup all-purpose flour

¾ tsp kosher salt

½ tsp sugar

handful of fresh herbs (chives, cilantro, parsley), roughly chopped

unsalted butter for frying

kosher salt to taste

Procedure

Put diced parsnips in a pot and cover with cold water.  Place over medium-high heat, cover and bring to a boil.  Lower to a strong simmer and simmer until fork tender (approximately 10-15 minutes depending on the size of your dice).  Drain in a colander and let air dry for a few minutes.

In a large bowl, mash parsnips with a potato masher or use a ricer to break them up.  Add the chilies, spring garlic, flour, salt, sugar and herbs and mix until a uniform texture (don’t overmix though or they’ll get a tad gummy).

Heat a sauté or cast iron pan over medium heat and add butter.  For the parsnip cakes, I like to use an ice cream scoop so I can be sure I get even amounts.  I love to use my hands here, making a flat patty out of the parsnip mixture and then just sliding them into the pan.  They don’t have to be perfectly shaped.

Fry for 3 to 4 minutes per side just to develop that nice golden crust, and work in batches if necessary to finish off the mixture.  Let drain on a paper towel-lined baking sheet.  Sprinkle with a bit of salt while it’s hot for extra flavor.

Serve immediately.  I like mine with a bit of sriracha on the side to dip.

tags: parsnip, spring garlic, vegetarian sides
categories: all -1, appetizers, breakfast, side dishes, vegetarian-1
Monday 03.19.12
Posted by Aliya LeeKong
 

Scallops with Spiced–Brown Butter Cassava Purée

View fullsize scallop-pic1-500x333.jpg
View fullsize scallop-pic2-500x333.jpg

Scallops with Spiced–Brown Butter Cassava Purée

So in a few weeks I’m headed down to St. Lucia to do a little cooking.  Last time I was down there, it was a bit of a blur because I was perfecting this rum punch recipe.  This time, I’m all business!  Usually, I travel to learn about the food and cooking of a place, but I’m actually going to partnerwith a local restaurant to do some exciting things with their menu.  The fact that it’s at one of the most beautiful resorts in the world (in my opinion!) makes me pretty much one of the luckiest ladies out there, and the fact that the menu is based on South Asian / Indian and West Indian influences couldn’t suit my background and passions more.  Here is a sneak peak at one of the dishes I’m developing for them.

Scallops, brown butter and spices work together really well, particularly with a nice root purée.  The island has incredible local seafood as well as produce – cassava is a local vegetable that’s starchy and takes on flavor beautifully.  I cook it here much like I would heavenly, creamy mashed potatoes and infuse it with signature South Asian spices like cumin and coriander.  I may change my mind and mix it with a bit of potato or use dasheen (taro root) instead, but I really did like the way this one came out so I wanted to share.

I am in absolute love with my ricer for making purées of root vegetables, and it really helps create that creamy, silky texture.  The spices make the cassava pop, and the nutty brown butter pairs with sweet scallops in such a lovely way.  I love to get a nice crust on the scallops, and secretly I cooked them in the same pan in which I made the brown butter for some extra flavor.  This is an easy weeknight meal but is certainly entertainment worthy.  You can absolutely substitute potatoes or even cauliflower here (adjusting cooking times of course) if cassava isn’t readily available.  Enjoy!

Ingredients

Serves 4

1 quart chicken stock

3 cups water

2 cassavas, approx. 1 ¾ lbs peeled, chopped cassava

½ tsp kosher salt

1 stick + 2 tbsps unsalted butter

¾ tsp turmeric

1 ½ tsps cumin

1 ½ tsps coriander

¾ tsp white pepper

large pinch cinnamon

large pinch cayenne

2 cups heavy cream

16 large, dry sea scallops, muscle removed

vegetable oil

kosher salt & freshly ground pepper

Procedure

In a stockpot, bring stock, water, cassava and salt up to a boil and lower to a simmer.  Simmer for 20 to 25 minutes until cassava is tender and breaks very easily with a fork.  Drain, pass through a ricer (or use a potato masher) and put back into a large saucepan.  Place saucepan on low heat, stirring for 2 to 3 minutes to dry out the cassava thoroughly.

In a small skillet, melt 1 stick of butter over medium-high heat.  Add spices and continue cooking butter until it browns and becomes fragrant in a hazelnut kind of way.

Whisk browned, spiced butter and heavy cream into cassava and heat through.  At this point you can serve like this or push it through a mesh sieve to get an even finer texture.  To keep warm, hold purée in a double boiler (i.e. in a bowl over simmering water).

For the scallops, you want to develop a nice, deep color on them.  Thoroughly dry the scallops before cooking and season generously with salt and freshly ground pepper.  If they are wet, they won’t caramelize and will sort of steam in the pan.  Also, if you crowd the pan, they will also steam, so work in batches if necessary.

Heat a skillet over medium-high heat and add vegetable oil to just coat the bottom of the pan.  When it’s just about to smoke, add the scallops, dragging a little so that the side gets coated in olive oil.  Cook for about two minutes and add a tablespoon or so of the butter.  Let cook for another minute or so and then flip.  They should have a nice brown crust on them.  At this point, I turn the heat down just a tad.  Let them cook on this side for another three minutes or so until they are cooked to your desired level.  I like mine so that the middle third looks a bit translucent and the top and bottom thirds are opaque, but remember different-sized scallops will take differing cooking times.

Serve scallops immediately with a side of the cassava purée and some chopped herbs if you desire.

tags: scallops, seafood recipes, cassava
categories: all -1, recipes, main dishes-1
Monday 03.12.12
Posted by Aliya LeeKong
 

Sacred Lotus

View fullsize lotus1-500x333.jpg
View fullsize lotus2-500x333.jpg

Sacred Lotus

No, I am not referring to the gorgeous flower (as you can see in the pic)!  It’s the stem of the plant, the lotus root that has recently shot up on my list of favorite ingredients to experiment with.  This is what grows underneath and up out of the water, which results in the beautiful lotus flower at the end of it, an extremely edible and very popular vegetable in Asian countries.

As it suggests, lotus root is a root vegetable, with a hard exterior that must be peeled and with a crunchy, white interior.  The cross section of the vegetable is beautiful – snowflake-like, and the flavor is mild and sweet – somewhere between jicama and a water chestnut.  The flower and vegetable are grown throughout India, parts of tropical Asia as well as Australia, and the entire plant is edible, from the stamens to the leaves to the seeds.

The thing about them is that they are incredibly versatile!  You can slice them thin, fry them and give potato chips a real run for their money.  Steamed they are delicious – crisp, yet tender.  They can be pickled, steeped in heavy cream or broth and puréed, braised, roasted, or stir-fried.   They are very forgiving, take on flavors extremely well and maintain a great texture.

Although I believe you can find these canned, I like to pick these up fresh in NYC’s Chinatown…

tags: sacred lotus, lotus root, root vegetables
categories: all -1, spices
Thursday 03.08.12
Posted by Aliya LeeKong
 

Baked Trini Wontons

View fullsize wonton-pic1-500x333.jpg
View fullsize wonton-pic4-500x333.jpg

Baked Trini Wontons

I’m just going to say it to get it out of the way.  Frying just tastes better.  It does.  There is no other way to get that perfect, even texture, signature crunch, and lovely fried flavor…BUT if you can pretend like fried wontons never existed or not do some sort of unfair comparison of a fried wonton vs. a baked one, these are absolutely delicious (and, of course, a little better for you and your waistline).

I first came across the fried and soup version of these because of my husband and his wonton cravings. The Chinese influence on Trinidad is evident here as it combines traditional Asian flavors with pops of West Indian influence – particularly the scotch bonnet or habanero.  What I love about this recipe is that it is ridiculously versatile – you can, of course, deep-fry these (as I do for company), keep them frozen and pop them in the oven for a weeknight appetizer for the family, throw a few of them into a brothy vegetable soup to cook with and add a bit of flavor, or even just use the stuffing mixture with some breadcrumbs for a nice, spicy pork meatball.  AND, if you want to use ground chicken, beef or shrimp instead of pork, the recipe still works great.

I got a bit crazy while making these and tested out the wontons at 25 degree intervals in the oven, on both convention and convection settings, to figure out which creates the best texture (crazy, I know, but effective!).  Deep-frying, because of the circulation of hot oil, cooks evenly and quickly, so I ended up going with a relatively high temperature (425° F) and using the convection setting (for circulating air) to yummy, crispy results.  These don’t take too long to cook, and what this does is prevent the wonton dough from getting too chewy, which seemed to happen at the lower temperatures.  Again, these do freeze up really easily, but make sure to bring to room temp before baking (if you’re frying, straight from the freezer is fine).  Easy weeknight app, little hors d’oeuvres for entertaining…this wonton is spicy, flavorful, crunchy and satisfying – Enjoy!

Ingredients

Yields 24 to 30 wontons

2 tbsps vegetable oil

1 large shallot, finely chopped

½ habanero pepper, seeded and minced

1 ½” piece of ginger, minced (~½ tsp)

1 scallion, minced

2-3 garlic cloves, minced

½ lb ground pork, room temperature

zest of 1 lime

¾ tsp soy sauce

½ tsp Worcestershire sauce

2 tbsps chopped fresh cilantro

salt and freshly ground black pepper

24-30 wonton skins

Olive oil or cooking spray

Procedure

Preheat the oven to 425° F on the convection setting for optimal texture.  If you don’t have an oven that has convection capabilities, preheat the regular oven to 450° F.

Heat a small pan over medium heat.  Add the vegetable oil and then add the shallot, pepper, ginger and scallion.  Add a little salt to draw out the moisture and sauté for 3 to 4 minutes until the shallot is translucent.  Add the minced garlic and sauté for another minute until the garlic is fragrant.  Remove from the heat and let cool.

Using a large bowl, mix together the pork with the cooled shallot mixture, lime zest, soy sauce, Worcestershire, cilantro and season with salt and freshly ground pepper (remember the soy and Worcestershire are salty so you might not need much).  You can always quickly sauté a tiny patty to check seasoning.

Set up a little work station for yourself with a cutting board, a small bowl with water, a towel to wipe your hands, the wonton skins, and the pork mixture.  I like to make these 3 to 5 at a time.

Lay out the wonton skins on your cutting board, and then spoon even amounts of the pork mixture in the center of each.  You don’t want to overstuff so test out the first one to see what the right amount of the pork mixture is.

Dip your fingertips in the water bowl, and then wipe across the four edges of the wonton skin with it so they’re wet.  Fold one corner over to the other and press down the corner and sides to form a triangle.  Don’t be afraid – press hard!  Or else your stuffing will ooze out.  Bring the other two edges up to meet, using more water if necessary, and press together. Place on a parchment-lined baking sheet that has been greased with either olive oil or spray.

Repeat until all of the wontons have been formed.  Spray each wonton or brush with olive oil and place in the oven.  Bake for 8 to 10 minutes until deep, golden brown.  Serve warm with your dipping sauce of choice.

*If you’ve frozen or refrigerated these, make sure they come up to room temperature before baking.

tags: wontons, baked snacks, pork
categories: all -1, appetizers, man-friendly, recipes, side dishes
Monday 03.05.12
Posted by Aliya LeeKong
 

Huacatay

View fullsize huacatay-pic1-500x333.jpg

Huacatay

Ahhh….the last of my stash of huacatay (pronounced wah-kah-tie).  This is the dried form of the herb I brought back from Peru and luckily still retains some of that signature flavor.  I usually avoid buying spices in plastic like this because the plastic has a tendency to “breathe” and basically that translates into deterioration of the aroma and flavor of the spice before you even bring it home…but desperate times call for desperate measures, and I just had to bring this herb home.

Huacatay is a staple herb in Peruvian cooking – it’s from the Andes (the word is in the local quechua language) and is used in signature dishes out there like pachamanca (an underground bbq of sorts).  It’s often ground to a paste before it’s used – mixed with fresh cheese and milk for a sauce for potatoes or with peanuts and chilies.  I actually watched a woman make an old school version of the peanut / chile / huacatay paste with a super cool mortar and pestle and have it on video!  And whenever I figure out how to edit it all, I’ll share it with you.

What does this herb taste like is the million dollar question?  To me….it honestly tastes like mint mixed with bubblegum flavor and is often mistakenly referred to as black mint.  I know!  That doesn’t sound particularly appetizing, but I swear it is nothing short of alluring in a dish. I literally couldn’t get enough of its unique flavor while I was there.  I’m sure the other question is where can I get it?  THAT, I am still working on – I’ve seen the paste in specialty stores but not yet the dried form (forget fresh).  I’m sure the some of the Latin stores carry it and will update when I find out!

tags: huacatay, herbs, Peruvian cooking
categories: all -1, spices
Thursday 03.01.12
Posted by Aliya LeeKong
 
Newer / Older