X

Sign up to receive exclusive recipes, tips, updates and other goodies from Aliya!

  • Home
  • Blog
    • All
    • Recipes
    • Spices + Ingredients
    • Lifestyle, etc.
    • Travel
  • The Cookbook
  • The App
  • Media
    • All Media
    • Video
  • About
  • Passions
Aliya LeeKong
  • Home
  • Blog
    • All
    • Recipes
    • Spices + Ingredients
    • Lifestyle, etc.
    • Travel
  • The Cookbook
  • The App
  • Media
    • All Media
    • Video
  • About
  • Passions

Chipotle-Miso Butternut Squash Soup

CHIPOTLE-MISO butternut SQUASH SOUP


I know, I know - chipotle plus miso??  Obviously, this has no root in real tradition, but those flavors together are literally incredible, something I first played around with in my mind before putting them together.  I love creating new soup recipes during squash season - that sweetness is the perfect canvas for spices and flavor.  Squash creates such a lush, smooth, silky texture without even adding any cream so it’s the perfect option for dairy-free days.  

The recipe below is for a spiced butternut squash soup, but you can easily substitute pumpkin, honeynut or kabocha squash for this recipe.  Most soups call for roasting the squash first, but I skip that step here.  The cubed, raw squash cooks up while it's simmering with all of the great flavors here.  I love the smokiness and heat of the chipotle mixed with the umami and sweetness of the miso.  Such a great, quick weeknight meal.  I served it along with my pan de coco (coconut bread subbing coconut milk in this recipe)….sooooooo good!

Serves 4 to 6

2-3 tablespoons unsalted butter
1 medium onion, diced
1 shallot, diced
3 cloves garlic, minced
1/2 teaspoon brown sugar
1 butternut squash, halved and seeded and cut into a 1-inch dice (optional: save the seeds for garnish)*
1/4 cup mirin**
4 cups vegetable or chicken stock
2 tablespoons white shiro miso**
1 chipotle in adobo (canned)
Salt and lemon juice, to taste
chopped chives, for garnish

In a soup pot, melt butter over medium-low heat.   Add onion and shallot
with a pinch of salt and cook for 5 to 7 minutes until translucent.  Add the
garlic and the brown sugar and cook for another minute.

Add in the cubed squash along with the mirin and cook for 2 to 3 minutes
until the wine has mostly absorbed.  Add the stock and bring up to a simmer.
Simmer for 35 minutes, partially covered, until all of the squash are
tender.

Add in the miso and chipotle and transfer to a blender or use a hand blender
to puree to your desired consistency.  Season with salt and adjust acidity with lemon juice if necessary..

Serve sprinkled with chives & toasted seeds (if using).

* To toast the squash seeds, preheat oven to 350 degrees.  Clean seeds of any pulp and dry on paper towels. Toss the seeds with oil, salt, cumin and smoked paprika.  Toast in oven until golden brown about 10-15 minutes.  Let cool on a tray and set aside for garnish on soup.

** Mirin is a type of Japanese rice wine.  This along with the miso can be found at Whole Foods or a specialty / Asian grocer.

tags: squash recipes, squash soup, how to make squash soup, butternut squash soup, butternut squash recipes, best butternut squash recipe ever
categories: all 4, appetizers 1, main dishes-1, man-friendly, quick & easy, recipes, soups, soups & salads, vegetarian-2
Wednesday 11.02.16
Posted by Aliya LeeKong
 

FATHER'S DAY GRILLING

FATHER'S DAY GRILLING

Father's Day falls in such a sweet spot of the year - the weather is always perfect and who doesn’t love a little family gathering outside!?  My plan to celebrate this weekend will be an afternoon of easy grilling - I can't go wrong keeping it a lil' meat-centric.  :) Below are some great grilling recipes to give you some ideas for this weekend.  Enjoy!


GRILLED BUTTERFLIED CHICKEN WITH CHARRED JALAPENO SAUCE


GRILLED LAMB SIRLOIN TACOS WITH CORN, PICKLED CHERRY PEPPERS AND CHIPOTLE CREMA


SALT & PEPPER BABYBACK RIBS

Photo: Food52


GRILLED PORK BANH MI

Photo: Food & Wine


GRILLED SHRIMP WITH KIMCHI-MISO BUTTER

Photo: Rasa Malaysia


GRILLED AVOCADO SALAD WITH GREEN GODDESS DRESSING

Photo: Salt & Wind


CORN WITH GREEN CHILI BUTTER & COCONUT


TAHINI OREOS

Photo: My Name is Yeh


RUM SWIZZLE

Photo: Bon Appetit

tags: father's day, what to cook for father's day, grilling ideas, what to grill for father's day, father's day brunch
categories: all 4, blog, lifestyle-1, man-friendly, recipes, salads, side dishes-1, soups & salads, main dishes-1
Wednesday 06.15.16
Posted by Aliya LeeKong
 

Awaze Skirt Steak

View fullsize steak-pic11-500x333.jpg
View fullsize steak-pic2-500x333.jpg
View fullsize steak-pic3-500x166.jpg

Awaze Skirt Steak

Awaze.  Pronounced Ah-wah-zay.  Awaze is an Ethiopian chili paste, a staple in the cuisine, made with one of their more famous spice blends, berbere. It’s a sauce, it’s a condiment, it’s a marinade.  And that last function is exactly how I used it here, to infuse flavor into some gorgeous, marbled skirt steaks in time for a bit of Sunday (almost) summer grilling.

And awaze IS full-flavored in all its multi-function glory.  First, the base of it, the spice blendberbere, is made from aromatics like red onion, chilies and garlic, spices like fenugreek, cardamom and ajwain, and even an herb called sacred basil. For awaze, berbere is traditionally mixed with Ethiopian honey wine (called tej) to form a paste or diluted a bit for more of a sauce consistency.

I only have one bottle of tej left and am saving it for a rainy day, so I approximated with some red wine and honey for the marinade.  I also threw in a bit of lime juice for acidity, fresh garlic for flavor, and a pinch of cayenne for heat.  The steaks took on the flavors beautifully and grilled up to perfection.  It doesn’t take long for the marinade to kick in, so even if you only have a few hours to marinate, it’s worth the trouble (trouble being mixing a few items together in a bowl and pouring it over the steaks!).  Rich, an intoxicating mix of spices, a touch of heat and sweetness from the honey…Enjoy!

Ingredients

Serves 4

6 tbsps berbere

generous pinch of salt

pinch of cayenne

juice of 1 lime

4 cloves garlic, minced

3 ½ tsps honey

1 ½ to 2 cups dry red wine

2 lbs skirt steak, trimmed cut into 4 pieces

kosher salt and freshly ground pepper

Procedure*

In a mixing bowl, whisk together the berbere, salt, cayenne, lime juice, garlic, honey and red wine.  Place steaks in a ziploc bag and pour marinade over steaks.  Remove as much air from the bag as possible before sealing. Refrigerate for a minimum of 2 hours and up to 24.

Remove steaks from bag, pat dry with paper towels, and let them come up to room temperature.   Season both sides of each steak generously with salt and freshly ground pepper.

Heat a grill or grill pan over medium-high heat.  Grill steaks 1 to 2 minutes per side for medium-rare and longer if you prefer them well done.   Rest for about 7 to 10 minutes tented with foil before serving.

*To serve with the steak, I like to cook red onions down in olive oil and use some of the remaining awaze marinade to season them.

tags: Awaze, skirt steak, grilled
categories: all, recipes, main dishes-1
Monday 06.04.12
Posted by Aliya LeeKong
 

Scallops with Spiced–Brown Butter Cassava Purée

View fullsize scallop-pic1-500x333.jpg
View fullsize scallop-pic2-500x333.jpg

Scallops with Spiced–Brown Butter Cassava Purée

So in a few weeks I’m headed down to St. Lucia to do a little cooking.  Last time I was down there, it was a bit of a blur because I was perfecting this rum punch recipe.  This time, I’m all business!  Usually, I travel to learn about the food and cooking of a place, but I’m actually going to partnerwith a local restaurant to do some exciting things with their menu.  The fact that it’s at one of the most beautiful resorts in the world (in my opinion!) makes me pretty much one of the luckiest ladies out there, and the fact that the menu is based on South Asian / Indian and West Indian influences couldn’t suit my background and passions more.  Here is a sneak peak at one of the dishes I’m developing for them.

Scallops, brown butter and spices work together really well, particularly with a nice root purée.  The island has incredible local seafood as well as produce – cassava is a local vegetable that’s starchy and takes on flavor beautifully.  I cook it here much like I would heavenly, creamy mashed potatoes and infuse it with signature South Asian spices like cumin and coriander.  I may change my mind and mix it with a bit of potato or use dasheen (taro root) instead, but I really did like the way this one came out so I wanted to share.

I am in absolute love with my ricer for making purées of root vegetables, and it really helps create that creamy, silky texture.  The spices make the cassava pop, and the nutty brown butter pairs with sweet scallops in such a lovely way.  I love to get a nice crust on the scallops, and secretly I cooked them in the same pan in which I made the brown butter for some extra flavor.  This is an easy weeknight meal but is certainly entertainment worthy.  You can absolutely substitute potatoes or even cauliflower here (adjusting cooking times of course) if cassava isn’t readily available.  Enjoy!

Ingredients

Serves 4

1 quart chicken stock

3 cups water

2 cassavas, approx. 1 ¾ lbs peeled, chopped cassava

½ tsp kosher salt

1 stick + 2 tbsps unsalted butter

¾ tsp turmeric

1 ½ tsps cumin

1 ½ tsps coriander

¾ tsp white pepper

large pinch cinnamon

large pinch cayenne

2 cups heavy cream

16 large, dry sea scallops, muscle removed

vegetable oil

kosher salt & freshly ground pepper

Procedure

In a stockpot, bring stock, water, cassava and salt up to a boil and lower to a simmer.  Simmer for 20 to 25 minutes until cassava is tender and breaks very easily with a fork.  Drain, pass through a ricer (or use a potato masher) and put back into a large saucepan.  Place saucepan on low heat, stirring for 2 to 3 minutes to dry out the cassava thoroughly.

In a small skillet, melt 1 stick of butter over medium-high heat.  Add spices and continue cooking butter until it browns and becomes fragrant in a hazelnut kind of way.

Whisk browned, spiced butter and heavy cream into cassava and heat through.  At this point you can serve like this or push it through a mesh sieve to get an even finer texture.  To keep warm, hold purée in a double boiler (i.e. in a bowl over simmering water).

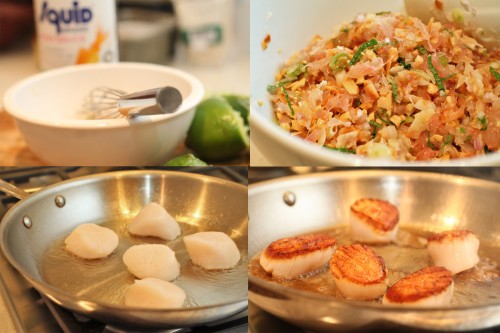
For the scallops, you want to develop a nice, deep color on them.  Thoroughly dry the scallops before cooking and season generously with salt and freshly ground pepper.  If they are wet, they won’t caramelize and will sort of steam in the pan.  Also, if you crowd the pan, they will also steam, so work in batches if necessary.

Heat a skillet over medium-high heat and add vegetable oil to just coat the bottom of the pan.  When it’s just about to smoke, add the scallops, dragging a little so that the side gets coated in olive oil.  Cook for about two minutes and add a tablespoon or so of the butter.  Let cook for another minute or so and then flip.  They should have a nice brown crust on them.  At this point, I turn the heat down just a tad.  Let them cook on this side for another three minutes or so until they are cooked to your desired level.  I like mine so that the middle third looks a bit translucent and the top and bottom thirds are opaque, but remember different-sized scallops will take differing cooking times.

Serve scallops immediately with a side of the cassava purée and some chopped herbs if you desire.

tags: scallops, seafood recipes, cassava
categories: all -1, recipes, main dishes-1
Monday 03.12.12
Posted by Aliya LeeKong
 

Arroz Con Pato

View fullsize arroz-pic1-500x333.jpg
View fullsize arroz-pic2-500x333.jpg
View fullsize arroz-pic3-500x166.jpg

Arroz Con Pato

A classic dish in Spanish and Latin culture is Arroz con Pollo or chicken with rice.  It’s a family-style, one-pot dish, chicken cooked with onions, peppers, garlic, tomatoes (sofrito) and rice – some families add achiote, others saffron, cilantro, or culantro…whatever is that family’s tradition.  One of the best dishes I tried in Peru was Arroz con Pato, where succulent duck replaces the chicken in the traditional dish.  It was such a rich and elegant dish that I had to try my hand at it now that I’m back home in NYC.  I’m so happy I did….

Two of the differences between arroz con pollo and arroz con pato (aside from the whole chicken v. duck thing) is that chicha, Peruvian corn beer, is used to cook the rice and duck in arroz con pato.  Also, cilantro is blended with water and added to the braising liquid, so the color of the dish takes on a gorgeous, green hue.  Beer, cilantro, and duck?  A winning combination in my book!

I learned a number of dishes from a fantastic friend in Lima, Naguib Ciurlizza, a colorful and multi-talented gentleman who boasts poetry and painting as skills alongside his vast knowledge of Peruvian cuisine.  He detailed to me how the original dish was made.  I had to make a few twists and turns to accommodate what’s locally available here in the States (aji amarillo can be so difficult to find!) and to accommodate my own taste.  So I use jalapenos in lieu of Peruvian peppers.  I also substitute a good stout beer instead of corn beer and chicken stock instead of water.  Traditionally, a long grain rice is used, but I went with a shorter grain rice that’s more of a paella tradition because I just love the texture.  I also throw in some olives at the end for a salty bite.

I will be blunt – this is not something to be whipped up in 30 minutes.  It’s a long, slow, loving cooking process, but I promise you the results are incredible and rewarding.   Fall-off-the-bone duck meat in a flavorful rice infused with beer and cilantro, studded with peas, bell pepper, and olives.  It’s a meal your family will love you for or that works for a great, casual dinner party (when you want to flex your Peruvian-inspired skills).  I’m a cook, so I shouldn’t say this but…I was literally shocked by how delicious this version of the dish is!  Enjoy!

Ingredients

Serves 4 to 6

Vegetable oil to coat pot

Duck, preferably 2 legs, bone-in with thigh meat and 1 breast, boneless split (approximately 3 lbs)

3 shallots, finely chopped

1 jalapeno, minced

2 tsps ground cumin

5 cloves garlic, minced

¾ cup stout beer

¼ cup Pisco liqueur (optional)

4 cups chicken stock

1 very large handful cilantro (no tough stems but soft stems are fine)

Bay leaf, dried or fresh

2 ½ cups Valencia, bomba or calasparra rice (paella rice)

¾ cup fresh or frozen peas

1 cup bell pepper, small dice (mixed yellow, red and orange)

Black olives (garnish)

Salt and freshly ground black pepper

Procedure

Preheat oven to 350° F.

Start by prepping the duck.  Dry the legs and breast and trim of excess fat.  I like to reserve this fat to melt down and keep for cooking in the future.  Prick the legs all over with a fork (this will help the legs render the fat easier) and season all over with salt and freshly ground pepper.  Score the skin on the breast in a criss-cross pattern (again for fat-rendering purposes) and set aside.

Heat a large pot or dutch oven over medium-low heat.  Add vegetable oil to coat the bottom of the pot and prevent the duck from sticking.  Add the legs skin-side down.  You want the fat to render out and the skin to crisp and brown.  This should take 3 to 4 minutes.  Turn pieces over and cook for another 3 minutes.  Remove legs to a plate and set aside.  Pour off (and keep!) any excess fat, reserving a few tablespoons in the pot for cooking the vegetables.

Add shallots, minced jalapeno and cumin and cook for 3 to 5 minutes until the shallots are softened and translucent.  Add the minced garlic and cook for another minute.  Pour in the beer and pisco, if using, and increase the heat.  Scrape the bottom of the pan with your spoon to dislodge any brown bits and bring up to boil.

While the duck or vegetables are cooking, blend 2 cups of the chicken stock in a blender with a large handful of the cilantro, reserving a small handful to chop for garnish later.  You want to blend on high for several minutes until the cilantro is totally pulverized.

Nestle the duck legs back into the pot, skin-side up.  Add the chicken stock blended with the cilantro and a bay leaf, cover and bring up to a boil.  As soon as it boils, place covered pot into the oven and cook for 1½ hours.

Take pot out of the oven, place on the stovetop and temporarily (and carefully) remove the duck legs.  Add the rice, peas, and chopped peppers and season very well with salt now to avoid stirring once it’s cooked.  Add the remaining 2 cups of chicken stock, stir and nestle the duck thighs back in.  Cover and bring back up to a boil.  Place in the oven for another 30 to 40 minutes until the rice is cooked through.

In the last 10 minutes of cooking, heat a skillet over medium-low heat.  Season scored duck breast all over with salt and freshly ground pepper.  Add a touch of oil to prevent the duck breast from sticking and place breast pieces skin-side down.  You want to render all of the fat out, so as the fat accumulates in the pan, carefully pour it off (and keep!).  Cook for 8 to 10 minutes until the skin has become crisp and there is no layer of fat underneath it.  Turn breast pieces over, increase heat to medium-high and cook for another 2 minutes.  This will yield a medium-rare breast – cook for longer if you like your meat more well done.

Remove the duck breast to a cutting board, cover loosely with foil and let rest for 5 minutes.  Thinly slice the duck breast.

Serve the rice garnished with black olives, some fresh cilantro and sliced duck breast.

tags: duck, Peru, Peruvian cooking
categories: recipes, travel, all-2, main dishes-1
Monday 01.16.12
Posted by Aliya LeeKong
 

Shrimp and Grits

View fullsize grits-pic1-500x318.jpg
View fullsize grits-pic2-500x333.jpg
View fullsize grits-pic3-500x333.jpg

Shrimp and Grits

This weekend, I taught a class with the De Gustibus cooking school over at Junoon.  I had a blast (!) chatting about spices in our spice room and walking the students through a traditional South Indian curry – which they made by themselves to rave reviews!  In any case, one of the students asked me about vadouvan, a mix I wrote about months back and in what dishes I might use it.  It put the bug in my brain, and this French-Indian spice blend became my seasoning du jour for some exotic shrimp and grits I whipped up for Sunday brunch.

Now, I’m honestly in favor of blending your own curry powder from spices you have on hand, tailoring to your palate.  But vadouvan is a fantastic blend to keep on hand.  It has a softer approach to curry, with ingredients like dried shallots, bay leaves and even fennel seeds blended in.  There is a warm sweetness to it that I think complements shrimp tremendously, and when you use a bit of butter to cook the shrimp, the pan drippings become a beautiful, fragrant golden sauce.

I know bacon or smoked sausage is traditional in shrimp and grits (not that tradition is reigning here anyway…), but the friend I cooked for is not big on pork.  For that reason, I used some grated smoked mozzarella to infuse the creamy grits with that signature smokiness.  Using milk and chicken stock give the grits a silkiness and rich flavor.  The shrimp need little else besides the vadouvan and a bit of salt, but the shallots and minced jalapeno are great here.  Finishing with fresh herbs brings in brightness, and this dish has so much body it could easily be a (super) easy weeknight dinner.  The curry notes, sweet shrimp and creamy smoky grits…heavenly.  Enjoy!

Ingredients

Serves 4

2 cups milk

2 cups chicken stock

salt & freshly ground black pepper

1 cup stone ground grits

5 tbsps unsalted butter

1 ½ cups smoked mozzarella, grated

1 lb shrimp, peeled and deveined

3 ½ tsps vadouvan

1 tbsp olive oil

1 shallot, minced

1 jalapeno, seeded, deveined and minced

Chopped scallions  and parsley / cilantro (for garnish)

Procedure

In a saucepan, bring milk and chicken stock up to a boil.  Lower to a simmer, season with salt and pepper, and whisk in grits.  Cover and cook at a low simmer for 25 to 30 minutes.  Remove from the heat and add in 3 tablespoons of the butter and the smoked mozzarella, whisking to incorporate fully.  Keep covered and warm.

Make sure the shrimp are dry and toss with vadouvan and some salt.  Heat a skillet over medium-high heat.  Add 2 tablespoons of butter and 1 of olive oil.  Add shrimp and cook for a minute or so.   Flip shrimp, lower heat to medium-low and add in the shallots and jalapeno, tossing to combine.  Cook for another 2 minutes.

Serve grits hot and spoon shrimp mixture on top, letting some of the pan juices drip on to the grits.  Garnish with some chopped scallions and parsley or cilantro.

tags: shrimp, grits, vadouvan
categories: recipes, breakfast, all-2, main dishes-1
Monday 10.17.11
Posted by Aliya LeeKong
 

Farm Stand Corn & Mushroom Tortilla Salad

View fullsize corn-tortilla-pic2-500x333.jpg

Farm Stand Corn & Mushroom Tortilla Salad

I walked into a coffee shop the other day, Nina Simone playing in the background, an unidentifiable buzz and warmth in the room and the scent of hot beverages brewing, and it totally transported me; I feel ready for the cooler months ahead to be filled with days of apple picking, Fall dinners with friends in Fort Greene, weekend drives to go leaf peeping, the build to the holidays and rum toddies.  I’m finally facing the fact that it’s the end of summer and am filled with this mixture of wistful nostalgia and excited anticipation of the fall to come. That said, it’s my last hurrah! And I couldn’t help but take one last shot at summer with this beautiful salad inspired by the farm stands I visited out in the South Fork this past week and a Mexican tortilleria in Queens where I spent the day cooking.

In thinking about Mexican food and traditions, I wanted to visit Tortilleria Nixtamal because they make incredible corn tortillas in keeping with true Mexican tradition, a not-so-straightforward process that hinges on corn quality, cal, humidity, and timing (they happen to supply to many of the best of the best Mexican restos in town).  The restaurant also turns out gorgeous authentic food to boot, so I headed out to Queens to learn a few dishes from the Chef there, Santiago, and see just how this tortilla process works.  My time at Nixtamal and this dish is the basis for my next webisode of Exotic Table, so stay tuned!

One dish Chef Santiago taught me was a quesadilla with Oaxaca cheese, corn, and huitlacoche, a fungus that actually grows on the corn and is a Mexican delicacy.  Here, I decided to use that as inspiration for a salad, substituting some farm stand shitakes to add the earthy kick from otherwise hard-to-find huitlacoche and threw in some gorgeous grape tomatoes.  Bright and filled with end of summer flavors, this is a super easy dish to make at home, tortilla bowls included.  Enjoy!

Ingredients

Yields 4 servings

4 corn tortillas (the thinnest you can find)

Butter and olive oil

¾ cup shitake mushrooms, thinly sliced

1 shallot, finely chopped

1 jalapeno, seeded and finely chopped

1 ¼ cups fresh corn kernels (about 2 ears)

6 – 8 grape tomatoes, halved

handful of cilantro, chopped

farmer’s cheese or queso fresco

salt and freshly ground black pepper

Procedure

The first step is to make the tortilla “bowls.”  Rather than deep-frying to achieve pliability and moldability, I like to go a bit healthier and just use a skillet with a touch of butter and/or olive oil to get similar results. While doing this, you’re going to use small bowls that fit inside each other to mold the tortillas.  They will not turn out as crisp (and using thinner tortillas will help), but this method makes me feel better about calling this a salad.

Simply heat a medium-sized skillet over medium-high heat.  When hot, add the tortilla and flip at intervals until it puffs and browns a bit.  You’ll feel the edges start to get crispy.  At this point, add a ½ tablespoon of butter or olive oil and let coat the tortilla.   Place a small bowl upside down on a cookie sheet.  Remove tortilla carefully and place on top of the overturned bowl.  Take another bowl, overturned, and put it on top.  It should mold the tortilla to the shape of the bowl and hold it in place as it cools.   Repeat for remaining tortillas, and let cool while preparing the rest of the ingredients.

Heat the same skillet over medium-high heat, and add another tablespoon of butter with 1 to 2 tablespoons of oil.  When the foam subsides, add the mushrooms and let sit undisturbed in a single layer for about 2 minutes.  You want to develop a nice, golden brown on the mushrooms and bring out the flavor.   Stir the mushrooms and sauté for another minute or two to cook through.  Add salt at the end to taste and, using a slotted spoon, transfer to a bowl.

Add another tablespoon or two of butter or olive oil to the pan.  Add shallots and jalapeno and a bit of salt to draw out the moisture.  When shallots are translucent (about 3 to 4 minutes), add corn kernels and tomatoes and toss to mix thoroughly.  I like to crank the heat up a bit here to develop a more roasted flavor to the corn, but be careful because the corn can start to pop a bit.  Cook for 5 to 7 minutes until corn is cooked through and tomatoes have puckered a bit.

Remove from the heat, toss back in the mushrooms, season with salt and freshly ground pepper to taste and add some chopped cilantro, reserving some of the cilantro for garnish.  Spoon mixture into tortilla bowls and dollop farmer’s cheese or queso fresco to your heart’s content.  Garnish with remaining cilantro and serve warm or room temperature.

tags: corn, mushrooms, recipes for summer, Mexican recipes, Tortilleria Nixtamal
categories: recipes, soups & salads, all-2, vegetarian-1, main dishes-1
Monday 09.12.11
Posted by Aliya LeeKong
 

Porcini Macaroni Pie

View fullsize porcini-pic3-500x333.jpg
View fullsize porcini-pic2-500x139.jpg

Porcini Macaroni Pie

So I’m working on my second episode of Exotic Table, and this one is inspired by a nonna I met at Enoteca Maria, an Italian spot in Staten Island that has grandmas from all over Italy as chefs making specialties from their individual regions.  How inviting is that?  I found the concept so powerful – I had to dig deeper, and a nonna by the name of Rosa Turano showed me her simple and elegant porcini dish. 

Of course, I can never leave well enough alone, so I did a bit of a double twist here drawing from my incredible day in the kitchen with Rosa and one of my favorites, Trinidadian Macaroni Pie.  The result is this beautiful baked mac ‘n cheese threaded with porcinis.  Cheesy, buttery, with a crust and that gorgeous porcini flavor…Enjoy and look out for the Exotic Table episode in a few weeks!

Ingredients

Serves 6 to 8 (yields (1) 3-quart baking dish)

olive oil or butter

1 cup fresh or rehydrated porcini mushrooms, thinly sliced*

1 yellow onion, finely diced

3 garlic cloves, minced

1 stick unsalted butter

½ cup all-purpose flour

1 quart milk

½ tsp white pepper

½ tsp black pepper

2 tsps salt

2 ½ cups grated gruyère

2 eggs

1 lb pasta (I used pappardelle here)

1 tbsp + 1 tsp fresh chives, finely chopped

1 ½ tsps fresh thyme, finely chopped

Procedure

Preheat oven to 350º F.

Heat a medium skillet over medium-high heat.  Add olive oil, and, when hot, add mushrooms.  Leave them alone and let them brown for a minute or two and then throw in a pat of butter to help with the browning.  Stir and add salt – browning the mushrooms will really bring out their earthy flavor and adding salt at the end will prevent moisture from ruining the browning process.  Lower the heat to medium-low and throw in the onions.  Cook for 3 to 5 minutes until the onions are translucent.  Add garlic and cook for 30 seconds or so until fragrant.  Remove from heat and cool in a bowl.

In a large sauté pan or pot over medium heat, melt butter.  Add flour all at once and whisk vigorously to avoid lumps.  Cook for 2 to 3 minutes.  You just want to remove the raw taste.  Add milk and spices and continue to whisk to prevent lumps (remember to get the corners!).  Once the mixture starts to bubble, reduce heat to low and cook for 8 to 10 minutes whisking often.  You want this to simmer gently while it’s thickening.  Remove from heat.

To the onion mixture in the bowl, add 2 cups of the grated cheese as well as the eggs.  Add a ladle full of the béchamel (milk mixture) and stir.  Continue to add ladlefuls until the egg mixture is up to temperature with the béchamel.  Add everything back to the béchamel in the sauté pan and stir to combine thoroughly and make sure cheese is completely melted.

Add pasta to boiling, heavily salted water and cook until it’s a bit underdone.  It depends on what type of pasta you are using.  I used fresh pappardelle, and it cooked in 2 to 3 minutes.  It’s going to continue cooking in the oven, so leave it al dente.  Drain pasta and add to the béchamel/cheese mixture.  Add 1 tablespoon of the chopped chives and 1 teaspoon of the chopped thyme and combine thoroughly.  Pour into a heavily greased, 3-quart baking dish.

In a bowl, combine remaining herbs, ½ cup of cheese, and breadcrumbs.  Sprinkle on top of macaroni and either dot with butter or drizzle with olive oil.  Bake for 35 minutes until top is browned and bubbly.

tags: Porcini Mushroom Pie, Enoteca Maria, vegetarian meals, macaroni pie
categories: all-3, recipes, side dishes, vegetarian-1, main dishes-1
Monday 08.01.11
Posted by Aliya LeeKong
 

Mini Gumbo Pot Pies (Take 2)

View fullsize gumbo-pot-pie-pic1-500x264.jpg
View fullsize gumbo-pot-pic-pic2-500x138.jpg
View fullsize gumbo-pot-pie-pic3-500x188.jpg

Mini Gumbo Pot Pies (Take 2)

A few months back, I put up a recipe for mini seafood gumbo pot pies, spicy little pescatarian pots of joy that were topped with puff pastry crust.  After visiting New Orleans, I decided to revisit this recipe and tweak it here and there.  I learned so much on my trip and got a serious lesson in NOLA cooking from my friend, Gwendolyn Scott, who owns her own catering company out there.  We caught the whole thing on film and wrapped it into my first webisode of Exotic Table, which I’ll post a little later this week! (All of the pics here are from the video.)

That NOLA smoked sausage is just irresistible, so you know I had to throw a little andouille in…I also made some changes to my “holy Trinity” ratio (holy Trinity is Louisiana’s catch phrase for onions, celery and peppers, which are key to their cooking) and added in a lot more okra to help thicken up my gumbo.

Thick, rich, spicy and hearty, but elegant enough to serve to dinner guests – little mini gumbo pot pies are a fun twist on an old favorite.  Enjoy!

Ingredients

Yields 8 10-ounce ramekins

1 stick unsalted butter

¾ cup all-purpose flour

2 tbsps butter

1 large onion, finely chopped

1 green pepper, finely chopped

1 celery, finely chopped

1 fresno, finely chopped

1 (1/2  lb) andouille sausage, diced

4 or 5 garlic cloves, minced

Creole seasoning (recipe follows, a little over 4 tbsps)*

4 cups chicken stock

2  cups sliced okra

1/3 cup peas

½ cup heavy cream

2 dried bay leaves

½ cup sliced green onion

small handful of cilantro, finely chopped

small handful of parsley, finely chopped

1 lb mixed seafood (lump crab, rock or small shrimp, bay or small scallops, shelled lobster)**

salt and freshly ground black pepper to taste

lemon juice to taste

1 egg (beaten with a bit of cream or water)

2 sheets of puff pastry, thawed according to package directions

Procedure

Preheat oven to 400° F.

I like to start by making the roux since it takes some time to develop color.   That is, melt butter in a heavy bottomed cast-iron pan (large enough) or dutch oven over medium heat.   Add the flour and whisk.  Continue to whisk at very frequent intervals (semi-constantly) for 15 to 20 minutes until the mixture has turned a deep chocolate brown.  Be careful not to burn.

In a separate skillet, melt butter over medium-low heat and add onions and a bit of salt (to draw out the moisture).  Cook for about 2 minutes and add peppers, celery.  Cook for another 5 minutes, and push to veggies one side.  Crank up the  heat, and brown the sausage in that side of the pan.  When browned, add minced garlic and creoled seasoning, mix in the veggies, and let cook for about 30 seconds to a minute until fragrant.  Remove from heat, and, if the roux is ready (good timing!), add directly to the roux.

To the cooked roux, add the chicken stock and whisk to fully incorporate.  Add the onion mixture as discussed, okra, peas, heavy cream, and bay leaves.  Make sure none of the roux is stuck to the bottom or in the crevices of the pot.  Bring mixture up to a boil and lower to a simmer for 20 minutes.  You want it to thicken up, so leave it partially covered.

On a floured surface, roll out the puff pastry to about 1/8th of an inch thick.  Using pastry cutters or a glass that’s larger than the diameter of your ramekins, cut out 8 circles.  Make sure they are large enough to fit over top the ramekins.

To the gumbo, add the green onions, chopped herbs, and seafood.  Adjust seasonings at this point, adding salt, pepper and a shot or two of lemon juice, if needed.  Ladle gumbo evenly into ramekins.

Brush the tops of the ramekins on the outside with the egg wash.  Place puff pastry circles on top, crimp to your desired effect, and brush entirely with the egg wash.  Use a knife to make slits into the top to let the steam escape.  Place ramekins on baking sheets and bake for 20 to 25 minutes until the top is brown and crusty.

*Creole Seasoning:

1 tsps onion powder

2  tsps garlic powder

1  tsps dried oregano leaves

3/4 tsp dried sweet basil

1  tsps dried thyme leaves

½ tsp black pepper

½ tsp white pepper

¼  tsp cayenne pepper (whatever you can stand!)

½ tsp celery seed

2 tsps sweet paprika

½ tsp ground mustard

**For the seafood, I like to use small pieces for a few reasons.  (1) The seafood has to fit into the ramekins with room for all of the other great stuff, and (2) I only put the seafood in right before it goes into the oven – small pieces will cook perfectly (without overcooking) and pre-cooked items, like crab, don’t turn to mush.   If you are using larger shrimp or decide to do this in a casserole dish rather than individual ramekins, adjust your cooking time accordingly.

tags: pot pie, mini pot pie, gumbo, New Orleans, Creole seasoning, andouille, NOLA cooking, seafood recipes
categories: all-3, recipes, man-friendly, main dishes-1
Monday 06.20.11
Posted by Aliya LeeKong
 

Pork Belly “Griot”

View fullsize belly-pic1-500x333.jpg
View fullsize belly-pic2-500x333.jpg
View fullsize belly-pic3-500x166.jpg
View fullsize belly-pic4-500x166.jpg

Pork Belly “Griot”

A signature dish in Haitian cooking is Griot.  Cubes of pork shoulder are marinated overnight or for a few days in a combination of habanero chile, garlic, shallot and bitter oranges.  The pork is then stewed in its juices until cooked through.  Finally, the delectable pieces are deep-fried to a crispy finish and served with an eye-wateringly good sauce, Sauce Ti Malice, again spiked with habanero.

My version of this dish is a bit labor-intensive, I have to admit, but is completely worth it.  If you are one of those people that shy away from fatty pieces, this dish is not for you, but for those that love pork belly, the method I used can be adapted to any flavors you like and results in a meltingly delicious dish.

I like to start by brining the pork belly to keep it juicy during the cooking process.  I infuse the brine with the same marination ingredients used in the original dish. If you have extra time, you can start with a dry marinade the first day, then brine and cook the next, and finish the third.  Whew!  Three day pork belly…are you up for the challenge?

The belly is then cooked confit, which is to say its cooked in its own fat.  You can use olive oil or duck fat if you like as a substitute.  I like the belly to cool in the cooking fat overnight.  The flavor develops, and, in fact, since confit has long been used as a method of preservation, you can keep it like that for at least a week.  The belly is then carved up, seared to create a crisp exterior, and served however you like.  I make a Haitian habanero-infused vinegar, called pikliz, and dress a light salad with it.  The pork belly is crackingly crisp with an indescribable melting tenderness, peppered with hints of garlic and habanero.  Enjoy!

Ingredients

Serves 6 to 8 as an entrée; serves 12 to 16 as an appetizer

1 (3 ¼-½ lb) pork belly, with skin

3 lbs lard (or olive oil / duck fat to cover)

Brine:

9 cups water

1 ¼ cups kosher salt

1/3 cup light brown sugar

12 garlic cloves, minced

2 shallots, minced

zest of 1 lemon

zest of 2 oranges

2 habanero peppers, minced

2 tsps black peppercorn

4 cloves

8 bay leaves

1 small bunch of thyme

Procedure

As I mentioned, I infuse the brine with the flavors of a typical Haitian griot marinade.  If you have time, you can marinate the pork belly in the garlic, shallots, zests, and habaneros overnight, and make the brine without these ingredients.  Otherwise, we’ll start with the brine.

In a medium-sized saucepan, heat 4-5 cups of the water with all brine ingredients.  Cover and bring up to a boil.  Boil covered for 2 minutes and then pour into a pitcher that contains the remaining amount of water, making sure that this water is ice cold (to cool down brine).  This allows you to save time and not wait for the brine to cool thoroughly before pouring over the pork belly.

I like to use a 1 to 2 gallon ziploc freezer bag for the brining.  Place the belly in the bag and pour in the cooled brine.  Remove as much air as possible before sealing.  Let brine at room temperature for 5 hours.  Conversely, you could also keep it in the refrigerator overnight for a maximum of 8 to 9 hours.

Preheat oven to 225° F.

Melt lard in a dutch oven.  Remove pork belly from brine, rinse off excess salt and ingredients, and dry thoroughly.  Carefully, slip pork belly into the lard and cook in oven for 3 ½ to 4 hours until fork tender.  Move belly to a baking dish or other storage container and cover completely in lard.  Refrigerate for a minimum of 12 hours.

To finish, make sure the pork belly has had time to sit out, so the lard can easily be wiped of.  Remove skin with a sharp knife (it peels off pretty easily).  Cut into serving-sized pieces (smaller for hors d’oeuvres or appetizer, larger for entrée size).

Heat a large skillet over medium-high heat.  Pan should be pretty hot.  Place pork belly, fat side down into the skillet and reduce heat to medium-low.  Some of the fat should render out – pour out if too much is accumulating in the pan.  Flip, when brown (3 to 5 minutes), and finish the other side.  If it’s a thick piece, after browning, place on a baking sheet in a 300° F oven to warm through.

tags: pork belly, griot, Haitian cooking
categories: appetizers, recipes, all-4, main dishes-1
Monday 05.02.11
Posted by Aliya LeeKong
 

Peruvian-Style Roast Chicken

View fullsize chick-pic1-500x333.jpg
View fullsize chick-pic2-500x333.jpg
View fullsize chick-pic3-500x333.jpg

Peruvian-Style Roast Chicken

A few weeks back on Facebook, I asked people to share their favorite family dishes – authentic, traditional food they love to eat at home.  As you know, I love to take old world flavors and traditions and reinvent them in ways that we can use in our every day cooking.  One dish that came up was aji de gallina, a typical Peruvian dish.  Chicken is cooked and topped with a rich creamy sauce that includes walnuts, garlic, breadcrumbs, and parmesan and is spiced with the yellow aji amarillo pepper.  The sauce is incredibly addictive and the aji lends such distinctive flavor and just the right amount of heat.

I had a craving the other night for roast chicken, which I think is the ULTIMATE in winter, comfort food.  Roast chicken is also a complete blank canvas, and, like everyone else, I’m constantly searching for ways to take it to the next level.  When I looked at the components of the Peruvian sauce, the ingredients called to mind a tasty stuffing, so I decided to convert aji de gallina into a roast chicken spiced with aji amarillo and filled with a beautiful, nutty, cheesy stuffing.

If you can get past the whole trussing part, roast chicken is extraordinarily easy and satisfying to make.  This recipe creates a gorgeous result – golden brown, tender and juicy, and snap-crispy skin.  The aji and cumin butter rub is what gives the skin that great texture.  The stuffing – bacon, onion, garlic, spices, walnuts, parm – creates the moisture inside the chicken.  I always make a little more stuffing than what fits in the bird and throw it into some ramekins because stuffing always goes quickly!  Enjoy!

Ingredients

Stuffing:*

2 slices thick-cut bacon, cut into small dice

1 medium onion, diced

1 ½ tsps ground aji amarillo

½ tsp ground cumin

3 or 4 garlic cloves, minced

½ cup white wine

¼ cup chicken stock

¼ cup heavy cream

5 slices white Pullman bread, cubed

½ cup raw walnut halves, toasted and crushed

1/3 cup ground parmesan

1 egg, beaten

Chicken:

5 tbsp unsalted butter, room temperature

1 ½ tsps ground aji amarillo

½ tsp ground cumin

1 4 – 5 lb roasting chicken

salt and freshly ground black pepper

Procedure

Before I start, there are a few keys to a crispy, succulent roast chicken.  First, the chicken must be completely dry.  After removing the covering and rinsing and drying the inside of the chicken, I like to place it, uncovered, on a rack on a baking sheet on a low shelf in the fridge (not touching anything!).  I leave it there for a couple of hours or even up to a day.  The air circulates and dries out the chicken from all sides.  Second, the chicken has to be at room temperature before putting it in the oven.  Take it out of the fridge at least an hour before you plan to cook.  The next things are a hot starting temperature and lots of salt!  Which we’ll get to…

Preheat the oven to 475° F.

For the stuffing, in a medium skillet on medium heat, add the diced bacon.  Cook for a few minutes until browned and crispy, remove using a slotted spoon to a paper towel-lined plate, and set aside.  Add the diced onion, aji, and cumin back into the pan with the bacon fat (should be enough but add a little oil or butter if not).  Cook for 3 to 5 minutes until the onions are translucent, add the minced garlic and cook for another minute.  Add the white wine and let reduce, stirring, until it’s almost all evaporated.  Add in the chicken stock and cream and reduce the heat, simmering for another 2 to 3 minutes until thickened.  Remove from heat and let mixture cool.

In a large bowl, add the bread cubes, crushed walnuts, parmesan, egg, bacon and onion mixture.  Stir to evenly distribute.  (Don’t do this until you are ready to stuff the chicken, so the stuffing doesn’t get soggy.)

For the chicken, combine softened butter with aji and cumin.  Massage butter all over the outside and inside of the bird.  Season generously with salt and freshly ground black pepper, and stuff with the stuffing.

At this point, you want to truss the bird for even cooking.  Here’s a great video (http://ruhlman.com/2010/07/how-to-truss-a-chicken.html) .

Place the stuffed, trussed chicken on a rack in a roasting pan, breast-side up, and into the oven.  Cook for 25 minutes and reduce the heat to 375° F.  Cook for another 45 minutes or so.  The safe internal temperature of cooked chicken is 165° F.  I check the temperature with a thermometer inserted into the thigh joint and actually take mine out of the oven around 155° F.   I then rest it on a cutting board for 15 minutes to finish cooking.

Slice (the juices should run clear) and serve!

*For this dish I create more stuffing than I can fit in the bird because I don’t think what can fit inside is enough for a side dish!  I like to take the leftover stuffing and throw it into buttered ramekins or a small, greased baking dish.  For the last 25 minutes of cooking, I throw the excess stuffing into the oven and let it get browned and crispy.

tags: roast chicken, Peruvian cooking, comfort food, recipes for winter
categories: all-4, recipes, main dishes-1
Monday 03.07.11
Posted by Aliya LeeKong
 

Spicy Seafood Gumbo Pot Pie

View fullsize pot-pie-pic1-500x333.jpg
View fullsize pot-pie-pic2-500x333.jpg
View fullsize pot-pie-pic3-500x166.jpg

Spicy Seafood Gumbo Pot Pie

Pot pie is one of those winter comfort foods that is really unmatched.  A warm, creamy, thick (typically, chicken) soup-like interior with delicious vegetables topped or, better, encased in crusty, buttery pastry dough.  It really wasn’t something I ate regularly growing up and always felt like such a treat.

I was trying to come up with a way to get the soul satisfaction of a pot pie but with a little more kick to it.  I didn’t feel like going WAY spiced – say, with a Thai or Indian base – and yet I wanted something more.  Gumbo immediately popped into mind, and that was it!  All of those Creole spices, that rich thickness…gumbo pot pie was born.

I decided to go with all seafood because I actually created this recipe for some pescatarian friends of mine, but feel free to add some andouille (yum!) or whatever you like in there.  I also cook the roux for this to a milk chocolate color (time saving…) though I know people who cook their roux for at least an hour and a half to get that super dark chocolate look.  Finally, I make these individual-sized for fun and only put the pastry on top to keep it easy and, perhaps, slightly healthier.  The gumbo is rich, spicy, hearty and has some heat to it (depending on your hot sauce and cayenne doses) and tastes amazing with bites of the pastry dough…Enjoy!

Ingredients

Yields 12 8–ounce round ramekins

1 stick unsalted butter

¾ cup all-purpose flour

2 tbsps butter

3 cups chopped onion, small dice (approximately 2 medium onions)

1 cup chopped bell or small sweet pepper, small dice (approximately 4 or 5 small sweet peppers)

¾ cup chopped celery

Creole seasoning (recipe follows, a little over 4 tbsps)*

4 or 5 garlic cloves, minced

1 cup sliced okra

½ cup peas

6 cups of chicken, seafood or vegetable stock

a few dashes of Worcestershire

a few dashes of hot sauce

2 bay leaves

½ cup sliced green onion

small handful of cilantro, finely chopped

small handful of parsley, finely chopped

½ cup heavy cream

1 ¾ lbs mixed seafood (lump crab, rock or small shrimp, bay or small scallops, shelled lobster)**

salt and freshly ground black pepper to taste

lemon juice to taste

1 egg (beaten with a bit of cream or water)

2 sheets of puff pastry, thawed according to package directions

Procedure

Preheat oven to 400° F.

I like to start by making the roux since it takes some time to develop color.   That is, melt butter in a heavy bottomed cast-iron pan (large enough) or dutch oven over medium heat.   Add the flour and whisk.  Continue to whisk at very frequent intervals (semi-constantly) for 15 to 20 minutes until the mixture has turned a deep chocolate brown.  Be careful not to burn.

In a separate skillet, melt butter over medium-low heat and add onions and a bit of salt (to draw out the moisture).  Cook for about 2 minutes and add peppers, celery and creole seasoning.  Cook for another 5 minutes, add minced garlic and let cook for about 30 seconds to a minute until fragrant.  Remove from heat, and, if the roux is ready (good timing!), add directly to the roux.

To the cooked roux, add the onion mixture as discussed, okra, peas, stock, Worcestershire, hot sauce and bay leaves.  Make sure none of the roux is stuck to the bottom or in the crevices of the pot.  Bring mixture up to a boil and lower to a simmer for 20 minutes.  You want it to thicken up, so leave it uncovered.

On a floured surface, roll out the puff pastry to about 1/8th of an inch thick.  Using pastry cutters or a glass that’s larger than the diameter of your ramekins, cut out 12 circles.  I like to poke holes now while it’s on a flat surface, so use a fork to poke little holes or a knife to make a few slits in each circle.

To the gumbo, add the green onions, chopped herbs, seafood and heavy cream.  Adjust seasonings at this point, adding salt, pepper and a shot or two of lemon juice, if needed.  Ladle gumbo evenly into ramekins.

Brush the tops of the ramekins on the outside with the beaten egg.  Place puff pastry circles on top, crimp to your desired effect, and brush entirely with the egg wash.  Place ramekins on baking sheets and bake for 20 to 25 minutes until the top is brown and crusty.

*Creole Seasoning:

1 ½ tsps onion powder

1 ½ tsps garlic powder

1 ½ tsps dried oregano leaves

1 tsp dried sweet basil

1 ½ tsps dried thyme leaves

½ tsp black pepper

½ tsp white pepper

¼ – ½ tsp cayenne pepper (whatever you can stand!)

½ tsp celery seed

1 tbsp sweet paprika

½ tsp ground mustard

**For the seafood, I like to use small pieces for a few reasons.  (1) The seafood has to fit into the ramekins with room for all of the other great stuff, and (2) I only put the seafood in right before it goes into the oven – small pieces will cook perfectly (without overcooking) and pre-cooked items, like crab, don’t turn to mush.   If you are using larger shrimp or decide to do this in a casserole dish rather than individual ramekins, adjust your cooking time accordingly.

tags: seafood recipes, Creole seasoning, pot pie, gumbo, recipes for winter
categories: all-4, recipes, main dishes-1
Monday 02.14.11
Posted by Aliya LeeKong
 

Lamb Meatballs with Quince & Black Olives

View fullsize lamb-meatballs-pic1-500x383.jpg
View fullsize lamb-meaballs-pic2-500x166.jpg
View fullsize lamb-meatballs-pic3-500x333.jpg

Lamb Meatballs with Quince & Black Olives

Lamb with quince is a truly classic combination and features heavily in the cuisines of Morocco, Tunisia, Greece, Turkey, the Republic of Armenia, and throughout the Middle East.  I recently had a stew with both that was the inspiration for this recipe – that perfect combination of sweet, tart, and textures along with the slow-cooked lamb was heavenly.

If you haven’t tried quince, it’s a hard, yellow, apple-looking fruit that is pretty tart.  The ones in the East are sweeter and more palatable raw, but both truly mellow and deepen in flavor with cooking.  I’ve been told beating them with a rolling pin helps bring the juices to the surface if you happen to be cooking them down for a jam or jelly.  They are also positively delicious poached in wine with spices and sugar and served with a bit of cream.

I went for a meatball here because there was a game on and my husband and his friend were playing guinea pigs.  These are, without a doubt, man-friendly.  The quince jam adds the perfect touch of sweetness and acidity, and I threw in the black olives for a briny touch.  I like to use both dried and fresh mint here because they offer different flavors, and I served these with a kicked-up, Greek yoghurt dip of sorts to add a bit of spice.  I personally prefer my meatballs a bit softer and melt-in-your-mouth rather than firm, so these meatballs are super moist and tender with a bit of char from the browning.  Enjoy!

Ingredients

Serves 6

3 shallots, chopped into chunks

5 garlic cloves

2 lbs ground lamb

2 scallions, finely chopped

2 tsps salt

2 ½ tsps cumin

¾ tsp paprika

½ tsp cayenne

½ tsp black pepper

2 ½ tsps dried mint*

½ cup black olives, pitted and finely chopped

1/3 cup quince jam

¾ cup plain breadcrumbs

2 egg yolks

8-10 mint leaves, finely chopped

handful of parsley, finely chopped

3 tbsp vegetable oil

Procedure

Preheat oven to 375° F.

In a food processor, pulse shallots and garlic until finely minced / almost a paste.

To a large mixing bowl, add the ground lamb and make a well in the center.  Add shallot/garlic mixture and rest of the ingredients except the vegetable oil.  Carefully, mix to ensure even distribution.  I like to make a claw with my hands and fold over the meat mixture repeatedly.  You don’t want to mash or over mix as it will make the meatballs tough.

Using wet hands, roll even-sized pieces of the mixture into balls until all of the mixture is finished.  I make my meatballs about 1 ½ inches in diameter, so if you make yours larger or smaller, adjust the cooking time appropriately.
Heat a large skillet over medium-high heat.  Add oil and place meatballs into the pan.  These brown pretty quickly, so I cook for about 30 seconds to a minute on each side.  Work in batches so as not to overcrowd the pan, and place browned meatballs in a baking dish.

Once all have been browned, cover baking dish with foil, and place in the oven.  Bake for 20 to 25 minutes until cooked through but tender.

Serve warm alongside your favorite dipping sauce.

*For the dried mint, rather than putting it straight from the jar, I like to crush it between my palms and then dust it into the bowl.  It helps to bring out the natural oils..

tags: lamb, lamb meatballs, quince, black olives, meatballs
categories: all-4, recipes, main dishes-1
Monday 01.31.11
Posted by Aliya LeeKong
 

Scallops with Thai Citrus Salad

View fullsize scallop-pic1-500x333.jpg
View fullsize scallop-pic2-500x333.jpg
View fullsize scallop-pic3-500x333.jpg

Scallops with Thai Citrus Salad

It’s amazing the difference a year makes.  I was actually in Thailand last winter and had the most beautiful pomelo salad, the inspiration for this recipe.  A pomelo is a huge, grapefruit-like fruit that is found all over Southeast Asia.  It’s sweet and lacks any of the bitterness typical of a grapefruit.  Pomelos have a thick, spongy pith, and the fruit shreds into segments easily, which makes it perfect for a salad.  When I got back, I had a hard time sourcing one, and then, lo and behold, a few weeks ago, I found them in Chelsea Market and on Fresh Direct!  They are a beautiful fruit, so I’m so happy they are becoming more accessible.

When I was in Bangkok, I had the opportunity to spend the day at Face Bangkok, a cool, open-air restaurant compound with a swanky bar, a Thai restaurant, an Indian restaurant, and even a spa on site!  The restaurant is part of a larger group that has branches in Jakarta, Beijing and Pudong, and is fantastic (if you happen to be visiting Bangkok) for a nice night out or drinks soaking up the chic scenery.  I did a bit of intensive Thai cooking there, and this is my version of one dish that I learned.

This salad has a few different flavors and textures that I think work really well with a beautifully-caramelized, sweet scallop (as well as on its own!).  If you can’t find a pomelo, delicious mandarins (satsumas are my fave) that are in season right now would work really well with all of the tangy and salty flavors.  The peanuts and toasted coconut provide a great texture, a little umami from the fish sauce, sweetness and tartness from the tart lime juice – it’s light and refreshing and perfect to break up winter’s heavy dishes and take in some seasonal citrus.  Enjoy!

Ingredients

Serves 4 as a main course or 6 for a starter

Salad:

¾ cup dried, unsweetened coconut (chips or shredded)

¾ cup peanuts, toasted and crushed

3 scallions, white and light green parts only, thinly sliced

½ shallot, finely minced

1 cup pomelo, segmented*

8-10 mint leaves, chiffonade

Citronette:

juice of 1 ½ limes

½ tsp salt

1 ½ tsps sugar

pinch of cayenne

1 ½ tsps fish sauce

1 ½ tbsps extra virgin olive oil

Scallops:

3 tbsps olive oil

2 lbs jumbo sea scallops

salt and freshly ground pepper to taste

1 tbsp butter

Procedure

In a skillet over medium heat, add the dried coconut and toast until the color is deep and golden.  This process happens fairly quickly, so keep your eye on it.   Add to a bowl along with the crushed peanuts, scallions, shallot and pomelo (and any juice that resulted from segmenting the pomelo).

For the dressing, combine the lime juice, sugar, salt and cayenne and whisk to dissolve thoroughly.  Add the fish sauce and then slowly drizzle in the extra virgin olive oil whisking to combine.  Toss salad with dressing, add mint, and season to taste.

For the scallops, you want to develop a nice deep color on them.  Thoroughly dry the scallops before cooking and season generously with salt and pepper.  If they are wet, they won’t caramelize and will sort of steam in the pan.  Also, if you crowd the pan, they will also steam, so work in batches if necessary.

Heat a skillet over medium-high heat and add olive oil.  When it’s just about to smoke, add the scallops, dragging a little so that the side gets coated in olive oil.  Cook for about two minutes and add the butter.  Let cook for another minute or so and then flip.  They should have a nice brown crust on them.  At this point, I turn the heat down just a tad.  Let them cook on this side for another three minutes or so until they are cooked to your desired level.  I like mine so that the middle third looks a bit translucent and the top and bottom thirds are opaque, but remember different-sized scallops will take differing cooking times. This is what I use to cook jumbo or U10-sized scallops.

Serve scallops hot with the cool salad spooned over top.

*The pomelo is a pretty unique fruit. To segment, I like to cut off as much of the rind and pith as possible.  Then, I take out the larger, membrane-enclosed segments (much like a grapefruit or orange) and slip a pairing knife under the membrane.  Once this is peeled away, the inner fruit shreds into little pieces.  I like to do this over a bowl and catch all of the residual juice, which adds great flavor to the salad.

tags: seafood recipes, scallops, Thai citrus salad, citrus
categories: salads, recipes, all-5, soups & salads, main dishes-1
Thursday 01.20.11
Posted by Aliya LeeKong
 

Spiced Sunchoke Soup

View fullsize sunchoke-pic1-500x333.jpg
View fullsize sunchoke-pic2-500x333.jpg
View fullsize sunchoke-pic3-500x333.jpg

Spiced Sunchoke Soup

I am still in the aftermath of my holiday party, and this is yet another dish I served that people seemed to really enjoy.  Yes, soup can be a fantastic hors d’oeuvres – I served this in little demitasse cups with some chopped cilantro and homemade croutons.  It looks elegant, and you can make it in advance and keep it warm, which for me is ideal when other items require more maintenance…

Sunchokes are root vegetables and look a lot like ginger, though taste nothing like it.  They have been popping up all over menus in NYC and Brooklyn.  My husband and I hit this adorable new place in Fort Greene called Roman’s (amazing, chocolate sorbet to die for), and he was shocked to see sunchoke soup on the menu.  He acted like they were biting my style (I almost cried laughing)…and I had to explain that they are seasonal and delicious and that’s why they are everywhere.

You might also see sunchokes labeled as Jerusalem artichokes, and their flavor does resemble the artichoke heart though they are not related at all.  I picked mine up from the Union Square Greenmarket, and they were perfectly sweet and creamy.  This soup incorporates some key spices – cumin, coriander, and turmeric – that really bring warmth to the dish but still allow the signature sunchoke flavor to shine through.  The coconut milk bumps up the sweetness and gives it a beautiful, creamy mouth-feel, and the shot of lemon juice brightens up all of the flavors.  This is easy enough as a go-to weeknight soup but refined enough for a dinner or holiday party.  Enjoy!

Ingredients

Serves 4 to 6 / Yields approximately 5 ½ cups

3 tbsps unsalted butter

1 onion, finely diced

½ tsp ginger, minced

1 small green chili, finely chopped (preferably thai or serrano, to your heat preference)

¾ tsp ground cumin

1 tsp ground coriander

¼ tsp turmeric

pinch of cayenne

3 or 4 cloves garlic, minced

7 medium-sized (12 oz) sunchokes, scrubbed, peeled, and thinly sliced*

1 bay leaf

2 ½ cups chicken or vegetable stock

1 can coconut milk

a few squeezes of fresh lemon juice

salt to taste

chopped cilantro or parsley

Procedure

Heat a dutch oven or other heavy-bottomed pot over medium-low heat and add butter.  When foam subsides, add onion and a bit of salt to draw out the moisture.  Let sweat for a minute or so.  Add ginger, green chili, cumin, coriander, turmeric and cayenne.  Cook for 5 to 7 minutes until onions are translucent and super soft.  Add garlic and cook for 1 minute until fragrant.

Add sunchokes and stir to combine.  Let cook for about 2 minutes until sunchokes begin to soften.  Add bay leaf and stock, bring up to a boil, and lower to a simmer.  Simmer covered for 20 to 25 minutes.  You want the sunchokes to easily break apart with your wooden spoon, which will really depend on how thinly you sliced them.

Remove bay leaf, and, in a blender or using a hand blender, puree until smooth.  Add coconut milk, lemon juice, and adjust seasoning to taste.  Serve hot with a little fresh chopped cilantro on top.

*After peeling the sunchokes, keep them submerged in cold water until ready to use.  Thinly slice right before throwing into the pot.

tags: soups for winter, sunchoke soup, sunchoke recipes, Jerusalem artichokes, weeknight meals, holiday recipes
categories: all-5, soups & salads, recipes, vegetarian, main dishes-1
Wednesday 12.22.10
Posted by Aliya LeeKong
 

Spicy Mussels with a Kokum-Coconut Broth

View fullsize mussel-pic1-500x333.jpg
View fullsize mussel-pic2-500x333.jpg
View fullsize mussel-pic3-500x333.jpg

Spicy Mussels with a Kokum-Coconut Broth

This Goa trip I just took has inspired a host of recipes – the fresh ingredients, bright flavors and colors, interesting cultural mix.  I seriously have to restrain myself to prevent all of my recipes from being monopolized by this cuisine.  This dish is one I was dreaming about after I made traditional Goan fish curry during my first few days there – an elegant take on mussels using a popular Konkani ingredient, kokum.

I posted about kokum before I left for my trip, but it’s effectively the dried rind of a local plum-like fruit.  It adds acidity and tartness to dishes there.  It’s often interchanged with fresh tamarind, so you could add a touch of that here instead if you happen to have it on hand.  You won’t get the same flavor, but I’ll bet it’s still delicious.

I love how cheap mussels are.  I average about 1 pound per person for a main, and at $3 a pound, there’s not a better deal.  They work incredibly well for entertaining – cheap yet elegant.

The combination of coconut and kokum was really popular in Goan dishes, though they tend to use freshly grated coconut.  A lot of their dishes also had this beautiful balance of tart, creaminess from the coconut, and a bit of sweetness from jaggery, which is unrefined cane or palm sugar.  Coconut milk is a lot easier to work with, so I used that here, and I used honey instead of sugar because I love the flavor.

The resulting broth is warmly spiced, with heat from the chili, acidity and tartness from the kokum and wine, and tempered by the creamy coconut milk.  A splash of fresh lemon juice and cilantro add brightness, and the dish is surprisingly light.  I toasted up some slices of a crunchy, French loaf with olive oil and a bit of salt and used it to sop up the sauce.  Decadent. Enjoy!

Ingredients

Makes 2 to 4 servings

2 lbs fresh mussels, scrubbed and beards removed*

3 tbsps butter

2 shallots, finely chopped

1 finger chili, halved and split

½ tsp ground coriander

¼ tsp ground cinnamon

¼ tsp ground black pepper

4 cloves garlic, minced

¼ cup white wine

1 can coconut milk

1 ½ tsps honey

1 to 3 pieces of kokum (depending on the strength/souring quality of the kokum)

1 handful cilantro, finely chopped

Salt to taste

2 scallions, green and light green parts only, thinly sliced

squeeze of lemon juice

Procedure

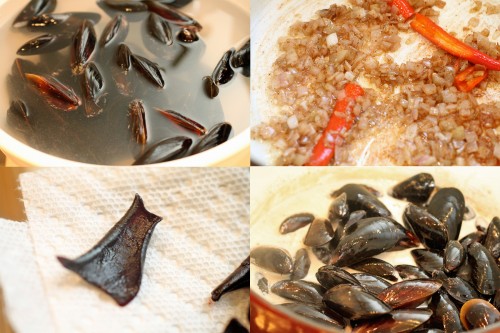
Heat a medium-sized pot or dutch oven over medium-low heat.  Add butter and when foam subsides, add shallots and a pinch of salt to draw out the moisture.  Cook for a minute or two and add in the chili and ground spices.  When shallots are translucent, add minced garlic and cook for 30 seconds or so or until it’s fragrant.

Add white wine and reduce until very little is left.  Add coconut milk, honey, kokum pieces, and 2 tablespoons of the cilantro.  Some kokum is extremely sour, so start with 1 piece and increase up to 3 depending on how tart you’d like your broth.  Bring mixture up to a boil and lower to a simmer.  Cook for 5 to 7 minutes or until the liquid has reduced by half.  Taste and adjust seasoning at this point.

Throw in the mussels and scallions.  Bring temperature up to a simmer again, and cook covered for a few minutes until mussels open.  Mine took somewhere between 3 and 4 minutes – you don’t want to overcook.

Squeeze fresh lemon juice over mussels, transfer to a bowl, and sprinkle remaining cilantro on top.  Serve hot with big pieces of toasted, crusty bread.

*I think a key to making delicious mussels is thoroughly cleaning them.  I like to scrape around the outside of each mussel with a pairing knife, removing any debris and hairy parts (beard).  Prepare an ice- cold bowl of water and add sea salt until the water tastes pretty salty.  Rinse off mussels, place in salt water, and refrigerate for a minimum of a half hour.  The mussels will release a lot of their sand and grit this way.  Remember to rinse again before cooking and discard any open mussels.

tags: mussels, seafood recipes, spicy mussels, kokum
categories: all-5, recipes, main dishes-1
Monday 11.29.10
Posted by Aliya LeeKong
 

Saffron & Roasted Garlic Spaghetti Squash Gratin

View fullsize squash-pic1-500x333.jpg
View fullsize squash-pic2-500x333.jpg
View fullsize squash-pic3-500x166.jpg
View fullsize squash-pic4-500x333.jpg

Saffron & Roasted Garlic Spaghetti Squash Gratin

Saffron, without a doubt, is an expensive spice to work with.  I’m a bit of a deal hunter when it comes to it and always search around when I’m traveling to see if I can get it on the cheap.  I remember spotting it in the medina in Marrakech for a ridiculously low price and basically carting home a bushel full.  It wasn’t incredibly fragrant (and quite frankly the color was off) but eh, it was saffron!  It’s been sitting in my spice cabinet ever since – the lousiest, tasteless saffron I’ve ever met…and somehow I still won’t part with it.

The saffron for this dish I picked up during my visit to Mercat de la Boqueria a few months back.  I still trekked around to each stall that sold it to make sure I got the cheapest one!  Got it right this time.  This stuff has an incredible perfume and was beautiful in this dish.

When I dug deep into why I thought spaghetti squash and saffron would pair well together, I realized the mental origin of this dish might seem a bit strange.  There’s a South Asian pudding that can be made with either rice or vermicelli called kheer; it’s often scented with saffron.  This, to me, was like a savoury version of it.

The saffron, of course, compliments the flavor of the spaghetti squash, which I boost a bit with a touch of brown sugar.  The sweet, roasted garlic adds a lovely nuttiness and works incredibly well with the freshly grated parm.  I love this dish.  It’s a bit sinful, but healthier as far as gratins go since we’re using squash.  Cheesy, creamy, nutty with the perfume of saffron – Enjoy!

Ingredients

Yields 1 2-quart casserole dish

2 medium-sized spaghetti squash

5 garlic cloves

olive oil

salt and freshly ground pepper

½ stick butter

¼ cup all-purpose flour

2 cups milk

¼ cup crème fraiche

generous pinch of saffron

pinch of cayenne

a few dashes of hot sauce

1 ½ tsps light brown sugar

½ cup freshly grated parmesan

Procedure

Preheat oven to 375° F.

Poke holes with a knife into the spaghetti squash on all sides and place on a foil-lined baking sheet.  Season garlic cloves with a little olive oil, salt and pepper and wrap separately in foil.

Bake the squash for 1 hour turning every 15 to 20 minutes.  Cooking time may vary depending on the size of the squash.  Let it cool.  Split the squash lengthwise (should easily cut) and remove the seeds.  The flesh should be easy to pull out – if not, place it cut side up back on the baking sheet and cook for a bit longer.  I like to use a fork around the edges to pull out the squash flesh.  You want all of it to be separate, like spaghetti.  Reserve in a bowl.

Remove the garlic after another 15 minutes or so.  It should be soft, caramelized, and smell nutty and fragrant.

Reduce oven to 350° F.

In a saucepan over medium-low heat, melt butter.  Add flour and cook 2 to 3 minutes, whisking continuously.  Add milk, crème fraiche, saffron, cayenne, hot sauce and sugar.  At this point, you can purée the roasted garlic and add it.  I actually just added the cloves right in and used my whisk and the heat to break it up.  Continue to whisk and simmer for 5 to 6 minutes.  It should be at a slow bubble.

Combine béchamel mixture with squash and transfer to a greased 2-quart baking dish.  Sprinkle the freshly grated parmesan all over the top, and bake for 45 to 50 minutes until brown and bubbly.

tags: spaghetti squash gratin, squash recipes, spaghetti squash recipes, gratin recipes, saffron
categories: all-5, vegetarian, recipes, side dishes, main dishes-1
Monday 11.22.10
Posted by Aliya LeeKong
 

Pork Chops with Red Onion & Apple Chutney

View fullsize pork-chop-pic1-500x333.jpg
View fullsize pork-chops-pic2-500x333.jpg
View fullsize pork-chops-pic3-500x166.jpg

Pork Chops with Red Onion & Apple Chutney

I worked at a restaurant where we used to make “marmalades”, one of which was a tomato based one.  The process called for red onions to be cooked down first, and it always amazed me what a subtle flavor it provided against the sweet backdrop.  I had to try the combination with apples just to see and what better way for the season than to prepare them as a chutney with golden, crusty pork chops.

I’m big on brining, particularly when it comes to pork chops and chicken.  I’m trying to figure out the mechanics of brining the massive turkey we’re going to prepare for Thanksgiving, but I haven’t – how we’re going to fit it all in the fridge is beyond me.  But anyway, here, the brine imparts incredible moisture to the chops.  It’s important to dry them fully before searing to achieve that beautiful caramelized exterior, the most flavorful part!

This apple chutney is a delicious addition to any pork dish really.  The sweet red onions melt into the background.  The fennel and cumin work perfectly with the pork, and the warm, mellow apples bring it all together.  I used fuji apples here because they hold their shape, but feel free to use whatever you have on hand.  This dish is incredibly versatile – it goes from simple weeknight supper to deserving holiday meal.  Enjoy!

Ingredients

Serves 4

4 pork loin or rib chops, 1” thick

olive oil

butter

Brine:

8 cups water

½ cup sea salt

¼ cup + 2 tbsps sugar

1 tsp dried thyme

½ tsp coriander seeds, crushed

½ tsp whole black peppercorns, crushed

1 bay leaf

Red Onion & Apple Chutney:

2 tbsps olive oil

1 tbsp unsalted butter

1 tsp fennel seed

½ tsp cumin seed

¼ cup red onion, finely minced

3 ½ cups apples, peeled, cored, and cut into a ½“ dice

½ tsp salt

2 tsps sugar

¼ to ½ tsp crushed red pepper

3 tbsps rice vinegar

Procedure

Brining really helps the pork chops stay juicy during the cooking process.  In a medium saucepan, heat 2 cups of water.   Add salt, sugar and brining spices and stir until all of the salt and sugar has dissolved.  Add this mixture to the remaining 6 cups of cold water.  In a baking dish, lay pork chops flat and pour brine over them.  Cover with plastic wrap and refrigerate for anywhere from 3 to 24 hours, turning chops regularly.  When ready to cook, take out from brine removing any whole spices that are stuck to the chops and dry thoroughly.  If you don’t have time to brine, feel free to skip this step altogether.  Results will still be delicious.  Make sure that chops are room temperature before cooking.

For the chutney, heat a skillet over medium heat.  Add oil and butter.  When foam subsides, add fennel seed and cumin seed.  Cook for about 1 minute until the spices are fragrant.  Add the red onion and cook for another 2 to 3 minutes until translucent.  Add apples, salt, sugar, and crushed red pepper and cook for another 3 to 4 minutes.  Add vinegar, reduce heat to low and let simmer 15 minutes, stirring frequently.  Remove from heat and adjust seasoning if necessary.

For the pork chops, preheat oven to 350° F.  Season chops lightly with salt and pepper if brined, more generously if not.  Heat a large skillet over medium-high heat.  Add oil to just coat the bottom of the skillet and a pat of butter, if desired.  When oil shimmers, add chops and cook for 2 to 3 minutes on each side.  Finish for 7 to 10 minutes in the oven depending on how well done you like your chops.  I did 2 minutes per side plus 7 in the oven for medium temperature.

Serve chops topped with chutney.

tags: pork chops, red onion & apple chutney, apple chutney, recipes for fall, holiday recipes, brined pork
categories: all-5, recipes, main dishes-1
Wednesday 11.03.10
Posted by Aliya LeeKong
 

North African-Inspired Chicken Terrine

View fullsize pastilla-pic1-500x333.jpg
View fullsize pastilla-pic2-500x333.jpg
View fullsize pastilla-pic4-500x166.jpg

North African-Inspired Chicken Terrine

So this friend of mine gave me this incredible book on terrines from the Phaidon bookstore in Soho which has a stunning array of recipes for different ways to make terrines.  The book was truly inspirational, and, for some reason, my mind immediately went to this tasty, Moroccan pie I had a few years ago in Marrakech.  It’s called bastilla or even pastilla, I’ve seen, and it’s traditionally a layered pie of pigeon with egg curd and sugary, cinnamon almonds all wrapped in a phyllo dough-like pastry.  A sweet and savoury pie of sorts that I thought would be fantastic as a terrine.

I spend so much time cooking for my husband – it causes me to trend towards manly food.  I.e. generally meaty, possibly in casserole form (he will take down with zeal anything layered in a casserole dish..) with some heavily starchy side.  I envisioned this dish for a girls’ brunch alongside a lightly dressed salad, and, true to form, every woman that’s eaten this has raved.   As a woman, sometimes (a lot of times…) I walk out of the house in an outfit that specifically women will appreciate.  This is my culinary version of that.

And I believe this incarnation of pastilla is an elegant one.  The pillowy puff pastry gives way to sweet, cinnamon-y crunchy almonds and then gently spiced, buttery minced chicken.  This is a great do ahead dish – I’ve actually travelled with the terrine as is (which also happens to be great cold) and when I get to a friends house, I wrap it up in puff pastry, throw it in the oven, and voilá!  20 minutes later the perfect compliment to a great bottle of wine and some cheese or even an elegant main dish.  Subtle, complex, surprising, textural, sweet and savoury all at the same time.  Enjoy!

Ingredients

Yields (1) 12” x 4” Terrine

¾ cups marcona almonds

¼ cup granulated sugar

¼ tsp ground cinnamon

3 tbsps unsalted butter

2 shallots, finely chopped

1 medium-sized leek, white and light green only, thinly sliced

¼ fennel bulb, finely chopped

¼ tsp grated ginger

½ tsp ground cinnamon

pinch ground allspice

¼ tsp turmeric

½ tsp ground coriander

½ tsp ground black pepper

1 dry bay leaf, crushed

1 pinch saffron

¼ tsp lemon zest

3 cloves garlic, minced

4 boneless, skinless chicken thighs, cut into ½” cubes

4 eggs

½ cup heavy cream

salt and pepper

1 sheet of puff pastry, thawed per package insructions

1 egg beaten with a little water or heavy cream (egg wash)

Confectioners sugar (for dusting)

Procedure

Preheat oven to 250° F.  Place almonds on a sheet pan and let toast in the oven for 50 minutes.  Cooking at a lower temperature for a longer period of time allows the nuts to toast all of the way through, not just on the outside.  Remove and cool.   Pulse in a food processor with sugar and cinnamon.  Set aside.

Turn oven temperature up to 350° F.  In a medium-sized skillet, melt butter over medium-low heat. Add shallots, leek, fennel and ginger and cook until softened (3 to 5 minutes).  Add all of the ground spices, the crushed bay leaf, the saffron and the lemon zest and continue to cook for another 2 to 3 minutes.  Add garlic and let cook for 30 seconds until fragrant.  Set aside mixture to cool.

In a food processor, add cubed chicken thighs and eggs and process until just a little chunky and transfer to a bowl.  I prefer a slightly chunky texture – feel free to process to a paste if you want a smoother consistency.  Add cream and the cooled shallot/leek mixture.

Line a terrine mold with plastic wrap so that the longer pieces of plastic wrap hang over the shorter sides of the mold.  Create a layer on the bottom with half of the almond mixture.  Add the entire chicken mixture and top with the other half of the almond mixture.

Overlap the plastic wrap across the top to cover the terrine completely.  Cover with a lid and place in a roasting pan or other baking dish.  Add boiling water until it comes halfway up the sides of the terrine mold and bake for 1 hour.  Remove from water bath and roasting pan and refrigerate.  Cool completely to unmold.  You can stop at this point in the recipe and serve the terrine either warm or cold – it’s delicious eiher way.

For those who want the extra decadence of the pastry, preheat the oven to 400° F.  Roll out the puff pastry on a lightly floured surface.  Place the cooled terrine top side down on the puff pastry.  Fold over to make a package of sorts and seal with a little water.  Flip over and transfer to a sheet pan.

Brush the egg wash over the exposed pastry and bake for 15 to 25 minutes to brown.  Dust with a little powdered sugar – slice, serve, and enjoy.

tags: chicken terrine recipe, North African cooking, bastilla, pastilla
categories: appetizers, recipes, main dishes-1, all-6
Wednesday 10.27.10
Posted by Aliya LeeKong
 

Sumptuous Beef & Rice Casserole w/ Raw Mango Salad

View fullsize pilau-pic1-500x333.jpg
View fullsize pilau-pic2-500x333.jpg
View fullsize pilau-pic3-500x333.jpg
View fullsize pilau-pic4-500x333.jpg
View fullsize pilau-pic5-500x333.jpg

Sumptuous Beef & Rice Casserole w/ Raw Mango Salad

The first time my mom made my husband pilau we were having a party at my place in NYC.  There were around 25 people over, celebrating, drinking wine and eating standing up because I didn’t have enough chairs for everyone.  The layout of my apartment is pretty open with the kitchen, dining, and living rooms all visible.  No joke, at the end of his 4th helping of the dish, my husband stood up abruptly, pronounced my mom had purposefully “roofied” him…and promptly went to sleep on the couch in front of the other 20-some-odd people!

In the spirit of dishes that work well for the holidays, I thought I would put this recipe out since it’s a delicious communal or even potluck dish.  Hanging with my parents this weekend meant my mom and I were seriously throwing down in the kitchen, and pilau was definitely on the menu.  Typically, there’s so much “a little of this, a little of that” that it’s pretty close to impossible to get a solid recipe out of the whole affair.   But I managed to pry this one out.  And even with this dish, it takes a bit of intuition and a little praying to get the beef and the rice to be cooked perfectly at the same time.  But it is so worth it.  For me, it’s old school comfort food, a taste memory that dates back to my early childhood.

I did a little research, and pilau = pilaf which is actually Turkish!  And this is extraordinarily exciting for me because I am planning a trip to Turkey later this year.  Cannot wait to cook their version…Much like another rice casserole I’ve mentioned, biryani, this dish originated in Persia and can be found throughout the world, taking its individual form in different cultures.   Afghani palau has carrots, raisins, and nuts; in parts of East Africa, coconut milk is included.  And West Indian pelau is closer to their peas and rice with the inclusion of chicken or another protein.

This version is a true combination of my mom and I.  The ingredients are largely hers, but I changed the technique to try to create the best textures and flavors possible.  I made a raw mango salad to go along with it, which provides the perfect cool and acidic balance to the warmly spiced rice and beef that melts in your mouth.  Enjoy!

Ingredients

Yields 6 to 8 servings

Pilau:

2 lbs beef chuck, cut into 1 ½ inch cubes

5 tbsps canola oil

1 stick of cinnamon

3 whole cloves

3 whole black peppercorns

3 whole cardamom pods, cracked open

1 ½ tsps cumin seeds

2 tsps black mustard seeds

1 large yellow onion, finely chopped

1-3 green chilies, finely chopped

½ tsp grated ginger

½ tsp of ground cumin

¼ tsp of ground coriander

4 cloves of garlic, minced

1 ½ bunches of fresh cilantro, chopped (including stems)

1 marrow bone (totally optional, I added it for extra flavor)

4 ½ cups light beef stock or beef stock + water

3 ½ cups of basmati rice

Salt and pepper to taste

Raw Mango Salad:

juice of 1 lime

2 ½ tsps rice wine vinegar

½ tsp salt

¼ tsp cayenne

1 raw mango, peeled, seeded and diced

1 cucumber, peeled, seeded and diced

1 apple, peeled, seeded and diced

½ red onion, minced

2 small sweet red peppers, minced

4 to 6 mint leaves, chiffonade

small handful of cilantro, finely chopped

Procedure

For the Pilau:

Preheat the oven to 325° F.

Thoroughly wash the basmati rice until the water runs clear.  You want to remove as much starch as possible.  Set aside.

Heat a large Dutch oven over high heat.  Liberally season the cubed beef.  Add oil to the pot and sauté beef for 2 to 3 minutes in batches.  You don’t want to overcrowd the pot or the meat won’t brown.  Also, you don’t want to cook the beef all the way through – just enough to brown the outside.  Using a slotted spoon, spoon beef onto an unlined plate and set aside.

Turn the heat down slightly to a medium heat and add all of the whole spices.  When they start to pop, add onions, chilies, ginger, ground cumin and ground coriander and cook for 6 to 8 minutes.  Lower the heat if necessary – you want the onions to turn translucent but not brown.   Add the garlic and ½ of the chopped cilantro and cook for another minute.  Add beef back to the pot along with any juices that have accumulated on the plate and the marrow bone if using.

This is where it gets slightly tricky.  Pre-measure the 4 ½ cups of liquid – you can use a light stock, water or some combination of the two.  You want to keep track of how much liquid you’ve added because the rice will become sticky if you end up adding too much and will be dry if not enough is used.  Add liquid to the pot to just cover the meat.  Place the lid on the pot, and turn the heat up.  When the temperature comes up and it’s about to boil, place covered pot in the oven and cook for about 1 ½ hours or until the meat is fork tender.

Once meat is cooked, add rice and the remaining liquid to get to 4 ½ cups.  Re-season if necessary and place back in the oven for another 30 to 35 minutes until rice is cooked and fluffy.  Rice may take a little less or more time depending on the type of rice you are using, type of pot in which you are cooking, etc., so I would advise checking it at intervals.

When serving, use the other half of the chopped cilantro to garnish the top.

For the Raw Mango Salad:

Combine lime juice, rice wine vinegar, cayenne and salt in a small bowl to create a dressing.

In a separate bowl, toss together raw mango, cucumber, apple, red onion, sweet red pepper, mint and cilantro.  Add dressing and adjust seasoning if necessary.

tags: casserole, pilau, beef and rice casserole, comfort food, holiday recipes
categories: recipes, all-6, soups & salads, main dishes-1, man-friendly
Monday 10.18.10
Posted by Aliya LeeKong
 
Newer / Older