X

Sign up to receive exclusive recipes, tips, updates and other goodies from Aliya!

  • Home
  • Blog
    • All
    • Recipes
    • Spices + Ingredients
    • Lifestyle, etc.
    • Travel
  • The Cookbook
  • The App
  • Media
    • All Media
    • Video
  • About
  • Passions
Aliya LeeKong
  • Home
  • Blog
    • All
    • Recipes
    • Spices + Ingredients
    • Lifestyle, etc.
    • Travel
  • The Cookbook
  • The App
  • Media
    • All Media
    • Video
  • About
  • Passions

Nan-e Barbari (Persian Flatbread)

View fullsize File May 03, 11 08 40 AM.jpeg
View fullsize File May 03, 11 08 18 AM.jpeg

NAN-E BARBARI

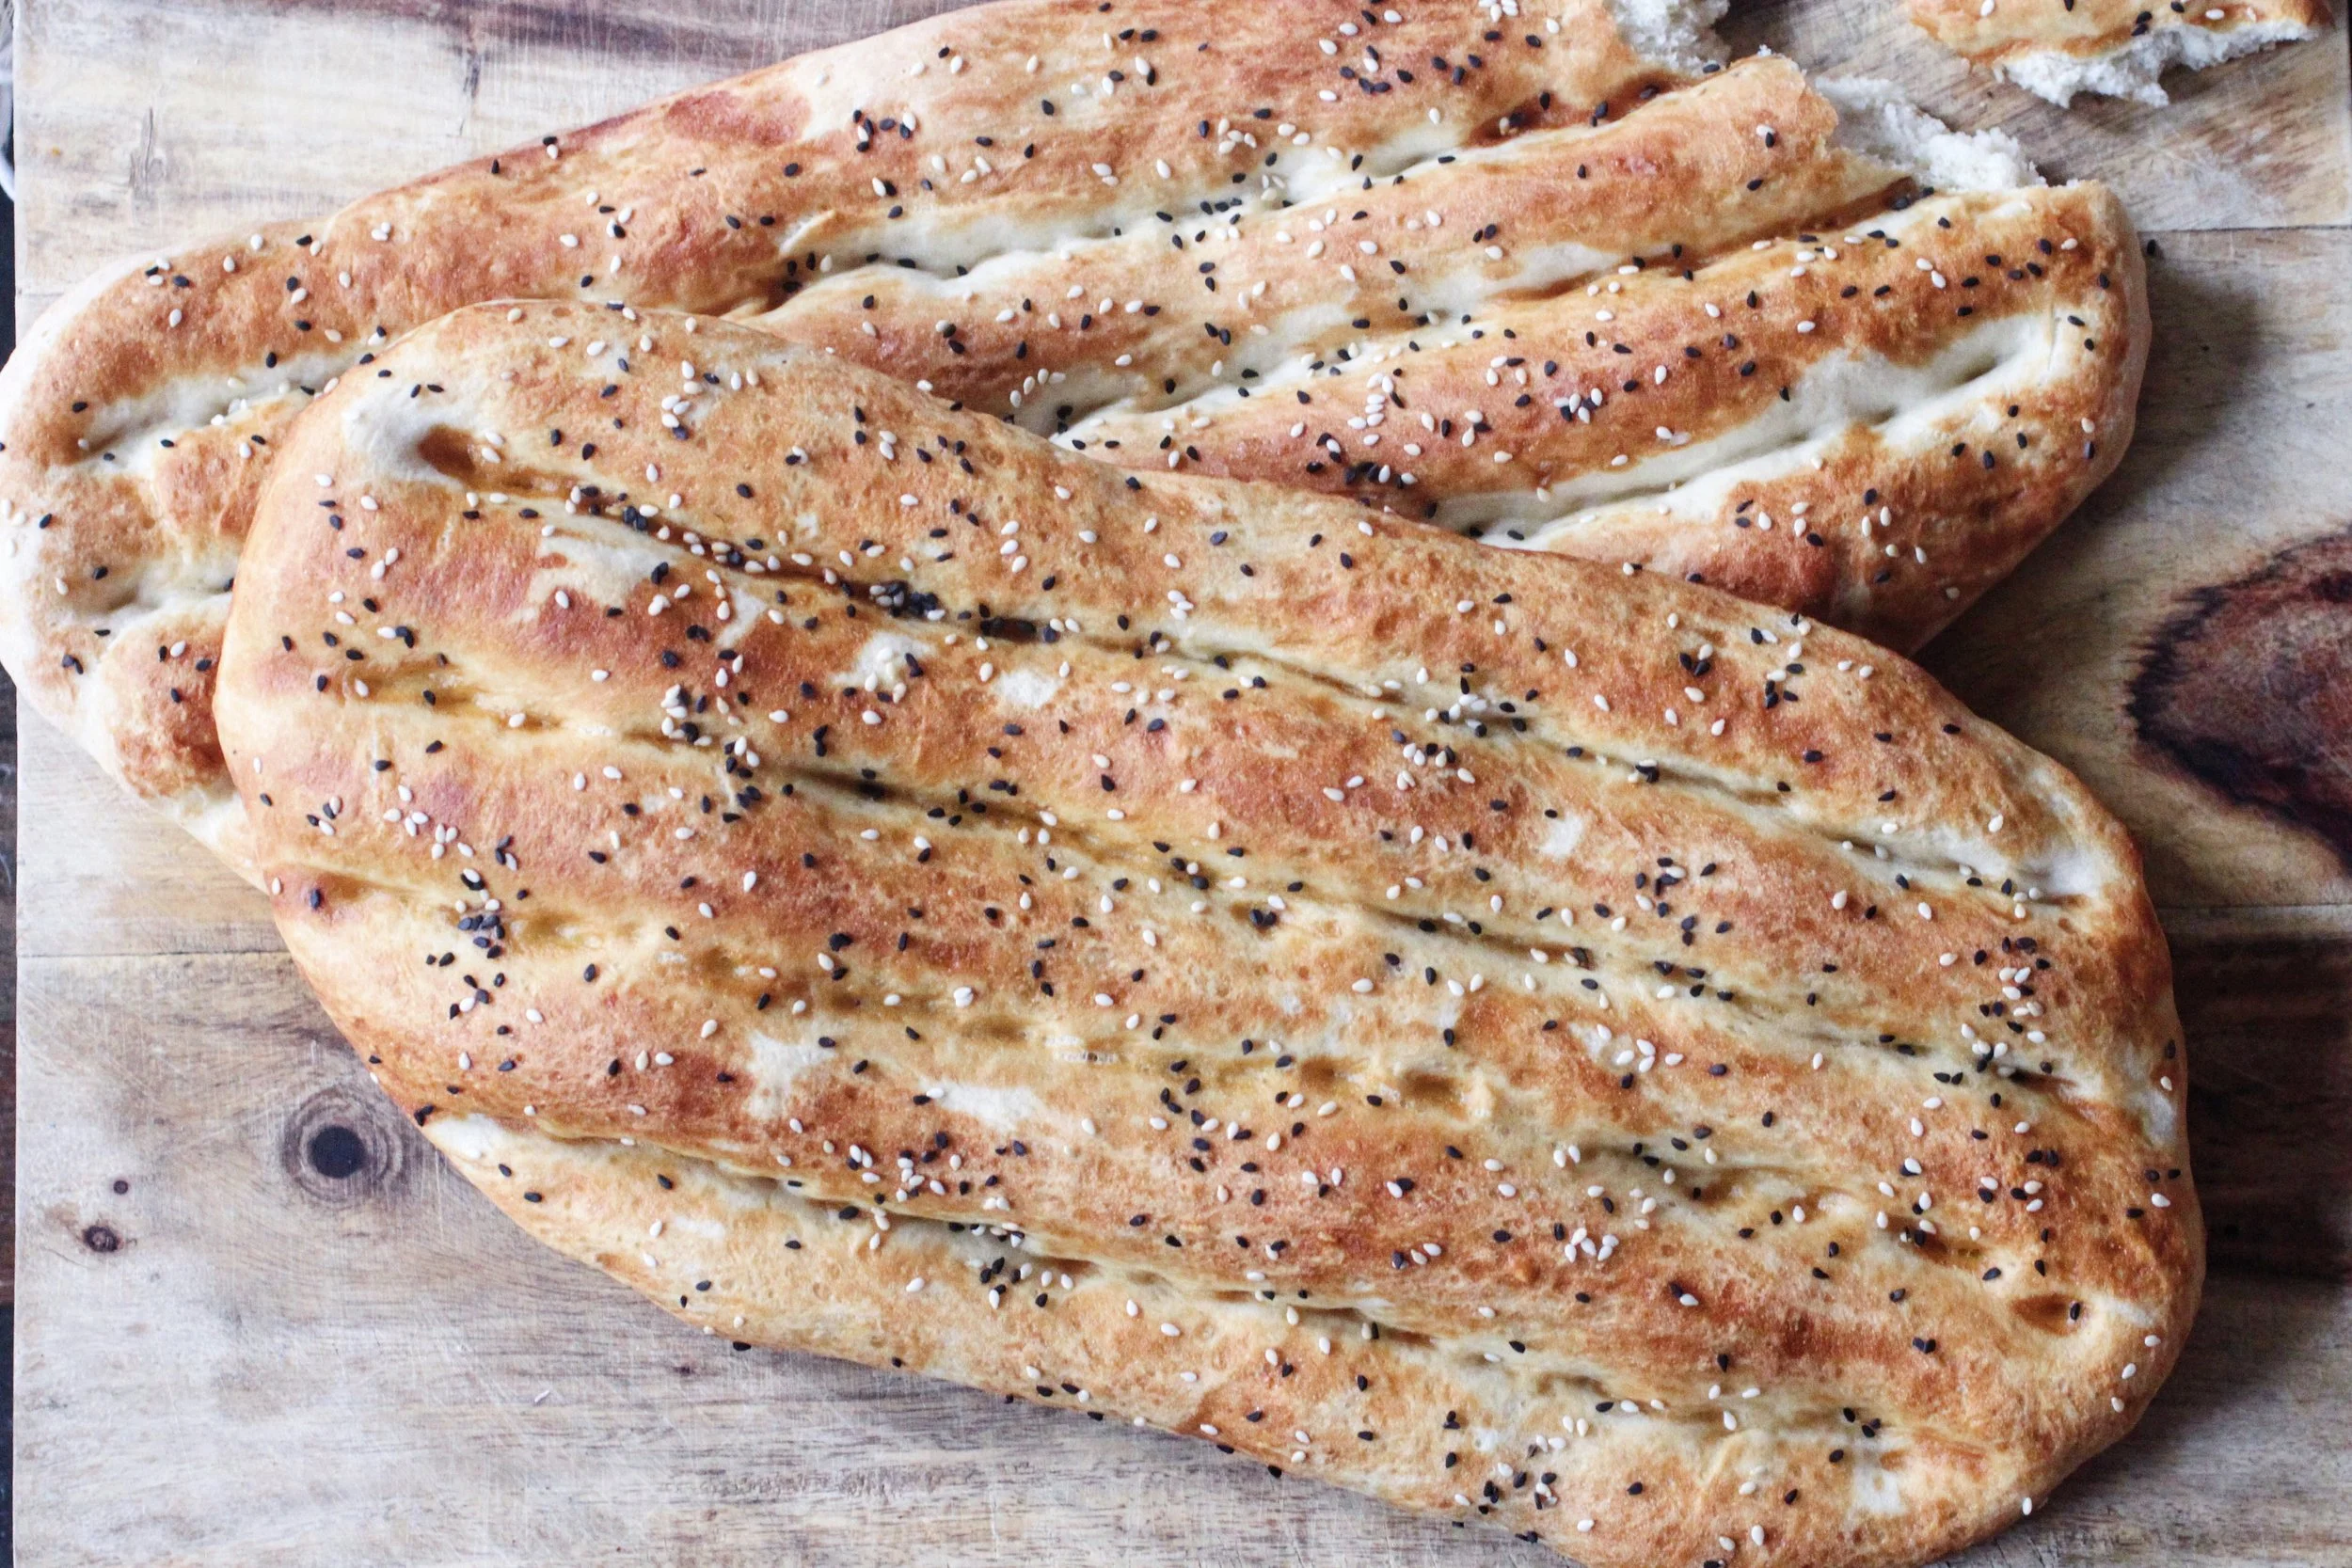
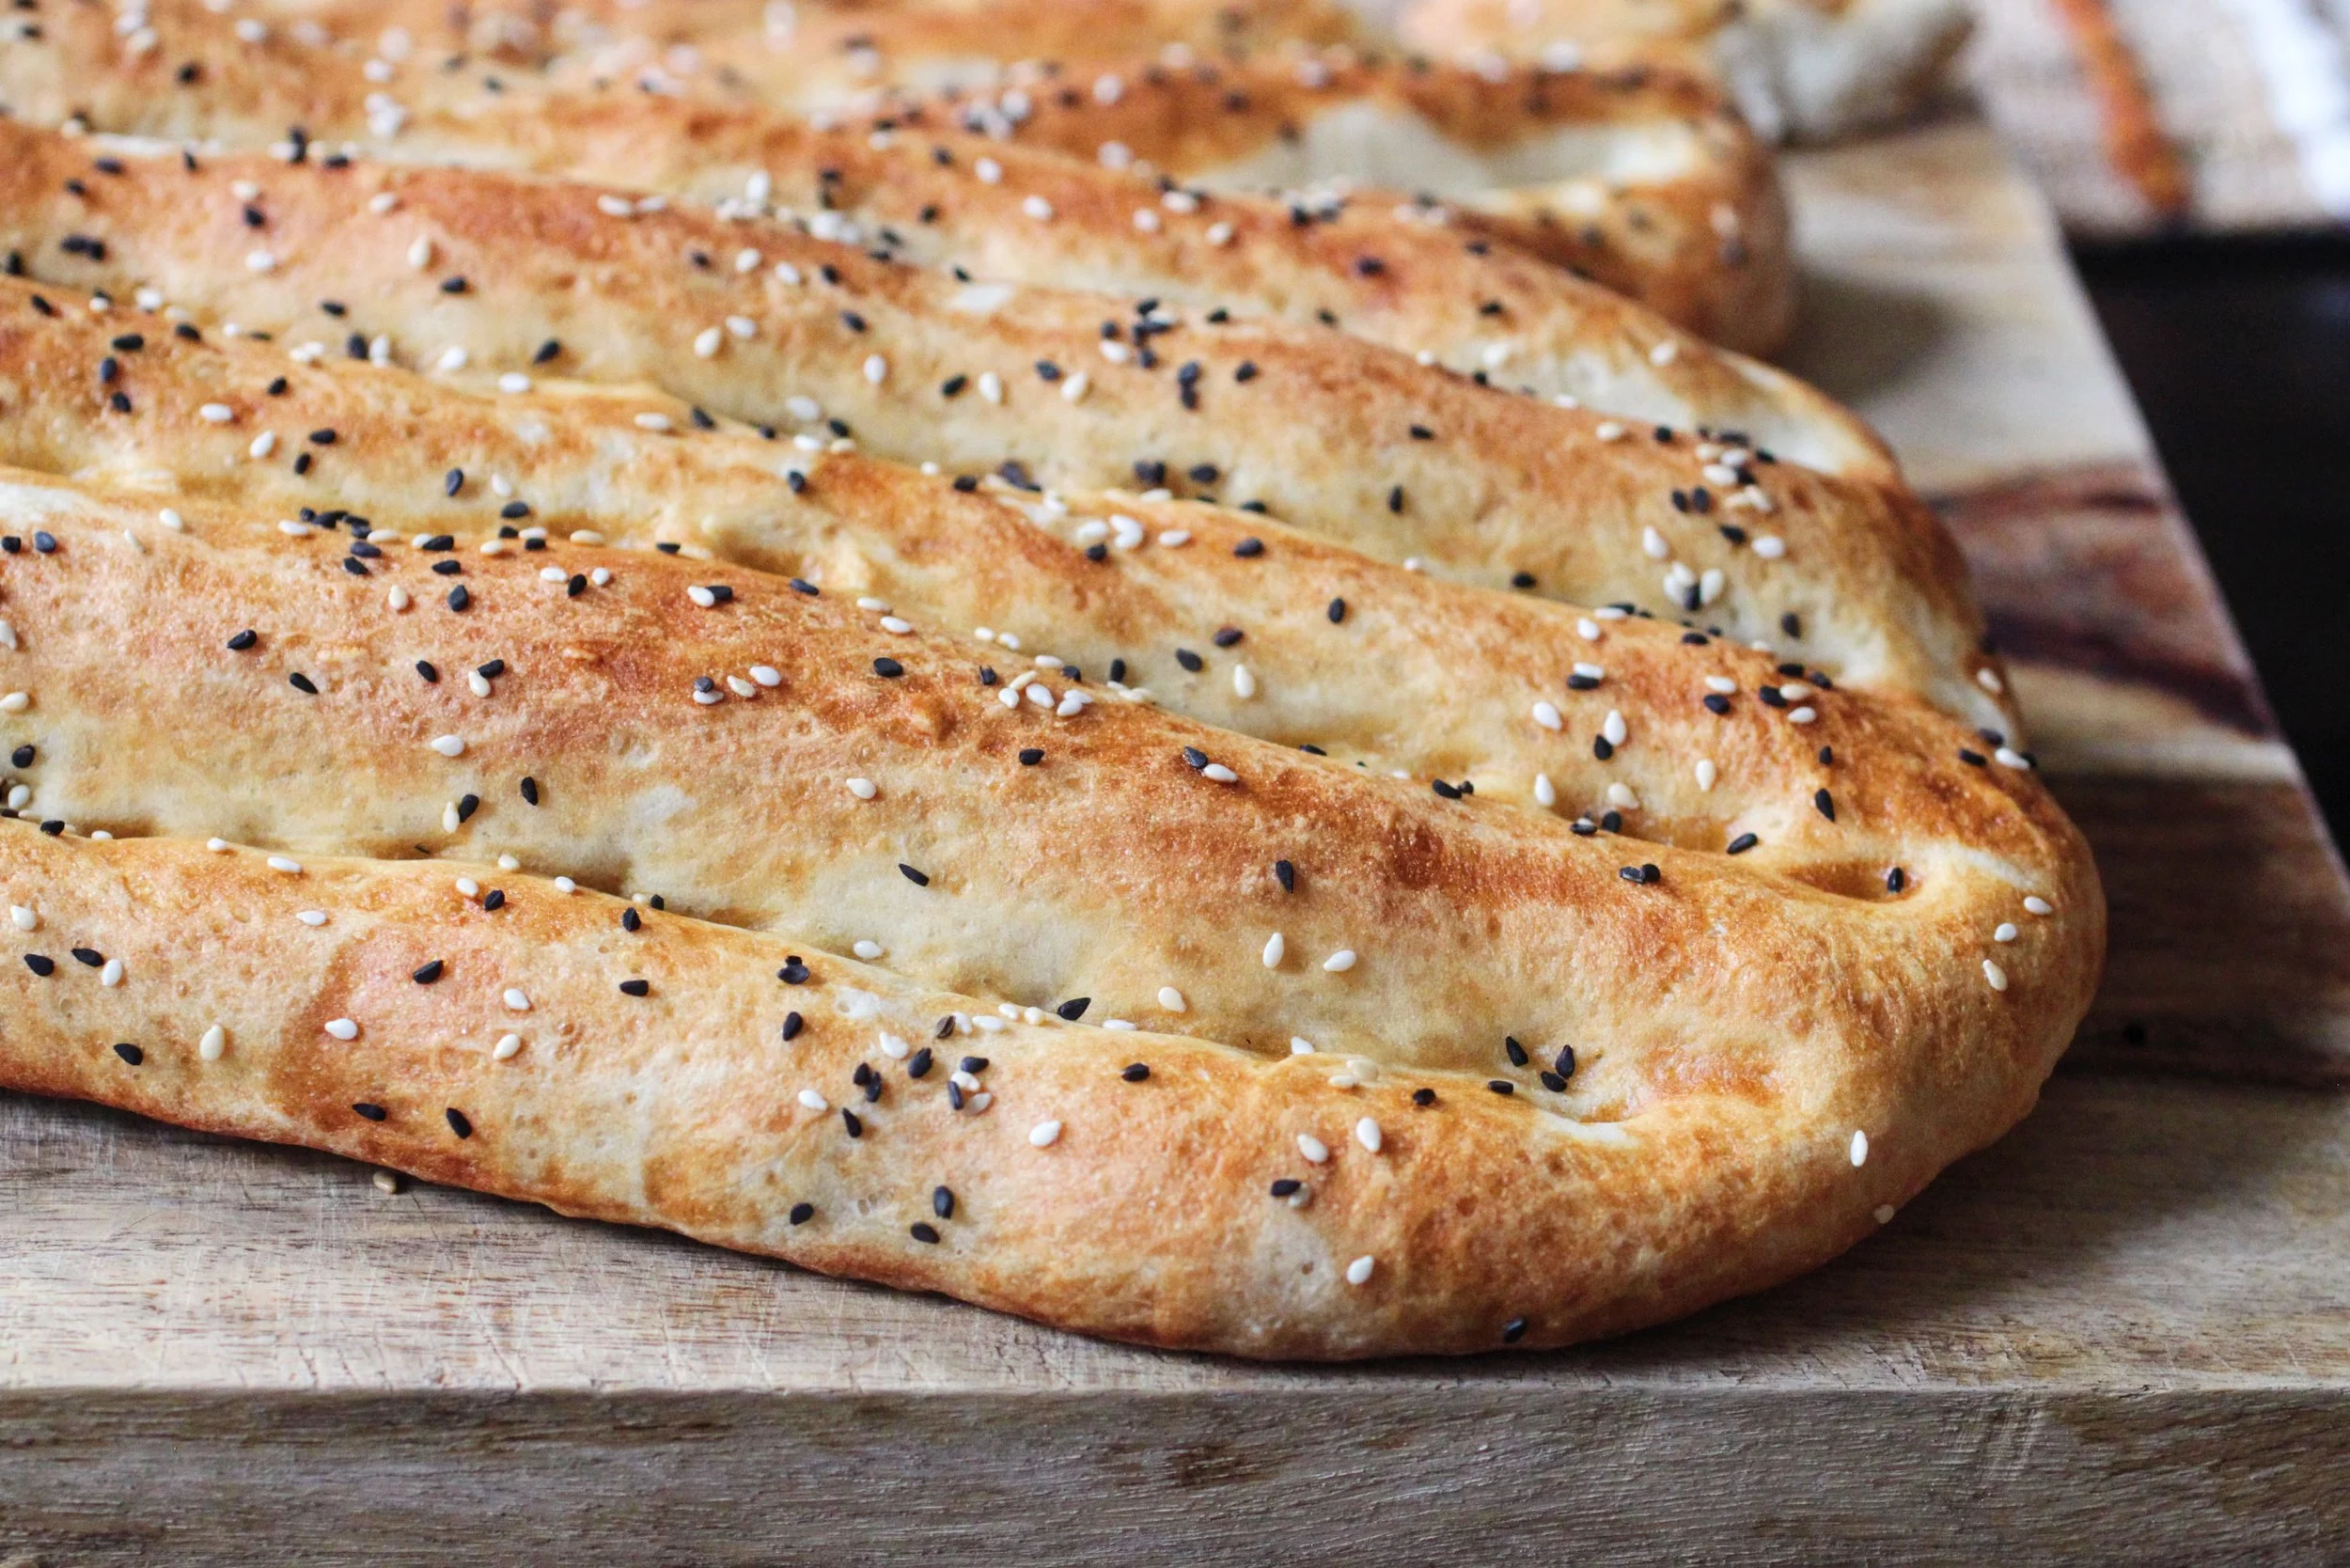
I know - I've been going a bit bread and baking crazy on here.  But THIS!  Nan-e barbari, more commonly known as Persian flatbread, is a very thick flatbread that is popular in Iran.  It is similar to Indian naan in shape and cooking technique, but is pretty unique and spectacular with it's grooves and coating of nigella and sesame seeds.  I call it "statement bread".

Nan-e barbari requires 2 rises but literally cooks within 20 minutes on a well heated stone in the oven.  There is also a paste that the bread is coated with called a roomal that gives the bread its crispy texture and golden brown color.  This flatbread is most commonly eaten as a breakfast bread, served with a type of feta cheese, clotted cream or jam, but I love it fresh out of the oven with dinner - to scoop up a curry or stew or hug some grilled kebabs.

I use a preheated pizza stone to bake this, but you can also use a cookie sheet.  Just know that you might not get as nice a crunch on the bottom of the flatbread.

Enjoy!

For the Dough:
1 packet active dry yeast
1 ¾ cup lukewarm water
2 teaspoons sugar
3 ¾ - 4 cups bread flour (plus more for coating pizza peel)
2 1/2 teaspoons salt

For the Paste (Roomal):
2 teaspoons all-purpose flour
1/2 teaspoon baking soda
1/2 cup water
pinch of sugar

Garnish: nigella seeds and/or white sesame seeds

In the bowl of a mixer fitted with the dough hook attachment, add the yeast, water and sugar and let stand for 10 minutes until it begins to foam.  If it doesn’t begin to foam at this point, your yeast may be bad and the dough may not rise properly.  With the mixer on low, slowly add the bread flour and salt until a shaggy dough forms.  Put the mixer on medium and let knead until a soft, smooth dough has formed (5 to 7 minutes).  You may get a little sticking to the bottom - that’s ok!  Remove the dough from the mixing bowl, form in to a ball and place in a lightly greased bowl to rise in a warm area, covered, for about an hour or until it doubles in size.

Once the dough has risen, punch the dough down and separate into two equal pieces. Shape each dough into a long oval.  Place each oval on a parchment lined cookie sheet and cover with plastic wrap to allow to rise for another 30 - 45 minutes.  

While the dough is on its second rise, preheat the oven to 450° F and allow the pizza stone to heat for 30 minutes or more on the bottom shelf. 

You can also start making the roomal. In a small saucepan over medium heat, combine all of the roomal ingredients and bring to a light boil.  Reduce heat to low and cook until the paste coats the back of your spoon and has deepened in color.  Remove from heat and set aside.

If you have a pizza peel/paddle, lightly coat with flour and place one of the pieces of dough on it (you can also use the back of a cookie sheet or a cookie sheet that has no raised sides). Make sure the dough can easily slide off so you have no issues when transferring it to the hot pizza stone.  Press down on the dough and release some of the air.  Using the side of your pinky finger, gently press down the length of the dough to make the grooves, trying not to go all the way through the dough.  Do this about 4-5 times. You can also go back over the grooves with your fingers if you want a deeper indent - up to you!  Brush the dough all over with the roomal and sprinkle with the nigella seeds and/or sesame seeds.  

Gently slide the bread on to the preheated pizza stone and cook in the oven for about 15 - 20 minutes until golden brown.  While the first piece of dough is cooking, prepare the other half.  
Barbari is best served warm, or at room temp. 

tags: flatbread recipe, pizza dough recipe, Persian flatbread, nan-e barbari, naan recipe
categories: all 5, breads & cakes, breakfast-1, recipes, traditions, vegetarian-2
Wednesday 05.03.17
Posted by Aliya LeeKong
 

Native American Heritage Day

NATIVE AMERICAN HERITAGE DAY

While Thanksgiving has long been my favorite holiday, I (unfortunately) haven't given it a ton of thought beyond a time for family and friends to get together, reset, eat, and share some beautiful moments.  The reality is the history of Thanksgiving is not so rosy, so I think I would be remiss not to pay homage to the Natives of our country.

Native American Heritage Day is the day after Thanksgiving, and it has me reminiscing about my trip to the Four Corners and the Navajo women I met and made fry bread with.  It often baffles me that Native American food is so elusive to the average person (myself included!), particularly when you think about how so many of our Thanksgiving tables originated with Natives teaching us about farming.  And when you think about it, it’s really just farm to table…right!?  They cooked according to their regions and what the land provided for them.

Over the past couple years, more and more chefs have been trying to revive this cuisine around America; it is, after all, the true heritage of this country.  As with other countries and their native cuisines, there are many different types of Native American foods based on regional tribal differences. Many cherish fry bread, and then there are some that refuse to make it because of the history of how it was born.  Eater had a great article about Native American food last summer that's a good read.

Here are a few Native recipes to get you started - enjoy!

NAVAJO FRY BREAD


CEDAR-PLANKED SALMON WITH MAPLE GLAZE AND MUSTARD MASHED POTATOES

Photo: Epicurious


WILD RICE WITH CRANBERRIES

Photo: Merci Mama


MAQUE CHOUX

Photo; Maque Choux


CORN HUSK BREAD

Photo: Cooking with Mama


THREE SISTERS STEW

Photo: NYTimes

tags: native american culture, native american food, native american heritage day, national native american heritage month
categories: all 4, appetizers 1, breads & cakes, holiday, main dishes, lifestyle-1, soups & salads, soups, traditions, vegetarian-2
Friday 11.25.16
Posted by Aliya LeeKong
 

Chipotle-Miso Butternut Squash Soup

CHIPOTLE-MISO butternut SQUASH SOUP


I know, I know - chipotle plus miso??  Obviously, this has no root in real tradition, but those flavors together are literally incredible, something I first played around with in my mind before putting them together.  I love creating new soup recipes during squash season - that sweetness is the perfect canvas for spices and flavor.  Squash creates such a lush, smooth, silky texture without even adding any cream so it’s the perfect option for dairy-free days.  

The recipe below is for a spiced butternut squash soup, but you can easily substitute pumpkin, honeynut or kabocha squash for this recipe.  Most soups call for roasting the squash first, but I skip that step here.  The cubed, raw squash cooks up while it's simmering with all of the great flavors here.  I love the smokiness and heat of the chipotle mixed with the umami and sweetness of the miso.  Such a great, quick weeknight meal.  I served it along with my pan de coco (coconut bread subbing coconut milk in this recipe)….sooooooo good!

Serves 4 to 6

2-3 tablespoons unsalted butter
1 medium onion, diced
1 shallot, diced
3 cloves garlic, minced
1/2 teaspoon brown sugar
1 butternut squash, halved and seeded and cut into a 1-inch dice (optional: save the seeds for garnish)*
1/4 cup mirin**
4 cups vegetable or chicken stock
2 tablespoons white shiro miso**
1 chipotle in adobo (canned)
Salt and lemon juice, to taste
chopped chives, for garnish

In a soup pot, melt butter over medium-low heat.   Add onion and shallot
with a pinch of salt and cook for 5 to 7 minutes until translucent.  Add the
garlic and the brown sugar and cook for another minute.

Add in the cubed squash along with the mirin and cook for 2 to 3 minutes
until the wine has mostly absorbed.  Add the stock and bring up to a simmer.
Simmer for 35 minutes, partially covered, until all of the squash are
tender.

Add in the miso and chipotle and transfer to a blender or use a hand blender
to puree to your desired consistency.  Season with salt and adjust acidity with lemon juice if necessary..

Serve sprinkled with chives & toasted seeds (if using).

* To toast the squash seeds, preheat oven to 350 degrees.  Clean seeds of any pulp and dry on paper towels. Toss the seeds with oil, salt, cumin and smoked paprika.  Toast in oven until golden brown about 10-15 minutes.  Let cool on a tray and set aside for garnish on soup.

** Mirin is a type of Japanese rice wine.  This along with the miso can be found at Whole Foods or a specialty / Asian grocer.

tags: squash recipes, squash soup, how to make squash soup, butternut squash soup, butternut squash recipes, best butternut squash recipe ever
categories: all 4, appetizers 1, main dishes-1, man-friendly, quick & easy, recipes, soups, soups & salads, vegetarian-2
Wednesday 11.02.16
Posted by Aliya LeeKong
 

The Ultimate Eggplant Dip

THE ULTIMATE EGGPLANT DIP

So I feel like the eggplant doesn’t get a lot of love!  Recently, at the market, all the stands seem to have some sort of eggplant variety:  the most common (classic), Japanese, white, Thai green, fairytale (those small purple ones above), Sicilian, baby.  I have in the past bought the Thai green eggplants when I see them in the Asian supermarkets; they are the little green round ones that can fit in the palm of your hand and are my favorite when making a thai green curry.  I just throw them in whole and let them simmer in the curry (fairytales are great for that too). 

There are so many more ways to use eggplant, though - roasting and scooping out the inside to make a great dip, breading and sautéing for an eggplant parm, or just frying and making a caponata.  Personally, I love fire-roasting eggplants, outside on coals or a gas grill or just over your gas stove flame.  Eggplants take on incredible smokiness, so I wanted to share my favorite, smoky eggplant dip from my cookbook. 

This dip is based on baba ganoush, a traditional Middle Eastern mezze of smoky eggplant purée mixed with tahini and extra virgin olive oil.  I also add a dollop of crème fraiche and a sprinkling of chives to give it that rich, party-worthy dip feel.  Fried fingerlings or other small potatoes are the perfect match for this!  Enjoy!

Ingredients

For the eggplant dip:

3 whole Italian eggplants

1 clove roasted/raw garlic, minced

2 tablespoons tahini

1 tablespoon crème fraiche

Juice of half a lemon

Salt to taste

Chives, for garnish

For the fingerling chips:

canola or peanut oil for frying

1 pound fingerling potatoes, scrubbed, skin-on

Salt, to finish

For the eggplant dip: Preheat the oven to 400° F.

Prick the eggplants all over with a fork and then place on the open flame of a gas burner.  You want to char the skin all over the eggplant to impart smokiness.  If you don’t have a gas burner, you can do this on a grill or under the broiler. 

Once the skin is charred and shriveling, transfer to a baking sheet and finish cooking in the oven for another 25 to 30 minutes. 

Let the eggplants cool before handling.  Split them open and scrape out all the flesh inside into a medium bowl.  Add the garlic, tahini, crème fraiche, lemon juice and salt and use a fork to mash everything together.  You want to create a creamy consistency but with texture.  You can also do this in the food processor if you want something smoother.  Taste and readjust seasoning.  Chill before serving.

For the fingerling chips: In a Dutch oven or large saucepan, heat 3 to 4 inches of oil to 360° F.  The oil should go less than halfway up the pot. 

Using a mandolin or with a very sharp knife, thinly slice the fingerling potatoes and transfer to a bowl of water.  Gently mix the potato slices, strain out the water and dry on paper towels.  The potatoes should be completely dry before adding to the oil or they will spatter and bubble up.

Add the fingerling slices to the oil, working in batches, and fry for about 45 seconds to 2 minutes depending on how thick you sliced them.  You basically want them golden brown.  Transfer them to a paper towel-lined plate and finish them with salt.

Serve the dip cold with fingerling chips on the side.


tags: eggplant recipes, how to cook eggplant, baba ganoush, how to make baba ganoush
categories: all 4, appetizers 1, blog, condiments, side dishes-1, vegetarian-2
Thursday 09.08.16
Posted by Aliya LeeKong
 

Strawberry Season, a Pickle, & a Jam!

STRAWBERRY SEASON, A PICKLE & A JAM!

Well….it took forever, but it has finally arrived: strawberry season.  This little window only lasts about a month up here, and I try to get out to the fields to pick my own, when possible.  Right now, I have literally the sweetest strawberries I've ever tasted sitting in the fridge.  They are so good, just by themselves, but if you’re like me (and get a bit overly excited about berry picking...), you end up with strawberry overload!

I decided to mess around with some flavors for a new strawberry jam using some fresh basil from my garden and a vanilla bean.  Strawberries and basil are a match literally made in heaven.  I don't prefer my jam overly sweet, so I just add sugar (unrefined) until it tastes like it’s enough.  There isn't a specific recipe because, of course, it depends how many strawberries you have left, but here are a few guidelines: (1) Clean and quarter berries and let them heat up in a saucepan with a couple tablespoons of lemon juice until they start to release their liquid.  (2) Once there is some liquid in the pan, add the sugar, basil and a vanilla bean and then let it all simmer until it thickens.  Remember, when it cools, it will thicken up a bit more.  (3) Use the stems from the basil (cause that’s where all the flavor is) and wrap them in a cheesecloth sachet.  You can also tear up or chiffonade the leaves and add them to the strawberries.  (4) Add some pectin powder if you like, to speed up this process.  Ultimately, you can cool and use right away or transfer to sterilized jars and vacuum seal for later.

This year, I also wanted to experiment pickling green strawberries.  It’s a different kind of pickling liquid then you might think - less vinegar, a little more sugar and a lot of flavor!  The green strawberries turn a bit sweet, slightly tart and still retain a nice bite.  These pickled strawberry makes them a perfect addition to any summer salad or cheese plate.  Enjoy!

Photo: We You They Ate

Pickled Green Strawberries
Yields 2 pint jars

2 pints green strawberries, cleaned and hulled (cut in half or sliced, if you like)

1 cup water

½ cup rice wine vinegar

2 ½ tablespoons sugar

1 tablespoon honey

2 teaspoons kosher salt

1 ½ tablespoons coriander seeds

1 tablespoon black peppercorns

4 Kaffir lime leaves

2 (1" x ½") pieces lime rind


Divide the strawberries between the two mason jars and set aside. 

In a saucepan over medium heat, bring the rest of the ingredients to a simmer until the all of the sugar, salt and honey has dissolved.  Let cool to room temperature before pouring into the jars with the strawberries.  Let sit in the fridge over night for the best flavor.


tags: strawberries, strawberry recipes, pickled green strawberries, strawberry jam, how to pickle strawberries
categories: all 4, condiments, lifestyle-1, quick & easy, recipes, side dishes-1, vegetarian-2
Wednesday 06.08.16
Posted by Aliya LeeKong