X

Sign up to receive exclusive recipes, tips, updates and other goodies from Aliya!

  • Home
  • Blog
    • All
    • Recipes
    • Spices + Ingredients
    • Lifestyle, etc.
    • Travel
  • The Cookbook
  • The App
  • Media
    • All Media
    • Video
  • About
  • Passions
Aliya LeeKong
  • Home
  • Blog
    • All
    • Recipes
    • Spices + Ingredients
    • Lifestyle, etc.
    • Travel
  • The Cookbook
  • The App
  • Media
    • All Media
    • Video
  • About
  • Passions

Yemen Honeycomb Bread (Khaliat Nahal)

View fullsize Yemeni honeycomb bread.jpeg
View fullsize File Mar 15, 7 37 15 PM.jpeg

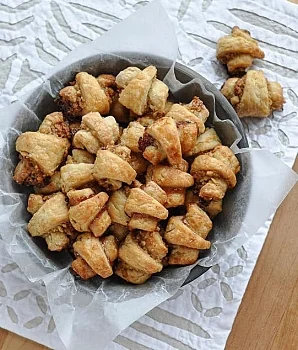
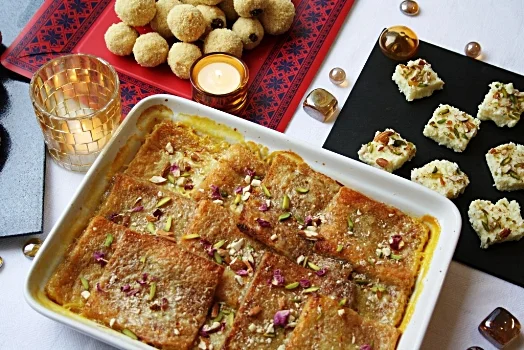
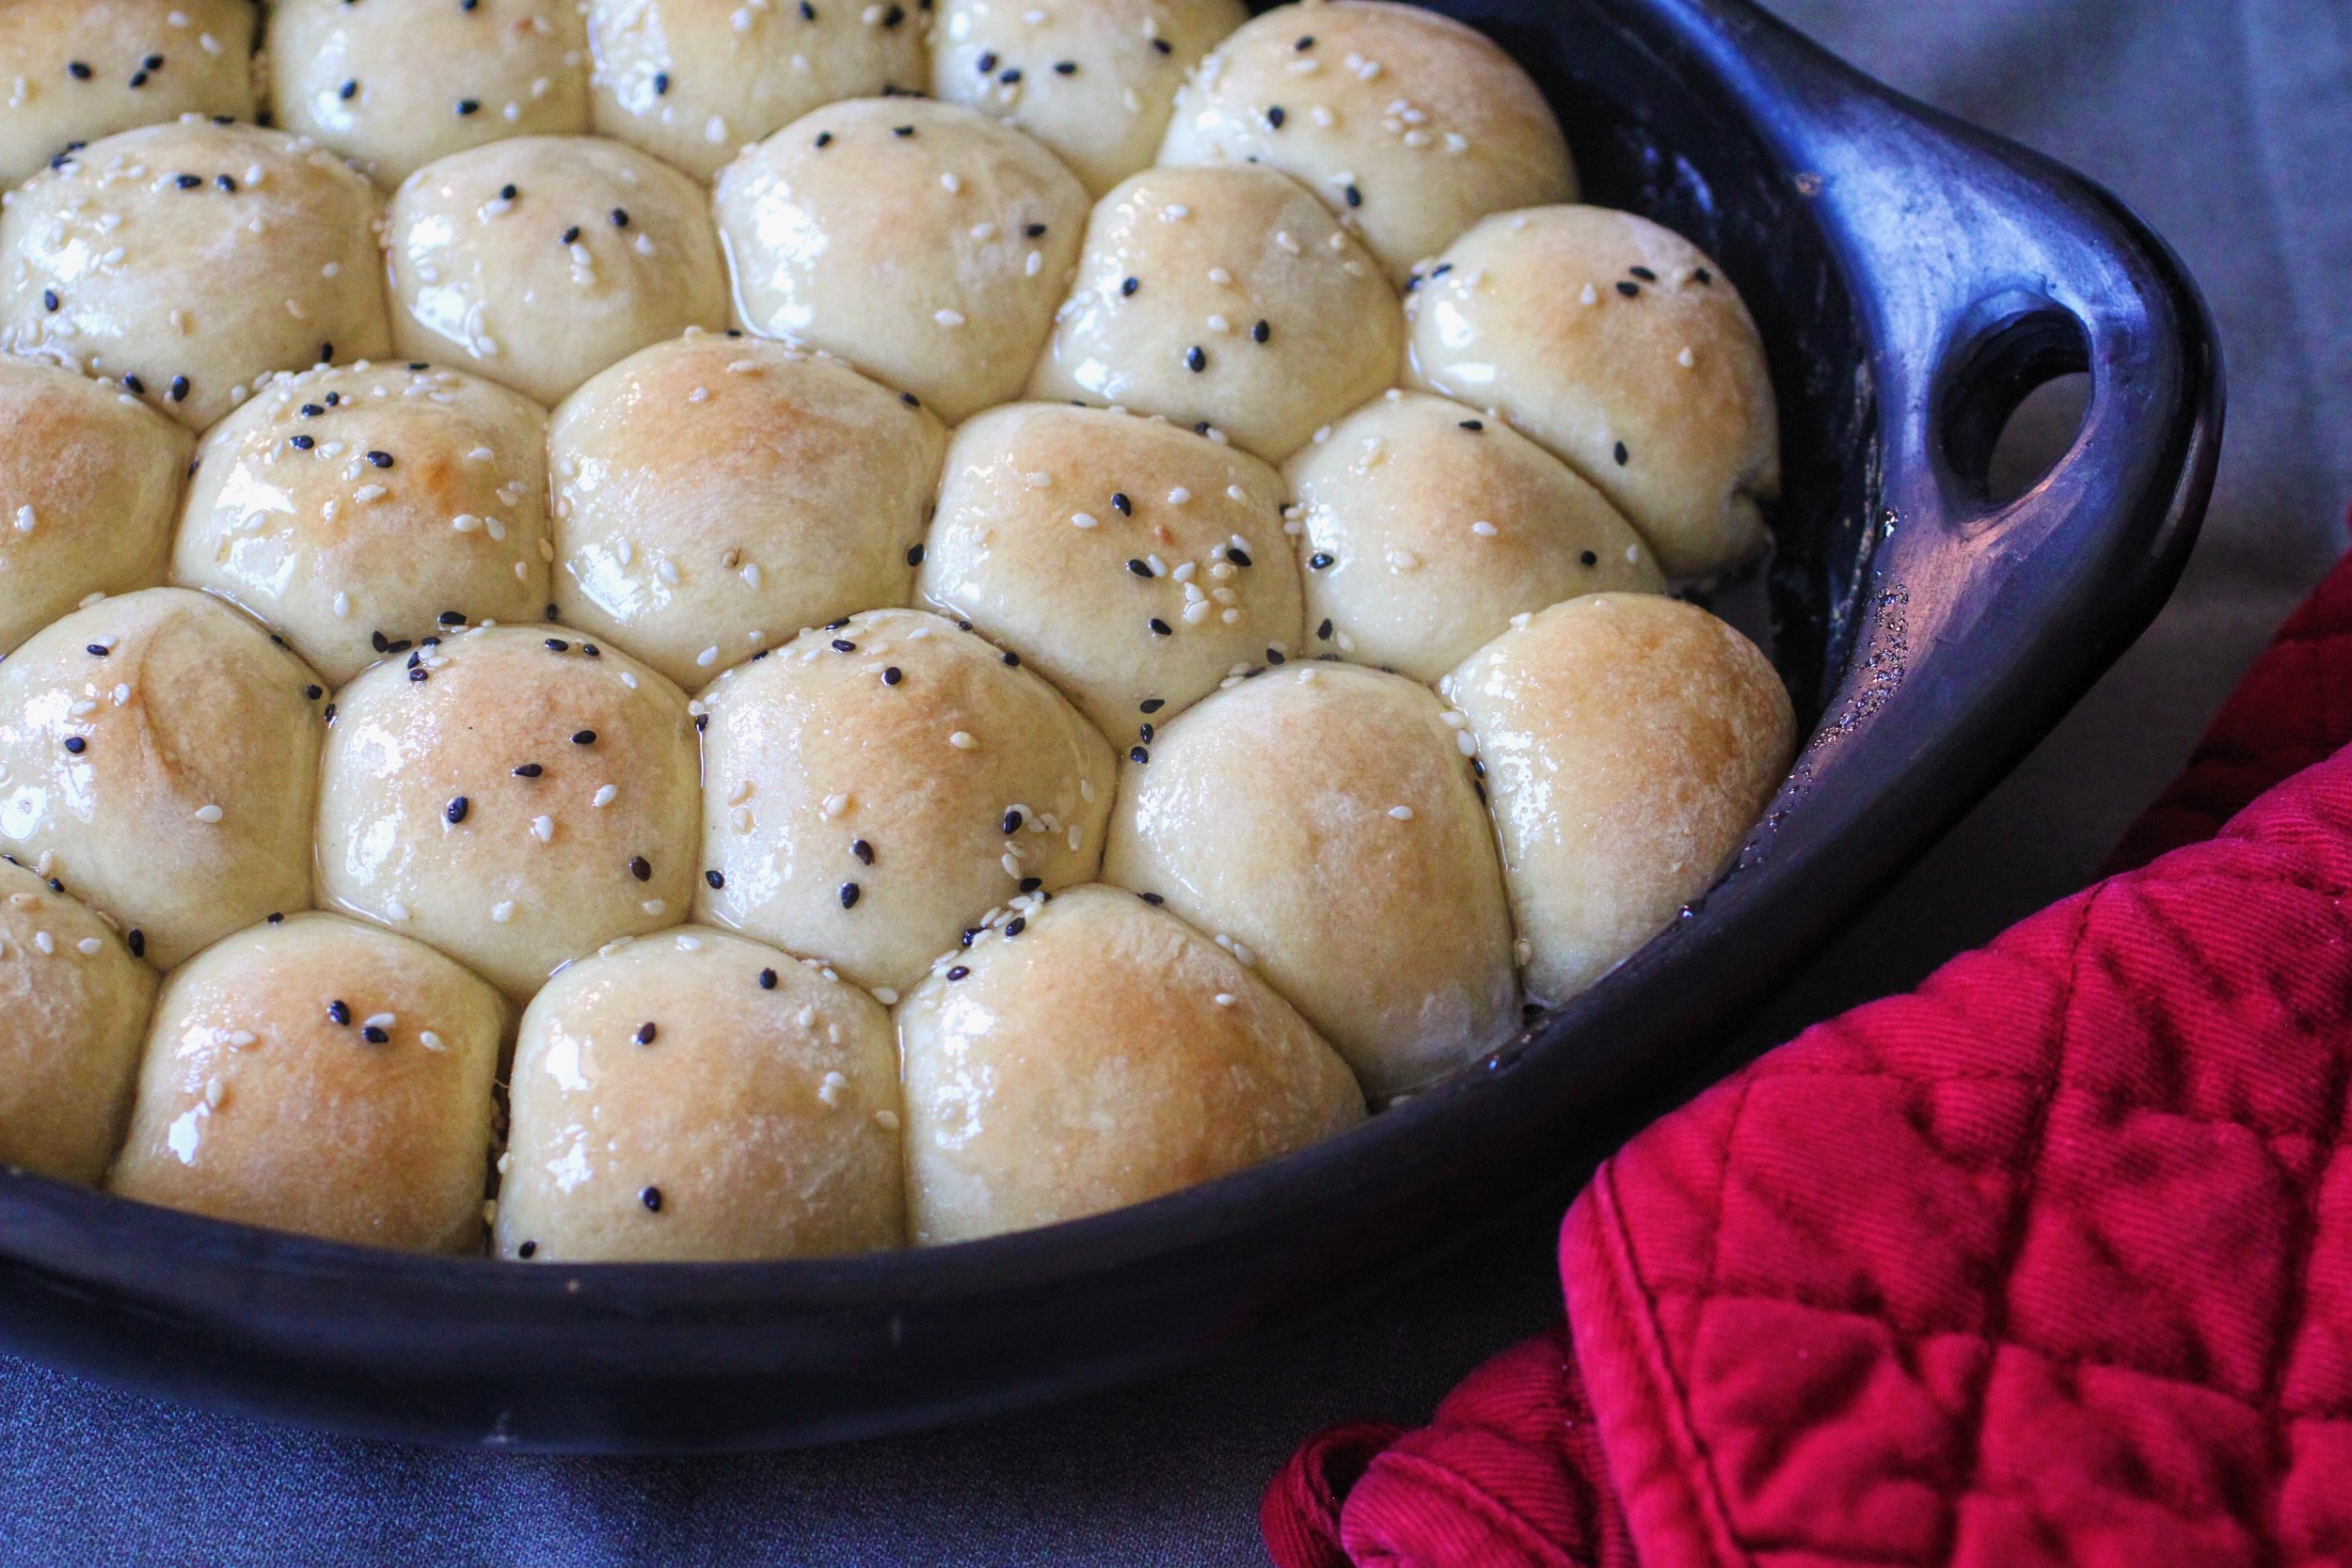
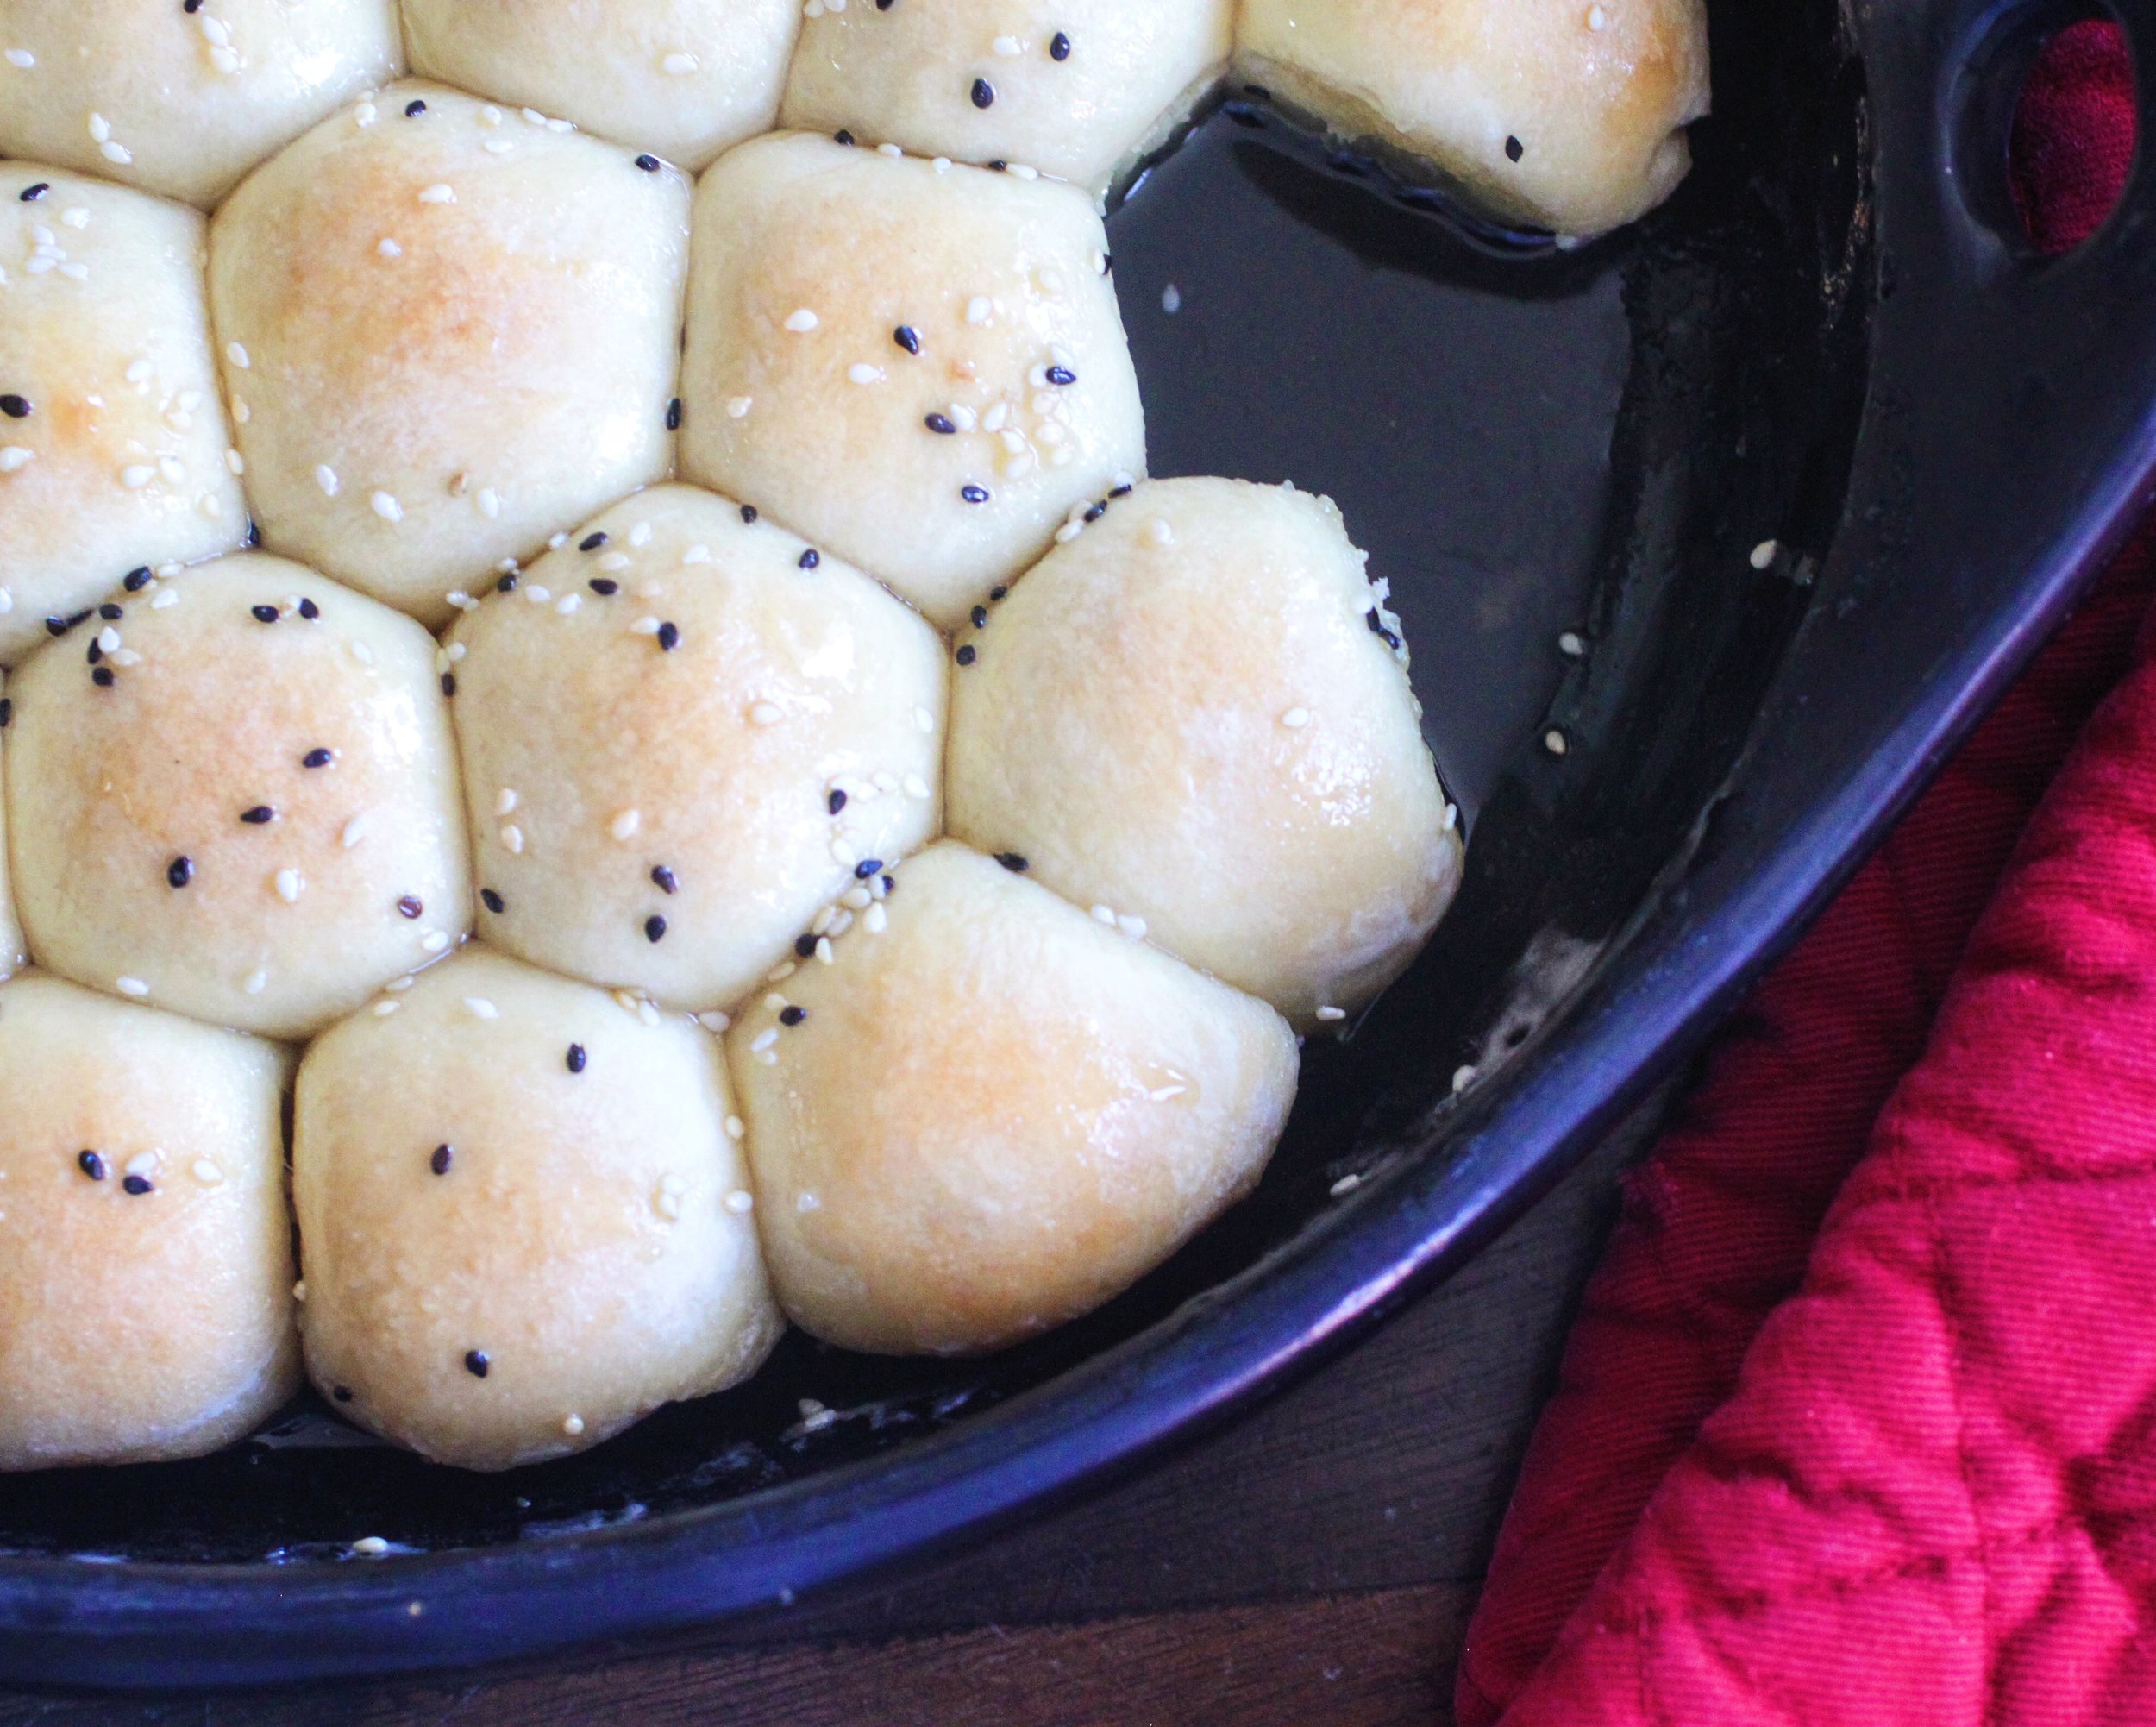
YEMEN HONEYCOMB BREAD (KHALIAT NAHAL)

For the last few months, I've been feeling a bit overwhelmed by the political climate and a tenor of hate that's been seeping into conversations, news, social media, everywhere.  It feels like the floodgates have opened, and bigotry has been given a safe space to be expressed. 

A bit heavy, I know, but I can't deny how I've been feeling.

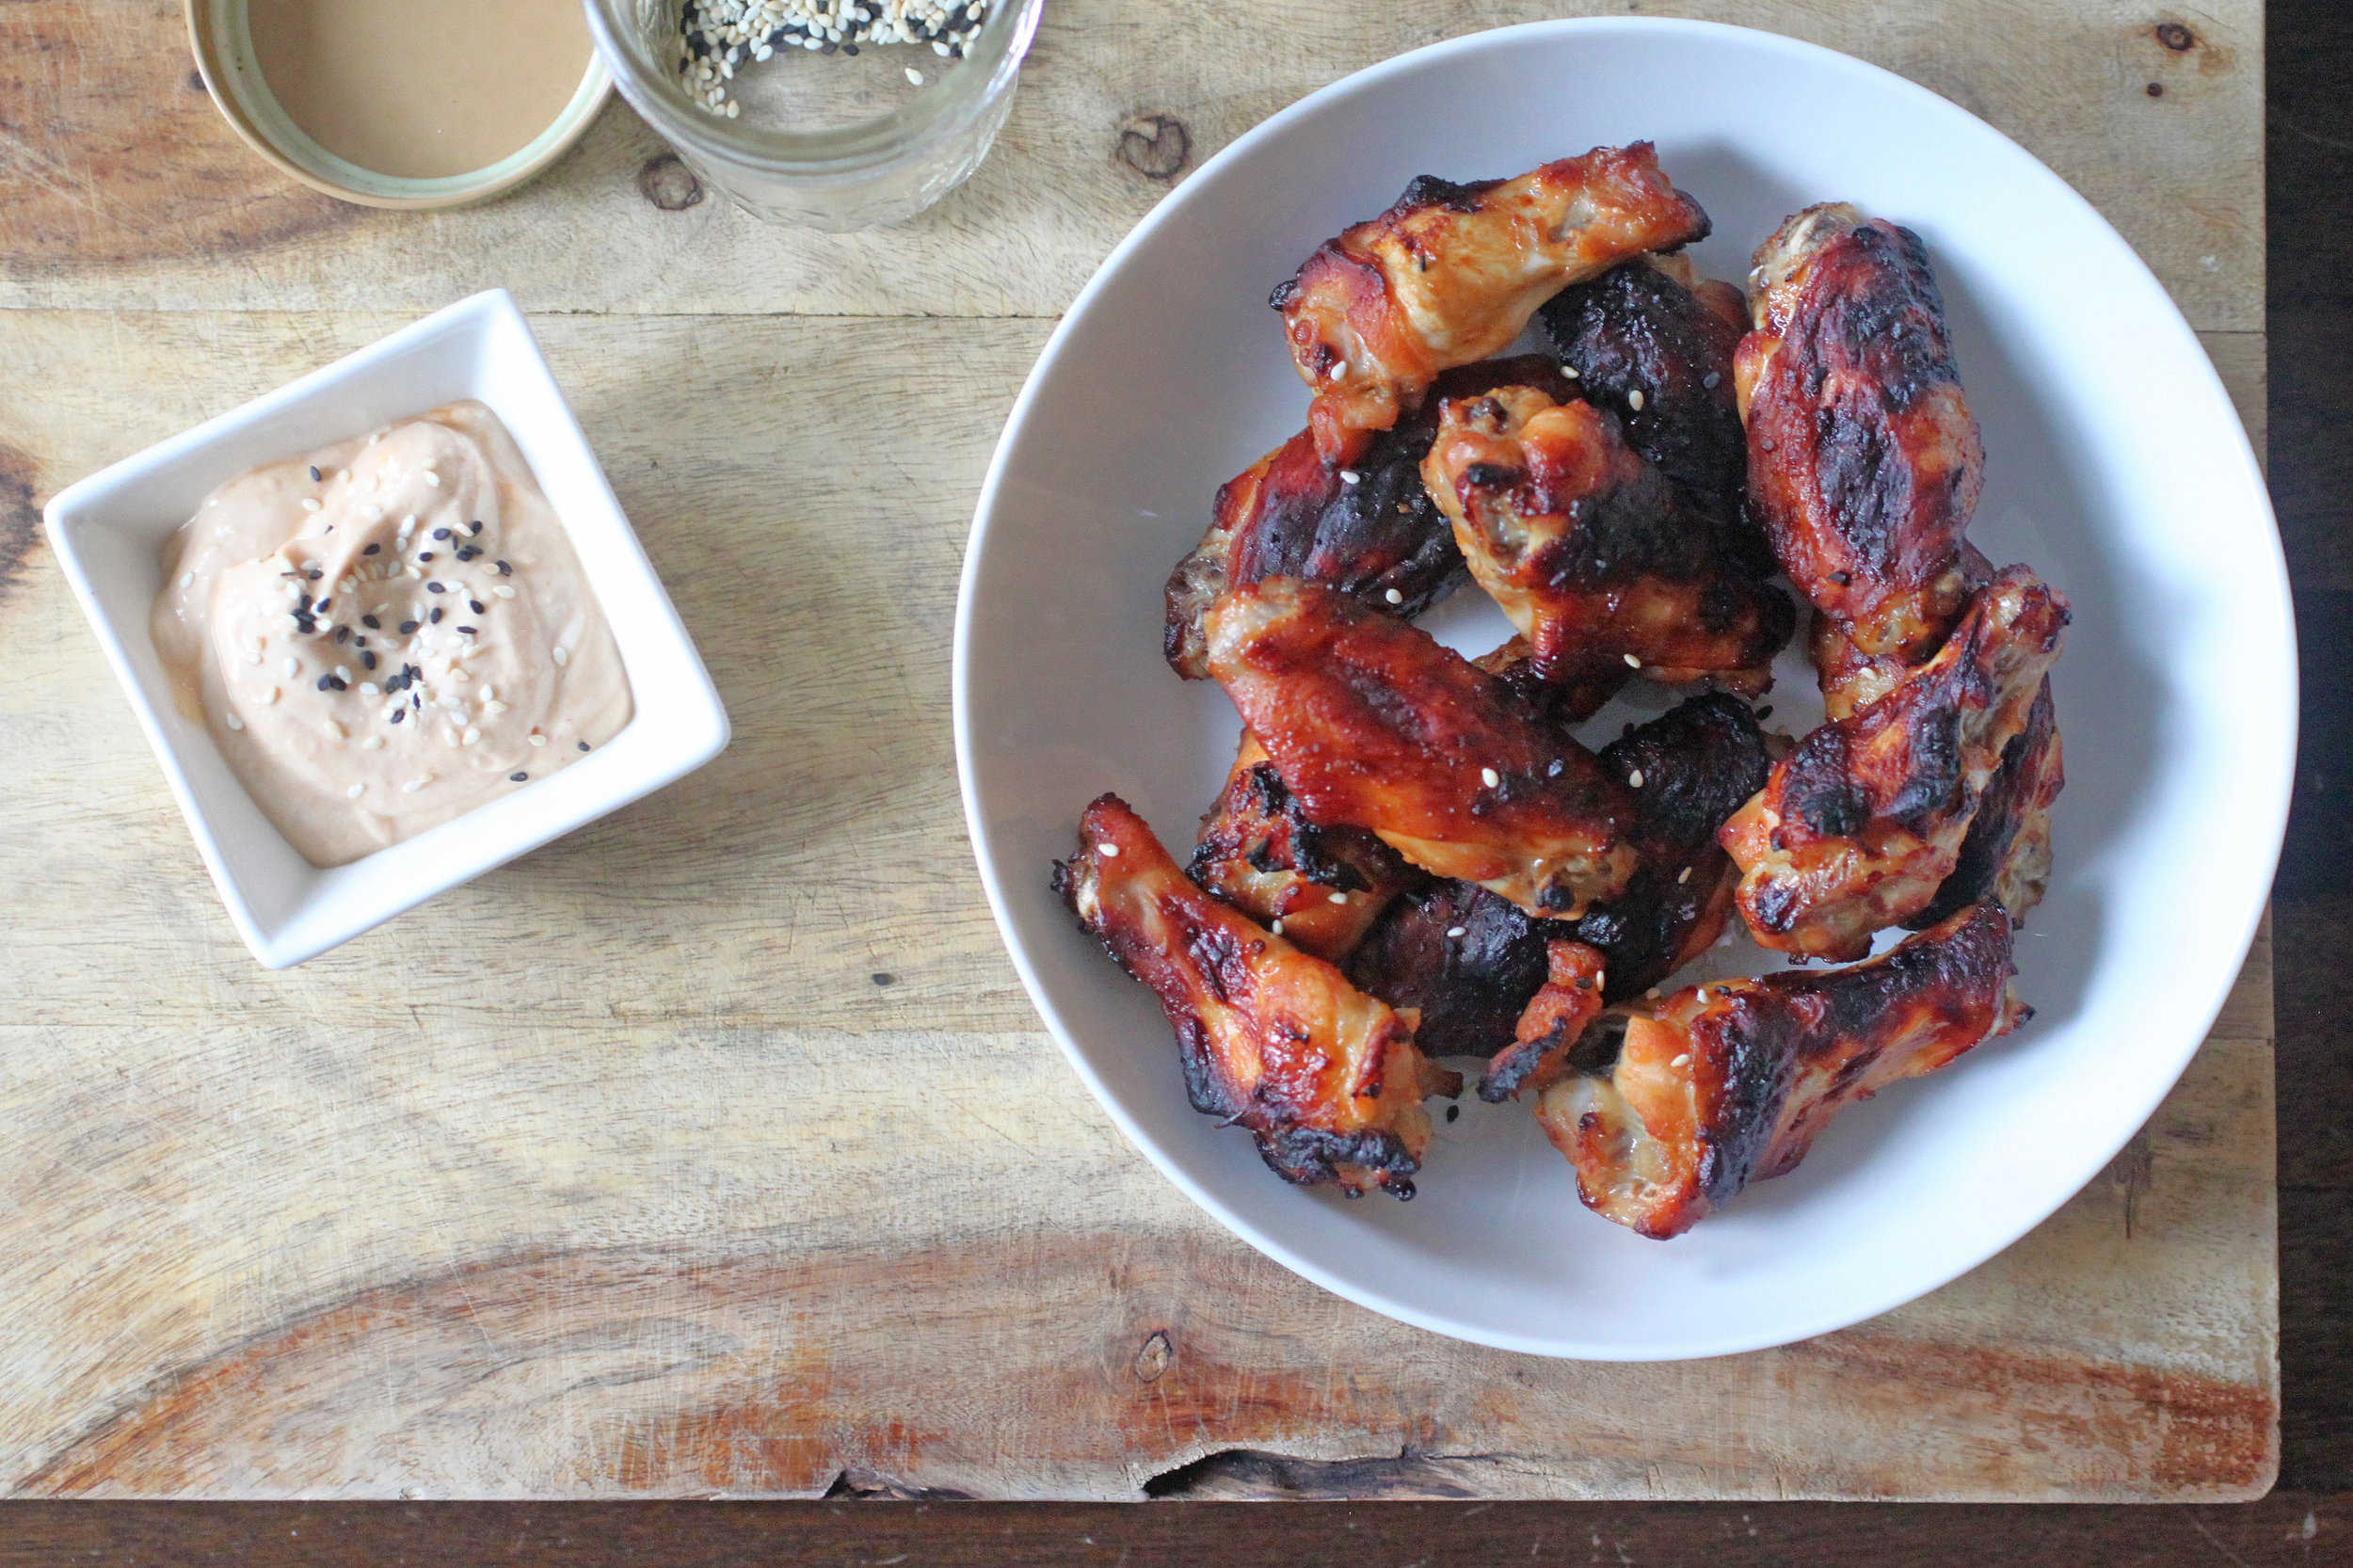
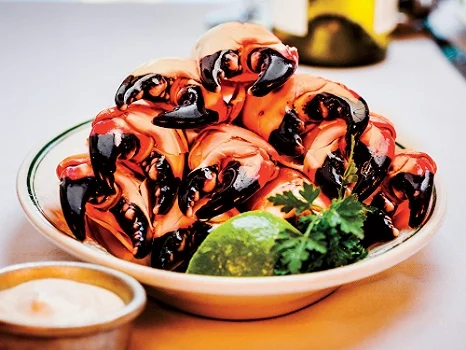
Though for sure, everyone is welcome at my table (it's my go to hashtag :) and that's plain to see in all of the recipes and stories I have here on my blog, as of late, I’ve been cooking food from the (now) 6 banned Muslim countries.  Some dishes are as familiar as an old friend; others are a tentative handshake with someone new.  From Irani Javaher Polow, a jeweled rice which comingles in my memory with Pakistani rice dishes from my childhood, to Yemeni Khaliat Nahal, honeycomb bread rolls filled with cheese and glazed with a sweet, orange blossom-scented syrup (recipe here!), each dish is a bit of resistance.  I’m doing it in part to raise awareness, but it's truly my way through: my personal means of processing this concerted exclusion. Of my parents.  Of me.  Of my daughter. Of so many others.

Ingredients

Yields 32 rolls

For the bread:

¼ cup lukewarm water

1 (¾) ounce packet yeast (active dry or instant)

¾ cup milk

7 tablespoons butter, softened, divided

¼ cup sugar

2 teaspoons salt

1 egg, beaten

3 ¾ to 4 cups all purpose flour

1 (8 oz) package of cream cheese, cut into 32 squares

1 tablespoon black and white sesame seeds, for garnish

For the glaze:

1/3 cup water

1 cup sugar

1 tablespoon honey

1 tablespoon orange blossom water

For the rolls: I make this recipe in a stand mixer, but you can easily do this by hand.  Start with the lukewarm water in the bowl of the stand mixer and sprinkle the packet of yeast over.  Mix gently to combine and let sit 5 minutes or so while you prepare the other ingredients.

In a medium pot, bring the milk up to a simmer and add 5 tablespoons of the butter, the sugar and salt.  Simmer for a minute, just until the butter melts and remove from the heat.  This should not be scalding, so let it cool for a bit before adding to the mixture.

Add the egg and 3 ¾ cups of flour to the yeast mixture and mix together with a fork.  Slowly pour in the milk mixture, using the fork to make a shaggy dough.  Using the dough hook attachment (or your hands), knead for about 3-4 minutes.  The dough should be soft and a bit tacky but should NOT stick to your hands.  If it's sticky, keep adding flour in tablespoon increments until you have a non-sticky consistency.  When you pull up the dough hook, the dough should slide right off.

Grease a 12 inch pie pan or cast iron skillet.  Divide the dough into 32 even-sized pieces. Flatten each piece and place a cream cheese square in the middle.  Form in to ball and place in the greased pan.  Once all the balls have been rolled,  cover with a kitchen towel and let rise for 1 hour.  Preheat oven to 375˚ F.

After the rise, brush the rolls generously with the remaining 2 tablespoons of melted butter, sprinkle with sesame seeds, and bake for 25 to 30 minutes.

For the glaze: Add the water and sugar to a saucepan and bring to a boil over medium-heat (until the sugar has dissolved).  Remove from the heat and whisk in the honey and orange blossom water.  Let cool while the rolls are baking.

Once the rolls are done, pour the glaze over the rolls while they are hot.  Enjoy!

tags: yemenite recipes, yemen recipes, yemen honeycomb bread, khaliat nahal
categories: appetizers 1, blog, breads & cakes, breakfast-1, desserts, recipes, traditions, all 5
Friday 03.17.17
Posted by Aliya LeeKong
 

Crispy Miso (Baked!) Wings

wing2.jpg
wing1.jpg
wing3.jpg

CRISPY MISO (BAKED!) WINGS

Super Bowl = wings!  And these are what I'm making.  The spread, for me, is what it's all about…..eating "bad" (but oh-so-good) food.  I figured it was time for me to up my wing game, and I’ve been slightly obsessed with putting white miso paste in everything lately.  There are a ton of varieties of miso, and you can find it in any Asian grocery store in the refrigerated section.  I use it in salad dressings, marinades for fish, meat and, of course, in my baked wings recipe. 

I LOVE some good wings, but I wasn’t so into deep-frying them and making a splattered mess of my kitchen.  But you can still get them crispy in the oven.   If you crank it up high enough and cook the wings on a rack over a sheet tray - the chicken skin fat will render out, they'll stay tender AND the skin will crisp up nicely!  These are slightly sweet, umami, and with a great kick.  Enjoy!

Serves 6

For the marinade + wings:

½ cup white miso paste

¼ cup plus two tablespoons mirin

3-4 tablespoons sriracha (plus more if you want extra heat)

3 tablespoons soy sauce

2 tablespoons sesame oil

1 tablespoon brown sugar

½ teaspoon rice wine vinegar

4 garlic cloves, finely chopped

3 lbs chicken wings, tips removed, drummettes and flats separated

Kosher salt

Toasted sesame seeds, for garnish

For the dipping sauce:

½ cup sour cream

½ lime, juiced

small handful of cilantro, chopped

Extra sriracha, to taste

For the marinade:  In a bowl, whisk together the miso, mirin, sriracha, soy, sesame oil, brown sugar and rice wine vinegar.  Set aside/refrigerate a half cup for the dipping sauce.  Add the minced garlic to the marinade and toss the wings with it until they are thoroughly coated.  Transfer to a plastic bag and refrigerate for a minimum of 5 hours and preferably overnight.

For the wings: Preheat oven to 400° F.  Put a wire rack over a baking sheet and set aside.

Transfer the marinated wings to a colander to drain, and then wipe off any excess.  The marinade can burn, so you want it dry-ish.  Season the wings with salt and transfer to the rack over the baking sheet.  Bake the wings for about 40 minutes, rotating half way through cooking..

For the dipping sauce: In another bowl, add the reserved marinade and mix with the sour cream, lime juice, cilantro and more sriracha, depending on your heat preference.  

Serve hot with the dipping sauce and sprinkled with toasted sesame seeds!

tags: super bowl recipes, what to cook for the super bowl, Super Bowl, wings, crispy wings, best chicken wings recipe
categories: all 4, appetizers 1, blog, main dishes, man-friendly, quick & easy, recipes
Wednesday 02.01.17
Posted by Aliya LeeKong
 

The Festival of Lights

THE FESTIVAL OF LIGHTS

This year, Christmas and Hanukkah land on the same day, and this has me thinking about lots of shared traditions and stories....and, of course, dessert!  If you have ever had the pleasure of enjoying a traditional Jewish meal on one of their many holidays, you understand the connection.  There’s nothing more extravagant and plentiful than a homemade Jewish feast and just when you think you can’t eat any more after dinner, the table gets cleared and rows and rows of sweet treats are placed in front of you!  From rugelach (my daughter's fave) to chocolate-covered matzo to coconut macaroons, it’s truly amazing for a dessert lover. 

For Hanukkah, the main dessert is sufganiyot, which is effectively a cultural jelly doughnut!  For the Festival of Lights, sufganiyot symbolizes the burning lamps in the ancient holy temple in Jerusalem.  Below is a fantastic recipe for these treats as well as a few others to round out the holiday table.  Enjoy and a very happy holiday season to you all!


STRAWBERRY SUFGANIYOT

Photo: Bon Appetit


THE BEST RUGELACH!

Photo: The Kitchn


BETTER CHOCOLATE BABKA

Photo: Smitten Kitchen


BLACK SESAME DONUTS WITH DATE MOLASSES


BLACK AND WHITE COOKIES

Photo: Chai & Home


COCONUT MACAROONS

Photo: Food & Wine

tags: hanukkah dessert recipes, babka recipe, rugelach recipe, how to make rugelach, sufganiyot recipe
categories: all 4, blog, breads & cakes, desserts, holiday, traditions
Wednesday 12.21.16
Posted by Aliya LeeKong
 

Homemade Chicken Thigh Shoyu Ramen

View fullsize Photo Dec 09, 1 52 57 AM.jpg
View fullsize Photo Dec 09, 1 54 59 AM.jpg
View fullsize Photo Dec 09, 1 55 07 AM.jpg

HOMEMADE CHICKEN THIGH SHOYU RAMEN

Secretly, when I go out of town, my husband goes to the store and buys instant ramen noodles.  He won't admit it or mention it when I'm gone, but I come back to the evidence stuffed in our trash can...

I decided to try to make ramen from scratch and outdo the store bought stuff!  Although, traditional ramen can take up to 3 days to make a proper broth, etc., I was not up to that task.  I was a bit under the weather and wanted this ramen to do double duty as my medicinal chicken soup.  SO I decided to do a delicious homemade chicken stock, infuse it with a little kombu and finish it with a shoyu-based tare.  All of the terms are a bit confusing, but Serious Eats does a great breakdown of all of the different types of ramen.

The best part of ramen are the fixings! What to put in your ramen? I used crispy chicken thighs, sliced red chilies, bean sprouts, baby bok choy, corn, scallions and some enoki mushrooms, and this kept it super fresh and light.  Whenever I’m in the Japanese store getting ingredients, I also pick up a few packs of fish balls from the freezer section.  These are made from fish paste, cook up quickly and taste delicious in ramen, particularly if you just make a simple dashi base (water + kombu + bonito flakes).  But you can get creative here: leftover chicken, spinach, ground beef, pork belly……whatever you want!  Enjoy!

Ingredients

Serves 4 to 6

For the Dashi and Tare:

2 quarts homemade or store-bought chicken stock

1 (10” x 4”) piece of kombu, wiped clean with a damp cloth

¼ cup shoyu (Japanese soy sauce)

2 tablespoons mirin

3 tablespoons sake

For the Ramen:

3 tablespoons canola oil, plus more if necessary

4 – 6 boneless chicken thighs, skin-on and room temperature

6 garlic cloves, minced

3 tablespoons toasted sesame oil

4-6 (3 oz) packages dried ramen noodles (if using fresh or homemade, replace each 3 oz dried with 5 oz. fresh)**

2 to 3 pieces baby bok choy, halved

½ cup enoki mushrooms, cleaned

3 large eggs, soft boiled*

2 scallions, thinly sliced

2 small red chilies, thinly sliced

2/3 cup corn, cooked

Salt, to taste

Other optional garnishes: togarashi, nori sheets, menma (fermented bamboo shoots), white pepper

Preheat the oven to 400° F.

For the dashi and tare:

Place the 2 quarts stock in a large pot and add the kombu.  Let soak 30 minutes.  Slowly, bring the stock up to a simmer and simmer for 6 minutes.  Remove the kombu and discard.  Reserve the stock in the pot until ready to serve.

In a separate bowl, combine the shoyu, mirin and sake and set aside.

For the Ramen:

In a large sauté pan, heat the canola oil over medium-high heat.  Make sure the chicken thighs are very dry and season on both sides with salt.  Place the thighs skin-side down in the hot pan and lower the heat to medium.  Cook for about 5 to 7 minutes until the skin crisps.  Flip and cook another minute.  Transfer to a sheet pan and finish in the oven for 10 minutes.  Let rest about 5 minutes and then slice the thighs to desired thickness.

In the same pan, add the minced garlic.  If the thighs haven’t rendered enough fat/drippings, add a little more oil, just enough to coat the garlic.  Cook for another 3 to 4 minutes until browned.  Strain infused oil into a bowl and add the sesame oil.  If you want, you can also blend the oil with the garlic to make it extra potent.  Set aside until ready to serve.

Heat a large pot of water.  Boil noodles per package directions until al dente.  Drain.

To Assemble:

Bring infused stock up to a boil and add the shoyu mixture.

Divide the cooked noodles and broth between the bowls.  Top with the sliced chicken, bok choy, enoki mushrooms, eggs, scallions, sliced chilies and corn.  Drizzle a teaspoon or two of the garlic sesame oil over each bowl.

Serve immediately.

*Eggs should be boiled only for about 7 minutes.  The yolk shouldn’t be completely set.

**If you are up to the task, making your own ramen noodles from scratch can be fun.  Ramen noodles aren’t just your average pasta noodle - they have to be able to stand up to sitting in a bowl of hot broth and keeping their signature chewy texture.  If you were to use a regular pasta dough, the noodles would be overcooked by the time you got through the entire bowl. 

What gives ramen noodles their texture and color, believe it or not, is the addition of one particular ingredient: Kansui, or alkaline minerals.  It’s difficult to find this ingredient if you don’t have a good Japanese store near you, but you can make it at home, I bet you have it in your pantry right now!  Baking soda. All you have to do is bake the soda for an hour at a low temp to change the properties from bicarbonate to carbonate.  It’s really that simple!

For the Noodles:

3 g baking soda
150 g lukewarm water
2 g sea salt
300 g all purpose flour

Preheat the oven to 250° F.  Sprinkle the baking soda on a sheet tray and bake it in oven for about an hour.  You can bake more than the recipe amount and keep the excess stored in an airtight jar indefinitely. 

Mix the water, baked baking soda and salt in a bowl until dissolved.  Measure flour into another bowl, and then add the water mixture.  Combine together and make a very flaky loose, crumbly dough.  Form mixture in to a ball and knead for about 5-10 minutes. 

The dough will be a lot more tough than pasta dough, and that is exactly what you want.  After the dough is smooth, wrap and keep at room temp for an hour. 

Cut the dough into 4- 6 pieces. You can then break out the pasta machine and roll the dough until the 2nd to last setting.  I cheat and put my dough through the spaghetti attachment instead of cutting by hand….up to you.
 

tags: ramen, homemade ramen, how to make ramen
categories: all 4, blog, main dishes, recipes, soups, soups & salads, traditions
Wednesday 12.14.16
Posted by Aliya LeeKong
 

Holiday Gifts for 2016!

HOLIDAY GIFTS for 2016!

If I'm being honest, I'm kind of in a panic with holiday shopping!  I'm traveling the week before Christmas and am down to the wire in picking out gifts and getting them delivered in time.  I should have started planning before Thanksgiving (which is kind of insane...).  In any case, I wanted to share my picks for the holidays, many of which are on my own wish list....


DOUBLE DUTY: WALNUT HANDLED PIZZA ROCKER

Photo: Food52

Though God knows I'd get enough use out of this cutting through pizza, I would actually love this rocking knife for my daily prep, namely mincing things like garlic, onions, or herbs!


UNIQUE POTTERY: STEM VESSEL

Photo: Marite Acosta

I love pottery, and this vase is so amazing!  Perfect for getting individual stems and creating your own unique arrangements for your house.


ONE-OF-A-KIND: SPALTED MAPLE CHEESE BOARD

Photo: Nershi Woodworks

Hand-turned, one-of-a-kind pieces in upstate New York - boards, espresso tampers, bowls, stirrers.  They even do custom pieces, and their instagram is gorgeous!


SKIN SAVERS: THE ASSEMBLY

Photo: Leland Francis

I’m loving this new line of oils and soaps from Leland Francis, and now they have all three as a little gift package.  Such a great way to pamper your skin in the cold winter months!


SMART AT-HOME SOUS VIDE: JOULE

Photo: ChefSteps

There’s nothing better than being able to cook food perfectly all the way through.  There's nothing worse, in my opinion, than over-cooked steak or under-cooked chicken.  But this little kitchen gadget allows you to cook anything perfectly, restaurant-style,...AND you can use an app to control the process! 


THE ULTIMATE SPLURGE FOR THE COOK: CUT TRAY

Photo: Malle W. Trousseau

This set is like the ultimate gift for the home cook and a true splurge.  Luckily, you can buy most of the items standalone - they are all artisan-made and many have lifetime guarantees.


EXOTIC INTERIORS: MOSAIC STANDING LAMP

Photo: Grand Bazaar NYC

I love mosaic anything, and these lamps are just gorgeous with all their color!  If you are in the NYC area, you can check out their booth at the Bryant Park Holiday Market.


COOKBOOKS BECAUSE.  COOKBOOKS!

Photos: Amazon

It’s a known fact that I have an obsession with cookbooks!  You can never have enough inspiration surrounding you!  Here are some of my faves this year.


GIVING = GIVING BACK

Gorgeous, fair trade, artisan-made,  All Across Africa has an incredible mission and beautiful products as well.  From baskets to jewelry to kitchen goods, you really can't go (or do!) wrong shopping here.


Happy Shopping!


tags: holiday shopping, holiday gift ideas 2016, gifts for the cook, culinary gifts, kitchen gifts
categories: all 4, blog, holiday, lifestyle-1
Thursday 12.08.16
Posted by Aliya LeeKong
 

Link Love: Diwali Sweets

LINK LOVE: DIWALI SWEETS

This weekend starts the ancient celebration of Diwali, the Festival of Lights.  Diwali is arguably the most significant Hindu celebration, marking the Hindu New Year.  This celebration of life happens in autumn, after the last summer harvest, to celebrate good over evil, light over dark, and hope over despair…The preparations and rituals last over a 5-day period and, amongst other things,  lamps and candles (diyas) are lit inside and outside of the home.  Gifts are exchanged, and families feast during this time, but the most important part of the food celebration is the sweet desserts (or mithai). 

Mithai were always a mystery to me growing up - they were always so beautiful, brightly colored and sometimes touched with gold leaf.  I wanted to show some link love with some of the best mithai recipes out there.  Enjoy!


GULAB JAMUN

Photo: Veg Recipes of India


CHOCOLATE BURFI

Photo: Indian Simmer


CHICKPEA FLOUR (BESAN) LADDU

Photo: Food52


SHAHI TUKRA

Photo: Maunika Gowardhan


DULCE DE LECHE BARFI

Photo: My Tamarind Kitchen


COCONUT LADDU

tags: Diwali, diwali sweets, mithai recipes, Indian sweets, Indian sweet recipes, Indian recipes, South Asian recipes
categories: all 4, blog, desserts-1, holiday, lifestyle-1, traditions
Thursday 10.27.16
Posted by Aliya LeeKong
 

Breaking the Fast After Yom Kippur

BREAKING THE FAST AFTER YOM KIPPUR

Yom Kippur is arguably the most important holiday in the Jewish calendar.  It marks the end of the 10 day celebration of Rosh Hashanah (Jewish New Year) and translates to the “Day of Atonement”.  The day is set aside to atone for the sins of the past year with a complete 25- hour fast.  The fasting begins just before sunset the day before and goes until the next evening.  At sunset on Yom Kippur, you have a “Breaking Fast” meal that usually includes all types of breads, cured meats and food that were cooked the day before since during fasting you are not allowed to do any work (even cooking)! 

With this in my mind, I thought about easy breaking fast food, a homemade coconut bread recipe as well as some different ways to do lox.


CONCORD GRAPE HAND PIES 

These are beyond easy!  This is grape season, so just halve and remove the seeds from the sweetest grapes you can find.  Roll out a sheet of homemade puff pastry and use a pastry cutter or overturned glass to cut out rounds.  Place a small mount of the halved grapes in each circle.  Fold the circle in half to make a semi circle and use a fork to press the edges down tightly.  Paint with an egg wash and bake at 400° F for about 25 minutes.  Done!


PAN DE COCO (WITH A TWIST)

Pan de coco is a Dominican bread that's usually a bit more flat.  I combined it with my basic bread roll recipe, adding yeast to make it fluffy and light.  Think a Parker House roll and Pan de Coco had a baby.  It's soooo good.

Yields 16 rolls

¼ cup lukewarm water

(1) ¾ ounce packet yeast (active dry)

3 tablespoons butter, plus more for greasing and melting

¼ cup honey

2 ½ teaspoons salt

1 cup coconut milk

1 egg, beaten

4 – 4 ¼ cups all purpose flour

½ cup coconut flakes

Flake salt, for sprinkling


I make this recipe in a stand mixer, but you can easily do this by hand.  Start with the lukewarm water in the bowl of the stand mixer and sprinkle the packet of yeast over.  Mix gently to combine and let sit 5 minutes or so while you prepare the other ingredients.

In a medium pot, melt the butter.  Add the honey, salt and coconut milk and heat gently until warmed through and uniform.  Remove from the heat.  (It shouldn’t simmer but should be warm to the touch.)

Add the egg and 3 ¾ cups of flour to the yeast mixture and mix together with a fork.  Slowly pour in the milk mixture, using the fork to make a shaggy dough.  Using the dough hook attachment (or your hands), knead for about 3-4 minutes.  The dough should be soft and a bit tacky but should NOT stick to your hands.  If it's sticky, keep adding flour in tablespoon increments until you have the right, non-sticky consistency.

For rolls, divide the dough into 16 even-sized balls and place in a heavily greased, 9-inch cake tin.  Cover with a kitchen towel and let rise 45 minutes.  Preheat oven to 375˚ F.

After the rise, brush the rolls generously with melted butter, sprinkle with coconut flakes and bake for 30 to 35 minutes.  Brush again with butter once out of the oven and sprinkle with a little salt.  Enjoy hot!


LOX 2 WAYS

Photo: Food & Wine

Asian Salt & Sweet Lox

1 lb salmon filet, trimmed and all pin bones removed
1 cup soy sauce
1 tablespoon dark brown sugar
1/4 cup mirin
1 or 2 fresh chilies (thai, serrano, depends on your heat tolerance), roughly chopped
1 inch fresh ginger, roughly chopped
1 bunch cilantro, roughly chop (1/2 for cure, 1/2 for creme fraiche)
1 cup crème fraiche
1/2 lime, juiced

Place salmon in a large ziploc bag on a cookie (just in case the bag leaks).  Whisk together the soy sauce, sugar and mirin until the sugar dissolves.  Pour the mixture in the bag and add in the chilies, ginger and cilantro.  Let as much air out of the bag as possible and seal.  Put another cookie sheet on top and weight down with cans or something else heavy.  Place in the fridge and let sit for 24-48 hours.  After, rinse the filet under cold water until the filet is clean.  Pat dry with paper towels and let it dry out a bit in the fridge before slicing. 

Chop the remaining cilantro a bit more finely.  In a bowl, mix together the crème fraiche with the lime juice and finely chopped cilantro.  Slice the salmon with a sharp knife, serve with thecrème fraiche and enjoy!


Traditional Lox

1 lb salmon filet, trimmed and all pin bones removed
1/3 cup kosher salt
1/3 cup sugar
1/2 bunch fresh dill, finely chopped
3 lemons, zested
2 tablespoons smoke powder (optional)

Place salmon in a large ziploc bag on a cookie (just in case the bag leaks).  Mix together the remaining ingredients.  Pat the mixture onto both sides of the salmon.  Let as much air out of the bag as possible and seal.  Put another cookie sheet on top and weight down with cans or something else heavy.  Place in the fridge and let sit for 24-48 hours.  After, rinse the filet under cold water until the filet is clean.  Pat dry with paper towels and let it dry out a bit in the fridge before slicing.  Enjoy!


tags: Yom Kippur recipes, break fast recipes, breaking the fast, bread recipe
categories: all 4, appetizers 1, breads & cakes, blog, breakfast-1, desserts-1, holiday, lifestyle-1, quick & easy, recipes, traditions
Wednesday 10.12.16
Posted by Aliya LeeKong
 

Not Just Apple Pie + Lamb Shanks!

NOT JUST APPLE PIE + LAMB SHANKS!

There’s nothing better than apple picking on a cool Fall weekend with the fam!  As I get older, I totally geek out about stuff like that (who knew?).  Now, if only the weather would cooperate...I have my favorite spot up in Warwick, NY, which, coincidentally, also happens to be a vineyard with wine tasting.  Because tipsy apple picking is even better!  Just joking (sort of). 

View fullsize apple3.jpg
View fullsize apple4.jpg
View fullsize apple2.jpg

There are so many different varieties of apples to choose from that I’m so glad they have maps and descriptions of each apple.  I tend to get overly excited and end up with WAY too many apples when I get home!  So after lugging pounds of different apple varieties home, I'm always thinking about what to do besides, of course, the mandatory pie or crisp.  I love a good apple butter to keep for later, and I freeze off batches of applesauce for the chickadee. 

I put together a few ideas for you, and, further down, is a yummy recipe for Honey-Braised Lamb Shanks with Butternut Squash and Apples, which is basically a tagine and seriously delicious.  Enjoy!


APPLE PIE WITH STAR ANISE BROWN BUTTER


BUTTERNUT SQUASH & APPLE BREAD WITH MAPLE & CARDAMOM


PISCO SOUR APPLE


SWEET APPLE COUSCOUS


HONEY-BRAISED LAMB SHANKS WITH BUTTERNUT SQUASH AND APPLES

This lamb dish is based on North African tagines, which slow-braise lamb and other meats with both sweet and salty elements. While many tagines feature apricots, prunes, or raisins, I thought seasonal butternut squash and apples would provide the perfect sweet counterbalance to the spiced braise.  I use lamb shank here because I love the flavor and the end result – spoonable, fall-off-the-bone meat in a rich stew.

Ingredients

2-3 tablespoons canola oil

2 ½ pounds lamb shanks (approximately 2 shanks), room temperature

1 large onion, cut into a medium dice

4 cloves garlic, minced

½ teaspoon ground ginger

large pinch saffron

1 ½ teaspoons cinnamon

4 cups beef or chicken stock

1 tablespoon honey

2 cups butternut squash, cut into a ¾” inch dice

1 ½ cups honeycrisp or fuji apple, cut into a ¾” inch dice

¼ cup sliced almonds, toasted

1 ½ teaspoons sesame seeds, toasted

Salt and freshly ground pepper

Preheat the oven to 325° F.

Heat a Dutch oven or large pot over medium-high heat.  Add the oil, season the shanks generously with salt and freshly ground pepper, and sear 2 to 3 minutes per side to develop a nice brown.  Remove to a plate and reduce the heat to medium-low.

Add the onion and a bit of salt and sauté for 5 to 7 minutes until the onions are translucent.  Add the garlic, ginger, saffron and cinnamon and sauté for another 30 seconds to a minute until fragrant.  Nestle the lamb shanks back in the pot, and add in the stock and the honey.  Cover, bring up to a boil and then place in the oven.

Cook for 2 hours and 15 minutes and then remove from the oven.  Toss in the squash, apples and half of the almonds.  Cover and put back in the oven for the next 45 minutes to an hour. The meat should be spoonable, basically falling off the bone.

Serve hot, garnished with the remaining toasted, sliced almonds and sesame seeds.  This is great alongside couscous.

tags: apple picking, apple recipes, what to do with apples, apple pie recipe, apple cake, lamb tagine, lamb shanks
categories: all 4, blog, holiday, lifestyle-1, main dishes, man-friendly, recipes, traditions, sweet & savoury
Thursday 09.22.16
Posted by Aliya LeeKong
 

The Ultimate Eggplant Dip

THE ULTIMATE EGGPLANT DIP

So I feel like the eggplant doesn’t get a lot of love!  Recently, at the market, all the stands seem to have some sort of eggplant variety:  the most common (classic), Japanese, white, Thai green, fairytale (those small purple ones above), Sicilian, baby.  I have in the past bought the Thai green eggplants when I see them in the Asian supermarkets; they are the little green round ones that can fit in the palm of your hand and are my favorite when making a thai green curry.  I just throw them in whole and let them simmer in the curry (fairytales are great for that too). 

There are so many more ways to use eggplant, though - roasting and scooping out the inside to make a great dip, breading and sautéing for an eggplant parm, or just frying and making a caponata.  Personally, I love fire-roasting eggplants, outside on coals or a gas grill or just over your gas stove flame.  Eggplants take on incredible smokiness, so I wanted to share my favorite, smoky eggplant dip from my cookbook. 

This dip is based on baba ganoush, a traditional Middle Eastern mezze of smoky eggplant purée mixed with tahini and extra virgin olive oil.  I also add a dollop of crème fraiche and a sprinkling of chives to give it that rich, party-worthy dip feel.  Fried fingerlings or other small potatoes are the perfect match for this!  Enjoy!

Ingredients

For the eggplant dip:

3 whole Italian eggplants

1 clove roasted/raw garlic, minced

2 tablespoons tahini

1 tablespoon crème fraiche

Juice of half a lemon

Salt to taste

Chives, for garnish

For the fingerling chips:

canola or peanut oil for frying

1 pound fingerling potatoes, scrubbed, skin-on

Salt, to finish

For the eggplant dip: Preheat the oven to 400° F.

Prick the eggplants all over with a fork and then place on the open flame of a gas burner.  You want to char the skin all over the eggplant to impart smokiness.  If you don’t have a gas burner, you can do this on a grill or under the broiler. 

Once the skin is charred and shriveling, transfer to a baking sheet and finish cooking in the oven for another 25 to 30 minutes. 

Let the eggplants cool before handling.  Split them open and scrape out all the flesh inside into a medium bowl.  Add the garlic, tahini, crème fraiche, lemon juice and salt and use a fork to mash everything together.  You want to create a creamy consistency but with texture.  You can also do this in the food processor if you want something smoother.  Taste and readjust seasoning.  Chill before serving.

For the fingerling chips: In a Dutch oven or large saucepan, heat 3 to 4 inches of oil to 360° F.  The oil should go less than halfway up the pot. 

Using a mandolin or with a very sharp knife, thinly slice the fingerling potatoes and transfer to a bowl of water.  Gently mix the potato slices, strain out the water and dry on paper towels.  The potatoes should be completely dry before adding to the oil or they will spatter and bubble up.

Add the fingerling slices to the oil, working in batches, and fry for about 45 seconds to 2 minutes depending on how thick you sliced them.  You basically want them golden brown.  Transfer them to a paper towel-lined plate and finish them with salt.

Serve the dip cold with fingerling chips on the side.


tags: eggplant recipes, how to cook eggplant, baba ganoush, how to make baba ganoush
categories: all 4, appetizers 1, blog, condiments, side dishes-1, vegetarian-2
Thursday 09.08.16
Posted by Aliya LeeKong
 

Labor Day Loungin'

LABOR DAY LOUNGIN'

I honestly can't believe I am already talking about Labor Day - literally, wasn't it just Memorial Day the other weekend??  The end of summer is always so nostalgic and filled with a sense of anticipation, and, somehow, each year, it speeds up the older (....umm, mature?) you get.  Either way, another summer has come and gone, and now it's time to max out and celebrate the last weekend of summer!!

If you are planning on grilling, which I definitely am, you can look back at these essential grilling tips (not to mention this killer whole grilled chicken with jalapeño sauce recipe).  My focus for this post is going to be on cocktails, because, quite frankly, I'm going to need a few to say goodbye to summer.  Not that I don't absolutely love Fall and looking forward to all of the holidays.....Back to cocktails - remember that chili post from last week?  Well, I took an open bottle of vodka and threw in a few jalapeños for a spicy cocktail this weekend.  Here are a few more that made my list - enjoy!


COCONUT CHILI MOJITO

Photo: francoiselaprune.com


STRAWBERRY-PEACH BASIL SHRUB 

Just add your favorite spirit - vodka, rum, pisco and tequila all work beautifully here.


CRUSHED BLACKBERRY MOSCOW MULE

Photo: What Gaby's Cooking


FROSÉ (FROZEN ROSÉ) 

Photo: Bon Appetit


ST. LUCIAN RUM PUNCH (MY OLD STANDBY!)


POMEGRANATE FIG SMASH

Photo: Saveur

tags: summer cocktails, labor day weekend cocktails, what to drink on labor day, rum punch recipe
categories: all 4, blog, drinks & cocktails, holiday, recipes
Thursday 09.01.16
Posted by Aliya LeeKong
 

Aged Hot Sauce & Other Things to do with Chili Peppers

AGED HOT SAUCE & OTHER THINGS TO DO WITH CHILI PEPPERS

I am slightly obsessed with hot sauce (I mean, obsessed).  I put that ish on everything.  Sometimes, I carry a small bottle in my purse because, you know, you just never know when you’ll need it...Right now, the market is bursting with all types of peppers, and there are so many different ways to make hot sauce or spice up ordinary kitchen condiments. Making your own hot sauce at home really isn’t that hard of a task.  You can do a quick stove top method (basic cooked), ferment in a salt brine solution for a few weeks (fermented/aged), or a quick pickle like my Haitian quick pikliz.

Fermented hot sauces might sound like something new, but they are in so many different cultures - super Southern (think Tobasco) and Asian (sriracha and kimchi to a certain degree) to name a few.  I personally like to make a green sauce and a red sauce. My green sauce is always a mix of serranos, jalapeños, and poblano peppers, roughly chopped.  I add some chopped onion, garlic and green bell peppers to round out the heat, pack it all in a jar and add a simple salt brine (1 1/2 cups water to 1 tablespoon salt).  Everything should be submerged, so if you're doing this at home, weight down if you must.  Initially, I cover the jar with muslin cloth, secured by a rubber band, and I let sit it sit on the counter for about a week to two weeks, stirring daily.  You will notice little bubbles (fermentation), but if white mold forms, skim it off.   You can ferment for as long as you like really - Tobasco takes 3 years!  I have experimented from a week to 8 weeks, so it's more about personal taste.

For the red sauce, I use hot cherry peppers, a couple scotch bonnets, and other red chilies like Fresnos or thai chilies.  Again, add onion, garlic and red bell peppers to round out the heat.  Same finish as the green sauce.  The hardest part is the waiting.  Also, I highly recommend wearing gloves when dealing with all these hot peppers!

Another fun way to experiment is with the salts in the brine or spices.  Think: a smoked, black Hawaiian sea salt or Himalayan pink. Spices like coriander, cloves, all spice, ginger, mustard seeds,  and even herbs will add great flavor.

After the peppers have fermented, I like to strain the pepper mix, reserving the brine.  Then, I purée adding back in the brine and a touch of vinegar until I reach the right consistency and flavor.  You can leave it like this, slightly chunky, or strain for a thinner hot sauce. Note: If the sauce is a little too hot you can add some sugar to smooth it out.   Finally, transfer to an airtight jar and store in the fridge.

Another great way to use up peppers from the market is to infuse them in vinegars or oils to make some kick-ass salad dressings!  For vinegars, I like to buy the tall thin glass jars with the pour spout and fill them with Thai bird chilies or any skinny peppers, really, that fit in the jar.  Then, it’s up to you which type of vinegar you want to infuse - no cooking necessary!  Fill the jar and let it sit for a week or more to infuse.  It's so simple - just make sure the chilies are covered by the liquid or they could mold. 

For the oil, I like to simmer canola or grapeseed oil on a low heat with garlic and spices.  Then, pour the hot oil over fresh or dried chilies and let sit until cool.  Strain and voilá!

Enjoy!!


tags: aged chili sauce, fermented chili sauce recipe, how to ferment chili peppers, pickled chili peppers
categories: all 4, blog, condiments, lifestyle-1, quick & easy, recipes
Wednesday 08.24.16
Posted by Aliya LeeKong
 

Peak Berry Season at the Market

PEAK BERRY SEASON AT THE MARKET

If you can ignore the sweltering heat, this is the best time of year at the farmers' market.  Why, might you ask?  Because it is the only time that all the berries overlap each other in the season, not to mention all of the heirloom tomatoes, stone fruit and the beginning of chili pepper season.  I went to my local greenmarket over the weekend (it was sooo hot out!) and was surprised to see strawberries still available - that doesn’t happen often!  But, always, there is a short window where blueberries, blackberries, raspberries and cherries come together.  This is the time that I make a mad rush to get a mixed berry jam going and, of course, possibly a new tart recipe.  

It’s also the time that I start to think about preserving, whether it be canning tomato sauce, pickling cherry peppers, freezing the berries, or creating syrups or shrubs to enjoy in a cocktail later!   Below are some recipes I may be bringing back for this limited berry season!  Enjoy!


SUGAR PLUM & CURRANT TORTE


MY BREAKFAST CLAFOUTIS


BLUEBERRY, RAW HONEY & COCONUT FOOL


BLUEBERRY-HIBISCUS SMASH


tags: dessert recipes, berry recipes, strawberry recipes, cherry clafouti
categories: all 4, blog, breads & cakes, breakfast-1, desserts
Wednesday 08.17.16
Posted by Aliya LeeKong
 

Not Your Average Oysters

NOT YOUR AVERAGE OYSTERS

It used to be that you could only eat oysters in months that end in "R", but, now oyster farming (rather than harvesting from the wild) makes them safe year-round.  And nothing says summer better than a bottle of wine and fresh oysters!  I recently took a day trip out to Greenport, Long Island and had some super fresh oysters at Little Creek Oysters, along with a bottle of local wine from Bedell Cellars.  I love this part of Long Island; there are so many vineyards to visit and have tastings as well as an abundance of local farm stands to get fresh produce, you can even pick your own at some spots!  The oysters are straight out of the Peconic Bay, and you can have them shucked or you can shuck yourself with a little lesson from the waitstaff.  I went for the shuck yourself, to get down and dirty, and to earn my dozen oysters for the day!  

I don’t know about you, but I like to have my first few oysters “naked”, and then I start to experiment with various toppings.  If I'm in a restaurant, I'll go for a mignonette, some fresh lemon juice or a few dashes of hot sauce, but, at home, it gives me the opportunity to use all of the crazy, multi-ethnic pantry items and sauces I have in the fridge.  A few thoughts:

(1) HORSERADISH - Horseradish and lemon juice are a great combo too.  You can buy store bought horseradish, or if you can find the fresh root make it yourself in a food processor.  (1) peel the horseradish root and chop in to a small dice (2) process in the food processor with a little salt until finely chopped (3) let sit for 5-10 minutes so the flavor strengthens….the longer the better! (4) add vinegar to preserve and give it a little cook.  Adding the vinegar stops the horseradish from blooming more flavor, so make sure it’s pungent enough to your liking before heading to this step. If you want to calm down the flavors add a little sugar for a nice balance.

(2) JALAPEÑO-BASED MIGNONETTE - A classic mignonette is made with finely diced shallots, pepper and vinegar.  I like to take mine a step further with some diced fresh or pickled jalapeños, chopped cilantro, lime juice, and I use apple cider vinegar to give it more of a kick!

(3) GO JAPANESE! - I love ponzu sauce, which is a Japanese, citrus-based sauce that has yuzu, lemon, sudachi and other tangy flavors.  I also always have ponzu shoyu, which is a blend of ponzu with soy sauce (which you can obv do yourself).  A few drops of either of these are great on oysters and can be mixed with some chili sauce for heat.  A little togarashi seasoning with ponzu is also a great touch.

(4) INDIAN PICKLES & CHUTNEYS - Indian pickles and chutneys also make for great toppings for oysters.   A good Indian pickle is typically a mustard-oil cured fruit or vegetable - think green mango, lime, carrots.   It has a really tart bite to it, so you using it sparingly is key here.  Also, a good coriander or coconut chutney is AH-MAZING on oysters with heat, sweetness, tang as is a tiny drop of tamarind paste.

(5) KIMCHI - If you happen to buy or make your own kimchi, finely chopping up a bit and throwing it on an oyster is kind of life-changing.  Just saying.

(6) OTHER CHILI SAUCES - Tabasco or Frank's aren't the only hot sauces out there that work on oysters.  I love Sriracha, sambal oelek or a good, West Indian pepper sauce made from scotch bonnets.   Salsa verde is perfect too.

(7) MOROCCAN-STYLE - Both harissa and preserved lemons are a fantastic topping for oysters.

There are so many different ways to play around with flavors for oysters - these are just a few (for the non-purist :))!  Enjoy!


tags: oysters, when to eat oysters, best oyster toppings, ponzu for oysters, global flavors oysters
categories: all 4, appetizers 1, blog, lifestyle-1, quick & easy
Friday 08.05.16
Posted by Aliya LeeKong
 

Honey Frozen Custard with Cherry-Currant Swirl

ice cream5.jpg
ice cream1.jpg
ice cream2.jpg
ice cream3.jpg
ice cream4.jpg

HONEY FROZEN CUSTARD WITH CHERRY-CURRANT SWIRL

As far as desserts go, I'd be perfectly content to eat ice cream all summer long (and maybe the occasional fruit tart or two)!  It's a past time for my daughter and I to take the walk over to Fort Grace
 in our neighborhood, grab a cone or two (likely with sprinkles) and leisurely stroll back home. 

But I have to admit, as time has gone on and, you know, being a mother and all, I get more and more focused on sourcing my ingredients and trying to make as many treats from scratch as I can.  With the help of a good ice cream maker or an ice cream attachment to your stand mixer, making your own ice cream is really not that tough AND you can control your ingredients - whether for health reasons or simply to tailor to your own tastes.  Not to mention, it's badass.

This is really a frozen custard, not quite ice cream, which is to say it has more yolks than tradition dictates and is a bit higher on the cream side.  The result: luscious, whipped, soft serve-style ice cream that keeps its fluffiness even after freezing for some time.  I used (raw / local) honey to sweeten here, in lieu of sugar, which adds to that silky texture as well.  You could easily use the base to make so many different flavors - I sometimes add cinnamon and toasted pecans to it for a totally different take.

With a glut of cherries and both red and black currants in my house, this sauce was an easy and rewarding way to use them all up!  I didn't even pit the cherries - just threw them all in a pot, knowing I was going to strain away the solids at the end.  If you have pitted cherries, you could easily just blend this mixture up in a good blender for a bit of texture instead of straining, but, remember, you'll probably have a bit more than the recipe calls for.

I love the combination of red fruits and cream - that creamsicle-like flavor, and this tastes AH-MAZING with a bit of chocolate, whether a sauce, some dark chocolate pieces or sprinkles.   Enjoy!

Ingredients

Yields about 2 pints

Frozen Custard Base:

1 cup milk

2 cups heavy cream

½ cup + 2 tablespoons honey

½ teaspoon vanilla extract

1/8 teaspoon salt

6 large egg yolks

Cherry-Currant Swirl:

1 cup red and/or black currants

1 cup cherries, stems removed (pitted or not, doesn’t matter)

2 tablespoons honey

1 tablespoon sherry vinegar

3 tablespoons water

a pinch of salt

For the ice cream base:  In a medium saucepan, bring milk, heavy cream, honey, vanilla and salt up to a simmer and remove from the heat.  Whisk the egg yolks in a heatproof mixing bowl.  Temper the yolks by adding a little of the milk mixture to them and beating in between until a third of the milk mixture has been added.  Return the milk-yolk mixture to the saucepan and place back over low heat.  Cook, stirring frequently, until the mixture thickens and coats the back of a spoon.  Strain and cool completely in the fridge (4 to 8 hours).

For the cherry-currant swirl:  Heat the currants and cherries with the honey, vinegar, water and salt over medium heat.  Simmer covered for 5 minutes until the fruit breaks down and then simmer uncovered another 4 to 5 minutes until the juice thickens.  Strain through a fine mesh strainer, pressing against the solids until all of the juice is through.  Cool completely (and it will continue to thicken as it cools) in the fridge.

To finish: Pour ice cream base into an ice cream maker or ice cream stand mixer attachment and process according to the manufacturer’s directions.  It usually takes about 25 to 30 minutes.  Transfer half of the ice cream into a container.  Pour half of the currant-cherry mixture on top and use a knife or small offset spatula to form swirls.  Repeat with the other half of the ice cream and sauce on top.

Serve immediately soft serve-style or freeze to firm it up a bit (will still be fluffy and soft) with or without sprinkles!

tags: ice cream recipe, frozen custard recipe, how to make ice cream, honey ice cream, swirl ice cream recipe
categories: all 4, blog, desserts, recipes
Wednesday 07.13.16
Posted by Aliya LeeKong
 

July 4th BBQ Sides

JULY 4TH BBQ SIDES

The last thing I want to do on a hot summer day is turn my oven on - I’m sure you all understand!  When entertaining on a gorgeous summer day, I like to keep my sides simple and easy to toss together so I'm not stuck in the kitchen all afternoon while my guests are enjoying the outdoors.  With July 4th creeping up this weekend, I’ve gathered a few ideas that may make an appearance at my BBQ this weekend.  Enjoy!


6-INGREDIENT CORN SALAD


KOREAN POTATO SALAD (GAMJA SALAD)

Photo: Two Red Bowls


NASI ULAM (MALAYSIAN MIXED HERB RICE)

Photo: Rasa Malaysia


SOUTH AFRICAN CHAKALAKA

Photo: Immaculate Bites


FREEKEH WITH SUMMER SQUASH AND BROWN BUTTER


TAHINI ROASTED (OR GRILLED) BROCCOLI


ROASTED CUMIN CARROT, RADISH & AVOCADO SALAD

Photo: Salt & Wind

tags: bbq sides, july 4th sides, global bbq sides
categories: all 4, blog, holiday, lifestyle-1, side dishes-1
Wednesday 06.29.16
Posted by Aliya LeeKong
 

Summer Fruit Tart Addiction

SUMMER FRUIT TART ADDICTION

Honestly, summer is my favorite time of year...I love when the weather turns warm and days (and daylight!) so long; attitudes feel more carefree and New York City comes alive.  The farmer's markets are always flush with fruits and vegetables, and, this weekend, it was overflowing with all sorts of berries (raspberries, blueberries, gooseberries, cherries, currants & strawberries). To me, this just signifies the official start of summer, and, if you follow my IG you'll know this to be true, I invariably have some form of a fruit tart on my counter throughout this time.  I wanted to share with you some go-to's - easy options so you can freestyle your own tarts this summer.


CRUSTS

I have 3 go-to crusts that I use depending on my mood, if I plan to bake the filling and who I’m hosting! 

(1) I love a classic, homemade tart dough (recipe: here).  I keep mine a bit low on the sugar, so I can use it for sweet and savoury crusts.  Doubling the recipe is key and allows you to freeze some to have for later.   This is a great dough to use for both a filling you have to cook or one you don't have to cook.

(2) Of course, already-made and frozen puff pastry is another way to go.  Who doesn’t love that flakey, buttery crust? Mixed with a layer of pastry cream and fresh fruit....This is what I use for my South African Milk Tart (pictured below).  I like to do an initial blind-bake and then fill - this weights it down so it doesn't puff too much.

(3) My third is for my gluten-free friends - a super easy, gluten-free pecan crust. 

You take 1 ½ cups raw pecans and pulse in a food processor until chopped.  Throw in 2 tablespoons unsalted, melted butter, 1 tablespoon honey,  ¼ teaspoon salt, ½ teaspoon ground cinnamon, and 1 egg white and pulse until a fine meal.  It will be a bit wet.  Press into a tart shell and bake at 375° F for 15 minutes.  Done.


CUSTARD FILLING

(1) Baked custard - One of my favorite tarts is this South African Milk Tart.  The creaminess of the cooked custard filling with the berries on top……sooo good.  It's not too egg-y and has a hint of cinnamon.  I love that the beaten egg whites also lighten the custard.

(2) Stovetop custard - I also love to make a quick stovetop custard (or pastry cream) instead of the baked custard in the milk tart recipe.  All you need is some sugar, eggs yolks, corn starch, vanilla bean and milk!  Ok, so sometimes I substitute the milk for Champagne or a nice Prosecco….  The process is simple:

In a medium pot, simmer 2 cups milk with a vanilla bean cut in half and seeds scraped out in to milk and remove from the heat. 

Separately, bring a pot of water to boil for your double boiler. In a metal bowl, whisk 4 egg yolks with 1/3 cup sugar until the mixture is a nice pale yellow.  Add ¼ cup cornstarch and whisk away any lumps.  Slowly stir in the warmed milk mixture and fit the bowl over the boiling water (without letting it touch the water) and constantly stir until the consistency starts to thicken. 

Remove from heat and cover the top directly with plastic wrap and let come to room temp before using.  You can also whip some cream and fold into this pastry cream to make it lighter.

(3) No-cook cream filling - A final option is to make a no cook cream filling and keep the tart refrigerated.  This is a bit like a lightened panna cotta.  Bloom 1 teaspoon gelatin in 2 tablespoons cold water.  Whip 1 cup heavy cream to soft peaks with 2 tablespoons regular or coconut sugar (you can make this sweeter if you like. taste and adjust).  Add in 1 teaspoon vanilla and fold in 4 ounces of mascarpone cheese.  Quickly blast the gelatin-water mixture in the microwave for 5 seconds or so until it's melted and fold that into the cream mixture as well.  It sets up very quickly in the fridge - just make sure to use it in a completely cooled tart or it will melt away!


FILL AND ASSEMBLY

Unless you are baking your custard, the tart shells should be blind-baked and cooled before you assemble.

Now, in terms of what goes on top, this is the time for you to experiment and be creative.  Seriously, whatever is the sweetest and in season works, and experiment to see how you like to arrange your fruits.  I looove cape gooseberries, but apricots and strawberries pair so well together.  It will all go!

If you want some extra sheen, microwave a bit of apricot preserves and paint the fruit with it.  You can also just simply sift a bit of powdered sugar too - up to you....

Enjoy!


tags: summer fruits, how to make a fruit tart, summer fruit tart recipe
categories: all 4, blog, desserts, holiday, lifestyle-1, recipes
Wednesday 06.22.16
Posted by Aliya LeeKong
 

FATHER'S DAY GRILLING

FATHER'S DAY GRILLING

Father's Day falls in such a sweet spot of the year - the weather is always perfect and who doesn’t love a little family gathering outside!?  My plan to celebrate this weekend will be an afternoon of easy grilling - I can't go wrong keeping it a lil' meat-centric.  :) Below are some great grilling recipes to give you some ideas for this weekend.  Enjoy!


GRILLED BUTTERFLIED CHICKEN WITH CHARRED JALAPENO SAUCE


GRILLED LAMB SIRLOIN TACOS WITH CORN, PICKLED CHERRY PEPPERS AND CHIPOTLE CREMA


SALT & PEPPER BABYBACK RIBS

Photo: Food52


GRILLED PORK BANH MI

Photo: Food & Wine


GRILLED SHRIMP WITH KIMCHI-MISO BUTTER

Photo: Rasa Malaysia


GRILLED AVOCADO SALAD WITH GREEN GODDESS DRESSING

Photo: Salt & Wind


CORN WITH GREEN CHILI BUTTER & COCONUT


TAHINI OREOS

Photo: My Name is Yeh


RUM SWIZZLE

Photo: Bon Appetit

tags: father's day, what to cook for father's day, grilling ideas, what to grill for father's day, father's day brunch
categories: all 4, blog, lifestyle-1, man-friendly, recipes, salads, side dishes-1, soups & salads, main dishes-1
Wednesday 06.15.16
Posted by Aliya LeeKong
 

Red Snapper with Lemon, Onions, Mustard & Habañero (Poisson Yassa)

View fullsize fish1_edited-2.jpg
View fullsize fish3.jpg
View fullsize fish2.jpg

RED SNAPPER WITH LEMON, ONIONS, MUSTARD & HABAÑERO (POISSON YASSA)

Summer has officially begun, and with that, besides grilling it up, I like to go a bit lighter.  This recipe is for a Senegalese-inspired fish, poisson yassa.  Fish (here, I used snapper) is marinated with onions, garlic, lemon, bay, mustard and habañero pepper.  After a quick sear of the fish and sauté of the onion mixture, it's all placed in the oven to bake and for the flavors to mingle. 

The flavor is so amazing - with the sweetness of the caramelized onions, the tart bite of the mustard and lemon, and the heat from the habañero.  I love that this preparation can also be used for chicken and lamb with obvious changes to cooking times.  Enjoy!

Serves 4

4 white onions, thinly sliced

5 garlic cloves, minced

Juice and zest of 2 lemons

1 habañero pepper, seeded, ribbed and thinly sliced

¼ cup canola or olive oil, plus more for cooking

¼ cup cider vinegar

1 ½ tablespoons Dijon mustard

1 tablespoons soy sauce

1 bay leaf, fresh or dried

4 filets red snapper (1 ½ - 2 lbs)

salt and freshly ground pepper

2 tablespoons unsalted butter

Handful of fresh herbs, finely chopped (parsley, chives, cilantro)

In a bowl, mix together the onions, garlic, lemon juice and zest, habañero pepper, oil, vinegar, mustard, soy and bay leaf.  This is the marinade for the fish.  Transfer to a plastic bag or baking dish and make sure the fish is thoroughly coated.  Marinate for a minimum of 30 minutes but preferably a few hours.

Preheat oven to 350° F.

Remove filets from the marinade (reserving the marinade), dry off and season with salt and pepper.

In a large cast iron skillet, heat enough oil to coat the bottom of the pan along with the butter over medium-high heat.  When hot, add the snapper skin-side down.  Cook for 3 minutes and remove to a plate (skin-side up).

Add the onion marinade mixture (juices and all!) to the skillet, reduce the heat slightly and cook for 6-8 minutes until the onions start to soften.  Remove from the heat, nestle the snapper filets in the onion mixture, cover with foil and transfer to the oven for 15 minutes.

Garnish with fresh herbs before serving.  It's traditionally served over rice, but I also love it with some crusty bread.


tags: fish recipe, poisson yassa, senegalese food, african cooking
categories: all 4, blog, main dishes, man-friendly, quick & easy, recipes, traditions
Wednesday 06.01.16
Posted by Aliya LeeKong
 

Essential Grilling Tips to Kick Off the Summer!

ESSENTIAL GRILLING TIPS TO KICK OFF THE SUMMER!

With the weather finally starting to warm up and the days getting longer, I can't wait to clean off my back porch and get my grill set up!  There’s nothing better than a little summer get-together with fresh salads, cocktails and grilled meats or fish.  I put together a few tips to help guide you through an easy grilling season...


CHARCOAL VS. GAS

This is the debate that sparks up at every BBQ get-together!  There aren't any real health differences cooking with either one, so it really just comes down to taste and preference.  Charcoal will give you more of a richer, smokier flavor whereas gas is a lot faster and a little less expensive to maintain.

I am partial to charcoal - the smoky flavor you get is so incredible, and for me, being close to the cooking process (thinking about heat and being intuitive about done-ness) is something I just love.  To start a charcoal grill, use a chimney, which makes it super easy to get the coals hot and ready to use.  Place paper or starter briquets on the underside of the chimney and then fill with charcoal.  Light the paper/briquets and let the coals catch fire, which should take around 20-25 minutes.  Dump out the charcoals into the grill when they have turned an ashy gray.  I'm not much for lighter fluid, so this is my favorite way. 


MAINTAINING YOUR GRILL

You want to oil the cold grates prior to grilling with a rag or paper towel.  This is basically the same as maintaining your cast iron pans at home - seasoning the grates will help to make the grill non-stick.

Also, always preheat the grill, and clean the grill while it is still hot before and after cooking.  The grill should be so hot that you can't keep your hand above it for more than 2 seconds. 


READY TO GRILL

A few points:

(1) Always let your meat come up to room temperature before grilling for a good 20-30 minutes.  This makes sure that your meat will cook evenly on the grill. 

(2) Season with spices or marinade overnight for the best flavor, but even a quick grill rub right before cooking makes for great flavor.  If you're using a marinade, make sure to pat the meat dry before cooking. 

(3) Save the basting of sauces towards the end of cooking so that they don’t burn the foods.  Most basting sauces contain brown sugar, tomato sauce, soy and other sugary ingredients that will char the meat before it is finished cooking. 

(4) Tongs and spatulas are the best tools to use when handling meat; never a grill fork as it releases all those good juices when you pierce the meat to turn.


LET'S GET COOKIN'!

The hardest thing to do while cooking?  Don’t touch the meat!  Let it sear and get those beautiful grill marks.  The meat will let you know when it is ready to be turned.  If you pick up the meat too early, it will stick to the grates.  After cooking, let the meat rest (about 5-15 minutes).  This way the juices will re-distribute.  If you cut into it right away, all the juices will flow out leaving you with a dry cut of meat. 

Using a meat thermometer is helpful, especially if you're grilling poultry.  I actually judge by the touch when I'm grilling red meat.  Use the skin on your hand between your thumb and your pointer finger as a guide.  The first pinch between the two fingers is soft and spongy – rare, ¼” back is a little spongy but springs back – medium, ½” back is firmer – well done.


GREAT GRILL ACCESSORIES

Photo: Sur La Table

Salt blocks are made from Himalayan salt, and they impart a subtle saltiness to foods and can be used directly on the grill. 


Photo: Amazon

Grill baskets are great for those foods that fall through the grates like asparagus, shrimp, onions etc…I love this one because I'm always cooking for a group and it's on the larger size.

Photo: Emile Henry

Pizza stones are amazing for making fresh pizza at home.  You can even stop by your local pizza place and ask to buy dough if you don’t have time to make your own.  This is actually what I own, and it works on the grill and in the oven.  What I love about this one is that you can cut directly on it making serving up that grilled pizza all the easier.


Photo: William Sonoma

Cedar planks & alder wood are amazing for grilling fish.  Not only do they keep the delicate fish from falling through the grates, they also infuse the fish with a rich, smokey flavor depending on the type of wood.  If you can find alder wood, the flavor is amazing!

tags: grilling tips, how to grill, grilling for memorial day, summer grill essentials
categories: all 4, blog, lifestyle-1, quick & easy, man-friendly
Monday 05.23.16
Posted by Aliya LeeKong
 

All About Crab Season + Crispy Spiced Crab Cakes

ALL ABOUT CRAB SEASON + CRISPY SPICED CRAB CAKES


I’ve previously expressed my undying love for crabs with this delicious recipe , and I just wanted to re-emphasize this love (ok…obsession!)  with the fact that soft shell crab season is just around the corner.  Crab is one of those delicate ingredients, sweet and flaky,  but can take on so many different preparations - deep-frying, pan-frying, baking, boiling, in a salad, soup, pasta, or rice dish.  For me, the marriage of crab with spices and butter is absolute heaven!!

Here are a bunch of crab recipes to experiment with along with my favorite, crispy, spiced crab cakes!


SOFT SHELL CRAB WITH CURRY BUTTER


Photo: NYTimes

Even though we are able to have crabs all year round, the soft shell crab is one of the varieties that has a true farming season (mid May - September, depending on the temperatures of the water).  During this time, the blue crab is molting its shell in order to grow in to a new, larger one.  When the crab loses (pretty much ejects itself from) its shell, they have to be taken out of the water immediately and harvested before they begin to grow their new, hard shell…you know the one that takes forever to crush and get to the juicy, delicious meat.  

As with most shellfish, it’s best to purchase live and take home immediately. Taking home a lobster and throwing in a pot of boiling water, or (gasp) sticking a knife in the head before throwing in said boiling water is a whole lot easier (in the sense of being humane and having less guilt) than cutting off the face of the soft shell crab, ripping out the gills from behind the face and then removing the apron on the underside of the crab….you tell me!  But, if you are adventurous in your cooking and you choose to tackle this task, this is a great step by step for cleaning them at home (and good luck to you, I will continue to have my local fishmonger clean them for me…thanks!).


SINGAPOREAN BLACK PEPPER SNOW CRAB

Photo: Saveur

I will never forget when I was vacationing in Hawaii having dinner at this completely ordinary looking restaurant and ordering a variety of sushi, one of which was a crab roll.  Crab roll - what comes to mind? The fake crab meat that's good...but not great.  When the food arrived, the crab roll was ridiculous, not to mention all the other sushi!  I’m talking fresh, amazing, shredded snow crab meat explosion wrapped in seaweed.  My mouth is watering just thinking about this meal again.  If you have the chance to experience fresh, just caught snow crab you should definitely jump at the chance.  This recipe is a delicious, simple way to enjoy the legs as well.


TRINIDAD CALLALOO WITH CRAB

Photo: Caribbean Pot


CRACKED DUNGENESS CRAB WITH LEMONGRASS, BLACK PEPPER & BASIL
 

Photo: My Recipes

Unfortunately, due to this crazy weather we have been having this year (thanks El Nino), Dungeness crab season has had a late start on the West coast.  The season finally kicked off at the end of March and ends in June. I love the sweetness of this crab meat - it complements different flavors so well and also is just perfect on its own with a bit of drawn butter.


STONE CRABS

Stone crabs are one of my favorite types, and especially since I found out how they are harvested.  The crabs are caught and one claw is removed and then the bodies thrown back in the water to regrow their claws (allowing it to have one to fend off predators).  How amazing!  As with most crab legs, these are great just steamed with a great mustard sauce or clarified butter.


CRAB CAKES WITH MUSTARD SEEDS & PARSNIPS

Serves 4-6; Yields 15 to 16 crab cakes

1 medium parsnip, peeled and cut into a medium dice

2-3 tablespoons canola oil plus more for frying

1 teaspoon mustard seeds

8 curry leaves (optional)

1 large shallot, finely minced

1-2 red and/or green chiles, finely chopped (ex. red jalapeno, jalapeno, thai)

3 - 4 garlic cloves

1 pound jumbo lump or lump crabmeat, drained and picked through for any shells

¾ cup breadcrumbs

1 egg, lightly beaten

½ teaspoon salt

¼ teaspoon freshly ground black pepper

handful of fresh herbs (chives, cilantro, parsley), roughly chopped

1 tablespoon unsalted butter for frying

kosher salt to taste

In a medium pot, cover parsnips with cold water by about 1 inch.  Bring up to a boil and cook for 6-8 minutes until fork tender.  Drain and pass through a ricer (best) or mash with a potato masher and let cool. 

While the parsnips are cooking, heat 2 tablespoons of oil in a medium saucepan over medium high heat.  Add mustard seeds and curry leaves if using, and, when they start to pop, reduce the heat to medium-low and add the shallots, chili and garlic.  Saute for 2 to 3 minutes until the shallots are translucent, remove and let cool.

In a medium bowl, combine crab with the pureed parsnips, the shallot mixture, breadcrumbs, egg, salt, pepper and herbs.  Form into 2 ¼ inch patties and let chill in the refrigerator for 15 minutes.

In a large sauté pan, heat 1/8” of oil with 1 tablespoon of butter.  Fry each crab cake 1-2 minutes per side until golden brown and removed to a papertowel-lined plate to drain.

Finish crab cakes with a sprinkle of salt as soon as they are out of the oil and serve hot.

Freezing: These guys freeze really well, and I love to make a double batch to keep some on hand for a quick weeknight meal.  Just let them thaw for a few hours in the fridge before frying up!


tags: soft-shell crab, soft shell crab recipes, how to cook crab, singaporean black pepper crab, crab cake recipe, crab cakes
categories: all 3, appetizers 1, blog, main dishes, quick & easy, recipes
Wednesday 05.18.16
Posted by Aliya LeeKong
 
Newer / Older