X

Sign up to receive exclusive recipes, tips, updates and other goodies from Aliya!

  • Home
  • Blog
    • All
    • Recipes
    • Spices + Ingredients
    • Lifestyle, etc.
    • Travel
  • The Cookbook
  • The App
  • Media
    • All Media
    • Video
  • About
  • Passions
Aliya LeeKong
  • Home
  • Blog
    • All
    • Recipes
    • Spices + Ingredients
    • Lifestyle, etc.
    • Travel
  • The Cookbook
  • The App
  • Media
    • All Media
    • Video
  • About
  • Passions

Sugar Plum & Currant Torte

View fullsize plum1.jpg
View fullsize plum2.jpg
View fullsize plum3.jpg
View fullsize plum4.jpg

SUGAR PLUM & CURRANT TORTE

I am forever going on and on about the market at this time of year and how truly beautiful, bright and flavorful all of the fruit is, and this post is no exception!  I found some gorgeous sugar plums and tart currants and set off to bake on a Sunday - nothing too complicated, just a tad decadent, and delicious for days into the week.

What I ended up with is this torte, a true summer dessert (and sometimes breakfast!).  This is perfect for cake novices because the batter is just so easy.  It comes together in less than 10 minutes and is virtually fool-proof.

A few points: I happened to make this gluten-free, but if you only have all purpose flour on hand, go ahead and replace the flours with an equal amount of it; just drop down the baking powder to 1 teaspoon.  Also, I don't use a ton of sugar here, so the key is using super sweet plums to offset the tartness of the currants. Taste before baking!

Enjoy!

Ingredients

Serves 6 to 8

½ cup oat flour

½ cup brown rice flour

¼ cup almond flour

1 ½ teaspoons baking powder

pinch of salt

1 stick unsalted butter, room temperature

¾ cup coconut, palm, unrefined, or plain old white sugar

2 eggs, room temperature

10 sugar plums, halved and pitted

½ cup red currants

raw honey + cinnamon

Procedure

Preheat the oven to 350˚ F.

In a medium bowl, mix together the flours, baking powder and salt.

With a stand or hand mixer, cream the butter with the sugar.  To the sweet butter, add the eggs one at a time until incorporated.  With the mixer on low, add in the flour until just incorporated.

Transfer the batter to a greased 9-inch cake or pie tin.  Layer the plum halves (skin side up) and currants.  Brush the plums with a bit of raw honey and sprinkle cinnamon all over.

Bake for 40 to 45 minutes until a toothpick inserted comes out clean.  Cool completely before unmolding.

tags: plum torte recipe, sugar plums, torte recipe, how to make plum torte, desserts, plum dessert
categories: all 2, breads & cakes, breakfast, desserts
Tuesday 08.11.15
Posted by Aliya LeeKong
 

Strawberry Rhubarb Crumble with Ancient Grain Oatmeal + Coconut Sugar

View fullsize straw4.jpg
View fullsize straw1.jpg
View fullsize straw2.jpg
View fullsize straw3.jpg

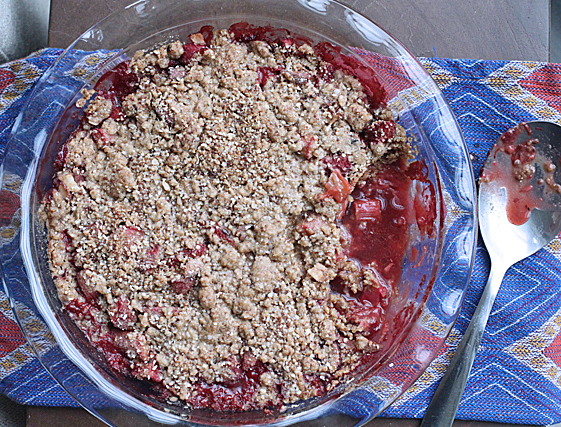
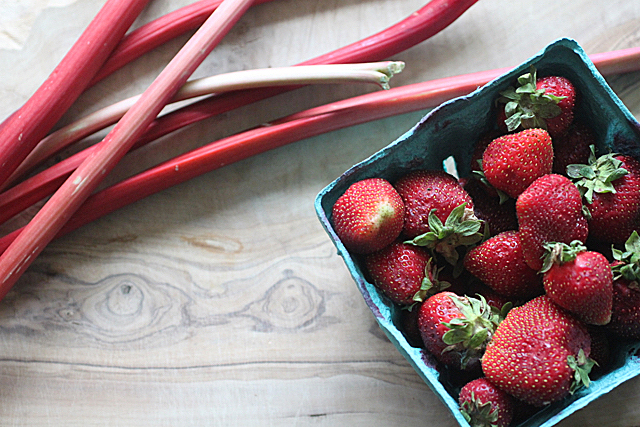
I have been slightly losing my mind over the strawberries that have just gotten to the market, and so I've been playing around with variations on crumbles.  I particularly love this one with rhubarb because strawberry and rhubarb are just so classic together, but, also, using peak season fruit means I can bake with a lot less sugar - the berries taste like candy! 

The filling gets an ingredient that you usually don't see in a crumble: sherry vinegar.  The vinegar really brightens and intensifies that berry flavor in a unique way.  I let the fruit marinate for a bit before topping and throwing into the oven.  And in lieu of an all purpose flour crumble topping, I use a bit of brown rice flour and an ancient grain oatmeal that has gluten-free oats, amaranth, and hemp amongst other ingredients.  When I set out to make this recipe, I actually wanted to create a breakfast crumble I could give my little girl, and this does double duty - for breakfast or a simple dessert.  I also used coconut sugar here - an unrefined sugar with a lot of antioxidants and lower glycemic effect; it's a bit sweeter than white sugar, so I used a lot less than other recipes you'll see out there.

Breakfast or not, this crumble is decadent - sweet ripe fruit with bits of sliced almonds topped with a buttery, crumb topping.  Full-bodied and deeply flavored - breakfast never tasted so good!

Enjoy!

Ingredients

Serves 6 to 8 / Yields (1) 9 1/2-inch pie dish

For the filling:

1 quart strawberries, hulled and halved (about 4 cups chopped)

5-6 stalks rhubarb (about a ½ lb), diced into ½ inch pieces

½ teaspoon vanilla extract

2 teaspoons (good quality) sherry vinegar

2 ½  tablespoons coconut sugar

2 tablespoons cornstarch

1/3 cup sliced almonds

For the crumb topping:

½ cup brown rice flour

½ cup ancient grain oatmeal (rolled oats work great here too)

1 teaspoon baking powder

¼ cup coconut sugar

½ teaspoon cinnamon

¼ tsp salt

7 tablespoons cold unsalted butter, cut into cubes (plus a bit more for greasing)

Procedure

Preheat the oven to 375° F.

In a medium bowl, mix together all of the filling ingredients.  Let marinate 10-15 minutes while preparing the topping.

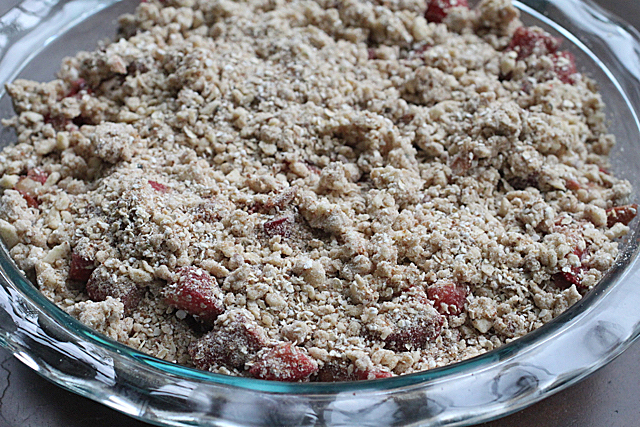
In a food processor, add the flour, oatmeal, baking powder, sugar, cinnamon and salt.  Pulse until uniformly mixed.  Scatter the cold cubes of butter and pulse until a coarse meal forms.  Don't let it run for too long because the butter will warm up and start to clump.

Grease a 9 ½-inch pie dish with a bit of butter and place on a baking sheet (to catch any juicy overflow).  Add the strawberry-rhubarb mixture.  Top with the crumb topping and bake for 35 minutes until the fruit is bubbling and the crumble topping has browned up.

Serve warm as is for breakfast or with a bit of ice cream or whipped cream for dessert.


tags: gluten free, gluten free baking, crumble recipe, crisp, strawberry rhubarb crumble, strawberry rhubarb crisp, strawberry pie, desserts
categories: all 2, breakfast, desserts
Tuesday 06.02.15
Posted by Aliya LeeKong
 

Currant, Pistachio & Coconut Overnight Oats

View fullsize oats1.jpg
View fullsize oats2.jpg
View fullsize oats3.jpg

CURRANT, PISTACHIO & COCONUT OVERNIGHT OATS

I've been seeing overnight oats recipes everywhere for the past few months, and I finally broke down and tried making some myself.  Love them!!  My brain takes some time to turn on in the morning, and this takes all the guesswork out of breakfast, for me and my little one (FYI, when I first gave them to her, it was the quietest I've seen her; she dug in!!).  There could be nothing easier than throwing a bunch of ingredients into a mason jar, shaking and letting them sit overnight - no cooking.  And it's a complete blank slate; you can literally layer any flavors you want.

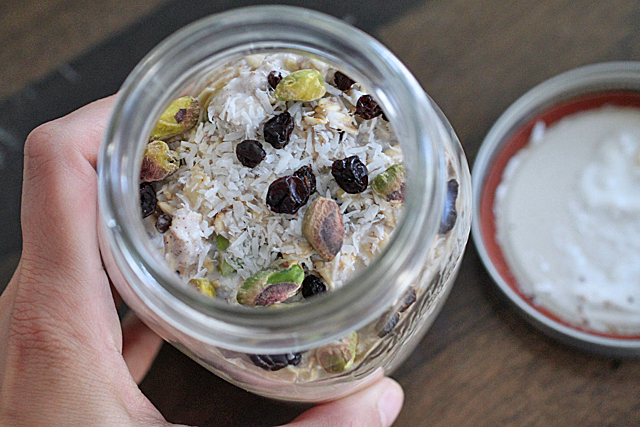
Breakfast, for me, is a way to cram in as many nutrients as I can.  The day can kind of slip by you, so I like to make sure I have at least packed my morning with protein and vitamins.  I went a bit Middle Eastern-inspired here with fruity currants (raisins or sultanas would be great too), pistachios and some dried, unsweetened coconut.  A bit of cinnamon, vanilla and ground cardamom make all of the flavors pop, and I added some chia seeds for protein, Omega-3s and hydration.  I also used a combination of milk and yogurt to bloom the oats, and I love how the currants and pistachios plump up a bit.  Pick any milk you like for this - almond, fresh coconut or any nut milk would be delicious here.  If you want the pistachios to have more crunch to them, leave them out and layer them the morning after.

Enjoy!

Ingredients

Yields 2 to 3 servings (depending on your appetite!)

1 cup old-fashioned rolled oats

3 tablespoons dried currants (or 1/4 cup raisins/sultanas)

3 tablespoons unsalted, shelled raw pistachios

2 1/2 tablespoons dried, unsweetened coconut

2 teaspoons chia seeds

1/2 teaspoon ground cinnamon

1/4 teaspoon ground cardamom

Pinch ground vanilla bean (or 1/2 teaspoon vanilla extract)

1 cup milk (cow's, nut, coconut, etc)

1/2 cup yogurt

Procedure

In a mason jar or bowl, add all of the ingredients.  Shake or stir until well-combined.  Cover and refrigerate overnight.  That's it!

If you want, you can heat them a bit over the stove the next morning if you like your oats warm.  I actually love them straight out of the fridge...These keep for a few days, but I prefer making it daily.


tags: best overnight oats, overnight oats recipe, how to make overnight oats, coconut recipes, breakfast recipes
categories: all 2, breakfast, vegetarian
Friday 03.06.15
Posted by Aliya LeeKong
 

Butternut Squash & Apple Bread with Maple and Cardamom

View fullsize squash 1.jpg
View fullsize Squash 2.jpg
View fullsize squash 3.jpg
View fullsize squash 4.jpg

Butternut Squash & Apple Bread with Maple and Cardamom

I posted a photo of this on Instagram a few days back, and a number of people came back and asked for this recipe to bake for the holidays.  And here it is!  It’s a bit lighter than other fruit or vegetable breads (think: cake), and relies much more on butternut squash than apple for flavor.  That said, the great thing about this bread is that the squash doesn’t have to be precooked or pureed or anything before being added in.  Grating it up in a processor does all the work you need, and the squash cooks in the baking time.

I made this cake for my daughter, who hated squash (until now…hah!).  And for that reason, I changed out the flour using an “all purpose” mix of oat, brown rice, and almond flours.  Really, it isn’t so much about the gluten, though being gluten free is a benefit for some here.  It’s more about the fact that oats and brown rice and almonds have a lot more nutritional value than AP flour.  Same goes for the maple sugar, a sugar from the maple tree that has a flavor very close to the syrup.   Again, maple sugar has antioxidants and minerals not found in refined sugar.  It has a lower glycemic index, and I always use a lot less of it in recipes.

These are just my choices, but feel free to use all purpose flour here and substitute another sugar if you can’t find maple.  Enjoy!


Ingredients

Yields 1 8½” x 4¼” x 2¾” loaf pan

2 cups raw, peeled, and grated butternut squash

1 cup peeled, cored and grated apple

scant 1 cup maple sugar

1 cup oat flour

½ cup brown rice flour

½ cup almond flour

½ tsp salt

½ tsp cinnamon

½ tsp ground cardamom

½ tsp baking soda

2 tsps baking powder

¼ cup organic, unrefined coconut oil or ½ stick butter, room temperature

1 tsp vanilla extract

2 eggs, room temperature

Procedure

Preheat oven to 375˚ F.

Place grated squash and apple in a bowl along with 3 tablespoons of the maple sugar.   Stir to combine and let stand to macerate for 15 minutes.

In another bowl, sift together flours with salt, spices, baking soda and baking powder.

In a stand mixer, cream together remaining sugar and coconut oil or butter.  With mixer on medium-low, add vanilla and then the eggs one at a time.  Turn mixer down to low, and add in the flour in three increments, stopping to scrape down the sides.  Mix until almost combined.  Fold in the macerated squash and apple with any liquid that’s accumulated and mix until thoroughly combined.

Pour batter into a greased loaf pan, and bake for 45-50 minutes or until a toothpick inserted into the center comes out clean.  Cool before unmolding.

tags: apple cake, holiday baking, holiday cakes, butternut squash recipes, maple sugar, butternut squash bread, squash bread, apple bread recipe, gluten free, gluten free baking
categories: breads & cakes, breakfast, desserts, holiday, recipes, sweet & savoury, all 2
Friday 12.05.14
Posted by Aliya LeeKong
 

Jamaican Ackee & Saltfish

View fullsize ackee-pic1-500x333.jpg
View fullsize ackee-pic1a-500x333.jpg
View fullsize ackee-pic2-500x333.jpg
View fullsize ackee-pic3-500x166.jpg

Jamaican Ackee & Saltfish

Recently, a friend of mine from Jamaica who happens to be an incredible cook gave me an impromptu cooking lesson.  She showed me how to make Ackee and Saltfish, Jamaica’s national dish, and, although I didn’t write down exact measurements (given the impromptu nature of it all!), I wanted to share the experience with you guys and at least give you the building blocks…

First, let’s talk about ackee – it’s Jamaica’s national fruit, though it’s not really sweet and, in this dish, cooks up like a vegetable.  Ackee starts out closed and green (and is actually poisonous in this state), and then it matures to red-orange and splits open to reveal black seeds and white-cream flesh (which is perfectly safe to eat).  Obviously, finding the fresh fruit here in the States is pretty tough, but you can sometimes find it canned or frozen.

The second part of the dish is the saltfish, which is dried, salted cod.  The cod can be soaked for a few hours to reduce its level of salt or used as is – a quick poach and flaked up, it’s ready for the dish.  Ackee and saltfish is really a sauté, and, in our version, we started with some bacon, and then added sliced onions and peppers, a minced, killer Scotch Bonnet pepper, chopped tomato, and sliced scallions.  We threw in the flaked saltfish and then carefully folded in the ackee and some fresh thyme.

Ackee can be boiled ahead of time or added into the sauté – it cooks up very quickly.  It turns from a white to an egg-yellow when cooked and can crumble easily (so be ginger with it).  We fried up some dumplings to go with the creamy, buttery ackee (the tradition), though rice, green bananas, yams or even fried breadfruit also go really well with it.

This is truly a breakfast (or brunch) of champions!  Creamy, spicy, and deeply flavorful and beautiful paired with the crispy, fried dumplings.  Thank you, May, for the ackee and saltfish tutorial!

categories: breakfast, travel, traditions, recipes, all
Wednesday 08.14.13
Posted by Liz Neilson
 

My Breakfast Clafoutis

View fullsize clafouti-pic1-500x333.jpg
View fullsize clafouti-pic2-500x333.jpg

My Breakfast Clafoutis

Lately, I’ve been craving desserts on a daily basis, and so in an effort not to get too crazy, I’ve been searching out healthier alternatives to satisfy my sweet tooth.  I made these as a fast and healthy weeknight dessert, but the leftovers quickly became my morning snack over the following days.  And why not?   Eggs, milk, fruit and almonds?  Perfect breakfast food!

These are decently healthier than the last version of clafoutis I posted with Amarena cherries and dark chocolate…which are delicious!  But, here, I used lowfat milk instead of heavy cream and made them gluten free with the addition of almond flour in lieu of all-purpose.  Everything (except the berries) gets whirred in a blender before a short rest period, so these are super quick to make and can’t be easier for clean up.

I don’t put a ton of sugar in these since I have them for breakfast, so you may need to sweeten them up a bit more if you like it on the sweet side or finish with a bit of powdered sugar or an extra drizzle of honey.  If you are using peak season berries, they should be plenty sweet – I use frozen berries in the off-season months myself.  Enjoy!

Ingredients

Yields 6 6-ounce ramekins

3 eggs

3/4 cup milk, lowfat or otherwise

1 tbsp vanilla extract

2 tsps almond extract

¼ cup honey or light brown sugar

¼ tsp salt

1/3 cup almond flour

1 ½ cups berries (blueberries, raspberries, strawberries or some combination)

cooking spray, for greasing

powdered sugar, for garnish (optional)

Procedure

Preheat oven to 375° F.

In a blender, blend together eggs, milk, extracts, honey and salt.  Add flour and blend for 10 seconds.  Scrape down the sides and blend for another 10 to 15 seconds until flour is incorporated and there are no lumps.  Rest batter in the refrigerator for a minimum of 15 minutes and up to overnight.

Grease the ramekins, and place on a large baking sheet.  Place ¼ cup of mixed berries in each ramekin and top with an even amount of batter in each.

Transfer baking sheet into the oven and bake for 23-25 minutes until lightly browned, raised and the custard is set.  Remove and let cool slightly before serving.   Dust with powdered sugar, if desired.

tags: Clafoutis, breakfast, brunch, berries, gluten free
categories: all, breakfast, recipes, breads & cakes, desserts-1
Tuesday 04.09.13
Posted by Aliya LeeKong
 

A Forgotten Food, Seera

View fullsize Seera-pic1-500x333.jpg
View fullsize seera-pic2-500x333.jpg
View fullsize seera-pic3-500x333.jpg

A Forgotten Food, Seera

Last week, one of the chefs over at Junoon shocked me into taste memory.  He cooked up a batch of seera (also called sheera or seero), which is a sweet, crumbly, buttery, cake-like dessert usually made with semolina or cream of wheat.  My mom used to make it for me growing up, and I hadn’t thought about it in years!  One bite…it’s amazing how the smell and taste of something can just transport you back.  That night, I went right home and made my own, comforting batch that I thought I’d share with you.

Seera belongs to a dessert family called halvas – these are desserts served throughout South, Central and West Asia, parts of Europe, the Middle East and North Africa.  Oftentimes, they are flour-based as you see here, but they can also be made from dense nut pastes and be more of a confection.

I had a full-on debate with my mom about the pros and cons of using semolina vs. cream of wheat, when’s the right time to add the cardamom, what the resulting color should be, and how no one should feel guilty if they want to eat this for breakfast (it’s cream of wheat after all!).  She even whipped out my grandmother’s old recipe written out in mugs!  I love that….Well, this is what I came up with.  And the reality is farina or cream of wheat will result in a slightly softer, more crumbly halva and the semolina, depending on the grind, will be a bit more dense and cake-like with a brighter yellow color.  Buttery, with the aromatics of saffron and cardamom, pure comfort, and whips up in less than 10 minutes…enjoy!

Ingredients

Serves 4 to 6

1 cup milk

½ tsp vanilla extract

pinch saffron

pinch salt

¾ cup palm sugar*

1 stick + 2 tbsps unsalted butter

2 cardamom pods, cracked

1 cup farina, cream of wheat or semolina flour

Optional garnishes:**

Pistachios, toasted

Sliced almonds, toasted

Sultanas

A few dashes of rosewater

Procedure

In a small, nonstick saucepan, bring milk up to a boil.  Lower to a simmer and add vanilla extract, saffron, salt and palm sugar, whisking to dissolve.  Keep over a low flame.

In another nonstick saucepan over medium heat, add butter and cardamom pods.  When the butter has melted and the foam subsides, add the farina and toast in the butter until golden brown, about 3 to 4 minutes.  Lower the flame, add the sweetened milk mixture and stir until texture dries a bit, another 2 to 3 minutes or so.

Serve warm or room temperature.

*You can substitute white or brown sugars here, but I would adjust down the amount as palm sugar is a bit less sweet than those two (so closer to ½ cup).

**For the optional garnishes, you can add as much as you like right on top.  For the sultanas, I like to throw them in with the simmering milk, so they plump up a bit.

tags: seera, halva, cardamom, almonds
categories: all, desserts, recipes, breads & cakes, breakfast
Monday 06.11.12
Posted by Aliya LeeKong
 

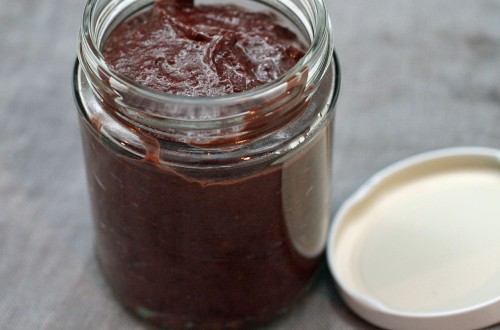
My Homemade Nutella

View fullsize nutella-pic3-500x333.jpg
View fullsize nutella-pic2-500x333.jpg
View fullsize nutella-pic1-500x330.jpg

My Homemade Nutella

So, admittedly, I’ve been on a bit of a healthy kick lately – toting around awful looking bottles of green juice, trying to eat more raw foods and roughage, and avoiding alcohol (gasp!). A bit of a spring cleanse, if you will.  It’s been about two weeks (14 days, 11 hours and 33 minutes but who’s counting?), and I’m feeling pretty good.  For some reason, over the last few days, my sweet tooth has gone a bit haywire, so I decided to make something I crave pretty often…nutella!

Now, nutella is one of those items with which I avoid eye contact in the grocery store.  God forbid I bring a jar of it home, and it sits there longingly, just asking for me to take a spoon to it each time I go into the kitchen.  I grew up eating it on special breakfast occasions, a lusciously chocolate-y and nutty filling for crèpes, a tradition I’ve carried on to adulthood.  It’s popular for breakfast in Europe, where it’s touted as healthy!  Can you actually believe it??

On closer inspection, it really isn’t that bad for you!  Nuts, skim milk, a bit of cocoa powder – I thought a homemade version could only be better.  I used a slightly healthier oil, hazelnut oil, in lieu of the palm oil used in the original version.  I also used a local honey instead of sugar.  I did add some real dark chocolate to mine, but I rationalized that 3.5 ounces spread out over a whole jar can’t be that bad for you, and isn’t dark chocolate an antioxidant anyway? This nutella is creamy, rich, and delicious and tastes just like the ingredients it’s made from (so use good ones!).  Enjoy!

Ingredients

¾ cup chopped hazelnuts, toasted*

¼ cup raw almonds, toasted*

2 tbsps hazelnut oil

1-3 tbsps local honey**

½ tsp vanilla extract

1 tbsp unsweetened cocoa powder

½ tsp kosher salt

½ cup skim milk

3.5 ounces semisweet or dark chocolate, chopped

Procedure

To the bowl of a food processor, add the toasted hazelnuts and almonds and process until a fine crumb.  Add the oil, honey, vanilla extract, cocoa powder and salt and process until a paste.

In a small saucepan, heat the milk and chocolate together until the chocolate is completely melted.  Add to the food processor and process until the nutella’s texture is smooth and creamy.  Cool and refrigerate.  This can be stored in the refrigerator for about a week.

*I chopped up the hazelnuts here to increase their surface area, so they toast up quicker.  You can easily toast the chopped hazelnuts and almonds together in a 350° F oven for 5 to 10 minutes.

**The variation in the amount of honey really depends on 2 things: (1) what type of chocolate you are using and (2) your personal preference for how sweet you want this.  I used a 70% dark chocolate and about 2 tablespoons, but if you are using a semisweet or even a milk chocolate, you may need less.  This is something that you can add at the end to taste if you like.

tags: dessert, healthy, raw, breakfast, nutella, almonds, chocolate, hazelnut
categories: breakfast, desserts, recipes, snacks, all -1
Monday 05.07.12
Posted by Aliya LeeKong
 

Parsnip Cakes with Spring Garlic & Chile

View fullsize parsnip-pic1-500x333.jpg
View fullsize parsnip-pic2-500x333.jpg
View fullsize parsnip-pic3-500x222.jpg

Parsnip Cakes with Spring Garlic & Chile

Walking through the Union Square Greenmarket the other day (as the weather shifted from the low 40’s to the low 60’s), it felt to me that the season is being a bit ambivalent, unsure of whether it’s winter or spring.  Piled high were the hearty root vegetables of the winter – rutabagas, salsify and parsnips – next to the burgeoning spring crop with lovely spring garlic and rhubarb making an appearance.  I nabbed some of the spring garlic and for breakfast this Sunday created these little cakes, as an ode to this in-between season.

Parsnip is an incredibly flavorful and versatile vegetable.  The flavor is somewhere between a potato and a carrot, and it’s signature sweetness works beautifully with butter, spices, and heat. Spring garlic, on the other hand, is like a two-for-one sale – garlic and green onion flavor in one!  If you can’t find any, using a bit of garlic with leek or green onion works really well here too.

This recipe couldn’t be simpler or more forgiving – cook the parsnips til tender, add other ingredients, fry until golden.  You could easily use potatoes instead of parsnips here if you have them on hand.  I love these for breakfast with some scrambled eggs and a touch of sriracha to dip.  But these could also be a great dinner side to accompany roast chicken or a nice piece of fish.  A crisp bite with that sweet, creamy parsnip flavor, garlic, onion and the heat from the chilies…Enjoy!

Ingredients

Serves 4 to 6

2 lbs parsnips, peeled and cut into a medium dice

1-2 red and/or green chilies, finely chopped (red jalapeno, jalapeno, Thai)

2 spring garlic shoots, finely chopped (approximately 1/3 cup)

½ cup all-purpose flour

¾ tsp kosher salt

½ tsp sugar

handful of fresh herbs (chives, cilantro, parsley), roughly chopped

unsalted butter for frying

kosher salt to taste

Procedure

Put diced parsnips in a pot and cover with cold water.  Place over medium-high heat, cover and bring to a boil.  Lower to a strong simmer and simmer until fork tender (approximately 10-15 minutes depending on the size of your dice).  Drain in a colander and let air dry for a few minutes.

In a large bowl, mash parsnips with a potato masher or use a ricer to break them up.  Add the chilies, spring garlic, flour, salt, sugar and herbs and mix until a uniform texture (don’t overmix though or they’ll get a tad gummy).

Heat a sauté or cast iron pan over medium heat and add butter.  For the parsnip cakes, I like to use an ice cream scoop so I can be sure I get even amounts.  I love to use my hands here, making a flat patty out of the parsnip mixture and then just sliding them into the pan.  They don’t have to be perfectly shaped.

Fry for 3 to 4 minutes per side just to develop that nice golden crust, and work in batches if necessary to finish off the mixture.  Let drain on a paper towel-lined baking sheet.  Sprinkle with a bit of salt while it’s hot for extra flavor.

Serve immediately.  I like mine with a bit of sriracha on the side to dip.

tags: parsnip, spring garlic, vegetarian sides
categories: all -1, appetizers, breakfast, side dishes, vegetarian-1
Monday 03.19.12
Posted by Aliya LeeKong
 

Frittata with Caramelized Garlic, Squash & Aleppo

View fullsize frittata-pic1-500x333.jpg
View fullsize frittata-pic2-500x333.jpg
View fullsize frittata-pic3-500x166.jpg

Frittata with Caramelized Garlic, Butternut Squash & Aleppo

One thing I get asked about all the time is how to incorporate spices into your every day foods.  I write here a lot about “exotic” spices or ingredients, and the reality is I do cook with them all of the time.  It doesn’t have to be a special occasion.  It doesn’t even have to be an overtly ethnic dish.  I like the foods everyone else does, but I tend to add a little something extra to them.

This frittata with caramelized garlic (like savoury candy!) and butternut squash is the perfect example.  Wait, I need to reiterate how ridiculously delicious caramelized garlic is.  This recipe is exact, but I encourage you to double the garlic portion and save half for other dishes later in the week – it’s like balsamic-y, glazed, nutty goodness and the cloves are fantastic on a salad, as part of a cheese plate, or worked into a pork or lamb chop sauce.

In any case, back to spices…here I use Aleppo chili flakes for heat.  These are my go-to-on-top-of-pizza chili flake and just have a really sweet, mild flavor.  Pairing this with a bit of smoked Spanish paprika brings a real richness to the dish; the scent as it’s cooking is maddening (particularly if you are starving like I was when I made this).

I love the idea of working a fall squash into breakfast, and this is a fantastic dish to entertain with for a brunch.  I used grana padano cheese here because it’s delicate, and there are so many outspoken flavors here: the caramelized garlic adds that savoury / sweet quality as does the butternut squash, the chilis and paprika a bit of smokiness and heat and the scallions that bright finish.  This is definitely one of my Sunday morning fall faves…Enjoy!

Ingredients

Serves 6 to 8

Caramelized garlic:

15 – 20 whole garlic cloves

¾ cup milk

1 tbsp unsalted butter

2 tsps olive oil

2 tsps balsamic vinegar

½ cup water

2 tsps sugar

pinch salt

pinch Aleppo chili flakes

Frittata:

2 cups butternut squash, peeled, seeded and cut into a ½” dice

olive oil

salt

freshly ground black pepper

10 eggs

½ cup crème fraiche

2 tsps pimentón de la Vera (smoked Spanish paprika)

1 tbsp Aleppo chili flakes

1 cup grana padano cheese, grated*

½ cup mozzarella, shredded

2 tbsps scallions or chives, green parts only, finely chopped

1 ¼ tsp salt

Procedure

Preheat oven to 375° F.

In a small saucepan, add whole garlic cloves and milk.  Bring up to a simmer and simmer for 5 minutes.  Be careful it doesn’t boil over!

Strain and rinse garlic cloves.  Wipe out saucepan and place back over medium heat.  Add butter and oil.  When hot, add garlic and sauté for 5 minutes.  Add remaining caramelized garlic ingredients and simmer until almost all of the liquid is reduced and the cloves are dry.  Swirl the garlic in the pan from time to time during this process to keep from sticking and to make sure the cloves cook evenly.  Strain off any excess liquid and set aside.

In an ovenproof skillet, toss together the squash cubes with a little olive oil, salt and pepper.  Roast in the oven for 15 to 20 minutes until squash is fork tender.

In a large bowl, whisk together the remaining ingredients, reserving ¼ cup of the grated cheese.  Add to the hot skillet with the squash.  Top with the remaining cheese and a sprinkle of salt and place back in the oven.  Cook at this temperature for 15 minutes and increase the temperature to 425° F for another 5 minutes.  Serve warm.

*You can substitute in Parmigiano Reggiano or any other grated hard cheese you like.


tags: Frittata, butternut squash recipes, aleppo, brunch recipes
categories: breakfast, recipes, all-2, vegetarian-1
Monday 12.05.11
Posted by Aliya LeeKong
 

Guava & Sweet Cheese Crèpes

View fullsize crepe-pic1-500x367.jpg
View fullsize crepe-pic2-500x333.jpg
View fullsize crepe-pic3-500x333.jpg
View fullsize crepe-pic4-500x333.jpg

Guava & Sweet Cheese Crèpes

That was fast!  I mentioned a few days ago in my post about guava paste and the popular pairing of it with soft, creamy cheese in various Latin American dishes like empanadas, turnovers and tarts.  As I was writing that post, I was dreaming of just how to marry the two, and this weekend gave me the perfect opportunity to test out that savoury combo. I thought a paper-thin crèpe would be the perfect vehicle, and so it was…

I used here what has become one of my favorite cheeses of all time – fromager d’affinois.  It’s a cow’s milk cheese that resembles Brie, with about 65% butterfat and an edible rind – it’s buttery, supple, creamy and goes incredibly well with fruit, jams and jellies.  That creaminess makes for the perfect crèpe filling alongside the sweet guava paste.

Now, the process of making crèpes can seem really intimidating, but it’s seriously like riding a bike. And, no matter how long you’ve been doing it, just forget about that first one (and possibly the second), pour and whirl with confidence, and the rest will come out like magic once you get that wrist work down.

This crepe batter is a great neutral one that would work for both sweet or salty fillings (with or without the cinnamon).  So to enhance the sweetness a bit for this dish, I drizzle a touch of honey on top and throw in some toasted almonds for a bit of texture and a nutty crunch.  This is a satisfying treat, perfect for breakfast, dessert, or an elegant afternoon tea.  What’s great is that this dish can be prepped ahead of time and thrown in the oven right before serving – makes it great for entertaining.  Enjoy!

Ingredients

Serves 8 to 10

For the crèpes (yields 8 to 10 crèpes):

3/4 cup whole milk

¼ cup water

2 large eggs

1 cup all-purpose flour

¼ tsp kosher salt

1 tsp sugar

½ tsp cinnamon

½ tsp vanilla extract

3 tablespoons unsalted butter, melted

melted butter for cooking

For the filling and garnish:

Guava paste

Soft cheese like fromager d’affinois, brie or your favorite triple-crème

Honey

Toasted almond slices

Procedure

Preheat oven to 375° F.

In a blender, mix all of the crèpe ingredients and pulse until fully blended and foamy.  Rest batter in the refrigerator at least an hour.  Strain batter.

Heat a non-stick pan over medium heat.  Brush pan with melted butter.  Pour crèpe batter, a little less than ¼ cup, into the pan while turning the pan to coat the bottom.  Cook for one minute or until the edges become crispy and start to brown.  Carefully, flip and cook for a little less than a minute.  Keep crèpes stacked together on a plate or cutting board until all of the batter has been used.

Place a crèpe on a cutting board.  Place a thin sliver of cheese in the center and a sliver of the guava paste on top of it.  Fold crepe and place seam-side down on a greased baking sheet.  Bake for 8 to 10 minutes until cheese is melted and guava paste is soft.

Serve warm, drizzled with honey and sprinkled with toasted almond slices.

tags: Crèpes, guava, guava paste, sweet cheese
categories: all-2, breakfast, recipes, desserts-1
Monday 10.24.11
Posted by Aliya LeeKong
 

Shrimp and Grits

View fullsize grits-pic1-500x318.jpg
View fullsize grits-pic2-500x333.jpg
View fullsize grits-pic3-500x333.jpg

Shrimp and Grits

This weekend, I taught a class with the De Gustibus cooking school over at Junoon.  I had a blast (!) chatting about spices in our spice room and walking the students through a traditional South Indian curry – which they made by themselves to rave reviews!  In any case, one of the students asked me about vadouvan, a mix I wrote about months back and in what dishes I might use it.  It put the bug in my brain, and this French-Indian spice blend became my seasoning du jour for some exotic shrimp and grits I whipped up for Sunday brunch.

Now, I’m honestly in favor of blending your own curry powder from spices you have on hand, tailoring to your palate.  But vadouvan is a fantastic blend to keep on hand.  It has a softer approach to curry, with ingredients like dried shallots, bay leaves and even fennel seeds blended in.  There is a warm sweetness to it that I think complements shrimp tremendously, and when you use a bit of butter to cook the shrimp, the pan drippings become a beautiful, fragrant golden sauce.

I know bacon or smoked sausage is traditional in shrimp and grits (not that tradition is reigning here anyway…), but the friend I cooked for is not big on pork.  For that reason, I used some grated smoked mozzarella to infuse the creamy grits with that signature smokiness.  Using milk and chicken stock give the grits a silkiness and rich flavor.  The shrimp need little else besides the vadouvan and a bit of salt, but the shallots and minced jalapeno are great here.  Finishing with fresh herbs brings in brightness, and this dish has so much body it could easily be a (super) easy weeknight dinner.  The curry notes, sweet shrimp and creamy smoky grits…heavenly.  Enjoy!

Ingredients

Serves 4

2 cups milk

2 cups chicken stock

salt & freshly ground black pepper

1 cup stone ground grits

5 tbsps unsalted butter

1 ½ cups smoked mozzarella, grated

1 lb shrimp, peeled and deveined

3 ½ tsps vadouvan

1 tbsp olive oil

1 shallot, minced

1 jalapeno, seeded, deveined and minced

Chopped scallions  and parsley / cilantro (for garnish)

Procedure

In a saucepan, bring milk and chicken stock up to a boil.  Lower to a simmer, season with salt and pepper, and whisk in grits.  Cover and cook at a low simmer for 25 to 30 minutes.  Remove from the heat and add in 3 tablespoons of the butter and the smoked mozzarella, whisking to incorporate fully.  Keep covered and warm.

Make sure the shrimp are dry and toss with vadouvan and some salt.  Heat a skillet over medium-high heat.  Add 2 tablespoons of butter and 1 of olive oil.  Add shrimp and cook for a minute or so.   Flip shrimp, lower heat to medium-low and add in the shallots and jalapeno, tossing to combine.  Cook for another 2 minutes.

Serve grits hot and spoon shrimp mixture on top, letting some of the pan juices drip on to the grits.  Garnish with some chopped scallions and parsley or cilantro.

tags: shrimp, grits, vadouvan
categories: recipes, breakfast, all-2, main dishes-1
Monday 10.17.11
Posted by Aliya LeeKong
 

Buttermilk Gruyère Biscuits with Ajwain

View fullsize biscuit-pic1-500x333.jpg
View fullsize biscuit-pic2-500x333.jpg
View fullsize biscuit-pic3-500x166.jpg

Buttermilk Gruyère Biscuits with Ajwain

Let’s face it.  Those biscuits in the refrigerated section of the grocery are easy (and tasty!), and we’ve all used them in a pinch to deliver some buttery goodness to the breakfast or dinner table.  BUT.  It’s just not the same as the homemade kind (see: nothing artificial), and this recipe, with or without the fancy cheese and spices, is so easy and quick, you may swear off the metal tube-sort for good…

I have always loved cheddar-thyme biscuits, and those were precisely the inspiration for this spice-flecked version.  I wrote about ajwain some months ago and used it in a gorgeous pissaladière with mushrooms and onions, and what I think is fantastic about this spice is its resemblance to thyme, albeit with a slightly more pungent, menthol quality to it.  It’s used a lot in South Asian cooking and is often added to flatbread or samosa dough.

The base of this recipe is self-rising flour.  I used it because it has a slightly lower protein content than all-purpose, which translates into super tender, flaky biscuits.  White Lily brand is supposedly the go-to flour for Southern biscuits because it has a significantly lower protein content than some of the other national brands out there, but if you can’t find it, any self-rising flour works well here.  You whir the flour with cold butter, pour in some buttermilk and voilá! Biscuit dough in about 2 minutes flat.  I add in some grated gruyere or cheddar, typically, along with a bit of ajwain for that signature flavor.  Enjoy!

Ingredients

Yields 1 dozen biscuits

2 cups self-rising flour

¼ tsp black pepper

½ stick cold, unsalted butter, cut into small cubes + 1 tbsp for brushing

1 cup grated gruyère or cheddar cheese

½ tsp ajwain seeds

¾ cups cold buttermilk

kosher or maldon salt

Procedure

The key to making tender, flaky biscuits is to not over-develop the glutens in the dough.  One way to do this is to keep all of the ingredients cold, and another is to not work the dough too much.

Preheat the oven to 425° F.

In a food processor or stand mixer, sift the flour and the black pepper together.  Add the cold, cubed butter and pulse or mix just until a sandy texture forms, and there are no visible clumps of butter.  Add the cheese and ajwain seeds and pulse to combine.  Pour the buttermilk in all at once and pulse until the dough sticks together.

Turn the dough out onto a floured surface.  Gently knead the dough a few times so that it comes together and form into a flat, 1-inch thick disc.  Use a 2-inch cutter to cut out a dozen biscuits.

Melt 1 tablespoon of butter over low heat in a small saucepan.  Place the biscuits so they are touching on a greased or parchment-lined baking sheet.  Paint the tops of the biscuits with the melted butter and sprinkle with a little salt.

Bake for 15 – 20 minutes until golden brown.  Serve warm…

tags: buttermilk biscuits, buttermilk cheese biscuits, Gruyère, Buttermilk Gruyère Biscuits, Ajwain, homemade biscuits
categories: all-2, breads & cakes, side dishes, recipes, vegetarian-1, breakfast
Monday 09.26.11
Posted by Aliya LeeKong
 

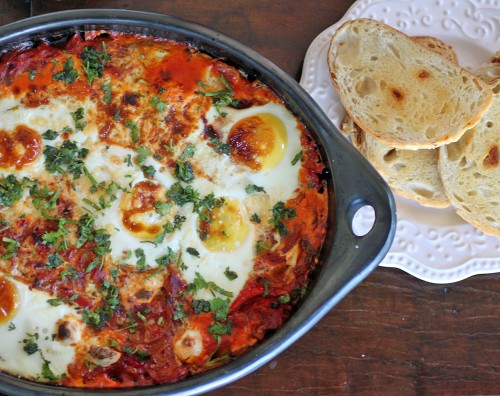
Heirloom Tomato Shakshuka

View fullsize shakshuka-pic1-500x396.jpg
View fullsize shakshuka-pic2-500x333.jpg
View fullsize shakshuka-pic3-500x333.jpg
View fullsize shakshuka-pic4-500x166.jpg

Heirloom Tomato Shakshuka

Summer’s tomatoes have been a constant source of inspiration – from different salads to bruschetta toppings to side dishes and even simply roasted and sprinkled with sea salt.  The late summer varieties and, particularly, the heirlooms were speaking to me last weekend. I wanted to create a dish that, typically calling for canned whole tomatoes, would benefit from the intense flavor and sweetness these tomatoes offer.  I went with a Maghreb dish called shakshuka.

My inspiration started with a local farm stand’s crazy number of heirloom varieties.  I went with the heirloom plum tomatoes, which are excellent for a sauce like this.

The Maghreb region incorporates the northwest portion of Africa – Tunisia, Morocco, Libya, Algeria and Mauritania.  Shakshuka is a mainstay there – baked eggs over an onion and tomato sauce that’s eaten for breakfast or supper – and even made its way to Israel where it’s an extremely popular dish.  The main ingredients for the dish are tomatoes, onions, garlic and eggs, and it differs from country to country, city to city, family to family.  It can be as simple or extravagant as you like – I tailored this version to my tastes, but feel free to make it your own!

First, please excuse the overcooked eggs in these pictures.  My husband likes everything well done and I didn’t take the dish out early enough for the final picture…ha!  It was still delicious and the cheese melted down and got all brown and bubbly.  The sweet onions, the intensity of those tomatoes, a bit of heat from the chilies and the fragrant spices – cumin, saffron, smoked paprika….it was all a bit heady.  I got a fresh-baked, roasted garlic loaf, sliced that baby up and toasted with a bit of butter.  The combination was heavenly!  I could put that sauce on anything (grilled fish, some nicely seared scallops, that bread alone…) and be incredibly happy.  This is my brunch staple…enjoy!

Ingredients

Serves 4 – 5

¾ tsp whole cumin seeds

2-3 tbsps olive oil

2 yellow onions, thinly sliced

3 – 4 red peppers, mix of hot and sweet*

pinch of saffron

1 tsp smoked paprika

3 cloves garlic, thinly sliced

4 sprigs thyme

2 bay leaves

2 lbs heirloom plum tomatoes, roughly chopped

handful of cilantro, chopped

salt and freshly ground black pepper to taste

1/3 cup fresh cheese (cream cheese, farmer’s cheese or queso fresco all work well)

6 whole eggs

Procedure

I like to cook this in a skillet and then transfer to a clay baking dish to finish in the oven.  You can just as easily make this in a cast-iron pan for double-duty or simply cover and finish this dish on the stove.  If you are finishing in the oven, preheat the broiler.

Heat a large skillet over medium heat.  Add cumin seeds and dry toast until fragrant.  Add olive oil, sliced onions, peppers, saffron, and paprika and cook for 6 to 8 minutes until onions are translucent.  Add garlic, thyme and bay leaf and sauté another minute or two until the garlic is fragrant.  I add in the thyme whole, let the leaves fall off, and pull off the stems later.  If you want to remove the leaves from the stems before adding, feel free.

Now, add in the rough-chopped tomatoes (seeds and all!) and cook for another 12 to 15 minutes until tomatoes have softened, much of the liquid has evaporated, and the dish has taken on a thick, sauce-like consistency.

Remove the thyme stems, if left in, and bay leaves.  Add the chopped cilantro, reserving a few tablespoons for garnish, and adjust seasoning.

If you are transferring to a baking dish, do this now.  Divide the cheese into small bite-sized pieces with your hands, and dot the surface of the sauce with it.  Carefully, crack the eggs over the sauce so that the eggs are distributed evenly across the surface.  Sprinkle the tops of the eggs with a bit of salt.  Either cover dish with a lid or foil and cook for another 6 to 8 minutes or place under the broiler for 3 to 4 minutes until the whites of the eggs have set and the cheese is melted.

Garnish with remaining chopped cilantro and serve hot with thick-cut pieces of toast.

* I used (2) hot red chilies and (2) medium-sized sweet peppers, but feel free to adapt to your own tastes.

tags: recipes for summer, eggs, brunch, heirloom tomato, shakshuka
categories: breakfast, recipes, vegetarian, all-2
Monday 08.29.11
Posted by Aliya LeeKong
 

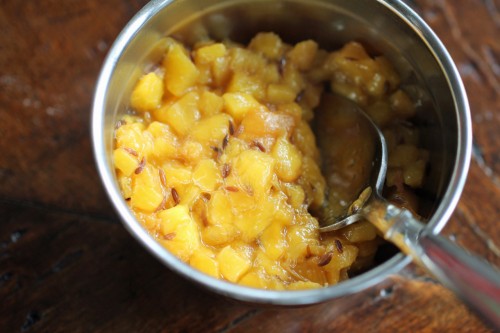
Smoked Peach Chutney

View fullsize smoked-peach-pic1-500x333.jpg
View fullsize smoked-peach-pic2-500x166.jpg
View fullsize smoked-peach-pic3-500x333.jpg

Smoked Peach Chutney

Biting through velvet skin into the honeyed-sweet juiciness of a peach is such a summer pleasure.  I’ve been on a quest, from farm stand to farm stand, to find the best of the bunch and have tasted this summer the stuff poets write about.  Of course, a few weekends back, I got a bit carried away at a local stand, and I ended up with more peaches than I knew what to do with.  What better way to use up this peak season fruit than to turn it into a chutney…Interestingly enough, it was a cocktail that inspired the flavor combo for the chutney; the drink had bourbon, crème de peche and cumin.  Genius!  The smokiness of the bourbon played beautifully off of the sweet tanginess of the peach intermingling with the warm earthiness of the cumin.  I wanted to figure out how to capture that in this chutney.

Smoking was the answer, and you can use either a stovetop smoker (my lifesaver in a NYC kitchen…) or the grill.  The smoked peaches by themselves are distinctive but a bit overwhelming until cooked down a bit more with some sugar, honey and the roasted cumin seeds.  The resulting chutney has a gorgeous flavor!  Smoky, sweet, tangy, with the bite of the cumin seed…it’s perfect on pork chops, fish or even with creamy brie on crackers. Enjoy!

Ingredients

Yields approximately 1 quart

6 large, lusciously-ripe peaches, halved with pit removed (skin on)

1 ¼ tbsps cumin seeds

2-3 tbsps water

¼ cup sugar

¼ cup honey

pinch of salt

Procedure

The first step of this chutney is smoking the peaches. I used a stovetop smoker and cherry wood.  Placing the peaches cut side down on the grate, I smoked the peaches for 6 minutes and achieved the perfect level of smokiness.  If you choose to do this on the grill, I would keep the temperature low (200° F to 225° F).  Once the chips start to smoke, place the peaches cut side down on the side with no flame (indirect heat), cover, and smoke for about 10-15 minutes.

Peel the peaches, the skin should slip off relatively easily, and cut into a fine dice.  Set aside.

Heat a medium-sized pot over medium heat.  Add the cumin seeds, and toast, stirring, until fragrant and slightly darker in color.  Reduce the heat slightly, add the diced peaches and remaining ingredients and simmer for 8 to 10 minutes, stirring at intervals, until the peaches are soft.  You want this chutney to have form, so overcooking will turn the peaches to mush.

You can serve this warm, cold, or at room temperature.

tags: recipes for summer, peaches, chutney, condiments
categories: breakfast, recipes, snacks, side dishes, vegetarian, all-3
Monday 08.22.11
Posted by Aliya LeeKong
 

Mandazi (East African Donuts)

View fullsize mandazi-pic4-500x333.jpg
View fullsize mandazi-pic2-500x333.jpg
View fullsize mandazi-pic3-500x333.jpg
View fullsize mandazi-pic1-500x333.jpg

Mandazi (East African Donuts)

One of my earliest cooking memories was when I asked my aunt to teach me how to make mandazis.  I think I was about 8 or 9 years old, and I was very serious about learning how to do these.  For some reason, we wouldn’t make these delectable little donuts at home.  I got to eat them when I traveled to see my family, and only the old school grandmas and aunties knew the secret.  Of course, East African restaurants were pretty much nonexistent in Florida where I grew up (not that I can find any now that serve these in NYC…I’m just saying).  So I felt I had to carry on the tradition!

Of course, the dish was a bit ambitious for an 8 year old (in one ear…and out the other!), and I was more focused on enjoying the fruits of my aunt’s and my labor than on getting the technique down.  As an adult, however, I decided I wanted to perfect my own using the tad more culinary knowledge I now have.

I should be clear: mandazis are savoury.  They shouldn’t be too sweet or too salty.  One of my most treasured food memories is sitting, facing the Indian Ocean, in Dar-Es-Salaam, Tanzania, using the (hollow) mandazis to scoop up a tender stew of pigeon peas in coconut milk with fresh chilies and cilantro (called barazi).  But, of course, you can eat them however you like; I’m partial now to having them for breakfast.

These are very easy to make.  A little yeast leavens the dough, and I use a combination of all-purpose and rice flour to make them even lighter.  A touch of sweetness, lightly coconut-scented, and that signature cardamom flavor.  Heavenly…Enjoy!

Ingredients

Yields 2 dozen donuts

¼ cup sugar

1 ½ tsp yeast

2/3 cup warm water

½ cup coconut milk

1 ¾ cup all purpose flour

¾ cup rice flour

¾ tsp salt

3 tbsp dried grated coconut (preferably unsweetened, adjust sugar if not)

¾ – 1 ¼ tsps ground cardamom*

oil for frying

salt & powdered sugar

Procedure

This can easily be made in a stand mixer or by hand.

In the bowl of a stand mixer fitted with a dough hook, dissolve sugar and yeast in warm water and let bloom 5-10 minutes.  It should become foamy and frothy.  Turn the mixer on low and add coconut milk.

In a separate bowl, sift flours together and mix in salt, grated coconut and cardamom.  Add contents to liquids in the mixer and knead on low for 5 to 10 minutes.  Conversely, you can also knead by hand – the dough should get pretty smooth (except for the grated coconut) and relatively sticky.

Transfer dough to a greased bowl, cover, and let rise for a minimum of 2 hours.

On a floured work surface, divide dough into 4 even pieces.  Form each piece into a ball and flatten to a disc.  Roll each circle out to about ¼” thick and cut like a pie into six triangular pieces.  Transfer to a parchment lined baking sheet while working on each piece.

In a dutch oven or pot, heat 3 to 4 inches of oil to 360 F.  Working in batches, carefully drop a few triangles into the oil.  Don’t overcrowd or the oil temperature will drop.  As soon as the triangles puff, quickly flip them over.  This will ensure that both sides cook – if they become lopsided, it will be hard to keep them on the less inflated side to brown.  Cook for a few minutes, flipping at intervals until golden brown.  Remove to a paper towel-lined plate or baking sheet and lighltly salt.

Before serving, sprinkle with powdered sugar.

They are best served warm as they can get a touch chewy once they’ve cooled.  If you need to reheat, do so in a very low oven or on a low power in the microwave.

*Traditionally, cardamom is roughly ground and added to the mandazi batter.  This results in biting into delightful pieces of cardamom while eating the donuts.  I add about 1 ¼ teaspoons when I’m using roughly ground cardamom and more like ¾ teaspoon when I use the powdered / ground form.


tags: Mandazi, East African donuts, donuts
categories: all-3, breads & cakes, desserts, recipes, side dishes, breakfast
Monday 05.23.11
Posted by Aliya LeeKong
 

Crab & Callaloo Quiche

View fullsize quiche-pic1-500x333.jpg
View fullsize quiche-pic2-500x333.jpg
View fullsize quiche-pic3-500x333.jpg
View fullsize quiche-pic4-500x166.jpg

Crab & Callaloo Quiche

So I’ve been flushing out dishes for an event for April.  The event is for Heifer International and honors their Pass on the Gift tradition, specifically for their Haiti projects.  It’s an incredible organization that promotes sustainable solutions for impoverished families worldwide, and I’m really excited to be involved with them.

I’m designing some Haitian-inspired dishes for the event, and this one comes from a popular West Indian side called callaloo, made from the eponymous greens.  The greens are the leaves of the dasheen bush or taro plant and are also used in Pacific Island and Asian cooking.  They can be found at West Indian markets but swiss chard, spinach and even collards make a great substitute here.

Callaloo, the side, is thick and stew-like with roots tracing back to West Africa.  The greens are flavored with salt pork, shallots or onions, garlic, ginger, habanero pepper and bouillon.  The mixture is roughly blended and coconut milk is used to thin it out.  Oftentimes, crab is added, and it’s such a rich, distinctive dish.  I was eating a spinach and bacon quiche one day, and the callaloo just mentally translated. I had to see what would happen if I changed its form.

My husband went a bit nuts for this, I have to admit.  He grew up eating callaloo and couldn’t get over how the flavor of the dish could transplant into a quiche.  The greens, the crab, a salty porkiness, garlicky and heat from the chilies – it’s an exciting combination.  Oh, and this crust recipe, though involved as most tart shells are, is pretty easy and foolproof as far as crusts go – crunchy, buttery and neutral (could definitely work for sweet applications).  It’s my go-to crust.  Enjoy!

Ingredients

Crust:

1 ½ cups all-purpose flour

¾ tsp salt

¼ tsp sugar

1 stick unsalted butter, cold and cut into small cubes

1 egg

1 tsp water

Filling:

1 slice thick-cut bacon, cut into small dice

½ habanero pepper, seeded and ribs removed, minced

1 small shallot, cut into a small dice

¼  tsp minced ginger

2 or 3 cloves garlic, minced

1 bunch callaloo, spinach, or swiss chard, roughly chopped, blanched and squeezed of excess water* (equivalent to 1/3rd cup cooked)

¼ lb peekytoe, lump, or jumbo lump crabmeat

1 scallion, finely chopped

1 tsp fresh thyme, finely chopped

1 tbsp cilantro, finely chopped

1 egg

2 egg yolks

3/4 cups coconut milk

Salt and freshly ground pepper to taste

Procedure

Preheat oven to 375° F.

For the crust, in a food processor, pulse together flour, salt and sugar.  Scatter the cold cubes of butter over the dry ingredients and pulse until the butter is cut in and the texture looks like sandy peas or a coarse meal.  In a small bowl, lightly beat together the egg and water.   Add in increments, pulsing, until the dough sticks together.  There will still be a lot of crumbly bits that haven’t incorporated – that’s okay.

Turn the dough out onto a work surface or a piece of parchment paper.  LIGHTLY, knead the dough to make sure everything is incorporated.  I literally just press it together a bit.  Place into plastic wrap and create a flattened disk.   Refrigerate for a minimum of 2 to 3 hours (and up to a day).

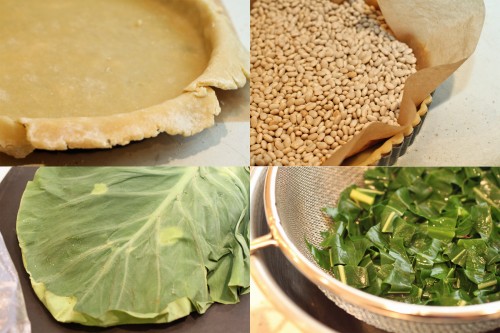
On a floured work surface or in between pieces of parchment paper (with flour), carefully roll out the dough with a rolling pin until uniform thickness and large enough for a 9 or 9 ½ inch tart shell.  Carefully transfer to the greased tart shell and press carefully into the sides.  Try not to stretch the dough at all.  Trim any excess edges and dock or prick holes all over the surface of the dough with a fork.  Wrap shell in plastic wrap and freeze for a minimum of a half hour.

Remove tart shell from freezer and plastic wrap and place on a baking sheet.  Fit a piece of parchment paper on the surface of the dough and weight down with dried beans or baking weights.  Bake for 20 minutes.  Remove baking weights or beans and parchment paper and bake for another 10 minutes to brown.  Let cool slightly.

Turn oven temperature down to 350° F.

For the filling, heat a medium skillet over medium-high heat.  Add bacon and brown.  Remove bacon with a slotted spoon and transfer to a paper towel-lined plate.  Turn heat down to medium-low, and add pepper, shallot and ginger.  Add a touch of salt to draw out the moisture.   Cook for 2 to 3 minutes until shallots are translucent.  Add garlic and cook for another minute until fragrant.  Remove to a bowl and let cool.

Add to the shallot mixture, the browned bacon, blanched callaloo, crab, scallion, thyme and cilantro.  Mix thoroughly and season to taste.

In a separate bowl, beat together egg, egg yolks and coconut milk and lightly season.

Spread crab and callaloo mixture evenly over the bottom of the tart shell.  Pour egg / coconut milk mixture evenly on top.  Bake for 25 minutes.   The edges should be firm and the middle slightly jiggly.

*Callaloo should NOT be eaten raw.  It contains a toxin, calcium oxalate, that can cause itching and constriction of the throat. Always cook callaloo thoroughly before consuming.  To blanch the callaloo or other greens, bring water in a medium-sized pot up to a boil.  Add a great deal of salt.  Also, prepare an ice bath (a bowl with ice and cold water).  Add callaloo to pot.  Cook for 2 to 3 minutes.  Strain and plunge into the ice bath to stop cooking.  Remember to wring out any excess water from the greens.

tags: crab, callaloo, quiche, brunch recipes
categories: all-4, breakfast, main dishes, recipes, vegetarian-1
Monday 03.14.11
Posted by Aliya LeeKong
 

Homemade Strained Yoghurt

View fullsize yoghurt-pic1-500x333.jpg
View fullsize yoghurt-pic2-500x333.jpg
View fullsize yoghurt-pic3-500x166.jpg
View fullsize yoghurt-pic-4-500x333.jpg

Homemade Strained Yoghurt

When I was in Bodrum, I got to visit a little agricultural village called Sazkoy, explore the area and have a delicious(!) homemade lunch with a family well-known for the Milas carpets they weave and sell.  The village is largely self-reliant, with most families having their own chickens, goats, cows, and sheep.  Many grow vegetables and some even have their own citrus trees, ripe with mandarins while I was there.

I got a tutorial in the tradition of yoghurt-making from a woman named Emine.  She also uses her fresh cows’ milk to make butter and curd cheese from whey on a regular basis, like most of the families in the area.  The yoghurt process was completely intuitive for her, reflexive after obvious years of making it.  Where I use a thermometer in my recipe, Emine dips her finger and instinctively knows the right temperature.

The key to yoghurt is that you need some to make some.  A little “starter” yoghurt is necessary and adds the appropriate bacteria.  I like to use a bit of Turkish or Greek yoghurt to start the process because they contain only live yoghurt cultures and not the preservatives, stabilizers or thickeners that other types do.  That said, basic store-bought yoghurt will work perfectly well here too.

The process is incredibly simple – heat milk almost to a boil, cool, add a bit of yoghurt, and keep warm to ferment.  To get a thicker consistency, I like to strain my yoghurt like they do in Turkey (as well as Greece, South Asia, the Middle East and even Mexico).  This yoghurt keeps for about 7 to 10 days, and you can use some of the homemade yoghurt to start the next batch!  It also has an incredibly creamy sweetness to it, slightly less tangy and fresher tasting than the store-bought kind.  Cheaper, tastier, and how cool is it to make your own.  Enjoy!

Ingredients

1 ½ quarts whole milk

2 tbsps starter plain yoghurt, room temperature

Procedure

In a saucepan, heat milk over medium heat until it starts to bubble and foam, almost at a boil.  It should reach 180° F.  Remove from heat and cool to 110° F.  (The woman I saw making this knows the temperature from dipping her finger in the milk, not from any thermometer.  It’s still hot but she could hold her finger in it comfortably.)  This temperature is important – significantly hotter and the bacteria will be killed and the yoghurt won’t set.  If the temperature is too low, again the bacteria won’t ferment, and the yoghurt won’t set.

In a ceramic bowl or pot that has a lid, add the 2 tablespoons of yoghurt.  Add a few spoonfuls of the milk to the yoghurt and whisk to combine.  Pour the rest of the milk in using a strainer to catch the skin that forms on top.  Whisk to combine thoroughly.

Cover with a lid and swaddle in thick kitchen towels or a blanket.  You want to keep this warm for the fermentation process.  I keep mine in the oven (off) with just the oven light on.

Yoghurt time can vary.  Mine took around 12 hours to set, but it all depends on the temperature, the climate, and the yoghurt starter you used.  It could take as little as 6 hours, and some people even claim as long as 24 hours.  I like to make it in the evening, so it can set overnight.

Once it’s set, refrigerate immediately.  It will firm up a bit more as it cools.  I like to then place it in a strainer lined with cheesecloth in the fridge for about 3 hours once it’s cooled to get a thicker consistency but feel free to use as is.

Store in an airtight container; it lasts for about a week.

tags: homemade yogurt, homemade yoghurt, yoghurt recipes
categories: all-5, breakfast, recipes, vegetarian
Friday 01.14.11
Posted by Aliya LeeKong
 

Chili Cheese Toast

View fullsize cheese-toast-pic1-500x333.jpg
View fullsize cheese-toast-pic2-500x333.jpg
View fullsize cheese-toast-pic31-500x333.jpg

Chili Cheese Toast

I absolutely love when you are feeding someone who has no idea what cooking requires, and you serve them something sinfully easy to prepare, and they take a bite and look at you as if you performed a miracle of sorts.  That’s what happened the first time I gave my husband these cheese toasts…for breakfast no less.  You would have thought I had prepared foie from scratch.

Although these might look like a kicked-up pizza of sorts, chili cheese toasts are actually a very popular South Asian snack.  Every cook has her or his own version – perhaps a dash of chili powder, a touch of turmeric , some curry leaves.  My grandmother used to make a delicious version and bound all of the ingredients together with egg.  She then fried it on the stove top for ultimate crispiness.

I kept this version relatively simple, so feel free to modify to your heart’s content.  I didn’t feel like frying as I wanted this to be a tad healthier, so these are baked.  I also used sundried tomatoes instead of fresh ones to minimize the moisture, but feel free to use fresh tomatoes  – just try to remove as much liquid as possible before adding to the cheese mixture.

You get heat from the chilies, delicious green onion flavor, a bit of sweet and tart from the tomato, of course, lovely, tangy, bubbly cheese, and a nice satisfying crunch from the toast.   These make an amazing afternoon snack, but I love them for breakfast.  If you’ve got knife skills, you can make this in 10 minutes with the cooking time!  Enjoy!

Ingredients

Serves 2 to 4

1 jalapeno or Serrano pepper, finely chopped (any chili of your choice)

2 sundried tomatoes, finely chopped

1 scallion, green and light green part only, thinly sliced

1 cup mozzarella, shredded (preferably low-moisture)

3 tbsps cream cheese, room temperature

¼ tsp salt

freshly ground black pepper

4 slices white bread, toasted

chopped cilantro or parsley

Procedure

Preheat the broiler.

In a bowl, mix together chopped chilies, sundried tomatoes, scallions, mozzarella, cream cheese, salt and pepper.  Spoon equal amounts of mixture onto 4 slices of toasted white bread.  Spread to create an even layer on each piece of toast.

Place cheese toasts on a baking sheet and place under the broiler.  Broil for anywhere from 3 to 5 minutes until cheese has melted – keep it under a bit longer if you like your cheese to brown (like I do!).  Sprinkle with a bit of fresh cilantro or parsley before serving.

tags: South Asian snacks, Chili cheese toast, cheese toast recipe, South Asian cheese toast
categories: all-5, breakfast, recipes, snacks, vegetarian
Wednesday 12.01.10
Posted by Aliya LeeKong
 

Scones with Sorrel Flower Jelly

View fullsize sorrel-pic1-500x333.jpg
View fullsize sorrel-pic2-500x333.jpg
View fullsize sorrel-pic3-500x333.jpg

Scones with Sorrel Flower Jelly

When someone says “sorrel” these days, what typically springs to mind is the green leafy vegetable, or herb to some, that has trendily showed up on menus in the past few years.  Though it might be delicious in jelly form, that is definitely not the sorrel in this recipe…I’m actually referring to the sorrel flower I mentioned in a previous post that’s used to make a popular West Indian drink.

The first time I tried sorrel was with my husband at the Trinidadian-Chinese spot in Brooklyn I wrote about a few months back.  It’s a blood-red drink – tart, sweet, floral with an underlying taste of cloves.  Unusually delicious.  The sorrel flower is actually hibiscus, so it’s not a far stretch from your basic hibiscus tea.  And similar to tea, sorrel is made from steeping the flower with sugar and spices.  A similar drink is also widely consumed in parts of Africa where it’s known as roselle orbissap rouge in Senegal or even karkadeh in Egypt.  Jamaicans use ginger to flavor the sorrel, but you know I had to stay true to the Trinidadians, so I stuck with their tradition of cinnamon and clove.

I actually trekked over to the (deep) BK to a small West Indian market to find dried sorrel petals for this recipe, which was totally unnecessary I found out during my last trip to some of my favorite ethnic grocers in the city.  You can typically find the dried form in health food stores and in various ethnic markets.

In any case, a jelly is a mildly unusual but interesting use of sorrel and, it turns out, delicious.  How cool is that – to make your own homemade and seasonal jellies and jams.  This one, I like to layer with a little mascarpone or Devonshire cream on the scone to balance out the sweetness.  The scone is buttery and delectable but plain Jane as far as scones go, a great basic scone recipe to which you can add any variation of ingredients.  That was purposeful – I really wanted the flavor of sorrel to shine though.  Enjoy.

Ingredients

Yields 6 ½ cups jelly and approximately a dozen scones (depending on size)

Sorrel Jelly:

4 ½ cups water

1 ½ cups dried sorrel flower

1 cinnamon stick

6 whole cloves

6 cups granulated sugar

1 3 oz pouch liquid pectin (I used Certo brand)

Basic Scone:

2 cups all-purpose flour

1 tbsp baking powder

1/3 cup granulated sugar

1 tsp salt

1 stick butter, cold, cut into cubes

2 eggs, cold

½ cup heavy cream, cold

Procedure

For the jelly, bring water to a boil with the cinnamon stick and cloves.  Add sorrel and boil for 2 minutes.  Remove from the heat and let sit overnight.  In certain places, sorrel may even be allowed to sit for several days to achieve the desired flavor.

Strain sorrel mixture into a saucepan and bring to a boil.  Add sugar, stir to dissolve, and bring back up to a boil.  Add liquid pectin and boil for 1 minute .  Be very careful at this point – it easily boils over.  Remove from the heat and immediately pour into sterilized jars.   Jars, prior to being filled, should be heated in a pot in simmering water and kept hot until filled with the jelly.

Although the sugar helps preserve the jelly, processing the jars in a boiling water bath after filling with jelly will help seal the jars for longer preservation.  Place jars back into the water pot and make sure that the water covers the jars by 1 to 2 inches.  Boil for 5 minutes, remove, and cool.  Unopened, the jellies will be good for about 1 year.  Once opened, the shelf life is about 3 weeks.

For the scones, preheat the oven to 375? F.   Combine all-purpose flour, baking powder, sugar and salt in a stand mixer.  Add diced, cold butter and mix on low until the texture resembles sandy peas.  It’s important that the ingredients stay cold as this creates a flakier texture for the resulting scone.  Combine eggs and cold, heavy cream and pour into the mixer bowl slowly with the mixer on low.   Be careful not to overmix – you just want the dough to come together.   Overmixing will also result in a tougher, less flakier scone.

Roll out dough on a floured surface with a floured rolling pin until about ½ “ thick and cut out with whatever cutter shape/size you like.  I say approximately a dozen scones because it varies with how you choose to size your scones.  You can also brush with an egg wash at this point if you like to make the tops deeper brown and shiny.  Bake for about 15-18 minutes until the scones are uniformly golden brown.  Cool on a rack for another 20 minutes or so.

Serve scones warm with a bit of the jelly and some cream.

tags: scones, sorrel flower jelly, sorrel, brunch recipes
categories: breads & cakes, breakfast, recipes, all-5
Monday 11.15.10
Posted by Aliya LeeKong
 
Newer / Older