X

Sign up to receive exclusive recipes, tips, updates and other goodies from Aliya!

  • Home
  • Blog
    • All
    • Recipes
    • Spices + Ingredients
    • Lifestyle, etc.
    • Travel
  • The Cookbook
  • The App
  • Media
    • All Media
    • Video
  • About
  • Passions
Aliya LeeKong
  • Home
  • Blog
    • All
    • Recipes
    • Spices + Ingredients
    • Lifestyle, etc.
    • Travel
  • The Cookbook
  • The App
  • Media
    • All Media
    • Video
  • About
  • Passions

Mango Cheesecake

View fullsize mango-pic1-500x333.jpg
View fullsize mango-pic2-500x333.jpg
View fullsize mango-pic3-500x333.jpg

Mango Cheesecake

I love this recipe.  This is surprisingly easy and straight forward to make, and mango cheesecake is one of those sleeper hits.  People who “don’t like cheesecake” will even love it.  And what I love is that it’s a fantastic do-ahead dessert for parties.  It’s always better to make this the night before, so it has a full 8 hours to cool.

I actually made it for my holiday party on Friday night but shrunk it down to miniature version.  It was the perfect poppable dessert – a creamy mango cheesecake in 1.5” pastry shell with a bit of glaze and a sweet raspberry on top.  These were inhaled – always estimate a 3-4x multiple of the number of party attendees!

The graham cracker crust is crisp and buttery, and the cheesecake comes out with a beautiful, silky, creamy texture, bright with sweet mango flavor.  I love the extra flavor and texture of this super simple glaze too.  I used alphonso mango puree because these mangoes, to me, have a truly rich, signature mango flavor.  If you are doing the tiny version, they only take 15 minutes in the oven and don’t need the water bath.  Enjoy!

Ingredients

Yields 1 9-inch springform pan

Crust:

2 cups graham cracker crumbs

1 ½ sticks of butter, melted

Filling:

2 (8-ounce) packages cream cheese, room temperature

1 cup whole milk ricotta cheese, room temperature

¾ cup sugar

4 eggs, room temperature

2 ¼ cups mango puree, preferably Ratna (from the ethnic grocer; alphonso mangoes)

Glaze:

Another ½ cup or so of mango puree

Sugar

lemon

Procedure

Preheat oven to 350° F

Wrap the springform pan tightly in foil all the way around.  You want to create a seal since we’re going to submerge it in water for cooking.  Generously grease all of the inside surfaces of the pan.

In a food processor, process crumbs with melted butter until sand-like texture.  Press firmly into the bottom of the pan and bake for 15 minutes.  Cool completely.

Blend cream cheese and ricotta with sugar until smooth and then add mango puree and eggs.  Pour mixture over cooled crust and place in a roasting pan.  We’re going to bake this in a water bath.  Add boiling water to the roasting pan until it reaches halfway up the sides of the cake pan.  Bake for an hour and 30 minutes or until slightly jiggles but starts to pull from the sides.  Cool at least 8 hours before serving.

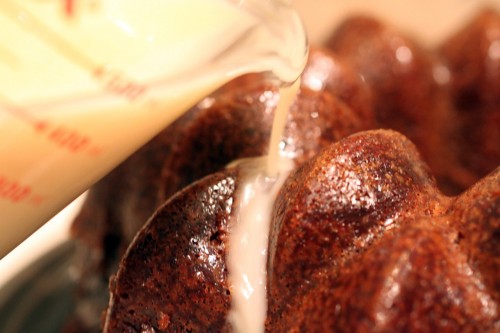
Take remainder mango puree and add a little water in a saucepan.  Reduce by half and add sugar and lemon to taste.  The glaze should coat a spoon.  Cool completely and pour over cheesecake before serving.

tags: mango recipes, cheesecake recipes, easy desserts, holiday baking, holiday recipes
categories: all-5, breads & cakes, recipes, desserts-1
Monday 12.20.10
Posted by Aliya LeeKong
 

West Indian Cassava Pone

View fullsize pone-pic1-500x333.jpg
View fullsize pone-pic2-500x333.jpg
View fullsize pone-pic3-500x167.jpg

West Indian Cassava Pone

This dish has to be one of my favorite West Indian desserts.   After my first bite of this sweet, gelatinous “cake”, I became obsessed, which culminated in some serious lessons in Trinidadian cooking from my husband’s Aunt Cherry who lives in Port-of-Spain.  I’m one of those nervous bakers – constantly peering into the oven to make sure a cake is rising well, and my heart is in my throat during the moment of truth unmolding.  When she and I made this together, she didn’t even use measuring cups!  An unnerving confidence in her years of cooking that she could eyeball the right texture…

In different West Indian counties, I’ve seen pone made with root vegetables – cassava here but also carrots and sweet potato, always with coconut, and some with pumpkin and even raisins.  What’s fascinating is that there’s a soul food iteration of pone (I’ve mostly seen the sweet potato kind) that they make in the South.  Would love to cross compare!

There are dozens of pone recipes out there.  I am one of those that absolutely love the moist, gummy texture, but find that it can be a bit too dense at times (thus in some West Indian countries it’s called “heavy cake”).  So I modified the traditional recipes a bit to make the texture a bit lighter here but still with that gelatinous bite.  I also made it thinner, to be eaten like a dessert bar rather than a cake.  Evaporated milk gives a bit of silkiness, and the vanilla, cinnamon, nutmeg and, yes, black pepper that delicious pumpkin pie-like spice.  I also saw that some Southern pone recipes use molasses, so I incorporated a few tablespoons for some beautiful, caramelized sweetness and a deeper color.  Heat it and throw a scoop of ice cream on top for serious decadence.  Enjoy!

Ingredients

Yields 1 9” x 13” x 2” 3-quart baking dish

2 cups grated cassava

1 ½ cups grated fresh coconut

1 can evaporated milk

3 tbsps unsalted butter, melted

1 ½ tsps vanilla extract

1 cup light brown sugar

3 tbsps molasses

1/3 cup all-purpose flour

½ tsp baking powder

1 ¼ tsps ground cinnamon

1/8 tsp ground nutmeg

½ tsp salt

¼ tsp ground black pepper

Procedure

Preheat oven to 350° F.

In a bowl, whisk together coconut milk, melted butter, sugar and molasses until sugar is dissolved.

In a separate bowl, sift together flour, baking powder, cinnamon, nutmeg, salt and black pepper and whisk to combine.  Add wet ingredients a little at a time to the dry ingredients whisking until batter is smooth (don’t overmix).  Fold in grated cassava, and coconut.

Transfer mixture to a greased dish and bake @ 350° F for 45 minutes.  The edges should look brown and starting to separate from the baking dish.  Remember that, if you are using a different baking dish from what I specified, cooking time will vary.  Cool completely before cutting into squares and serving.

tags: pone, West Indian desserts, West Indian recipes, Cassava recipes, Cassava
categories: all-5, breads & cakes, desserts, recipes
Monday 12.06.10
Posted by Aliya LeeKong
 

Pear-Anise Cake

View fullsize pear-cake-pic1-500x333.jpg
View fullsize pear-cake-pic2-500x333.jpg
View fullsize pear-cake-pic3-500x333.jpg

Pear-Anise Cake

Whenever I head down to visit my parents in Florida, my mom bakes this incredible apple loaf cake.  Moist, cinnamon-ey, bursting with soft, baked chunks of apple.  Warmed up with a scoop of vanilla ice cream (um, on the couch in some sweats…) – it is pure, luxurious comfort.

I thought I’d recreate a version of this loaf cake using delicious, seasonal winter pears instead of apples.  Returning from Goa, I brought back a ton of spices – turmeric, massive cinnamon sticks, woodsy black cardamom, and some beautiful anise seed.  The anise struck me as an ideal compliment to sweet, ripened pears, AND I’ve been looking for an excuse to use that Pernod liqueur that’s been sitting on the shelf for who knows how long.

I used Bosc pears here because they hold up really well to cooking and don’t turn to complete mush.  I always ripen my pears in a bag on the counter before using them to get the peak flavor because most of the ones at the farmers’ market are unripe when you get them.  Also, I macerated the diced pears with Pernod and sugar before adding to the cake batter – the liquid that’s released develops beautiful flavor in the cake and adds moisture.  Theoretically, you could leave out the Pernod as long as you still macerate the pears with sugar and enough liquid is released – but I’m disclaiming that I haven’t tried it that way so you’re on your own!  The result is a fine crumb loaf cake that is moist, full of pear flavor, scented with licorice-anise.  Enjoy!

Ingredients

Yields 1 8½” x 4¼” x 2¾” loaf pan

3 cups peeled, cored and diced bosc pears

3 tbsps Pernod liqueur

1 ¼ cups light brown sugar

1 ½ cups all-purpose flour

½ tsp salt

½ tsp cinnamon

¾ tsp anise seed, crushed (with a mortar and pestle)

½ tsp baking soda

2 tsps baking powder

½ stick butter, room temperature

1 tsp vanilla

2 eggs, room temperature

Procedure

Preheat oven to 375° F.

Place diced pears in a bowl and add Pernod along with 2 tablespoons of the sugar.   Stir to combine and let stand to macerate for 15 minutes.

In another bowl, sift together flour with salt, spices, baking soda and baking powder.

In a stand mixer, cream together remaining sugar and butter.  With mixer on medium-low, add vanilla and then the eggs one at a time.  Turn mixer down to low, and add in the dry ingredients, stopping to scrape down the sides.  Mix until almost combined.  Add in the pears with any liquid that’s accumulated and mix until thoroughly combined.

Pour batter into a greased loaf pan, and bake for 45 minutes or until a toothpick inserted into the center comes out clean.

tags: pear cake, anise recipes, pear desserts, pear-anise recipes
categories: all-5, breads & cakes, recipes, desserts-1
Wednesday 11.17.10
Posted by Aliya LeeKong
 

Scones with Sorrel Flower Jelly

View fullsize sorrel-pic1-500x333.jpg
View fullsize sorrel-pic2-500x333.jpg
View fullsize sorrel-pic3-500x333.jpg

Scones with Sorrel Flower Jelly

When someone says “sorrel” these days, what typically springs to mind is the green leafy vegetable, or herb to some, that has trendily showed up on menus in the past few years.  Though it might be delicious in jelly form, that is definitely not the sorrel in this recipe…I’m actually referring to the sorrel flower I mentioned in a previous post that’s used to make a popular West Indian drink.

The first time I tried sorrel was with my husband at the Trinidadian-Chinese spot in Brooklyn I wrote about a few months back.  It’s a blood-red drink – tart, sweet, floral with an underlying taste of cloves.  Unusually delicious.  The sorrel flower is actually hibiscus, so it’s not a far stretch from your basic hibiscus tea.  And similar to tea, sorrel is made from steeping the flower with sugar and spices.  A similar drink is also widely consumed in parts of Africa where it’s known as roselle orbissap rouge in Senegal or even karkadeh in Egypt.  Jamaicans use ginger to flavor the sorrel, but you know I had to stay true to the Trinidadians, so I stuck with their tradition of cinnamon and clove.

I actually trekked over to the (deep) BK to a small West Indian market to find dried sorrel petals for this recipe, which was totally unnecessary I found out during my last trip to some of my favorite ethnic grocers in the city.  You can typically find the dried form in health food stores and in various ethnic markets.

In any case, a jelly is a mildly unusual but interesting use of sorrel and, it turns out, delicious.  How cool is that – to make your own homemade and seasonal jellies and jams.  This one, I like to layer with a little mascarpone or Devonshire cream on the scone to balance out the sweetness.  The scone is buttery and delectable but plain Jane as far as scones go, a great basic scone recipe to which you can add any variation of ingredients.  That was purposeful – I really wanted the flavor of sorrel to shine though.  Enjoy.

Ingredients

Yields 6 ½ cups jelly and approximately a dozen scones (depending on size)

Sorrel Jelly:

4 ½ cups water

1 ½ cups dried sorrel flower

1 cinnamon stick

6 whole cloves

6 cups granulated sugar

1 3 oz pouch liquid pectin (I used Certo brand)

Basic Scone:

2 cups all-purpose flour

1 tbsp baking powder

1/3 cup granulated sugar

1 tsp salt

1 stick butter, cold, cut into cubes

2 eggs, cold

½ cup heavy cream, cold

Procedure

For the jelly, bring water to a boil with the cinnamon stick and cloves.  Add sorrel and boil for 2 minutes.  Remove from the heat and let sit overnight.  In certain places, sorrel may even be allowed to sit for several days to achieve the desired flavor.

Strain sorrel mixture into a saucepan and bring to a boil.  Add sugar, stir to dissolve, and bring back up to a boil.  Add liquid pectin and boil for 1 minute .  Be very careful at this point – it easily boils over.  Remove from the heat and immediately pour into sterilized jars.   Jars, prior to being filled, should be heated in a pot in simmering water and kept hot until filled with the jelly.

Although the sugar helps preserve the jelly, processing the jars in a boiling water bath after filling with jelly will help seal the jars for longer preservation.  Place jars back into the water pot and make sure that the water covers the jars by 1 to 2 inches.  Boil for 5 minutes, remove, and cool.  Unopened, the jellies will be good for about 1 year.  Once opened, the shelf life is about 3 weeks.

For the scones, preheat the oven to 375? F.   Combine all-purpose flour, baking powder, sugar and salt in a stand mixer.  Add diced, cold butter and mix on low until the texture resembles sandy peas.  It’s important that the ingredients stay cold as this creates a flakier texture for the resulting scone.  Combine eggs and cold, heavy cream and pour into the mixer bowl slowly with the mixer on low.   Be careful not to overmix – you just want the dough to come together.   Overmixing will also result in a tougher, less flakier scone.

Roll out dough on a floured surface with a floured rolling pin until about ½ “ thick and cut out with whatever cutter shape/size you like.  I say approximately a dozen scones because it varies with how you choose to size your scones.  You can also brush with an egg wash at this point if you like to make the tops deeper brown and shiny.  Bake for about 15-18 minutes until the scones are uniformly golden brown.  Cool on a rack for another 20 minutes or so.

Serve scones warm with a bit of the jelly and some cream.

tags: scones, sorrel flower jelly, sorrel, brunch recipes
categories: breads & cakes, breakfast, recipes, all-5
Monday 11.15.10
Posted by Aliya LeeKong
 

Deadly Cape Malva Pudding

View fullsize malva-pic1-500x333.jpg
View fullsize Malva-pic2-500x333.jpg
View fullsize malva-pic3-500x333.jpg
View fullsize Malva-pic3-rev-500x168.jpg

Deadly Cape Malva Pudding

In a previous post on luscious bobotie, I mentioned some fun cooking I did while travelling around South Africa and a dessert I had there, Cape Malva pudding.  When Americans think pudding, it’s usually the sweet, cornstarch-thickened milk kind or, more often, the Jell-O sort.  But, historically, puddings are sweet or savoury and actually take a more solid form (like a Yorkshire or even a bread pudding).  In Europe or in places where Europeans migrated, these sorts of puddings are really popular, and this one is Dutch in origin, brought to South Africa sometime after the Dutch East India Company established Cape Town in the 1600’s.

At some point during try # 572 (exaggeration but it took me fooorever to create a recipe that I was 100% happy with), I was texting with a girlfriend who spent some time modeling in South Africa.  She’s always interesting to talk to because she was born in Somalia, spent the early part of her life in Kenya, and then grew up in Seattle.  She has travelled all over the world, and unlike the rest of us, can eat things like Malva pudding and still stay thin enough to model!  Anyway, when I mentioned that I was making it, she wrote back one word: DEADLY.  Can’t wait until she comes to New York in a few weeks so I can attempt to fatten her up with this…:)

This dessert is, indeed, deadly, the type that gets even better the next day.  The result is slightly spongy, super moist and buttery, with an amazing caramelized exterior.  The sauce is thin and meant to be poured over the pudding to soak in and give it added moisture and flavor.  I used brandy in my sauce, but Amarula would be fantastic here.  The sauce can easily be made as is without the alcohol if you’re serving this to kids, and it’s still lovely.  Malva pudding is typically served in the Cape warm and with a side of custard (as if it needs anything else!).  Devonshire cream, mascarpone, whipped cream, or even ice cream are the perfect accompaniments.  Delicious.  Enjoy!

Ingredients

Yields 1 10-12 cup Bundt or ring-shaped cake pan

Pudding:

1 ½ cups flour

1 ½ tbsps baking soda

2 tsps baking powder

3/4 tsp salt

3 tbsps butter, softened at room temperature

1 ½ cups sugar

4 eggs, room temperature

2 tbsps red wine vinegar, room temperature

3 ½ tbsps apricot jam, room temperature

2 tsps vanilla extract

1 ½ cups milk, room temperature

Sauce:

¾ cup fresh cream

½ cup sugar

½ stick butter

1/3 cup water

1 tsp vanilla extract

1 – 2 tbsps brandy (whatever works for your tipsy scale)

Procedure

Preheat the oven to 350° F.

In a bowl, sift together the flour, baking soda, baking powder and salt.  Set aside.

All ingredients should be at room temperature.  In a stand mixer with a paddle attachment, cream together butter and sugar.  With the mixer still running, add eggs one at a time.  Once incorporated, add vinegar, apricot jam, and vanilla extract.  With the mixer on low, add one third of the flour mixture and then one third of the milk.  Repeat process two more times.

At this point, I stop the mixer and scrape down the sides.  Then, I turn it back on long enough to make sure that all of the flour is incorporated.  You don’t want to over mix and develop the glutens in the flour, but you do want to make sure that there are no dry spots in the mixture.

Pour into a heavily greased and well-floured Bundt, or other ring-shaped pan (single piece – no detachments – and preferably non-stick) or baking dish of your choice.  It should come up a little over halfway the size of the dish as it will rise significantly.  Bake at 350° F for 45 minutes, longer if needed – until an inserted cake tester or toothpick comes out clean.  The outside should be well caramelized.

For the sauce, simply heat all of the ingredients in a small saucepan, whisking to make sure all of the sugar is dissolved.  Keep warm until you are ready to pour.  If you let this sit too long, a skin will form on top.  If this happens, just strain before pouring.

If you are unmolding the pudding, cool for about 15 minutes, run a knife around the edge if necessary and turn onto a plate.  Poke holes all over the pudding with a knife or a skewer, and slowly pour or spoon the sauce over all sides.  You want the sauce to soak in everywhere.  If you pour too quickly, the sauce will just pool and will make only the bottom part of the pudding moist.

If you are not unmolding, simply poke holes all over and pour the sauce right in.

tags: cape malva pudding, South African food, South African cooking, South African recipes
categories: breads & cakes, recipes, desserts-1, all-7
Monday 08.23.10
Posted by Aliya LeeKong
 

Quick Bread with Bacon, Medjool Dates & Nigella Seeds

View fullsize savoury-cake-pic1-500x333.jpg
View fullsize Savoury-Cake-Ingredients-500x333.jpg
View fullsize Savoury-Cake-Pic2-500x166.jpg

Quick Bread with Bacon, Medjool Dates & Nigella Seeds

I was reading this article in the New York Times on what the French call a cake salé, and it inspired me to create my own exotic version.   A cake salé is close to what we call a quick bread or a quick loaf in America (think zucchini bread, cornbread, or even muffins).

The main ingredients of any quick bread are flour, baking powder (and/or soda), fat, eggs, and liquid; the flavor is really up to the imagination.  It’s chemically leavened, so it’s much faster to make than traditional bread, which requires a whole process leavening with yeast.  This loaf is incredibly easy to make and really versatile. I’ve been serving it warm for breakfast, but it would also make a delicious lunch paired with a simple salad.

I mentioned to a girlfriend the inclusion of dates in this bread, and I got a wrinkled nose reaction.  She believed dates to be the shriveled up nonsense that’s in trail mix.  At that point, she hadn’t tried Medjool dates, which are amazing – plump, sweet, and creamy with thick, soft flesh and a taste closer to caramel and honey than to fruit.  (She’s now addicted).  They are also incredibly nutrient dense, high in fiber and an excellent source of potassium.  They are eaten throughout the Middle East, to break a fast or served with a thick, Arabic coffee at the beginning of a meal.

For this recipe, I couldn’t get the idea of bacon out of my mind.  I’m such a fan of sweet and savoury – it’s a richness of flavor that can’t be matched – and bacon tastes fantastic with a hint of sweetness.  With the caramelized leeks, the honey of the dates, and the slightly bitter, thyme-like bite of the nigella seeds, the flavor of the bread is really well-rounded – great as a stand alone but also wonderful as an accompaniment to a larger meal.   Enjoy!

Ingredients

Yields 1 8½” x 4¼” x 2¾” loaf pan

4 slices bacon, chopped

3 tbsps butter

1 leek, white and light green only, thinly sliced

1 ½ tsps nigella seeds

salt

3 dates, skinned and pitted*

¼ cup + 1 tbsp vegetable oil

3 eggs

1/3 cup milk

1 ¼ cups flour

1 ½ tsps baking powder

1 tsp salt

¼ tsp black pepper

Procedure

Preheat oven to 350° F.

Heat a skillet over medium-low heat.  Add bacon and cook until just starting to crisp.  Remove with a slotted spoon into a bowl to cool.

Heat another, clean skillet on low.  Add butter.  When foam subsides, add leeks and stir to coat completely with the fat.  Add nigella seeds and a few pinches of salt to draw out the moisture.  Cook on low, stirring frequently, for 15 to 20 minutes until the leeks are well caramelized.  Remove with a slotted spoon and add to bowl with the bacon.

Combine dates, oil, eggs, and milk in a blender or food processor.  Blend for 30 seconds on low or pulse until dates are finely chopped.  This helps to distribute the dates in the batter.  The goal isn’t to have them pureed, just chopped a bit more finely, so they don’t clump in one place in the batter.  Add this liquid to bacon and leeks, and stir to combine.

In a large bowl, sift together flour, baking powder, salt and pepper and whisk so that all of the ingredients are well combined.  Fold in the liquid to the dry ingredients using a spatula.  Do not overmix.   You just want everything to come together.  It should be a wet, sticky, clumpy dough – like muffin batter.

Pour batter into a greased 8 ½ “x 4 ½” loaf pan.  Bake at 350° F for 40-45 minutes until golden brown.

* To remove the skin from the dates, simply heat water to a boil.  Pour over dates and let sit for 1 minute.  Carefully remove from the water, and peel off skin – it should slide off easily.

tags: quick bread, medjool dates, savoury cake, cake salé, brunch recipes, nigella seeds
categories: all-7, breads & cakes, breakfast, side dishes
Wednesday 07.28.10
Posted by Aliya LeeKong
 

Savoury Roasted Cinnamon Popovers

View fullsize IMG_06172-500x333.jpg
View fullsize test2-copy-500x333.jpg
View fullsize 6-500x333.jpg

Savoury Roasted Cinnamon Popovers

I just looked at the title of this, and my mind immediately went to a breakfast association.  The interesting thing is these popovers were conceived as a thought for an awesome dinner accompaniment: a hollow, savoury, buttery puff with which to scoop up extra sauce or even a jus.

I was eating Van Leeuwen cinnamon ice cream (out of the container) when I came up with the thought for these tasty treats.  Van Leeuwen, which creates incredible artisanal ice cream, uses a Ceylonese version of cinnamon – the flavor reminiscent of Atomic Fireballs, those crazy hot candies we ate as kids that turned our tongues red.  Although lovely, I prefer the more woodsy and subtle flavor of Vietnamese or Saigon cinnamon…Which I’ve read is actually a version of the cassia plant, not cinnamon after all.

Cinnamon is such a diverse spice and is a staple ingredient in many savory ethnic dishes; it adds such complexity and nuance to even a simple marinade.  Whether part of Indian garam masala or a Mexican spice blend, the added note can elevate a simple dish to something much greater.  Pan-roasting the cinnamon deepens the smoky-woodiness of the spice, which makes this even better as a savoury side.  And who doesn’t love a popover?  I mean their shapes alone are comical.  And there is something about serving a warm baked (from scratch!) good at dinner that is suggestively decadent.

The best part is that this is a super easy recipe with ingredients most of us have on hand.  Oh, and I’ve tailored it for use in a muffin pan.  I feel like I don’t make them often enough to warrant the expense of popover tins and much prefer the smaller size.  Although easy, the recipe is not without science, because getting these little guys to rise can be nerve-wracking.  I’ve done it a million times and still stand watch peering through the hazily-lit oven (never open!) to make sure they are on track.  So read the procedure carefully.  And enjoy some luxurious dinner (or breakfast) popovers…

Ingredients

Yields 12 popovers in a traditional muffin pan

1 stick cinnamon or ¾ tsp ground cinnamon (Vietnamese, Saigon, whatever you like)

1 cup AP flour

½ tsp salt

1 cup whole milk

2 eggs

1 tbsp melted butter

melted butter for brushing

Procedure

Lower the rack in your oven to the 2nd rack from the bottom, and preheat oven to 450° F.  Keeping the rack lower will prevent over-browning of the popovers.

Pan-roast cinnamon sticks or ground cinnamon in a sauté pan on medium-low heat until fragrant and toasty.  If using sticks, grind in a spice or coffee grinder.  You want to yield ¾ of a teaspoon of ground cinnamon.

Combine milk, butter, and eggs in a blender.  Blend thoroughly.   Add flour, cinnamon, and salt, and pulse until thoroughly combined.  Don’t overmix.  I like to pulse, scrape down, and blend until it just mixes through.  You want to let the batter stand and come to room temperature (around 20 to 25 minutes).  A room temperature or even slightly warm mixture will rise much higher and easier than a cold one.

When the batter is almost ready, place the muffin pan on a baking sheet and place in the oven for 5 – 10 min.  You want to preheat the tin, and placing it on a baking sheet creates better heat from the bottom – again, all good for the rising of the dough.  When hot, brush the muffin pan with butter to prevent sticking.

Fill the cups about halfway full and immediately place in the oven.  Bake for 10 minutes at 450° F, and then lower temperature to 350° F for another 20.  Don’t peak at them or they will fall!  You want to keep the oven heat even.  The puffs should be crusty on the outside and soft and hollow on the inside.   I shut the oven off and leave the door slightly ajar, a technique used for gougeres, for another 3 to 5 minutes just to make sure.

Serve these delicious puffs warm!

tags: savoury popovers, roasted cinnamon, popover recipes
categories: breakfast, breads & cakes, side dishes, recipes, all-8
Monday 07.19.10
Posted by Aliya LeeKong
 
Newer / Older