X

Sign up to receive exclusive recipes, tips, updates and other goodies from Aliya!

  • Home
  • Blog
    • All
    • Recipes
    • Spices + Ingredients
    • Lifestyle, etc.
    • Travel
  • The Cookbook
  • The App
  • Media
    • All Media
    • Video
  • About
  • Passions
Aliya LeeKong
  • Home
  • Blog
    • All
    • Recipes
    • Spices + Ingredients
    • Lifestyle, etc.
    • Travel
  • The Cookbook
  • The App
  • Media
    • All Media
    • Video
  • About
  • Passions

The (Non) Eggnog I'm Making For The Holidays

View fullsize coquito3.jpg
View fullsize coquito1.jpg
View fullsize coquito2.jpg

THE (NON) EGGNOG I'M MAKING FOR THE HOLIDAYS

In a few days, I'm having a (very) small group of friends over for a holiday get together.  This year, after Thanksgiving fatigue, I'm taking it easy and going to enjoy my friend time.  I'm doing some fun holiday drinks; there's going to be serious spades playing, and we are all going to eat my favorite delivery pizza (which in Brooklyn is nothing short of amazing)!  Christmas eve will be my blowout cooking event with my family, so I'll get my cooking fix then.

One of my favorite things to do for holiday parties is serve little, sweet, liqueured up shots for dessert!  And this year, I'm making this (non) eggnog for the occasion.  I love how the Caribbean does eggnog and have put up the recipe for West Indian Ponche de Crème in the past - a sweet, creamy spiced eggnog with a touch of bitters.  For this recipe, the inspiration is coquito, the Puerto Rican version which I like to think of as coconut eggnog!

I made some key changes to a traditional coquito here.  Instead of canned evaporated milk and sweetened condensed milk, which are traditional, I infused heavy cream with sugar and the signature spices of the drink - cinnamon, nutmeg, star anise and cloves - making my own sweetened and spiced condensed cream!  Because I use heavy cream, I omit the eggs which is great because it's creamy enough.  Also, I have some friends that aren't so into the "egg-y" flavor and are a bit skeeved out about the whole raw eggs thing, so it works all around.

This drink is so rich and delicious - it's creamy and scented with coconut.  I love that it has the traditional cinnamon and nutmeg, but the star anise, if you have it, is such an unusual touch.  Enjoy!

Ingredients

Yields a little over 8 cups

4 cups heavy cream

3/4 - 1 cup coconut or white sugar

5 cinnamon sticks

6 star anise pods (optional)

6 whole cloves

pinch ground nutmeg

pinch of salt

zest of 1 lime

3 ½ cups fresh coconut milk or 2 cans coconut milk

4 teaspoons vanilla extract

1 cup light rum

½-1 cup gold rum

Optional: Amaretto or Coffee Liqueur

Garnish: Ground or whole cinnamon, more star anise pods

Procedure

In a medium saucepan, add the heavy cream, sugar, cinnamon sticks, star anise, cloves, nutmeg, salt and lime zest.  I give a range on the sugar because I like mine a bit less sweet (3/4 cup), but a traditional one would be more sweet (1 cup) - do to your tastes and remember you can always taste and add more!  Bring up to a boil and then remove from the heat.

To a blender, add the coconut milk, vanilla extract and rums (again, to your booziness level).  Blend until it's uniform.  In a pitcher, pot of whatever you are going to store this in, stir together the blended coconut mixture with the spiced heavy cream.  Chill completely before serving.  I prefer letting it sit in the fridge a day or two before serving so all the flavors come through, but it's pretty amazing after a few hours too.

If you want to put a twist on this, substitute 1/2 cup amaretto or coffee liqueur in lieu of the same amount of the gold rum.  Just drop down the sugar to 1/2-3/4 cup to balance out the sweetness.

Strain out the whole spices and serve over ice with some ground cinnamon, a cinnamon stick or some star anise pods.

Enjoy!

tags: eggnog recipe, ponche de creme, ponche de creme recipe, coquito recipe, how to make coquito, eggless eggnog recipe, holiday drinks recipe
categories: all 3, drinks & cocktails, holiday, traditions
Thursday 12.17.15
Posted by Aliya LeeKong
 

Black Friday Brunch

BLACK FRIDAY BRUNCH

It’s the day after Thanksgiving, and your fridge is filled with leftovers!  You can't think about cooking another thing for the rest of the week.  This is my favorite time to be creative and come up with new ways to re-purpose the delicious meal from the night before (instead of just reheating the same old plate). And why not turn the dreaded Black Friday into a yummy brunch day with friends and family while having them help you clear out your fridge! 


THE TURKEY

Photo: A Beautiful Mess

Everyone’s go-to the day after will most likely be a quick turkey sandwich or a one pot hash mix up, but there are so many other options out there to choose from!  The word brunch and "benedict" go hand-in-hand so why not a Turkey Benedict?  A traditional eggs benedict is your basic starting point and can be played up with whatever your leftover situation looks like. 

- Let's start with the base: instead of using English muffins on the bottom, use any leftover parker house rolls or biscuits.  If you’re feeling really adventurous with your Benedict, you can even use the stuffing as the base and just mold in to a patty and sear in a pan on the stove to give it a nice crust.  You could even crumb coat leftover mashed potatoes to make a patty. 

- Next comes the bacon.  Substitute here with your turkey or ham (or short ribs in my case!), if that’s what you cooked…or both if you’re like my family and completely over do Thanksgiving!  I like to warm them up in a sauce pan real quick. 

- Get some eggs poaching: bring a pot of water to boil, and once it comes to a rolling boil, add a couple tablespoons of white vinegar - this will help the eggs stay together once in the water.  Stir the water a bit and drop the egg in slowly, as close to the surface of the water as you can without poaching your fingers!

- The finishing touch: sauce.  Hollandaise with the runny yolk is what makes this dish, but I’ve come across some recipes that use the gravy instead (equally delicious). Warm up some of the leftover gravy in the pot and pour away once the benedict is assembled!

- For the vegetarian option, omit the turkey and add any leftover vegetable side you might have (think creamed spinach or roasted brussels sprouts).  The possibilities are endless with this dish, you can’t go wrong!


THE VEGETABLE SIDES

Another no-brainer when it comes to brunch is quiche.  I love quiche because you can pretty much fill them with whatever ingredients you happen to have on hand…hopefully you over-shopped and have an extra pie crust in your freezer or some puff pastry lying around to make your life easier!  If not, use my crab and callaloo quiche recipe as a starting point for your crust and quiche procedure (think roasted brussels sprouts and bacon quiche, green bean casserole, stuffing and turkey quiche etc…) so easy!  Don’t have a ready made pie crust and don’t feel like dealing with homemade dough?  Try this frittata recipe and replace the butternut squash with your chosen Thanksgiving leftover (even better if you do have leftover squash!).


MASHED POTATOES & STUFFING

Photo: Epicurious

Honestly, I can just eat the stuffing the next day right out of the fridge (and may even be too lazy to heat it up...) - it is so delicious and something I really only cook once a year…so why not!?  But if you want quick bites to initially satisfy your hungry brunch guests these recipes for croquettes, samosas and steam buns are the most genius way to combine stuffing, mashed potatoes and your turkey leftovers…who knew!?


CRANBERRY SAUCE

What to do with the massive amount of leftover cranberry sauce?  Make some pancakes, waffles, or use my recipe for these breakfast clafoutis and substitute the cranberry sauce for the mixed berries, so delicious and compliments the season so well!  For a more savory recipe, try this cranberry and brie puffed pastry bite.  Also, how good would leftover cranberry sauce be, as is, on top of spiced potato samosas?!?


Enjoy the holiday everyone!


tags: thanksgiving leftover ideas, leftover veggies, leftover turkey, black friday brunch, brunch after thanksgiving
categories: all 3, appetizers 1, holiday, lifestyle, recipes, traditions, breakfast-1
Wednesday 11.25.15
Posted by Aliya LeeKong
 

Spiced Up Thanksgiving Sides

SPICED UP THANKSGIVING SIDES

With Thanksgiving a week away, I'm getting my menu in order and always find myself a bit stumped on the sides, not only what to do but also the big jostle for oven room!  I'm a big believer in keeping the turkey classic and mashed potatoes luscious, buttery and minimal as a canvas, but beyond that, it's open season.  Experimenting with sides gives Thanksgiving that signature, that little mark that makes it particularly yours. 

The Standard: Stuffing

How to Change it Up: This has to be one of the best places to start experimenting!  There are so many variations on stuffing that there literally isn't enough room to write about them.  I make a version with challah, bacon and Aleppo chilies, but, really, it comes down to a great bread (brioche, sourdough, cornbread), aromatics (garlic, onion, shallot, celery), liquid (chicken broth, eggs, cream), and herbs (parsley, sage, chives).  From there, you can play with meats (pancetta, bacon, spicy chicken or pork sausage), fruits (apples, quince, apricots, currants), nuts and spices.  I loved the fruitiness of Aleppo chilies, but a bit of allspice or fennel seeds would also be great. 


The Standard: Mac 'n Cheese

How to Change it Up: I love a good mac 'n cheese, but I love macaroni pie even more: a baked mac 'n cheese with onions, garlic, and chilies that comes from my husband's side of the family.  The one above is a version with porcini mushrooms (to die for!).  This is a great do-ahead dish that needs a bit of reheating in the oven, but if it's stovetop for you, throw in some chipotles in adobo and top with garlic breadcrumbs, lobster and brandy if you're being fancy, or go Greek with feta, Kalamata olives and spinach.  Even a basic mac 'n cheese recipe can be taken to the next level with different cheeses (Gruyere, smoked cheddar, mascarpone) and a great topping (panko, fried onions, or an extra layer of cheese broiled to perfection).


The Standard: Sweet Potatoes

How to Change it Up: I never really grew up with sweet potato casserole, canned or fresh sweet potatoes kicked up with brown sugar and topped with marshmallows.  I happen to love them simply roasted or mashed and lightly sweetened like in this bake, but there are tons of ways to prepare them.  This version uses pecans and cornflakes in lieu of marshmallows to top the casserole.  If you're going the pie route, a few key spices can bring out that beautiful sweet potato flavor.  I personally add a bit of chai spice to make mine special.


                                   Photo: Bon Appetit

The Standard: Green Bean Casserole

How to Change it Up: Green beans are deliciously versatile and take on flavor easily!  I love the idea of simply cooking them a day in advance.  Then, you can sauté them right before serving using different sauces (homemade or store bought) to take them to the next level.  Think harissa and marcona almonds, basil pesto and cherry tomatoes, thai curry and butternut squash.  Want to go a totally different route?  This recipe calls for tempura-battering them and serving them with a shallot dip - I'm so tempted for this year!


The Standard: Parker House Rolls

How to Change it Up: I personally love parker house rolls as they are - fluffy and buttery.  But where I always like to play with breads is the butter.  Mixing in a few ingredients can totally change the tone of a bread dish, even store-bought ones.  I top my rolls with miso-butter, but I also love to add a bit of honey and spice for a chili-honey butter.  Sesame oil can add nuttiness, and herbs can add both brightness and elegance to your table butter.

Enjoy and Happy Thanksgiving to everyone!

tags: thanksgiving ideas, thanksgiving recipes, thanksgiving sides, how to spice up sides
categories: all 3, holiday, lifestyle, recipes, side dishes-1, traditions, vegetarian
Thursday 11.19.15
Posted by Aliya LeeKong
 

Handmade Pasta: How-To + Recipe

HANDMADE PASTA: HOW-TO + RECIPE

If pizza is my ultimate comfort food, pasta is a very close second.  I actually haven’t made pasta from scratch for a really long time and, lately, with the weather getting cooler and the fact that I'm going to serve it at my pop-up in a few weeks, I’ve been wanting to break out my pasta roller and get started.  I bought a couple cookbooks for inspiration to get me started.  The dough recipe is actually super simple, and I find myself wondering why I don’t make pasta from scratch more often at home instead of buying it at the store.  Oh right, time! That little thing that tends to escape all of us...But if you are planning on having a dinner party, nothing is more impressive than serving a plate of homemade tagliolini!  And it's something you can make in advance and cook quickly while your guests are enjoying a drink (or two...). 


MAKING THE DOUGH

There are two types of dough when making pasta; one for the different shapes of noodles (spaghetti, tagliatelle, fettuccini etc…) and one for filled pastas (ravioli, tortellini, agnolotti etc…).  The only differences between these two is that the filled pasta dough just adds a little bit more liquid to make the dough more pliable for making shapes and is a bit thinner since you are often double layering it. 

My go-to recipe is pretty simple:

Serves 6-8

2 cups 00 or all purpose flour

2 eggs + 3 yolks

1 1/2 tablespoons water

1/2 teaspoon salt

Mixing is very simple. Just create a mound with the flour ( “00” is the most commonly used in Italy, but all purpose works just as well) pour all the liquid (whole eggs, yolks, water) in the center and slowly, with a fork, combine everything until the dough starts to come together and is not sticky.  Now comes the hard part: kneading!  You want to knead the dough for at least 10-15 minutes, doesn’t sound like a huge task but it is essential to create a smooth pasta dough.  You will see as you knead the dough the roughness when the dough first comes together starts to disappear the more you work the dough.  Once the dough is nice and smooth, form in to a ball and cover with plastic wrap and let it rest.  If you're rolling it right away, you can allow rest it for 30 minutes at room temperature.  If you're rolling it later, keep it in the fridge and allow the dough to come back up to room temperature just before.  Because of the eggs in the dough, you want to use this within 24hrs to ensure freshness or freeze it for later use. 


HAND ROLL OR MACHINE?

Having a pasta machine is essential to rolling out the dough.  You can, of course, do it with a rolling pin, but it will take a lot more time and effort, not to mention a lot of upper body and arm strength!  The process of kneading alone makes my arms and hands ache, but the result is just too delicious to give up on.  There's also just something soothing about the process of rolling out the dough with a machine, going through every size on the rollers and then creating your pasta shape.  The key is to start the pasta dough on the largest setting of the machine and work down from there, cutting the dough and doing it in batches. 

Start by cutting the dough into quarters.  Flatten the quarter piece a bit and put the dough through the largest setting, once through. Fold the dough on itself (take both ends fold over and meet in the middle) rotate 90 degrees and put through the machine on the same setting again - you basically just want to get a rectangular shape to start.  Raise or lower the setting (depending on the machine) and run through again.  You want to get thinner and thinner, running the dough once at each incremental setting.  If it gets too long, cut it in half and roll each piece separately.  After the dough has made its way through, I usually end on the second to last setting for stuffed pastas or the third to last for thick noodles.


SAUCES AND FILLINGS

And now for the good stuff: the filling and the sauces!  First, though, a note on cooking.  In boiling, heavily salted water, fresh pasta only takes 1 to 2 minutes to cook, so if you spend the time up front, know that, at the very least, you are saving on cook time! 

For my pop-up, I'm doing a roasted maitake mushroom pasta with pickled chilies, garlic and some Egyptian Dukkah.  I know - major and not so traditional.  BUT I love a good simple tomato sauce with noodles, and this recipe is such a great go to.  There are so many others to choose from; Bolognese, avocado-basil pesto, and classic brown butter and sage.  The possibilities are endless - it really just depends what mood you are in!  Same with choosing the filling for stuffed pastas, you can go the traditional route and do a ricotta filled ravioli or go with the season and do a pumpkin ravioli for fall, a pea ravioli for spring etc…

The important part is to make sure you have all the essential tools to create and roll out the perfect dough - the rest you can just make up as you go along!  That is the fun part after all..

Enjoy!


tags: how to make pasta, pasta how to, how to roll pasta, how to make ravioli, ravioli recipe, homemade pasta recipe
categories: all 2, holiday, lifestyle, main dishes, side dishes-1, vegetarian, traditions
Friday 10.16.15
Posted by Aliya LeeKong
 

Marrakech + Msemen

MARRAKECH + MSEMEN

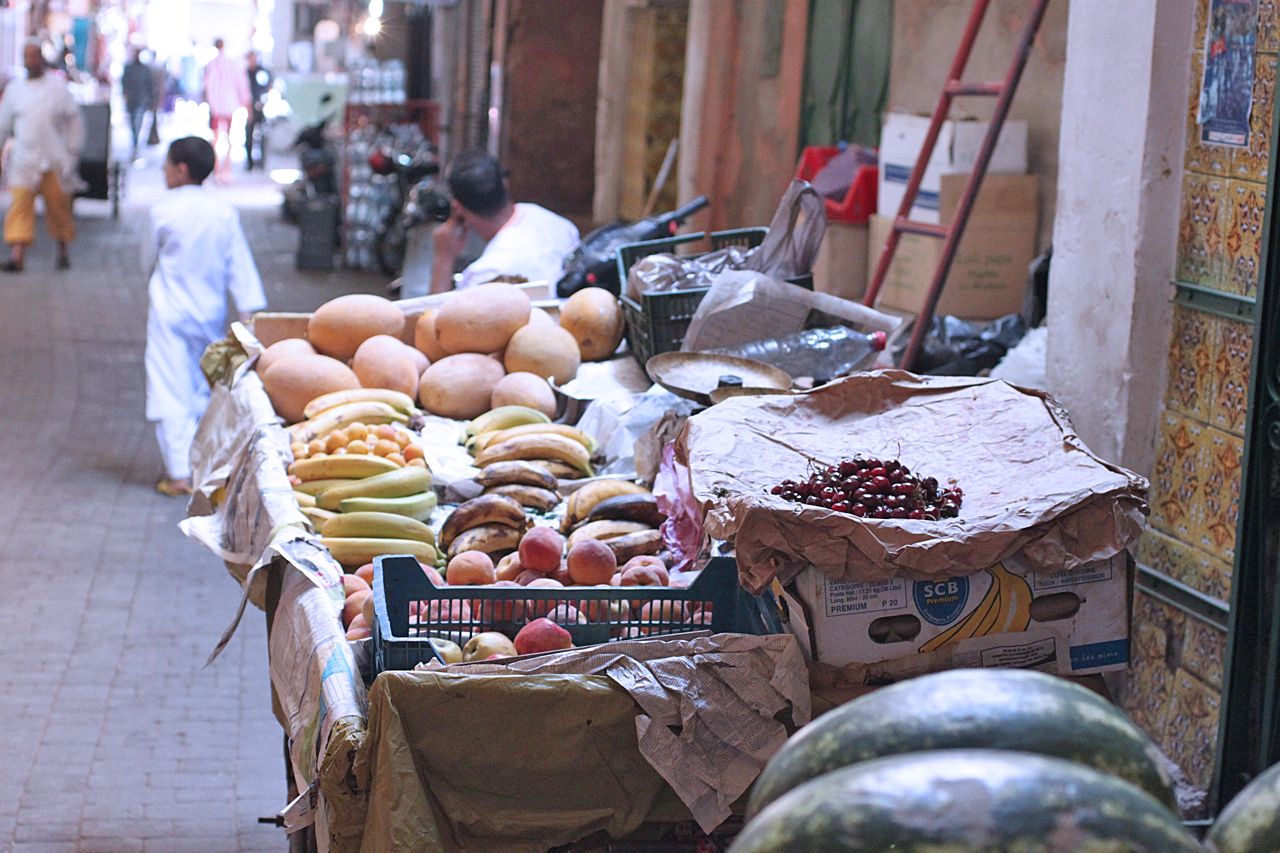
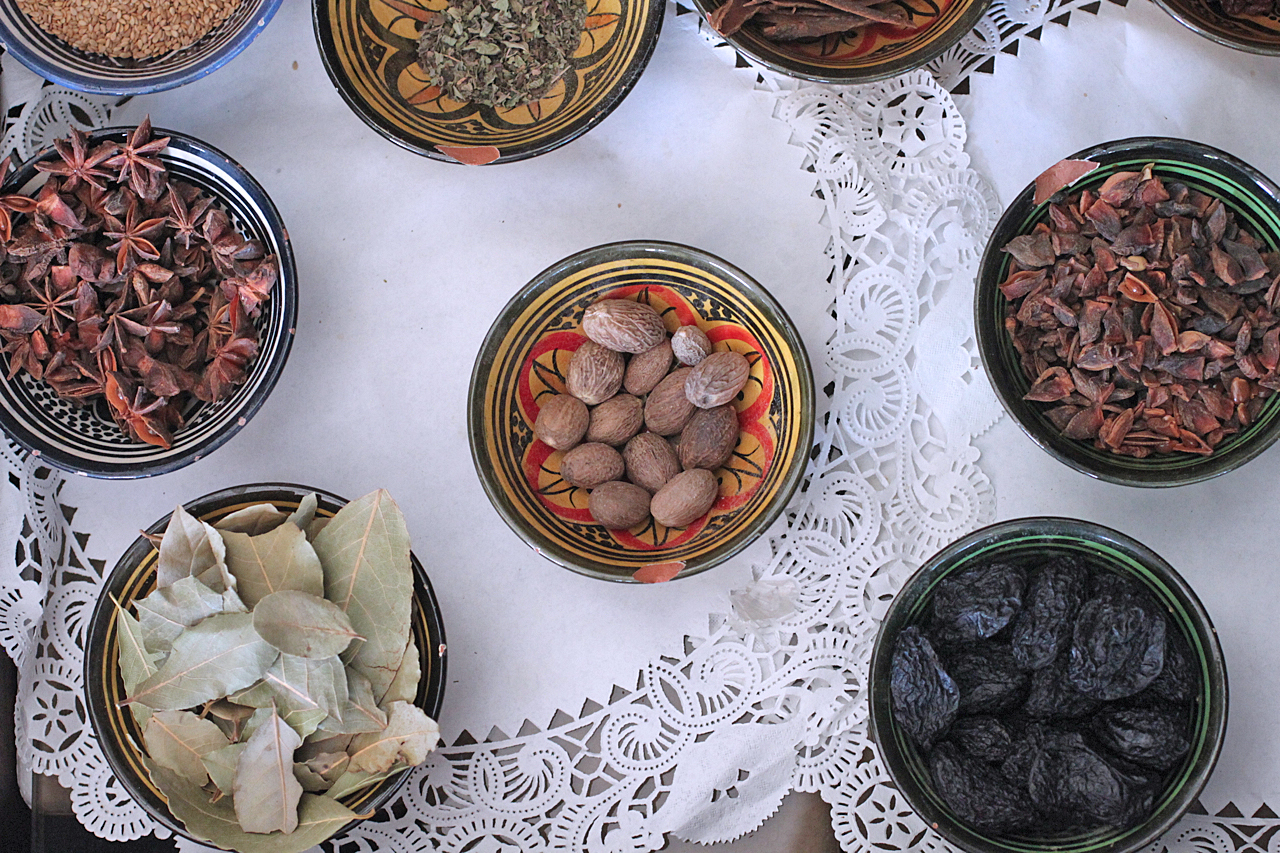
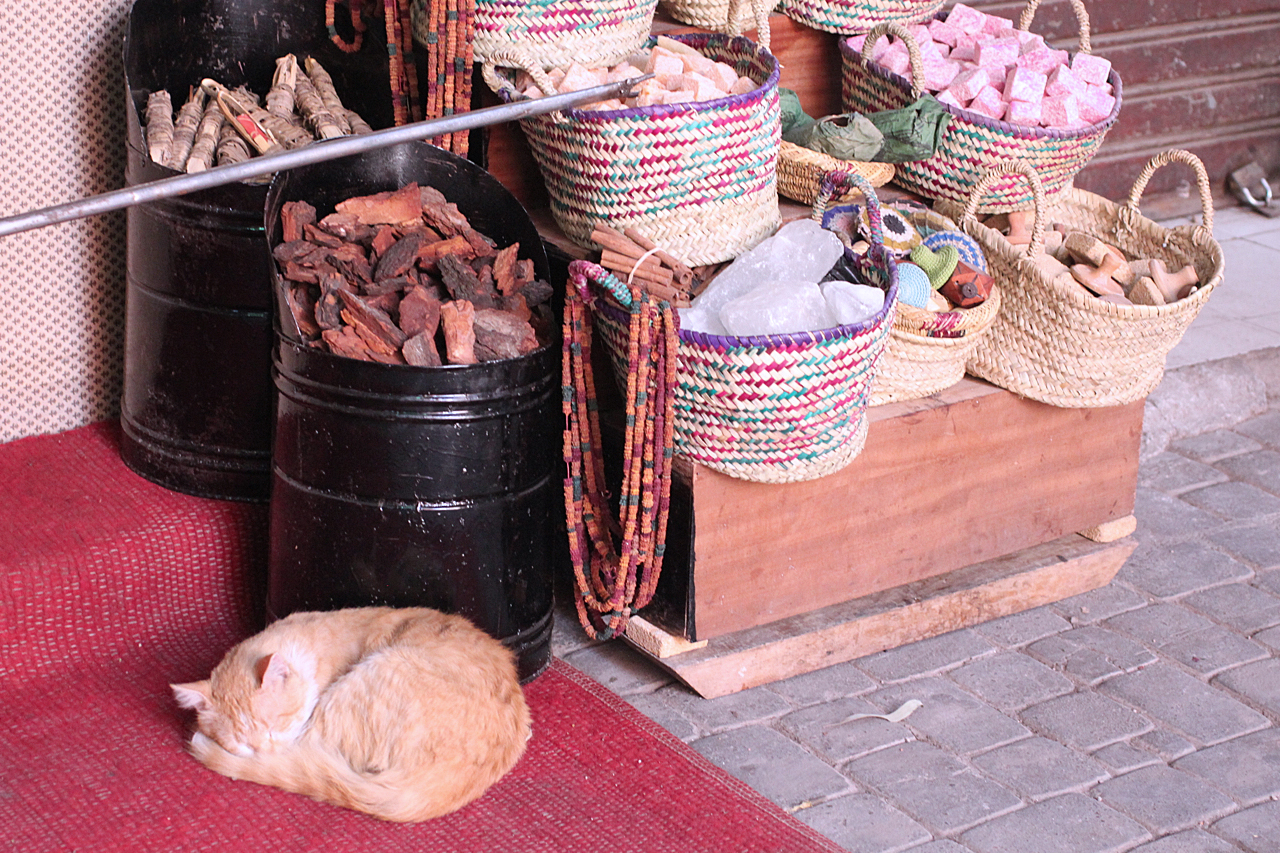
Writing about Navajo fry bread a few weeks ago got me thinking about another fry bread I learned to make last year when I was visiting Marrakech called msemen (heh heh...).  But first!  I want to share some photos I took when I was strolling around the medina.  This was my second time visiting, and the winding alleyways, colors and smells were still such a draw. (Hint: clicking on one of the photos will open up lightbox. Seeing them a bit bigger, you'll catch all of the subtle details, as they were meant to be viewed.)

View fullsize morocco 1.jpg
View fullsize morocco 10.jpg
View fullsize morocco 7.jpg
View fullsize morocco 5.jpg
View fullsize morocco 9.jpg
View fullsize morocco 12.jpg
View fullsize morocco 11.jpg
View fullsize morocco 8.jpg
View fullsize morocco 6.jpg
View fullsize morocco 4.jpg
View fullsize morocco 2.jpg
View fullsize morocco 3.jpg

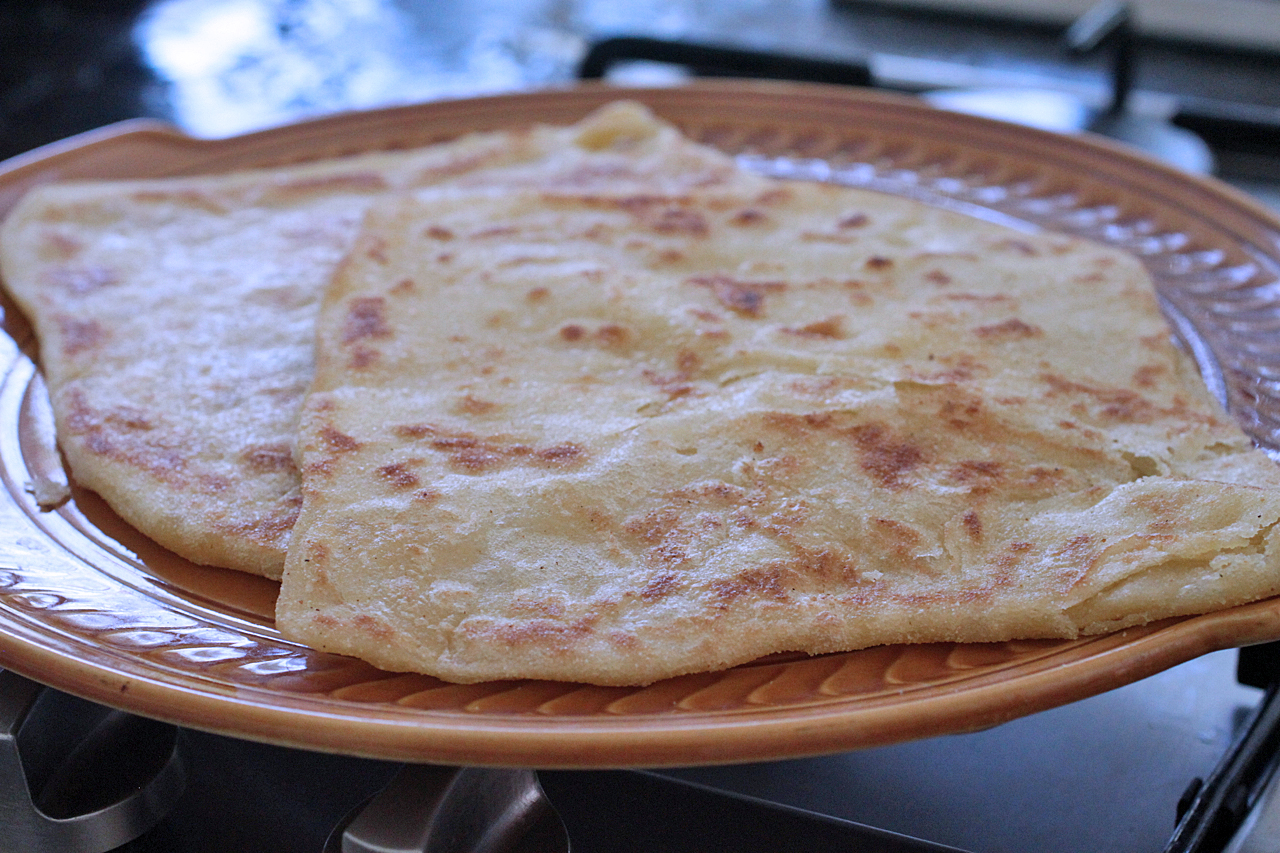
Now, on to msemen.  I spent a morning learning some traditional Moroccan cookery - few different tagines, some typical salads, briouats (cheese-filled pastries) and this gorgeous bread. 

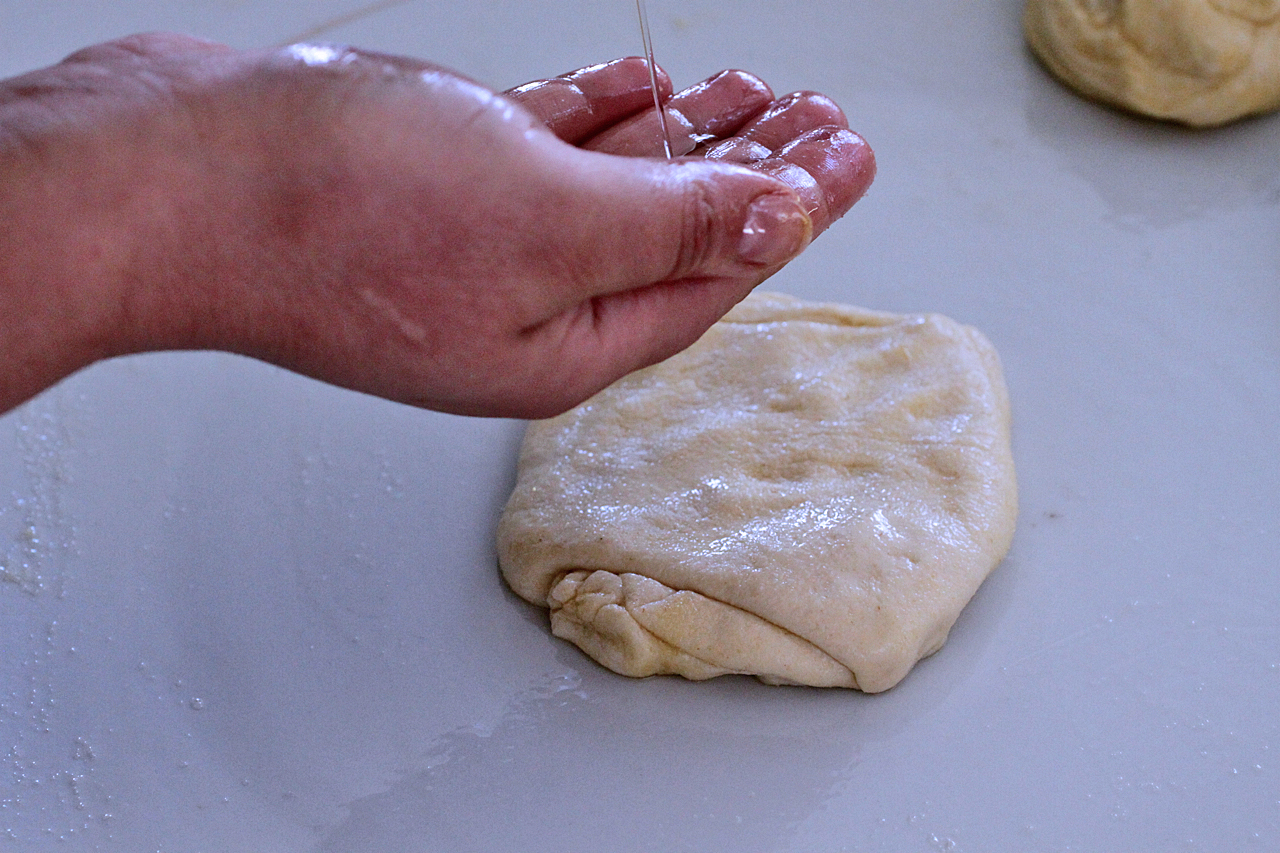
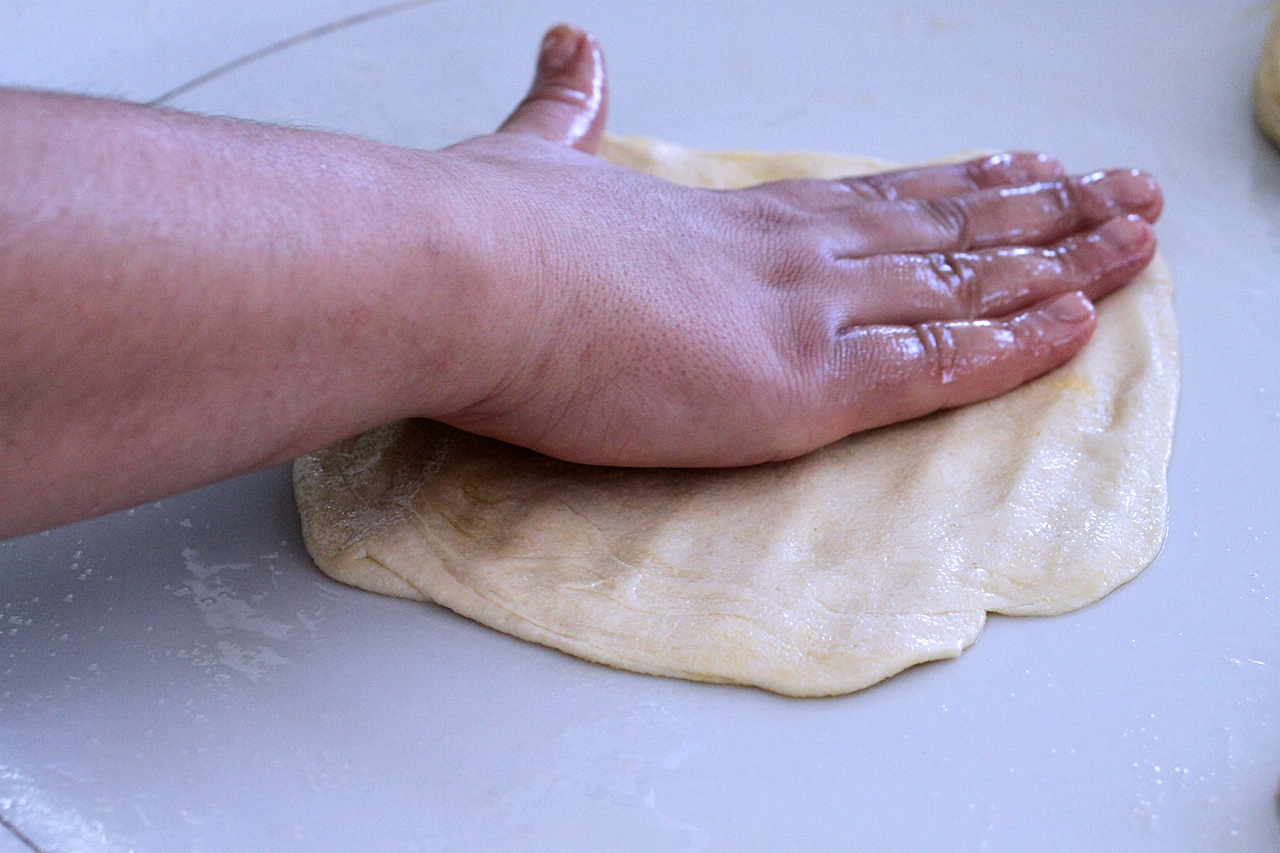
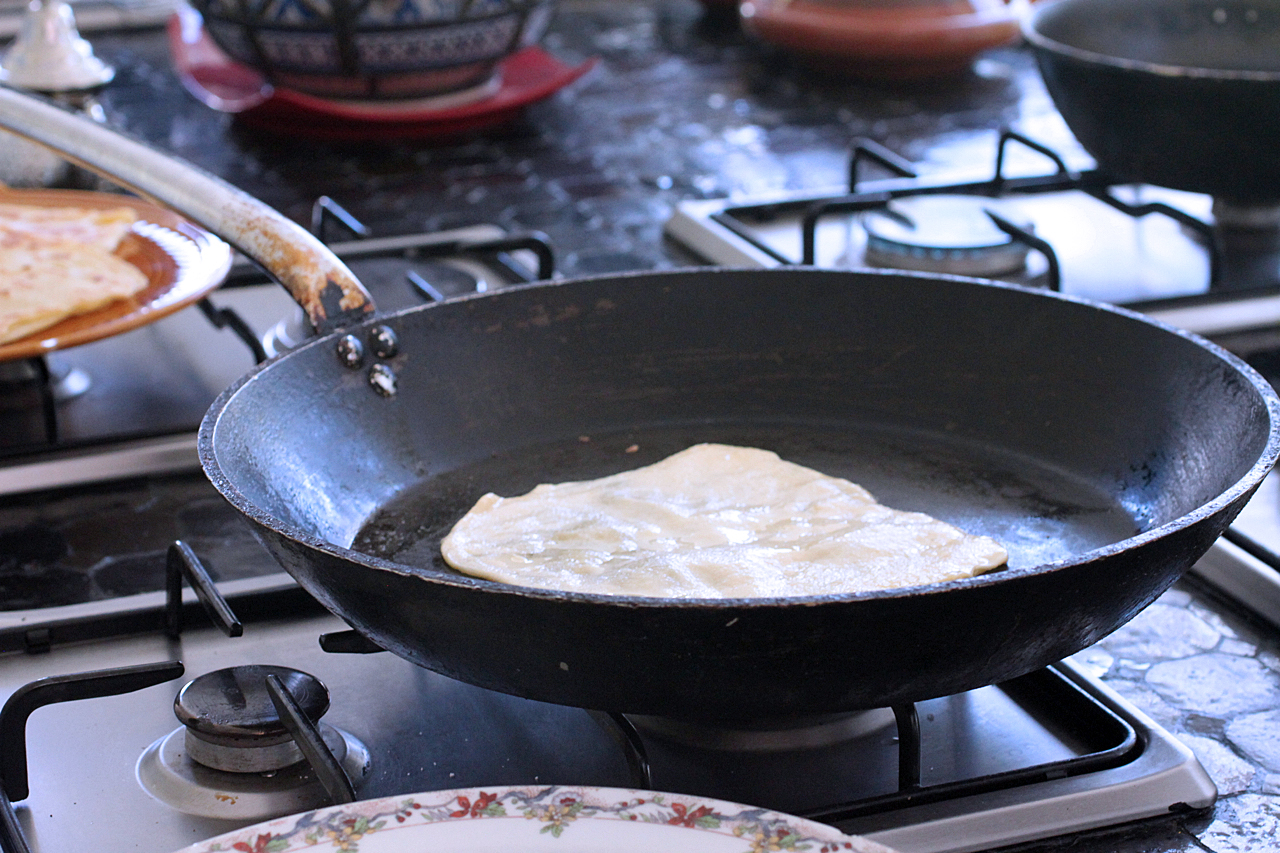
Msemen is a square-shaped, Moroccan pancake that's generally had for breakfast with a bit of honey on top.  It's delicious, and although the dough is pretty simple, what puts it over the top is the folding process, where butter is spread between the layers.  That's what gives it those flaky layers when it's cooked, not unlike puff pastry.  It reminded me a lot of a flatbread in Indian cooking called paratha - with that same, flaky, buttery texture. 

View fullsize morocco 13.jpg
View fullsize morocco 14.jpg
View fullsize morocco 16.jpg
View fullsize morocco 15.jpg

I'm still perfecting my recipe, but if you want to try some, Hot Bread Kitchen carries it at local NYC and BK retailers, farmers' markets and a few locations across the U.S.  They have an online shop too, and in general, the company is just an amazing, amazing concept that supports people, culture and traditions. 

tags: marrakech, moroccan travel, Morocco, hot bread kitchen, multi-ethnic breads, msemen, msmen
categories: all 2, travel, traditions
Tuesday 02.03.15
Posted by Aliya LeeKong
 

Happy New Years + Navajo Fry Bread

View fullsize frybread1.jpg
View fullsize frybread2.jpg

HAPPY NEW YEARS + NAVAJO FRY BREAD

I know I'm a bit late with this New Year's wish, but really creating a new blog from scratch with all of your old stuff is so not as straight-forward as you think it would be!  So please bear with me on the technical difficulties and bad links (and let me know if they go on for another month!).

In the meantime, I got away right before New Years and visited a ridiculously scenic part of the U.S. called the Four Corners – the only place where four states physically meet (Utah, Arizona, New Mexico, and Colorado).  The area is rich with the culture and the traditions of the local Native Americans, the Navajo, and I wanted to share a few things with you from this trip.

A woman named Ingrid showed me this dish called fry bread.  Food always has a history, and the story from Ingrid’s grandmother is that during the “Long Walk of the Navajo” (when they were forcibly relocated from Arizona to eastern New Mexico), bread was a staple based on the rations of flour that they were given.  When the dough was accidentally dropped in hot oil, fry bread was born.

Ingrid’s mom used to make it by hand (though our batch came together in a stand mixer), and there is all sorts of lore around the bread.  If there’s hole in the bread, it’s often told that you’ll have a bad marriage or be a bad in-law…harsh! 

And though it’s typically eaten as a meal with a stew or beans, we had a yummy, sweet version of it with berries, ice cream and honey drizzled all over.

ut2.jpg ut1.jpg ut4.jpg ut3.jpg

The trip was pretty amazing, and there was an unprecedented amount of snow the first few days I was there.  It usually doesn’t snow out there, and people I spoke to said that they hadn’t seen this in 20 years.  Either way, the scenery and snow made my photography skills comp to Ansel Adams (not) so I wanted to share some photos I took.  

tags: utah, navajo fry bread, fry bread recipe, native american food, native american culture
categories: all 2, blog, traditions, travel
Wednesday 01.21.15
Posted by Aliya LeeKong
 

Jamaican Ackee & Saltfish

View fullsize ackee-pic1-500x333.jpg
View fullsize ackee-pic1a-500x333.jpg
View fullsize ackee-pic2-500x333.jpg
View fullsize ackee-pic3-500x166.jpg

Jamaican Ackee & Saltfish

Recently, a friend of mine from Jamaica who happens to be an incredible cook gave me an impromptu cooking lesson.  She showed me how to make Ackee and Saltfish, Jamaica’s national dish, and, although I didn’t write down exact measurements (given the impromptu nature of it all!), I wanted to share the experience with you guys and at least give you the building blocks…

First, let’s talk about ackee – it’s Jamaica’s national fruit, though it’s not really sweet and, in this dish, cooks up like a vegetable.  Ackee starts out closed and green (and is actually poisonous in this state), and then it matures to red-orange and splits open to reveal black seeds and white-cream flesh (which is perfectly safe to eat).  Obviously, finding the fresh fruit here in the States is pretty tough, but you can sometimes find it canned or frozen.

The second part of the dish is the saltfish, which is dried, salted cod.  The cod can be soaked for a few hours to reduce its level of salt or used as is – a quick poach and flaked up, it’s ready for the dish.  Ackee and saltfish is really a sauté, and, in our version, we started with some bacon, and then added sliced onions and peppers, a minced, killer Scotch Bonnet pepper, chopped tomato, and sliced scallions.  We threw in the flaked saltfish and then carefully folded in the ackee and some fresh thyme.

Ackee can be boiled ahead of time or added into the sauté – it cooks up very quickly.  It turns from a white to an egg-yellow when cooked and can crumble easily (so be ginger with it).  We fried up some dumplings to go with the creamy, buttery ackee (the tradition), though rice, green bananas, yams or even fried breadfruit also go really well with it.

This is truly a breakfast (or brunch) of champions!  Creamy, spicy, and deeply flavorful and beautiful paired with the crispy, fried dumplings.  Thank you, May, for the ackee and saltfish tutorial!

categories: breakfast, travel, traditions, recipes, all
Wednesday 08.14.13
Posted by Liz Neilson
 
Newer / Older