X

Sign up to receive exclusive recipes, tips, updates and other goodies from Aliya!

  • Home
  • Blog
    • All
    • Recipes
    • Spices + Ingredients
    • Lifestyle, etc.
    • Travel
  • The Cookbook
  • The App
  • Media
    • All Media
    • Video
  • About
  • Passions
Aliya LeeKong
  • Home
  • Blog
    • All
    • Recipes
    • Spices + Ingredients
    • Lifestyle, etc.
    • Travel
  • The Cookbook
  • The App
  • Media
    • All Media
    • Video
  • About
  • Passions

Lucknow Fennel

View fullsize fennel-pic2-500x333.jpg
View fullsize fennel-pic1-500x333.jpg

Lucknow Fennel

Roaming around various markets and farms in Goa, I was overwhelmed by the abundance of fresh spices.  I brought back the most beautiful cinnamon from a farm I visited, incredible white poppy seeds from a popular indoor market, and all sorts of nonsense from the famed, outdoor Mapusa Friday market the day before I left.  I smuggled in the lot  (smuggled as in declared them, carried them in my hand, and chatted away with the customs officer about cooking after…) and am now happily sitting on some prized spices.  They are incredibly fresh, distinct, aromatic – it’s sad how much of their potency is lost by the time they get to the supermarket shelves.

One of the spices I brought back is Lucknow Fennel, which is believed to be one of the highest quality fennel seeds out there.  These seeds are primarily grown in Lucknow, the capital of Uttar Pradesh in India.  They are smaller, greener, and definitively sweeter and more aromatic than traditional fennel seeds.  In South Asia, they are often used as a digestive or breath freshener.

I’ve seen this spice used in desserts and am debating baking them into a shortbread cookie myself.  They also would be fantastic in a riz au lait or kheer or even with yogurt, honey, and fruit.  I usually prefer traditional fennel seeds for more savoury applications (LOVE it in sausage and pork dishes), but love the sweeter crunch these provide for breads.

This type of fennel seed is easily found at ethnic grocers and online spice providers.

tags: fennel, Lucknow fennel, Goa
categories: all-5, spices-2
Thursday 11.18.10
Posted by Aliya LeeKong
 

Pear-Anise Cake

View fullsize pear-cake-pic1-500x333.jpg
View fullsize pear-cake-pic2-500x333.jpg
View fullsize pear-cake-pic3-500x333.jpg

Pear-Anise Cake

Whenever I head down to visit my parents in Florida, my mom bakes this incredible apple loaf cake.  Moist, cinnamon-ey, bursting with soft, baked chunks of apple.  Warmed up with a scoop of vanilla ice cream (um, on the couch in some sweats…) – it is pure, luxurious comfort.

I thought I’d recreate a version of this loaf cake using delicious, seasonal winter pears instead of apples.  Returning from Goa, I brought back a ton of spices – turmeric, massive cinnamon sticks, woodsy black cardamom, and some beautiful anise seed.  The anise struck me as an ideal compliment to sweet, ripened pears, AND I’ve been looking for an excuse to use that Pernod liqueur that’s been sitting on the shelf for who knows how long.

I used Bosc pears here because they hold up really well to cooking and don’t turn to complete mush.  I always ripen my pears in a bag on the counter before using them to get the peak flavor because most of the ones at the farmers’ market are unripe when you get them.  Also, I macerated the diced pears with Pernod and sugar before adding to the cake batter – the liquid that’s released develops beautiful flavor in the cake and adds moisture.  Theoretically, you could leave out the Pernod as long as you still macerate the pears with sugar and enough liquid is released – but I’m disclaiming that I haven’t tried it that way so you’re on your own!  The result is a fine crumb loaf cake that is moist, full of pear flavor, scented with licorice-anise.  Enjoy!

Ingredients

Yields 1 8½” x 4¼” x 2¾” loaf pan

3 cups peeled, cored and diced bosc pears

3 tbsps Pernod liqueur

1 ¼ cups light brown sugar

1 ½ cups all-purpose flour

½ tsp salt

½ tsp cinnamon

¾ tsp anise seed, crushed (with a mortar and pestle)

½ tsp baking soda

2 tsps baking powder

½ stick butter, room temperature

1 tsp vanilla

2 eggs, room temperature

Procedure

Preheat oven to 375° F.

Place diced pears in a bowl and add Pernod along with 2 tablespoons of the sugar.   Stir to combine and let stand to macerate for 15 minutes.

In another bowl, sift together flour with salt, spices, baking soda and baking powder.

In a stand mixer, cream together remaining sugar and butter.  With mixer on medium-low, add vanilla and then the eggs one at a time.  Turn mixer down to low, and add in the dry ingredients, stopping to scrape down the sides.  Mix until almost combined.  Add in the pears with any liquid that’s accumulated and mix until thoroughly combined.

Pour batter into a greased loaf pan, and bake for 45 minutes or until a toothpick inserted into the center comes out clean.

tags: pear cake, anise recipes, pear desserts, pear-anise recipes
categories: all-5, breads & cakes, recipes, desserts-1
Wednesday 11.17.10
Posted by Aliya LeeKong
 

Ritz Classic

Ritz Classic

I’m back from Goa and reflecting on all of the amazing food experiences I had while I was there.  I’m incredibly thankful I stayed with family – it allowed me to get a completely non-tourist perspective on everything from what restaurants locals really go to, typical foods that are cooked at home, and even what the best markets are for food shopping.  I packed in a serious culinary schedule over the last two weeks (and have the extra lbs to show for it…).

Ritz Classic was just one of these restaurants located in Panjim and I went there for lunch during the first few days of my trip.  Now, don’t let the décor fool you.  The yellow crown molding, palm trees painted on the walls, waiters in bow ties – it’s all part of the charm.  And, besides me of course, I did not see a single tourist in there.  The food there is a trifecta – authentic, delicious, and cheap.

Since this was one of my first few days, I went all-in and ordered the pork vindaloo.  For those that don’t know, vindaloo is one of the hottest curries in India and is actually a Portuguese tradition – tangy, serious heat, and a touch of sweetness.  The waiter brought out some sort of rookie vindaloo, which I didn’t find hot at all, and I had to level with him.  I told him I can take the heat, and he should give me what he serves the locals.  So he came with the thunder and brought out the real vindaloo.  I seriously sweated through the rest of the meal – it was, if I’m being honest, almost too hot for me, but I couldn’t fold after all the fuss I had made.

My aunt goes there for their crab, which she claims is the best in Goa, and given my crab obsession, I had to try it.  I made the HUGE mistake of going into this feast wearing silk.  Why?  The flimsy little paper napkins were no match for the flying, masala-coated crab, and I finished the meal satisfied though grease-stained.

Shrimp-stuffed papads were first out and were flavorful and perfectly crisp.  Fried, “rawa” fish, a Goan specialty using semolina in lieu of breadcrumbs, was ridiculously fresh with the perfect amount of crunch.   Of course, the pork vindaloo was rich and spicy and painful…and the crab was perfect.  Particularly since I’ve never eaten that much crab for something that converts to around $3!

In fact, the whole meal for the four of us came out to something like $14.  It was insane.  This is definitely a first stop for anyone visiting to get a true taste of Goa…

tags: Goa
categories: all-5, travel
Tuesday 11.16.10
Posted by Aliya LeeKong
 

Scones with Sorrel Flower Jelly

View fullsize sorrel-pic1-500x333.jpg
View fullsize sorrel-pic2-500x333.jpg
View fullsize sorrel-pic3-500x333.jpg

Scones with Sorrel Flower Jelly

When someone says “sorrel” these days, what typically springs to mind is the green leafy vegetable, or herb to some, that has trendily showed up on menus in the past few years.  Though it might be delicious in jelly form, that is definitely not the sorrel in this recipe…I’m actually referring to the sorrel flower I mentioned in a previous post that’s used to make a popular West Indian drink.

The first time I tried sorrel was with my husband at the Trinidadian-Chinese spot in Brooklyn I wrote about a few months back.  It’s a blood-red drink – tart, sweet, floral with an underlying taste of cloves.  Unusually delicious.  The sorrel flower is actually hibiscus, so it’s not a far stretch from your basic hibiscus tea.  And similar to tea, sorrel is made from steeping the flower with sugar and spices.  A similar drink is also widely consumed in parts of Africa where it’s known as roselle orbissap rouge in Senegal or even karkadeh in Egypt.  Jamaicans use ginger to flavor the sorrel, but you know I had to stay true to the Trinidadians, so I stuck with their tradition of cinnamon and clove.

I actually trekked over to the (deep) BK to a small West Indian market to find dried sorrel petals for this recipe, which was totally unnecessary I found out during my last trip to some of my favorite ethnic grocers in the city.  You can typically find the dried form in health food stores and in various ethnic markets.

In any case, a jelly is a mildly unusual but interesting use of sorrel and, it turns out, delicious.  How cool is that – to make your own homemade and seasonal jellies and jams.  This one, I like to layer with a little mascarpone or Devonshire cream on the scone to balance out the sweetness.  The scone is buttery and delectable but plain Jane as far as scones go, a great basic scone recipe to which you can add any variation of ingredients.  That was purposeful – I really wanted the flavor of sorrel to shine though.  Enjoy.

Ingredients

Yields 6 ½ cups jelly and approximately a dozen scones (depending on size)

Sorrel Jelly:

4 ½ cups water

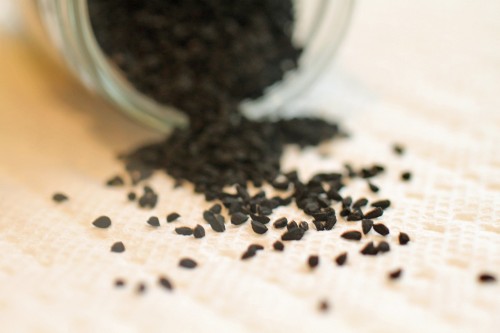
1 ½ cups dried sorrel flower

1 cinnamon stick

6 whole cloves

6 cups granulated sugar

1 3 oz pouch liquid pectin (I used Certo brand)

Basic Scone:

2 cups all-purpose flour

1 tbsp baking powder

1/3 cup granulated sugar

1 tsp salt

1 stick butter, cold, cut into cubes

2 eggs, cold

½ cup heavy cream, cold

Procedure

For the jelly, bring water to a boil with the cinnamon stick and cloves.  Add sorrel and boil for 2 minutes.  Remove from the heat and let sit overnight.  In certain places, sorrel may even be allowed to sit for several days to achieve the desired flavor.

Strain sorrel mixture into a saucepan and bring to a boil.  Add sugar, stir to dissolve, and bring back up to a boil.  Add liquid pectin and boil for 1 minute .  Be very careful at this point – it easily boils over.  Remove from the heat and immediately pour into sterilized jars.   Jars, prior to being filled, should be heated in a pot in simmering water and kept hot until filled with the jelly.

Although the sugar helps preserve the jelly, processing the jars in a boiling water bath after filling with jelly will help seal the jars for longer preservation.  Place jars back into the water pot and make sure that the water covers the jars by 1 to 2 inches.  Boil for 5 minutes, remove, and cool.  Unopened, the jellies will be good for about 1 year.  Once opened, the shelf life is about 3 weeks.

For the scones, preheat the oven to 375? F.   Combine all-purpose flour, baking powder, sugar and salt in a stand mixer.  Add diced, cold butter and mix on low until the texture resembles sandy peas.  It’s important that the ingredients stay cold as this creates a flakier texture for the resulting scone.  Combine eggs and cold, heavy cream and pour into the mixer bowl slowly with the mixer on low.   Be careful not to overmix – you just want the dough to come together.   Overmixing will also result in a tougher, less flakier scone.

Roll out dough on a floured surface with a floured rolling pin until about ½ “ thick and cut out with whatever cutter shape/size you like.  I say approximately a dozen scones because it varies with how you choose to size your scones.  You can also brush with an egg wash at this point if you like to make the tops deeper brown and shiny.  Bake for about 15-18 minutes until the scones are uniformly golden brown.  Cool on a rack for another 20 minutes or so.

Serve scones warm with a bit of the jelly and some cream.

tags: scones, sorrel flower jelly, sorrel, brunch recipes
categories: breads & cakes, breakfast, recipes, all-5
Monday 11.15.10
Posted by Aliya LeeKong
 

Nigella Seeds

View fullsize nigella-pic1-500x333.jpg
View fullsize nigella-pic2-500x333.jpg

Nigella Seeds

Nigella seeds are one of those nebulous spices.  If you bite into these little tear-shaped, matte, coal-black seeds raw, you get a little bitterness but otherwise very little flavor.  When cooked, though, there develops a smokiness of sorts, a peppery, almost oregano-like flavor that is absolutely delicious.  I love these in baked goods like in a biscuit or in my quickbread from a few months back.

Nigella seeds are found throughout Middle Eastern, South Asian, and even some African cooking.  In Ethiopia, the seed may be crushed up in stews or may even be added to their spiced clarified butter. The quatre épices or Chinese five spice equivalent in South Asia is called paanch phoron, and it includes nigella along with fenugreek, cumin, fennel, and black mustard seeds.   The seeds are also baked into Middle Eastern and South Asian flatbreads and added to pickles and chutneys.

tags: Nigella, Ethiopian spices
categories: all-5, spices-2
Thursday 11.11.10
Posted by Aliya LeeKong
 

Pumpkin Soup with Garam Masala & Crème Fraiche

View fullsize pumpkin-soup-pic1-500x333.jpg
View fullsize pumpkin-soup-pic2-500x166.jpg
View fullsize pumpkin-soup-pic3a-500x333.jpg
View fullsize pumpkin-soup-pic3-500x333.jpg

Pumpkin Soup with Garam Masala & Crème Fraiche

A few years back I discovered the beautiful combination of pumpkin and garam masala.  I think I was making a pumpkin polenta and, like the Swedish Chef on the Muppets, kind of just threw it in.  I’ve been in love with the combo ever since.

Garam masala is a traditional South Asian spice blend.  It’s spicy and full-flavored but has no real heat to it.  The blend differs from region to region but usually includes peppercorns, cardamom, cloves, cumin, cinnamon, coriander and bay leaves but can also include nutmeg, star anise, and even saffron.  I usually make my own at home because sometimes it’s added whole and sometimes ground.  But you can find the spice blend in powdered form at most supermarkets these days.  It can completely overwhelm a dish, so the key is to use it sparingly.

I debated a lot of different forms for the spice / vegetable combo – everything from waffles to pumpkin pie.  I settled on soup because it’s the perfect fall food – warm, comforting, and aromatic.  There’s sweetness from the pumpkin, the garam masala spice in the background, a little kick from the cayenne and a fantastic tanginess and mouth-feel from the crème fraiche…really delicious.   I used smaller sugar pumpkins because they are sweeter and have a more developed flavor than the larger ones, but even butternut squash would be beautiful here if you have it on hand.  Enjoy!

Ingredients

Serves 4 to 6

2 small sugar pumpkins (3 to 4 lbs each), halved and seeded

olive oil

salt and freshly ground pepper

4 tbsps unsalted butter

2 medium onions, diced

1 tsp salt

1 tsp ground garam masala

½ tsp freshly ground black pepper

¼ tsp ground cayenne pepper

2 cloves garlic, minced

2 tsp brown sugar

few sprigs thyme

1 bay leaf

½ cup white wine

3 cups stock

1/3  cup crème fraiche

chives, for garnish

Procedure

Preheat oven to 400° F.  Drizzle the inside of the pumpkin halves with olive oil, and season with salt and pepper.  Place halves flesh side down on a foil-lined baking sheet, and roast for 45 to 50 minutes until very tender.  Let cool slightly, and then scoop out the flesh into a bowl and reserve.

In a soup pot, melt butter over medium-low heat.   Add onions, salt, garam masala, black pepper, and cayenne and cook for 3 to 4 minutes until translucent.  Add the garlic and the brown sugar and cook for another minute.

Now, add back in the pumpkin along with the thyme, bay leaf and white wine and cook for 2 to 3 minutes until the wine has mostly absorbed.  Add the stock and bring up to a simmer.  Simmer for 35 minutes partially covered to finish cooking and let all of the flavors combine.

Remove the thyme sprigs and the bay leaf.  Add the crème fraiche and either transfer to a blender or use a hand blender to puree to your desired consistency.  I like mine with a bit of texture.

Serve sprinkled with chives and a nice piece of crusty bread!

tags: pumpkin, soups, garam masala, soups for winter
categories: recipes, soups & salads, all-5, vegetarian-1
Wednesday 11.10.10
Posted by Aliya LeeKong
 

Bacon, Cheddar & Cassava Stuffing

View fullsize stuffing-pic1-500x333.jpg
View fullsize stuffing-pic2-500x333.jpg
View fullsize stuffing-pic3-500x333.jpg

Bacon, Cheddar & Cassava Stuffing

A lovely food memory of mine growing up was baked cassava with a little lime, salt and chili pepper.  It’s an incredibly versatile vegetable whether deep-fried, ground into flour, puréed or even baked into a sweet dessert – my favorite being West Indian cassava pone, a thick, moist, gelatinous cake with coconut and spices like cinnamon and nutmeg.  Yum!  I craved it just thinking about it – will definitely be making soon…

Cassava, which is also called yucca, is a staple starch in many tropical areas.  It’s found throughout South America and the Caribbean and is also a large part of sub-Saharan African cuisines.  Again, building on the Thanksgiving-preparation concept, I decided to make a stuffing.  I used the cassava here much like I would a potato – for it’s starchy binding effect, gentle flavor and texture.

The flavors that really pop in this dish are the salty, smoky bacon, tangy cheddar and green onion.  It’s like a biscuit-turned-stuffing!   Totally yummy and pairs well with just about anything.    I’m not sure why stuffing has been relegated to holiday status – I would so eat this on any given day as my carb side.  Enjoy!

Ingredients

Yields 1 9” x 13” x 2” baking dish

2 to 3 slices bacon, diced

5 tbsps butter

2 cups diced onions

1 ½ cups grated cassava

3 cloves garlic, minced

1/3 cup sliced green onions, green and light green parts only

1 ¼ cups shredded cheddar cheese

10 cups day-old white or sourdough bread, cut into 3/4 “ cubes*

1 1/4 cup chicken stock

2 eggs, beaten

Procedure

Preheat oven to 350°F.

Heat a medium skillet over medium heat.  Add diced bacon and cook for 5 to 7 minutes until crispy.  Transfer bacon using a slotted spoon to a paper towel-lined plate.  Pour out most of the rendered bacon fat save about 2 teaspoons.

Turn heat down to medium-low and add butter.  Add onions and cook 3 to 5 minutes until translucent.  Add cassava and garlic and cook for another minute.  Transfer to a bowl.

Add green onions, cheese, bread, eggs, and chicken stock to onion mixture and combine thoroughly.  Pour stuffing mixture into a greased baking dish and bake for 30 to 40 minutes until the outside is lightly browned and the stuffing is warmed through.  Serve warm.

*You want the bread to be a little crusty.  If the bread is soft, lay the cubes out on baking sheets, and bake in a 350°F oven until lightly toasted (7 to 10 minutes).

tags: bacon recipes, stuffing recipes, Cassava recipes, bacon-cheddar
categories: all-5, side dishes, recipes
Monday 11.08.10
Posted by Aliya LeeKong
 

Pork Chops with Red Onion & Apple Chutney

View fullsize pork-chop-pic1-500x333.jpg
View fullsize pork-chops-pic2-500x333.jpg
View fullsize pork-chops-pic3-500x166.jpg

Pork Chops with Red Onion & Apple Chutney

I worked at a restaurant where we used to make “marmalades”, one of which was a tomato based one.  The process called for red onions to be cooked down first, and it always amazed me what a subtle flavor it provided against the sweet backdrop.  I had to try the combination with apples just to see and what better way for the season than to prepare them as a chutney with golden, crusty pork chops.

I’m big on brining, particularly when it comes to pork chops and chicken.  I’m trying to figure out the mechanics of brining the massive turkey we’re going to prepare for Thanksgiving, but I haven’t – how we’re going to fit it all in the fridge is beyond me.  But anyway, here, the brine imparts incredible moisture to the chops.  It’s important to dry them fully before searing to achieve that beautiful caramelized exterior, the most flavorful part!

This apple chutney is a delicious addition to any pork dish really.  The sweet red onions melt into the background.  The fennel and cumin work perfectly with the pork, and the warm, mellow apples bring it all together.  I used fuji apples here because they hold their shape, but feel free to use whatever you have on hand.  This dish is incredibly versatile – it goes from simple weeknight supper to deserving holiday meal.  Enjoy!

Ingredients

Serves 4

4 pork loin or rib chops, 1” thick

olive oil

butter

Brine:

8 cups water

½ cup sea salt

¼ cup + 2 tbsps sugar

1 tsp dried thyme

½ tsp coriander seeds, crushed

½ tsp whole black peppercorns, crushed

1 bay leaf

Red Onion & Apple Chutney:

2 tbsps olive oil

1 tbsp unsalted butter

1 tsp fennel seed

½ tsp cumin seed

¼ cup red onion, finely minced

3 ½ cups apples, peeled, cored, and cut into a ½“ dice

½ tsp salt

2 tsps sugar

¼ to ½ tsp crushed red pepper

3 tbsps rice vinegar

Procedure

Brining really helps the pork chops stay juicy during the cooking process.  In a medium saucepan, heat 2 cups of water.   Add salt, sugar and brining spices and stir until all of the salt and sugar has dissolved.  Add this mixture to the remaining 6 cups of cold water.  In a baking dish, lay pork chops flat and pour brine over them.  Cover with plastic wrap and refrigerate for anywhere from 3 to 24 hours, turning chops regularly.  When ready to cook, take out from brine removing any whole spices that are stuck to the chops and dry thoroughly.  If you don’t have time to brine, feel free to skip this step altogether.  Results will still be delicious.  Make sure that chops are room temperature before cooking.

For the chutney, heat a skillet over medium heat.  Add oil and butter.  When foam subsides, add fennel seed and cumin seed.  Cook for about 1 minute until the spices are fragrant.  Add the red onion and cook for another 2 to 3 minutes until translucent.  Add apples, salt, sugar, and crushed red pepper and cook for another 3 to 4 minutes.  Add vinegar, reduce heat to low and let simmer 15 minutes, stirring frequently.  Remove from heat and adjust seasoning if necessary.

For the pork chops, preheat oven to 350° F.  Season chops lightly with salt and pepper if brined, more generously if not.  Heat a large skillet over medium-high heat.  Add oil to just coat the bottom of the skillet and a pat of butter, if desired.  When oil shimmers, add chops and cook for 2 to 3 minutes on each side.  Finish for 7 to 10 minutes in the oven depending on how well done you like your chops.  I did 2 minutes per side plus 7 in the oven for medium temperature.

Serve chops topped with chutney.

tags: pork chops, red onion & apple chutney, apple chutney, recipes for fall, holiday recipes, brined pork
categories: all-5, recipes, main dishes-1
Wednesday 11.03.10
Posted by Aliya LeeKong
 
Newer / Older