X

Sign up to receive exclusive recipes, tips, updates and other goodies from Aliya!

  • Home
  • Blog
    • All
    • Recipes
    • Spices + Ingredients
    • Lifestyle, etc.
    • Travel
  • The Cookbook
  • The App
  • Media
    • All Media
    • Video
  • About
  • Passions
Aliya LeeKong
  • Home
  • Blog
    • All
    • Recipes
    • Spices + Ingredients
    • Lifestyle, etc.
    • Travel
  • The Cookbook
  • The App
  • Media
    • All Media
    • Video
  • About
  • Passions

Honey Frozen Custard with Cherry-Currant Swirl

ice cream5.jpg
ice cream1.jpg
ice cream2.jpg
ice cream3.jpg
ice cream4.jpg

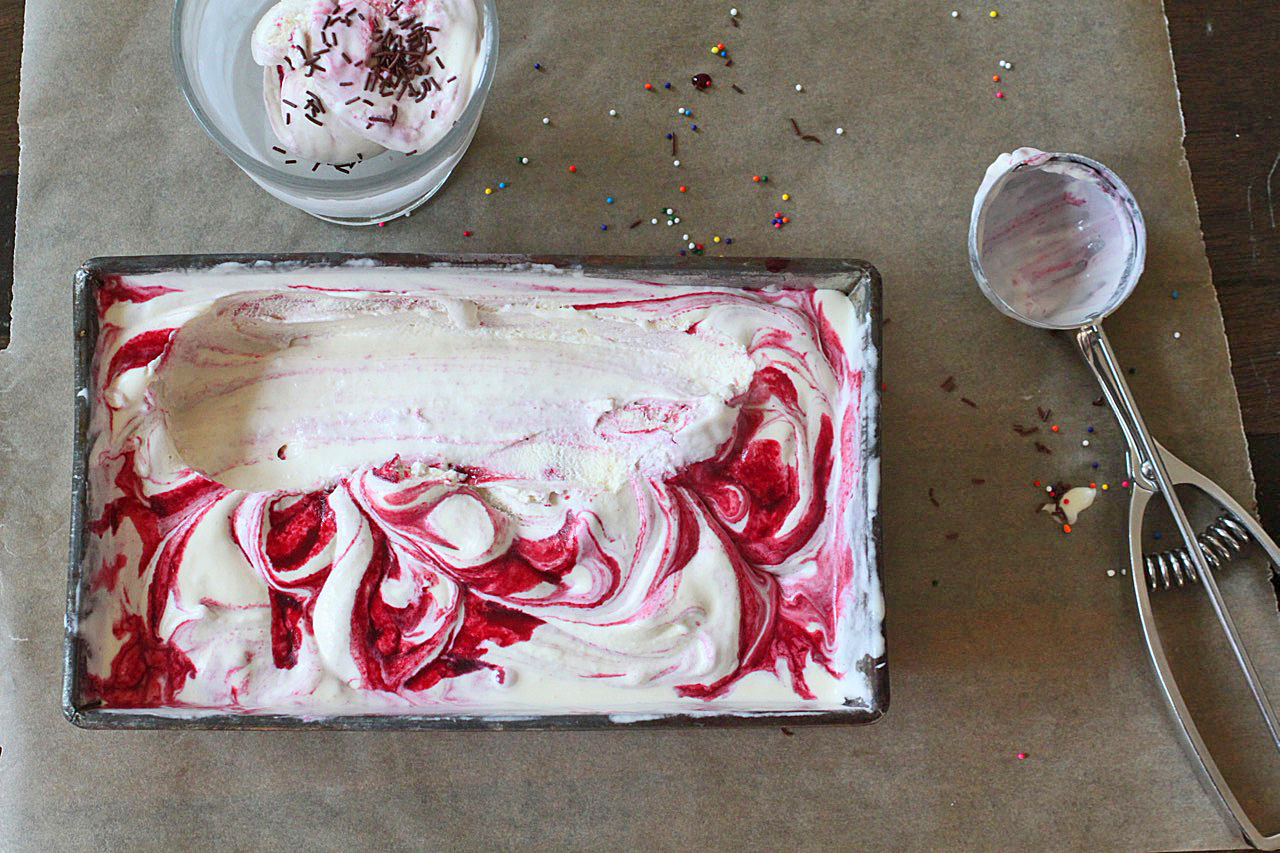
HONEY FROZEN CUSTARD WITH CHERRY-CURRANT SWIRL

As far as desserts go, I'd be perfectly content to eat ice cream all summer long (and maybe the occasional fruit tart or two)!  It's a past time for my daughter and I to take the walk over to Fort Grace
 in our neighborhood, grab a cone or two (likely with sprinkles) and leisurely stroll back home. 

But I have to admit, as time has gone on and, you know, being a mother and all, I get more and more focused on sourcing my ingredients and trying to make as many treats from scratch as I can.  With the help of a good ice cream maker or an ice cream attachment to your stand mixer, making your own ice cream is really not that tough AND you can control your ingredients - whether for health reasons or simply to tailor to your own tastes.  Not to mention, it's badass.

This is really a frozen custard, not quite ice cream, which is to say it has more yolks than tradition dictates and is a bit higher on the cream side.  The result: luscious, whipped, soft serve-style ice cream that keeps its fluffiness even after freezing for some time.  I used (raw / local) honey to sweeten here, in lieu of sugar, which adds to that silky texture as well.  You could easily use the base to make so many different flavors - I sometimes add cinnamon and toasted pecans to it for a totally different take.

With a glut of cherries and both red and black currants in my house, this sauce was an easy and rewarding way to use them all up!  I didn't even pit the cherries - just threw them all in a pot, knowing I was going to strain away the solids at the end.  If you have pitted cherries, you could easily just blend this mixture up in a good blender for a bit of texture instead of straining, but, remember, you'll probably have a bit more than the recipe calls for.

I love the combination of red fruits and cream - that creamsicle-like flavor, and this tastes AH-MAZING with a bit of chocolate, whether a sauce, some dark chocolate pieces or sprinkles.   Enjoy!

Ingredients

Yields about 2 pints

Frozen Custard Base:

1 cup milk

2 cups heavy cream

½ cup + 2 tablespoons honey

½ teaspoon vanilla extract

1/8 teaspoon salt

6 large egg yolks

Cherry-Currant Swirl:

1 cup red and/or black currants

1 cup cherries, stems removed (pitted or not, doesn’t matter)

2 tablespoons honey

1 tablespoon sherry vinegar

3 tablespoons water

a pinch of salt

For the ice cream base:  In a medium saucepan, bring milk, heavy cream, honey, vanilla and salt up to a simmer and remove from the heat.  Whisk the egg yolks in a heatproof mixing bowl.  Temper the yolks by adding a little of the milk mixture to them and beating in between until a third of the milk mixture has been added.  Return the milk-yolk mixture to the saucepan and place back over low heat.  Cook, stirring frequently, until the mixture thickens and coats the back of a spoon.  Strain and cool completely in the fridge (4 to 8 hours).

For the cherry-currant swirl:  Heat the currants and cherries with the honey, vinegar, water and salt over medium heat.  Simmer covered for 5 minutes until the fruit breaks down and then simmer uncovered another 4 to 5 minutes until the juice thickens.  Strain through a fine mesh strainer, pressing against the solids until all of the juice is through.  Cool completely (and it will continue to thicken as it cools) in the fridge.

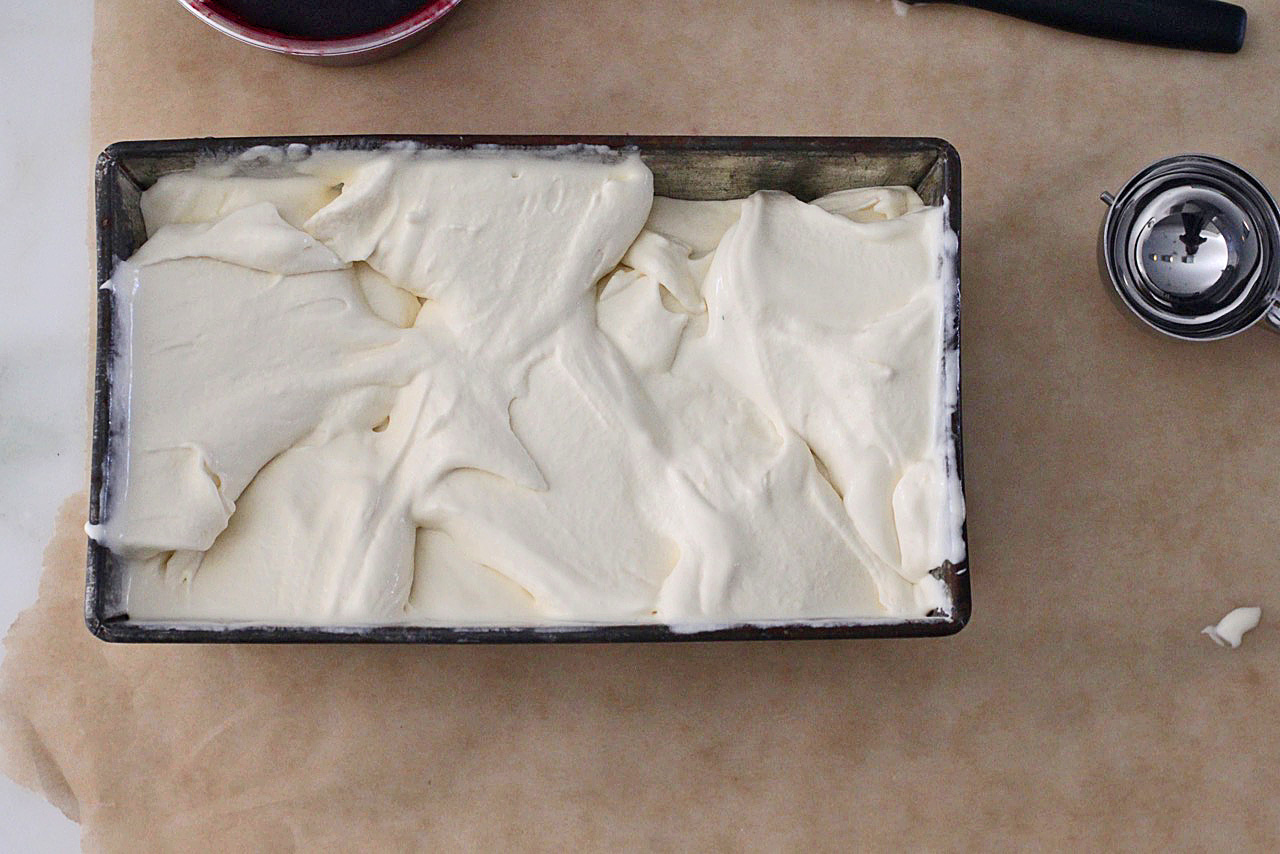
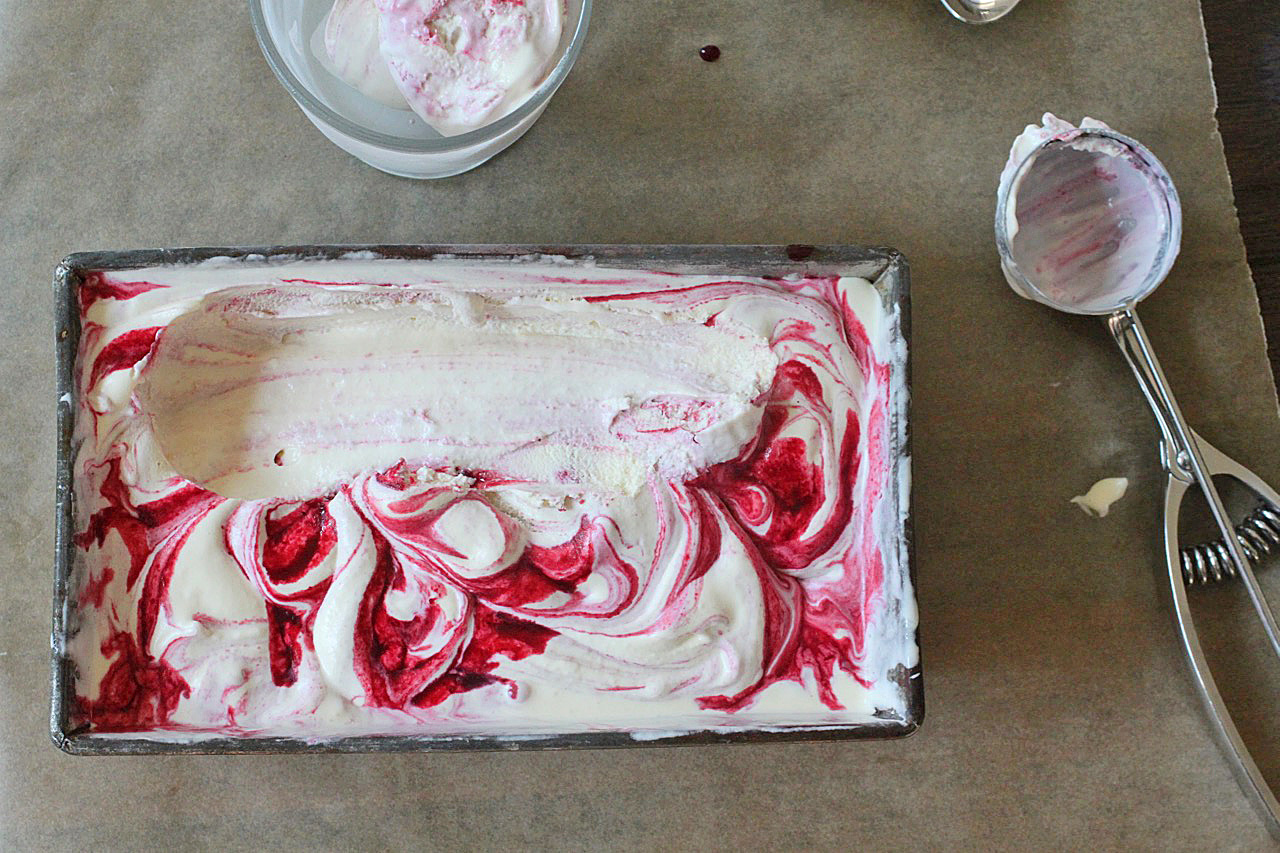
To finish: Pour ice cream base into an ice cream maker or ice cream stand mixer attachment and process according to the manufacturer’s directions.  It usually takes about 25 to 30 minutes.  Transfer half of the ice cream into a container.  Pour half of the currant-cherry mixture on top and use a knife or small offset spatula to form swirls.  Repeat with the other half of the ice cream and sauce on top.

Serve immediately soft serve-style or freeze to firm it up a bit (will still be fluffy and soft) with or without sprinkles!

tags: ice cream recipe, frozen custard recipe, how to make ice cream, honey ice cream, swirl ice cream recipe
categories: all 4, blog, desserts, recipes
Wednesday 07.13.16
Posted by Aliya LeeKong
 

Summer = Fish Tacos

SUMMER = FISH TACOS

I. Love. Tacos.  Tacos are the ultimate - easy food with literally endless combinations.  Summer is all about simplicity and lightness, so my favorite by far this time of year are fish tacos.  From grilled red snapper to lightly breaded mahi mahi or a nice “meaty” grilled swordfish, there’s nothing better for an easy weeknight meal (or for entertaining).  The hardest part is deciding on toppings!

The Baha-style, fried ones here took no time to whip up.  I never use a recipe, so I'm just going to tell you what I do.  For 4-6 people, take a 1 ¼ - 1 ½ lbs flaky white fish (snapper, mahi mahi, grouper, etc) and portion into strips.  Basicallly, make sure the size of the fish strip fits into your taco as one or two strips.  Divide a cup of flour evenly between two bowls.  Season one of the bowls with salt, pepper, paprika and any other powdered spices you like until it tastes good.  To the other bowl, whisk in beer until it has the consistency of wet paint. 

Dip the fish strips first into the flour bowl, shake off excess and dip into the beer batter.  Let any extra drip off and fry in about an inch to an inch and a half of oil (at 350° F) until golden brown (generally 3-5 minutes).  Transfer pieces to a paper towel-lined plate and sprinkle with some salt.  Make sure to fry in batches and not crowd the pan too much.

In terms of toppings, the combination for my lamb tacos are my go to, especially the chipotle crema, but, here, I just used some pickled shallot, cabbage, fresh chile, green onion, and cilantro.  My sauce was a smoked habanero crema (mayo/crema + smoked habanero sauce), but you can literally stir together mayo/crema/crème fraiche with any hot sauce you like until it tastes good. 

Since it's summer, my smoked peach chutney is another topping that would be ridiculous on some fish tacos.  The sweet, smokey flavors of the peach pairs perfectly with any fish dish.  Or you can do a simple pico de gallo (diced tomatoes, red onion, cilantro, jalapeño and lime juice), super easy and refreshing. 

Feel free to use soft or hard tacos.  I'm partial to corn tortillas myself.  Enjoy!


tags: fish tacos, how to make fish tacos, Baha-style fish tacos, baha fish taco recipe
categories: all 4, lifestyle-1, main dishes, quick & easy, recipes, traditions
Wednesday 07.06.16
Posted by Aliya LeeKong
 

July 4th BBQ Sides

JULY 4TH BBQ SIDES

The last thing I want to do on a hot summer day is turn my oven on - I’m sure you all understand!  When entertaining on a gorgeous summer day, I like to keep my sides simple and easy to toss together so I'm not stuck in the kitchen all afternoon while my guests are enjoying the outdoors.  With July 4th creeping up this weekend, I’ve gathered a few ideas that may make an appearance at my BBQ this weekend.  Enjoy!


6-INGREDIENT CORN SALAD


KOREAN POTATO SALAD (GAMJA SALAD)

Photo: Two Red Bowls


NASI ULAM (MALAYSIAN MIXED HERB RICE)

Photo: Rasa Malaysia


SOUTH AFRICAN CHAKALAKA

Photo: Immaculate Bites


FREEKEH WITH SUMMER SQUASH AND BROWN BUTTER


TAHINI ROASTED (OR GRILLED) BROCCOLI


ROASTED CUMIN CARROT, RADISH & AVOCADO SALAD

Photo: Salt & Wind

tags: bbq sides, july 4th sides, global bbq sides
categories: all 4, blog, holiday, lifestyle-1, side dishes-1
Wednesday 06.29.16
Posted by Aliya LeeKong
 

Summer Fruit Tart Addiction

SUMMER FRUIT TART ADDICTION

Honestly, summer is my favorite time of year...I love when the weather turns warm and days (and daylight!) so long; attitudes feel more carefree and New York City comes alive.  The farmer's markets are always flush with fruits and vegetables, and, this weekend, it was overflowing with all sorts of berries (raspberries, blueberries, gooseberries, cherries, currants & strawberries). To me, this just signifies the official start of summer, and, if you follow my IG you'll know this to be true, I invariably have some form of a fruit tart on my counter throughout this time.  I wanted to share with you some go-to's - easy options so you can freestyle your own tarts this summer.


CRUSTS

I have 3 go-to crusts that I use depending on my mood, if I plan to bake the filling and who I’m hosting! 

(1) I love a classic, homemade tart dough (recipe: here).  I keep mine a bit low on the sugar, so I can use it for sweet and savoury crusts.  Doubling the recipe is key and allows you to freeze some to have for later.   This is a great dough to use for both a filling you have to cook or one you don't have to cook.

(2) Of course, already-made and frozen puff pastry is another way to go.  Who doesn’t love that flakey, buttery crust? Mixed with a layer of pastry cream and fresh fruit....This is what I use for my South African Milk Tart (pictured below).  I like to do an initial blind-bake and then fill - this weights it down so it doesn't puff too much.

(3) My third is for my gluten-free friends - a super easy, gluten-free pecan crust. 

You take 1 ½ cups raw pecans and pulse in a food processor until chopped.  Throw in 2 tablespoons unsalted, melted butter, 1 tablespoon honey,  ¼ teaspoon salt, ½ teaspoon ground cinnamon, and 1 egg white and pulse until a fine meal.  It will be a bit wet.  Press into a tart shell and bake at 375° F for 15 minutes.  Done.


CUSTARD FILLING

(1) Baked custard - One of my favorite tarts is this South African Milk Tart.  The creaminess of the cooked custard filling with the berries on top……sooo good.  It's not too egg-y and has a hint of cinnamon.  I love that the beaten egg whites also lighten the custard.

(2) Stovetop custard - I also love to make a quick stovetop custard (or pastry cream) instead of the baked custard in the milk tart recipe.  All you need is some sugar, eggs yolks, corn starch, vanilla bean and milk!  Ok, so sometimes I substitute the milk for Champagne or a nice Prosecco….  The process is simple:

In a medium pot, simmer 2 cups milk with a vanilla bean cut in half and seeds scraped out in to milk and remove from the heat. 

Separately, bring a pot of water to boil for your double boiler. In a metal bowl, whisk 4 egg yolks with 1/3 cup sugar until the mixture is a nice pale yellow.  Add ¼ cup cornstarch and whisk away any lumps.  Slowly stir in the warmed milk mixture and fit the bowl over the boiling water (without letting it touch the water) and constantly stir until the consistency starts to thicken. 

Remove from heat and cover the top directly with plastic wrap and let come to room temp before using.  You can also whip some cream and fold into this pastry cream to make it lighter.

(3) No-cook cream filling - A final option is to make a no cook cream filling and keep the tart refrigerated.  This is a bit like a lightened panna cotta.  Bloom 1 teaspoon gelatin in 2 tablespoons cold water.  Whip 1 cup heavy cream to soft peaks with 2 tablespoons regular or coconut sugar (you can make this sweeter if you like. taste and adjust).  Add in 1 teaspoon vanilla and fold in 4 ounces of mascarpone cheese.  Quickly blast the gelatin-water mixture in the microwave for 5 seconds or so until it's melted and fold that into the cream mixture as well.  It sets up very quickly in the fridge - just make sure to use it in a completely cooled tart or it will melt away!


FILL AND ASSEMBLY

Unless you are baking your custard, the tart shells should be blind-baked and cooled before you assemble.

Now, in terms of what goes on top, this is the time for you to experiment and be creative.  Seriously, whatever is the sweetest and in season works, and experiment to see how you like to arrange your fruits.  I looove cape gooseberries, but apricots and strawberries pair so well together.  It will all go!

If you want some extra sheen, microwave a bit of apricot preserves and paint the fruit with it.  You can also just simply sift a bit of powdered sugar too - up to you....

Enjoy!


tags: summer fruits, how to make a fruit tart, summer fruit tart recipe
categories: all 4, blog, desserts, holiday, lifestyle-1, recipes
Wednesday 06.22.16
Posted by Aliya LeeKong
 

FATHER'S DAY GRILLING

FATHER'S DAY GRILLING

Father's Day falls in such a sweet spot of the year - the weather is always perfect and who doesn’t love a little family gathering outside!?  My plan to celebrate this weekend will be an afternoon of easy grilling - I can't go wrong keeping it a lil' meat-centric.  :) Below are some great grilling recipes to give you some ideas for this weekend.  Enjoy!


GRILLED BUTTERFLIED CHICKEN WITH CHARRED JALAPENO SAUCE


GRILLED LAMB SIRLOIN TACOS WITH CORN, PICKLED CHERRY PEPPERS AND CHIPOTLE CREMA


SALT & PEPPER BABYBACK RIBS

Photo: Food52


GRILLED PORK BANH MI

Photo: Food & Wine


GRILLED SHRIMP WITH KIMCHI-MISO BUTTER

Photo: Rasa Malaysia


GRILLED AVOCADO SALAD WITH GREEN GODDESS DRESSING

Photo: Salt & Wind


CORN WITH GREEN CHILI BUTTER & COCONUT


TAHINI OREOS

Photo: My Name is Yeh


RUM SWIZZLE

Photo: Bon Appetit

tags: father's day, what to cook for father's day, grilling ideas, what to grill for father's day, father's day brunch
categories: all 4, blog, lifestyle-1, man-friendly, recipes, salads, side dishes-1, soups & salads, main dishes-1
Wednesday 06.15.16
Posted by Aliya LeeKong
 

Strawberry Season, a Pickle, & a Jam!

STRAWBERRY SEASON, A PICKLE & A JAM!

Well….it took forever, but it has finally arrived: strawberry season.  This little window only lasts about a month up here, and I try to get out to the fields to pick my own, when possible.  Right now, I have literally the sweetest strawberries I've ever tasted sitting in the fridge.  They are so good, just by themselves, but if you’re like me (and get a bit overly excited about berry picking...), you end up with strawberry overload!

I decided to mess around with some flavors for a new strawberry jam using some fresh basil from my garden and a vanilla bean.  Strawberries and basil are a match literally made in heaven.  I don't prefer my jam overly sweet, so I just add sugar (unrefined) until it tastes like it’s enough.  There isn't a specific recipe because, of course, it depends how many strawberries you have left, but here are a few guidelines: (1) Clean and quarter berries and let them heat up in a saucepan with a couple tablespoons of lemon juice until they start to release their liquid.  (2) Once there is some liquid in the pan, add the sugar, basil and a vanilla bean and then let it all simmer until it thickens.  Remember, when it cools, it will thicken up a bit more.  (3) Use the stems from the basil (cause that’s where all the flavor is) and wrap them in a cheesecloth sachet.  You can also tear up or chiffonade the leaves and add them to the strawberries.  (4) Add some pectin powder if you like, to speed up this process.  Ultimately, you can cool and use right away or transfer to sterilized jars and vacuum seal for later.

This year, I also wanted to experiment pickling green strawberries.  It’s a different kind of pickling liquid then you might think - less vinegar, a little more sugar and a lot of flavor!  The green strawberries turn a bit sweet, slightly tart and still retain a nice bite.  These pickled strawberry makes them a perfect addition to any summer salad or cheese plate.  Enjoy!

Photo: We You They Ate

Pickled Green Strawberries
Yields 2 pint jars

2 pints green strawberries, cleaned and hulled (cut in half or sliced, if you like)

1 cup water

½ cup rice wine vinegar

2 ½ tablespoons sugar

1 tablespoon honey

2 teaspoons kosher salt

1 ½ tablespoons coriander seeds

1 tablespoon black peppercorns

4 Kaffir lime leaves

2 (1" x ½") pieces lime rind


Divide the strawberries between the two mason jars and set aside. 

In a saucepan over medium heat, bring the rest of the ingredients to a simmer until the all of the sugar, salt and honey has dissolved.  Let cool to room temperature before pouring into the jars with the strawberries.  Let sit in the fridge over night for the best flavor.


tags: strawberries, strawberry recipes, pickled green strawberries, strawberry jam, how to pickle strawberries
categories: all 4, condiments, lifestyle-1, quick & easy, recipes, side dishes-1, vegetarian-2
Wednesday 06.08.16
Posted by Aliya LeeKong
 

Red Snapper with Lemon, Onions, Mustard & Habañero (Poisson Yassa)

View fullsize fish1_edited-2.jpg
View fullsize fish3.jpg
View fullsize fish2.jpg

RED SNAPPER WITH LEMON, ONIONS, MUSTARD & HABAÑERO (POISSON YASSA)

Summer has officially begun, and with that, besides grilling it up, I like to go a bit lighter.  This recipe is for a Senegalese-inspired fish, poisson yassa.  Fish (here, I used snapper) is marinated with onions, garlic, lemon, bay, mustard and habañero pepper.  After a quick sear of the fish and sauté of the onion mixture, it's all placed in the oven to bake and for the flavors to mingle. 

The flavor is so amazing - with the sweetness of the caramelized onions, the tart bite of the mustard and lemon, and the heat from the habañero.  I love that this preparation can also be used for chicken and lamb with obvious changes to cooking times.  Enjoy!

Serves 4

4 white onions, thinly sliced

5 garlic cloves, minced

Juice and zest of 2 lemons

1 habañero pepper, seeded, ribbed and thinly sliced

¼ cup canola or olive oil, plus more for cooking

¼ cup cider vinegar

1 ½ tablespoons Dijon mustard

1 tablespoons soy sauce

1 bay leaf, fresh or dried

4 filets red snapper (1 ½ - 2 lbs)

salt and freshly ground pepper

2 tablespoons unsalted butter

Handful of fresh herbs, finely chopped (parsley, chives, cilantro)

In a bowl, mix together the onions, garlic, lemon juice and zest, habañero pepper, oil, vinegar, mustard, soy and bay leaf.  This is the marinade for the fish.  Transfer to a plastic bag or baking dish and make sure the fish is thoroughly coated.  Marinate for a minimum of 30 minutes but preferably a few hours.

Preheat oven to 350° F.

Remove filets from the marinade (reserving the marinade), dry off and season with salt and pepper.

In a large cast iron skillet, heat enough oil to coat the bottom of the pan along with the butter over medium-high heat.  When hot, add the snapper skin-side down.  Cook for 3 minutes and remove to a plate (skin-side up).

Add the onion marinade mixture (juices and all!) to the skillet, reduce the heat slightly and cook for 6-8 minutes until the onions start to soften.  Remove from the heat, nestle the snapper filets in the onion mixture, cover with foil and transfer to the oven for 15 minutes.

Garnish with fresh herbs before serving.  It's traditionally served over rice, but I also love it with some crusty bread.


tags: fish recipe, poisson yassa, senegalese food, african cooking
categories: all 4, blog, main dishes, man-friendly, quick & easy, recipes, traditions
Wednesday 06.01.16
Posted by Aliya LeeKong
 

Essential Grilling Tips to Kick Off the Summer!

ESSENTIAL GRILLING TIPS TO KICK OFF THE SUMMER!

With the weather finally starting to warm up and the days getting longer, I can't wait to clean off my back porch and get my grill set up!  There’s nothing better than a little summer get-together with fresh salads, cocktails and grilled meats or fish.  I put together a few tips to help guide you through an easy grilling season...


CHARCOAL VS. GAS

This is the debate that sparks up at every BBQ get-together!  There aren't any real health differences cooking with either one, so it really just comes down to taste and preference.  Charcoal will give you more of a richer, smokier flavor whereas gas is a lot faster and a little less expensive to maintain.

I am partial to charcoal - the smoky flavor you get is so incredible, and for me, being close to the cooking process (thinking about heat and being intuitive about done-ness) is something I just love.  To start a charcoal grill, use a chimney, which makes it super easy to get the coals hot and ready to use.  Place paper or starter briquets on the underside of the chimney and then fill with charcoal.  Light the paper/briquets and let the coals catch fire, which should take around 20-25 minutes.  Dump out the charcoals into the grill when they have turned an ashy gray.  I'm not much for lighter fluid, so this is my favorite way. 


MAINTAINING YOUR GRILL

You want to oil the cold grates prior to grilling with a rag or paper towel.  This is basically the same as maintaining your cast iron pans at home - seasoning the grates will help to make the grill non-stick.

Also, always preheat the grill, and clean the grill while it is still hot before and after cooking.  The grill should be so hot that you can't keep your hand above it for more than 2 seconds. 


READY TO GRILL

A few points:

(1) Always let your meat come up to room temperature before grilling for a good 20-30 minutes.  This makes sure that your meat will cook evenly on the grill. 

(2) Season with spices or marinade overnight for the best flavor, but even a quick grill rub right before cooking makes for great flavor.  If you're using a marinade, make sure to pat the meat dry before cooking. 

(3) Save the basting of sauces towards the end of cooking so that they don’t burn the foods.  Most basting sauces contain brown sugar, tomato sauce, soy and other sugary ingredients that will char the meat before it is finished cooking. 

(4) Tongs and spatulas are the best tools to use when handling meat; never a grill fork as it releases all those good juices when you pierce the meat to turn.


LET'S GET COOKIN'!

The hardest thing to do while cooking?  Don’t touch the meat!  Let it sear and get those beautiful grill marks.  The meat will let you know when it is ready to be turned.  If you pick up the meat too early, it will stick to the grates.  After cooking, let the meat rest (about 5-15 minutes).  This way the juices will re-distribute.  If you cut into it right away, all the juices will flow out leaving you with a dry cut of meat. 

Using a meat thermometer is helpful, especially if you're grilling poultry.  I actually judge by the touch when I'm grilling red meat.  Use the skin on your hand between your thumb and your pointer finger as a guide.  The first pinch between the two fingers is soft and spongy – rare, ¼” back is a little spongy but springs back – medium, ½” back is firmer – well done.


GREAT GRILL ACCESSORIES

Photo: Sur La Table

Salt blocks are made from Himalayan salt, and they impart a subtle saltiness to foods and can be used directly on the grill. 


Photo: Amazon

Grill baskets are great for those foods that fall through the grates like asparagus, shrimp, onions etc…I love this one because I'm always cooking for a group and it's on the larger size.

Photo: Emile Henry

Pizza stones are amazing for making fresh pizza at home.  You can even stop by your local pizza place and ask to buy dough if you don’t have time to make your own.  This is actually what I own, and it works on the grill and in the oven.  What I love about this one is that you can cut directly on it making serving up that grilled pizza all the easier.


Photo: William Sonoma

Cedar planks & alder wood are amazing for grilling fish.  Not only do they keep the delicate fish from falling through the grates, they also infuse the fish with a rich, smokey flavor depending on the type of wood.  If you can find alder wood, the flavor is amazing!

tags: grilling tips, how to grill, grilling for memorial day, summer grill essentials
categories: all 4, blog, lifestyle-1, quick & easy, man-friendly
Monday 05.23.16
Posted by Aliya LeeKong
 
Newer / Older