X

Sign up to receive exclusive recipes, tips, updates and other goodies from Aliya!

  • Home
  • Blog
    • All
    • Recipes
    • Spices + Ingredients
    • Lifestyle, etc.
    • Travel
  • The Cookbook
  • The App
  • Media
    • All Media
    • Video
  • About
  • Passions
Aliya LeeKong
  • Home
  • Blog
    • All
    • Recipes
    • Spices + Ingredients
    • Lifestyle, etc.
    • Travel
  • The Cookbook
  • The App
  • Media
    • All Media
    • Video
  • About
  • Passions

Finger Limes and a Superstorm

View fullsize finger-lime-pic1-500x333.jpg
View fullsize finger-lime-pic2-500x333.jpg

Finger Limes and a Superstorm

I am writing this one week since Hurricane Sandy took center stage in New York City – a sandy, watery, windy whirlwind leaving some of us lucky and merely power/internet/cell service-less and others devastated.  The week was a suspension of normal life and while some of us have gone back to work, others are still dealing with the after effects of the storm.

I have to share ways to help.  Edible Manhattan sums up some ways to eat for a good cause, and Gothamist does a fundraiser round up of its own.  Huffington Post has an updated list of organizations that are helping and ways to get involved, and, of course, the Food Bank of New Yorkis a great way to start.

Now, on to a much less important but still very interesting discovery I had this week: finger limes.  Although I’ve read about them for quite some time, I’ve never gotten an up close and personal look at them until recently.  Finger limes are mainly grown in Australia, though there are a few growers in the U.S. selling them as well.   They are indeed limes in the shape of fingers, but the quirkiness extends beyond that.

Crack open one of these little luscious fruits, and instead of traditional citrus pulp, there are tiny bubbles of citrus juiciness.  Think: citrus caviar.  The little balls burst in your mouth – it’s like nature’s original spherification (without the molecular gastronomy part).  A girlfriend of mine described it as a burst of zesty freshness in her mouth!

The flavor to me is very much like the scent of kaffir lime – lemon-limey with grassy and floral notes.  I love the texture and could easily see layering this on a tiradito or crudo dish or in lieu of caviar with crème fraiche for a quick, crostini appetizer.  It would be gorgeous with desserts – I’m just hoping we see more of this in the markets, so I can make a recipe to share with you all!

tags: finger limes, citrus
categories: spices, all
Tuesday 11.06.12
Posted by Aliya LeeKong
 

Behind the Cookbook Cover

Behind the Cookbook Cover

Recently, I shot the cover of my cookbook and I wanted to share with you guys some behind-the-scenes shots over the day.  It was a loooong day and a great time! and I worked with an incredible photographer, Michael Creagh.  The day was full of antics and outtakes, a make-me-laugh playlist, and plenty of goofing around.  Check out some of the shots after the jump.

Food and set styling courtesy of Yvette

The scrutiny begins

How many cameras do I need

More scrutiny

It was freezing out, so all of us are getting psyched to brave the cold

The day could not have been possible without the help of all the friends that made it amazing, so thank you, thank you, thank you to Michael and Michael, Hawa, Yvette, and my hardcore, roller-wearing girl Yahaira.  Can’t wait to show you guys the final pics

tags: Cookbook, Exotic Table, photo shoot
categories: lifestyle, all
Thursday 10.25.12
Posted by Aliya LeeKong
 

Half Manuscript Deadline and Playing with Ingredients

View fullsize ingred-pic1-500x333.jpg
View fullsize ingred-pic2-500x333.jpg
View fullsize ingred-pic3-500x333.jpg

Half Manuscript Deadline and Playing with Ingredients

This week I have been a complete catastrophe!  Half of my manuscript is due, and I am writing my booty off to make the deadline (broken finger and all).  I spent the entire week cooking and writing….and revising and writing again!  Being a stress basket aside, I did experiment a bit with some ingredients and wanted to share my findings with you all.

In this photo on the left is sumac, in its whole, dried berry form.  I use sumac all the time in za’atar and have only really seen it already ground.  I had some thoughts about using it whole but after biting into it I changed my mind.  It has a small pit, not unlike a pomegranate, but much tougher since it’s dried.  The flavor is incredible though – tart and floral, and I’m happy to grind it and keep it moving.

On the left is hibiscus, and I have been on a full-on West Indian kick this week!  Dried hibiscus is called sorrel there and used to make a tart soft drink of the same name, spiced with cinnamon and clove and usually served around the holidays.  I played around with it for my dessert section of the book and am pumped about how it all came out.

I also cooked up some oxtail for a pasta dish and killer peas and rice.  I have never used a recipe to make nor given much thought about how much of anything goes into these dishes.  I’m on automatic when I cook them, so it’s really been interesting for me – translating my body’s memory of cooking into measurements and finite amounts.  Does it taste the same?  I don’t know!!  I’m being crazy – they do….they came out full-flavored and I can’t wait until I see them in the book. 

I’m throwing this photo in because I love the stuff and have been messing with it in all sorts of recipes.  I’ll just say – you’ll never look at French dressing the same!


tags: Exotic Table, sumac, za'atar, sorrel, spices
categories: spices, all
Monday 10.01.12
Posted by Aliya LeeKong
 

Tristar Strawberries and a Broken Finger

View fullsize tristar-pic1-500x333.jpg
View fullsize tristar-pic2-500x333.jpg

Tristar Strawberries and a Broken Finger

I’m going to start with the good news.  Recently, a little European-style market called All Good Things opened up in the heart of Tribeca – think little cheese stand, my fave meat purveyor, incredibly fresh seafood and farmstand produce along with a little bar to eat your freshly opened oysters with a glass of wine.

Amongst the produce this weekend were some gorgeous Tristar Strawberries, and I hadn’t seen them before so I wanted to share with you guys too.  They are miniature, super sweet with an intense strawberry flavor, and they fruit throughout the summer and even into the fall.  Anyway, if you can get your hands on them, grab ‘em.  These little guys are going into one of my recipes for the cookbook, an end of summer berry bread pudding of sorts….

As for the bad news, it’s all right in this photo. And, no that’s not an oversized bandaid (what most people think and then don’t give me the just sympathy!).  It’s a cast on a broken finger…done, not during some dire cooking incident, but actually when I was playing football and trying to impress a little girl and teach her how to throw and catch.  Yep.

Needless to say, trying to cook, not get the cast wet or completely coated in chocolate (which happened day 2 of having it on), and type when half of my manuscript for my cookbook is due in 2 weeks (ahhh!!) is turning out to be a tall order.  The silver lining is I narrowly missed having to get surgery, which would have totally set me back – now, it’s just a lot of right hand compensation and some serious typos!  Wish me luck as I cook (and write) on!

tags: Tristar Strawberries, broken finger, summer fruits
categories: spices, all
Monday 09.17.12
Posted by Aliya LeeKong
 

Cookbook War Stories Part 1: Musings on Chocolate Cake

View fullsize choc-cake-500x333.jpg

Cookbook War Stories Part 1: Musings on Chocolate Cake

Ok….I warned you guys I’d be talking about the trials and tribulations of writing this cookbook and with my half manuscript deadline creeping up in a few weeks, I’m starting to freak out a bit!  I’ve been steadily chipping away at this cookbook: ticking off recipes, photos and writing on a daily basis.  Recipe testing is just that – testing and sometimes you get it on the first or second try (woot!) and other times it takes a bit more.  I’ve been working on a chocolate loaf cake recipe for about a month now (with my own special exotic twist, of course..) and it has literally been the bane of my existence!

It’s a loaf cake, and to me, a chocolate loaf cake has to be nothing less than moist, dense and ridiculously luscious.  And I kid you not, I’ve tried umpteen iterations to get this recipe right.  How delicate is this cake process?

Here are a few things I’ve learned:

-       1 cup of all-purpose flour is equal to 1 cup plus 2 tablespoons of cake flour but none of this matters because all purpose is perfectly fine for a loaf cake.

-       Crème fraiche is a far superior if not a completely fatty substitute for buttermilk in a recipe.  It also might mean your cake doesn’t set in the same amount of time….

-       Too much flour can make your cake crumbly.   So can too much sugar or too much baking powder.  So can not waiting long enough to unmold the dang thing because you are so desperate to take a bite of it.

-       LOVE dark brown sugar over light brown.  I’m not going back.

-       Too much fat in your batter can make your cake sink in the middle.  So can opening the oven door too early to baby your beautiful cake.

-       Grease AND flour….

-       You may slowly be driving your husband insane with these five little words: “How does this one taste?”

The perfecting of this recipe continues, but I’m so close I can literally taste it.  It will be so worth it I promise you.  Once or twice more and it has to be right!

As always, would love to hear your own cake war stories!

tags: cookbook war stories
categories: all, lifestyle
Tuesday 09.11.12
Posted by Aliya LeeKong
 

Musical Inspiration: A Culinary Playlist

View fullsize ipods1-500x333.jpg

Musical Inspiration: A Culinary Playlist

Over the last few weeks, I’ve been thinking a lot about inspiration.  Cooking for me is a complete joy, but being creative with food also requires bringing together tastes, experiences, and thoughts from all over and continuing to be inspired on a daily basis.  I’ve decided it’s really important to be an inspiration hog!  Grab it whenever and wherever you can….One thing that is a must when I’m cooking is great music in the background – it allows me to zone out and just do my thing.  And, oftentimes, it’s the thing I need to get my creative juices flowing.  So with that, I thought I would share with you guys my current playlist – what I’m listening to when I’m working on recipes in the kitchen.

Here goes in no particular order…Now, I totally realize how eclectic this is, but my music, like my food, comes from all over, geographically and otherwise!

Electric Relaxation – A Tribe Called Quest

Samba Triste – Stan Getz

I Chase the Devil – Lee Scratch Perry

Dreamworld – Robin Thicke

What You Need – The Weeknd

Unthinkable – Alicia Keys

Glory Box – Portishead

Hometown Glory – Adele

You’re My Thrill – Amel Larrieux

The Sweetest Thing – Lauren Hill

Candela – Buena Vista Social Club

Water No Get Enemy – Fela Kuti

In The Closet – Michael Jackson

Lovesong – the Cure

Genevieve – Cymande

Cherish the Day – Sade

War/No More Trouble (Medley) – Bob Marley

Thinking of You – Frank Ocean

Upgrade U – Beyonce featuring Jay Z

Tanto Tempo – Bebel Gilberto


Enjoy!

tags: playlist, musical inspiration
categories: all, lifestyle
Monday 08.06.12
Posted by Aliya LeeKong
 

Swiss Chard "Leaves"

View fullsize dolma-pic1-500x333.jpg
View fullsize dolma-pic2-500x166.jpg

Swiss Chard "Leaves"

Grape leaves have to be one of my all-time, favorite Middle Eastern snacks (and something I deemed impossible to make at home for many years).  When I visited Turkey a few years back, I learned a nifty trick for how to make them using a more common green to the West, swiss chard.  This would actually work with a number of different greens, but I do have to say the flavor of swiss chard works great – it’s mild and verdant and lets the flavor of the stuffing pop.

Grape leaves are often stuffed with ground meat and/or rice and flavored with mint and lemon.  They are part of a group of stuffed vegetables made throughout the Middle East, Greece and Turkey called dolmas.

I kept these guys vegetarian – I feel like they are a bit more delicate that way.  A few other things: in lieu of long-grain rice, I used a short-grain one, Egyptian rice, which is one of my favorites!  It’s fluffy, rounder, has a great toothsome texture and absorbs flavor beautifully.  Also, in lieu of steaming them the traditional way – I lay the leaves on top of stacked lemon slices and let the juice from the lemons steam and infuse them with even more flavor.  These are not the most speedy hors d’oeuvres to make, but they are well worth it!  And I guarantee by your 48th folding, you’ll be a lot faster…Enjoy!

Ingredients

24 Swiss chard leaves, washed and stems removed (approximately 3 bunches)

2 tbsps unsalted butter

1 small shallot, finely chopped

1 garlic clove, minced

½ tsp dried mint

¼ tsp ground allspice

¼ tsp ground cinnamon

¼ tsp ground black pepper

pinch chili flakes

pinch ground cloves

¾ cup Egyptian rice

1 cup vegetable stock or water

2 tbsps pine nuts, toasted

1 tbsp lemon juice

½ tsp lemon zest

2 tbsps chives and parley, finely chopped

3 or 4 lemons, cut into ½ inch rounds

olive oil

salt

Procedure

Preheat oven to 350° F.

Bring a large pot of water up to a boil and prepare a large bowl with ice and water.  Add enough salt to make the boiling water taste like the sea.  Place the chard leaves in the boiling water for 60 seconds and then shock them in the ice bath.  Let dry on paper towels.

In a medium saucepan, melt butter over medium heat.  Add shallot and garlic and sauté for 3-4 minutes until shallots are translucent.  Add spices and then the Egyptian rice and toast for about 1 minute.  Add stock or water and bring up to a boil.  Lower to a simmer and cook partially covered for 15 minutes.  Let cool slightly and add pine nuts, lemon juice, lemon zest and herbs.  Season to taste, though note that the rice will not yet be fully cooked.

Cut chard leaves down the middle on either side of the seam.  Place one leaf rib-side up, vertically in front of you.  Add about 2 teaspoons of the rice mixture about an inch up the leaf.  Start by rolling the end closest to you away from you to cover the rice.  Tuck each side of the chard leaf in and roll the entire parcel.  If the leaf is too long, you can cut the other end a bit short.  Repeat until you’ve finished the chard leaves and rice mixture.

Layer lemons in a dutch oven or pot with ¼ cup of water.  Layer the dolmas on top and drizzle them with a little olive oil.  Cover and bake for 30-40 minutes until the rice is fully cooked.

Serve warm or cold.

tags: swiss chard recipes, dolmas, middle eastern recipes
categories: side dishes, appetizers, snacks, vegetarian, all, spices
Monday 07.30.12
Posted by Aliya LeeKong
 

Cookbooks as Inspiration

Cookbooks as Inspiration

For a number of years now, I have become a cookbook collector of sorts.  It’s a natural gift I receive from houseguests, friends, and family (a tradition I completely adore!), and it’s become an obsessive habit to find THE cookbook that defines a cuisine when I travel.  As I’m embarking on writing my own cookbooks, I flip through my favorites to check out everything from fonts to page layouts to important passages and, of course, recipes.  Cookbooks have long served me as inspiration, and I wanted to share a few of my favorites with you here.

Now, these are rather wide-ranging, but I have to say some of my most treasured cookbooks have been sent or suggested by the individuals with whom I’ve had the privilege of cooking with in other countries. They swear by these cookbooks as “the real deal” – showcasing the cuisine’s authentic traditions – so I’m starting with those.

(1) Naparima Girls’ High School Cookbook: The Multi-Cultural Cuisine of Trinidad & Tobago & the Caribbean

I LOVE this book!  This dives deep into West Indian food and its multitude of influences from Indian to Chinese to Latin.  I definitely use it as a flavor reference, and it’s practical chapter divisions, glossary and intense indexing make it super easy to follow.

(2) The Art of Peruvian Cuisine I by Tony Custer

Visiting Peru earlier this year opened up a world of flavors, produce, and cuisine styles I hadn’t experienced.  The country has so many different climates, and the food reflects the terroir – coastal, mountain, Amazon.  This cookbook delves into a number of the dishes I loved while visiting the country – ceviche, tiradito, the rice dishes, and the famed aji de gallina to name a few.

(3) Exotic Ethiopian Cooking by D.J. Mesfin

This, to me, is the seminal text on Ethiopian food.  Not only does it give in-depth, easy-to-follow instructions for how to make all of the beautiful stews, lentil dishes, and even breads of the country, it gives a clear history of the food and culture of Ethiopia.  I love that the fundamental techniques (spiced butter, how to make berbere, etc) are all outlined in this book.

(4) Brasil: Gastronomia, Cultura e Turismo by Eva Ribenboim Steinbruch

A great cook in Rio de Janeiro recommended this book to me.  She implicitly trusts the recipes and authenticity here and, most importantly for me, the book is written in both Portuguese and English! It has a ton of Brazilian favorites – feijoada,  moqueca, farofa – and is divided by region, so it requires a little flipping through and imagination…

(5) All Cookbooks By Claudia Roden

Claudia Roden has to be one of the most impressive food writers out there – she was born in Egypt, studied in Paris, and writes from upwards of 45 years of experience.   Her first Middle Eastern cookbook came out in 1968, and she is a woman after my own heart – she learned from home cooks!  These aren’t glossy, just-for-looking cookbooks; they are straight utilitarian, and some have 800+ recipes!

(6) The Great American Cookbook by Clementine Paddleford

I recently received this cookbook as a gift, and it has shot up to one of my favorites!  The story behind it is amazing – Clementine (a woman!) was the first American food journalist, writing for the New York Herald Tribune from 1936 onward.  She also wrote a monthly column for Gourmetmagazine, published seven books, and traveled across the U.S. (when travel was not the easiest) to research and document immigrant, regional, and farm-to-table American cooking in the 30’s, 40’s and 50’s.  Imagine!  I love flipping through this book and seeing what the cuisine looked like then, how it has evolved, and finding inspiration for today.

(7) Modernist Cuisine: The Art and Science of Cooking by Nathan Myhrvoid, Chris Young and Maxime Bilet

So, the rest of these books are reasonably priced and have rather traditional procedures for the recipes – the geek in me had to give you my favorite food science-related book.  This 6-volume behemoth required a team of chefs and scientists and years of research.  What started out as a 150-page book on sous-vide cooking became a 2,400+ page manual detailing the science behind cooking and over 1,500 recipes.  This set may seem daunting but contains invaluable information for the serious cook.  An “At Home” version is on its way for this October by the way.

These are only a few of my favorites, and I hope you enjoy and glean as much inspiration from them as I do!


tags: cookbooks, inspiration
categories: cookbook war stories, lifestyle, all
Monday 07.23.12
Posted by Aliya LeeKong
 

Announcement & Cookies for Everyone!

View fullsize cookie-1-500x333.jpg

Announcement & Cookies for Everyone!

I have some exciting news and want to share it with you all.  Hopefully, from reading my site over the past few years, you’ve had the opportunity to see that I have an incredible passion for culture, food and cooking.  I love bringing together all of the travels and experiences that make up my life – combining flavors, textures, techniques and ingredients into my own personal style of cooking.  I’ve recently signed on to do my first cookbook!  I’m extremely thrilled (and a bit nervous, honestly…) to bring together and share the flavors of my Exotic Table in a lasting work, and over the next six months I’ll be cooking, writing, and photographing each step of the process.  As you can imagine, my creative resources will be dedicated to the book, but I hope to share with you the experiences, inspirations and trials and tribulations here (p.s. I will from time to time to post interesting recipes you won’t be able to find in the book).

I want to thank you all for your continued support!  None of this would be possible without the feedback and confidence I receive from you guys.  As a token of my appreciation, I want to share with you my most treasured, secret, best cookie recipe ever!  I’m a huge fan of how oatmeal changes the texture of a cookie and the combination of that with some dark chocolate and a touch of cinnamon and salt is heavenly… Enjoy!

Ingredients

Yields approximately 2 dozen cookies (size-dependent)

¾ cup all-purpose flour

½ tsp baking soda

¼ tsp baking powder

½ tsp ground cinnamon

½ tsp salt

1 stick unsalted butter, room temperature*

¼ cup shortening

1/3 cup white sugar

½ cup light brown sugar

1 egg, room temperature

1 tsp vanilla extract

1 ¼ cup dark chocolate chunks or chips

1 cup oats**

Procedure

Preheat oven to 350° F.  Line two baking sheets with parchment paper.

In a bowl, sift together flour, baking soda, baking powder, cinnamon and salt.

In the bowl of a stand mixer or with a hand mixer using a paddle attachment, cream together butter, shortening and both sugars.  Add the egg and vanilla extract.  Add flour mixture and mix until almost completely incorporated.  It should mostly be sticking to the paddle at this point.  Scrape down, add in chips and oats and mix for another 15 to 20 seconds until uniform.

At this point, I like to turn the cookie dough out onto plastic wrap, form into a cylinder, and freeze for about 10 minutes.  This makes it easier to cut into even sized, round cookies.  Conversely, you can just drop rounded spoonfuls a few inches apart onto prepared baking sheets.

Bake for 9 to 11 minutes depending on how chewy or crunchy or what size you made the cookies.  Cool on the baking sheets for 5 minutes and then transfer to wire racks to cool completely.

*If you are feeling extra ambitious, browning the butter (heating the butter over medium heat until the foam subsides, little brown flecks appear in the bottom of the pan and it smells like hazelnuts) is a great step to add depth of flavor.  Just cool down before the creaming step.

**Quick-cooking oats are fine here.

tags: Exotic Table, cookies, chocolate chip cookies
categories: desserts, recipes, all
Monday 07.16.12
Posted by Aliya LeeKong
 

Lemon-Orange Blossom “Pots de Crème”

View fullsize lemon-pic1-500x333.jpg
View fullsize lemon-pic2-500x333.jpg
View fullsize lemon-pic3-500x166.jpg

Lemon-Orange Blossom “Pots de Crème”

As a chef, one of the most thrilling things I experience is when I learn a new little trick or technique that makes a dish that much better (or that much easier!).  I remember when I was in Turkey and witnessed a shortcut that would make baklava a quick and easy affair. And how in Ethiopian cuisine, warming chopped beef and bathing in spiced butter made a steak tartare truly legendary.  It’s those little technique plays that are gratifying and why I’m so happy with this week’s lemon-orange blossom “pots de crème” recipe…

I recently read a recipe where lemon juice set a custard by simply being added to hot cream and then refrigerating.  ?!?!  I’ve used lemon juice in hot milk to break it and form cheese – it causes curdling, so to hear you could just add it like that and create a custard seemed quite frankly magical! 

The good news is…it’s true!  And so, of course, I tested a few recipes and came up with this one, which I think creates the best texture and combines the lovely citrus-y lemon with one of my favorite secret ingredients, orange blossom water.  With traditional pots de crème, you have to make the custard one of the old school-styles (the two ways are, roughly: stirred on the stovetop or baked in the oven), which is to say scald cream and flavors, add egg yolks and bake in a low slow water bath until jiggly perfection like this one…. This is waaay simpler: heat cream with flavors, add lemon juice, refrigerate for a few hours…and that’s it!  Enjoy!

Ingredients

Yields 6 5-inch oval ramekins

2 ½ cups heavy cream

1 vanilla bean

¼ tsp salt

¼ cup sugar

3 tbsps honey

2 ½ tbsps orange blossom water*

1 tbsp lemon zest

7 tbsps lemon juice

Procedure

In a small saucepan, bring heavy cream, vanilla bean, salt, sugar, honey, orange blossom water and lemon zest up to a boil.  Remove from the heat, cover and let steep 20 minutes.  Gently stir in lemon juice and strain cream mixture.  Refrigerate for a minimum of 4 to 5 hours until thickened (these can definitely be made a day or two ahead of time).

Serve well-chilled with fruit, if desired.

*The amount of orange blossom water really depends on the brand you are using.  For mine, I used 2 ½ tablespoons, but taste yours as you add to make sure it doesn’t become too cloying.

tags: pots de creme, citrus, lemon, lemon desserts
categories: desserts, recipes, all
Monday 07.02.12
Posted by Aliya LeeKong
 

Cherry-Pinot Paletas

View fullsize cherry-pic1-500x333.jpg
View fullsize cherry-pic2-500x333.jpg
View fullsize cherry-pic3-500x333.jpg

Cherry-Pinot Paletas

When cherry season rolls around each year, I get oddly giddy.  Maybe it’s a remnant of childhood – the feeling that these little fruits are the nectar of the gods (and thus you only get one of them on top of a sundae), that they are a privilege to eat (I remember fighting for the last one…), or that they were hands-down the best hard candy (Blow-pop, Ring Pop, Lifesaver, Jolly Rancher) flavor out there.  Whatever the case, as an adult, I definitely go a bit dessert crazy around this time of year, working cherries in wherever I can, and here is one with a decidedly un-childlike spin….

The weather here in New York City has been absurdly hot, so naturally my thoughts turn to ways to cool off.  Paletas are basically Latin American popsicles, and THE way to do it.  They are usually made with fresh fruit juice, sometimes with bits of fruit, or can be milk-based.  I thought cherries would be the perfect ingredient until I became overwhelmed by the thought of having to pit and stem them…And then it struck me, why do I have to?!?

The adult spin here is that I use a bit of red wine.  I had a popsicle phase last summer where I was freezing everything from fresh juices to my St. Lucian rum punch (which didn’t freeze by the way because of the alcohol!), and I love serving these as dessert at a summer bbq.  It’s a light treat after serious grubbing and happens to keep the party going… These pops not only have cherries and red wine, a heavenly combo, but also a host of spices – black peppercorns, cloves, cinnamon and vanilla bean – that create gorgeous flavor.  You may end up just wanting to reduce the liquid to a syrup and pour it all over ice cream!  Enjoy!

Ingredients

Yields 3¾ cups juice or 10-12 popsicles

2 lbs fresh, sweet cherries, washed*

2 cups water

¾ cup sugar

½ cup red wine (Pinot Noir or whatever red wine you like)**

3 black peppercorns

2-3 whole cloves

1 cinnamon stick

1 vanilla bean, split and scraped

Procedure

The best part about this recipe is that you just throw in the whole cherries here, stems, seeds and all.  The whole bits get strained out at the end.

In a medium-sized pot, bring all ingredients up to a boil.  Lower to a simmer  and simmer half-covered for 10 minutes.  Let cool to room temperature.

Using a potato masher, mash up the mixture until the cherries are completely broken down.  Strain liquid through a mesh sieve extracting as much of the juice as possible.  I like to use the back of the spoon to push on the pulp.

Pour into popsicle molds and let freeze until solid (about 7 to 8 hours).

*I used bing cherries here but feel free to use whatever is in season nearest you.  Pitted, frozen cherries would also work wonderfully here – without the pits or stems, you could blend up the whole mixture to get bits of the cherry in there and change up the texture.  Just remember you’ll likely have more than 10 to 12 popsicles at the end!

**Of course, if you are making these for the little ones, you can replace the red wine here with some juice or water.


tags: recipes for summer, popsicles, paletas, cherries
categories: desserts, recipes, snacks, all
Monday 06.25.12
Posted by Aliya LeeKong
 

Ras El Hanout

View fullsize ras-pic1-500x333.jpg

Ras El Hanout

Today I’m sharing with you one of the spice blends that is a key part of my cooking arsenal….ras el hanout!  This blend hails from Morocco and is used throughout North African cooking.  Ras El Hanout quite literally means “top of the shop” and is supposed to represent the most coveted blend the spice merchant has to offer….I like to think of it like a Moroccan curry.

And, like curry, there are countless variations of this North African specialty.  My chicken thighs from earlier this week feature one version of this spice blend, but each shop, family, and region has its own list of ingredients sometimes reaching upwards of 40 spices!  The flavor is nuanced and complex, a heady mixture that’s difficult to describe.  It tastes to me like the smell of walking into a spice shop!  Rosebuds may be added for a floral touch, grains of paradise for a peppery note, lavender for aromatic purposes; some spice merchants go so far as to add spices, herbs or other extractions that have aphrodisiac effects…clearly trying to get repeat customers.

That said, my shortened blend from this week is an easy one, and I keep a big batch on hand for summer grilling, to spice up a rice dish or flavor a quick pot of lentils.  Ras el hanout is the basis for many a Moroccan tagine and lends itself to a slow braising process.  I particularly like it with chicken, pork and certain hearty fish – it benefits from pairing with a meaty base but not one that will overwhelm the combination of delicate flavors.  It’s also beautiful with starchy vegetables – particularly squash and corn – where it highlights the vegetables’ own natural sweetness.

tags: ras el hanout, Morocco, spices
categories: spices, all
Thursday 06.21.12
Posted by Aliya LeeKong
 

North African-Spiced Chicken Thighs with Oranges, Marcona Almonds, & Summer Vegetables

View fullsize chicken-pic1-500x333.jpg
View fullsize chicken-pic2-500x333.jpg
View fullsize chicken-pic3-500x166.jpg

North African-Spiced Chicken Thighs with Oranges, Marcona Almonds, & Summer Vegetables

Crispy, chicken thighs, as of late, are fast becoming one of my favorite weeknight meals.  I cycle through trends in cooking like a lot of people and I just can’t resist how easy and fulfilling these are.  I’ve tried countless different spice blends and ways of cooking them (my friends and husband are partial to my Cajun ones…) but I love the flavor in these North African-inspired ones.

The technique I use here is a go to – crisp the thighs, cook the vegetables in the flavored chicken fat, layer the chicken back on top, throw it all in the oven and prep a salad, make the table or do whatever else you need to do!  The result is beautifully, tender chicken with really flavorful vegetables.  I love this method.

The North African blend here is called ras el hanout.  I’ll write more about this later this week but think of it like a Moroccan curry.  The roasted cumin powder – white cumin seeds I toast up in a pan before grinding to a powder – creates a lovely, smoky undertone.  The cinnamon adds a bit of sweetness, the black pepper rounds it out, and I love the gentle aroma of the saffron here.  When these spices mingle with the julienned zucchini and squash, the natural sweetness in the vegetables really come through, highlighted by the orange slices and zest.  The almonds plump and add a nutty bite.  When the season warms a bit I like to throw in some gorgeous grape or cherry tomatoes as well….Enjoy!

Ingredients

Serves 4 to 6

4 or 5 zucchini or summer squash, julienned

1½ – 1¾ tsp salt

2 lbs chicken thighs, skin-on with bone (4 to 6 thights)

2 tsp paprika

2 tsp ground cumin, toasted*

½ tsp cinnamon

¼ tsp turmeric

½ tsp ground ginger

2 tsp ground black pepper

¼ tsp cayenne pepper

pinch saffron

1 tsp unsalted butter

2 tsps vegetable oil

1 onion, julienned or finely chopped

2 cloves garlic, minced

¼ cup raw, unsalted marcona almonds, toasted

small bunch of thyme

5 or 6 thin slices of orange (~1/4 of an orange)

1 tsp orange zest

Salt to taste

Procedure

Preheat the oven to 400° F and place the rack on the top shelf.

For the zucchini, I like to use my mandoline fitted with the julienne attachment.   You can also use a food processor or quite simply a knife to do this.  In a large bowl, mix together the julienned zucchini / squash with ½ to ¾ teaspoon of salt and place in a colander over a bowl or in the sink.  You want to remove as much water as possible, so let sit for 15 minutes and then wring out the vegetables using a kitchen towel, paper towels and your hands.

Let the chicken thighs come up to room temperature.  Mix together the paprika, cumin, cinnamon, turmeric, ground ginger, black pepper, cayenne, saffron and 1 teaspoon of the salt.  Season chicken thighs on both sides with the spice blend – I personally add a bit more salt than this but I want to leave it up to you how salty you want these.  Heat a large pan over medium-high heat.  Add butter and oil and place thighs skin-side down in the pan.  Let cook for 3 to 4 minutes until the skin turns crisp.  Be careful not to let the heat creep up too high or the spices will burn.  Flip thighs and let cook another 2 minutes.  Remove to a plate and set aside.

Reduce heat to medium and pour off excess fat.  Add onions and garlic with a bit more salt to draw out the moisture and cook for a minute.  Switch off heat and add julienned zucchini, almonds and thyme and toss together.  Layer slices of orange around the outside of the pan and place the thighs on top of the bed of vegetables.  Sprinkle with orange zest and place on the top rack of the oven and cook for 20 to 25 minutes (until the juices run clear out of the chicken.

Serve chicken thighs hot with a side of the vegetables.

Note: The thighs should stay crisp but this depends on how much moisture is coming off the vegetables.  If not, I have in the past popped them back in a clean sauté pan with a bit of oil for a minute over medium-high heat to crisp them back up.

*For this blend, I like to take whole cumin seeds and toast them in a pan over a low flame until they deepen in color and are fragrant.  I then grind this to a powder.

tags: chicken thighs, marcona almonds, summer vegetables
categories: all, recipes, main dishes
Monday 06.18.12
Posted by Aliya LeeKong
 

A Forgotten Food, Seera

View fullsize Seera-pic1-500x333.jpg
View fullsize seera-pic2-500x333.jpg
View fullsize seera-pic3-500x333.jpg

A Forgotten Food, Seera

Last week, one of the chefs over at Junoon shocked me into taste memory.  He cooked up a batch of seera (also called sheera or seero), which is a sweet, crumbly, buttery, cake-like dessert usually made with semolina or cream of wheat.  My mom used to make it for me growing up, and I hadn’t thought about it in years!  One bite…it’s amazing how the smell and taste of something can just transport you back.  That night, I went right home and made my own, comforting batch that I thought I’d share with you.

Seera belongs to a dessert family called halvas – these are desserts served throughout South, Central and West Asia, parts of Europe, the Middle East and North Africa.  Oftentimes, they are flour-based as you see here, but they can also be made from dense nut pastes and be more of a confection.

I had a full-on debate with my mom about the pros and cons of using semolina vs. cream of wheat, when’s the right time to add the cardamom, what the resulting color should be, and how no one should feel guilty if they want to eat this for breakfast (it’s cream of wheat after all!).  She even whipped out my grandmother’s old recipe written out in mugs!  I love that….Well, this is what I came up with.  And the reality is farina or cream of wheat will result in a slightly softer, more crumbly halva and the semolina, depending on the grind, will be a bit more dense and cake-like with a brighter yellow color.  Buttery, with the aromatics of saffron and cardamom, pure comfort, and whips up in less than 10 minutes…enjoy!

Ingredients

Serves 4 to 6

1 cup milk

½ tsp vanilla extract

pinch saffron

pinch salt

¾ cup palm sugar*

1 stick + 2 tbsps unsalted butter

2 cardamom pods, cracked

1 cup farina, cream of wheat or semolina flour

Optional garnishes:**

Pistachios, toasted

Sliced almonds, toasted

Sultanas

A few dashes of rosewater

Procedure

In a small, nonstick saucepan, bring milk up to a boil.  Lower to a simmer and add vanilla extract, saffron, salt and palm sugar, whisking to dissolve.  Keep over a low flame.

In another nonstick saucepan over medium heat, add butter and cardamom pods.  When the butter has melted and the foam subsides, add the farina and toast in the butter until golden brown, about 3 to 4 minutes.  Lower the flame, add the sweetened milk mixture and stir until texture dries a bit, another 2 to 3 minutes or so.

Serve warm or room temperature.

*You can substitute white or brown sugars here, but I would adjust down the amount as palm sugar is a bit less sweet than those two (so closer to ½ cup).

**For the optional garnishes, you can add as much as you like right on top.  For the sultanas, I like to throw them in with the simmering milk, so they plump up a bit.

tags: seera, halva, cardamom, almonds
categories: all, desserts, recipes, breads & cakes, breakfast
Monday 06.11.12
Posted by Aliya LeeKong
 

Awaze Skirt Steak

View fullsize steak-pic11-500x333.jpg
View fullsize steak-pic2-500x333.jpg
View fullsize steak-pic3-500x166.jpg

Awaze Skirt Steak

Awaze.  Pronounced Ah-wah-zay.  Awaze is an Ethiopian chili paste, a staple in the cuisine, made with one of their more famous spice blends, berbere. It’s a sauce, it’s a condiment, it’s a marinade.  And that last function is exactly how I used it here, to infuse flavor into some gorgeous, marbled skirt steaks in time for a bit of Sunday (almost) summer grilling.

And awaze IS full-flavored in all its multi-function glory.  First, the base of it, the spice blendberbere, is made from aromatics like red onion, chilies and garlic, spices like fenugreek, cardamom and ajwain, and even an herb called sacred basil. For awaze, berbere is traditionally mixed with Ethiopian honey wine (called tej) to form a paste or diluted a bit for more of a sauce consistency.

I only have one bottle of tej left and am saving it for a rainy day, so I approximated with some red wine and honey for the marinade.  I also threw in a bit of lime juice for acidity, fresh garlic for flavor, and a pinch of cayenne for heat.  The steaks took on the flavors beautifully and grilled up to perfection.  It doesn’t take long for the marinade to kick in, so even if you only have a few hours to marinate, it’s worth the trouble (trouble being mixing a few items together in a bowl and pouring it over the steaks!).  Rich, an intoxicating mix of spices, a touch of heat and sweetness from the honey…Enjoy!

Ingredients

Serves 4

6 tbsps berbere

generous pinch of salt

pinch of cayenne

juice of 1 lime

4 cloves garlic, minced

3 ½ tsps honey

1 ½ to 2 cups dry red wine

2 lbs skirt steak, trimmed cut into 4 pieces

kosher salt and freshly ground pepper

Procedure*

In a mixing bowl, whisk together the berbere, salt, cayenne, lime juice, garlic, honey and red wine.  Place steaks in a ziploc bag and pour marinade over steaks.  Remove as much air from the bag as possible before sealing. Refrigerate for a minimum of 2 hours and up to 24.

Remove steaks from bag, pat dry with paper towels, and let them come up to room temperature.   Season both sides of each steak generously with salt and freshly ground pepper.

Heat a grill or grill pan over medium-high heat.  Grill steaks 1 to 2 minutes per side for medium-rare and longer if you prefer them well done.   Rest for about 7 to 10 minutes tented with foil before serving.

*To serve with the steak, I like to cook red onions down in olive oil and use some of the remaining awaze marinade to season them.

tags: Awaze, skirt steak, grilled
categories: all, recipes, main dishes-1
Monday 06.04.12
Posted by Aliya LeeKong
 

Happy Memorial Day + Strawberry-Chia Aqua Fresca

View fullsize aqua-pic1-500x333.jpg
View fullsize aqua-pic2-500x333.jpg

Happy Memorial Day + Strawberry-Chia Aqua Fresca

First off, Happy Memorial Day to everyone!  It’s the unofficial start of summer, and I am hanging out with friends and enjoying it – I hope you are too.  I wanted to start off the summer with something very simple, something you could even make today if you wanted.  It’s refreshing and is all about easy summer cooking and entertaining. – an aqua fresca.

I love when something in another language makes it sound so much more interesting or complex!  The reality is aqua fresca, or “fresh waters”, are traditional Latin American beverages that blend seasonal fruits and sometimes even grains or seeds with water and a touch of sugar or natural sweetener.  The succulent strawberries that have been staring at me in the market seemed a natural base for a refreshing drink, and I decided to include another popular aqua fresca ingredient: chia.

If you didn’t read my diatribe last week on chia seeds, you should if you are interested in all of the amazing health benefits of this superfood.  If not, they add a nice gelatinous texture to the drink and at the very least increase hydration on a hot day.  Enjoy!

Ingredients

Yields approximately 4 cups / Serves 4 to 6

1 lb fresh strawberries, washed and hulled

1-2 tbsps honey

2 cups cold water

Juice of 1 lime

4-6 tsps chia seeds

Procedure

In a blender, puree the strawberries with honey, water and lime juice.  Pass through a strainer.  Chill further if desired or pour into glasses.

I like to add the chia seeds, 1 teaspoon per serving, directly to the glasses and let sit in the aqua fresca for about 10 minutes to bloom.  The chia seeds will absorb some of the liquid and become gelatinous.   Serve with or without ice.

tags: chia, recipes for summer, aqua fresca, strawberries, drinks
categories: drinks & cocktails, recipes, all -1
Monday 05.28.12
Posted by Aliya LeeKong
 

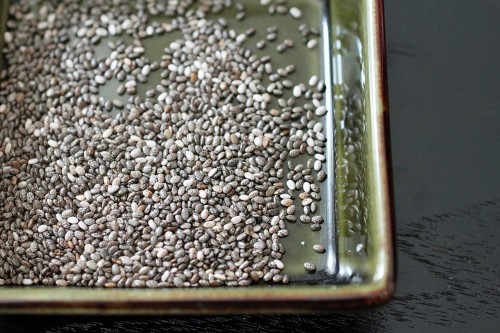
Chia Seeds

View fullsize chia-pic1-500x333.jpg
View fullsize chia-pic2-500x333.jpg

Chia Seeds

Ok, so if you follow these posts, you’ve read about me toting around green juices and coming up with natural replacements for certain desserts out there.  Let’s not get too crazy – I’m not going full-on natural (note the butter and crème fraiche in my dish earlier this week…), but I am acknowledging my health a bit more now that I’m in my 30’s and want to take a bit better care (slash vanity wants me to hold back the aging process!).  My parents’ obsession with Dr. Oz adds fuel to the fire, and it seems like every week they are sending me tips on what to incorporate into my diet.  My mom the other day went OFF about chia seeds, and I won’t say I was skeptical(particularly if you are reading this, mom) but I wanted to dig a bit deeper…

As always, she was right.  It’s like beyond a superfood, a super-super-superfood if you will!  A member of the mint family that is mainly grown for its seeds, this food has history – native to parts of Mexico and Guatemala, the Mayans and Aztecs used to grow it as a staple, using it to increase their stamina and energy levels, and knew what they were doing.  It’s a complete source of protein, has more calcium than skim milk on a per ounce basis, and is the richest plant source of Omega-3 (even higher than salmon!).

Soaking these little guys in water, the seeds swell up and become gelatinous (like basil seeds) actually holding 9 to 12 times their weight in water.  What this means is that they help prolong hydration and retain electrolytes in the body.  Before I get completely off my soapbox…they also prevent blood sugar spikes, help clean out the intestinal tract (a huge source of fiber) and are very high in antioxidants and other minerals.  There, I’m done.

They do have fat, fyi, for all you naysayers, so I’ll just give you that to criticize, but most seeds are rich in oils (think: flax).  And they can be eaten a number of different ways – ground into a flour to include in breads or sauces, sprouted like alfalfa, bloomed in water or liquids (think rice pudding-esque) or merely by themselves.

I personally have been adding them to my water with a bit of chlorophyll in the mornings as a pre-workout booster.  And I will be including them in next week’s recipe, so I thought I would brief you before you look at the recipe like “what the heck is that.”

Anyway, would love to hear if any of you guys have been eating this stuff…

tags: chia seeds, healthy
categories: all -1, spices
Thursday 05.24.12
Posted by Aliya LeeKong
 

Roasted Garlic, Cheese & Herb Baked Rice

View fullsize rice-pic1-500x333.jpg
View fullsize rice-pic2-500x333.jpg
View fullsize rice-pic3-500x166.jpg

Roasted Garlic, Cheese & Herb Baked Rice

This is not your every day, throw-in-the-oven-rather-than-on-the-stovetop rice.  My inspiration for this dish is Tah Chin, a Persian rice pilaf that layers saffron rice with chicken and bakes it to perfection.  The rice is bound with yoghurt and egg yolks and during its slow-baking process forms this beautiful crust where it hits the baking dish, not wholly unlike soccarat (which is the crusty layer found at the bottom or paella).  Suffice it to say, I veered a bit off of tradition with this version….

Many of the items are similar to the original – the long grain rice (though trying this with Valencia or Bomba rice sounds pretty alluring), saffron, yoghurt and egg yolks.  But that is where it ends!  I leave out the chicken and created this to be an easy (and slightly more elegant…) substitute for mac n’ cheese, a lovely casserole side.  Thus, I included some butter and crème fraiche for richness and tang, some cheeses for good measure, roasted garlic and herbs for depth of flavor.

It was truly an experiment, and I love the result…First of all, it’s beautiful! I plan to just leave the cutting board and knife out for people to help themselves at my next dinner party.   I warn you, however, to do this as close to serving time as possible.  It was all I could do to snap a few pics before my husband hacked off a third of it and ran off!  The smell of it drove him mad…the roasted garlic and cheese, creaminess and that crusty layer of rice – amazing.  Enjoy!

Ingredient

Yields (1) 9”x13” baking dish

3 cups long grain rice

3 tbsps kosher salt

½ stick unsalted butter

½ cup yoghurt

½ cup crème fraiche

pinch saffron

4 egg yolks

1 cup grated mozzarella cheese

¾ cup grated grana padano or parmigiano reggiano cheese

12-13 roasted garlic cloves

¾ cup chopped herbs

freshly ground black pepper

Procedure

Preheat oven to 350° F.

Rinse the rice in changes of hot water until the water runs clear.  In a medium pot, bring 6 cups of water up to a boil.  Add 1 ½ tablespoons of the salt and the washed rice.  Let cook 6 to 8 minutes (rice should start to soften but still be raw at the center), drain and rinse lightly.  Transfer to a large bowl.

In a small saucepan, melt butter with yoghurt and crème fraiche over medium heat.  When it starts to bubble, shut off the heat and add the saffron.  Let it bloom for 5 minutes.  Place the egg yolks in a medium bowl.  Add spoonfuls of the saffron mixture to the egg yolks stirring constantly – you want to bring the egg yolks up to temperature slowly.

To the drained rice, now add the saffron-egg yolk mixture, the cheeses, roasted garlic cloves, chopped herbs, the other 1 ½ tablespoons of salt and freshly ground black pepper to taste.  Combine thoroughly.

Grease a 9” x 13” baking pan and line the bottom with parchment paper.  Transfer the rice mixture to the baking pan, cover with foil and bake for 1 hour and 35 minutes.  Let cool slightly and then loosen the side of the rice from the dish.  Turn out onto a cutting board and serve hot in slices or squares as you choose.

tags: baked rice, saffron, vegetarian sides, roasted garlic, cheese
categories: all -1, side dishes, recipes, vegetarian-1
Monday 05.21.12
Posted by Aliya LeeKong
 

South African Milk Tart with Fruits

View fullsize tart-pic1-500x361.jpg
View fullsize tart-pic4-500x333.jpg
View fullsize tart-pic3-500x222 (1).jpg

South African Milk Tart with Fruits

I tried a really delicious milk tart a few years back when I was visiting Capetown and was hooked!  This is one of those ubiquitous desserts in South Africa that’s served throughout the country, on all sorts of occasions and every cook has his or her own secrets.  Melktart (meaning, literally, milk tart…) is a tradition that came from the Dutch settlers in the country, a custard-based tart scented with cinnamon delivered in a flaky pastry crust.

I am one of those people that have fruit tart cravings.  I will take a gorgeous tart with a pastry cream filling and topped with fruit over a straight fruit pie any day.  For some reason, I feel like the creaminess balances out the acidity in the fruit and with a flaky crust creates a perfect dessert. For me, the idea of putting fruit on top of a milk tart seemed perfectly natural (though it’s not usually done there).

Also, I semi-cheated and used puff pastry for the crust – how I could go on about the benefits of puff pastry!!  I’ve made it before from scratch, and it’s definitely a process.   Puff pastry tastes good, and those guys who’ve created the frozen versions have mastered it – why mess with perfection here?  This crust comes together easily, and it’s a few less steps you have to take to make an equally delicious tart.

So, now about milk tart itself.  The filling is basically a custard with hints of cinnamon, almond, and (my addition) vanilla.  The cornstarch helps to thicken the custard and make sure it’s not too eggy – you don’t want a crème brulée tart here!  The beaten egg whites lighten the batter and add an airy quality to the finished product.  The result is a beautiful, creamy, vanilla-specked filling with that caramelized top in a gorgeous flaky crust – the fruit just adds another lovely layer of flavor.  This is perfect for a dinner party (impressive too!) or even a ladies lunch.  Enjoy!

Ingredients

Yields 1 9-inch fluted tart / Serves 6 to 8

Crust:

½ package frozen puff pastry (1 sheet), defrosted

1 egg beaten with a bit of heavy cream for egg wash

Wax paper and dry beans to weight down

Filling:

1 ½ cups whole milk

½ tsp salt

1 stick cinnamon

1 vanilla bean, split and scraped

½ tsp almond essence

½ cup heavy cream

¼ cup cornstarch

1 ½ tbsps unsalted butter

2 eggs, separated

½ cup + 2 tbsps confectioner’s sugar

½ tsp cinnamon ground

Topping:

Sliced or whole fruit of choice: strawberries, blueberries, raspberries, kumquats, cape gooseberries, etc.

Procedure

For the crust:

Preheat the oven to 350° F convection / 375° F convention.

Let’s start by rolling out and blind-baking the crust.  On a floured surface, roll the sheet of puff pastry out just enough so it will cover the inside of the tart pan and have some overlap.   Place it carefully in the 9-inch, fluted tart shell and press it into the corners and sides.  Trim the excess.  Place a piece of wax paper across the top of the tart so it covers the sides.  Add dried beans to weight down the crust and refrigerate for 15 minutes while you start on the filling.

Place in the oven and bake for 20 minutes.  Take the crust out of the oven, remove the weights, and brush with the egg wash.  Put back in the oven for another 5 minutes until golden.  Set aside until ready to fill and leave the oven on.

For the filling:

In a small saucepan, bring the milk, salt, cinnamon stick, vanilla bean, and almond essence up to boil.  Lower immediately to a simmer.  In a small bowl, whisk together the heavy cream with the cornstarch making sure there aren’t any lumps.  Add this to the milk mixture along with the butter and stir until the mixture thickens.  Remove from the heat.

Make sure the egg yolks are in a larger-sized bowl because you’ll be adding the milk mixture to them.  You want to start by adding a little bit of the milk mixture and stirring or whisking to incorporate.   Continue to do this a little at a time until the milk mixture is completely incorporated – we do this to avoid cooking the yolks and having bits of it in the tart.  Let this mixture cool to closer to body temperature before moving on to the next step.

In another bowl, beat the egg whites with the ½ cup of confectioner’s sugar until soft peaks form – should be light and fluffy.  Add a spoonful or two of the milk custard to the egg whites and incorporate.  Carefully, fold the egg whites into the milk custard to lighten it up.  Be careful not to overmix or you will deflate it significantly.

Add this filling to the tart shell.  Mix together the last 2 tablespoons of confectioner’s sugar with cinnamon and sprinkle on top of the tart.  This will develop into a nice brown crust on top.

Bake for 10 minutes, and then lower the temperature 25 degrees and bake another 15 minutes.  Don’t be surprised if it puffs up during cooking – it will reduce down as it cools.  Cool on a rack and top with fruits of your choice.

This tart can be served warm or cold, but since I added the fruits I thought I’d keep it on the cooler side myself.

tags: milk tart, desserts, fruit, special occasion, south african
categories: desserts, recipes, all -1
Monday 05.14.12
Posted by Aliya LeeKong
 

My Homemade Nutella

View fullsize nutella-pic3-500x333.jpg
View fullsize nutella-pic2-500x333.jpg
View fullsize nutella-pic1-500x330.jpg

My Homemade Nutella

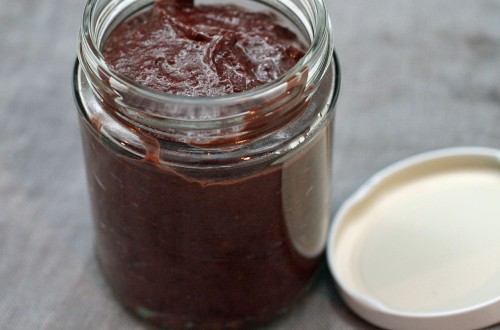
So, admittedly, I’ve been on a bit of a healthy kick lately – toting around awful looking bottles of green juice, trying to eat more raw foods and roughage, and avoiding alcohol (gasp!). A bit of a spring cleanse, if you will.  It’s been about two weeks (14 days, 11 hours and 33 minutes but who’s counting?), and I’m feeling pretty good.  For some reason, over the last few days, my sweet tooth has gone a bit haywire, so I decided to make something I crave pretty often…nutella!

Now, nutella is one of those items with which I avoid eye contact in the grocery store.  God forbid I bring a jar of it home, and it sits there longingly, just asking for me to take a spoon to it each time I go into the kitchen.  I grew up eating it on special breakfast occasions, a lusciously chocolate-y and nutty filling for crèpes, a tradition I’ve carried on to adulthood.  It’s popular for breakfast in Europe, where it’s touted as healthy!  Can you actually believe it??

On closer inspection, it really isn’t that bad for you!  Nuts, skim milk, a bit of cocoa powder – I thought a homemade version could only be better.  I used a slightly healthier oil, hazelnut oil, in lieu of the palm oil used in the original version.  I also used a local honey instead of sugar.  I did add some real dark chocolate to mine, but I rationalized that 3.5 ounces spread out over a whole jar can’t be that bad for you, and isn’t dark chocolate an antioxidant anyway? This nutella is creamy, rich, and delicious and tastes just like the ingredients it’s made from (so use good ones!).  Enjoy!

Ingredients

¾ cup chopped hazelnuts, toasted*

¼ cup raw almonds, toasted*

2 tbsps hazelnut oil

1-3 tbsps local honey**

½ tsp vanilla extract

1 tbsp unsweetened cocoa powder

½ tsp kosher salt

½ cup skim milk

3.5 ounces semisweet or dark chocolate, chopped

Procedure

To the bowl of a food processor, add the toasted hazelnuts and almonds and process until a fine crumb.  Add the oil, honey, vanilla extract, cocoa powder and salt and process until a paste.

In a small saucepan, heat the milk and chocolate together until the chocolate is completely melted.  Add to the food processor and process until the nutella’s texture is smooth and creamy.  Cool and refrigerate.  This can be stored in the refrigerator for about a week.

*I chopped up the hazelnuts here to increase their surface area, so they toast up quicker.  You can easily toast the chopped hazelnuts and almonds together in a 350° F oven for 5 to 10 minutes.

**The variation in the amount of honey really depends on 2 things: (1) what type of chocolate you are using and (2) your personal preference for how sweet you want this.  I used a 70% dark chocolate and about 2 tablespoons, but if you are using a semisweet or even a milk chocolate, you may need less.  This is something that you can add at the end to taste if you like.

tags: dessert, healthy, raw, breakfast, nutella, almonds, chocolate, hazelnut
categories: breakfast, desserts, recipes, snacks, all -1
Monday 05.07.12
Posted by Aliya LeeKong
 
Newer / Older