X

Sign up to receive exclusive recipes, tips, updates and other goodies from Aliya!

  • Home
  • Blog
    • All
    • Recipes
    • Spices + Ingredients
    • Lifestyle, etc.
    • Travel
  • The Cookbook
  • The App
  • Media
    • All Media
    • Video
  • About
  • Passions
Aliya LeeKong
  • Home
  • Blog
    • All
    • Recipes
    • Spices + Ingredients
    • Lifestyle, etc.
    • Travel
  • The Cookbook
  • The App
  • Media
    • All Media
    • Video
  • About
  • Passions

Peak Berry Season at the Market

PEAK BERRY SEASON AT THE MARKET

If you can ignore the sweltering heat, this is the best time of year at the farmers' market.  Why, might you ask?  Because it is the only time that all the berries overlap each other in the season, not to mention all of the heirloom tomatoes, stone fruit and the beginning of chili pepper season.  I went to my local greenmarket over the weekend (it was sooo hot out!) and was surprised to see strawberries still available - that doesn’t happen often!  But, always, there is a short window where blueberries, blackberries, raspberries and cherries come together.  This is the time that I make a mad rush to get a mixed berry jam going and, of course, possibly a new tart recipe.  

It’s also the time that I start to think about preserving, whether it be canning tomato sauce, pickling cherry peppers, freezing the berries, or creating syrups or shrubs to enjoy in a cocktail later!   Below are some recipes I may be bringing back for this limited berry season!  Enjoy!


SUGAR PLUM & CURRANT TORTE


MY BREAKFAST CLAFOUTIS


BLUEBERRY, RAW HONEY & COCONUT FOOL


BLUEBERRY-HIBISCUS SMASH


tags: dessert recipes, berry recipes, strawberry recipes, cherry clafouti
categories: all 4, blog, breads & cakes, breakfast-1, desserts
Wednesday 08.17.16
Posted by Aliya LeeKong
 

Not Your Average Oysters

NOT YOUR AVERAGE OYSTERS

It used to be that you could only eat oysters in months that end in "R", but, now oyster farming (rather than harvesting from the wild) makes them safe year-round.  And nothing says summer better than a bottle of wine and fresh oysters!  I recently took a day trip out to Greenport, Long Island and had some super fresh oysters at Little Creek Oysters, along with a bottle of local wine from Bedell Cellars.  I love this part of Long Island; there are so many vineyards to visit and have tastings as well as an abundance of local farm stands to get fresh produce, you can even pick your own at some spots!  The oysters are straight out of the Peconic Bay, and you can have them shucked or you can shuck yourself with a little lesson from the waitstaff.  I went for the shuck yourself, to get down and dirty, and to earn my dozen oysters for the day!  

I don’t know about you, but I like to have my first few oysters “naked”, and then I start to experiment with various toppings.  If I'm in a restaurant, I'll go for a mignonette, some fresh lemon juice or a few dashes of hot sauce, but, at home, it gives me the opportunity to use all of the crazy, multi-ethnic pantry items and sauces I have in the fridge.  A few thoughts:

(1) HORSERADISH - Horseradish and lemon juice are a great combo too.  You can buy store bought horseradish, or if you can find the fresh root make it yourself in a food processor.  (1) peel the horseradish root and chop in to a small dice (2) process in the food processor with a little salt until finely chopped (3) let sit for 5-10 minutes so the flavor strengthens….the longer the better! (4) add vinegar to preserve and give it a little cook.  Adding the vinegar stops the horseradish from blooming more flavor, so make sure it’s pungent enough to your liking before heading to this step. If you want to calm down the flavors add a little sugar for a nice balance.

(2) JALAPEÑO-BASED MIGNONETTE - A classic mignonette is made with finely diced shallots, pepper and vinegar.  I like to take mine a step further with some diced fresh or pickled jalapeños, chopped cilantro, lime juice, and I use apple cider vinegar to give it more of a kick!

(3) GO JAPANESE! - I love ponzu sauce, which is a Japanese, citrus-based sauce that has yuzu, lemon, sudachi and other tangy flavors.  I also always have ponzu shoyu, which is a blend of ponzu with soy sauce (which you can obv do yourself).  A few drops of either of these are great on oysters and can be mixed with some chili sauce for heat.  A little togarashi seasoning with ponzu is also a great touch.

(4) INDIAN PICKLES & CHUTNEYS - Indian pickles and chutneys also make for great toppings for oysters.   A good Indian pickle is typically a mustard-oil cured fruit or vegetable - think green mango, lime, carrots.   It has a really tart bite to it, so you using it sparingly is key here.  Also, a good coriander or coconut chutney is AH-MAZING on oysters with heat, sweetness, tang as is a tiny drop of tamarind paste.

(5) KIMCHI - If you happen to buy or make your own kimchi, finely chopping up a bit and throwing it on an oyster is kind of life-changing.  Just saying.

(6) OTHER CHILI SAUCES - Tabasco or Frank's aren't the only hot sauces out there that work on oysters.  I love Sriracha, sambal oelek or a good, West Indian pepper sauce made from scotch bonnets.   Salsa verde is perfect too.

(7) MOROCCAN-STYLE - Both harissa and preserved lemons are a fantastic topping for oysters.

There are so many different ways to play around with flavors for oysters - these are just a few (for the non-purist :))!  Enjoy!


tags: oysters, when to eat oysters, best oyster toppings, ponzu for oysters, global flavors oysters
categories: all 4, appetizers 1, blog, lifestyle-1, quick & easy
Friday 08.05.16
Posted by Aliya LeeKong
 

Japanese-Inspired 5-Ingredient Cheesecake

View fullsize cheesecake 3.jpg
View fullsize cheesecake2.jpg
View fullsize cheesecake1.jpg

JAPANESE-INSPIRED 5-INGREDIENT CHEESECAKE

The fact that National Cheesecake Day falls in the summertime is a bit odd to me.  That thick, tangy lusciousness somehow belongs during a time when you're not trying to eat light (and kill it in a bathing suit...).  BUT I recently tried a Japanese cheesecake, which is also called a Cotton cheesecake (because of how light and fluffy it is).  Think if an angel food cake and a cheesecake had a baby....Turns out, this crustless, spongy creation is the perfect summer dessert.

I set out to create a simplified version of it because summer desserts should be a bit easy.  I wanted a canvas, a simple cake, to showcase seasonal ingredients as its topping.  This cake is 5 ingredients, and the hardest step is just whipping the egg whites to stiff peaks and folding into the batter.  Other than that, foolproof!  I used yuzu juice as the acid in keeping with the Japanese theme and because it has a touch of salinity, which I looooove, but lemon juice or even key lime juice would be a great substitute.

When I’m indecisive about a topping for my cheesecake, my favorite go to is a whipped sour cream topping.  The tangy tartness of the sour cream with the bite of the creamy, sweet cheesecake is one of the more surprising taste combinations.  Who would have thought sour cream with cheesecake would be a thing!?  And it’s super simple to make.  For a more basic recipe I use sour cream, confectioner’s sugar and vanilla extract.  Just throw it all into the Kitchenaid and whip 'til smooth or whisk in a bowl if you don’t like lugging out your stand mixer. 

There were so many blueberries at my Saturday's farmers' market, so I thought I would test out a blueberry sauce with my cheesecake.  This recipe combines the blueberries with one of my favorite herbs, lemon verbena.  It’s a super simple sauce and starts off like you would a jam.  Instead of letting it boil down til thick, you simply take off the heat and let cool.  I like to steep the lemon verbena in boiling water to really bring out the flavor and then use the water when making the sauce.  In a sauce pan, mix the blueberries, corn starch, and sugar until the blueberries start to release their juices.  Gradually stir in the lemon verbena water and bring to a simmer.  Let cook for 5-10 minutes until desired consistency and some of the berries start to burst.  Turn off heat and let cool to room temperature.

Here's the 5-ingredient cheesecake recipe - enjoy!

Yields (1) 9-inch cake

1 can sweetened condensed milk
8 ounces cream cheese, room temp
6 eggs, room temp and separated
2 ½ tablespoons cornstarch
1 tablespoon yuzu, lemon or key lime juice

Preheat the oven to 350° F.

In a large bowl, whisk together condensed milk and cream cheese.  Fold in yolks, cornstarch and yuzu/lemon juice.

In a separate bowl, whip egg whites to stiff peaks.  Add a little bit of the egg whites to the cream cheese mixture to lighten and then fold in the rest in 3 increments.  Transfer to a greased, parchment-lined 9-inch cake tin or springform pan.  Place in a roasting pan and pour boiling water in the pan to halfway up the cake tin (if using a springform, make sure to wrap in foil all over to keep the water from seeping in.

Bake for 40 minutes.  Then, turn off the oven and leave the cheesecake in the oven for another 15 minutes.  Remove and let cool completely before refrigerating.  Refrigerate at least hours before serving.


tags: cheesecake recipes, japanese cheesecake, easy cheesecake recipe, cotton cheesecake, desserts
categories: all 4, desserts, holiday, quick & easy, recipes, traditions
Wednesday 07.27.16
Posted by Aliya LeeKong
 

Honey Frozen Custard with Cherry-Currant Swirl

ice cream5.jpg
ice cream1.jpg
ice cream2.jpg
ice cream3.jpg
ice cream4.jpg

HONEY FROZEN CUSTARD WITH CHERRY-CURRANT SWIRL

As far as desserts go, I'd be perfectly content to eat ice cream all summer long (and maybe the occasional fruit tart or two)!  It's a past time for my daughter and I to take the walk over to Fort Grace
 in our neighborhood, grab a cone or two (likely with sprinkles) and leisurely stroll back home. 

But I have to admit, as time has gone on and, you know, being a mother and all, I get more and more focused on sourcing my ingredients and trying to make as many treats from scratch as I can.  With the help of a good ice cream maker or an ice cream attachment to your stand mixer, making your own ice cream is really not that tough AND you can control your ingredients - whether for health reasons or simply to tailor to your own tastes.  Not to mention, it's badass.

This is really a frozen custard, not quite ice cream, which is to say it has more yolks than tradition dictates and is a bit higher on the cream side.  The result: luscious, whipped, soft serve-style ice cream that keeps its fluffiness even after freezing for some time.  I used (raw / local) honey to sweeten here, in lieu of sugar, which adds to that silky texture as well.  You could easily use the base to make so many different flavors - I sometimes add cinnamon and toasted pecans to it for a totally different take.

With a glut of cherries and both red and black currants in my house, this sauce was an easy and rewarding way to use them all up!  I didn't even pit the cherries - just threw them all in a pot, knowing I was going to strain away the solids at the end.  If you have pitted cherries, you could easily just blend this mixture up in a good blender for a bit of texture instead of straining, but, remember, you'll probably have a bit more than the recipe calls for.

I love the combination of red fruits and cream - that creamsicle-like flavor, and this tastes AH-MAZING with a bit of chocolate, whether a sauce, some dark chocolate pieces or sprinkles.   Enjoy!

Ingredients

Yields about 2 pints

Frozen Custard Base:

1 cup milk

2 cups heavy cream

½ cup + 2 tablespoons honey

½ teaspoon vanilla extract

1/8 teaspoon salt

6 large egg yolks

Cherry-Currant Swirl:

1 cup red and/or black currants

1 cup cherries, stems removed (pitted or not, doesn’t matter)

2 tablespoons honey

1 tablespoon sherry vinegar

3 tablespoons water

a pinch of salt

For the ice cream base:  In a medium saucepan, bring milk, heavy cream, honey, vanilla and salt up to a simmer and remove from the heat.  Whisk the egg yolks in a heatproof mixing bowl.  Temper the yolks by adding a little of the milk mixture to them and beating in between until a third of the milk mixture has been added.  Return the milk-yolk mixture to the saucepan and place back over low heat.  Cook, stirring frequently, until the mixture thickens and coats the back of a spoon.  Strain and cool completely in the fridge (4 to 8 hours).

For the cherry-currant swirl:  Heat the currants and cherries with the honey, vinegar, water and salt over medium heat.  Simmer covered for 5 minutes until the fruit breaks down and then simmer uncovered another 4 to 5 minutes until the juice thickens.  Strain through a fine mesh strainer, pressing against the solids until all of the juice is through.  Cool completely (and it will continue to thicken as it cools) in the fridge.

To finish: Pour ice cream base into an ice cream maker or ice cream stand mixer attachment and process according to the manufacturer’s directions.  It usually takes about 25 to 30 minutes.  Transfer half of the ice cream into a container.  Pour half of the currant-cherry mixture on top and use a knife or small offset spatula to form swirls.  Repeat with the other half of the ice cream and sauce on top.

Serve immediately soft serve-style or freeze to firm it up a bit (will still be fluffy and soft) with or without sprinkles!

tags: ice cream recipe, frozen custard recipe, how to make ice cream, honey ice cream, swirl ice cream recipe
categories: all 4, blog, desserts, recipes
Wednesday 07.13.16
Posted by Aliya LeeKong
 

Summer = Fish Tacos

SUMMER = FISH TACOS

I. Love. Tacos.  Tacos are the ultimate - easy food with literally endless combinations.  Summer is all about simplicity and lightness, so my favorite by far this time of year are fish tacos.  From grilled red snapper to lightly breaded mahi mahi or a nice “meaty” grilled swordfish, there’s nothing better for an easy weeknight meal (or for entertaining).  The hardest part is deciding on toppings!

The Baha-style, fried ones here took no time to whip up.  I never use a recipe, so I'm just going to tell you what I do.  For 4-6 people, take a 1 ¼ - 1 ½ lbs flaky white fish (snapper, mahi mahi, grouper, etc) and portion into strips.  Basicallly, make sure the size of the fish strip fits into your taco as one or two strips.  Divide a cup of flour evenly between two bowls.  Season one of the bowls with salt, pepper, paprika and any other powdered spices you like until it tastes good.  To the other bowl, whisk in beer until it has the consistency of wet paint. 

Dip the fish strips first into the flour bowl, shake off excess and dip into the beer batter.  Let any extra drip off and fry in about an inch to an inch and a half of oil (at 350° F) until golden brown (generally 3-5 minutes).  Transfer pieces to a paper towel-lined plate and sprinkle with some salt.  Make sure to fry in batches and not crowd the pan too much.

In terms of toppings, the combination for my lamb tacos are my go to, especially the chipotle crema, but, here, I just used some pickled shallot, cabbage, fresh chile, green onion, and cilantro.  My sauce was a smoked habanero crema (mayo/crema + smoked habanero sauce), but you can literally stir together mayo/crema/crème fraiche with any hot sauce you like until it tastes good. 

Since it's summer, my smoked peach chutney is another topping that would be ridiculous on some fish tacos.  The sweet, smokey flavors of the peach pairs perfectly with any fish dish.  Or you can do a simple pico de gallo (diced tomatoes, red onion, cilantro, jalapeño and lime juice), super easy and refreshing. 

Feel free to use soft or hard tacos.  I'm partial to corn tortillas myself.  Enjoy!


tags: fish tacos, how to make fish tacos, Baha-style fish tacos, baha fish taco recipe
categories: all 4, lifestyle-1, main dishes, quick & easy, recipes, traditions
Wednesday 07.06.16
Posted by Aliya LeeKong
 

July 4th BBQ Sides

JULY 4TH BBQ SIDES

The last thing I want to do on a hot summer day is turn my oven on - I’m sure you all understand!  When entertaining on a gorgeous summer day, I like to keep my sides simple and easy to toss together so I'm not stuck in the kitchen all afternoon while my guests are enjoying the outdoors.  With July 4th creeping up this weekend, I’ve gathered a few ideas that may make an appearance at my BBQ this weekend.  Enjoy!


6-INGREDIENT CORN SALAD


KOREAN POTATO SALAD (GAMJA SALAD)

Photo: Two Red Bowls


NASI ULAM (MALAYSIAN MIXED HERB RICE)

Photo: Rasa Malaysia


SOUTH AFRICAN CHAKALAKA

Photo: Immaculate Bites


FREEKEH WITH SUMMER SQUASH AND BROWN BUTTER


TAHINI ROASTED (OR GRILLED) BROCCOLI


ROASTED CUMIN CARROT, RADISH & AVOCADO SALAD

Photo: Salt & Wind

tags: bbq sides, july 4th sides, global bbq sides
categories: all 4, blog, holiday, lifestyle-1, side dishes-1
Wednesday 06.29.16
Posted by Aliya LeeKong
 

Summer Fruit Tart Addiction

SUMMER FRUIT TART ADDICTION

Honestly, summer is my favorite time of year...I love when the weather turns warm and days (and daylight!) so long; attitudes feel more carefree and New York City comes alive.  The farmer's markets are always flush with fruits and vegetables, and, this weekend, it was overflowing with all sorts of berries (raspberries, blueberries, gooseberries, cherries, currants & strawberries). To me, this just signifies the official start of summer, and, if you follow my IG you'll know this to be true, I invariably have some form of a fruit tart on my counter throughout this time.  I wanted to share with you some go-to's - easy options so you can freestyle your own tarts this summer.


CRUSTS

I have 3 go-to crusts that I use depending on my mood, if I plan to bake the filling and who I’m hosting! 

(1) I love a classic, homemade tart dough (recipe: here).  I keep mine a bit low on the sugar, so I can use it for sweet and savoury crusts.  Doubling the recipe is key and allows you to freeze some to have for later.   This is a great dough to use for both a filling you have to cook or one you don't have to cook.

(2) Of course, already-made and frozen puff pastry is another way to go.  Who doesn’t love that flakey, buttery crust? Mixed with a layer of pastry cream and fresh fruit....This is what I use for my South African Milk Tart (pictured below).  I like to do an initial blind-bake and then fill - this weights it down so it doesn't puff too much.

(3) My third is for my gluten-free friends - a super easy, gluten-free pecan crust. 

You take 1 ½ cups raw pecans and pulse in a food processor until chopped.  Throw in 2 tablespoons unsalted, melted butter, 1 tablespoon honey,  ¼ teaspoon salt, ½ teaspoon ground cinnamon, and 1 egg white and pulse until a fine meal.  It will be a bit wet.  Press into a tart shell and bake at 375° F for 15 minutes.  Done.


CUSTARD FILLING

(1) Baked custard - One of my favorite tarts is this South African Milk Tart.  The creaminess of the cooked custard filling with the berries on top……sooo good.  It's not too egg-y and has a hint of cinnamon.  I love that the beaten egg whites also lighten the custard.

(2) Stovetop custard - I also love to make a quick stovetop custard (or pastry cream) instead of the baked custard in the milk tart recipe.  All you need is some sugar, eggs yolks, corn starch, vanilla bean and milk!  Ok, so sometimes I substitute the milk for Champagne or a nice Prosecco….  The process is simple:

In a medium pot, simmer 2 cups milk with a vanilla bean cut in half and seeds scraped out in to milk and remove from the heat. 

Separately, bring a pot of water to boil for your double boiler. In a metal bowl, whisk 4 egg yolks with 1/3 cup sugar until the mixture is a nice pale yellow.  Add ¼ cup cornstarch and whisk away any lumps.  Slowly stir in the warmed milk mixture and fit the bowl over the boiling water (without letting it touch the water) and constantly stir until the consistency starts to thicken. 

Remove from heat and cover the top directly with plastic wrap and let come to room temp before using.  You can also whip some cream and fold into this pastry cream to make it lighter.

(3) No-cook cream filling - A final option is to make a no cook cream filling and keep the tart refrigerated.  This is a bit like a lightened panna cotta.  Bloom 1 teaspoon gelatin in 2 tablespoons cold water.  Whip 1 cup heavy cream to soft peaks with 2 tablespoons regular or coconut sugar (you can make this sweeter if you like. taste and adjust).  Add in 1 teaspoon vanilla and fold in 4 ounces of mascarpone cheese.  Quickly blast the gelatin-water mixture in the microwave for 5 seconds or so until it's melted and fold that into the cream mixture as well.  It sets up very quickly in the fridge - just make sure to use it in a completely cooled tart or it will melt away!


FILL AND ASSEMBLY

Unless you are baking your custard, the tart shells should be blind-baked and cooled before you assemble.

Now, in terms of what goes on top, this is the time for you to experiment and be creative.  Seriously, whatever is the sweetest and in season works, and experiment to see how you like to arrange your fruits.  I looove cape gooseberries, but apricots and strawberries pair so well together.  It will all go!

If you want some extra sheen, microwave a bit of apricot preserves and paint the fruit with it.  You can also just simply sift a bit of powdered sugar too - up to you....

Enjoy!


tags: summer fruits, how to make a fruit tart, summer fruit tart recipe
categories: all 4, blog, desserts, holiday, lifestyle-1, recipes
Wednesday 06.22.16
Posted by Aliya LeeKong
 

FATHER'S DAY GRILLING

FATHER'S DAY GRILLING

Father's Day falls in such a sweet spot of the year - the weather is always perfect and who doesn’t love a little family gathering outside!?  My plan to celebrate this weekend will be an afternoon of easy grilling - I can't go wrong keeping it a lil' meat-centric.  :) Below are some great grilling recipes to give you some ideas for this weekend.  Enjoy!


GRILLED BUTTERFLIED CHICKEN WITH CHARRED JALAPENO SAUCE


GRILLED LAMB SIRLOIN TACOS WITH CORN, PICKLED CHERRY PEPPERS AND CHIPOTLE CREMA


SALT & PEPPER BABYBACK RIBS

Photo: Food52


GRILLED PORK BANH MI

Photo: Food & Wine


GRILLED SHRIMP WITH KIMCHI-MISO BUTTER

Photo: Rasa Malaysia


GRILLED AVOCADO SALAD WITH GREEN GODDESS DRESSING

Photo: Salt & Wind


CORN WITH GREEN CHILI BUTTER & COCONUT


TAHINI OREOS

Photo: My Name is Yeh


RUM SWIZZLE

Photo: Bon Appetit

tags: father's day, what to cook for father's day, grilling ideas, what to grill for father's day, father's day brunch
categories: all 4, blog, lifestyle-1, man-friendly, recipes, salads, side dishes-1, soups & salads, main dishes-1
Wednesday 06.15.16
Posted by Aliya LeeKong
 

Strawberry Season, a Pickle, & a Jam!

STRAWBERRY SEASON, A PICKLE & A JAM!

Well….it took forever, but it has finally arrived: strawberry season.  This little window only lasts about a month up here, and I try to get out to the fields to pick my own, when possible.  Right now, I have literally the sweetest strawberries I've ever tasted sitting in the fridge.  They are so good, just by themselves, but if you’re like me (and get a bit overly excited about berry picking...), you end up with strawberry overload!

I decided to mess around with some flavors for a new strawberry jam using some fresh basil from my garden and a vanilla bean.  Strawberries and basil are a match literally made in heaven.  I don't prefer my jam overly sweet, so I just add sugar (unrefined) until it tastes like it’s enough.  There isn't a specific recipe because, of course, it depends how many strawberries you have left, but here are a few guidelines: (1) Clean and quarter berries and let them heat up in a saucepan with a couple tablespoons of lemon juice until they start to release their liquid.  (2) Once there is some liquid in the pan, add the sugar, basil and a vanilla bean and then let it all simmer until it thickens.  Remember, when it cools, it will thicken up a bit more.  (3) Use the stems from the basil (cause that’s where all the flavor is) and wrap them in a cheesecloth sachet.  You can also tear up or chiffonade the leaves and add them to the strawberries.  (4) Add some pectin powder if you like, to speed up this process.  Ultimately, you can cool and use right away or transfer to sterilized jars and vacuum seal for later.

This year, I also wanted to experiment pickling green strawberries.  It’s a different kind of pickling liquid then you might think - less vinegar, a little more sugar and a lot of flavor!  The green strawberries turn a bit sweet, slightly tart and still retain a nice bite.  These pickled strawberry makes them a perfect addition to any summer salad or cheese plate.  Enjoy!

Photo: We You They Ate

Pickled Green Strawberries
Yields 2 pint jars

2 pints green strawberries, cleaned and hulled (cut in half or sliced, if you like)

1 cup water

½ cup rice wine vinegar

2 ½ tablespoons sugar

1 tablespoon honey

2 teaspoons kosher salt

1 ½ tablespoons coriander seeds

1 tablespoon black peppercorns

4 Kaffir lime leaves

2 (1" x ½") pieces lime rind


Divide the strawberries between the two mason jars and set aside. 

In a saucepan over medium heat, bring the rest of the ingredients to a simmer until the all of the sugar, salt and honey has dissolved.  Let cool to room temperature before pouring into the jars with the strawberries.  Let sit in the fridge over night for the best flavor.


tags: strawberries, strawberry recipes, pickled green strawberries, strawberry jam, how to pickle strawberries
categories: all 4, condiments, lifestyle-1, quick & easy, recipes, side dishes-1, vegetarian-2
Wednesday 06.08.16
Posted by Aliya LeeKong
 

Red Snapper with Lemon, Onions, Mustard & Habañero (Poisson Yassa)

View fullsize fish1_edited-2.jpg
View fullsize fish3.jpg
View fullsize fish2.jpg

RED SNAPPER WITH LEMON, ONIONS, MUSTARD & HABAÑERO (POISSON YASSA)

Summer has officially begun, and with that, besides grilling it up, I like to go a bit lighter.  This recipe is for a Senegalese-inspired fish, poisson yassa.  Fish (here, I used snapper) is marinated with onions, garlic, lemon, bay, mustard and habañero pepper.  After a quick sear of the fish and sauté of the onion mixture, it's all placed in the oven to bake and for the flavors to mingle. 

The flavor is so amazing - with the sweetness of the caramelized onions, the tart bite of the mustard and lemon, and the heat from the habañero.  I love that this preparation can also be used for chicken and lamb with obvious changes to cooking times.  Enjoy!

Serves 4

4 white onions, thinly sliced

5 garlic cloves, minced

Juice and zest of 2 lemons

1 habañero pepper, seeded, ribbed and thinly sliced

¼ cup canola or olive oil, plus more for cooking

¼ cup cider vinegar

1 ½ tablespoons Dijon mustard

1 tablespoons soy sauce

1 bay leaf, fresh or dried

4 filets red snapper (1 ½ - 2 lbs)

salt and freshly ground pepper

2 tablespoons unsalted butter

Handful of fresh herbs, finely chopped (parsley, chives, cilantro)

In a bowl, mix together the onions, garlic, lemon juice and zest, habañero pepper, oil, vinegar, mustard, soy and bay leaf.  This is the marinade for the fish.  Transfer to a plastic bag or baking dish and make sure the fish is thoroughly coated.  Marinate for a minimum of 30 minutes but preferably a few hours.

Preheat oven to 350° F.

Remove filets from the marinade (reserving the marinade), dry off and season with salt and pepper.

In a large cast iron skillet, heat enough oil to coat the bottom of the pan along with the butter over medium-high heat.  When hot, add the snapper skin-side down.  Cook for 3 minutes and remove to a plate (skin-side up).

Add the onion marinade mixture (juices and all!) to the skillet, reduce the heat slightly and cook for 6-8 minutes until the onions start to soften.  Remove from the heat, nestle the snapper filets in the onion mixture, cover with foil and transfer to the oven for 15 minutes.

Garnish with fresh herbs before serving.  It's traditionally served over rice, but I also love it with some crusty bread.


tags: fish recipe, poisson yassa, senegalese food, african cooking
categories: all 4, blog, main dishes, man-friendly, quick & easy, recipes, traditions
Wednesday 06.01.16
Posted by Aliya LeeKong
 

Essential Grilling Tips to Kick Off the Summer!

ESSENTIAL GRILLING TIPS TO KICK OFF THE SUMMER!

With the weather finally starting to warm up and the days getting longer, I can't wait to clean off my back porch and get my grill set up!  There’s nothing better than a little summer get-together with fresh salads, cocktails and grilled meats or fish.  I put together a few tips to help guide you through an easy grilling season...


CHARCOAL VS. GAS

This is the debate that sparks up at every BBQ get-together!  There aren't any real health differences cooking with either one, so it really just comes down to taste and preference.  Charcoal will give you more of a richer, smokier flavor whereas gas is a lot faster and a little less expensive to maintain.

I am partial to charcoal - the smoky flavor you get is so incredible, and for me, being close to the cooking process (thinking about heat and being intuitive about done-ness) is something I just love.  To start a charcoal grill, use a chimney, which makes it super easy to get the coals hot and ready to use.  Place paper or starter briquets on the underside of the chimney and then fill with charcoal.  Light the paper/briquets and let the coals catch fire, which should take around 20-25 minutes.  Dump out the charcoals into the grill when they have turned an ashy gray.  I'm not much for lighter fluid, so this is my favorite way. 


MAINTAINING YOUR GRILL

You want to oil the cold grates prior to grilling with a rag or paper towel.  This is basically the same as maintaining your cast iron pans at home - seasoning the grates will help to make the grill non-stick.

Also, always preheat the grill, and clean the grill while it is still hot before and after cooking.  The grill should be so hot that you can't keep your hand above it for more than 2 seconds. 


READY TO GRILL

A few points:

(1) Always let your meat come up to room temperature before grilling for a good 20-30 minutes.  This makes sure that your meat will cook evenly on the grill. 

(2) Season with spices or marinade overnight for the best flavor, but even a quick grill rub right before cooking makes for great flavor.  If you're using a marinade, make sure to pat the meat dry before cooking. 

(3) Save the basting of sauces towards the end of cooking so that they don’t burn the foods.  Most basting sauces contain brown sugar, tomato sauce, soy and other sugary ingredients that will char the meat before it is finished cooking. 

(4) Tongs and spatulas are the best tools to use when handling meat; never a grill fork as it releases all those good juices when you pierce the meat to turn.


LET'S GET COOKIN'!

The hardest thing to do while cooking?  Don’t touch the meat!  Let it sear and get those beautiful grill marks.  The meat will let you know when it is ready to be turned.  If you pick up the meat too early, it will stick to the grates.  After cooking, let the meat rest (about 5-15 minutes).  This way the juices will re-distribute.  If you cut into it right away, all the juices will flow out leaving you with a dry cut of meat. 

Using a meat thermometer is helpful, especially if you're grilling poultry.  I actually judge by the touch when I'm grilling red meat.  Use the skin on your hand between your thumb and your pointer finger as a guide.  The first pinch between the two fingers is soft and spongy – rare, ¼” back is a little spongy but springs back – medium, ½” back is firmer – well done.


GREAT GRILL ACCESSORIES

Photo: Sur La Table

Salt blocks are made from Himalayan salt, and they impart a subtle saltiness to foods and can be used directly on the grill. 


Photo: Amazon

Grill baskets are great for those foods that fall through the grates like asparagus, shrimp, onions etc…I love this one because I'm always cooking for a group and it's on the larger size.

Photo: Emile Henry

Pizza stones are amazing for making fresh pizza at home.  You can even stop by your local pizza place and ask to buy dough if you don’t have time to make your own.  This is actually what I own, and it works on the grill and in the oven.  What I love about this one is that you can cut directly on it making serving up that grilled pizza all the easier.


Photo: William Sonoma

Cedar planks & alder wood are amazing for grilling fish.  Not only do they keep the delicate fish from falling through the grates, they also infuse the fish with a rich, smokey flavor depending on the type of wood.  If you can find alder wood, the flavor is amazing!

tags: grilling tips, how to grill, grilling for memorial day, summer grill essentials
categories: all 4, blog, lifestyle-1, quick & easy, man-friendly
Monday 05.23.16
Posted by Aliya LeeKong
 

All About Crab Season + Crispy Spiced Crab Cakes

ALL ABOUT CRAB SEASON + CRISPY SPICED CRAB CAKES


I’ve previously expressed my undying love for crabs with this delicious recipe , and I just wanted to re-emphasize this love (ok…obsession!)  with the fact that soft shell crab season is just around the corner.  Crab is one of those delicate ingredients, sweet and flaky,  but can take on so many different preparations - deep-frying, pan-frying, baking, boiling, in a salad, soup, pasta, or rice dish.  For me, the marriage of crab with spices and butter is absolute heaven!!

Here are a bunch of crab recipes to experiment with along with my favorite, crispy, spiced crab cakes!


SOFT SHELL CRAB WITH CURRY BUTTER


Photo: NYTimes

Even though we are able to have crabs all year round, the soft shell crab is one of the varieties that has a true farming season (mid May - September, depending on the temperatures of the water).  During this time, the blue crab is molting its shell in order to grow in to a new, larger one.  When the crab loses (pretty much ejects itself from) its shell, they have to be taken out of the water immediately and harvested before they begin to grow their new, hard shell…you know the one that takes forever to crush and get to the juicy, delicious meat.  

As with most shellfish, it’s best to purchase live and take home immediately. Taking home a lobster and throwing in a pot of boiling water, or (gasp) sticking a knife in the head before throwing in said boiling water is a whole lot easier (in the sense of being humane and having less guilt) than cutting off the face of the soft shell crab, ripping out the gills from behind the face and then removing the apron on the underside of the crab….you tell me!  But, if you are adventurous in your cooking and you choose to tackle this task, this is a great step by step for cleaning them at home (and good luck to you, I will continue to have my local fishmonger clean them for me…thanks!).


SINGAPOREAN BLACK PEPPER SNOW CRAB

Photo: Saveur

I will never forget when I was vacationing in Hawaii having dinner at this completely ordinary looking restaurant and ordering a variety of sushi, one of which was a crab roll.  Crab roll - what comes to mind? The fake crab meat that's good...but not great.  When the food arrived, the crab roll was ridiculous, not to mention all the other sushi!  I’m talking fresh, amazing, shredded snow crab meat explosion wrapped in seaweed.  My mouth is watering just thinking about this meal again.  If you have the chance to experience fresh, just caught snow crab you should definitely jump at the chance.  This recipe is a delicious, simple way to enjoy the legs as well.


TRINIDAD CALLALOO WITH CRAB

Photo: Caribbean Pot


CRACKED DUNGENESS CRAB WITH LEMONGRASS, BLACK PEPPER & BASIL
 

Photo: My Recipes

Unfortunately, due to this crazy weather we have been having this year (thanks El Nino), Dungeness crab season has had a late start on the West coast.  The season finally kicked off at the end of March and ends in June. I love the sweetness of this crab meat - it complements different flavors so well and also is just perfect on its own with a bit of drawn butter.


STONE CRABS

Stone crabs are one of my favorite types, and especially since I found out how they are harvested.  The crabs are caught and one claw is removed and then the bodies thrown back in the water to regrow their claws (allowing it to have one to fend off predators).  How amazing!  As with most crab legs, these are great just steamed with a great mustard sauce or clarified butter.


CRAB CAKES WITH MUSTARD SEEDS & PARSNIPS

Serves 4-6; Yields 15 to 16 crab cakes

1 medium parsnip, peeled and cut into a medium dice

2-3 tablespoons canola oil plus more for frying

1 teaspoon mustard seeds

8 curry leaves (optional)

1 large shallot, finely minced

1-2 red and/or green chiles, finely chopped (ex. red jalapeno, jalapeno, thai)

3 - 4 garlic cloves

1 pound jumbo lump or lump crabmeat, drained and picked through for any shells

¾ cup breadcrumbs

1 egg, lightly beaten

½ teaspoon salt

¼ teaspoon freshly ground black pepper

handful of fresh herbs (chives, cilantro, parsley), roughly chopped

1 tablespoon unsalted butter for frying

kosher salt to taste

In a medium pot, cover parsnips with cold water by about 1 inch.  Bring up to a boil and cook for 6-8 minutes until fork tender.  Drain and pass through a ricer (best) or mash with a potato masher and let cool. 

While the parsnips are cooking, heat 2 tablespoons of oil in a medium saucepan over medium high heat.  Add mustard seeds and curry leaves if using, and, when they start to pop, reduce the heat to medium-low and add the shallots, chili and garlic.  Saute for 2 to 3 minutes until the shallots are translucent, remove and let cool.

In a medium bowl, combine crab with the pureed parsnips, the shallot mixture, breadcrumbs, egg, salt, pepper and herbs.  Form into 2 ¼ inch patties and let chill in the refrigerator for 15 minutes.

In a large sauté pan, heat 1/8” of oil with 1 tablespoon of butter.  Fry each crab cake 1-2 minutes per side until golden brown and removed to a papertowel-lined plate to drain.

Finish crab cakes with a sprinkle of salt as soon as they are out of the oil and serve hot.

Freezing: These guys freeze really well, and I love to make a double batch to keep some on hand for a quick weeknight meal.  Just let them thaw for a few hours in the fridge before frying up!


tags: soft-shell crab, soft shell crab recipes, how to cook crab, singaporean black pepper crab, crab cake recipe, crab cakes
categories: all 3, appetizers 1, blog, main dishes, quick & easy, recipes
Wednesday 05.18.16
Posted by Aliya LeeKong
 

Mother's Day Breakfast in Bed

MOTHER'S DAY BREAKFAST IN BED

There’s nothing better than enjoying breakfast in bed, especially if you weren’t the one that prepared it!  So why not treat mom this Sunday to a lovely, lazy morning with a deliciously home cooked meal! (Anybody from my house getting the hint?? :)  As a child, this was my favorite way to spoil my mom (with Dad’s help….sometimes).  I put together a bunch of my favorite breakfast/brunch recipes below to help you plan your Mother’s Day feast!


HEIRLOOM TOMATO SHAKSHUKA


FLATBREAD WITH SMOKED TROUT, RADISHES & HERBS

Photo: Bon Appetit


MY FAVORITE CHAI


BLUEBERRY CREPES WITH VANILLA ICE CREAM

Photo: Flourishing Foodie


ROASTED ASPARAGUS WITH POACHED EGG AND LEMON MUSTARD

Photo: Food52


SPICED RICOTTA HOTCAKES WITH POMEGRANATE MOLASSES


BUBBLE TEA OATMEAL (!)

Photo: Two Red Bowls


RHUBARB, RASPBERRY AND ORANGE FLOWER WATER GALETTE

Photo: Cannelle et Vanille


PINEAPPLE COCONUT WATER

Photo: 101 Cookbooks

tags: mother's day, mother's day recipes, mother's day breakfast
categories: all 3, breakfast-1, blog, holiday, lifestyle-1, recipes, traditions
Wednesday 05.04.16
Posted by Aliya LeeKong
 

Smoked Ricotta Gnocchi with Ramps, Favas & Thai Green Curry

View fullsize gnocchi4.jpg
View fullsize gnocchi2.jpg
View fullsize gnocchi1.jpg
View fullsize gnocchi3.jpg

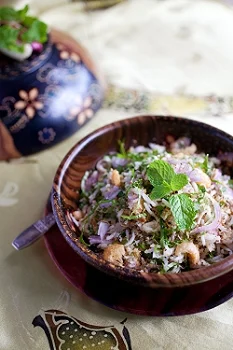
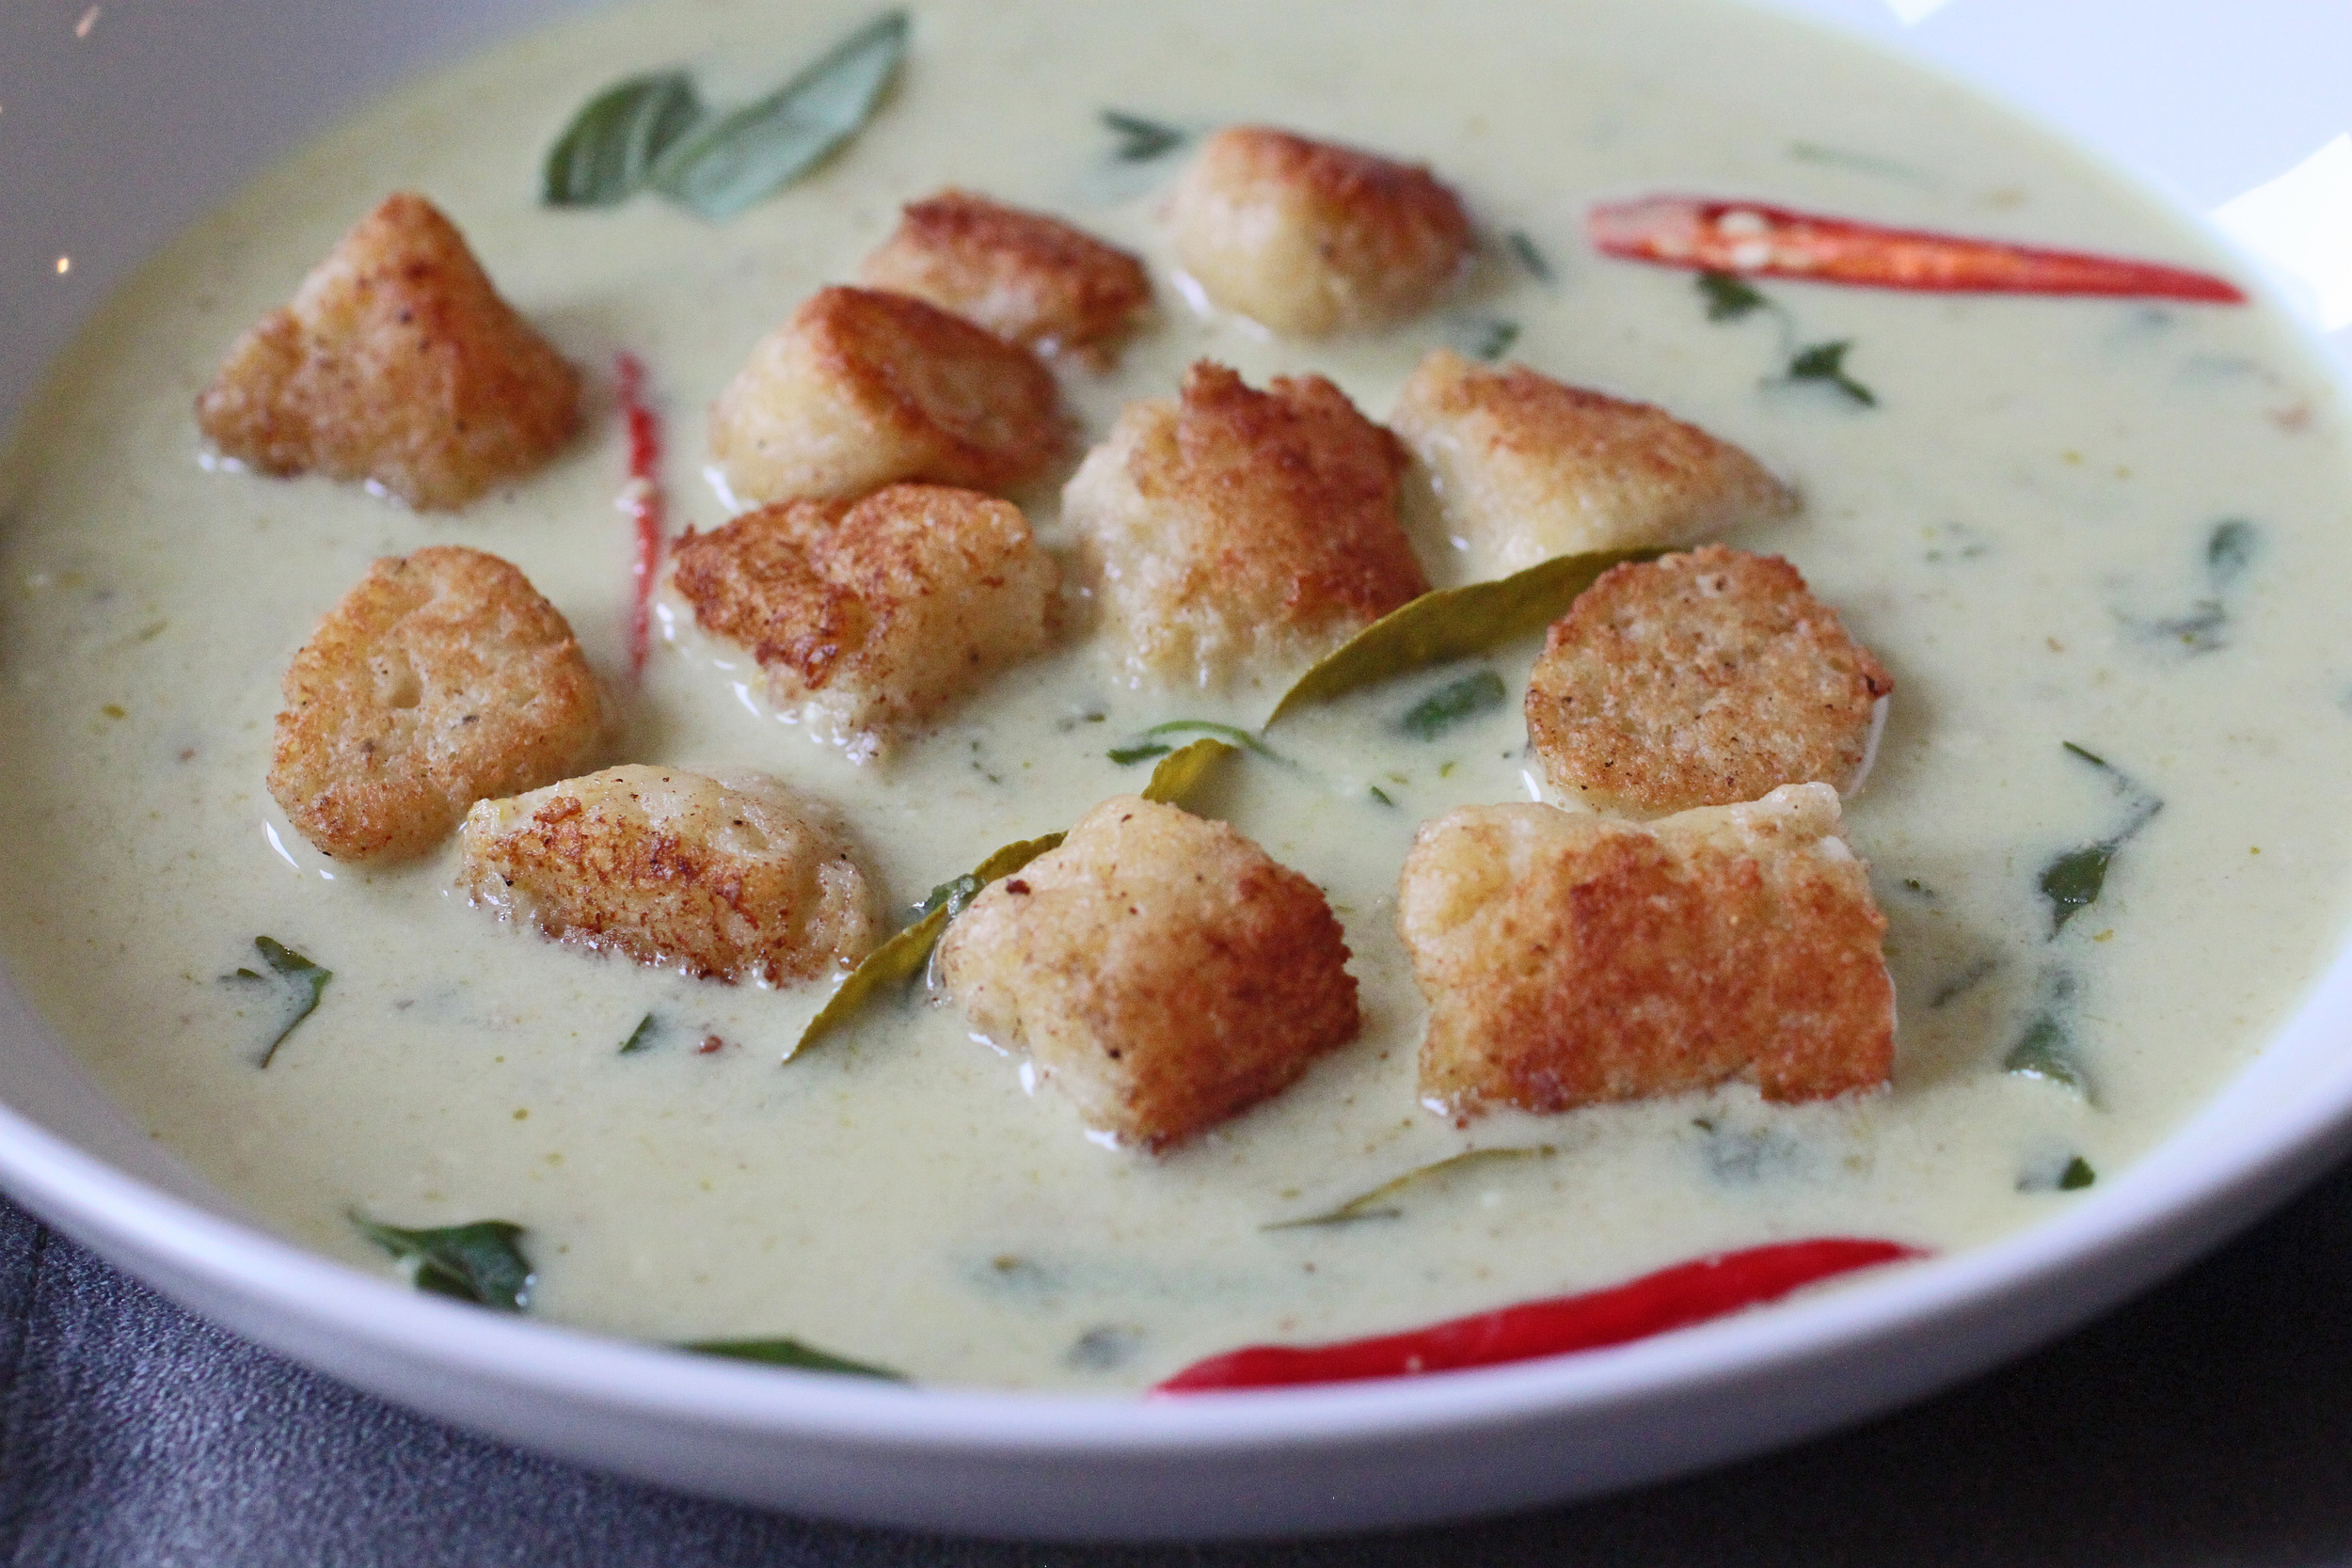
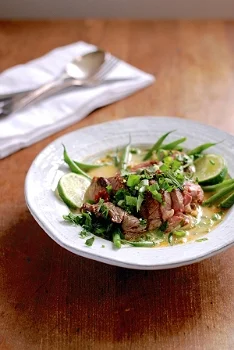
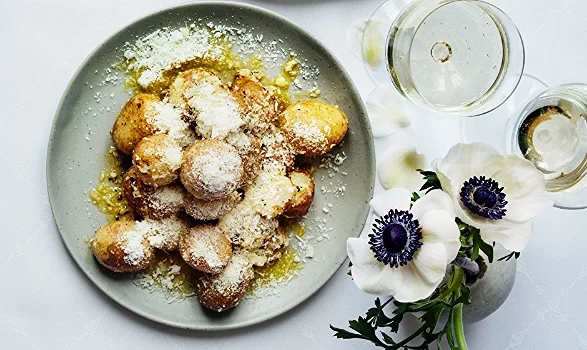
SMOKED RICOTTA GNOCCHI WITH RAMPS, FAVAS & THAI GREEN CURRY

Inspiration can come from anywhere, and this dish started because I bought a tub of smoked ricotta and it loomed in the fridge.  There were some stray egg yolks as well, and I thought about how I could use it all up: a ricotta tart, savoury cheesecake...but ultimately landed on making gnocchi.

When I mentioned it to my girlfriend, she told me a secret her grandma used for her gnocchi, which she said were the ultimate.  Potato flakes!  Instant. Mashed. Potatoes.  And her grandma was a genius!  So in playing around with making the ricotta gnocchi, I added some in, and light, fluffy (without any dough-y taste) gnocchi resulted. 

I also happened to be working on a spring thai curry with ramps and favas and dipped one of the butter-browned gnocchi in because why not.  So this dish!

If you scroll down, you may decide that there is an insane amount of work to make this dish.  But I think what's great is that there are elements to play around with to do from scratch or decide not to:  You can use store-bought gnocchi.  You can make the gnocchi with regular ricotta instead of smoked.  You can just make the curry and throw some fish and shrimp in (which is what I did with the leftover curry!).  You can leave out some of the hard-to-find Thai ingredients and still have an amazing dish.  I've played around with all of these, and it's still damn good.

And this Thai green curry is everything you want in a Thai curry - super spicy (seriously not for the faint of heart) with that beautiful lemongrass-ginger-kaffir lime fragrance and brightness from Thai basil.  And it only takes 10 minutes to make.  So so good...

Enjoy!

Serves 4 to 6

Ingredients

For the gnocchi:

8-ounce container ricotta cheese, preferably whole milk

1 egg yolk

1 egg

½ cups freshly grated Parmesan, plus more for serving

1 ½ tsp kosher salt, plus more

Freshly ground black pepper

1 cup potato flakes

¼ cup "00" or all purpose flour

½ stick unsalted butter

For the curry:

2 cans (13.5 ounces) coconut milk  (full fat)

4 tablespoons Thai green curry paste*

½ cup water

1½ teaspoons palm / coconut sugar or brown sugar

6 kaffir lime leaves

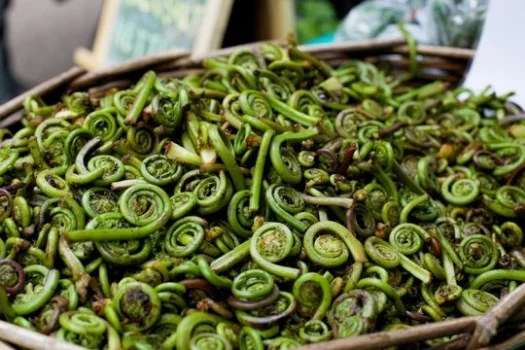
4 ramps, top leaves chopped and bottom stems left in tact (about 1 ½ inches at the bottom)

1 lemongrass stalk, outer leaves removed and inner stalk finely chopped (optional)

½ inch piece of galangal, thinly sliced (optional)

¼ cup fava beans, shelled & peeled

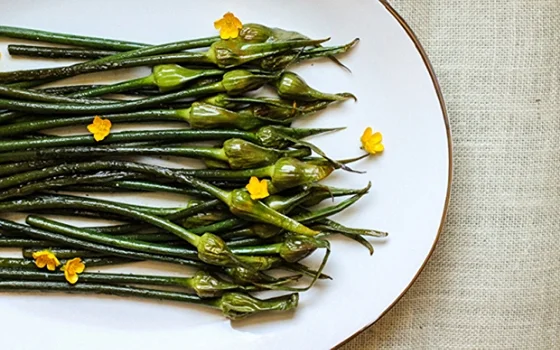
2/3 cup green beans, snipped and halved

1 tbsp fish sauce

Garnishes: handful of chopped fresh cilantro, handful of chopped Thai basil and 4 halved Thai chilies


For the gnocchi:

Set a large pot of water on the fire to bring up to a boil while you are prepping the gnocchi.  Remember to salt the water heavily once it’s up to a boil.

First, you want to dry out the ricotta a bit.  You can drain or just blot your ricotta with paper towels depending on how much moisture it has.

In a bowl, mix together the ricotta, egg yolk, egg, Parmesan, salt and some freshly ground black pepper using a wooden spoon or a spatula.  You want the mixture to be uniform.  Add in the potato flakes and flour and fold until incorporated.

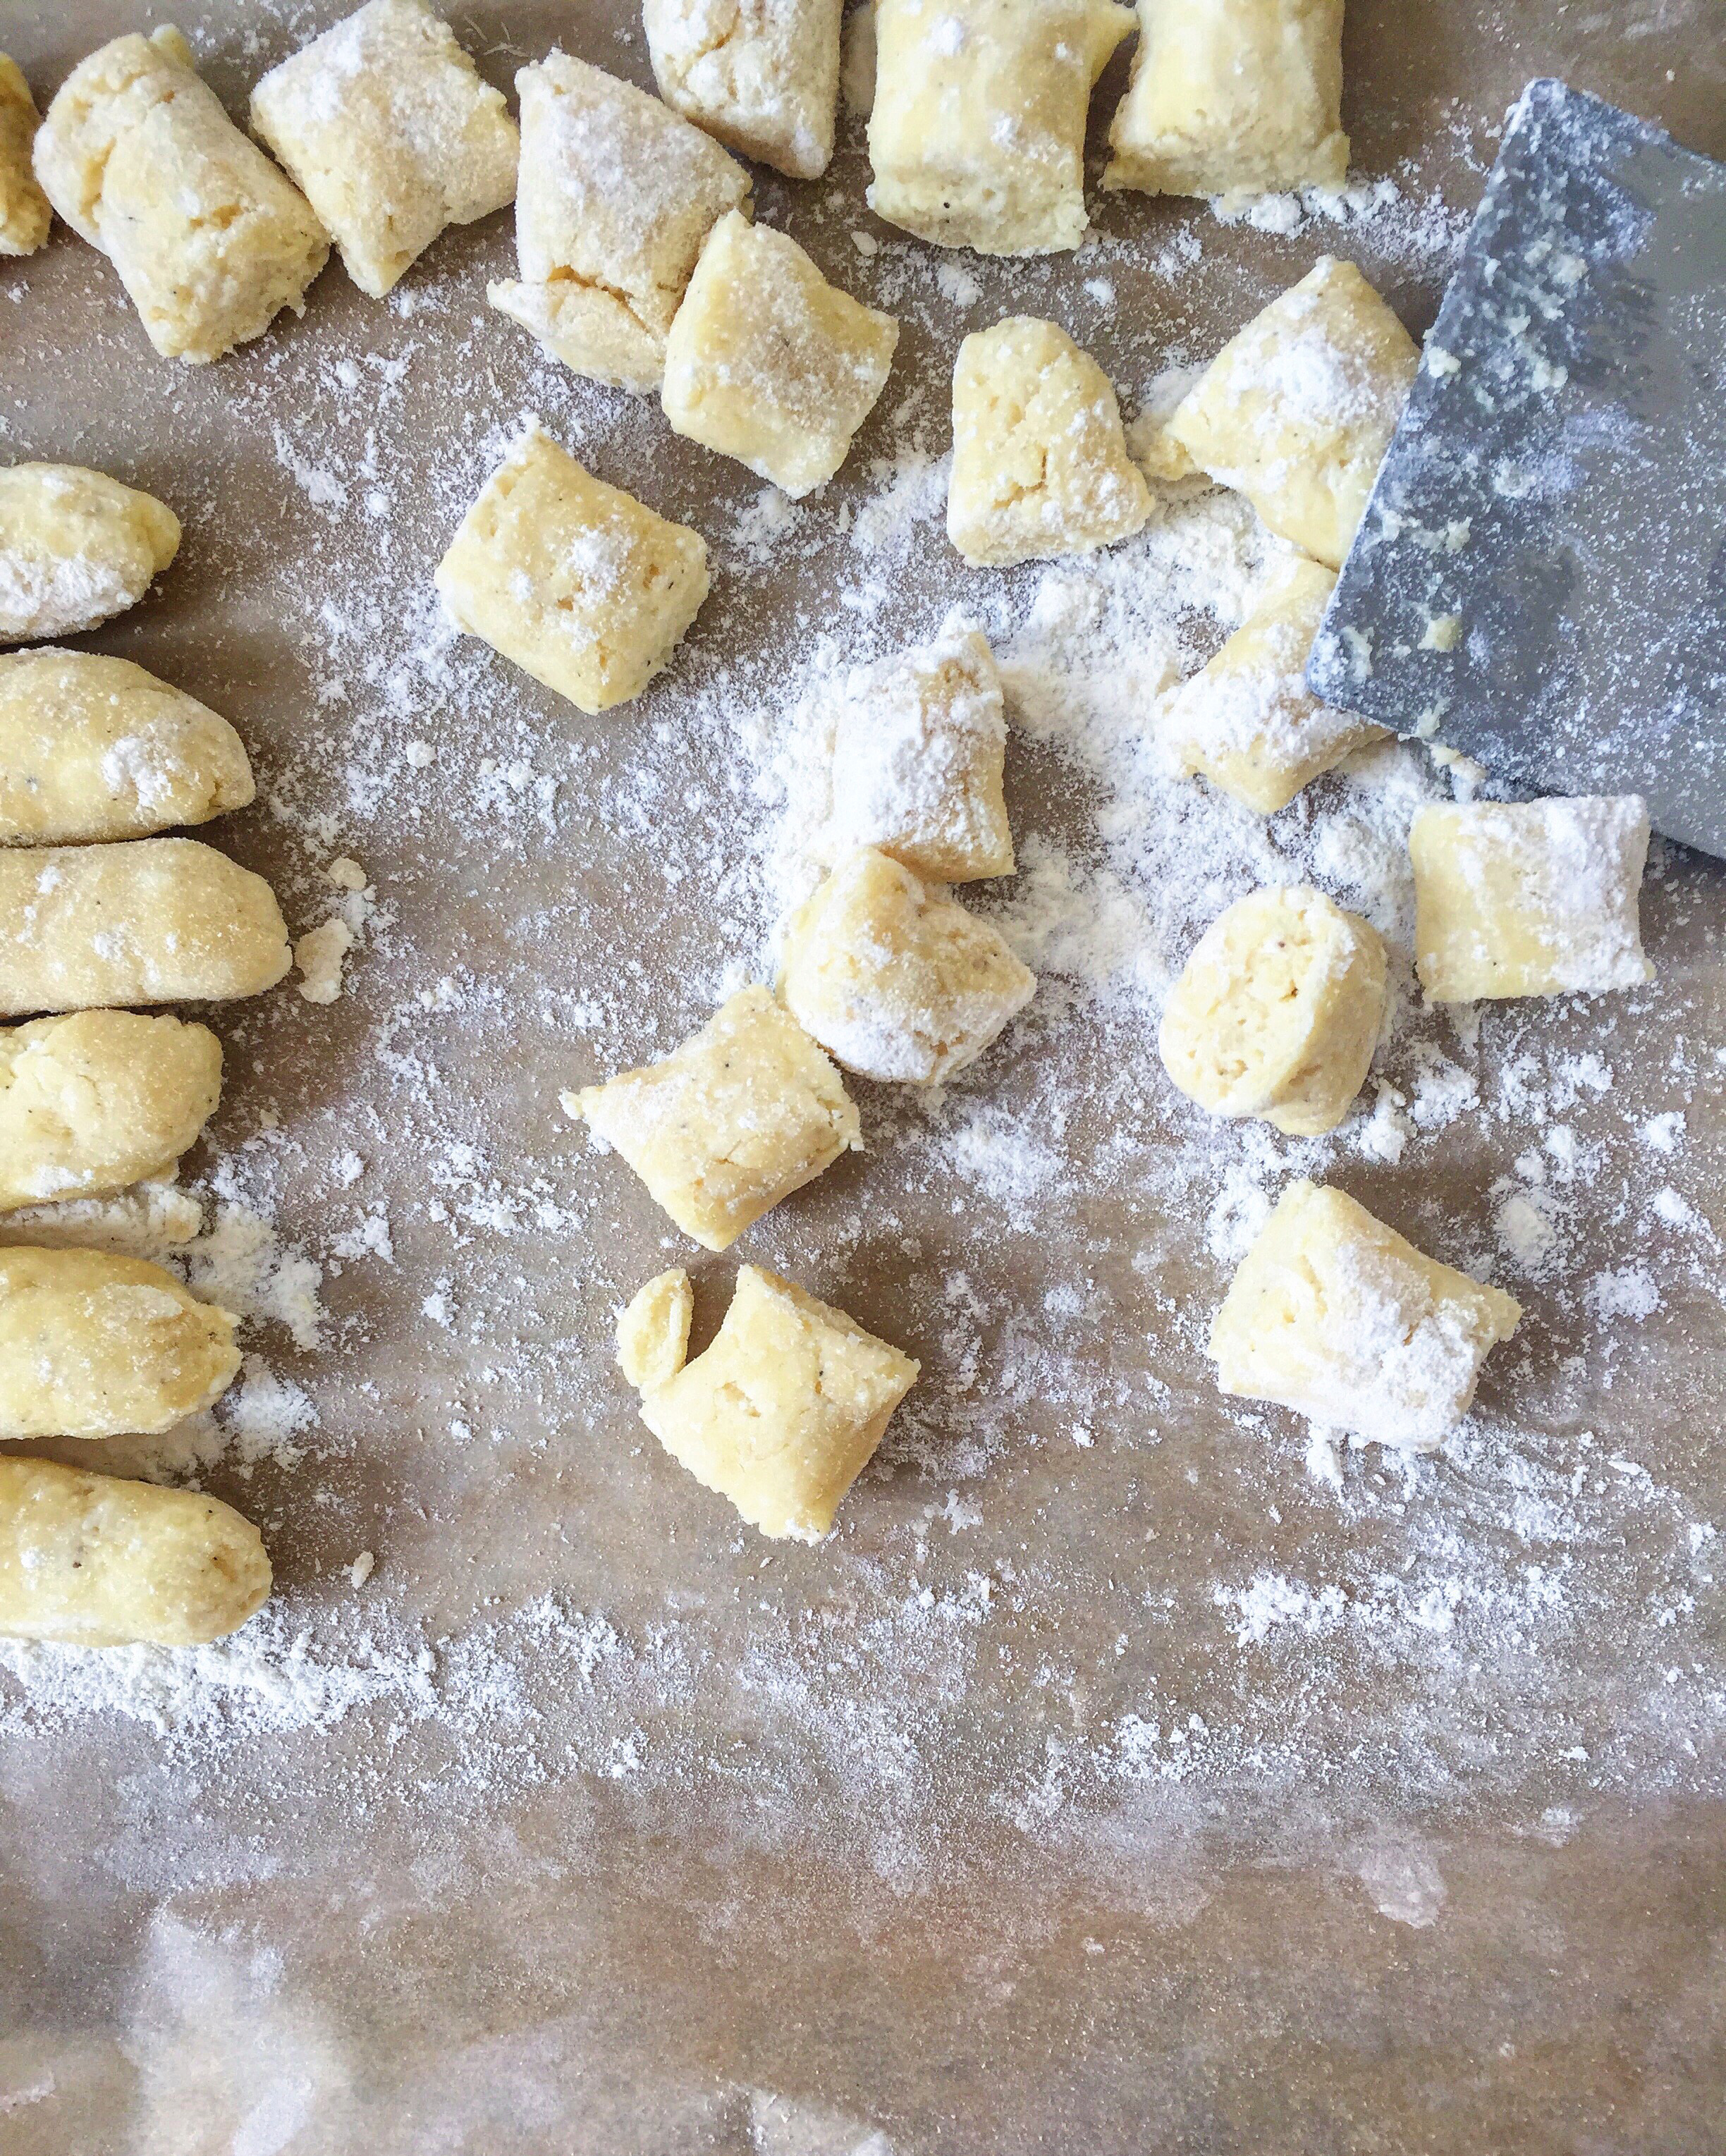
On a floured surface, mold dough into a circular disc.  Cut into 4 quadrants using a pastry cutter or a knife.   Roll each quadrant out into a 12-inch cylinder and then cut into 8 to 10 gnocchi. 

You can cook these right away or freeze to cook later.  If you are freezing to cook later, let them freeze on a floured baking sheet with space in between each gnocchi before putting them in plastic bags.  That way, they won’t stick together.

Add gnocchi gently to the boiling, salted water and cook for about 3 minutes or until the gnocchi float for about 30 seconds.   If you are cooking all of these, I wouldn’t do them all at the same time – break it up into 3 rounds of boiling. 

If you are cooking from frozen, add on an extra minute or two and follow the same rule for floating.

For the curry:

Start with the canned coconut milk.  Don’t shake the cans before using! You want to take the thickened coconut cream from the top of one can and sauté in a medium saucepan.  Saute for about 6 to 8 minutes over medium-high heat until it breaks and looks a bit curdled.  Add the Thai green curry paste and sauté for another 5 minutes.  You want to cook out any rawness in the curry paste.

Add in the remaining coconut milk, water, palm sugar, kaffir lime leaves, ramps, lemongrass and galangal (if using), and bring up to a boil.  Simmer for 5 minutes.

Add in the fava beans and green beans and simmer another 5 minutes.

Remove from the heat, and add in the fish sauce, Thai basil, cilantro and chilies.  Cover and let sit 5 to 10 minutes to infuse.

To serve:

In a skillet, melt the butter until it browns.  Add in the gnocchi and sauté for about 1 minute per side to crispy brown.  Drain on a paper towel-lined plate and sprinkle with a bit of salt.

Spoon the curry into the bowls and top with the gnocchi and extra basil and cilantro, if desired.

*I like Maesri.

tags: how to make gnocchi, ricotta gnocchi recipe, best ricotta gnocchi recipe, thai green curry recipe, spring thai green curry, how to make thai green curry
categories: all 3, appetizers 1, blog, main dishes, man-friendly, recipes, vegetarian
Wednesday 04.27.16
Posted by Aliya LeeKong
 

My Current Faves

MY CURRENT FAVES

Just want to share with you guys a few things I'm loving right now that span the kitchen, body and mind.  Many of these would make great Mother's Day gifts too....Enjoy!


A TEAPOT ALMOST TOO BEAUTIFUL TO DRINK FROM

Babylon Blossoms Goldstar Teapot Large | T2

Babylon Blossoms Goldstar Teapot Large | T2

I wandered into this store on Prince and Crosby in downtown Manhattan and was totally in love with everything.  It was pretty hard for me to pick one image to share here.  They have a beautiful Moroccan-inspired collection of teapots, and I really love the 'tea for one' sets - waaay better than pouring hot water over a bag in a mug.  Their matcha is also incredible; I cook with it.  My mom is definitely getting something from here for Mother's Day!


FOR THE CAKESTAND OBSESSED (ME...)

Walnut Cake Stand | Food52

Walnut Cake Stand | Food52


A FITNESS TRACKER THAT'S ACCESSORY-WORTHY

UP2 by Jawbone

UP2 by Jawbone


ART THAT REFLECTS RACE + CULTURE + IDENTITY

Toyin Ojih Odutola

Toyin Ojih Odutola

Love what this Nigerian-born, America-residing artist is doing.  Definitely checking her out at the Brooklyn museum later this month.


BECAUSE MAKING INFUSED OILS / LIQUORS / VINEGARS IS DOPE

Mason Jar Infuser | William Sonoma

Mason Jar Infuser | William Sonoma


BEAUTIFYING THE WAY YOU SERVE SPICES

Striped Marble Serveware | Anthropologie

Striped Marble Serveware | Anthropologie


SUCCULENTS AS WALL-ART

Set of 2 Trigg Small Wall Vases | CB2

Set of 2 Trigg Small Wall Vases | CB2


GOOD READS

The Queen of the Night

I heard the author speak and read a chapter from the book at a MacDowell event a few weeks back and was transported.  This is what I'm reading at every free moment!

tags: mothers day gifts, holiday gift ideas, Global Kitchen, art
categories: all 3, lifestyle-1
Wednesday 04.20.16
Posted by Aliya LeeKong
 

Wild Spring!

WILD SPRING: FORAGING SPRING'S FIRST ARRIVALS

When you work in a kitchen and the season changes from winter to spring, there is nothing more exciting than seeing all of the spring (green!) produce coming in.  The beginning of spring is all about edibles foraged in the wild, and these are not your every day vegetables that you see year-round in the grocery store.  For me, they are the most delicious part of the season.  I've only seen a few of these at the market this week, but keep an eye out!  They will all pop up soon and have pretty short seasons (less than 2 months).


RAMPS

Ramps, also known as wild leeks, are probably my favorite of the spring foraged greens.  They have a big leafy top and a skinny bottom with a little bulb and a bold garlicky-onion flavor.  The leaves are great sautéed in olive oil with salt and pepper or marinated in olive oil and thrown on the grill.  The bottoms are delicious pickled with a simple pickling liquid.  I recently came across a recipe to use both the stem and greens in a compound butter; what a genius idea to savor the flavor for months to come! 


FIDDLEHEAD FERNS

Photo: The Kitchn

Photo: The Kitchn


Fiddlehead ferns are another early spring, short season veg.  These cute little pinwheels are the beginning of a fern plant.  They are delicious when cooked, but unlike other veggies, you can’t eat them raw.  Treat them as you would asparagus when it comes to eating them on their own (blanching, sautéing, steaming).  They are also great in pasta and rice dishes and are even perfect as a curry.


GARLIC SCAPES

Garlic scapes are the top of the garlic plant that is above ground.  They are harvested from the plant in order to focus all of its energy on the bulb below the surface to produce flavorful garlic.  Scapes have a very mild, garlicky flavor to them and are delicious raw or cooked.  You can substitute them in dishes for scallions or even pickle them like ramps - there are endless ways to cook them.


STINGING NETTLE

Photo: Food52

Photo: Food52

Have you ever touched a plant and had a crazy, stinging pain in your hand as if you had been stung by about 20 fire ants?  I have, while on vacation in England, and it was not fun.  And now this plant, the stinging nettle, has been popping up in menus everywhere making me have flashbacks!  Luckily, the stinging goes away once the plant is cooked, and nettles are delicious (and healthy) when cooked!  Nettles make a great substitute for spinach, are delicious in omelettes and work really well in a pesto! 


SPRING ONIONS


Spring onions are very young onions that are picked before they mature.  They look like scallions but have a more rounded bottom to them.  These onions have a much milder flavor and are delicious eaten both raw or cooked.  They are great tossed in olive oil, salt and pepper and thrown straight on the grill or sauté and add them to any recipe that calls for onions ( think soups, tarts, breads!)  


MORELS

The only non-green edibles on this list are morels, gorgeous mushrooms with a deep earthy and umami flavor.  You want to find ones that are on the firmer side, and deep-cleaning these is a must!  Their crevices hide more dirt than you can imagine, so soaking them in cold, salted water helps draw everything out.  After that, they don't need much though they shouldn't be consumed raw - a little butter-poaching is always delicious or even a quick sauté with some ramps or spring onions.  Butter and cream seem to bring out what's best in this mushroom; this pan butter-fry method is amazing, and I love them in a pasta.


Enjoy!


tags: spring garlic, recipes for spring, how to cook morel mushrooms, garlic scapes, fiddlehead fern recipes
categories: all 3, lifestyle-1, blog
Wednesday 04.13.16
Posted by Aliya LeeKong
 

A Bread Dough You Can Use for Everything

View fullsize Photo Mar 28, 5 47 10 PM.jpg
View fullsize Photo Mar 28, 4 14 47 PM.jpg
View fullsize Photo Apr 03, 12 42 45 PM.jpg
View fullsize Photo Jan 17, 12 27 40 PM.jpg

A BREAD DOUGH YOU CAN USE FOR EVERYTHING

Lately, I've been mildly obsessed with baking my own bread and not just your basic quick bread: the real stuff with yeast and what not.  It always seemed so time-consuming - brioches with 5 steps and 2 rising times, cinnamon buns that proof in the refrigerator overnight, sourdoughs with starters, weighing ingredients, waiting for them to rise....(I hope I haven't talked you out of reading on!)

Well, this recipe is none of those.  It's what I call my "universal" bread dough - a simple bread dough that requires only (1) 45-minute rise and can be used to make everything from soft, buttery, fluffy rolls, to cheese-stuffed buns or even pull-apart bread.  It's weeknight bread.  It's weekend-morning-made-THAT-morning bread.  It's guests-are-about-to-arrive bread.  It's everything.

I'm going to share the basic recipe and then some thoughts for ways to transform it.  I'm still experimenting myself with it...like every few days, so expect some more versions of this on Insta!

Yields 16 rolls

¼ cup lukewarm water

(1) ¾ ounce packet yeast (active dry)

1 cup milk

¼ cup honey

3 tablespoons butter, plus more for greasing and melting

2 teaspoons salt

1 egg, beaten

3 ¾ to 4 cups all purpose or "00" flour*

Flake salt, for sprinkling


I make this recipe in a stand mixer, but you can easily do this by hand.  Start with the lukewarm water in the bowl of the stand mixer and sprinkle the packet of yeast over.  Mix gently to combine and let sit 5 minutes or so while you prepare the other ingredients.

In a medium pot, bring the milk up to a simmer and add the honey, butter and salt.  Simmer for a minute or two, just until the butter melts and remove from the heat.

Add the egg and 3 ¾ cups of flour to the yeast mixture and mix together with a fork.  Slowly pour in the milk mixture, using the fork to make a shaggy dough.  Using the dough hook attachment (or your hands), knead for about 3-4 minutes.  The dough should be soft and a bit tacky but should NOT stick to your hands.  If it's sticky, keep adding flour in tablespoon increments until you have the right, non-sticky consistency.

For rolls, divide the dough into 16 even-sized balls and place in a greased, 9-inch cake tin.  Cover with a kitchen towel and let rise 45 minutes.  Preheat oven to 375˚ F.

After the rise, brush the rolls generously with melted butter and bake for 30 to 35 minutes.  Brush again with butter once out of the oven and sprinkle with a little flake salt.  Enjoy hot!

*For the rolls, I used all purpose flour, but for the savoury buns, I used 00 flour, which yielded a more delicate, fluffier texture.

Some fun options:

(1) Before baking, but after brushing with butter, sprinkle with spices!  Thing za'atar, an everything bagel spice blend (!!), furikake, simple nigella seeds...

(2) To make the savoury buns, roll out the dough into an 18"x12" rectangle and place it in front of you with one of the longer sides near you (a horizontal rectangle).  Mix together a stick of unsalted, room temperature butter with a half packet of softened, Boursin cheese.  You could also use regular cream cheese and then add in your own garlic, roasted garlic, chives, other herbs.  Spread this mixture all over the dough and sprinkle with a bit of salt.  You can also use other cheeses here by themselves or in addition to the cream cheese - mozzarella, a mexican blend....Roll the dough, starting with long side near you to form a cylinder, and then place in the freezer for five to ten minutes to make it easier to cut.  Use a serrated knife and cut the rolls into 1 ½-inch thick rolls.  Place cut side down in the greased tin.  Let rise an hour.  Brush with butter and bake at 375˚ F for closer to 40 minutes, until the buns are uniformly golden brown. 

(3) For pull apart bread, roll into a 6"x14" rectangle and cut into 12 pieces.  Spread the butter / cheese mixture on 11 of the pieces.  Stack layers horizontally in a parchment-lined loaf pan, ending with the non-buttered piece to book-end.  Cover and let rise.  Spread the remaining butter-cheese mixture on top with a sprinkle of salt before baking.  Bake at 375˚ F for closer to 35 to 40 minutes until golden brown.  Cover towards the end of baking if the cheese is browning too much.  (By the way, the photo to the side is a pull-apart cinnamon scone bread, but just wanted to give everyone an idea for what it could look like!)

Enjoy!!


tags: how to make bread, bread dough recipe, cheesy pull apart bread recipe, savory buns recipe, cheese buns recipe
categories: all 3, appetizers 1, breads & cakes, breakfast-1, side dishes-1, vegetarian
Wednesday 04.06.16
Posted by Aliya LeeKong
 

Hello Spring, Goodbye Peak Season Citrus

HELLO SPRING, GOODBYE PEAK SEASON CITRUS

With the arrival of all the fresh spring produce, we often forget the fact that the citrus season is coming to an end.  I mean, you can get lemons, limes, oranges, grapefruit etc. all year round, so why would you miss it?  But the citrus family goes far beyond those 4 common fruits.  Below are a few of my favorites and how I like to preserve them until they are back in season next winter!


MEYER LEMONS

Meyer lemons are a hybrid of a lemon and a mandarin or orange.  These guys are my go-to for salad dressings (and cocktails) because of their sweetness and when I don’t want that acidic, lemon-y taste that a regular lemon gives me.  You can find them in your grocery store in the winter but, lately, they've become more popular and can be found year round in most specialty stores.  They have a more orange tinge to their flesh as opposed to their “parent” the regular yellow lemon and are a bit softer.  Preserving lemons in the traditional, Moroccan style is really easy and adds amazing, bright flavor to recipes.  All you need is a bunch of lemons (Meyer or otherwise), jars and salt!  Although they are traditional in tagines, stews and savoury dishes, a preserved lemon curd is another great use for them.


KUMQUATS

Photo: BBC Good Food

Photo: BBC Good Food

These little, olive-sized fruits are amazing - they are super healthy for you, and I grew up with a kumquat tree in my backyard.  I remember trying them at intervals as they ripened and went from really tart to a floral sweetness.  As opposed to the other citrus fruits, you can pop them in your mouth, peel and all.  The have a lightly sweet, tangy flavor and are packed full of vitamin C and fiber.  These are probably one of my favorite citrus fruits and when I can find them in the stores I buy a bunch to preserve them and make marmalades or chutneys…or both!  


BLOOD ORANGES

These beautiful, blood red-colored oranges are my favorite flavor for fresh squeezed OJ or for the Dominican drink, morir sonando.  They are the primary orange grown in Italy, so you will find many Italian recipes with it as a main ingredient (i.e. ricotta cakes, gelato, Italian soda).  They often have a sweet bite to them but can also be very tart, which makes them perfect for a fresh bite in your salad.  You can preserve them much the same way you do lemons or Meyer lemons or go the chutney/marmalade/curd route, but I also loooove this recipe for orangecello, an orange-y take on limoncello!  It's genius to throw in a vanilla bean.


POMELOS

Photo: Food52

Photo: Food52

Also known as the Chinese grapefruit, these guys are much larger than your average grapefruit; they also have a much milder, sweeter flavor to them as well.  They are native to South and Southeast Asia (I ate my way through them in the form of salads when I was Thailand) and can be found in most asian grocery stores.  They go great in a simple noodle dish, on seafood and are perfect for any citrus-y cocktail.  For these, making a candied peel is a great way to preserve their flavor.


SUMO CITRUS

Photo: The Kitchn

Photo: The Kitchn

I am now addicted to these delicious ‘oranges’, but unfortunately their season just ended! Sumos are a hybrid between a navel orange and a mandarin.  Larger than your average orange, much easier to peel, super sweet and juicy, I haven’t had a bad one yet!  They took 30 years to develop in Japan and were only available in California but they have finally made their way to the East Coast during their short season.  You could add these to any recipe that calls for citrus…..sure.  But every time I buy these in the store I eat them so fast they don’t make it in to my cooking! 


Enjoy!

tags: winter citrus, preserved lemons, how to make preserved lemons, kumquats, pomelos, peak season citrus, marmalade, chutney, orangecello
categories: all 3, blog, lifestyle-1, recipes, traditions
Wednesday 03.30.16
Posted by Aliya LeeKong
 

Link Love: Step Up Your Easter Cooking

LINK LOVE: STEP UP YOUR EASTER COOKING

Easter is such a fun holiday to cook for! With the beginning of Spring, the meal just signifies all the good, fresh food to come!  So, with this in mind, I wanted to share some of the recipes that have been inspiring me this year (because I'm honestly still on the fence for my menu)!  Enjoy!


SLOW ROASTED LAMB PAPPARDELLE WITH GARDEN PEAS & MINT

Photo: What Katie Ate

Photo: What Katie Ate


GRILLED LAMB WITH HARICOT VERT AND COCONUT MILK BROTH

Photo: Brooklyn Supper

Photo: Brooklyn Supper


FRESH HAM WITH HONEY & CLOVES

Photo: Saveur

Photo: Saveur


CACIO E PEPE POTATOES

Photo: Bon Appetit

Photo: Bon Appetit


POTATO LEEK AU GRATIN

Photo: Food52

Photo: Food52


SIMPLY SAUTEED GARLICKY PEA SHOOTS

Photo: A Little Yumminess

Photo: A Little Yumminess


FARRO & ASPARAGUS SALAD WITH SESAME-MISO DRESSING

Photo: Two Red Bowls

Photo: Two Red Bowls


SKY HIGH LEMON MERINGUE PIE

Photo: A Beautiful Mess

Photo: A Beautiful Mess


MOLTEN HALVA LAVA CAKES


KOMBUCHA HOLIDAY PUNCH

Photo: 101 Cookbooks

Photo: 101 Cookbooks

tags: Easter recipes, holiday recipes, what to make for Easter, link love
categories: all 3, appetizers 1, blog, drinks & cocktails, holiday, lifestyle-1, main dishes, man-friendly, recipes, traditions
Wednesday 03.23.16
Posted by Aliya LeeKong
 

How to Make Your Every Day Salad Taste Good

HOW TO MAKE YOUR EVERY DAY SALAD TASTE GOOD

With spring on its way, I’m getting super impatient waiting for the fresh greens and veggies that are about to explode at the farmers' markets.  For me, and I feel like a lot of others, when the weather gets warmer I start to crave lighter, healthier foods.  The thought of a winter pot roast just isn’t doing it for me anymore.  But, truthfully, I'm not the biggest salad person!  I have, however, mastered how to dress up a salad (in a healthy way) to make it more appealing to a big eater like me, combining flavors and textures to make it crave-worthy.  Thought I would share a few of these tips with you guys!


THE BEST MIX-INS

You've got the greens - now what?  I think the perfect salad has a great raw base but works in one or two cooked elements.  Roasted beets and salad always seem to go hand in hand with me; a mixture of golden and red roasted with shallot, garlic, olive oil, fresh thyme and marjoram are the best.  If you aren't a beet fan, roasted sweet potatoes, squash, fennel, cherry tomatoes or asparagus are delicious.  A simple blanching of veggies (cauliflower, broccoli, green beans, etc…) is easy too - bring water to a boil, salt heavily, add veggies for a minute or two max depending on how large the cuts are and then shock the drained veggies in ice water.  You just want to get rid of that raw bite and keep the vibrant colors.  I love to keep blanched veggies in the fridge to throw into salads or even a fried rice....ok, back to salads! :) 


HERB IT UP

Fresh herbs are aromatic, healthy and go a long way in adding flavor with just a light chop and toss in (cilantro, parley, basil, dill, mint!)  There's this one stall at my local market that has amazing micro greens and mustard greens.  I love the spicy bite I get when I have a mixture of mustards greens with my regular green mix….such a great surprise.  Mint and cilantro are my favorite combo though - they just add such brightness and cut some of the bitterness of other greens.


MAKE A KILLER DRESSING

Photo: Teacher-Chef.com

Photo: Teacher-Chef.com

The dressing makes all the difference.  I always have olive oil, sherry vinegar, dijon mustard and lemons on hand.  A super simple vinaigrette and always a hit! 

We don't always think of oils as important, but it can completely change the flavor of a dressing.  Lately, I've been using grapeseed oil for a more milder flavor than EVOO; for me, I find extra virgin gets bitter so easily.  Other great oils are avocado oil (it has a faint aniseed flavor to it), hazelnut oil, walnut, macadamia and, of course, sesame oil.  Infused oils also add great flavor - think rosemary, garlic, and, of course, truffle.

Once you have the base of your vinaigrette figured out you can then add other ingredients to create a creamy dressing without the cream.  Mustard is an incredible emulsifier, the ingredient that makes a dressing thick, but there are so many other things you can add to do that.   My current fave is tossing some roasted shallots and garlic in the blender with dijon, sherry vinegar and grapeseed oil - so tangy and delicious.  Other great ingredients for a creamy dressing without the cream are tahini, miso, yogurt, avocado, and almond butter (or any nut butter, really).  Also, jam or jelly makes a great emulsifier, so if you like a touch of sweetness, try a tablespoon or two of currant or berry preserves.


ADD SOMETHING PICKLED

Pickled chilies are a staple in my fridge. I pretty much put them on everything I eat, so why not salad?  A little sour and a little heat….sooo good!  Olives are a no brainer - nice plump, juicy kalamata or green, stuffed with blue cheese.  Capers are a nice little pop of salty goodness which, by the way, are made even more delicious if you deep fry them!  You can also do a quick pickle of other veggies like radishes, red onion and daikon for a nice crunchy texture, or, if you are a bit experimental, of dried fruit.  Pickled raisins, sultanas or even cherries add a great sweet-sour bite.


CROUTON ALTERNATIVES

Love the crunchy topping of croutons but don’t want to eat the bread!?  There are lots of crunchy alternatives.  Of course, nuts are always a great option, but my latest experiment was with red quinoa.  I simply soaked as usual for 10-15 minutes and baked it in the oven until crispy!  You can also do it on the stove top.  Buckwheat is another great grain to toast up - some grocers even sell it toasted.  Sev is also a great crunchy alternative.  It is an Indian snack made out of seasoned chick pea flour paste and deep fried.  They come in various sizes, but are very thin…thinner than the crunchy chow mien noodles you usually see on “Asian” salads. 


TOP IT OFF WITH A SPICE BLEND

I often see people add salt and pepper to their salads before eating, so why not make a spice blend to give it more depth of flavor.  Egyptian Dukkah is always a great go-to.  Za'atar (usually a combination of sumac, sesame seeds and thyme) adds a sort of tangy and nutty flavor to any dish.  Advieh is a Persian spice mix usually containing dried rose petals, cardamon, cinnamon and cumin, so warming and aromatic. You can find these spice blends at the store if you aren’t the spice blending type of person.  I also stock up on Japanese rice seasoning blends (furikake) for a quick shake of flavor on my salad.  They usually have bonito flakes, dried seaweed and sesame seeds in them adding a little saltiness to your salad.  

Enjoy!


tags: how to make a good salad, how to make salad taste better, creamy dressing with no cream, salad dressing ideas
categories: all 3, appetizers 1, lifestyle-1, quick & easy, salads, soups & salads, vegetarian
Wednesday 03.16.16
Posted by Aliya LeeKong
 
Newer / Older