X

Sign up to receive exclusive recipes, tips, updates and other goodies from Aliya!

  • Home
  • Blog
    • All
    • Recipes
    • Spices + Ingredients
    • Lifestyle, etc.
    • Travel
  • The Cookbook
  • The App
  • Media
    • All Media
    • Video
  • About
  • Passions
Aliya LeeKong
  • Home
  • Blog
    • All
    • Recipes
    • Spices + Ingredients
    • Lifestyle, etc.
    • Travel
  • The Cookbook
  • The App
  • Media
    • All Media
    • Video
  • About
  • Passions

Nan-e Barbari (Persian Flatbread)

View fullsize File May 03, 11 08 40 AM.jpeg
View fullsize File May 03, 11 08 18 AM.jpeg

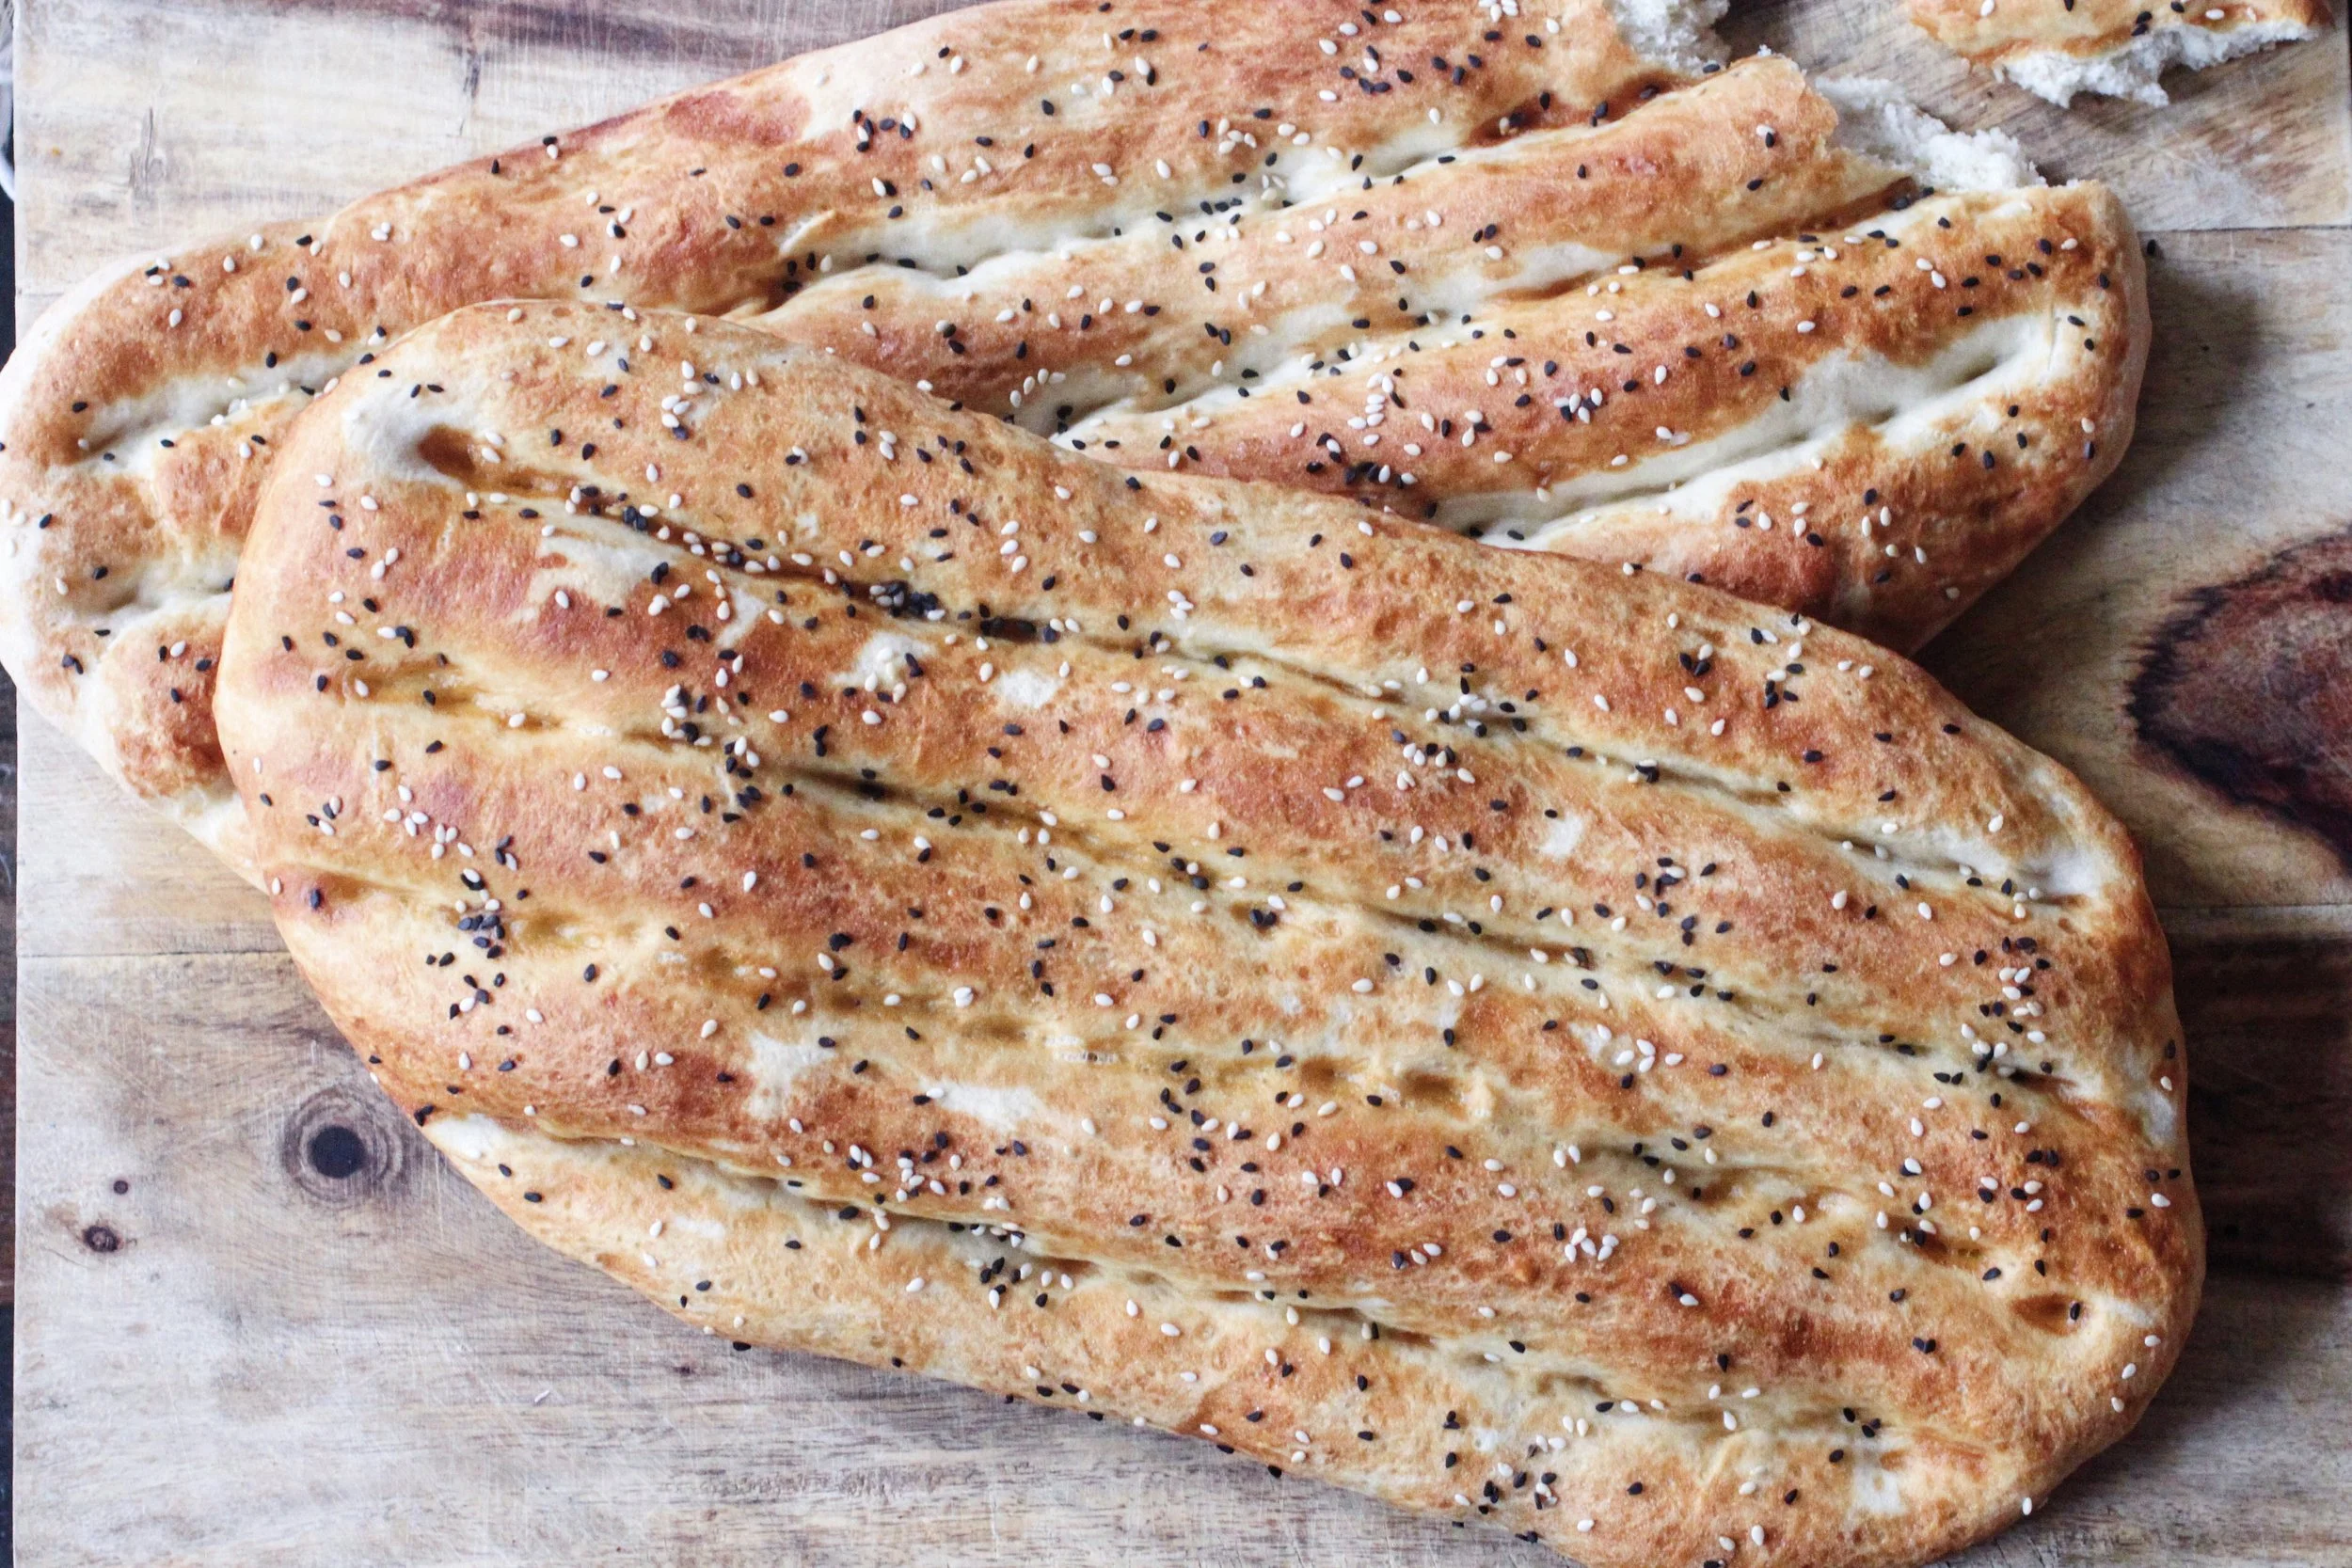
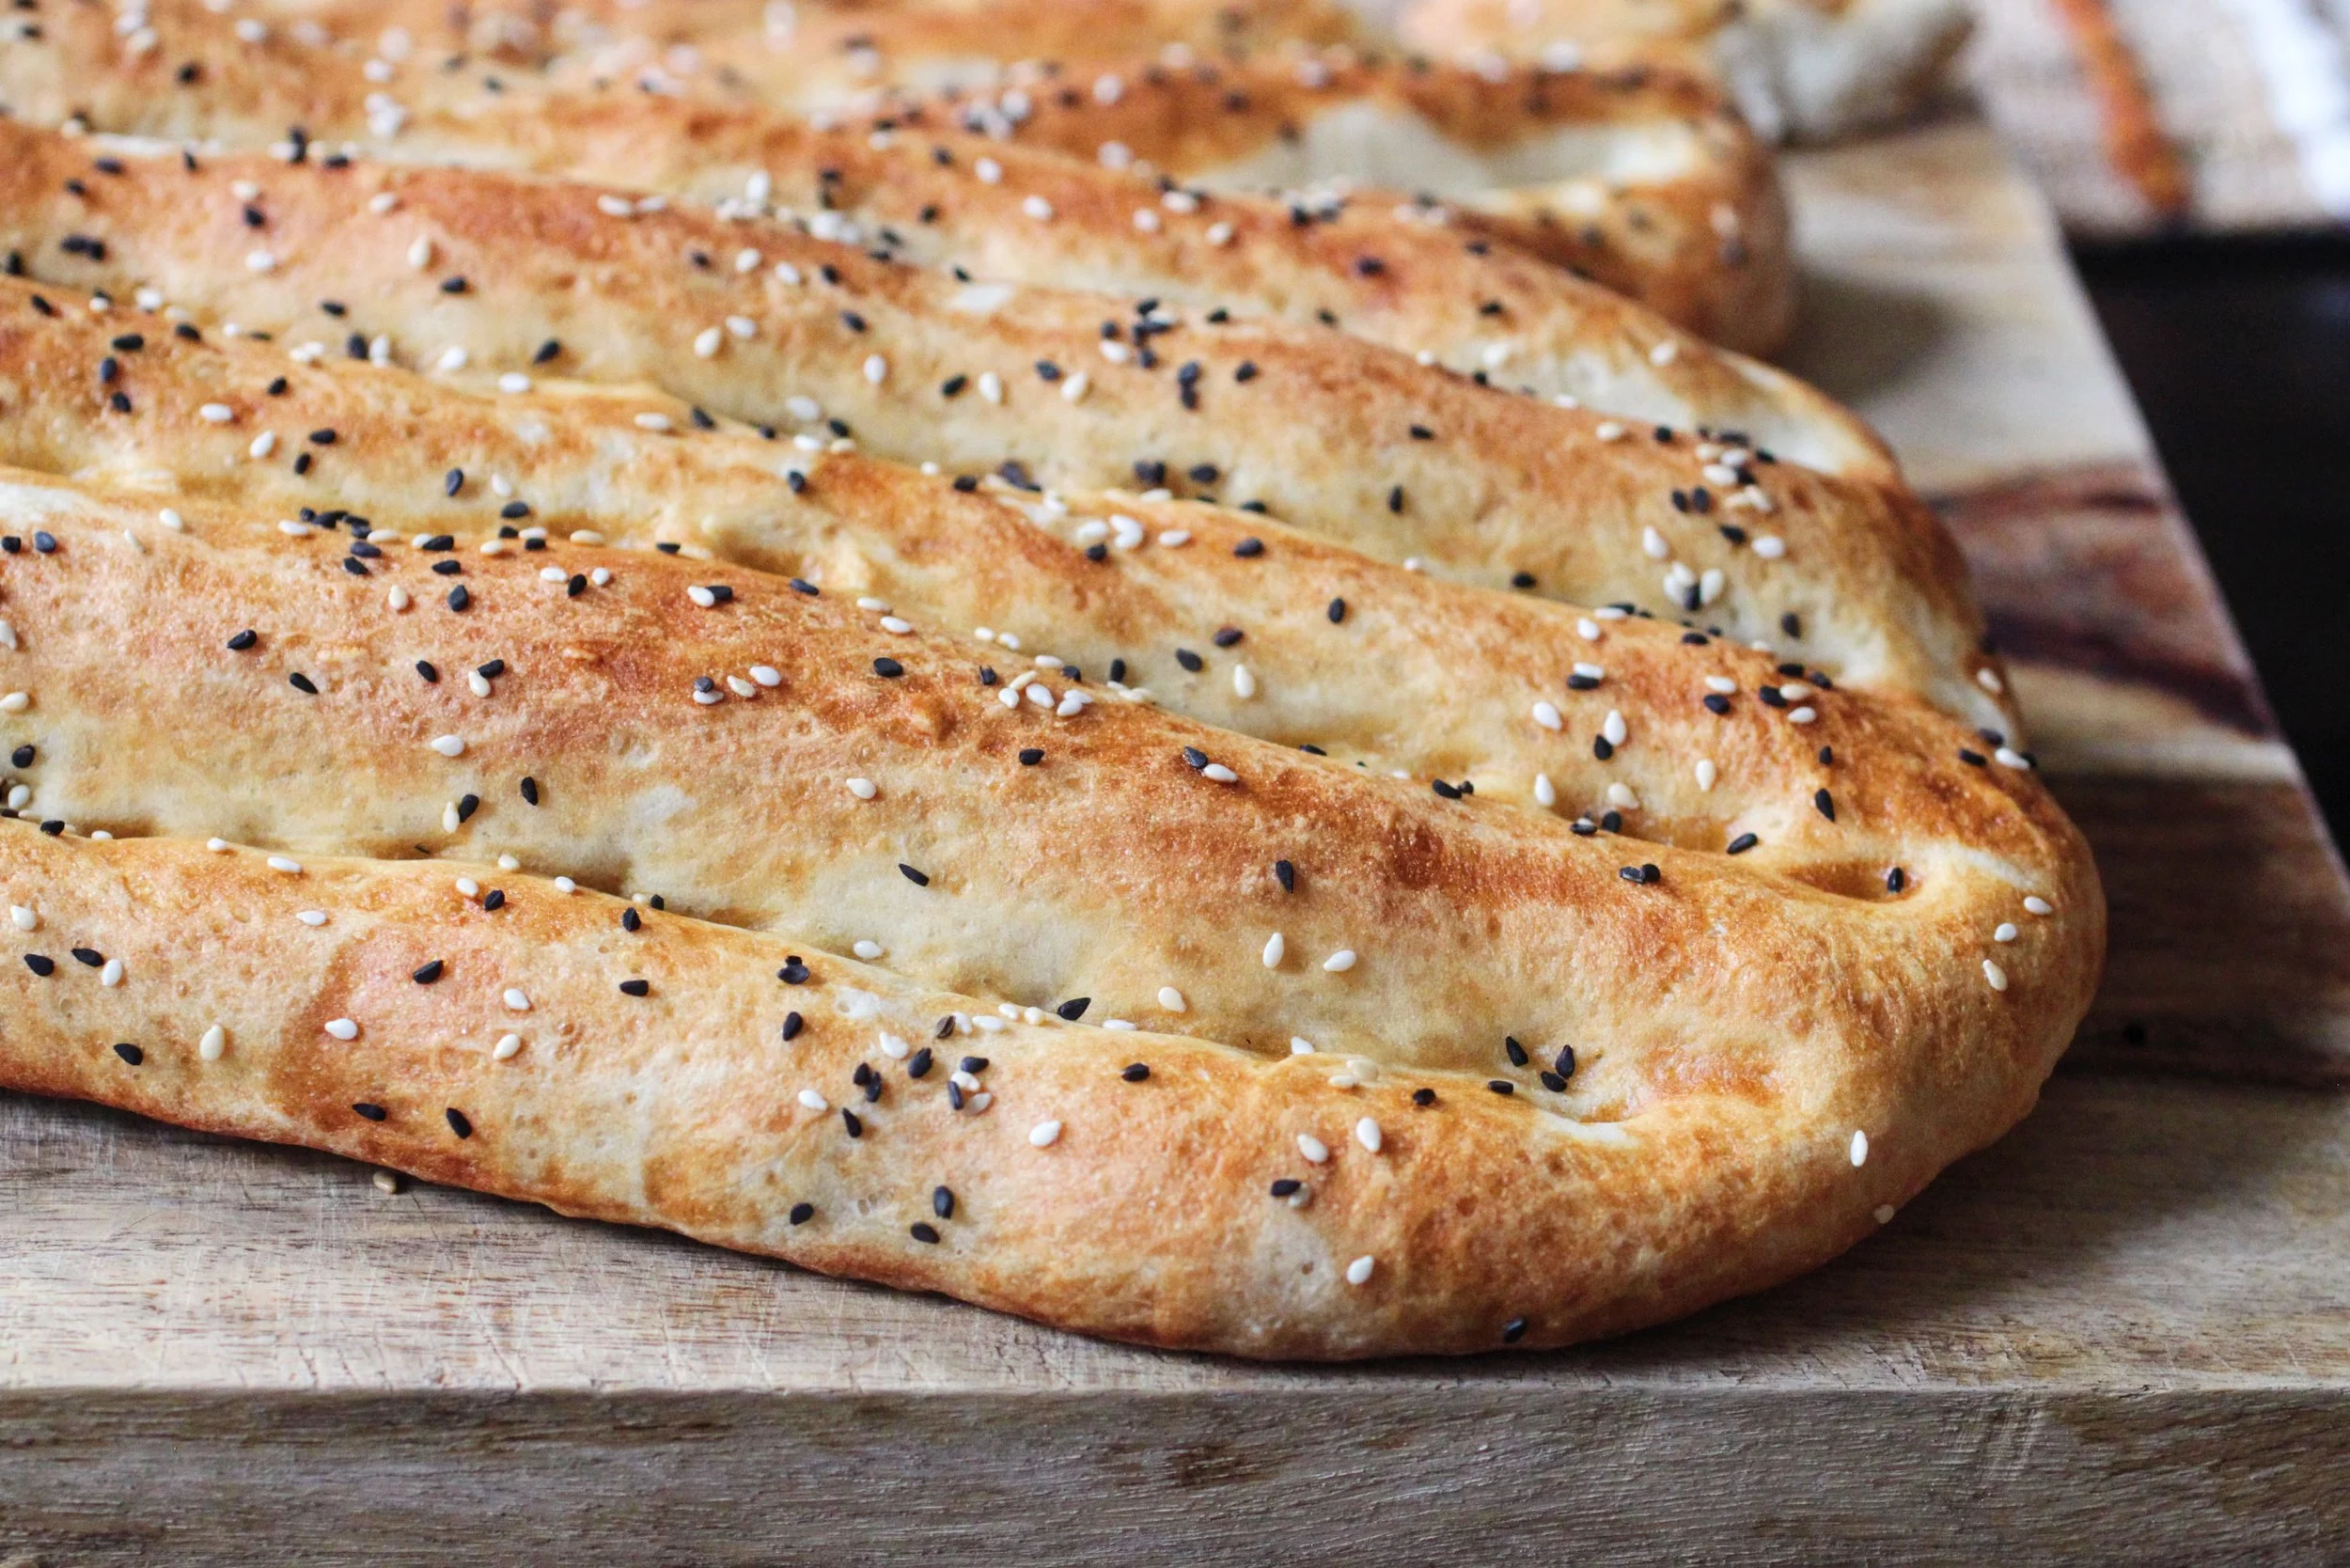
NAN-E BARBARI

I know - I've been going a bit bread and baking crazy on here.  But THIS!  Nan-e barbari, more commonly known as Persian flatbread, is a very thick flatbread that is popular in Iran.  It is similar to Indian naan in shape and cooking technique, but is pretty unique and spectacular with it's grooves and coating of nigella and sesame seeds.  I call it "statement bread".

Nan-e barbari requires 2 rises but literally cooks within 20 minutes on a well heated stone in the oven.  There is also a paste that the bread is coated with called a roomal that gives the bread its crispy texture and golden brown color.  This flatbread is most commonly eaten as a breakfast bread, served with a type of feta cheese, clotted cream or jam, but I love it fresh out of the oven with dinner - to scoop up a curry or stew or hug some grilled kebabs.

I use a preheated pizza stone to bake this, but you can also use a cookie sheet.  Just know that you might not get as nice a crunch on the bottom of the flatbread.

Enjoy!

For the Dough:
1 packet active dry yeast
1 ¾ cup lukewarm water
2 teaspoons sugar
3 ¾ - 4 cups bread flour (plus more for coating pizza peel)
2 1/2 teaspoons salt

For the Paste (Roomal):
2 teaspoons all-purpose flour
1/2 teaspoon baking soda
1/2 cup water
pinch of sugar

Garnish: nigella seeds and/or white sesame seeds

In the bowl of a mixer fitted with the dough hook attachment, add the yeast, water and sugar and let stand for 10 minutes until it begins to foam.  If it doesn’t begin to foam at this point, your yeast may be bad and the dough may not rise properly.  With the mixer on low, slowly add the bread flour and salt until a shaggy dough forms.  Put the mixer on medium and let knead until a soft, smooth dough has formed (5 to 7 minutes).  You may get a little sticking to the bottom - that’s ok!  Remove the dough from the mixing bowl, form in to a ball and place in a lightly greased bowl to rise in a warm area, covered, for about an hour or until it doubles in size.

Once the dough has risen, punch the dough down and separate into two equal pieces. Shape each dough into a long oval.  Place each oval on a parchment lined cookie sheet and cover with plastic wrap to allow to rise for another 30 - 45 minutes.  

While the dough is on its second rise, preheat the oven to 450° F and allow the pizza stone to heat for 30 minutes or more on the bottom shelf. 

You can also start making the roomal. In a small saucepan over medium heat, combine all of the roomal ingredients and bring to a light boil.  Reduce heat to low and cook until the paste coats the back of your spoon and has deepened in color.  Remove from heat and set aside.

If you have a pizza peel/paddle, lightly coat with flour and place one of the pieces of dough on it (you can also use the back of a cookie sheet or a cookie sheet that has no raised sides). Make sure the dough can easily slide off so you have no issues when transferring it to the hot pizza stone.  Press down on the dough and release some of the air.  Using the side of your pinky finger, gently press down the length of the dough to make the grooves, trying not to go all the way through the dough.  Do this about 4-5 times. You can also go back over the grooves with your fingers if you want a deeper indent - up to you!  Brush the dough all over with the roomal and sprinkle with the nigella seeds and/or sesame seeds.  

Gently slide the bread on to the preheated pizza stone and cook in the oven for about 15 - 20 minutes until golden brown.  While the first piece of dough is cooking, prepare the other half.  
Barbari is best served warm, or at room temp. 

tags: flatbread recipe, pizza dough recipe, Persian flatbread, nan-e barbari, naan recipe
categories: all 5, breads & cakes, breakfast-1, recipes, traditions, vegetarian-2
Wednesday 05.03.17
Posted by Aliya LeeKong
 

Nankhatai (South Asian-ish Shortbread Biscuits)

Nankhatai 2.jpeg
Nankhatai 1.jpeg

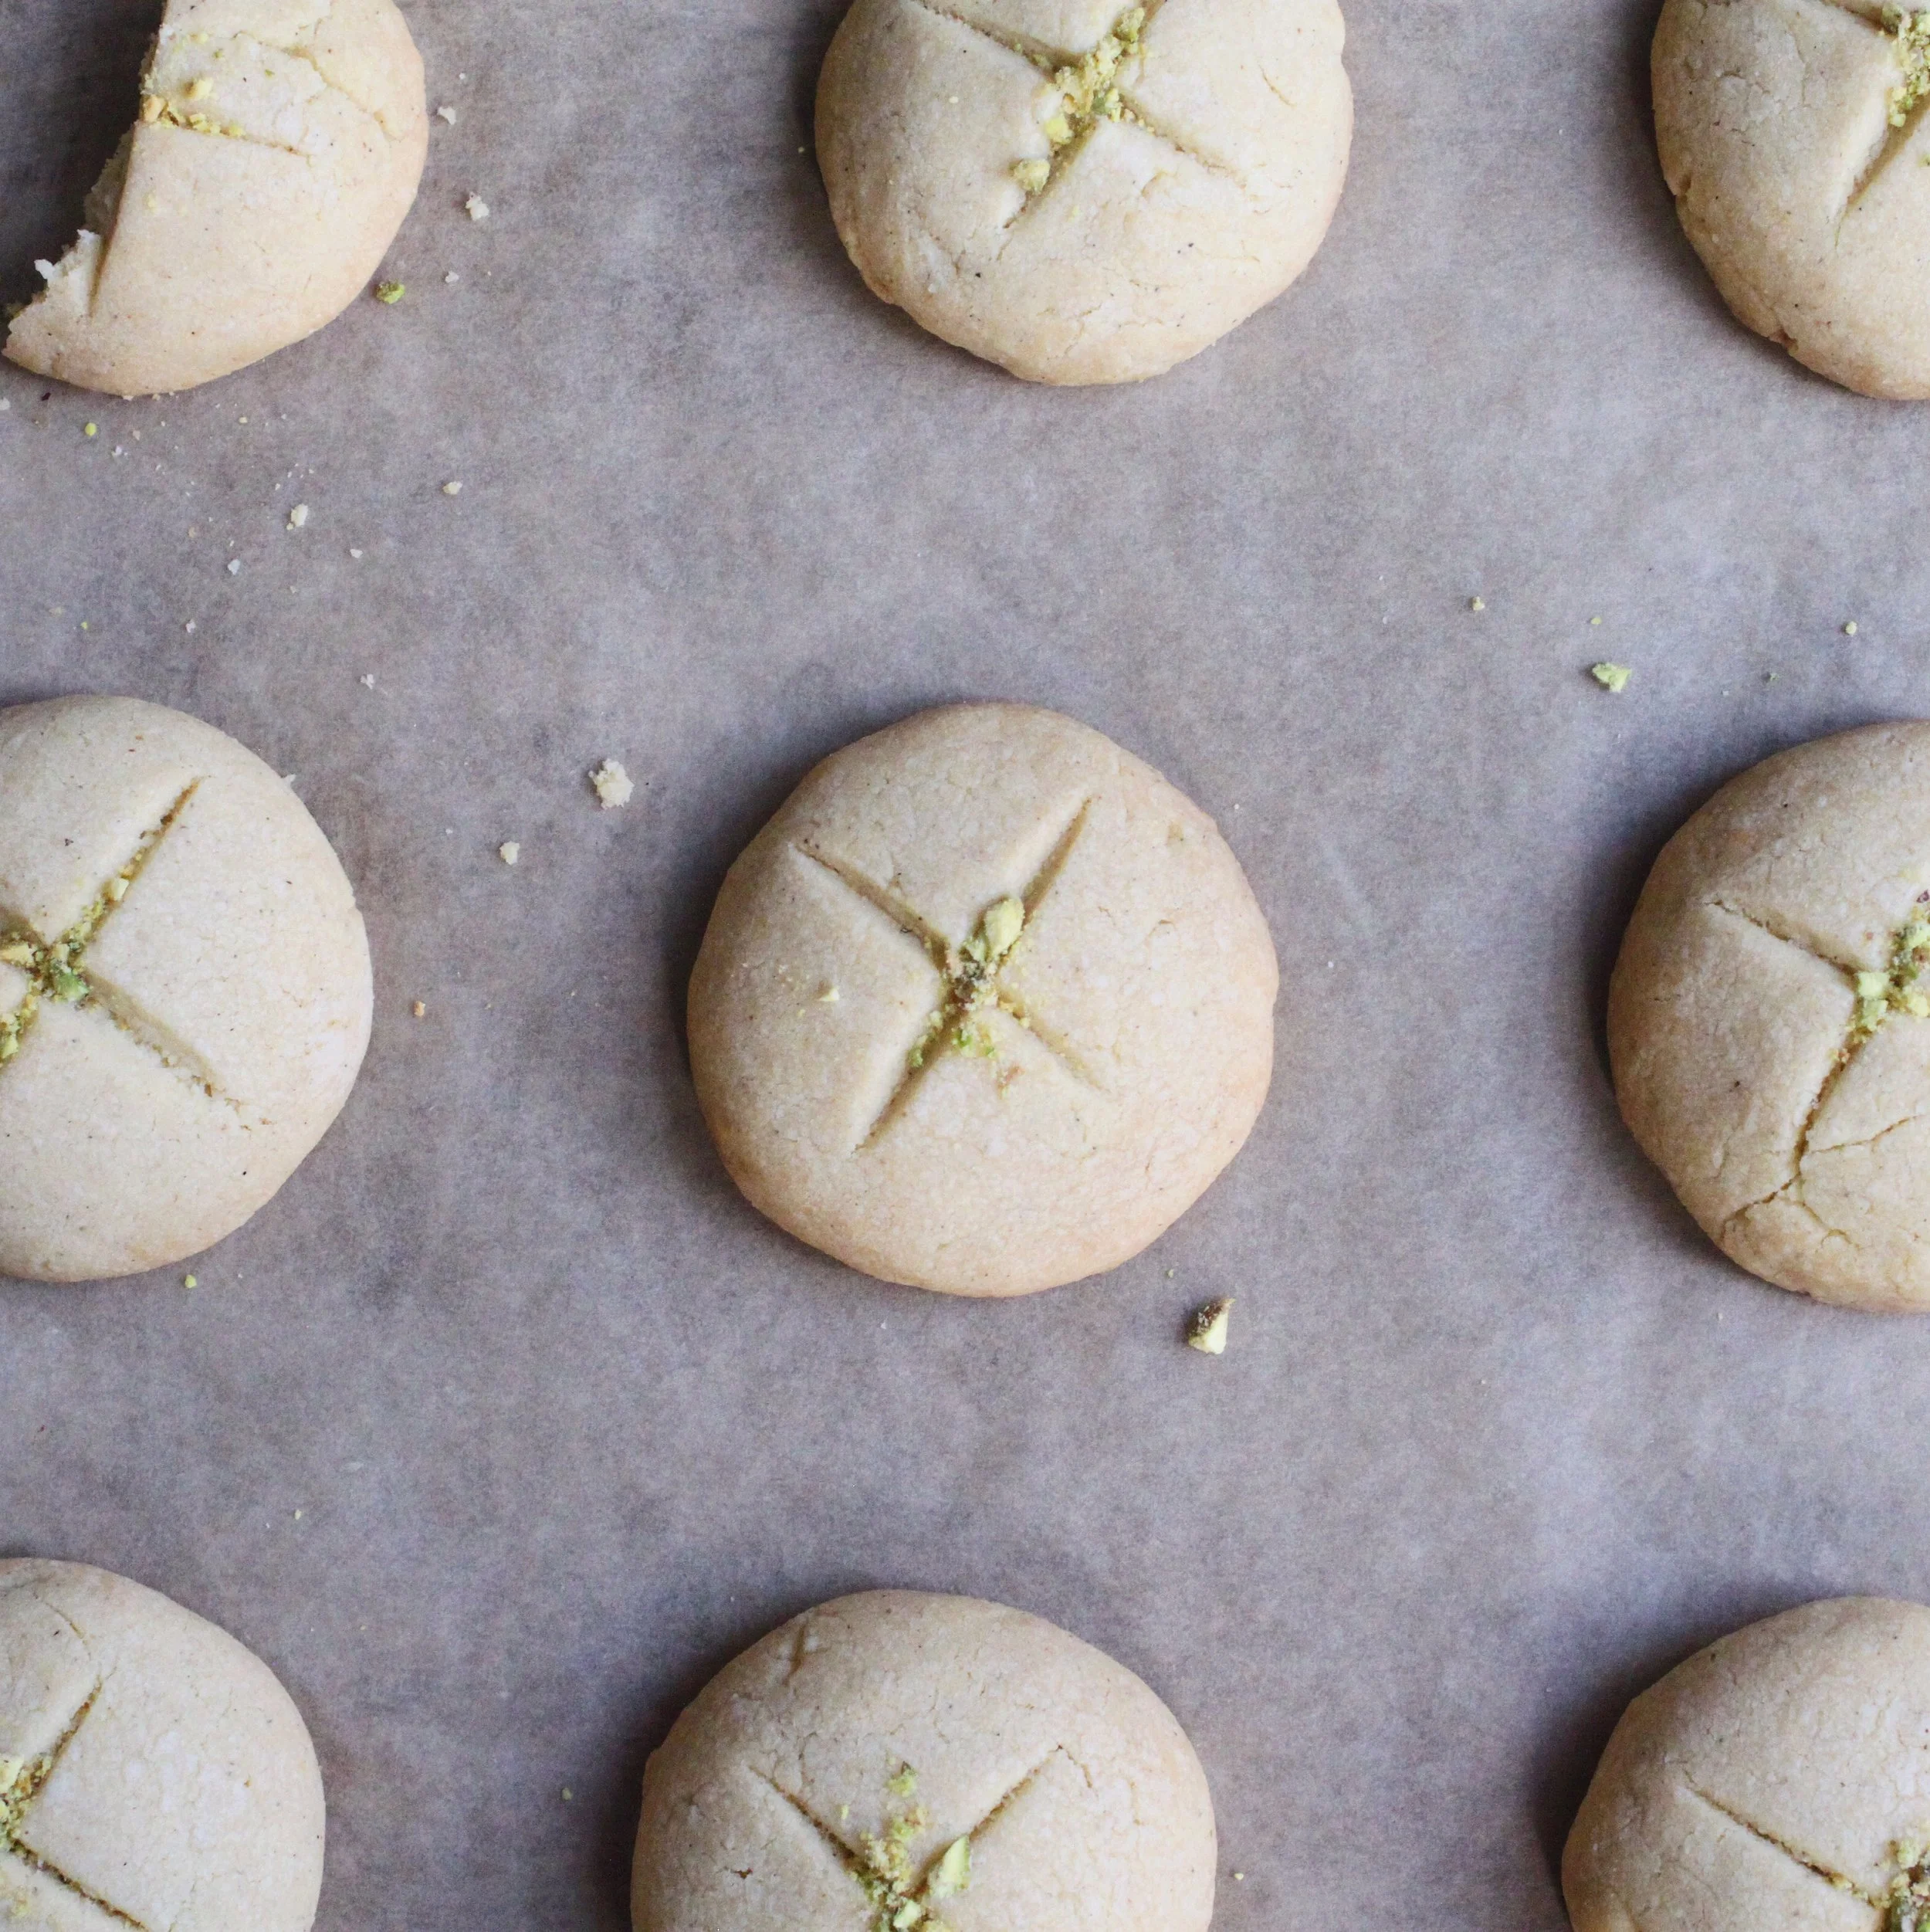
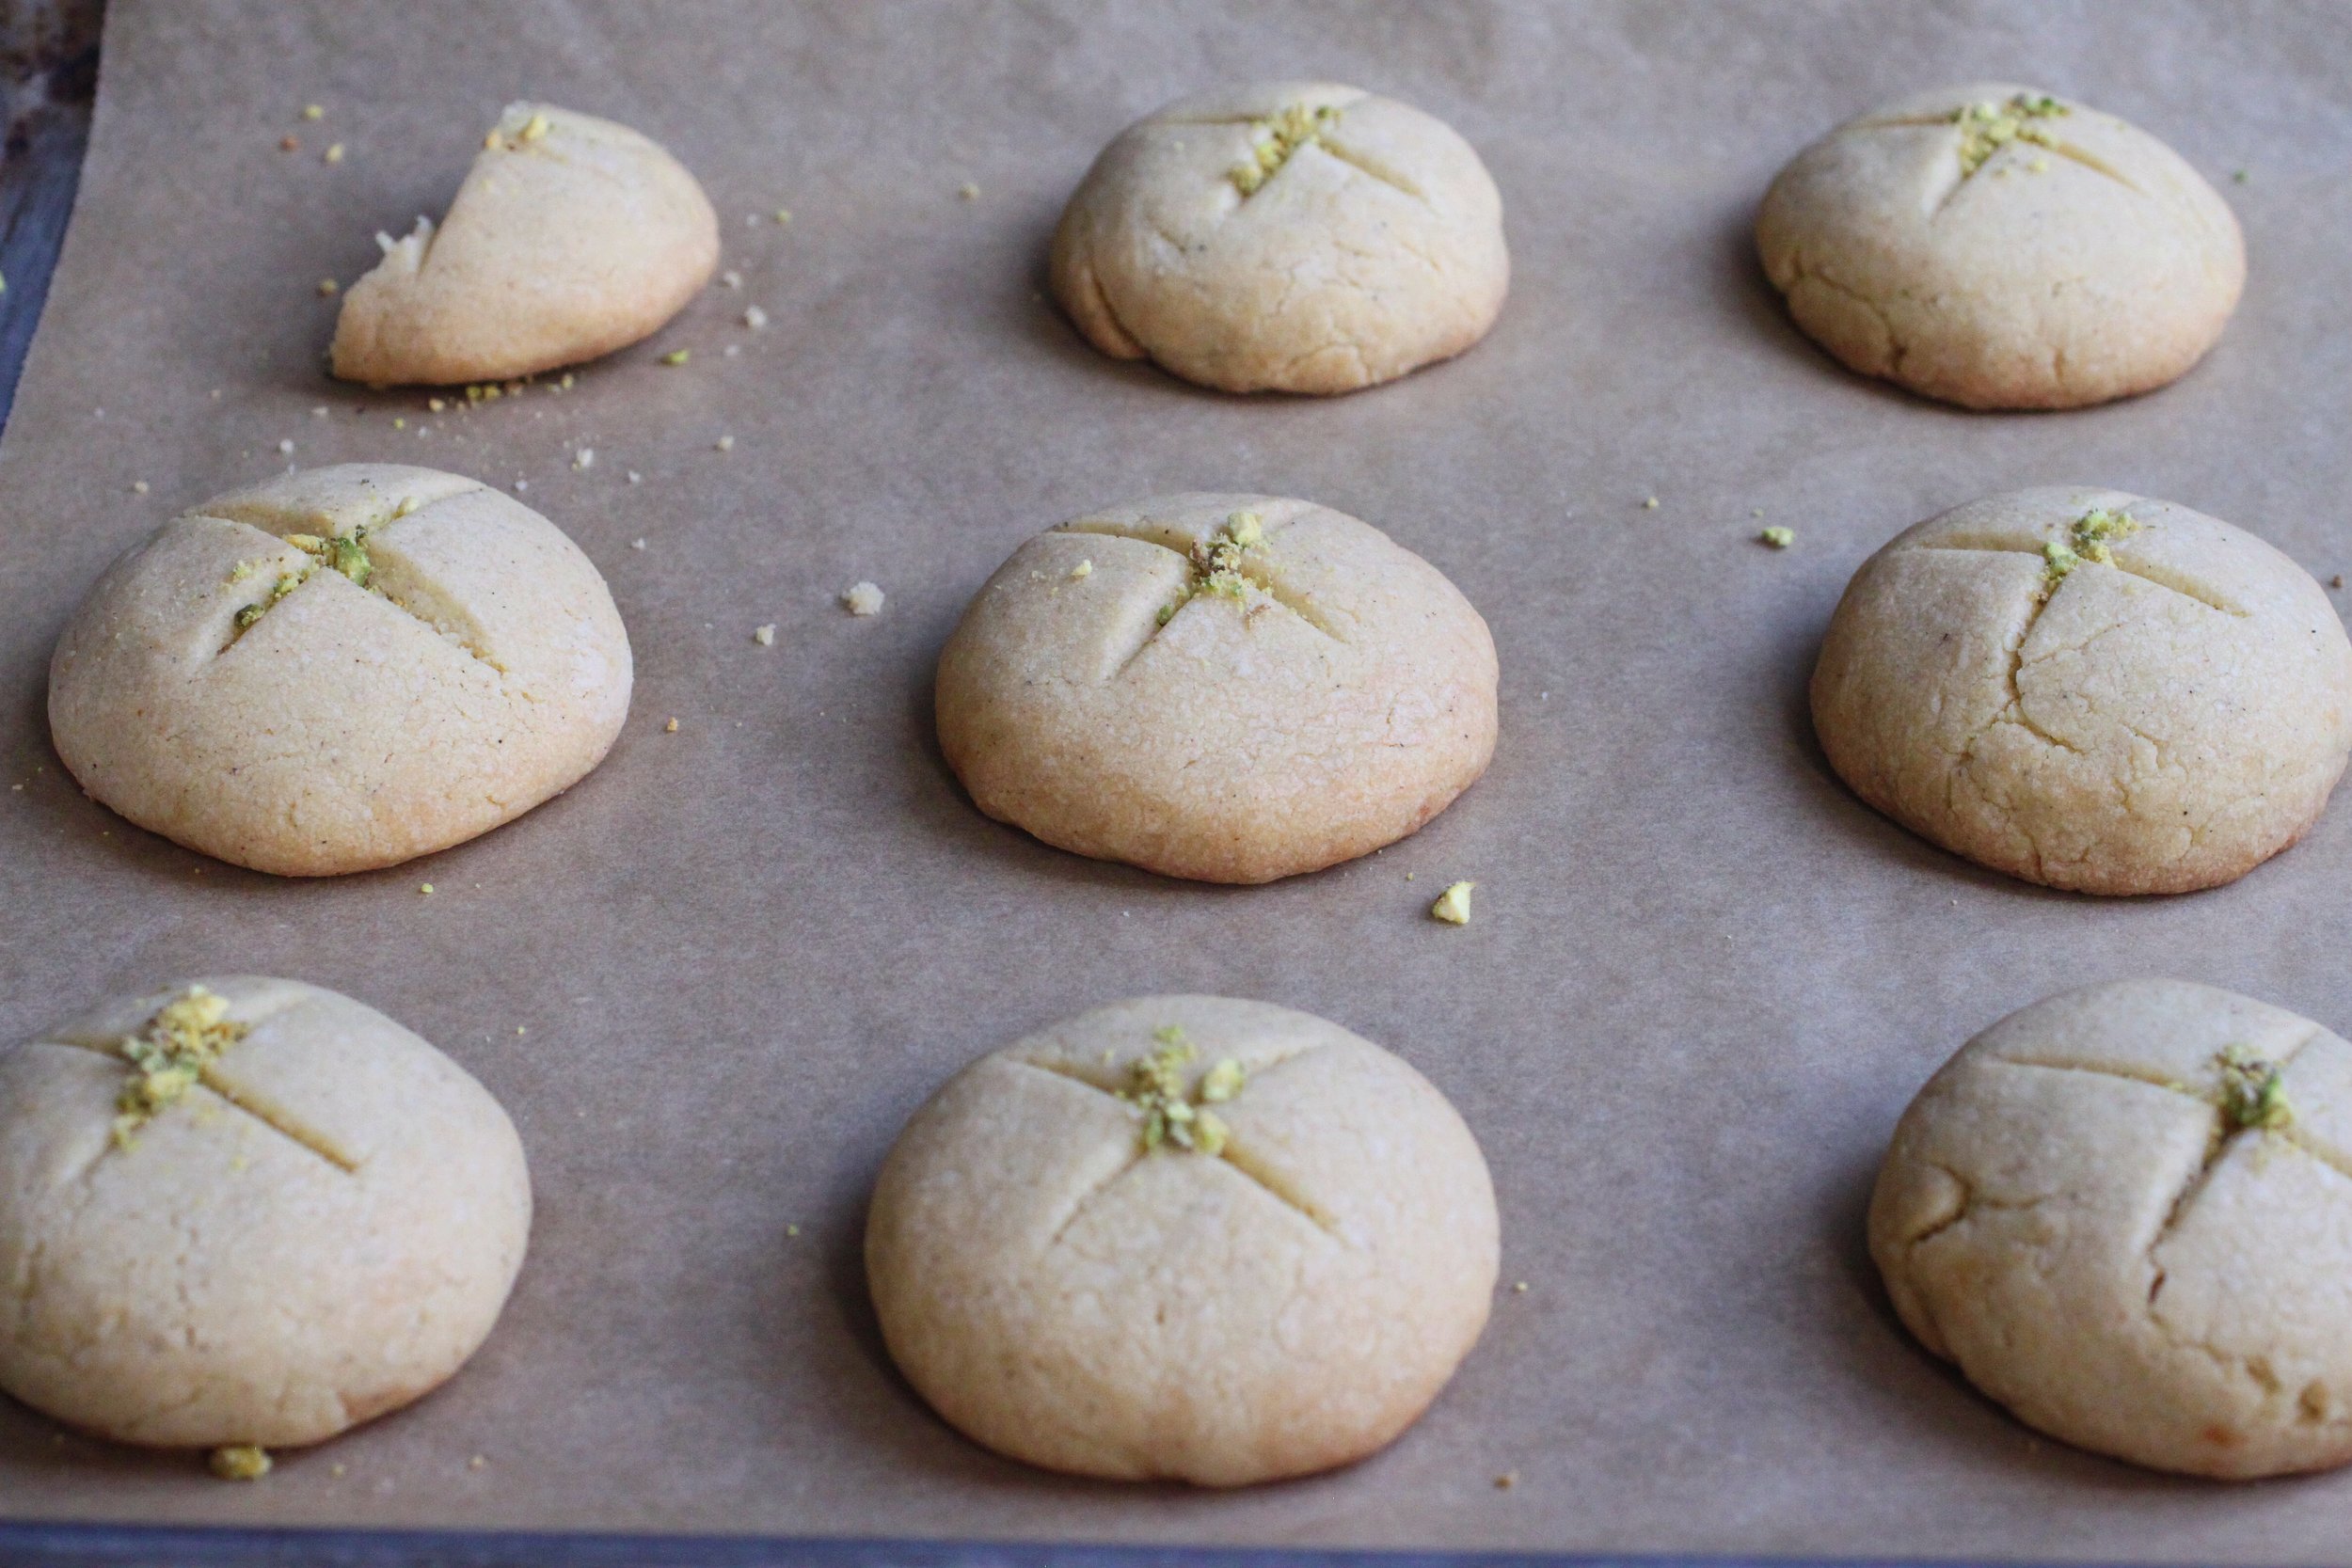
NANKHATAI (SOUTH ASIAN-ISH SHORTBREAD BISCUITS)

I know, I say South Asian-ish here!  I grew up eating these beautiful, cardamom-flecked shortbread biscuits, and I mainly ate them with the East African half of my family (go figure!).  The whole time I thought these were South Asian, but when I went to research a bit more about them, I found out differently.  The name for these cookies, nankhatai, is actually derived from Persian "naan", meaning bread, and Afghani "kulcha-e-khataye", meaning biscuit.

I love that!  So many foods commingle and cross culture, and I'm happy these did.  They remind me of childhood days, nibbling at the dinner table with my extended family chatting away in no less than three different languages (unfortunately, I only understood English).

After many, many tries, I got these right.  They are buttery, crumbly, more biscuit than cookie and have what my mom calls this "warming" sensation when you eat them (which I call loads of butter...).  Enjoy!

Ingredients

Yields 1 dozen cookies (about 2” diameter)

1 ½ sticks unsalted butter, room temperature

½ cup plus 2 tablespoons powdered sugar

2 tablespoons plain yogurt

1 ¼ cups all purpose flour

¾ cup semolina flour

¾ teaspoon ground cardamom

½ teaspoon salt

¼ teaspoon baking soda

Crushed pistachios, for garnish


Preheat the oven for 375° F.

Using a stand or hand mixer, cream together the butter and powdered sugar until fluffy.  Add in the yogurt.  In a separate bowl, whisk together the flours, cardamom, salt and baking soda.  With the stand mixer running, add the flour mixture in 3 increments, scraping down between each.  Stop when all of the flour is added.

The mixture is very crumbly, so you have to work it a bit to form the cookies.  I like to use an ice cream scoop or spoon to get even amounts, and, rather than roll them between my palms, I pat them into round, semi-flat shapes.

Place cookies on a parchment-lined baking sheet and mark each with an X using a knife.  Bake for 20 minutes, and let the cookies cool before removing.  Garnish with crushed pistachios.

tags: cookies, cookie recipe, nankhatai recipe, cardamom biscuit
categories: all 5, breads & cakes, breakfast-1
Monday 04.03.17
Posted by Aliya LeeKong
 

Yemen Honeycomb Bread (Khaliat Nahal)

View fullsize Yemeni honeycomb bread.jpeg
View fullsize File Mar 15, 7 37 15 PM.jpeg

YEMEN HONEYCOMB BREAD (KHALIAT NAHAL)

For the last few months, I've been feeling a bit overwhelmed by the political climate and a tenor of hate that's been seeping into conversations, news, social media, everywhere.  It feels like the floodgates have opened, and bigotry has been given a safe space to be expressed. 

A bit heavy, I know, but I can't deny how I've been feeling.

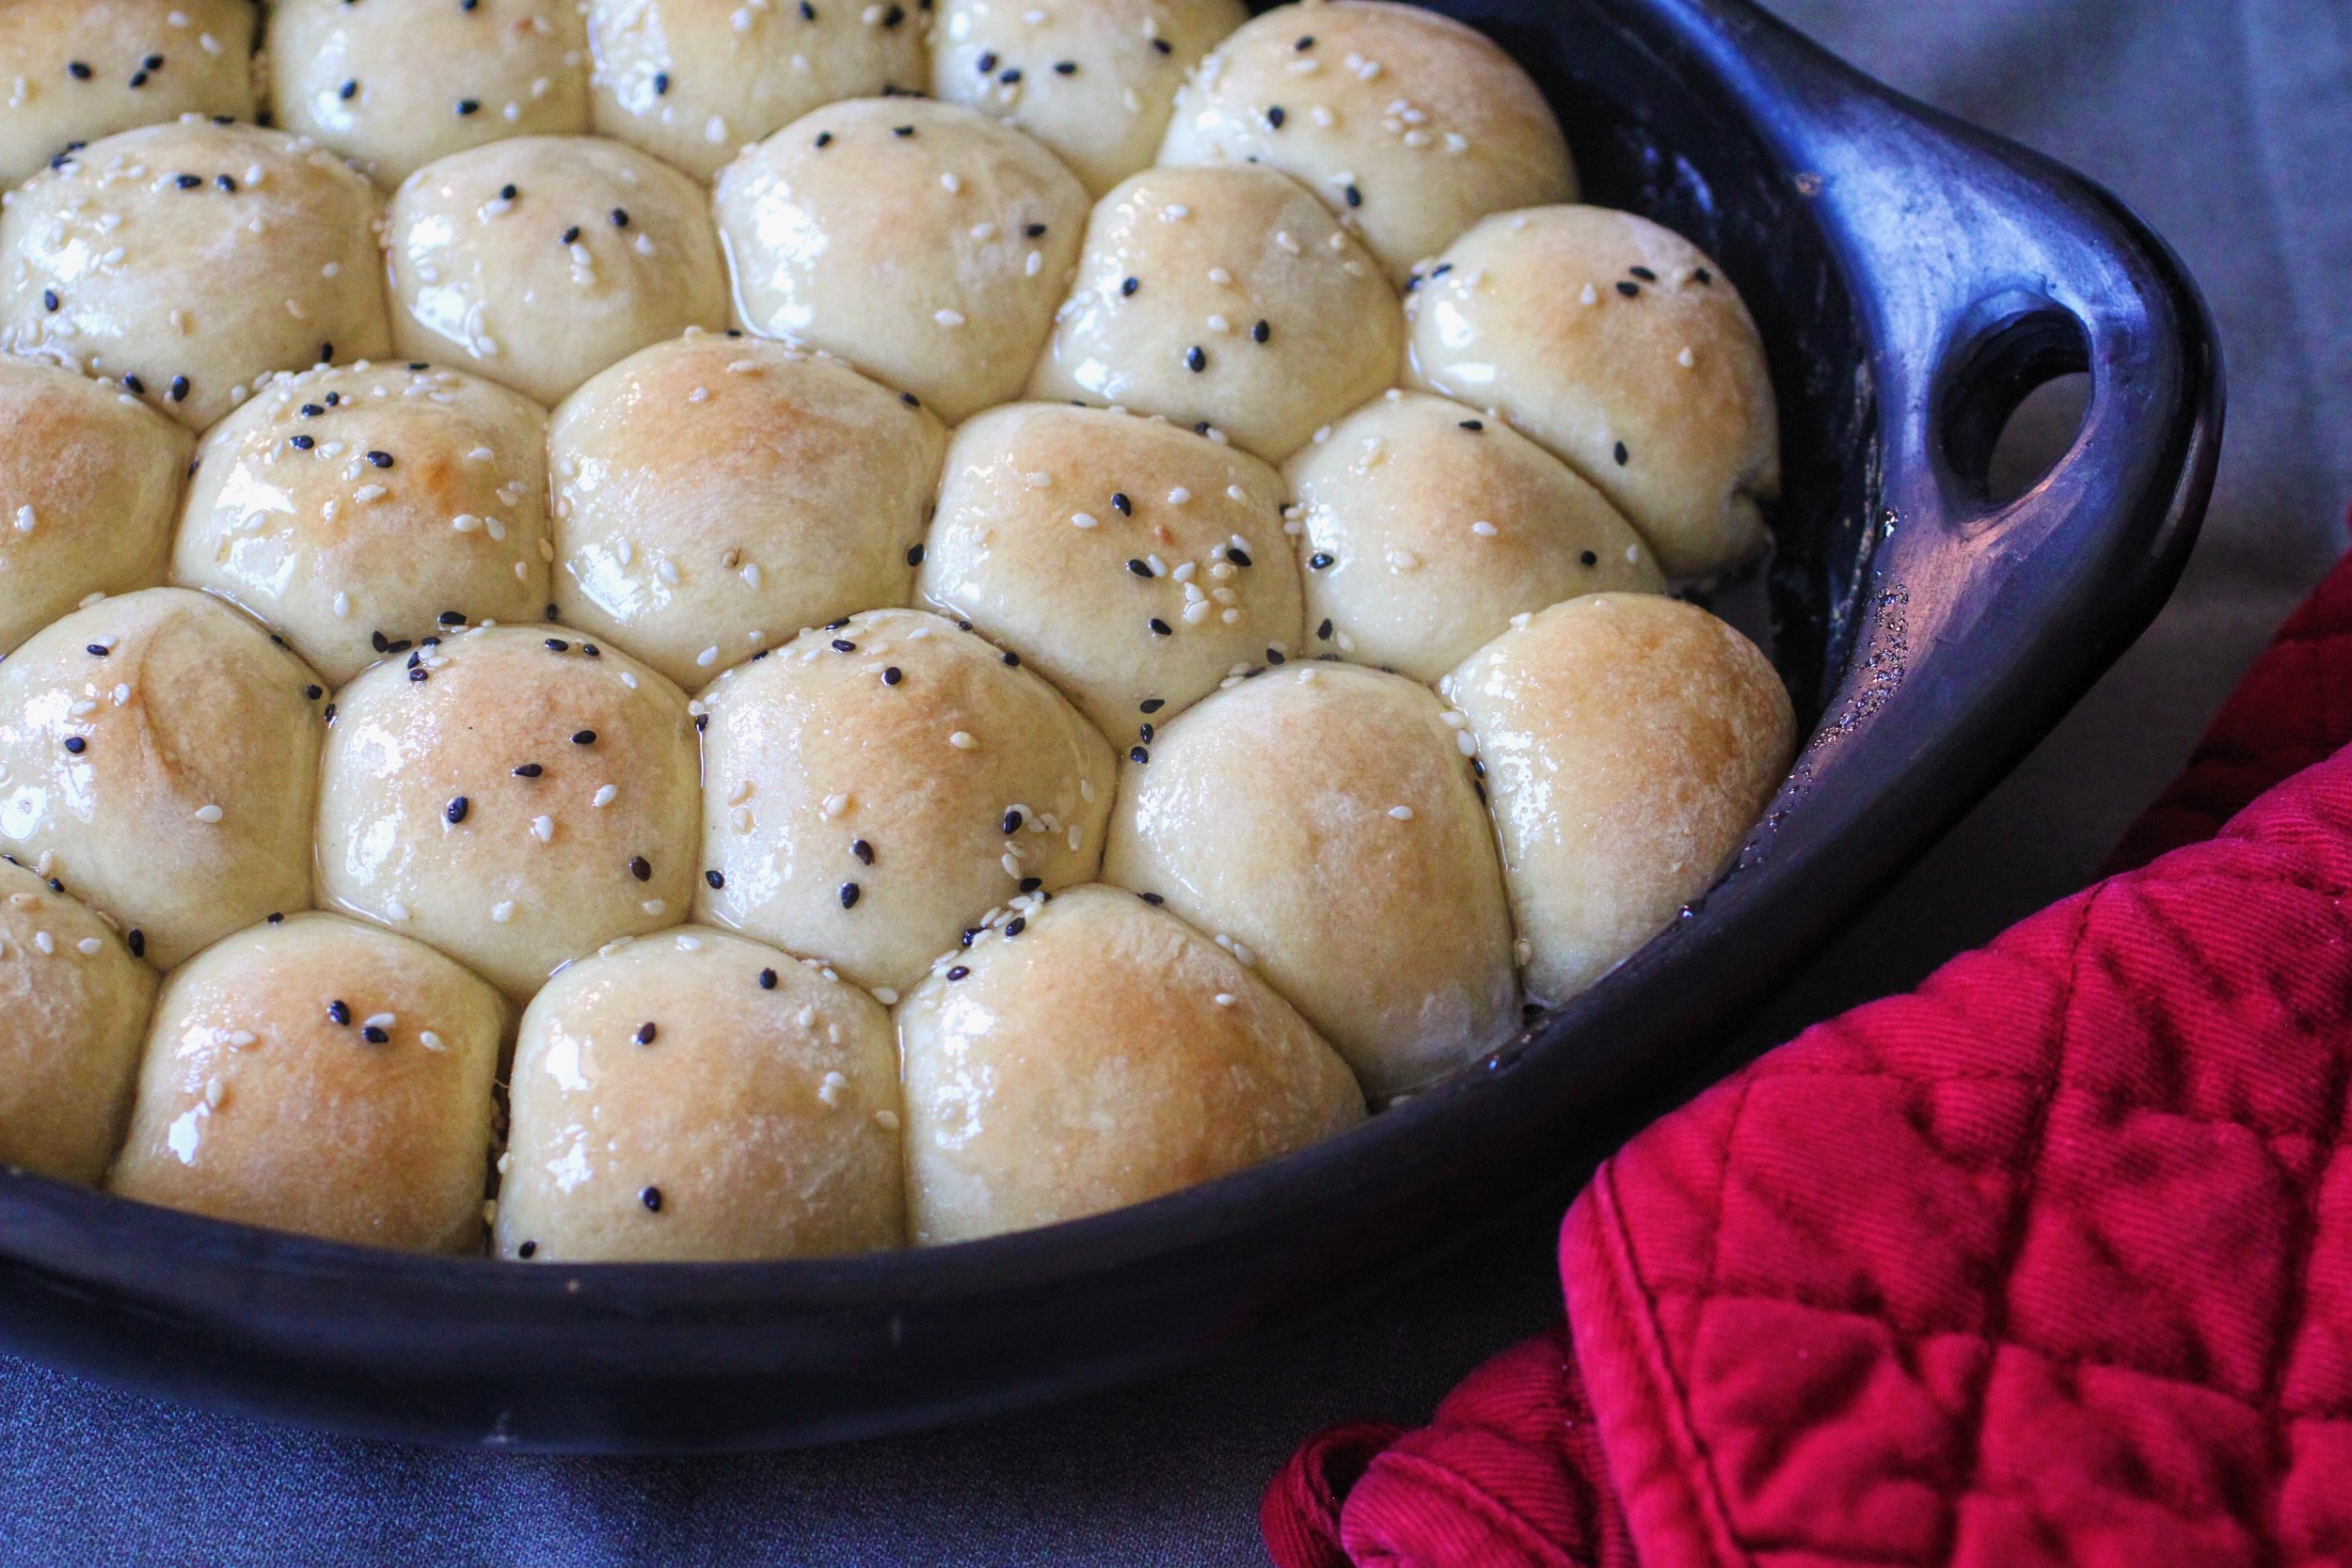
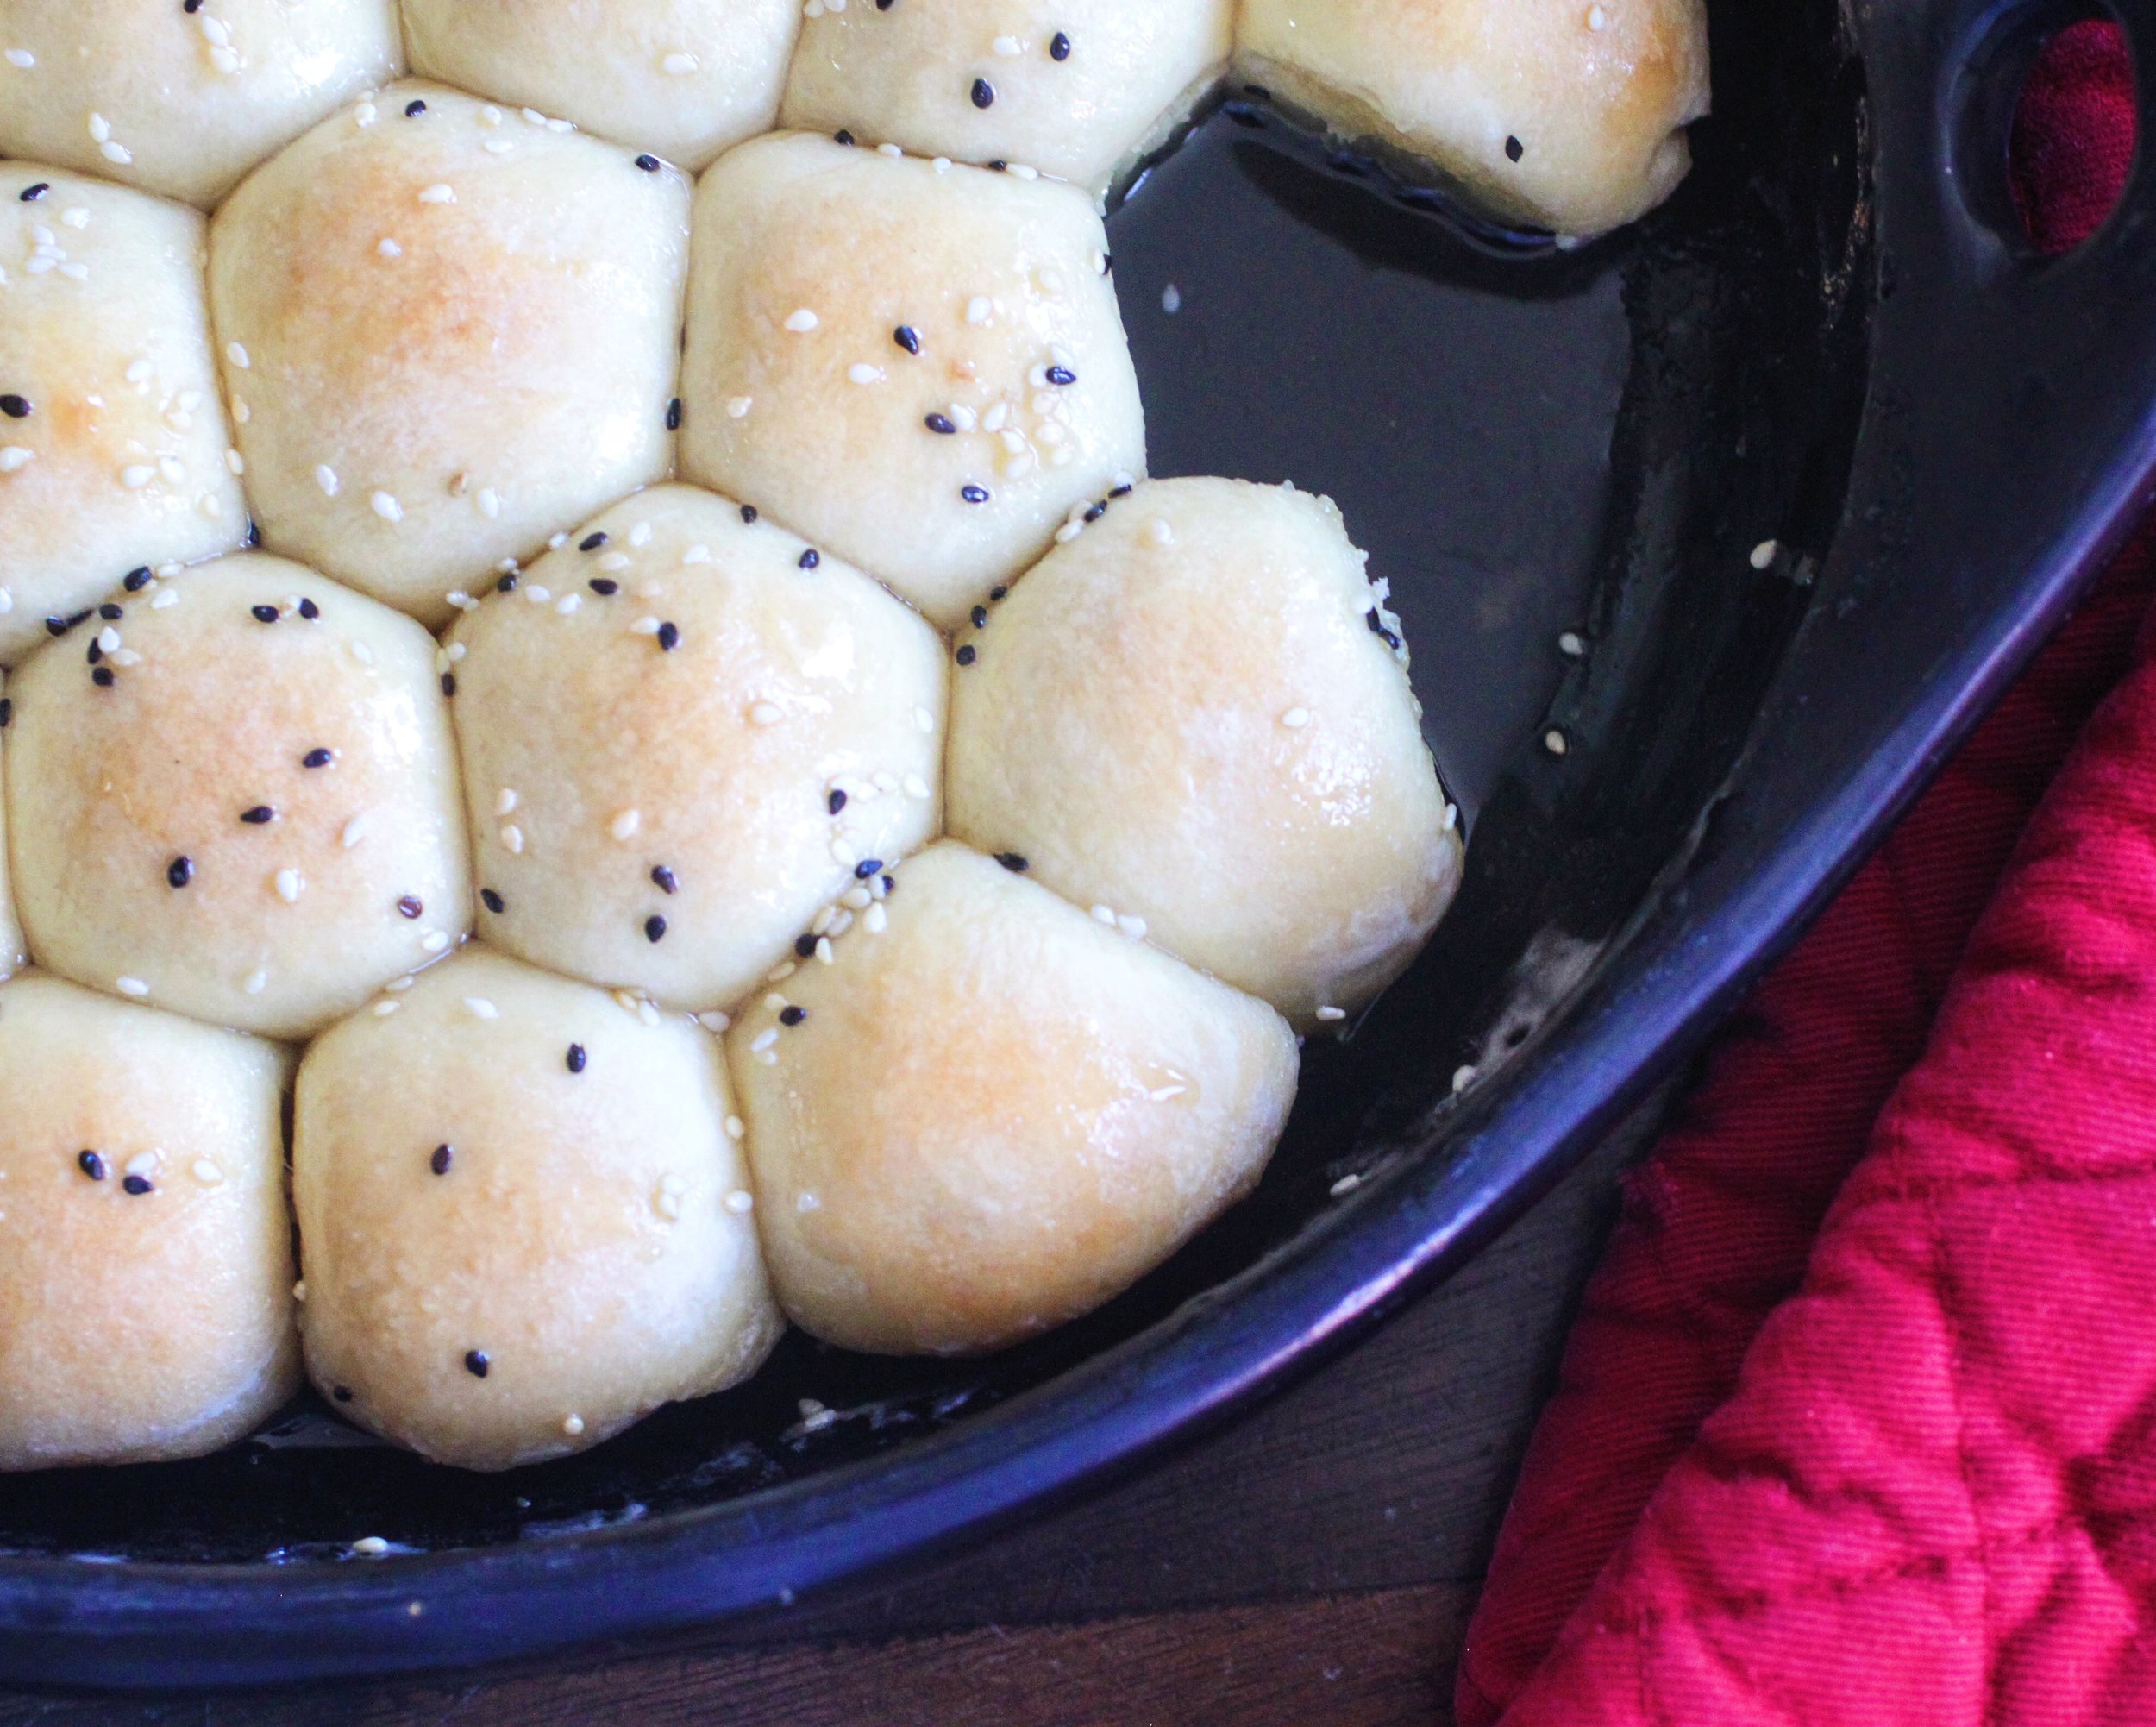
Though for sure, everyone is welcome at my table (it's my go to hashtag :) and that's plain to see in all of the recipes and stories I have here on my blog, as of late, I’ve been cooking food from the (now) 6 banned Muslim countries.  Some dishes are as familiar as an old friend; others are a tentative handshake with someone new.  From Irani Javaher Polow, a jeweled rice which comingles in my memory with Pakistani rice dishes from my childhood, to Yemeni Khaliat Nahal, honeycomb bread rolls filled with cheese and glazed with a sweet, orange blossom-scented syrup (recipe here!), each dish is a bit of resistance.  I’m doing it in part to raise awareness, but it's truly my way through: my personal means of processing this concerted exclusion. Of my parents.  Of me.  Of my daughter. Of so many others.

Ingredients

Yields 32 rolls

For the bread:

¼ cup lukewarm water

1 (¾) ounce packet yeast (active dry or instant)

¾ cup milk

7 tablespoons butter, softened, divided

¼ cup sugar

2 teaspoons salt

1 egg, beaten

3 ¾ to 4 cups all purpose flour

1 (8 oz) package of cream cheese, cut into 32 squares

1 tablespoon black and white sesame seeds, for garnish

For the glaze:

1/3 cup water

1 cup sugar

1 tablespoon honey

1 tablespoon orange blossom water

For the rolls: I make this recipe in a stand mixer, but you can easily do this by hand.  Start with the lukewarm water in the bowl of the stand mixer and sprinkle the packet of yeast over.  Mix gently to combine and let sit 5 minutes or so while you prepare the other ingredients.

In a medium pot, bring the milk up to a simmer and add 5 tablespoons of the butter, the sugar and salt.  Simmer for a minute, just until the butter melts and remove from the heat.  This should not be scalding, so let it cool for a bit before adding to the mixture.

Add the egg and 3 ¾ cups of flour to the yeast mixture and mix together with a fork.  Slowly pour in the milk mixture, using the fork to make a shaggy dough.  Using the dough hook attachment (or your hands), knead for about 3-4 minutes.  The dough should be soft and a bit tacky but should NOT stick to your hands.  If it's sticky, keep adding flour in tablespoon increments until you have a non-sticky consistency.  When you pull up the dough hook, the dough should slide right off.

Grease a 12 inch pie pan or cast iron skillet.  Divide the dough into 32 even-sized pieces. Flatten each piece and place a cream cheese square in the middle.  Form in to ball and place in the greased pan.  Once all the balls have been rolled,  cover with a kitchen towel and let rise for 1 hour.  Preheat oven to 375˚ F.

After the rise, brush the rolls generously with the remaining 2 tablespoons of melted butter, sprinkle with sesame seeds, and bake for 25 to 30 minutes.

For the glaze: Add the water and sugar to a saucepan and bring to a boil over medium-heat (until the sugar has dissolved).  Remove from the heat and whisk in the honey and orange blossom water.  Let cool while the rolls are baking.

Once the rolls are done, pour the glaze over the rolls while they are hot.  Enjoy!

tags: yemenite recipes, yemen recipes, yemen honeycomb bread, khaliat nahal
categories: appetizers 1, blog, breads & cakes, breakfast-1, desserts, recipes, traditions, all 5
Friday 03.17.17
Posted by Aliya LeeKong
 

The Festival of Lights

THE FESTIVAL OF LIGHTS

This year, Christmas and Hanukkah land on the same day, and this has me thinking about lots of shared traditions and stories....and, of course, dessert!  If you have ever had the pleasure of enjoying a traditional Jewish meal on one of their many holidays, you understand the connection.  There’s nothing more extravagant and plentiful than a homemade Jewish feast and just when you think you can’t eat any more after dinner, the table gets cleared and rows and rows of sweet treats are placed in front of you!  From rugelach (my daughter's fave) to chocolate-covered matzo to coconut macaroons, it’s truly amazing for a dessert lover. 

For Hanukkah, the main dessert is sufganiyot, which is effectively a cultural jelly doughnut!  For the Festival of Lights, sufganiyot symbolizes the burning lamps in the ancient holy temple in Jerusalem.  Below is a fantastic recipe for these treats as well as a few others to round out the holiday table.  Enjoy and a very happy holiday season to you all!


STRAWBERRY SUFGANIYOT

Photo: Bon Appetit


THE BEST RUGELACH!

Photo: The Kitchn


BETTER CHOCOLATE BABKA

Photo: Smitten Kitchen


BLACK SESAME DONUTS WITH DATE MOLASSES


BLACK AND WHITE COOKIES

Photo: Chai & Home


COCONUT MACAROONS

Photo: Food & Wine

tags: hanukkah dessert recipes, babka recipe, rugelach recipe, how to make rugelach, sufganiyot recipe
categories: all 4, blog, breads & cakes, desserts, holiday, traditions
Wednesday 12.21.16
Posted by Aliya LeeKong
 

Native American Heritage Day

NATIVE AMERICAN HERITAGE DAY

While Thanksgiving has long been my favorite holiday, I (unfortunately) haven't given it a ton of thought beyond a time for family and friends to get together, reset, eat, and share some beautiful moments.  The reality is the history of Thanksgiving is not so rosy, so I think I would be remiss not to pay homage to the Natives of our country.

Native American Heritage Day is the day after Thanksgiving, and it has me reminiscing about my trip to the Four Corners and the Navajo women I met and made fry bread with.  It often baffles me that Native American food is so elusive to the average person (myself included!), particularly when you think about how so many of our Thanksgiving tables originated with Natives teaching us about farming.  And when you think about it, it’s really just farm to table…right!?  They cooked according to their regions and what the land provided for them.

Over the past couple years, more and more chefs have been trying to revive this cuisine around America; it is, after all, the true heritage of this country.  As with other countries and their native cuisines, there are many different types of Native American foods based on regional tribal differences. Many cherish fry bread, and then there are some that refuse to make it because of the history of how it was born.  Eater had a great article about Native American food last summer that's a good read.

Here are a few Native recipes to get you started - enjoy!

NAVAJO FRY BREAD


CEDAR-PLANKED SALMON WITH MAPLE GLAZE AND MUSTARD MASHED POTATOES

Photo: Epicurious


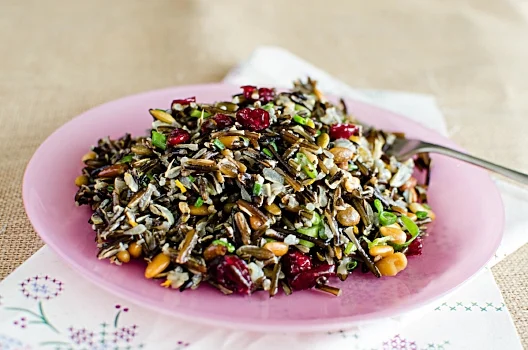
WILD RICE WITH CRANBERRIES

Photo: Merci Mama


MAQUE CHOUX

Photo; Maque Choux


CORN HUSK BREAD

Photo: Cooking with Mama


THREE SISTERS STEW

Photo: NYTimes

tags: native american culture, native american food, native american heritage day, national native american heritage month
categories: all 4, appetizers 1, breads & cakes, holiday, main dishes, lifestyle-1, soups & salads, soups, traditions, vegetarian-2
Friday 11.25.16
Posted by Aliya LeeKong
 

Breaking the Fast After Yom Kippur

BREAKING THE FAST AFTER YOM KIPPUR

Yom Kippur is arguably the most important holiday in the Jewish calendar.  It marks the end of the 10 day celebration of Rosh Hashanah (Jewish New Year) and translates to the “Day of Atonement”.  The day is set aside to atone for the sins of the past year with a complete 25- hour fast.  The fasting begins just before sunset the day before and goes until the next evening.  At sunset on Yom Kippur, you have a “Breaking Fast” meal that usually includes all types of breads, cured meats and food that were cooked the day before since during fasting you are not allowed to do any work (even cooking)! 

With this in my mind, I thought about easy breaking fast food, a homemade coconut bread recipe as well as some different ways to do lox.


CONCORD GRAPE HAND PIES 

These are beyond easy!  This is grape season, so just halve and remove the seeds from the sweetest grapes you can find.  Roll out a sheet of homemade puff pastry and use a pastry cutter or overturned glass to cut out rounds.  Place a small mount of the halved grapes in each circle.  Fold the circle in half to make a semi circle and use a fork to press the edges down tightly.  Paint with an egg wash and bake at 400° F for about 25 minutes.  Done!


PAN DE COCO (WITH A TWIST)

Pan de coco is a Dominican bread that's usually a bit more flat.  I combined it with my basic bread roll recipe, adding yeast to make it fluffy and light.  Think a Parker House roll and Pan de Coco had a baby.  It's soooo good.

Yields 16 rolls

¼ cup lukewarm water

(1) ¾ ounce packet yeast (active dry)

3 tablespoons butter, plus more for greasing and melting

¼ cup honey

2 ½ teaspoons salt

1 cup coconut milk

1 egg, beaten

4 – 4 ¼ cups all purpose flour

½ cup coconut flakes

Flake salt, for sprinkling


I make this recipe in a stand mixer, but you can easily do this by hand.  Start with the lukewarm water in the bowl of the stand mixer and sprinkle the packet of yeast over.  Mix gently to combine and let sit 5 minutes or so while you prepare the other ingredients.

In a medium pot, melt the butter.  Add the honey, salt and coconut milk and heat gently until warmed through and uniform.  Remove from the heat.  (It shouldn’t simmer but should be warm to the touch.)

Add the egg and 3 ¾ cups of flour to the yeast mixture and mix together with a fork.  Slowly pour in the milk mixture, using the fork to make a shaggy dough.  Using the dough hook attachment (or your hands), knead for about 3-4 minutes.  The dough should be soft and a bit tacky but should NOT stick to your hands.  If it's sticky, keep adding flour in tablespoon increments until you have the right, non-sticky consistency.

For rolls, divide the dough into 16 even-sized balls and place in a heavily greased, 9-inch cake tin.  Cover with a kitchen towel and let rise 45 minutes.  Preheat oven to 375˚ F.

After the rise, brush the rolls generously with melted butter, sprinkle with coconut flakes and bake for 30 to 35 minutes.  Brush again with butter once out of the oven and sprinkle with a little salt.  Enjoy hot!


LOX 2 WAYS

Photo: Food & Wine

Asian Salt & Sweet Lox

1 lb salmon filet, trimmed and all pin bones removed
1 cup soy sauce
1 tablespoon dark brown sugar
1/4 cup mirin
1 or 2 fresh chilies (thai, serrano, depends on your heat tolerance), roughly chopped
1 inch fresh ginger, roughly chopped
1 bunch cilantro, roughly chop (1/2 for cure, 1/2 for creme fraiche)
1 cup crème fraiche
1/2 lime, juiced

Place salmon in a large ziploc bag on a cookie (just in case the bag leaks).  Whisk together the soy sauce, sugar and mirin until the sugar dissolves.  Pour the mixture in the bag and add in the chilies, ginger and cilantro.  Let as much air out of the bag as possible and seal.  Put another cookie sheet on top and weight down with cans or something else heavy.  Place in the fridge and let sit for 24-48 hours.  After, rinse the filet under cold water until the filet is clean.  Pat dry with paper towels and let it dry out a bit in the fridge before slicing. 

Chop the remaining cilantro a bit more finely.  In a bowl, mix together the crème fraiche with the lime juice and finely chopped cilantro.  Slice the salmon with a sharp knife, serve with thecrème fraiche and enjoy!


Traditional Lox

1 lb salmon filet, trimmed and all pin bones removed
1/3 cup kosher salt
1/3 cup sugar
1/2 bunch fresh dill, finely chopped
3 lemons, zested
2 tablespoons smoke powder (optional)

Place salmon in a large ziploc bag on a cookie (just in case the bag leaks).  Mix together the remaining ingredients.  Pat the mixture onto both sides of the salmon.  Let as much air out of the bag as possible and seal.  Put another cookie sheet on top and weight down with cans or something else heavy.  Place in the fridge and let sit for 24-48 hours.  After, rinse the filet under cold water until the filet is clean.  Pat dry with paper towels and let it dry out a bit in the fridge before slicing.  Enjoy!


tags: Yom Kippur recipes, break fast recipes, breaking the fast, bread recipe
categories: all 4, appetizers 1, breads & cakes, blog, breakfast-1, desserts-1, holiday, lifestyle-1, quick & easy, recipes, traditions
Wednesday 10.12.16
Posted by Aliya LeeKong
 

Peak Berry Season at the Market

PEAK BERRY SEASON AT THE MARKET

If you can ignore the sweltering heat, this is the best time of year at the farmers' market.  Why, might you ask?  Because it is the only time that all the berries overlap each other in the season, not to mention all of the heirloom tomatoes, stone fruit and the beginning of chili pepper season.  I went to my local greenmarket over the weekend (it was sooo hot out!) and was surprised to see strawberries still available - that doesn’t happen often!  But, always, there is a short window where blueberries, blackberries, raspberries and cherries come together.  This is the time that I make a mad rush to get a mixed berry jam going and, of course, possibly a new tart recipe.  

It’s also the time that I start to think about preserving, whether it be canning tomato sauce, pickling cherry peppers, freezing the berries, or creating syrups or shrubs to enjoy in a cocktail later!   Below are some recipes I may be bringing back for this limited berry season!  Enjoy!


SUGAR PLUM & CURRANT TORTE


MY BREAKFAST CLAFOUTIS


BLUEBERRY, RAW HONEY & COCONUT FOOL


BLUEBERRY-HIBISCUS SMASH


tags: dessert recipes, berry recipes, strawberry recipes, cherry clafouti
categories: all 4, blog, breads & cakes, breakfast-1, desserts
Wednesday 08.17.16
Posted by Aliya LeeKong
 

A Bread Dough You Can Use for Everything

View fullsize Photo Mar 28, 5 47 10 PM.jpg
View fullsize Photo Mar 28, 4 14 47 PM.jpg
View fullsize Photo Apr 03, 12 42 45 PM.jpg
View fullsize Photo Jan 17, 12 27 40 PM.jpg

A BREAD DOUGH YOU CAN USE FOR EVERYTHING

Lately, I've been mildly obsessed with baking my own bread and not just your basic quick bread: the real stuff with yeast and what not.  It always seemed so time-consuming - brioches with 5 steps and 2 rising times, cinnamon buns that proof in the refrigerator overnight, sourdoughs with starters, weighing ingredients, waiting for them to rise....(I hope I haven't talked you out of reading on!)

Well, this recipe is none of those.  It's what I call my "universal" bread dough - a simple bread dough that requires only (1) 45-minute rise and can be used to make everything from soft, buttery, fluffy rolls, to cheese-stuffed buns or even pull-apart bread.  It's weeknight bread.  It's weekend-morning-made-THAT-morning bread.  It's guests-are-about-to-arrive bread.  It's everything.

I'm going to share the basic recipe and then some thoughts for ways to transform it.  I'm still experimenting myself with it...like every few days, so expect some more versions of this on Insta!

Yields 16 rolls

¼ cup lukewarm water

(1) ¾ ounce packet yeast (active dry)

1 cup milk

¼ cup honey

3 tablespoons butter, plus more for greasing and melting

2 teaspoons salt

1 egg, beaten

3 ¾ to 4 cups all purpose or "00" flour*

Flake salt, for sprinkling


I make this recipe in a stand mixer, but you can easily do this by hand.  Start with the lukewarm water in the bowl of the stand mixer and sprinkle the packet of yeast over.  Mix gently to combine and let sit 5 minutes or so while you prepare the other ingredients.

In a medium pot, bring the milk up to a simmer and add the honey, butter and salt.  Simmer for a minute or two, just until the butter melts and remove from the heat.

Add the egg and 3 ¾ cups of flour to the yeast mixture and mix together with a fork.  Slowly pour in the milk mixture, using the fork to make a shaggy dough.  Using the dough hook attachment (or your hands), knead for about 3-4 minutes.  The dough should be soft and a bit tacky but should NOT stick to your hands.  If it's sticky, keep adding flour in tablespoon increments until you have the right, non-sticky consistency.

For rolls, divide the dough into 16 even-sized balls and place in a greased, 9-inch cake tin.  Cover with a kitchen towel and let rise 45 minutes.  Preheat oven to 375˚ F.

After the rise, brush the rolls generously with melted butter and bake for 30 to 35 minutes.  Brush again with butter once out of the oven and sprinkle with a little flake salt.  Enjoy hot!

*For the rolls, I used all purpose flour, but for the savoury buns, I used 00 flour, which yielded a more delicate, fluffier texture.

Some fun options:

(1) Before baking, but after brushing with butter, sprinkle with spices!  Thing za'atar, an everything bagel spice blend (!!), furikake, simple nigella seeds...

(2) To make the savoury buns, roll out the dough into an 18"x12" rectangle and place it in front of you with one of the longer sides near you (a horizontal rectangle).  Mix together a stick of unsalted, room temperature butter with a half packet of softened, Boursin cheese.  You could also use regular cream cheese and then add in your own garlic, roasted garlic, chives, other herbs.  Spread this mixture all over the dough and sprinkle with a bit of salt.  You can also use other cheeses here by themselves or in addition to the cream cheese - mozzarella, a mexican blend....Roll the dough, starting with long side near you to form a cylinder, and then place in the freezer for five to ten minutes to make it easier to cut.  Use a serrated knife and cut the rolls into 1 ½-inch thick rolls.  Place cut side down in the greased tin.  Let rise an hour.  Brush with butter and bake at 375˚ F for closer to 40 minutes, until the buns are uniformly golden brown. 

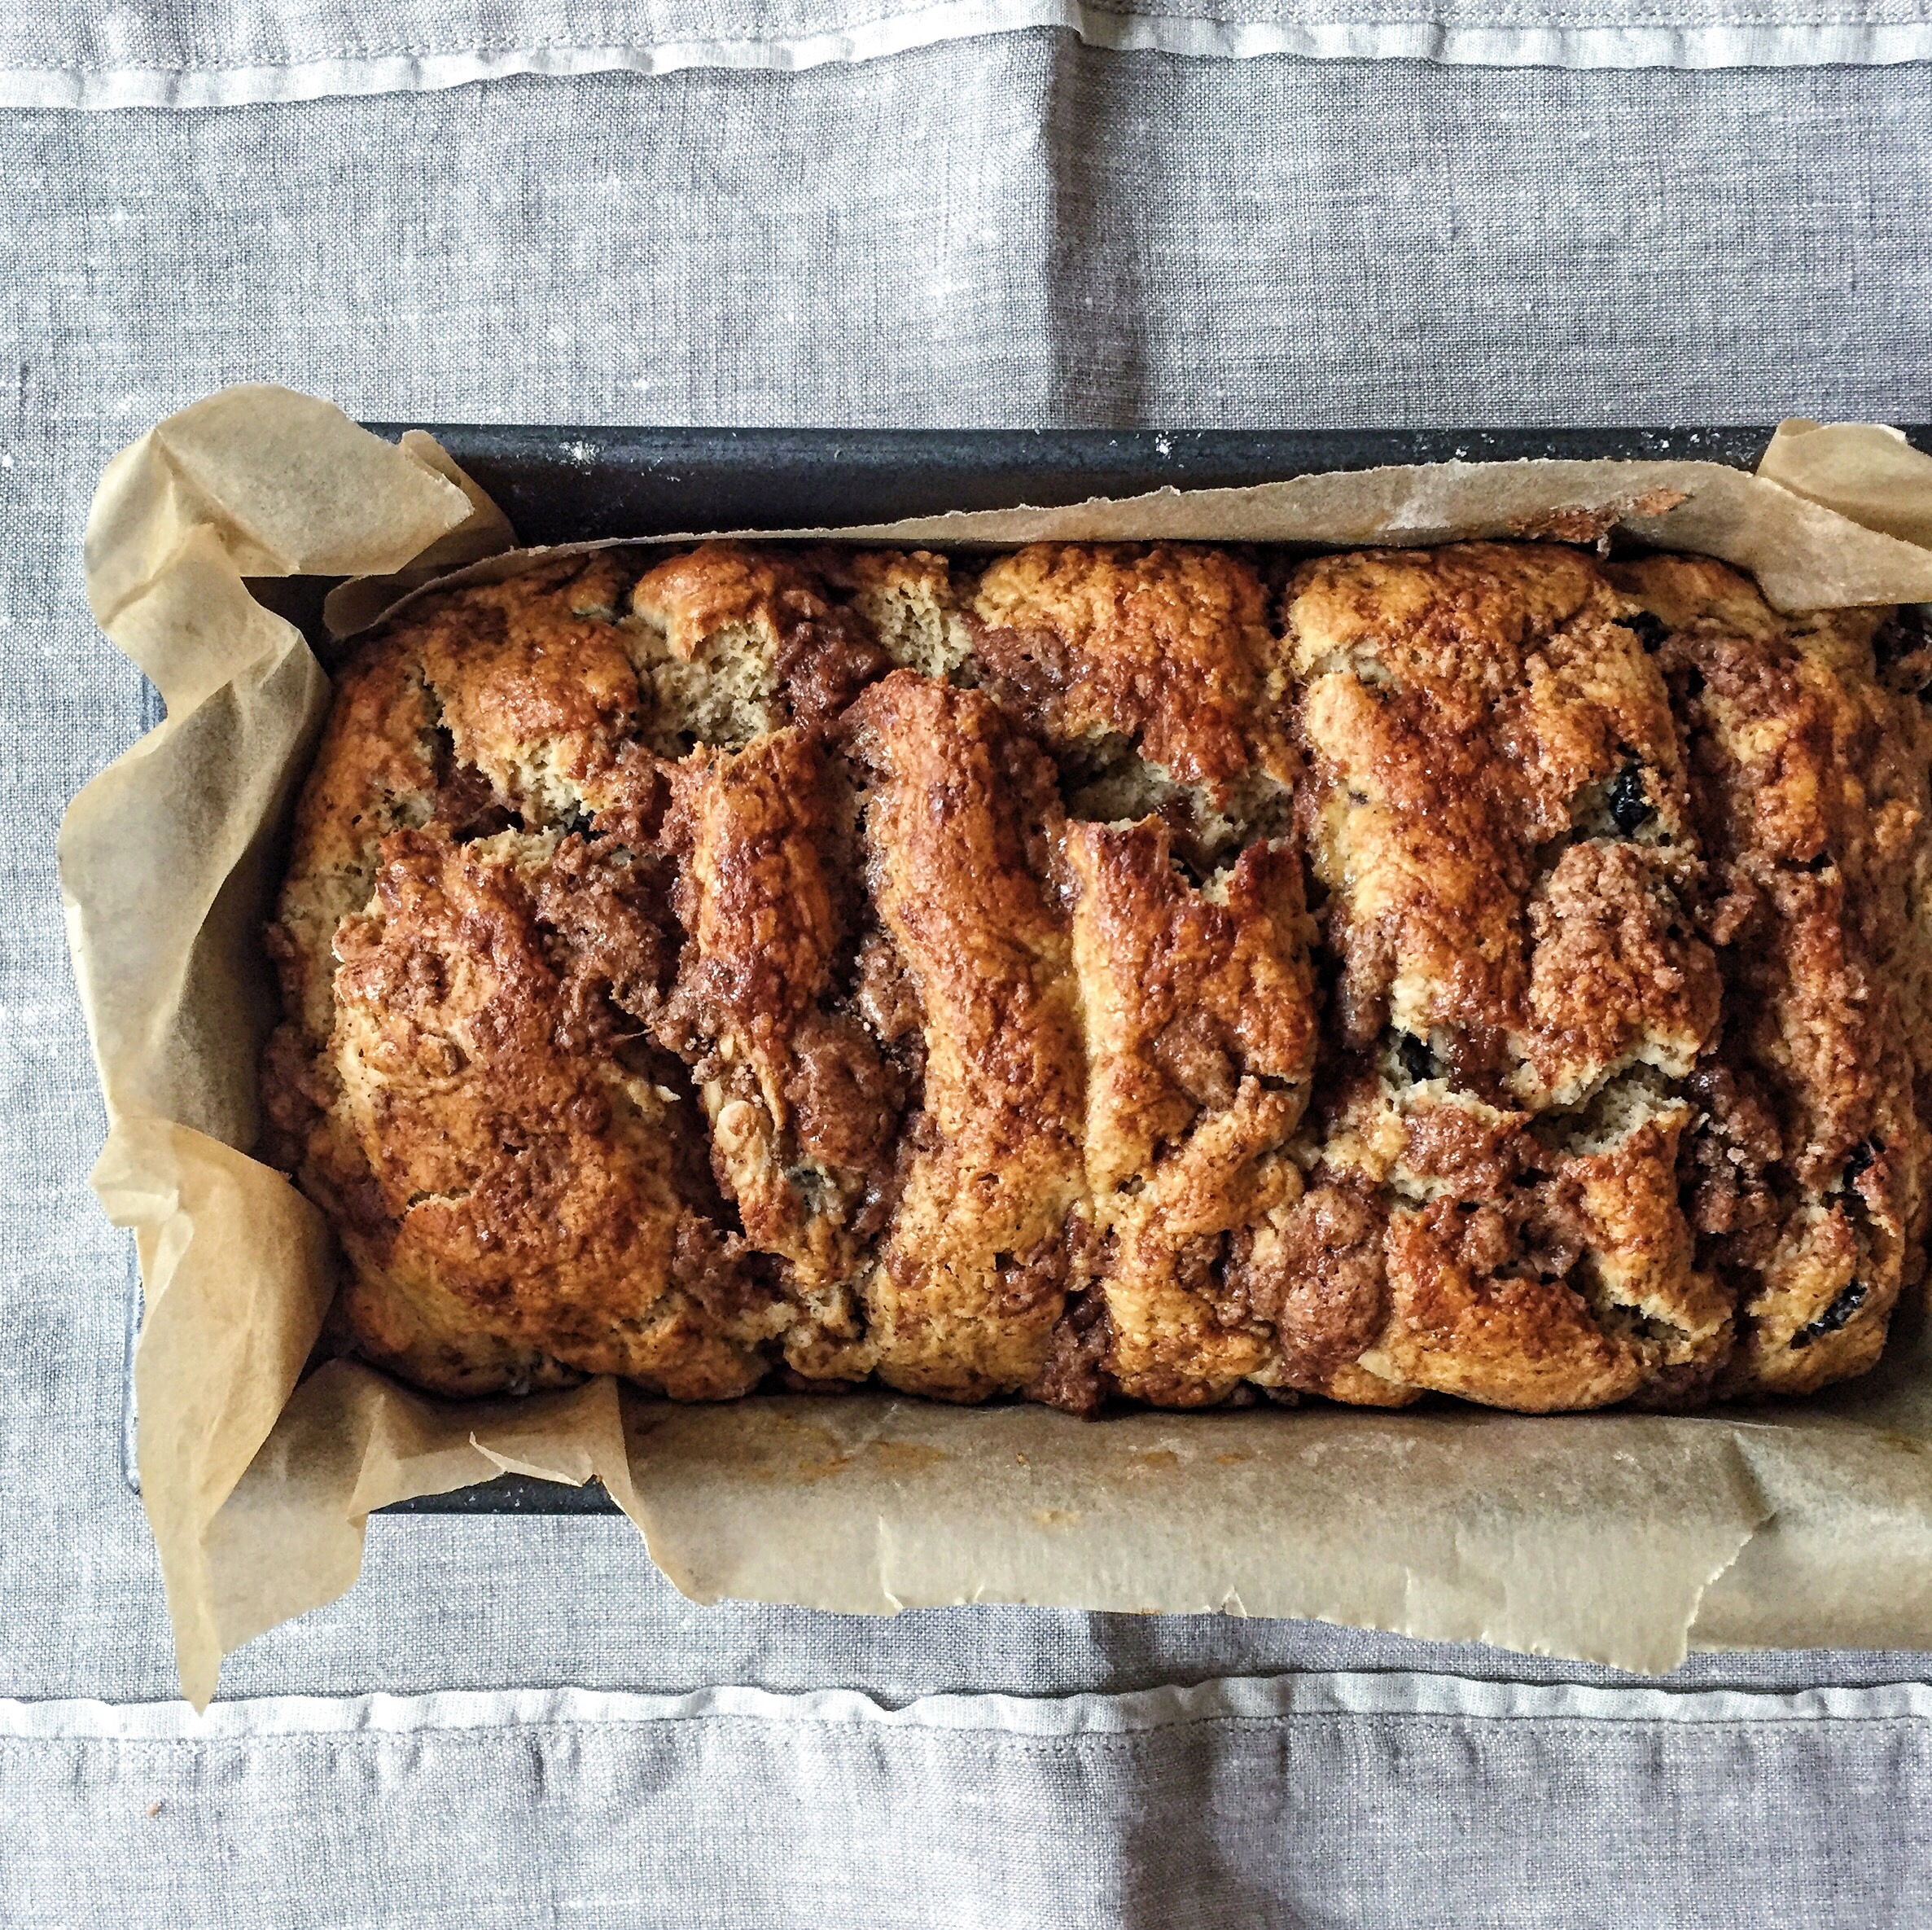
(3) For pull apart bread, roll into a 6"x14" rectangle and cut into 12 pieces.  Spread the butter / cheese mixture on 11 of the pieces.  Stack layers horizontally in a parchment-lined loaf pan, ending with the non-buttered piece to book-end.  Cover and let rise.  Spread the remaining butter-cheese mixture on top with a sprinkle of salt before baking.  Bake at 375˚ F for closer to 35 to 40 minutes until golden brown.  Cover towards the end of baking if the cheese is browning too much.  (By the way, the photo to the side is a pull-apart cinnamon scone bread, but just wanted to give everyone an idea for what it could look like!)

Enjoy!!


tags: how to make bread, bread dough recipe, cheesy pull apart bread recipe, savory buns recipe, cheese buns recipe
categories: all 3, appetizers 1, breads & cakes, breakfast-1, side dishes-1, vegetarian
Wednesday 04.06.16
Posted by Aliya LeeKong
 

Not-So-Traditional Irish Soda Bread

View fullsize soda bread2.jpg
View fullsize soda bread1.jpg
View fullsize sodabread3.jpg

NOT-SO-TRADITIONAL IRISH SODA BREAD

I love indulging in a warm, baked-from-scratch loaf of bread.  But let's be honest: making it at home can be a long (see: tedious) task what with the letting the yeast rise, punching down, rising again...but that's why the quick bread was invented!  Quick breads are basically any breads that don't use yeast to rise - like banana bread.  With St. Patty’s Day just around the corner, I thought a take on the traditional Irish soda bread would be fun.

Irish soda bread is usually made with a few simple ingredients: flour (wheat or white), baking soda, buttermilk and salt. Once you have those basics, you can expand with any seeds, citrus, dried fruits you want to create a not-so-traditional soda bread.  This recipe is a slightly modified version of one from a great friend/chef, Tamsin Kelly, who makes this with her family for St. Patrick's Day.  I love the combination of caraway seeds, orange zest, and dried currants in this recipe, but you can substitute however you like (raisins, fennel seeds, etc…)!  Enjoy!

Yields (1) 9-inch cake tin 

4 cups plus 3 - 4 tablespoons all purpose flour
3 tablespoons white sugar
¾ teaspoon salt
1 ½ teaspoons baking soda
½ stick unsalted butter, cold and cubed
1 ½ cups buttermilk*
1 large egg, beaten
1 cup dried currants
2 tablespoons caraway seeds
zest of 1 orange


Preheat the oven to 350º F.  

To the bowl of food processor, add the 4 cups plus 3 tablespoons of flour, sugar, salt and baking soda.  Pulse until mixed.  Sprinkle the cold, cubed butter on top and pulse until the mixture resembles a coarse meal. 

Whisk the buttermilk with the egg and slowly add to the flour mixture, pulsing until the dough forms.  Pulse in the currants, caraway seeds and orange zest.  If the dough is too sticky, add another tablespoon of flour.  Do not overmix or it will toughen up!  You just want the flour blended, and you are ready to go.

I like to cook mine in a greased cast iron skillet or you can use a greased, 9-inch round cake tin.  Score an “X” in the dough (about 1/2” thick) and place in the middle of the oven for 60 minutes or until a toothpick comes out clean.  Rotate the dough halfway through cooking.  When done, transfer to a wire rack to cool.

Make sure to enjoy with a nice, rich, salty Irish butter!!

*I hardly ever buy buttermilk for a recipe since I always have milk, vinegar and lemon juice laying around.  For every cup of milk, use 1 tablespoon distilled white vinegar or lemon juice.  Just mix together and let sit for about 5 to 10 minutes.  It will thicken slightly and look a bit curdled and then it's ready to go!

tags: irish soda bread, quick bread recipe, how to make irish soda bread
categories: all 3, breads & cakes, breakfast-1, holiday, quick & easy, recipes, sweet & savoury, traditions
Wednesday 03.09.16
Posted by Aliya LeeKong
 

Global Holiday Cookies

GLOBAL HOLIDAY COOKIES

Holidays = cookies, and we are fast approaching that time of year where you are either getting your baking skills ready for holiday parties and family get togethers or you’re thinking about yummy gifts for your friends and co-workers.  Because, honestly, it’s impossible to buy everyone presents this time of year, but it's sooo easy to bake delicious cookies for them!  To keep it interesting, I like to make different types of cookies for the holidays and incorporate some from around the world.  The following are just a few to get started on your lists - click through for the recipes.  There are so many to choose from - happy baking!

KOURABIEDES-INSPIRED MADELEINES

madeleine.jpg

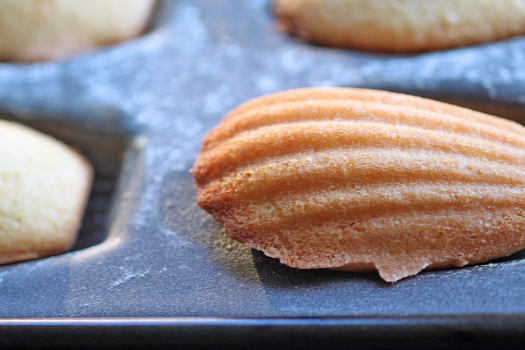
Nothing is more impressive than nailing a great madeleine.  This traditional French small cake is unmistakeable with its distinctive shell-like shape and delicate, cake-y textures.  Kourabiedes are a Greek shortbread that's usually had around the holiday - almond-scented and perfumed with rosewater, and that was the inspiration for this combo cookie.  They are best served right away and warm, so I would use these for a holiday party rather than as a gift.


SOUTH AMERICAN ALFAJORES

Photo credit: Food52

Photo credit: Food52

Although alfajores originated in Spain, the South American version is twice as good, namely because the cookies sandwich dulce de leche.  These can be chocolate-coated, dusted with coconut, or holiday-decorated and are the perfect gift!


DOUBLE CHOCOLATE MINT COOKIES

These are the ultimate double chocolate mint cookies - brownie-rich, chocolate chip cookies scented with peppermint.  The dough freezes really well too.


ITALIAN RAINBOW COOKIES

Photo: Bon Appetit

Photo: Bon Appetit

Rainbow cookies are a childhood favorite and one I love to make around the holidays.  They do take a couple days (just to set the layers and cool) but the end result is equally impressive as it is yummy!   Originally colored to represent the Italian flag by Italian - American immigrants, you can play around with the (all natural...) food coloring to the occasion.  A little more red and green for the holidays please!


TURKISH BAKLAVA

Okay, so baklava isn't technically a cookie, but it really doesn't matter.  My recipe for these is the easiest out there!


WEST INDIAN CASSAVA PONE

Okay, okay!  This isn't a typical cookie either!  But this is a beautiful cake that I make into squares.  Pone is a super dense, slightly gummy cake, and in different West Indian countries, I’ve seen pone made with root vegetables – cassava here but also carrots and sweet potato.  It always has coconut, and some even have pumpkin and raisins.  Cinnamon, nutmeg, and a touch of black pepper makes this complete holiday fare.


AUSTRIAN LINZER COOKIES

Photo: Love, Cake

Photo: Love, Cake

An Austrian favorite that is seen around the holidays is the linzer cookie.  These are sandwich cookies with jam in the middle and cutouts in the center to peek at the filling, usually hearts but I like to do Christmas trees, stars or candy canes for the holidays.  Also, a good time to use the preserves you made earlier this year!


PUERTO RICAN MANTECADITOS CON GUAYABA (ALMOND SHORTBREAD WITH GUAVA)

Photo: The Noshery

Photo: The Noshery

Jam-filled and thumbrint cookies are one of my favorites, and I love that these use guava paste in lieu of other preserves.  It's a totally unique flavor - tart and sweet - and an unexpected twist, and yet they have such a traditional look about them.


SOUTH AFRICAN CRUNCHIES

Photo: Cakespy

Photo: Cakespy

These are classic, South African cookies - crunchy (of course), buttery and coconut-ty.  These are a one bowl, easy cookie to make, so great if you need to feed a crowd.


SWEDISH GINGERBREAD COOKIES

Photo: Saveur

Photo: Saveur

Really, not much needs to be said about these.  Gingerbread (wo)men, different holiday shapes - these are a must!


Enjoy!!

tags: holiday cookie recipes, holiday baking, cookie recipes, global cookie recipes, international cookie recipes, 12 days of cookies, national cookie day
categories: all 3, breads & cakes, holiday, lifestyle, recipes, desserts-1
Thursday 12.03.15
Posted by Aliya LeeKong
 

Sugar Plum & Currant Torte

View fullsize plum1.jpg
View fullsize plum2.jpg
View fullsize plum3.jpg
View fullsize plum4.jpg

SUGAR PLUM & CURRANT TORTE

I am forever going on and on about the market at this time of year and how truly beautiful, bright and flavorful all of the fruit is, and this post is no exception!  I found some gorgeous sugar plums and tart currants and set off to bake on a Sunday - nothing too complicated, just a tad decadent, and delicious for days into the week.

What I ended up with is this torte, a true summer dessert (and sometimes breakfast!).  This is perfect for cake novices because the batter is just so easy.  It comes together in less than 10 minutes and is virtually fool-proof.

A few points: I happened to make this gluten-free, but if you only have all purpose flour on hand, go ahead and replace the flours with an equal amount of it; just drop down the baking powder to 1 teaspoon.  Also, I don't use a ton of sugar here, so the key is using super sweet plums to offset the tartness of the currants. Taste before baking!

Enjoy!

Ingredients

Serves 6 to 8

½ cup oat flour

½ cup brown rice flour

¼ cup almond flour

1 ½ teaspoons baking powder

pinch of salt

1 stick unsalted butter, room temperature

¾ cup coconut, palm, unrefined, or plain old white sugar

2 eggs, room temperature

10 sugar plums, halved and pitted

½ cup red currants

raw honey + cinnamon

Procedure

Preheat the oven to 350˚ F.

In a medium bowl, mix together the flours, baking powder and salt.

With a stand or hand mixer, cream the butter with the sugar.  To the sweet butter, add the eggs one at a time until incorporated.  With the mixer on low, add in the flour until just incorporated.

Transfer the batter to a greased 9-inch cake or pie tin.  Layer the plum halves (skin side up) and currants.  Brush the plums with a bit of raw honey and sprinkle cinnamon all over.

Bake for 40 to 45 minutes until a toothpick inserted comes out clean.  Cool completely before unmolding.

tags: plum torte recipe, sugar plums, torte recipe, how to make plum torte, desserts, plum dessert
categories: all 2, breads & cakes, breakfast, desserts
Tuesday 08.11.15
Posted by Aliya LeeKong
 

Butternut Squash & Apple Bread with Maple and Cardamom

View fullsize squash 1.jpg
View fullsize Squash 2.jpg
View fullsize squash 3.jpg
View fullsize squash 4.jpg

Butternut Squash & Apple Bread with Maple and Cardamom

I posted a photo of this on Instagram a few days back, and a number of people came back and asked for this recipe to bake for the holidays.  And here it is!  It’s a bit lighter than other fruit or vegetable breads (think: cake), and relies much more on butternut squash than apple for flavor.  That said, the great thing about this bread is that the squash doesn’t have to be precooked or pureed or anything before being added in.  Grating it up in a processor does all the work you need, and the squash cooks in the baking time.

I made this cake for my daughter, who hated squash (until now…hah!).  And for that reason, I changed out the flour using an “all purpose” mix of oat, brown rice, and almond flours.  Really, it isn’t so much about the gluten, though being gluten free is a benefit for some here.  It’s more about the fact that oats and brown rice and almonds have a lot more nutritional value than AP flour.  Same goes for the maple sugar, a sugar from the maple tree that has a flavor very close to the syrup.   Again, maple sugar has antioxidants and minerals not found in refined sugar.  It has a lower glycemic index, and I always use a lot less of it in recipes.

These are just my choices, but feel free to use all purpose flour here and substitute another sugar if you can’t find maple.  Enjoy!


Ingredients

Yields 1 8½” x 4¼” x 2¾” loaf pan

2 cups raw, peeled, and grated butternut squash

1 cup peeled, cored and grated apple

scant 1 cup maple sugar

1 cup oat flour

½ cup brown rice flour

½ cup almond flour

½ tsp salt

½ tsp cinnamon

½ tsp ground cardamom

½ tsp baking soda

2 tsps baking powder

¼ cup organic, unrefined coconut oil or ½ stick butter, room temperature

1 tsp vanilla extract

2 eggs, room temperature

Procedure

Preheat oven to 375˚ F.

Place grated squash and apple in a bowl along with 3 tablespoons of the maple sugar.   Stir to combine and let stand to macerate for 15 minutes.

In another bowl, sift together flours with salt, spices, baking soda and baking powder.

In a stand mixer, cream together remaining sugar and coconut oil or butter.  With mixer on medium-low, add vanilla and then the eggs one at a time.  Turn mixer down to low, and add in the flour in three increments, stopping to scrape down the sides.  Mix until almost combined.  Fold in the macerated squash and apple with any liquid that’s accumulated and mix until thoroughly combined.

Pour batter into a greased loaf pan, and bake for 45-50 minutes or until a toothpick inserted into the center comes out clean.  Cool before unmolding.

tags: apple cake, holiday baking, holiday cakes, butternut squash recipes, maple sugar, butternut squash bread, squash bread, apple bread recipe, gluten free, gluten free baking
categories: breads & cakes, breakfast, desserts, holiday, recipes, sweet & savoury, all 2
Friday 12.05.14
Posted by Aliya LeeKong
 

My Breakfast Clafoutis

View fullsize clafouti-pic1-500x333.jpg
View fullsize clafouti-pic2-500x333.jpg

My Breakfast Clafoutis

Lately, I’ve been craving desserts on a daily basis, and so in an effort not to get too crazy, I’ve been searching out healthier alternatives to satisfy my sweet tooth.  I made these as a fast and healthy weeknight dessert, but the leftovers quickly became my morning snack over the following days.  And why not?   Eggs, milk, fruit and almonds?  Perfect breakfast food!

These are decently healthier than the last version of clafoutis I posted with Amarena cherries and dark chocolate…which are delicious!  But, here, I used lowfat milk instead of heavy cream and made them gluten free with the addition of almond flour in lieu of all-purpose.  Everything (except the berries) gets whirred in a blender before a short rest period, so these are super quick to make and can’t be easier for clean up.

I don’t put a ton of sugar in these since I have them for breakfast, so you may need to sweeten them up a bit more if you like it on the sweet side or finish with a bit of powdered sugar or an extra drizzle of honey.  If you are using peak season berries, they should be plenty sweet – I use frozen berries in the off-season months myself.  Enjoy!

Ingredients

Yields 6 6-ounce ramekins

3 eggs

3/4 cup milk, lowfat or otherwise

1 tbsp vanilla extract

2 tsps almond extract

¼ cup honey or light brown sugar

¼ tsp salt

1/3 cup almond flour

1 ½ cups berries (blueberries, raspberries, strawberries or some combination)

cooking spray, for greasing

powdered sugar, for garnish (optional)

Procedure

Preheat oven to 375° F.

In a blender, blend together eggs, milk, extracts, honey and salt.  Add flour and blend for 10 seconds.  Scrape down the sides and blend for another 10 to 15 seconds until flour is incorporated and there are no lumps.  Rest batter in the refrigerator for a minimum of 15 minutes and up to overnight.

Grease the ramekins, and place on a large baking sheet.  Place ¼ cup of mixed berries in each ramekin and top with an even amount of batter in each.

Transfer baking sheet into the oven and bake for 23-25 minutes until lightly browned, raised and the custard is set.  Remove and let cool slightly before serving.   Dust with powdered sugar, if desired.

tags: Clafoutis, breakfast, brunch, berries, gluten free
categories: all, breakfast, recipes, breads & cakes, desserts-1
Tuesday 04.09.13
Posted by Aliya LeeKong
 

A Forgotten Food, Seera

View fullsize Seera-pic1-500x333.jpg
View fullsize seera-pic2-500x333.jpg
View fullsize seera-pic3-500x333.jpg

A Forgotten Food, Seera

Last week, one of the chefs over at Junoon shocked me into taste memory.  He cooked up a batch of seera (also called sheera or seero), which is a sweet, crumbly, buttery, cake-like dessert usually made with semolina or cream of wheat.  My mom used to make it for me growing up, and I hadn’t thought about it in years!  One bite…it’s amazing how the smell and taste of something can just transport you back.  That night, I went right home and made my own, comforting batch that I thought I’d share with you.

Seera belongs to a dessert family called halvas – these are desserts served throughout South, Central and West Asia, parts of Europe, the Middle East and North Africa.  Oftentimes, they are flour-based as you see here, but they can also be made from dense nut pastes and be more of a confection.

I had a full-on debate with my mom about the pros and cons of using semolina vs. cream of wheat, when’s the right time to add the cardamom, what the resulting color should be, and how no one should feel guilty if they want to eat this for breakfast (it’s cream of wheat after all!).  She even whipped out my grandmother’s old recipe written out in mugs!  I love that….Well, this is what I came up with.  And the reality is farina or cream of wheat will result in a slightly softer, more crumbly halva and the semolina, depending on the grind, will be a bit more dense and cake-like with a brighter yellow color.  Buttery, with the aromatics of saffron and cardamom, pure comfort, and whips up in less than 10 minutes…enjoy!

Ingredients

Serves 4 to 6

1 cup milk

½ tsp vanilla extract

pinch saffron

pinch salt

¾ cup palm sugar*

1 stick + 2 tbsps unsalted butter

2 cardamom pods, cracked

1 cup farina, cream of wheat or semolina flour

Optional garnishes:**

Pistachios, toasted

Sliced almonds, toasted

Sultanas

A few dashes of rosewater

Procedure

In a small, nonstick saucepan, bring milk up to a boil.  Lower to a simmer and add vanilla extract, saffron, salt and palm sugar, whisking to dissolve.  Keep over a low flame.

In another nonstick saucepan over medium heat, add butter and cardamom pods.  When the butter has melted and the foam subsides, add the farina and toast in the butter until golden brown, about 3 to 4 minutes.  Lower the flame, add the sweetened milk mixture and stir until texture dries a bit, another 2 to 3 minutes or so.

Serve warm or room temperature.

*You can substitute white or brown sugars here, but I would adjust down the amount as palm sugar is a bit less sweet than those two (so closer to ½ cup).

**For the optional garnishes, you can add as much as you like right on top.  For the sultanas, I like to throw them in with the simmering milk, so they plump up a bit.

tags: seera, halva, cardamom, almonds
categories: all, desserts, recipes, breads & cakes, breakfast
Monday 06.11.12
Posted by Aliya LeeKong
 

Black Sesame Arabic Donuts w/Date Molasses

View fullsize donut-pic4-500x333.jpg
View fullsize donut-pic2-500x333.jpg
View fullsize donut-pic3-500x166.jpg
View fullsize donuts-pic11-500x333.jpg

Black Sesame Arabic Donuts w/Date Molasses

Last week I told you all about my yeast fiasco and how it wasn’t proofing, but this week I at least got that straight!  I tasted these while staying with a good friend in Bahrain – she made them for afternoon tea, and I knew I was going to come home and work on my own version.  I’ve just never tasted a donut like this – with cardamom, (black) sesame seeds for nuttiness, and, though I know it looks sticky sweet, not-too-sweet date molasses as the glaze.  It’s the perfect little treat.

The original dish is called luqaimat or luqmat, and they are often described as fermented, sweet dumplings; they’re eaten year-round but especially around Ramadan and may be glazed with sugar syrup rather than date molasses.  But as with most foods, these balls of fried dough aren’t 100% unique.  They are related to loukamades, a Greek version, and are loosely similar to Indian jalebiand even Italian zeppole.

And the reality is that what I had in Bahrain had a hollower, lighter and crisper texture.  When I watched this batter being made, it was completely by eye and water (rather than milk) was added to achieve the right batter consistency.  I turned these guys into more of a donut (much closer to zeppole) for my own purposes.  I love them this way but will continue to experiment and play around with quantities to see what I others end up liking the best.

Regardless, these are hard to resist – crispy and doughy at the same time, perfumed with cardamom and saffron, a touch of sesame for nuttiness and that tangy, addictive date molasses…Enjoy!

Ingredients

Yields approximately 2 dozen donuts

3/4 cup milk

¼ cup sugar

1 packet active dry yeast (2 ¼ tsps)

1 cup flour

½ tsp ground cardamom

½ tsp salt

pinch saffron

2 tbsps black sesame seeds, toasted

3 tbsps yoghurt, room temperature

oil for frying

¼ cup date molasses

Procedure

In a small saucepan, heat milk to just warm and remove from the heat.  If it gets too hot, it will kill the yeast – you should still be able to dip your finger in it with no problem (110°-115° F).  Add the sugar and the yeast and stir to combine.  Let sit 10 minutes.  It should start to bubble and get foamy (if not, your yeast may no longer be active).

In a bowl, sift together the flour, cardamom and salt.  Add the saffron and the black sesame seeds to the flour mixture and whisk to combine.  Add the yoghurt to the warm milk/yeast mixture, whisk to combine and then whisk it into the flour mixture.  You want to make the batter uniform and lump free.  Transfer to a greased bowl – cover and keep in a warm place for 2 hours.

Heat 2 to 3 inches of your preferred frying oil in a large pot to 325° F.  Using a small ice cream scoop (or spoon), spoon uniform balls of the batter into the hot oil.  Fry for 5 to 7 minutes until the donuts turn a dark golden brown.  Continuously move them around and flip them so that they get evenly browned.  Transfer to a rack or paper towels to degrease.

Toss the fried donuts with the date molasses while they are still warm and serve as soon as possible.


tags: black sesame, donuts, Bahrain, luqaimat, luqmat, date molasses
categories: all -1, breads & cakes, desserts
Monday 02.13.12
Posted by Aliya LeeKong
 

Kourabiedes-Inspired Madeleines

View fullsize madeleine-pic1-500x333.jpg
View fullsize madeleine-pic2-500x333.jpg
View fullsize madeleine-pic3-500x166.jpg

Kourabiedes-Inspired Madeleines

Madeleines to me have always been a bit untouchable – you know, one of those things you look at and say that is better left to someone else to make (because I couldn’t possibly produce that sort of perfection!).  I loved conquering that fear here.  Yes, they take a bit of finesse to make the genoise batter (the base of them) but can easily be mastered in one or two try’s, and THEN become a serious piece in your culinary arsenal.  I plan to show these off, in fact, at my Thanksgiving table…

Kourabiedes are a Greek, shortbread cookie that are served at holidays, particularly Christmas.  As opposed to a traditional shortbread, these cookies have almonds ground up in the batter, rosewater to scent them, and are crescent-shaped and dusted with powdered sugar.

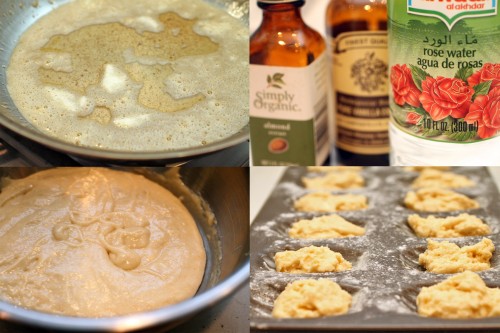
Kourabiedes were absolutely the inspiration for me to create these fluffy, buttery madeleines.  As opposed to grinding up the almonds, I used almond extract here to keep the integrity of the madeleine – that signature spongy texture.  I also went ahead and browned the butter before adding it to the batter; brown butter is simply butter that has been cooked until the milk solids turn a golden color and it smells like hazelnuts.  It adds a beautiful, nutty undertone to complement the almond flavor.  The key to this batter is beating the eggs until they have tripled in volume, not deflating it when adding in the flour and browned butter, and resting it a bit before cooking.  The result: light as air, addictive and buttery madeleines that are nutty and perfumed with rosewater.  Enjoy!

Ingredients

Yields 1 dozen

5 tbsps unsalted butter

2 large eggs

1/3 cups sugar

½ tsp vanilla extract

1 tsp almond extract

1 ½ tbsps rose water

1/2 cup + 2 tbsps all-purpose flour

½ tsp baking powder

½ tsp kosher salt

extra butter and flour for greasing

powdered sugar

Procedure

In a small pan, heat butter over medium-low heat until it browns and gives off a hazelnut aroma.  Be careful not to burn.  Strain butter through a cheesecloth or paper towel-lined mesh strainer and set aside to cool completely.

Using a stand mixer or hand mixer, beat eggs with sugar until they have tripled in volume and the mixture is extremely foamy.  When the beater is lifted, a ribbon should form.  Add the vanilla extract, almond extract and rosewater and beat for a few seconds to incorporate.

Sift together the all-purpose flour, baking powder and salt.  If you are using a stand mixer, remove the bowl from the stand.  Otherwise, carefully fold in the flour mixture using a spatula.  You don’t want to work it too much or the mixture will deflate.  Add a little of the mixture to the cooled brown butter and fold it all back in carefully.  Cover and refrigerate the batter for at least an hour.

Preheat oven to 375º F.  Generously grease a madeleine pan (I used non-stick) with softened or melted butter and then dust with flour, shaking off any excess.  Divide the dough amongst the 12 molds, letting a tablespoon or so just heap in the center.

Bake for 11 to 13 minutes on the center rack of the oven until the edges look golden brown and the centers feel a bit spongy.  Serve the same day sprinkled with powdered sugar.

tags: Madeleines, cookies, Kourabiedes
categories: all-2, desserts, recipes, breads & cakes
Monday 11.07.11
Posted by Aliya LeeKong
 

Buttermilk Gruyère Biscuits with Ajwain

View fullsize biscuit-pic1-500x333.jpg
View fullsize biscuit-pic2-500x333.jpg
View fullsize biscuit-pic3-500x166.jpg

Buttermilk Gruyère Biscuits with Ajwain

Let’s face it.  Those biscuits in the refrigerated section of the grocery are easy (and tasty!), and we’ve all used them in a pinch to deliver some buttery goodness to the breakfast or dinner table.  BUT.  It’s just not the same as the homemade kind (see: nothing artificial), and this recipe, with or without the fancy cheese and spices, is so easy and quick, you may swear off the metal tube-sort for good…

I have always loved cheddar-thyme biscuits, and those were precisely the inspiration for this spice-flecked version.  I wrote about ajwain some months ago and used it in a gorgeous pissaladière with mushrooms and onions, and what I think is fantastic about this spice is its resemblance to thyme, albeit with a slightly more pungent, menthol quality to it.  It’s used a lot in South Asian cooking and is often added to flatbread or samosa dough.

The base of this recipe is self-rising flour.  I used it because it has a slightly lower protein content than all-purpose, which translates into super tender, flaky biscuits.  White Lily brand is supposedly the go-to flour for Southern biscuits because it has a significantly lower protein content than some of the other national brands out there, but if you can’t find it, any self-rising flour works well here.  You whir the flour with cold butter, pour in some buttermilk and voilá! Biscuit dough in about 2 minutes flat.  I add in some grated gruyere or cheddar, typically, along with a bit of ajwain for that signature flavor.  Enjoy!

Ingredients

Yields 1 dozen biscuits

2 cups self-rising flour

¼ tsp black pepper

½ stick cold, unsalted butter, cut into small cubes + 1 tbsp for brushing

1 cup grated gruyère or cheddar cheese

½ tsp ajwain seeds

¾ cups cold buttermilk

kosher or maldon salt

Procedure

The key to making tender, flaky biscuits is to not over-develop the glutens in the dough.  One way to do this is to keep all of the ingredients cold, and another is to not work the dough too much.

Preheat the oven to 425° F.

In a food processor or stand mixer, sift the flour and the black pepper together.  Add the cold, cubed butter and pulse or mix just until a sandy texture forms, and there are no visible clumps of butter.  Add the cheese and ajwain seeds and pulse to combine.  Pour the buttermilk in all at once and pulse until the dough sticks together.

Turn the dough out onto a floured surface.  Gently knead the dough a few times so that it comes together and form into a flat, 1-inch thick disc.  Use a 2-inch cutter to cut out a dozen biscuits.

Melt 1 tablespoon of butter over low heat in a small saucepan.  Place the biscuits so they are touching on a greased or parchment-lined baking sheet.  Paint the tops of the biscuits with the melted butter and sprinkle with a little salt.

Bake for 15 – 20 minutes until golden brown.  Serve warm…

tags: buttermilk biscuits, buttermilk cheese biscuits, Gruyère, Buttermilk Gruyère Biscuits, Ajwain, homemade biscuits
categories: all-2, breads & cakes, side dishes, recipes, vegetarian-1, breakfast
Monday 09.26.11
Posted by Aliya LeeKong
 

Pão de Queijo (Brazilian Cheese Bread)

View fullsize pao-pic1-500x333.jpg
View fullsize pao-pic2-500x333.jpg
View fullsize pao-pic3-500x166.jpg
View fullsize pao-pic4-500x167.jpg

Pão de Queijo (Brazilian Cheese Bread)

One of my favorite Brazilian restaurants in the city is Casa.  Tucked away on a quiet block in the West Village, this cozy spot gets it right – spot on flavors, perfect portions, delicious wines, an intimate setting.  The feijoada and moqueca are killer, but I can never make it through a dinner there without ordering their little basket of farm cheese bread, or pão de queijo. These little cheesy, chewy, buttery balls are perfection, so I decided to dig further to satisfy my cheese bread cravings at home.

Brazilian cuisine is completely amazing to me because of the number and span of cultures that have contributed to it – Portuguese, African, Native American, Japanese, Syrian, Lebanese.  Cassava or yucca is a staple ingredient in Brazilian cooking, and the resulting flour is used, in its coarse form, for farofa, and its finely ground form to make these lovely rolls.

We are familiar with one form of cassava or manioc starch, which is tapioca, but Brazilians have a sour fermented version, polvilho azedo, and a sweet one, polvilho doce.  Traditionally, both are used to make this bread, but, on the fly, I only found plain manioc starch and went with it.  If you can find both kinds, I suggest using them in 2/3rd sour / 1/3rd sweet ratio.

The great thing about these is, if you have a stand mixer, they are really easy to make.  Otherwise, it’s a bit of a work out and requires some sweat to knead!  The procedure and form is not unlike those lovely, French gougères, but the result here is a lot more dense and toothsome than that.  They are the perfect dinner roll – buttery and cheesy with a delicately crunchy exterior.  I added a touch of black pepper and nutmeg, not traditional but I think gives it a balanced flavor.  Be forewarned, they are addictive…Enjoy!

Ingredients

Yields 20 golf ball-sized pieces

1 ½ cup manioc or tapioca starch

½ cup all-purpose flour*

2 tsps kosher salt

1 tsp sugar

½ tsp black pepper

pinch of ground nutmeg

1 cup milk

6 tbsps stick butter

3 eggs

1 ½ cups finely grated parmesan

Procedure**

Preheat oven to 350° F.

Fit a stand mixer with a paddle attachment.  In the bowl of the stand mixer, sift together starch, flour, salt, sugar, and spices.  In a small saucepan, heat milk and butter over medium-high heat until mixture comes up to a full boil (make sure it doesn’t boil over!).  Add milk mixture to dry ingredients and mix on low for 2 minutes.

In a small bowl, beat together 1 egg and 1 egg yolk.  With the mixer still running, add eggs to the dough. When eggs are incorporated, add grated parmesan and mix/knead for another 5 minutes, scraping down at intervals.  Refrigerate for a minimum of 1 hour.

Using a small ice cream scoop or your hands, portion out dough into even-sized pieces.  Heavily (and repeatedly) flour hands and roll portioned pieces into balls.  Place on a parchment-lined baking sheet.  In a small bowl, beat the other egg.  Brush dough balls with egg wash and bake for 25 to 30 minutes until browned and the outside is crisp and a bit cracked.  Serve immediately.

*If you want these to be gluten-free, just use manioc starch in lieu of all-purpose flour here.

**A few points on procedure.  The dough can be kneaded traditionally – that is, by hand – if desired.  It just takes a bit of upper body strength.  The resulting dough should be soft and very sticky.  If not baking immediately (or that day), the dough can be frozen when formed into balls and popped in the oven at a later time.  This bread is best served warm and straight from the oven as it turns a bit gummy when cold (though, of course, if can be reheated).

tags: Pão de Queijo, Brazilian cheese bread, Brazilian cuisine, farofa
categories: all-3, breads & cakes, vegetarian, recipes, appetizers, side dishes
Monday 07.11.11
Posted by Aliya LeeKong
 

Mandazi (East African Donuts)

View fullsize mandazi-pic4-500x333.jpg
View fullsize mandazi-pic2-500x333.jpg
View fullsize mandazi-pic3-500x333.jpg
View fullsize mandazi-pic1-500x333.jpg

Mandazi (East African Donuts)

One of my earliest cooking memories was when I asked my aunt to teach me how to make mandazis.  I think I was about 8 or 9 years old, and I was very serious about learning how to do these.  For some reason, we wouldn’t make these delectable little donuts at home.  I got to eat them when I traveled to see my family, and only the old school grandmas and aunties knew the secret.  Of course, East African restaurants were pretty much nonexistent in Florida where I grew up (not that I can find any now that serve these in NYC…I’m just saying).  So I felt I had to carry on the tradition!

Of course, the dish was a bit ambitious for an 8 year old (in one ear…and out the other!), and I was more focused on enjoying the fruits of my aunt’s and my labor than on getting the technique down.  As an adult, however, I decided I wanted to perfect my own using the tad more culinary knowledge I now have.

I should be clear: mandazis are savoury.  They shouldn’t be too sweet or too salty.  One of my most treasured food memories is sitting, facing the Indian Ocean, in Dar-Es-Salaam, Tanzania, using the (hollow) mandazis to scoop up a tender stew of pigeon peas in coconut milk with fresh chilies and cilantro (called barazi).  But, of course, you can eat them however you like; I’m partial now to having them for breakfast.

These are very easy to make.  A little yeast leavens the dough, and I use a combination of all-purpose and rice flour to make them even lighter.  A touch of sweetness, lightly coconut-scented, and that signature cardamom flavor.  Heavenly…Enjoy!

Ingredients

Yields 2 dozen donuts

¼ cup sugar

1 ½ tsp yeast

2/3 cup warm water

½ cup coconut milk

1 ¾ cup all purpose flour

¾ cup rice flour

¾ tsp salt

3 tbsp dried grated coconut (preferably unsweetened, adjust sugar if not)

¾ – 1 ¼ tsps ground cardamom*

oil for frying

salt & powdered sugar

Procedure

This can easily be made in a stand mixer or by hand.

In the bowl of a stand mixer fitted with a dough hook, dissolve sugar and yeast in warm water and let bloom 5-10 minutes.  It should become foamy and frothy.  Turn the mixer on low and add coconut milk.

In a separate bowl, sift flours together and mix in salt, grated coconut and cardamom.  Add contents to liquids in the mixer and knead on low for 5 to 10 minutes.  Conversely, you can also knead by hand – the dough should get pretty smooth (except for the grated coconut) and relatively sticky.

Transfer dough to a greased bowl, cover, and let rise for a minimum of 2 hours.

On a floured work surface, divide dough into 4 even pieces.  Form each piece into a ball and flatten to a disc.  Roll each circle out to about ¼” thick and cut like a pie into six triangular pieces.  Transfer to a parchment lined baking sheet while working on each piece.

In a dutch oven or pot, heat 3 to 4 inches of oil to 360 F.  Working in batches, carefully drop a few triangles into the oil.  Don’t overcrowd or the oil temperature will drop.  As soon as the triangles puff, quickly flip them over.  This will ensure that both sides cook – if they become lopsided, it will be hard to keep them on the less inflated side to brown.  Cook for a few minutes, flipping at intervals until golden brown.  Remove to a paper towel-lined plate or baking sheet and lighltly salt.

Before serving, sprinkle with powdered sugar.

They are best served warm as they can get a touch chewy once they’ve cooled.  If you need to reheat, do so in a very low oven or on a low power in the microwave.

*Traditionally, cardamom is roughly ground and added to the mandazi batter.  This results in biting into delightful pieces of cardamom while eating the donuts.  I add about 1 ¼ teaspoons when I’m using roughly ground cardamom and more like ¾ teaspoon when I use the powdered / ground form.


tags: Mandazi, East African donuts, donuts
categories: all-3, breads & cakes, desserts, recipes, side dishes, breakfast
Monday 05.23.11
Posted by Aliya LeeKong
 

Sweet Bread

View fullsize sweet-bread-pic1-500x333.jpg
View fullsize sweet-bread-pic2-500x333.jpg
View fullsize sweet-bread-pic3-500x166.jpg

Sweet Bread

Welcome back! I hope that everyone had a really fantastic holiday season and New Year.  I just got back from an eye-opening culinary adventure in Turkey – exploring everything from traditional bread baking in a tandoor to how to make luscious strained Turkish yogurt to watching a woman in a village create her signature bergamot and mandarin preserves.  I’ll be posting more about Turkey in the coming weeks, but I did put a ton of pictures on Facebook if you want to check them out.

On to the usual…Sweet bread is one of those universal foods.  A quick google will generate recipes anywhere from a Romanian version to Italian panettone to Portuguese sweet bread or even our all-American banana bread.  Some include yeast and others are more of a quick bread, much like one I did a few months back.

This version is a West Indian tradition and is like a cross between a fruit cake and a bread loaf.  I’ve also seen it called coconut bread, and, although it pops up a lot around the holidays, it’s an all-occasion treat.  I love to make it for breakfast on a Sunday – a nice buttered slice of this loaf with hot coffee and fresh fruit is the perfect light meal.

Many versions of this bread I’ve seen include mixed peel, which are candied peels and fruits, a typical ingredient in fruitcake.  I like to substitute good old lemon, lime or orange zest – the flavor is natural, more subtle, and less candy-like (which makes me feel better when I have it for breakfast…).   This is a beautiful, not-too-sweet-loaf that works with afternoon coffee or even with a little vanilla sauce for dessert.  Enjoy!

Ingredients

Yields 1 8½” x 4¼” x 2¾” loaf pan

Bread:

2 cups all-purpose flour

1 ½ tsps baking powder

½ tsp baking soda

½ tsp salt

½ tsp cinnamon

¼ tsp nutmeg

¼ cup golden raisins

¼ cup dried currants

¼ cup chopped maraschino cherries

1 ½ cups grated fresh coconut

¼ tsp lemon, lime, or orange zest

½ stick unsalted butter, room temperature

1 cup sugar

2 eggs

½ tsp vanilla extract

1 tsp almond extract

2/3 cup milk

Glaze:

1 tbsp sugar

1 tbsp boiling water

Procedure

Preheat oven to 325° F.

In a bowl, sift together flour, baking powder, baking soda, salt, cinnamon and nutmeg.  Whisk ingredients to combine thoroughly.

In another bowl, combine raisins, currants, cherries, coconut, and zest.

In the bowl of a stand mixer or with a hand mixer, using the paddle attachment, cream together the butter and sugar.  With the mixer on low, add the eggs one at a time until incorporated.  Add in the extracts.

With the mixer on low, add 1/3rd of the flour mixture followed by ¼ cup of the milk.  Scrape down and repeat process another two times.  Add the dried fruit and coconut mixture, and make sure everything is fully incorporated.

Transfer to a greased loaf pan and bake for 60 to 70 minutes until an inserted toothpick comes out clean.

For the glaze, melt the sugar in the boiling water and brush onto sweet bread.  Place back in the oven for another minute or two just to develop the sheen.

Cool before unmolding and serving.

tags: sweet bread recipes, West Indian sweet bread, West Indian traditions
categories: all-5, breads & cakes, recipes, desserts-1
Monday 01.10.11
Posted by Aliya LeeKong
 
Newer / Older